NetScaler Gateway 11.1 – LDAP Authentication

Last Modified: Nov 7, 2020 @ 6:34 am

Navigation

💡 = Recently Updated

LDAP Load Balancing

Before you create an LDAP authentication policy, load balance the Domain Controllers. If you don’t load balance your Domain Controllers, then when users enter an incorrect password, the user account will be prematurely locked out.

If you have multiple domains, create different Load Balancing Virtual Servers for each domain. These multiple Load Balancing Virtual Servers can share the same VIP if their port numbers are different. Or you can use a different VIP for each domain.

LDAP Authentication Server

To create the LDAP Authentication Server, do the following:

  1. On the left, expand Authentication and click Dashboard.
  2. On the right, click Add.
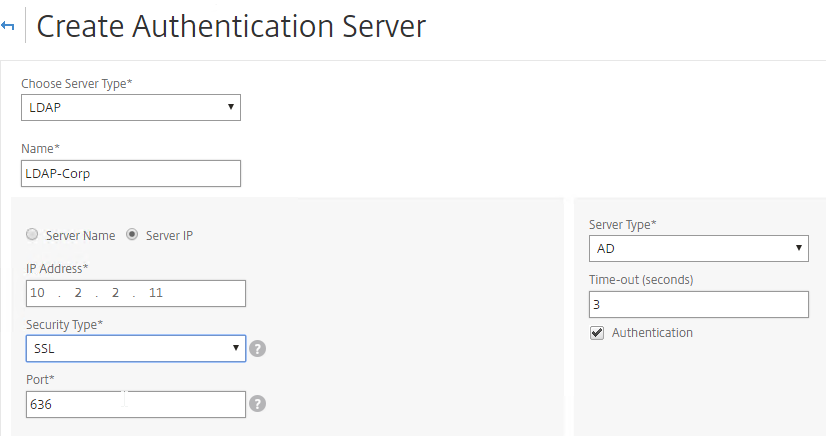
  3. In the Choose Server Type drop-down, select LDAP.
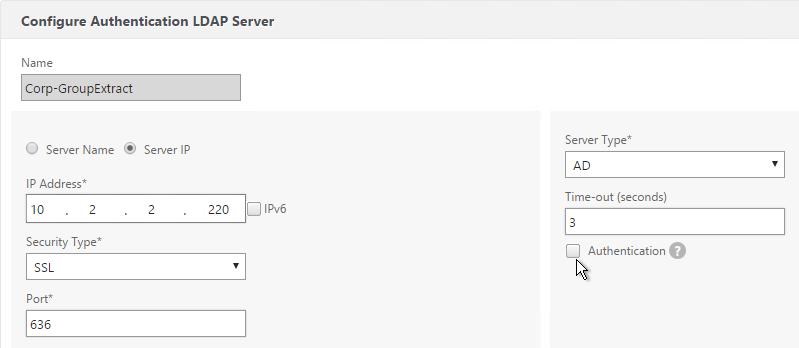
  4. Enter LDAP-Corp as the name. If you have multiple domains, you’ll need a separate LDAP Server per domain so make sure you include the domain name.
  5. Change the selection to Server IP. Enter the VIP of the load balancing vServer for LDAP.
  6. Change the Security Type to SSL.
  7. Enter 636 as the Port. Scroll down.
  8. Note: it’s also possible to point the LDAP Server IP to a Global Catalog. See Citrix CTX200506 How to Change Password through NetScaler in a Multi-Domain Active Directory Forest Using LDAP Referral for configuration details.  💡
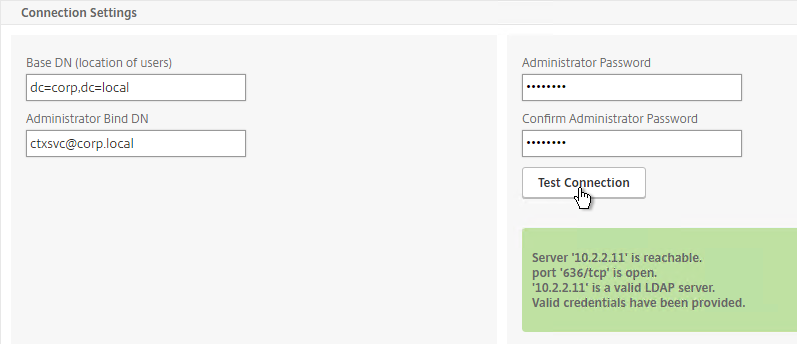
  9. In the Connection Settings section, in the Base DN field, enter your Active Directory DNS domain name in LDAP format.
  10. In the Administrator Bind DN field, enter the credentials of the LDAP bind account in userPrincipalName format. Domain\Username also works.
  11. Enter the Administrator password.
  12. Click Test Connection. NetScaler will attempt to login to the LDAP IP. Scroll down.
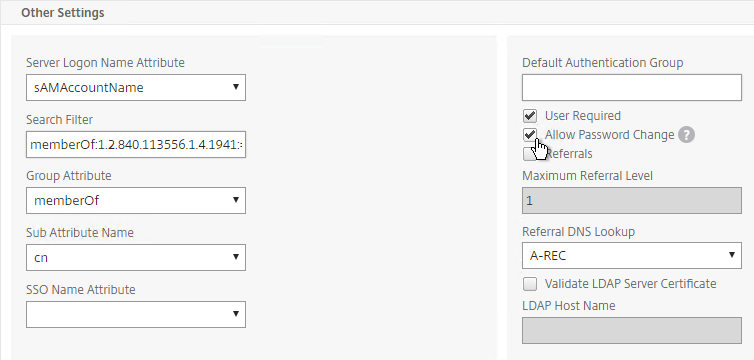
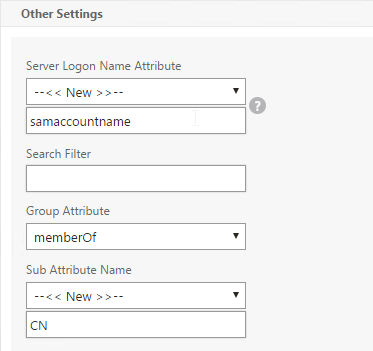
  13. In the Other Settings section, use the drop-down next to Server Logon Name Attribute, Group Attribute, and Sub Attribute Name to select the default fields for Active Directory.
  14. On the right, check the box next to Allow Password Change.
  15. Note: there is a checkbox for Validate LDAP Server Certificate. If you want to do this, see Citrix Discussions for instructions for loading the root certificate to /nsconfig/truststore.
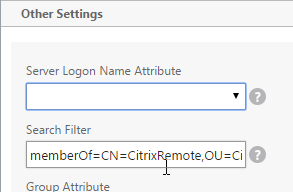
  16. If you want to restrict access to only members of a specific group, in the Search Filter field, enter memberOf=<GroupDN>. See the example below:
    memberOf=CN=CitrixRemote,OU=Citrix,DC=corp,DC=local
    You can add :1.2.840.113556.1.4.1941: to the query so it searches through nested groups. Without this users will need to be direct members of the filtered group.
    memberOf:1.2.840.113556.1.4.1941:=CN=CitrixRemote,OU=Citrix,DC=corp,DC=local

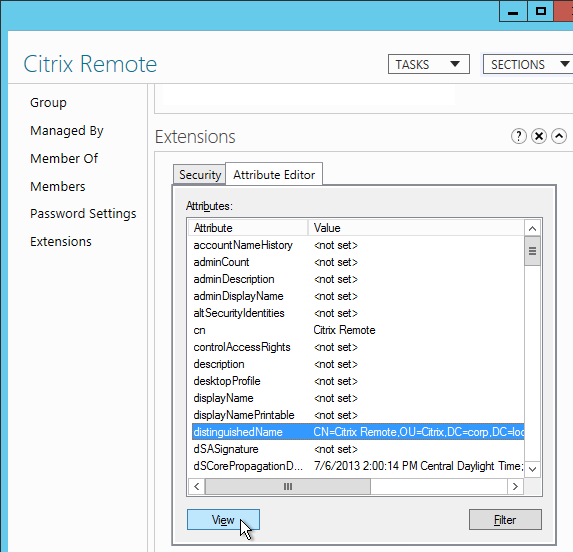
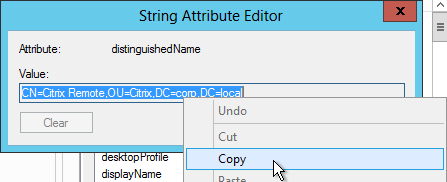
    1. An easy way to get the full distinguished name of the group is through Active Directory Administrative Center. Double-click the group object and switch to the Extensions page. On the right, switch to the Attribute Editor tab.
    2. Or in Active Directory Users & Computers, enable Advanced view, browse to the object (don’t use Find), double-click the object, and switch to the Attribute Editor tab.
    3. Scroll down to distinguishedName, double-click it and then copy it to the clipboard.

    4. Back on the NetScaler, in the Search Filter field, type in memberOf= and then paste the Distinguished Name right after the equals sign. Don’t worry about spaces.
  17. Scroll down and click More.
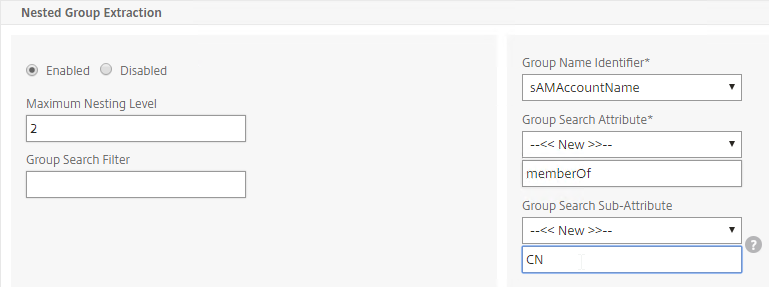
  18. For Nested Group Extraction, if desired, change the selection to Enabled.
  19. Set Group Name Identifier to samAccountName.
  20. Set Group Search Attribute to memberOf. Select << New >> first.
  21. Set Group Search Sub-Attribute to CN. Select << New >> first.
  22. For the Group Search Filter field, see CTX123795 Example of LDAP Nested Group Search Filter Syntax.
  23. Scroll down and click Create.

    add authentication ldapAction Corp-Gateway -serverIP 10.2.2.210 -serverPort 636 -ldapBase "dc=corp,dc=local" -ldapBindDn "corp\\ctxsvc" -ldapBindDnPassword Passw0rd -ldapLoginName samaccountname -searchFilter "memberOf=CN=Citrix Remote,CN=Users,DC=corp,DC=local" -groupAttrName memberOf -subAttributeName CN -secType SSL -passwdChange ENABLED
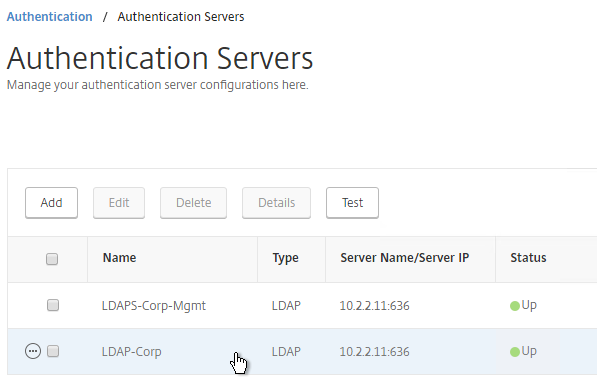
  24. The status of the LDAP Server should be Up.

LDAP Policy Expression

The Authentication Dashboard doesn’t allow you to create the LDAP Policy so you must create it elsewhere.

You can create the LDAP policy now. Or you can wait and create it later when you bind the LDAP Server to the NetScaler Gateway vServer.

To create it now:

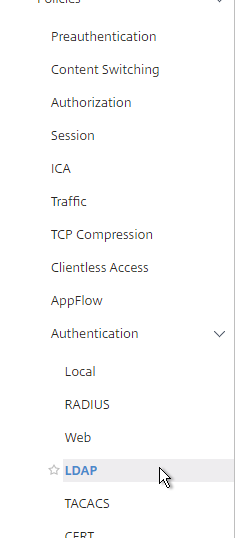
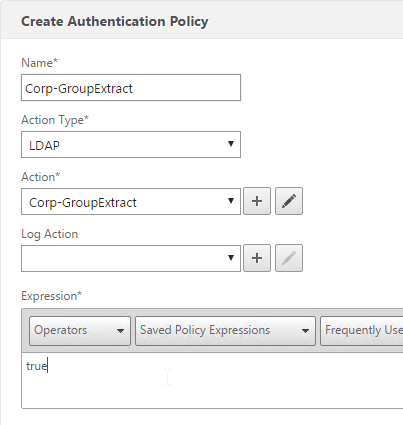
  1. Go to NetScaler Gateway > Policies > Authentication > LDAP.
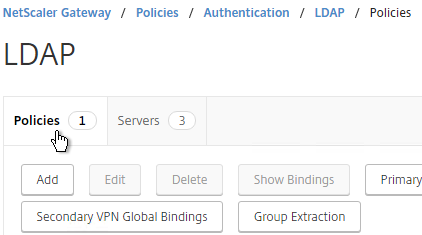
  2. On the right, in the Policies tab, click Add.
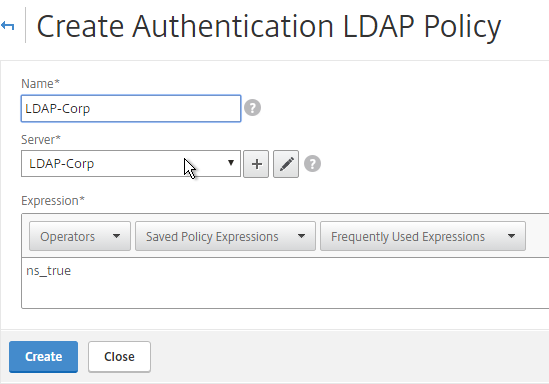
  3. Change the Server drop-down to the LDAP Server you created earlier.
  4. Give the LDAP Policy a name (one for each domain).
  5. In the Expression box, enter ns_true.
  6. Click Create.

     add authentication ldapPolicy LDAP-Corp ns_true LDAP-Corp

Gateway Authentication Feedback and Licenses

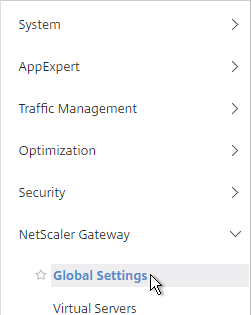
  1. On the left, under NetScaler Gateway, click Global Settings.
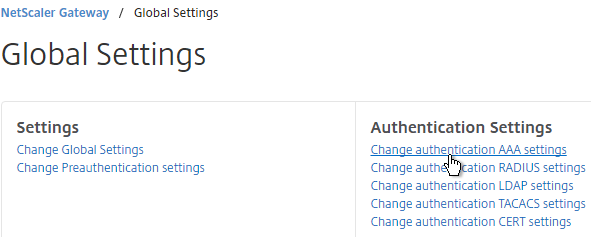
  2. On the right, in the right column, click Change authentication AAA settings.
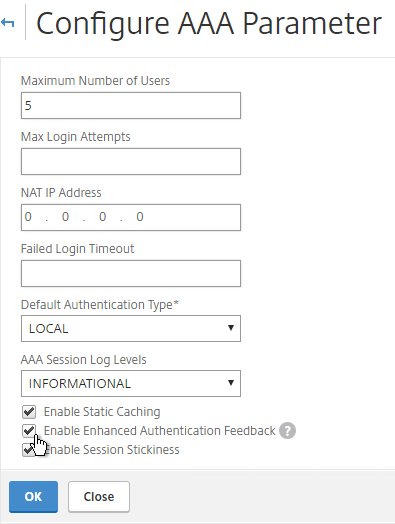
  3. If you are using Gateway features that require Gateway Universal licenses, then change the Maximum Number of Users to the number of Gateway Universal licenses you have installed on this appliance. This field has a default value of 5, and administrators frequently forget to change it, thus only allowing 5 users to connect.
  4. If desired, check the box for Enable Enhanced Authentication Feedback. This feature provides a message to users if authentication fails. The message users receive include password errors, account disabled or locked, or the user is not found, to name a few. Click OK.

    set aaa parameter -enableEnhancedAuthFeedback YES -maxAAAUsers 200

Next Step

Multiple Domains – UPN Method

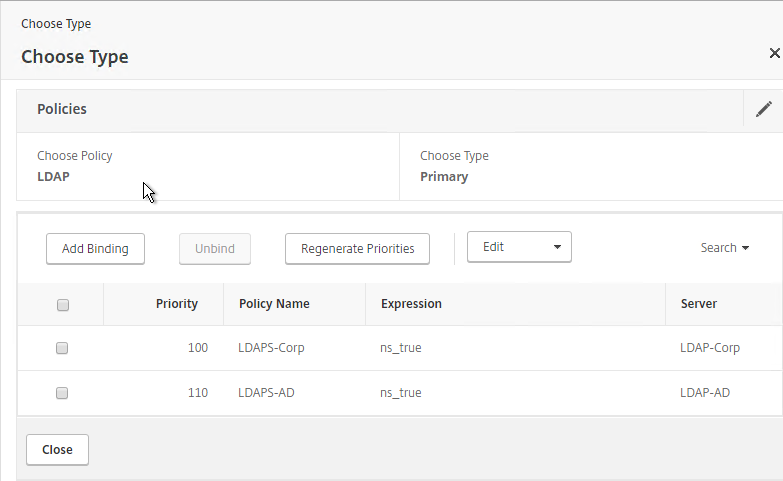
To support multiple Active Directory domains on a NetScaler Gateway, you create multiple LDAP authentication policies, one for each Active Directory domain, and bind all of the LDAP policies to the NetScaler Gateway Virtual Server. When the user logs into NetScaler Gateway, only the username and password are entered. The NetScaler will then loop through each of the LDAP policies in priority order until it finds one that contains the entered username/password.

What if the same username is present in multiple domains? As NetScaler loops through the LDAP policies, as soon as it finds one with the specified username, it will try to authenticate with that particular LDAP policy. If the password doesn’t match the user account for the attempted domain then a failed logon attempt will be logged in that domain and NetScaler will try the next domain.

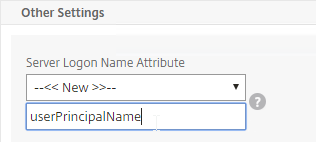
Unfortunately, the only way to enter a realm/domain name during user authentication is to require users to login using userPrincipalNames. To use userPrincipalName, set the LDAP Policy/Server with the Server Logon Name Attribute set to userPrincipalName.

You can even do a combination of policies: some with samAccountName and some with userPrincipalName. The samAccountName policies would be searched in priority order and the userPrincipalName policies can be used to override the search order. Bind the userPrincipalName policies higher (lower priority number) than the samAccountName policies.

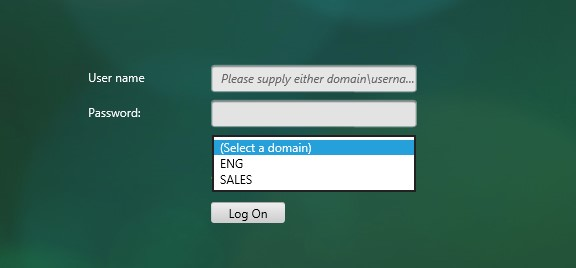
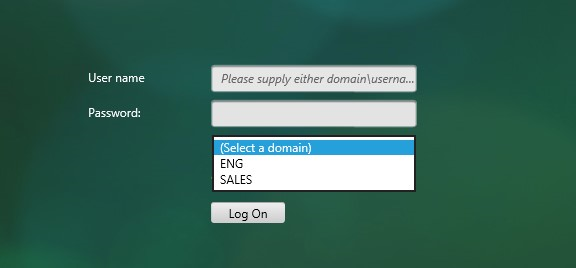
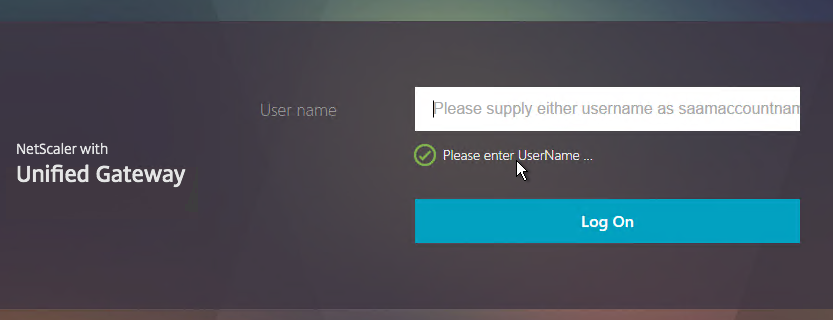
NetScaler 11.1 supports adding a domain name drop-down list to the logon page. Then use Cookie expressions in the auth policies and session policies. However, this probably doesn’t work for Receivers. See CTX203873 How to Add Drop-Down Menu with Domain Names on Logon Page for NetScaler Gateway 11.0 64.x and later releases for details.
User-added image

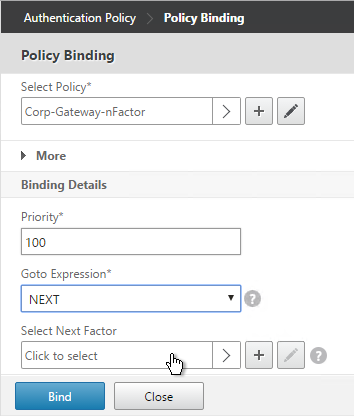
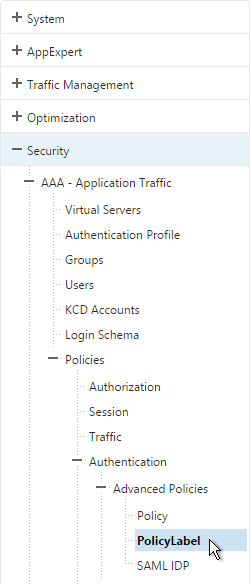
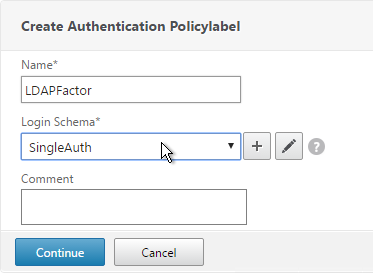
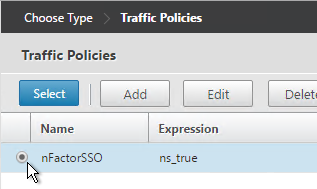
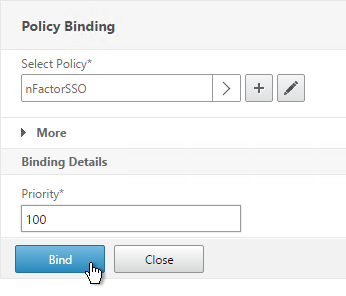
Another option for a domain drop-down is nFactor Authentication for Gateway. This also doesn’t work with Receiver Self-service.

After authentication is complete, a Session Policy will be applied that has the StoreFront URL. The NetScaler Gateway will attempt to log into StoreFront using Single Sign-on so the user doesn’t have to login again. When logging into NetScaler Gateway, only two fields are required: username and password. However, when logging in to StoreFront, a third field is required: domain name. So how does NetScaler specify the domain name while logging in to StoreFront?

There are two methods of specifying the domain:

  • AAA Group – Configure multiple session policies with unique Single Sign-on Domains.  Inside the Session Policy is a field called Single Sign-on Domain for specifying the domain name. If there is only one Active Directory domain, then you can use the same Session Policy for all users. However, if there are multiple domains, then you would need multiple Session Policies, one for each Active Directory domain. But as the NetScaler loops through the LDAP policies during authentication, once a successful LDAP policy is found, you need a method of linking an LDAP policy with a Session Policy that has the corresponding SSO Domain. This is typically done using AAA groups. To use this method, see Multiple Domains – AAA Group Method.
  • userPrincipalName – Alternatively, configure the LDAP policy/server to extract the user’s UPN, and then authenticate to StoreFront using UPN. This is the easiest method but some domains don’t have userPrincipalNames configured correctly.

The userPrincipalName method is detailed below:

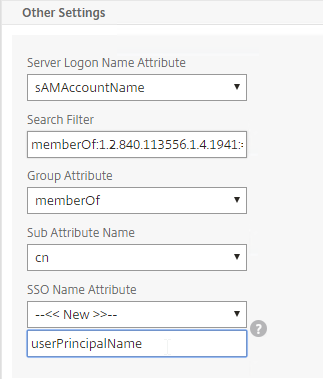
  1. In each of your NetScaler LDAP policies/servers, in the Other Settings section, in the SSO Name Attribute field, enter userPrincipalName (select –<< New >>– first). Make sure there are no spaces after this attribute name. NetScaler will use this pull this attribute from AD, and use it to Single Sign-on the user to StoreFront.
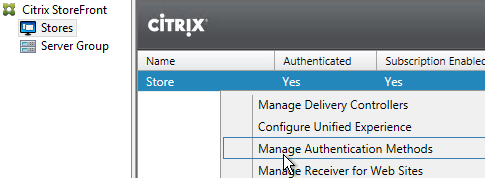
  2. In StoreFront Console, right-click  the Store, and click Manage Authentication Methods.
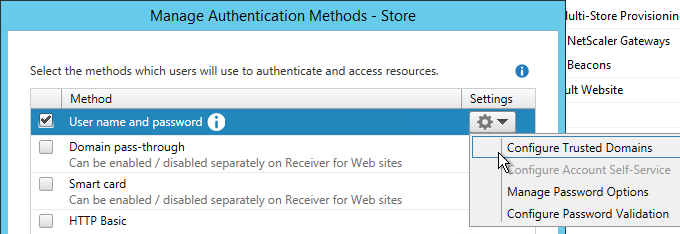
  3. On the right, click the gear icon, and then click Configure Trusted Domains.
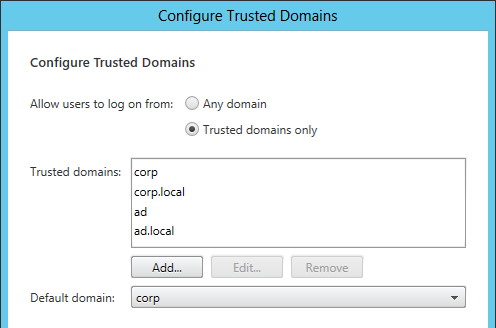
  4. In the Trusted domains box, select Any domain.
  5. Or add your domains in DNS format. The advantage of entering domain names is that you can select a default domain if internal users forget to enter a domain name during login. The DNS format is required for UPN logins (e.g. SSO from NetScaler Gateway).
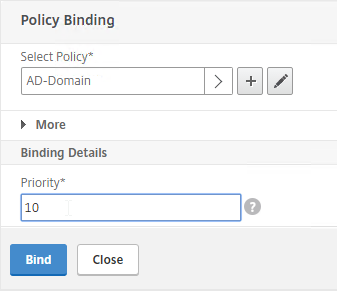
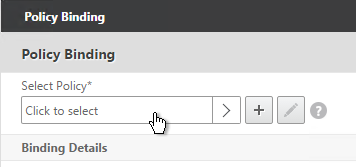
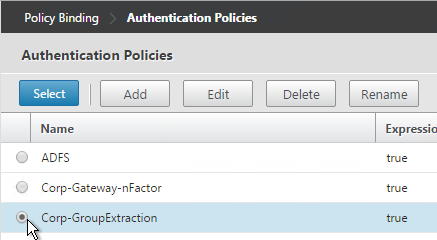
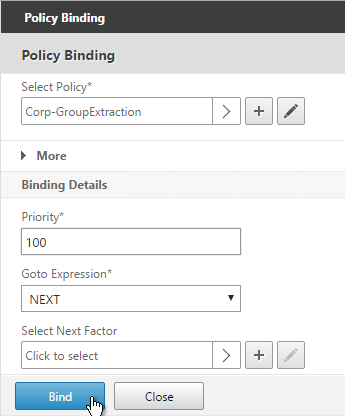
  6. On the NetScaler Gateway Virtual Server, bind LDAP authentication polices in priority order. It will search them in order until it finds a match.
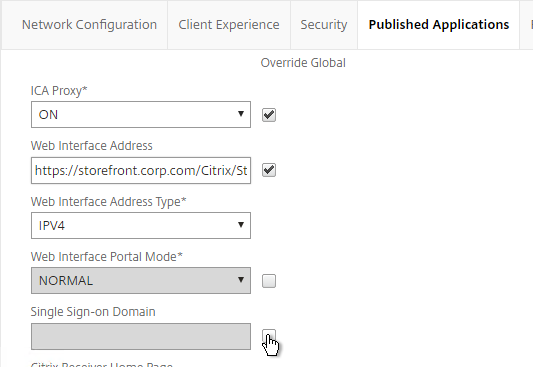
  7. In your Session Policies/Profiles, in the Published Applications tab, make sure Single Sign-on Domain is not configured. Since NetScaler is using the userPrincipalName there’s no need to specify a domain. If Single Sign-on Domain is configured then Single Sign-on authentication will fail.

Multiple Domains – AAA Groups Method

Another method of specifying the domain name when performing Single Sign-on to StoreFront is to use a unique session policy/profile for each domain. Use AAA Groups to distinguish one domain from another.

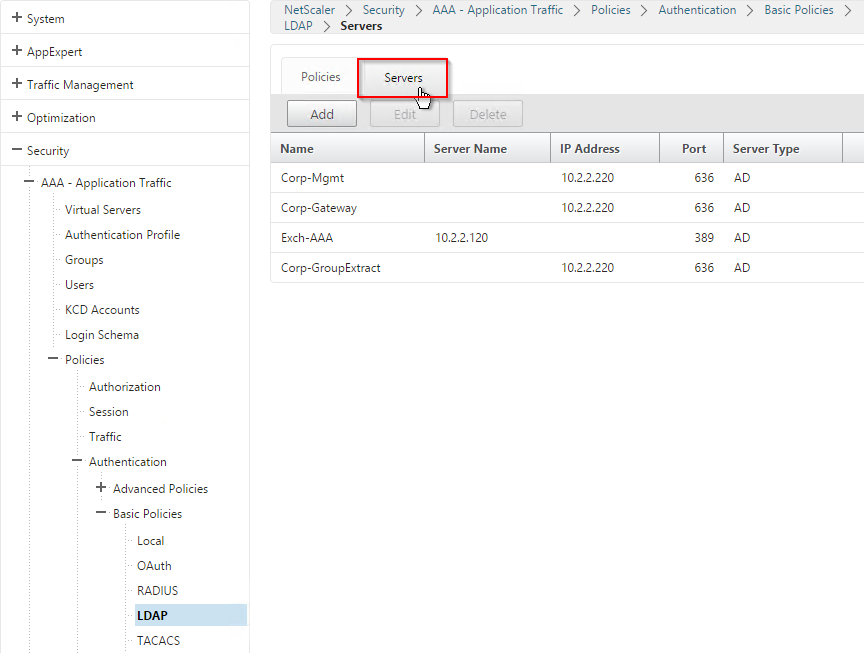
  1. Go to NetScaler Gateway > Policies > Authentication > LDAP.
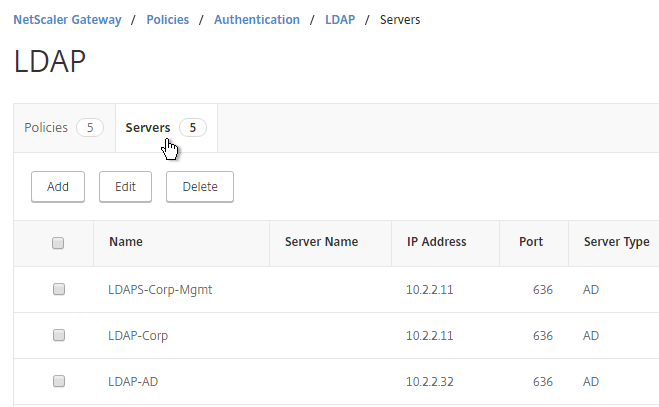
  2. On the right, switch to the Servers tab. Make sure all domains are in the list. Edit one of the domains.
  3. Scroll down to the Other Settings section,
  4. In the Default Authentication Group field, enter a new, unique group name. Each domain has a different group name. Click OK.
  5. Edit another domain and specify a new unique group name. Each domain has a different group name.
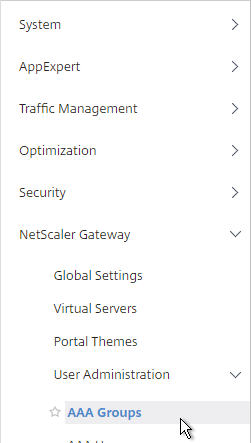
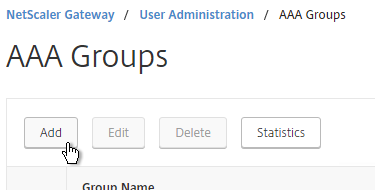
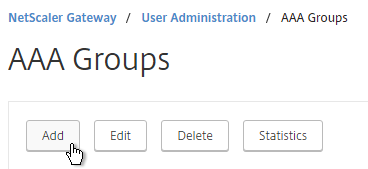
  6. Go to NetScaler Gateway > User Administration > AAA Groups.
  7. On the right, click Add.
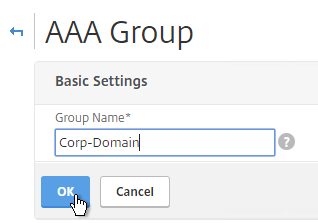
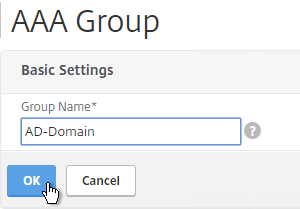
  8. Name the group so it exactly matches the group name you specified in the LDAP server. Click OK.
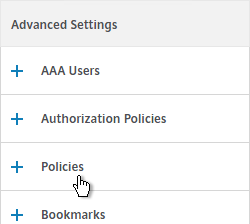
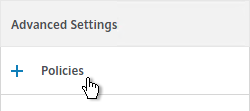
  9. On the right, in the Advanced Policies section, add the Policies section.
  10. On the left, in the Policies section, click the Plus icon.
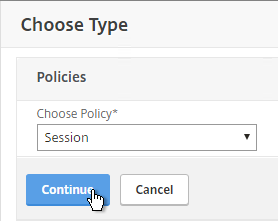
  11. Select Session, and click Continue.
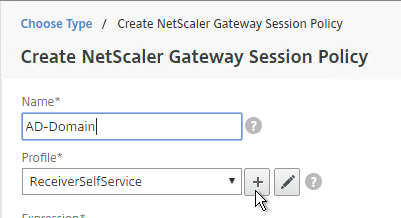
  12. Click the plus icon to create a new policy.
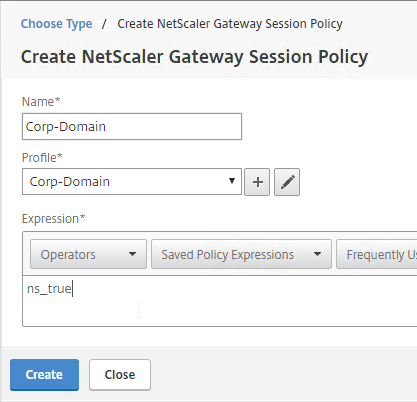
  13. Give it a name that indicates the domain. You will have a separate policy for each domain.
  14. Click the plus icon to create a new profile.
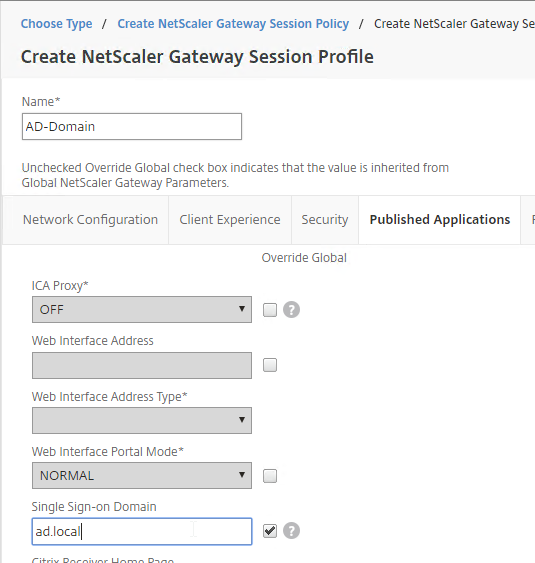
  15. Give the Profile a name that indicates the domain. You will have a separate profile for each domain.
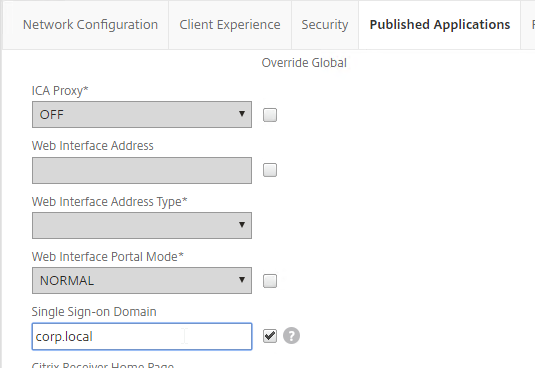
  16. Switch to the Published Applications tab.
  17. Check the Override Global box next to Single Sign-on Domain. Enter the domain name that StoreFront is expecting. Click Create.
  18. Give the policy a ns_true expression, and click Create.
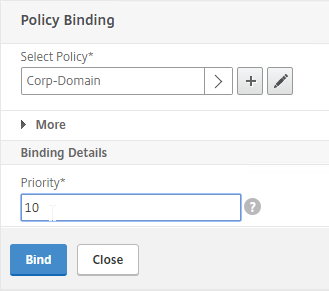
  19. In the Priority field, give it a number that is lower than any other Session Policy that has Single Sign-on Domain configured. Click OK.
  20. Click Done.
  21. Create another AAA Group.
  22. Give it a name for the next domain.
  23. Create another Session Policy for the next domain.
  24. Create another profile for the next domain. On the Published Applications tab, specify the domain name of the next domain.
  25. Bind the new policy with a low Priority number.
  26. When a user logs in, NetScaler loops through LDAP policies until one of them works. NetScaler adds the user to the Default Authentication Group specified in the LDAP Server. NetScaler finds a matching AAA Group and applies the Session Policy that has SSON Domain configured. Since the policy is bound with a low priority number, it overrides any other policy that also has SSON Domain configured.

Domain Controller (LDAPS) Load Balancing – NetScaler 11.1

Last Modified: Nov 6, 2020 @ 7:26 am

Navigation

Overview

If you plan to use LDAP (Active Directory) for NetScaler Gateway or NetScaler management authentication, load balance the Domain Controllers that are used for authentication.

An alternative to load balancing is to configure NetScaler Gateway and NetScaler management authentication with multiple authentication policies, each pointing to a single Domain Controller. However, NetScaler will try each authentication policy until it finds one that works. If the user enters a wrong password and if you have three authentication policies pointing to different Domain Controllers in the same domain then three different failure attempts will be recorded thus causing premature account lockout. Use Load Balancing to avoid this behavior.

This page details LDAPS, aka Secure LDAP. This protocol requires certificates to be installed on the Domain Controllers. When a user’s password expires, Active Directory does not allow password changes over clear text LDAP so LDAPS must be used instead. Make sure you have certificates installed on your Domain Controllers. The easiest way to accomplish that is to deploy a Microsoft Certificate Authority. Once that’s done the Domain Controllers will request certificates automatically.

An ldaps monitor can be used to verify that the Domain Controller is functional. The ldaps monitor will login as an account, perform an LDAP query, and look for a successful response. The ldaps monitor uses a service account to login. Make sure the service account’s password does not expire. Domain User permissions are sufficient. Since this monitor is a Perl script, it uses NSIP as the source IP. You can use RNAT to override this as described in CTX217712 How to Force scriptable monitor to use SNIP in Netscaler in 10.5.

If you have Domain Controllers in multiple datacenters, you can create multiple load balancing Virtual Servers and cascade them so that the local Domain Controllers are used first, and if they’re not available, then the Virtual Server fails over to Domain Controllers in remote datacenters.

The Load Balancing Virtual Server for LDAPS can be TCP or SSL_TCP:

  • If the protocol is TCP, then SSL-encrypted LDAP traffic is not terminated on the NetScaler, and is simply forwarded to the LDAP servers. If your LDAP client needs to verify the LDAP server certificate, then this Load Balancing configuration will not work, since each back-end LDAP server will have a different certificate.
  • If your Load Balancing Virtual Server is protocol SSL_TCP, then a certificate must be installed on the NetScaler and bound to the Load Balancing Virtual Server. SSL is terminated at the NetScaler and re-encrypted before sending it to the destination Domain Controller. The primary benefit of NetScaler SSL termination is that your LDAP clients can verify the Virtual Server SSL certificate.

When NetScaler uses a local (same appliance) load balanced Virtual Server for LDAPS authentication, the traffic is sourced from the NetScaler SNIP (Subnet IP). When NetScaler uses a direct connection to a Domain Controller without going through a local Load Balancing Virtual Server, or if NetScaler uses a remote (different appliance) Load Balancing VIP, then the traffic is sourced from the NetScaler NSIP (NetScaler IP). Adjust firewall rules accordingly.

LDAPS Monitor

Note: Perl monitor uses NSIP as the source IP. You can use RNAT to override this as described in CTX217712 How to Force scriptable monitor to use SNIP in Netscaler in 10.5.

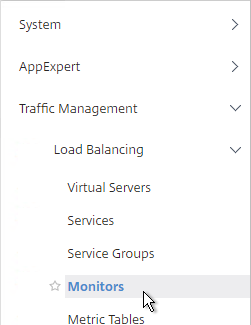
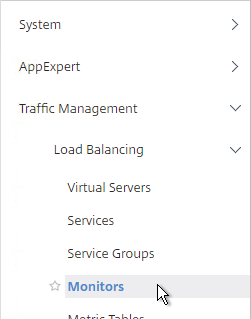
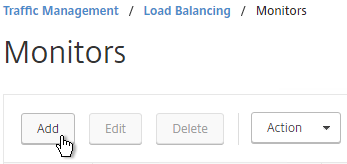
  1. In the NetScaler Configuration Utility, expand Traffic Management, expand Load Balancing, and click Monitors.
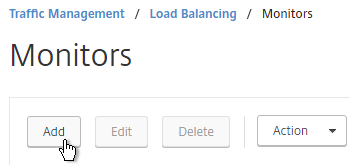
  2. On the right, click Add.
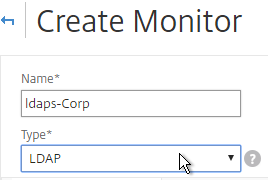
  3. Name the monitor ldaps-Corp or similar. The ldaps monitor logs into Active Directory, performs an LDAP query, and looks for a successful response. The monitor configuration has domain specific information so if you have multiple Active Directory domains, then you will need multiple ldaps monitors. Include the domain name in the monitor name.
  4. Change the Type to LDAP.
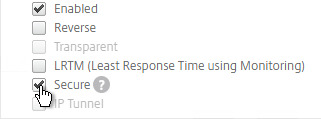
  5. Scroll down and check the box next to Secure.
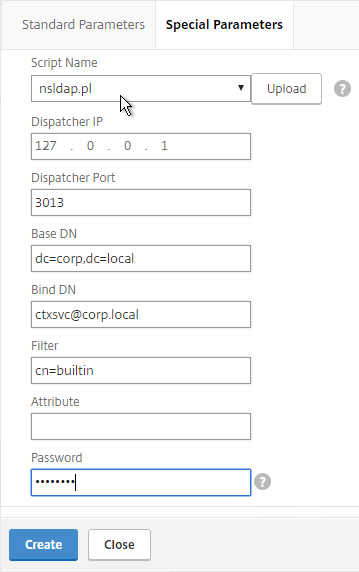
  6. Scroll back up and switch to the Special Parameters tab.
  7. On the Special Parameters tab, use the Script Name drop-down list to select the nsldap.pl file.
  8. In the Base DN field, enter your domain name in LDAP format (e.g. dc=company,dc=com)
  9. In the Bind DN field, enter the UPN login (e.g. ctxsvc@company.com) of a service account in the domain that can browse all objects. Any normal Domain User should be sufficient. Just make sure the password doesn’t expire.
  10. In the Filter field, enter cn=builtin. This limits the search results.
  11. In the Password field, enter the password for the service account. Make sure there is no semicolon in the password or the script will be unable to parse the parameters.
  12. Click Create.

    add lb monitor LDAP-Corp LDAP -scriptName nsldap.pl -dispatcherIP 127.0.0.1 -dispatcherPort 3013 -password Passw0rd -secure YES -baseDN "dc=corp,dc=local" -bindDN "corp\\ctxsvc" -filter cn=builtin
  13. If you have multiple domains then create additional monitors: one for each domain.

Servers

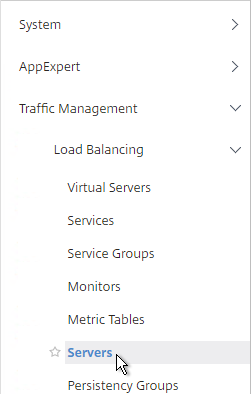
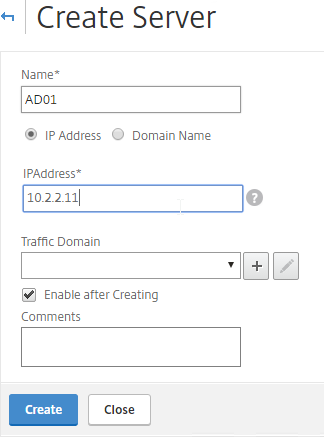
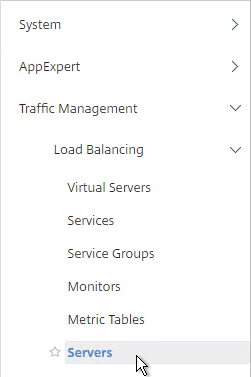
  1. On the left, expand Traffic Management, expand Load Balancing, and click Servers.
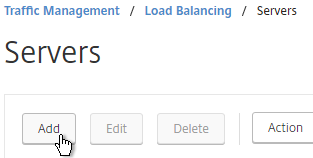
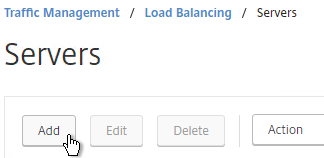
  2. On the right, click Add.
  3. Enter a descriptive server name, usually it matches the actual server name.
  4. Enter the IP address of the server.
  5. Enter comments to describe the server. Click Create.

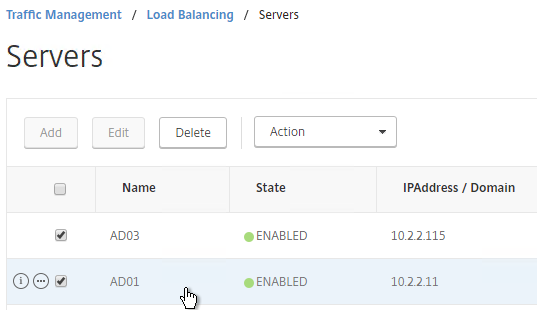
    add server AD01 10.2.2.11
    add server AD01 10.2.2.12
  6. Continue adding Domain Controllers.

Service Groups

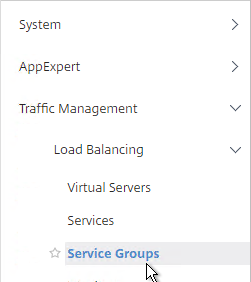
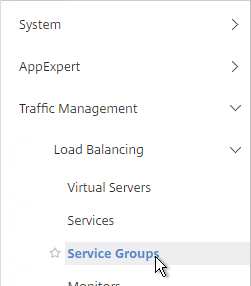
  1. On the left, expand Traffic Management, expand Load Balancing, and click Service Groups.
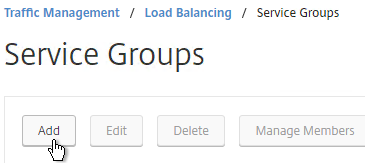
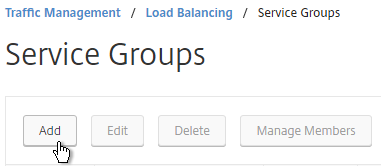
  2. On the right click Add
    .
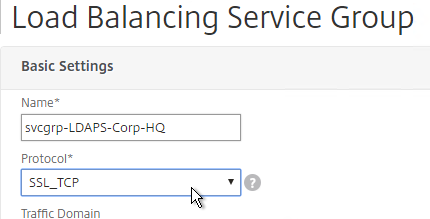
  3. You will create one Service Group per datacenter. Enter a name reflecting the name of the data center. Also, you will create a set of service groups per Active Directory domain so include the domain name.
  4. Change the Protocol to SSL_TCP. Scroll down and click OK.

  5. On the left, in the Service Group Members section, click where it says No Service Group Member.
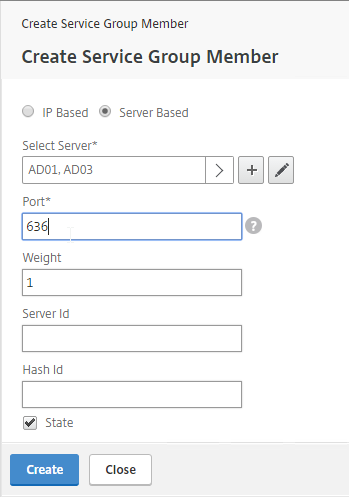
  6. If you did not create server objects, then enter the IP address of a Domain Controller in this datacenter. If you previously created a server object, then change the selection to Server Based, and select the server object. In the Port field, enter 636 (LDAPS).
    1. Note: Any Domain Controller you add to this list must have an SSL certificate installed. The easiest way to install SSL certificates on the Domain Controllers is with Active Directory Certificate Services since it installs the certificates automatically.
  7.  Click Create.
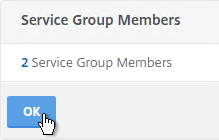
  8. Click OK.
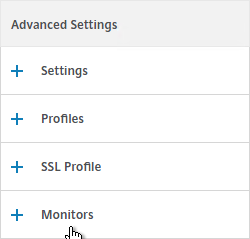
  9. On the right, in the Advanced Settings column, click Monitors.
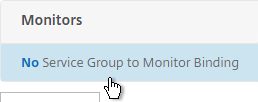
  10. On the left, in the Monitors section, click where it says No Service Group to Monitor Binding.
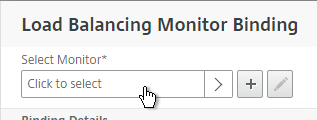
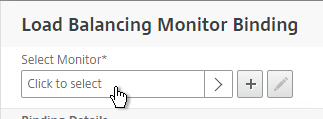
  11. Click the arrow next to Click to select.
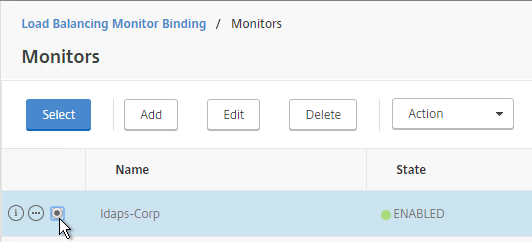
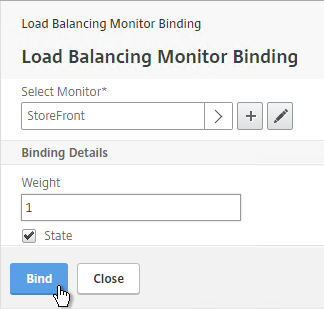
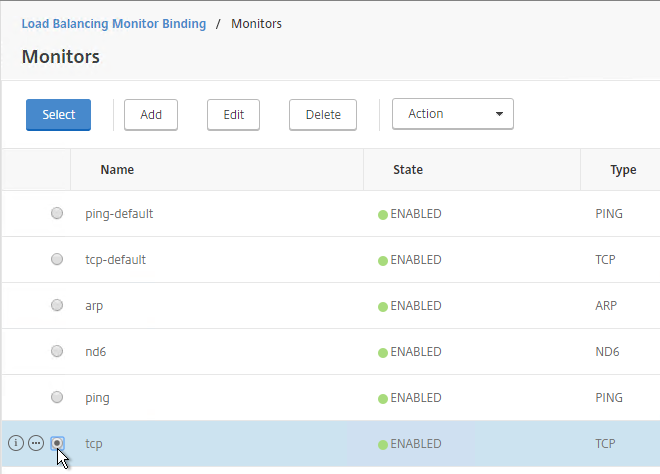
  12. Select your new LDAPS monitor and click Select.
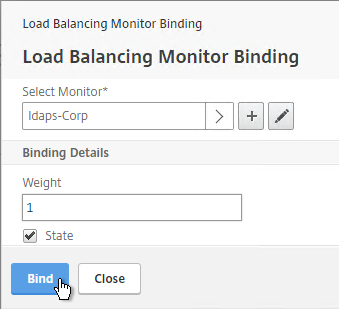
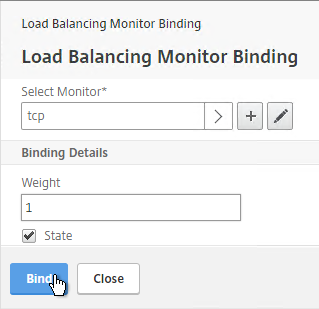
  13. Click Bind.
  14. To verify the member is up, click in the Service Group Members section.
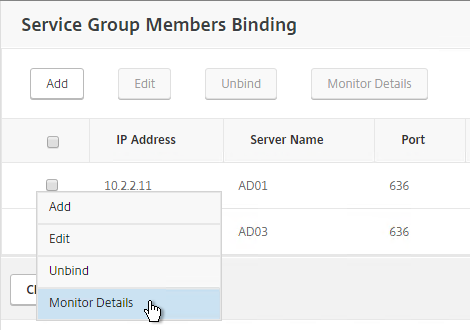
  15. Click the ellipsis next to a member and click Monitor Details.
  16. It should say Success – Probe succeeded. Click Close.
  17. If the monitor doesn’t work, use ldp.exe to verify the Domain Controller certificate.
  18. Click Close and Done to finish creating the Service Group.

    add serviceGroup svcgrp-LDAP-Corp SSL_TCP
    bind serviceGroup svcgrp-LDAP-Corp AD01 636
    bind serviceGroup svcgrp-LDAP-Corp AD02 636
    bind serviceGroup svcgrp-LDAP-Corp -monitorName LDAP-Corp
  19. Add additional service groups for Domain Controllers in each data center.

Virtual Server

  1. Create or import a certificate that matches the FQDN that resolves to the new Load Balancing VIP for LDAPS.
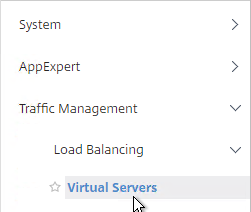
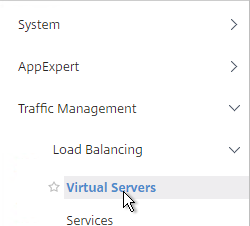
  2. On the left, expand Traffic Management, expand Load Balancing, and click Virtual Servers.

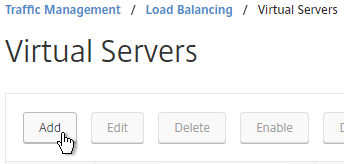
  3. On the right, click Add.
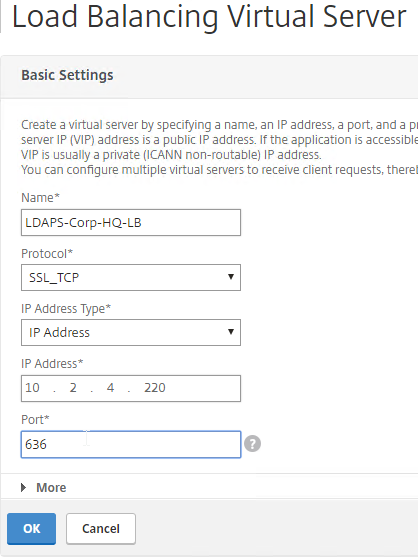
  4. Name it LDAPS-Corp-HQ-LB or similar. You will create one Virtual Server per datacenter so include the datacenter name. Also, each domain has a separate set of Virtual Servers so include the domain name.
  5. Change the Protocol drop-down to SSL_TCP.
  6. Enter a Virtual IP. This VIP cannot conflict with any other IP + Port already being used. You can use an existing VIP that is not already listening on TCP 636.
  7. Enter 636 as the Port. Click OK.
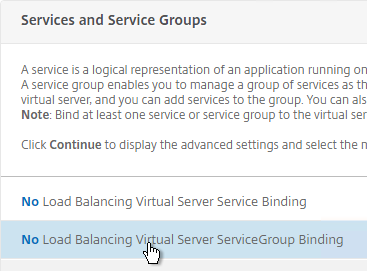
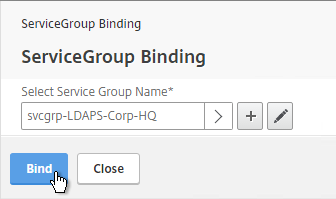
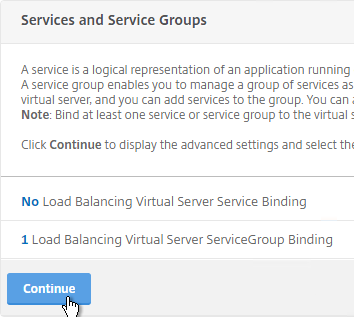
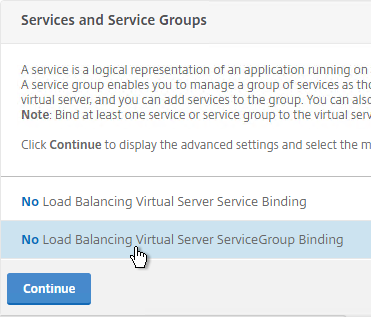
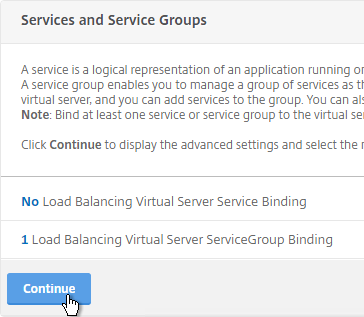
  8. On the left, in the Service Group section, click where it says No Load Balancing Virtual Server ServiceGroup Binding.
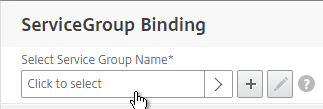
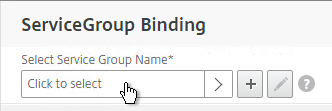
  9. Click the arrow next to Click to select.
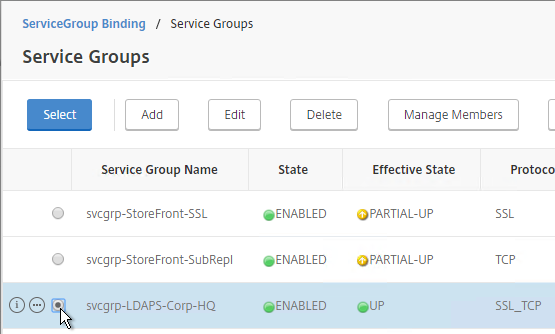
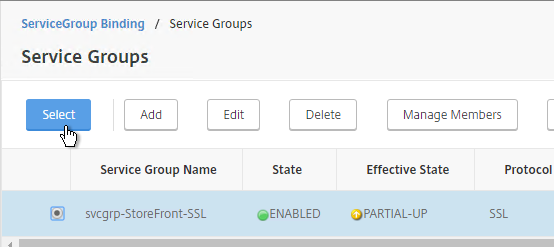
  10. Select the previously created Service Group and click Select.
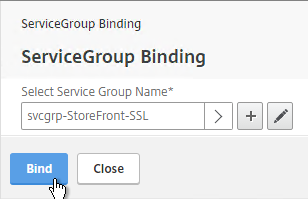
  11. Click Bind.
  12. Click Continue.
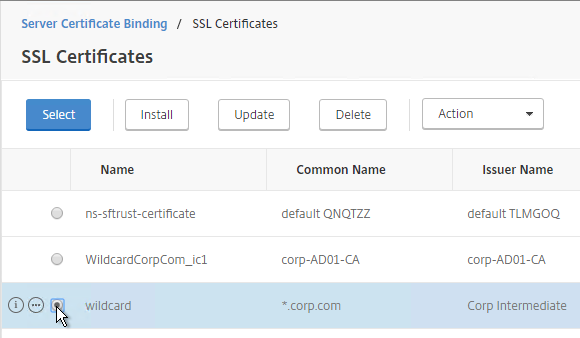
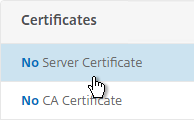
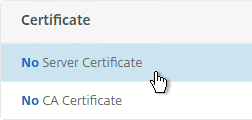
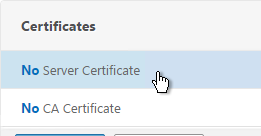
  13. On the left, in the Certificates section, click where it says No Server Certificate.
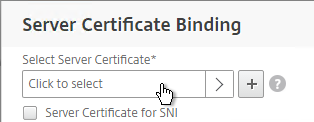
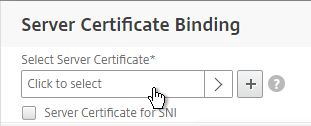
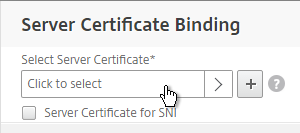
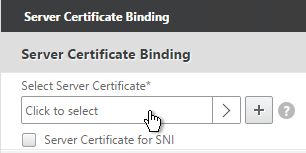
  14. Click the arrow next to Click to select.
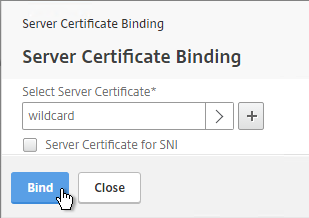
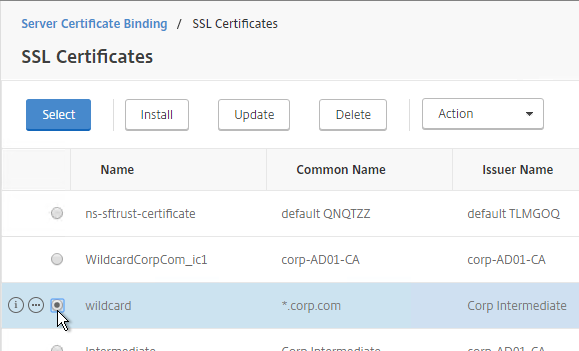
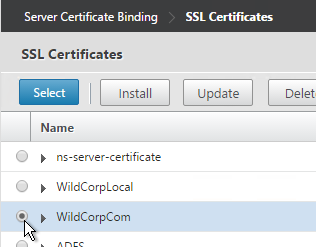
  15. Select a certificate that matches the FQDN that will resolve to this VIP. Click Select.
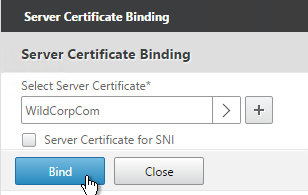
  16. Click Bind.
  17. Click Continue.

    add lb vserver lbvip-LDAP-Corp SSL_TCP 10.2.2.210 636 -persistenceType NONE -cltTimeout 9000
    
    bind lb vserver lbvip-LDAP-Corp svcgrp-LDAP-Corp
  18. If you haven’t enabled the Default SSL Profile, then perform other normal SSL configuration including: disable SSLv3, and bind a Modern Cipher Group.
    bind ssl vserver MyvServer -certkeyName MyCert
    
    set ssl vserver MyvServer -ssl3 DISABLED -tls11 ENABLED -tls12 ENABLED
    
    unbind ssl vserver MyvServer -cipherName ALL
    
    bind ssl vserver MyvServer -cipherName Modern
    
    bind ssl vserver MyvServer -eccCurveName ALL
  19. Click Done to finish creating the Virtual Server.
  20. The new Virtual Server should show as Up.
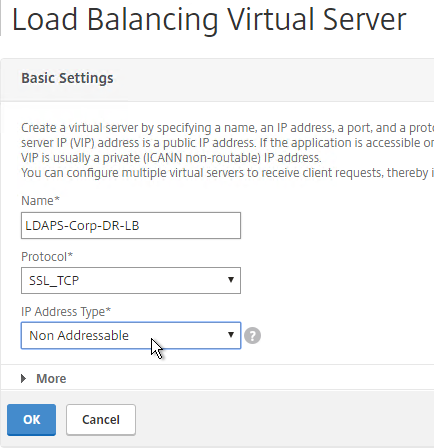
  21. Create additional Virtual Servers for each datacenter. These additional Virtual Servers do not need a VIP so change the IP Address Type to Non Addressable. Only the first Virtual Server will be directly accessible.

    add lb vserver lbvip-LDAP-Corp-Backup SSL_TCP 0.0.0.0 0
  22. Notice that the additional datacenter Virtual Servers show up with an IP Address of 0.0.0.0 and port of 0.
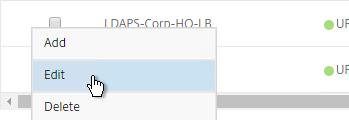
  23. After you are done creating a Virtual Server for each datacenter, click the ellipsis next to the primary datacenter’s Virtual Server and click Edit.
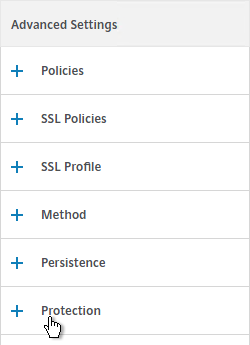
  24. On the right, in the Advanced Settings column, click Protection.
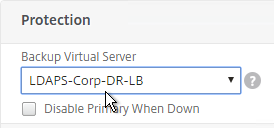
  25. On the left, in the Protection section, change the Backup Virtual Server to one of the other datacenter Virtual Servers. If all of the services in this datacenter are DOWN, the backup Virtual Server will be used instead. You can cascade multiple Virtual Servers using this method. Click OK and Done.

    set lb vserver lbvip-LDAP-Corp -backupVServer lbvip-LDAP-Corp-Backup

Next Steps

You may now use this Virtual IP in your LDAP authentication policies for NetScaler Gateway or NetScaler management login.

StoreFront Load Balancing – NetScaler 11.1

Last Modified: Nov 7, 2020 @ 6:35 am

Navigation

Monitor

Note: This is a Perl monitor, which uses the NSIP as the source IP. You can use RNAT to override this as described in CTX217712 How to Force scriptable monitor to use SNIP in Netscaler in 10.5.

  1. On the left, expand Traffic Management, expand Load Balancing, and click Monitors.
  2. On the right, click Add.
  3. Name it StoreFront or similar.
  4. Change the Type drop-down to STORERONT.
  5. If you will use SSL to communicate with the StoreFront servers, then scroll down, and check the box next to Secure.
  6. Scroll up, and switch to the Special Parameters tab.
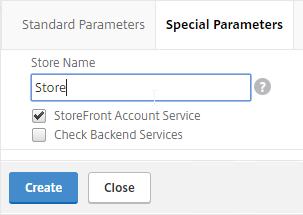
  7. In the Store Name field, enter the name of your store (e.g. MyStore) without spaces.
  8. Click Create.

    add lb monitor StoreFront STOREFRONT -scriptName nssf.pl -dispatcherIP 127.0.0.1 -dispatcherPort 3013 -secure YES -storename Store

Servers

  1. On the left, expand Traffic Management, expand Load Balancing, and click Servers.
  2. On the right, click Add.
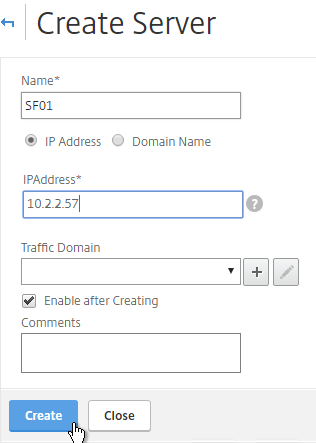
  3. Enter a descriptive server name, usually it matches the actual server name.
  4. Enter the IP address of the server.
  5. Enter comments to describe the server. Click Create.
  6. Continue adding StoreFront servers.

    add server SF01 10.2.2.57
    add server SF02 10.2.2.58

Service Group

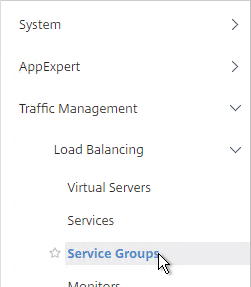
  1. On the left, expand Traffic Management, expand Load Balancing, and click Service Groups.

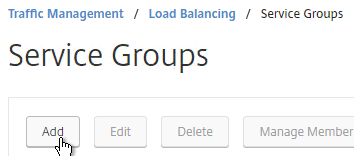
  2. On the right, click Add.
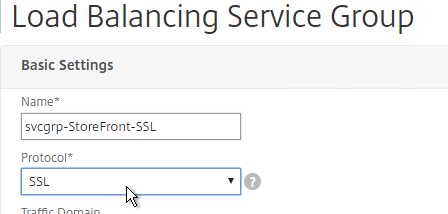
  3. Give the Service Group a descriptive name (e.g. svcgrp-StoreFront-SSL).
  4. Change the Protocol to HTTP or SSL. If the protocol is SSL, ensure that the StoreFront Monitor has Secure checked.
  5. Scroll down and click OK.

  6. Click where it says No Service Group Member.
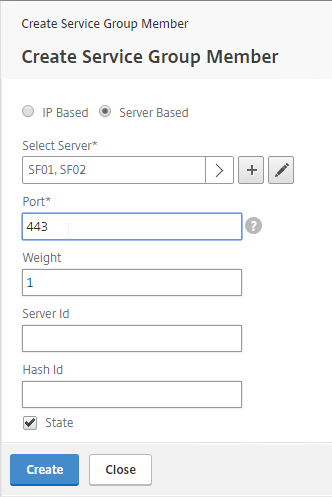
  7. If you did not create server objects then enter the IP address of a StoreFront Server. If you previously created a server object then change the selection to Server Based and select the server objects.
  8. Enter 80 or 443 as the port. Then click Create.
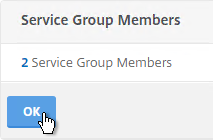
  9. Click OK.
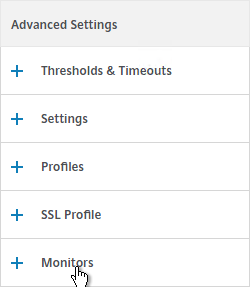
  10. On the right, under Advanced Settings , click Monitors.
  11. Click where it says says No Service Group to Monitor Binding.
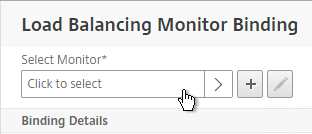
  12. Click the arrow next to Click to select.
  13. Select your StoreFront monitor and click Select.
  14. Then click Bind.
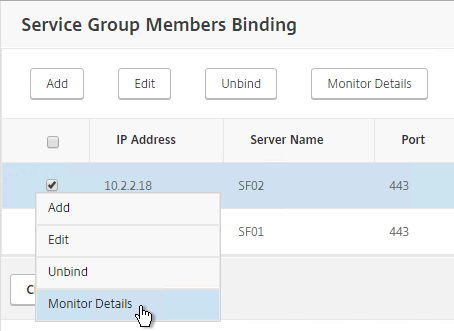
  15. To verify that the monitor is working, on the left, in the Service Group Members section, click the Service Group Members line.
  16. Click the ellipsis next to a member and click Monitor Details.
  17. The Last Response should be Success – Probe succeeded. Click Close twice.
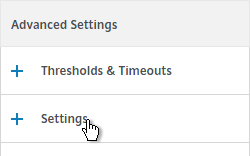
  18. On the right, under Advanced Settings, click Settings.
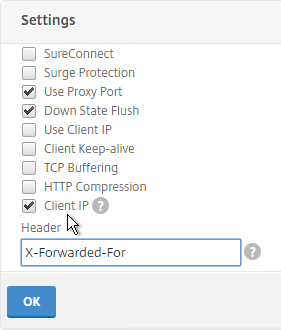
  19. On the left, in the Settings section, check the box for Client IP and enter X-Forwarded-For as the Header. Then click OK.
  20. Then click Done.

    add serviceGroup svcgrp-StoreFront-SSL SSL -maxClient 0 -maxReq 0 -cip ENABLED X-Forwarded-For
    
    bind serviceGroup svcgrp-StoreFront-SSL SF01 443
    bind serviceGroup svcgrp-StoreFront-SSL SF02 443
    bind serviceGroup svcgrp-StoreFront-SSL -monitorName StoreFront
  21. If the Service Group is http and you don’t have certificates installed on your StoreFront servers (aka SSL Offload) then you’ll need to enable loopback in StoreFront.
    1. In StoreFront 3.5 and newer, you enable it in the GUI console.
    2. In StoreFront 3.0, run the following commands on the StoreFront 3.0 servers as detailed at Citrix Blog Post What’s New in StoreFront 3.0.
      & "C:\Program Files\Citrix\Receiver StoreFront\Scripts\ImportModules.ps1"
      
      Set-DSLoopback -SiteId 1 -VirtualPath /Citrix/StoreWeb -Loopback OnUsingHttp

Load Balancing Virtual Server

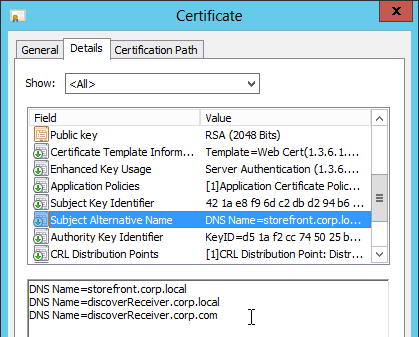
  1. Create or install a certificate that will be used by the SSL Offload Virtual Server. This certificate must match the DNS name for the load balanced StoreFront servers. For email discovery in Citrix Receiver, the certificate must either be a wildcard (*.corp.local) or have a subject alternative name for discoverReceiver.domain.com (domain.com = email address suffix)
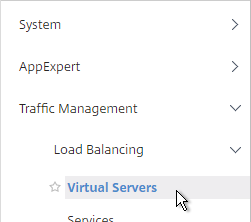
  2. On the left, under Traffic Management > Load Balancing, click Virtual Servers.

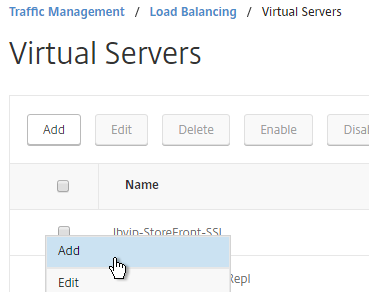
  3. On the right click Add.
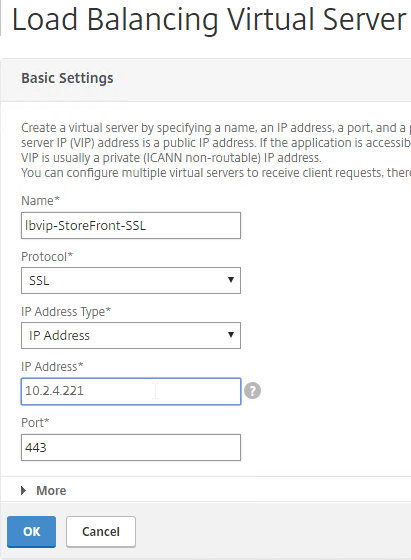
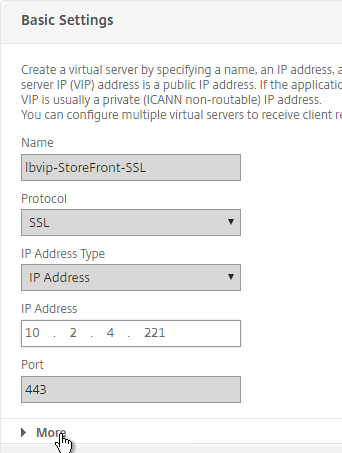
  4. Name it lbvip-StoreFront-SSL or similar.
  5. Change the Protocol to SSL.
  6. Specify a new internal VIP.
  7. Enter 443 as the Port.
  8. Click OK.

    add lb vserver lbvip-StoreFront-SSL SSL 10.2.2.221 443 -persistenceType SOURCEIP -timeout 60
  9. On the left, in the Services and Service Groups section, click where it says No Load Balancing Virtual Server ServiceGroup Binding.
  10. Click the arrow next to Click to select.
  11. Select your StoreFront Service Group and click Select.
  12. Click Bind.

    bind lb vserver lbvip-StoreFront-SSL svcgrp-StoreFront-SSL
  13. Click Continue.
  14. Click where it says No Server Certificate.
  15. Click the arrow next to Click to select.
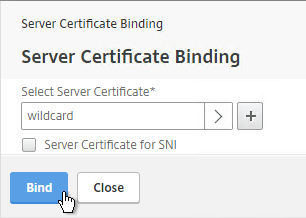
  16. Select the certificate for this StoreFront Load Balancing Virtual Server and click Select.
  17. Click Bind.

    bind ssl vserver lbvip-StoreFront-SSL -certkeyName WildCorpCom
  18. Click Continue.
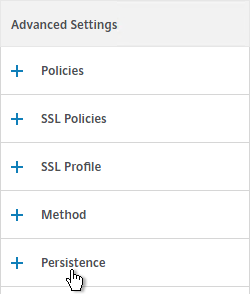
  19. On the right, in the Advanced Settings column, click Persistence.
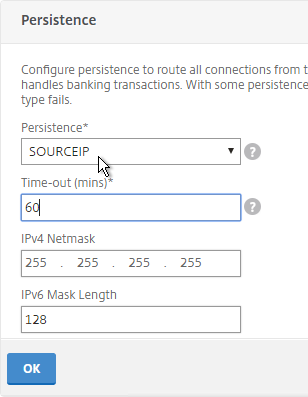
  20. On the left, in the Persistence section, select SOURCEIP. Do NOT use COOKIEINSERT persistence or Android devices will not function correctly.
  21. Set the timeout to match the timeout of Receiver for Web.
  22. The IPv4 Netmask should default to 32 bits.
  23. Click OK.
  24. If the NetScaler communicates with the StoreFront servers using HTTP (aka SSL Offload – 443 on client-side, 80 on server-side), and if you have enabled the Default SSL Profile, then you’ll either need to edit the Default SSL Profile to include the SSL Redirect option, or create a new custom SSL Profile with the SSL Redirect option enabled, and then bind the custom SSL Profile to this vServer.
  25. If the default SSL Profile is not enabled, then you’ll need to edit the SSL Parameters section on the vServer, and at the top right, check the box next to SSL Redirect. Otherwise the Receiver for Web page will never display.
  26. set ssl vserver lbvip-StoreFront-SSL -sslRedirect ENABLED -ssl3 DISABLED
  27. If you haven’t enabled the Default SSL Profile, then perform other normal SSL configuration including: disable SSLv3, bind a Modern Cipher Group, and enable Strict Transport Security.
    bind ssl vserver lbvip-StoreFront-SSL -certkeyName MyCert
    
    set ssl vserver lbvip-StoreFront-SSL -ssl3 DISABLED -tls11 ENABLED -tls12 ENABLED
    
    unbind ssl vserver lbvip-StoreFront-SSL -cipherName ALL
    
    bind ssl vserver lbvip-StoreFront-SSL -cipherName Modern
    
    bind ssl vserver lbvip-StoreFront-SSL -eccCurveName ALL
    
    bind lb vserver lbvip-StoreFront-SSL -policyName insert_STS_header -priority 100 -gotoPriorityExpression END -type RESPONSE

When connecting to StoreFront through load balancing, if you want to put the server name on the StoreFront webpage so you can identify the server, see Nicolas Ignoto Display server name with Citrix StoreFront 3.
Server name is displayed

SSL Redirect – SSL Load Balancing vServer Method

Users must enter https:// when navigating to the StoreFront website. To make it easier for the users, enable SSL Redirection.

This procedure details the SSL Load Balancing vServer method of performing an SSL redirect. An alternative is to use the Responder method.

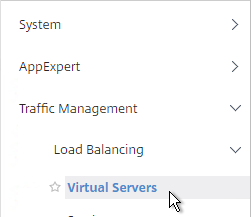
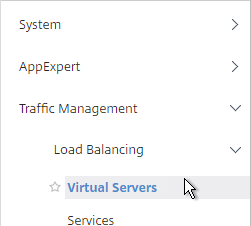
  1. On the left, under Traffic Management > Load Balancing, click Virtual Servers.

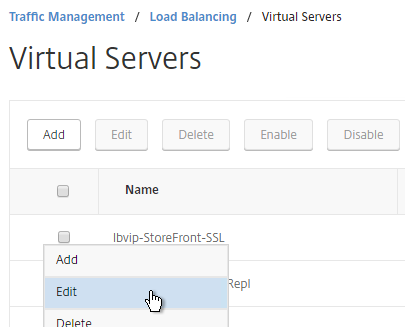
  2. On the right, find the SSL Virtual Server you’ve already created, click the ellipsis next to it and click Edit.
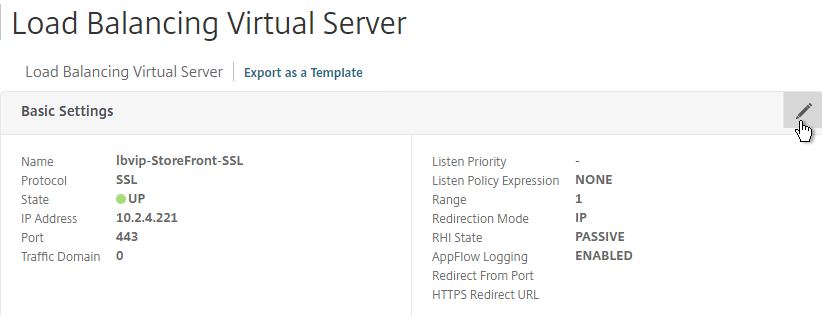
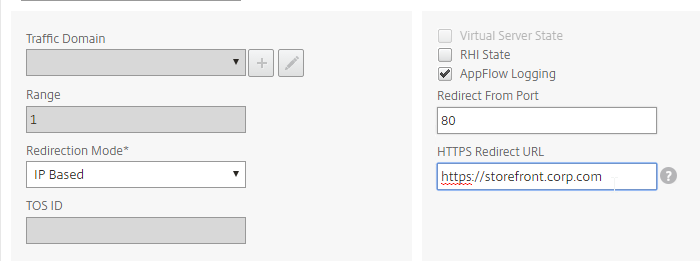
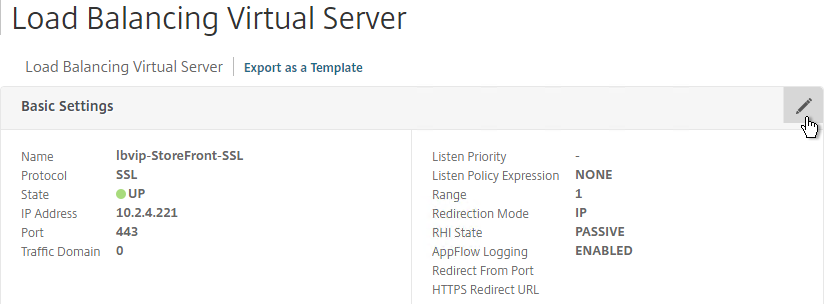
  3. In the Basic Settings section, click the pencil icon.
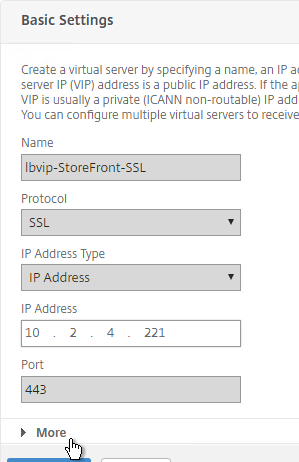
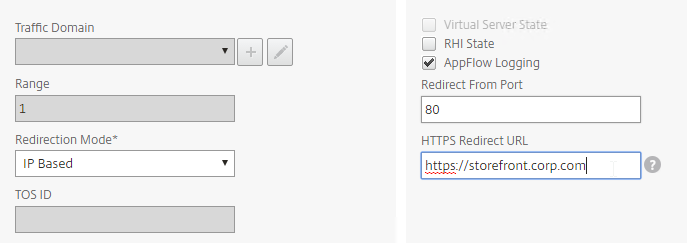
  4. Click the More link.
  5. In the Redirect from Port field, enter 80.
  6. In the HTTPS Redirect URL field, enter your StoreFront Load Balancing URL (e.g. https://storefront.corp.com).
  7. Scroll down and click Continue twice.

    set lb vserver lbvip-StoreFront-SSL -redirectFromPort 80 -httpsRedirectUrl https://storefront.corp.com
  8. This method does not add any new vServers to the list so it’s not easy to see if this is configured.

StoreFront Base URL

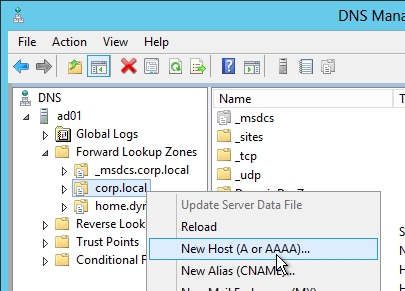
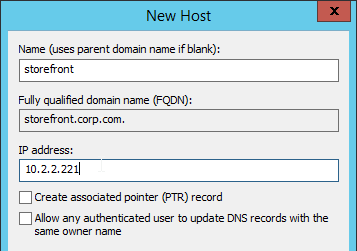
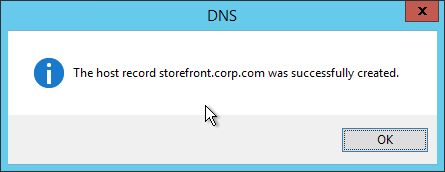
  1. Create a DNS Host record that resolves to the new VIP.
  2. The DNS name for StoreFront load balancing must be different than the DNS name for NetScaler Gateway. Unless you are following the Single FQDN procedure.

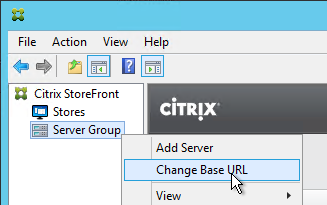
  3. In the Citrix StoreFront console, right-click Server Group and click Change Base URL.
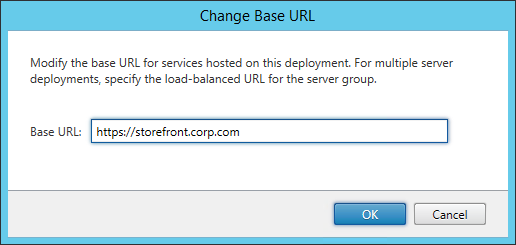
  4. Enter the new Base URL in https://storefront.corp.com format. This must match the certificate that is installed on the load balancer. Click OK.

Subscription Replication Load Balancing

If you have multiple StoreFront clusters (separate datacenters), you might want to replicate subscriptions between them. StoreFront subscription replication uses TCP port 808. To provide High Availability for this service, load balance TCP port 808 on the StoreFront servers. See Configure subscription synchronization at Citrix Docs for more information.

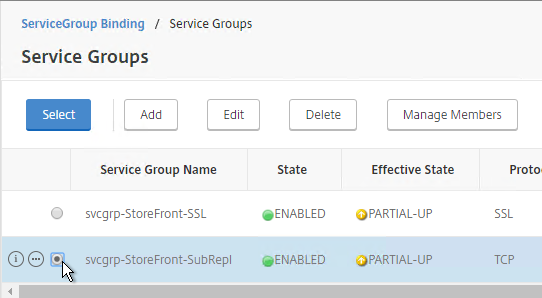
  1. On the left, expand Traffic Management, expand Load Balancing, and click Service Groups.

  2. On the right, click Add.
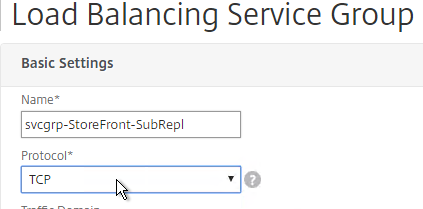
  3. Give the Service Group a descriptive name (e.g. svcgrp-StoreFront-SubRepl).
  4. Change the Protocol to TCP.
  5. Scroll down and click OK.
  6. Click where it says No Service Group Member.
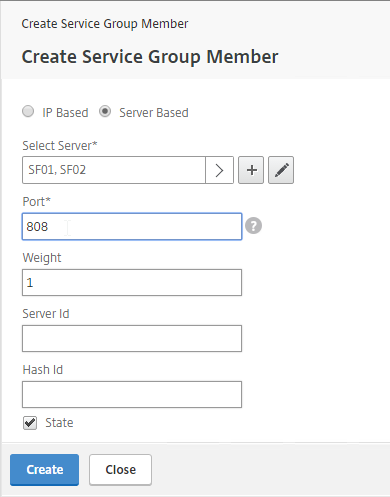
  7. Change the selection to Server Based and select the StoreFront servers.
  8. Enter 808 as the port. Then click Create.

  9. Click OK.
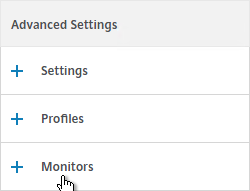
  10. On the right, under Advanced Settings, click Monitors.
  11. On the left, in the Monitors section, click where it says No Service Group to Monitor Binding.
  12. Click the arrow next to Click to select.
  13. Select the tcp monitor and click Select.
  14. Then click Bind and click Done.

    add serviceGroup svcgrp-StoreFront-FavRepl TCP
    bind serviceGroup svcgrp-StoreFront-FavRepl SF01 808
    bind serviceGroup svcgrp-StoreFront-FavRepl SF02 808
  15. On the left, under Traffic Management > Load Balancing, click Virtual Servers.

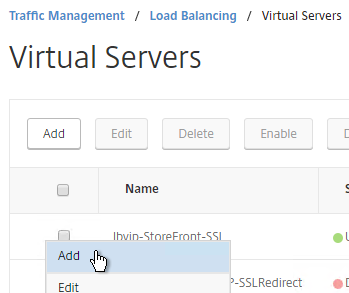
  16. On the right, click the ellipsis next to the existing StoreFront Load Balancing vServer, and click Add.
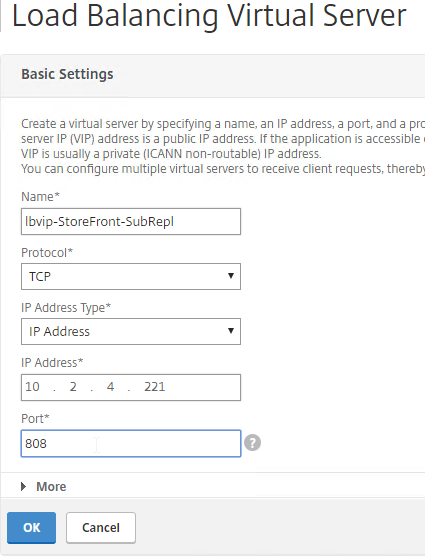
  17. Name it lbvip-StoreFront-SubRepl or similar.
  18. Change the Protocol to TCP.
  19. Specify the same VIP that you used for SSL Load Balancing of StoreFront.
  20. Enter 808 as the Port.
  21. Click OK.
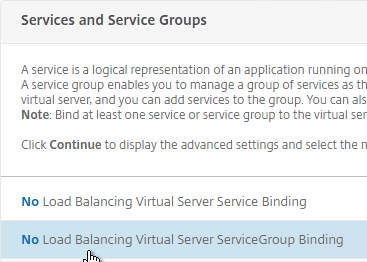
  22. Click where it says No Load Balancing Virtual Server ServiceGroup Binding.

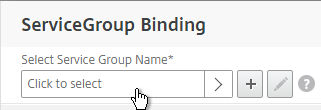
  23. Click the arrow next to Click to select.
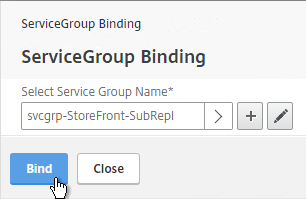
  24. Select your StoreFront Subscription Replication Service Group and click Select.
  25. Click Bind.
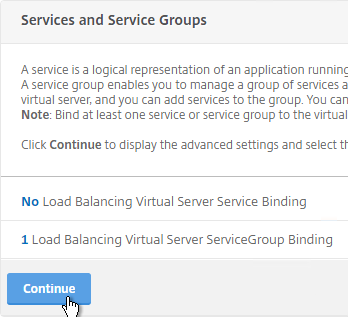
  26. Click Continue.
  27. Then click Done.

    add lb vserver lbvip-StoreFront-FavRepl TCP 10.2.2.201 808 -persistenceType NONE
    
    bind lb vserver lbvip-StoreFront-FavRepl svcgrp-SF-FavRepl

Related Posts

EUC Weekly Digest – July 2, 2016

Last Modified: Sep 2, 2018 @ 7:53 am

Here are some EUC items I found interesting last week:

Receiver

XenApp/XenDesktop

NetScaler

XenMobile

ShareFile

VMware

Other

SSL Virtual Servers – NetScaler 11.1

Last Modified: Nov 7, 2020 @ 6:34 am

This page contains generic SSL instructions for all SSL Virtual Servers including: Load Balancing, NetScaler Gateway, Content Switching, and AAA.

Navigation

💡 = Recently Updated

Change Log

Cipher Group

References:

To create a custom secure cipher group:

  1. Ryan Butler has a PowerShell script at Github that can automate NetScaler SSL configuration to get an A+.
  2. The easiest way to create a cipher group is from the CLI. See Citrix Blogs Scoring an A+ at SSLlabs.com with Citrix NetScaler – 2016 update for cipher group CLI commands.
  3. The last cipher is only needed for Windows XP machines. It doesn’t actually require SSL3. If you don’t need to support Windows XP, then skip that command.
    add ssl cipher custom-ssllabs-cipher
    bind ssl cipher custom-ssllabs-cipher -cipherName TLS1.2-ECDHE-RSA-AES256-GCM-SHA384
    bind ssl cipher custom-ssllabs-cipher -cipherName TLS1.2-ECDHE-RSA-AES128-GCM-SHA256
    bind ssl cipher custom-ssllabs-cipher -cipherName TLS1.2-ECDHE-RSA-AES-256-SHA384
    bind ssl cipher custom-ssllabs-cipher -cipherName TLS1.2-ECDHE-RSA-AES-128-SHA256
    bind ssl cipher custom-ssllabs-cipher -cipherName TLS1-ECDHE-RSA-AES256-SHA
    bind ssl cipher custom-ssllabs-cipher -cipherName TLS1-ECDHE-RSA-AES128-SHA
    bind ssl cipher custom-ssllabs-cipher -cipherName TLS1.2-DHE-RSA-AES256-GCM-SHA384
    bind ssl cipher custom-ssllabs-cipher -cipherName TLS1.2-DHE-RSA-AES128-GCM-SHA256
    bind ssl cipher custom-ssllabs-cipher -cipherName TLS1-DHE-RSA-AES-256-CBC-SHA
    bind ssl cipher custom-ssllabs-cipher -cipherName TLS1-DHE-RSA-AES-128-CBC-SHA
    bind ssl cipher custom-ssllabs-cipher -cipherName TLS1-AES-256-CBC-SHA
    bind ssl cipher custom-ssllabs-cipher -cipherName TLS1-AES-128-CBC-SHA
    bind ssl cipher custom-ssllabs-cipher -cipherName SSL3-DES-CBC3-SHA
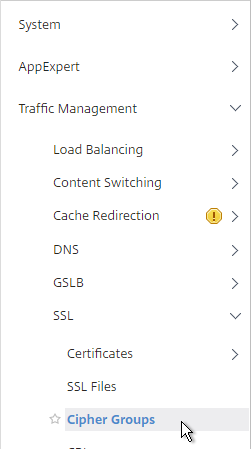
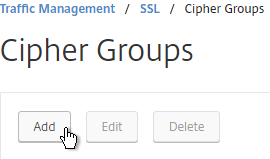
  4. Or you can create the cipher group using the GUI. Go to Traffic Management > SSL > Cipher Groups.
  5. On the right, click Add.
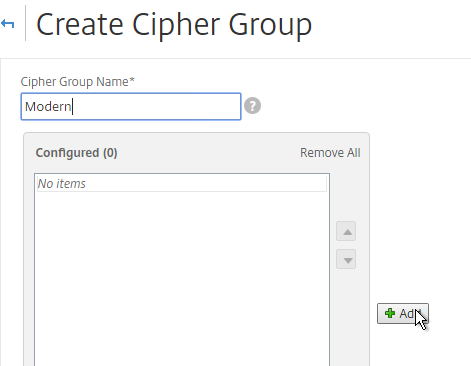
  6. Name it Modern or similar.
  7. In the middle, click Add.
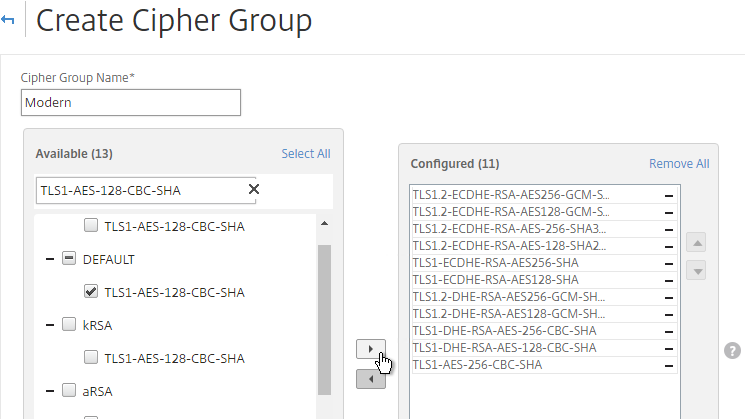
  8. Use the search box to find a particular cipher.
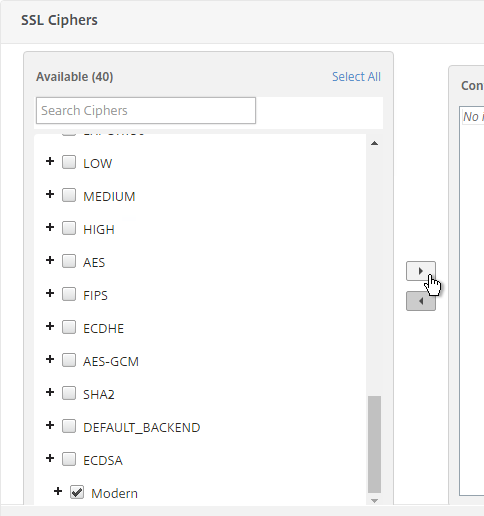
  9. Check the box next to one of the results and click the arrow to move it to the right. See Citrix Blogs Scoring an A+ at SSLlabs.com with Citrix NetScaler – 2016 update for recommended ciphers. The recommended ciphers vary based on the hardware platform and support for older clients.
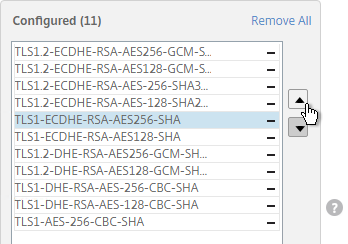
  10. Use the up and down arrows to order the ciphers. NetScaler prefers the ciphers on top of the list, so the ciphers at the top of the list should be the most secure ciphers.
  11. Click Create when done.

Strict Transport Security Rewrite Policy

To get an A+ at SSLLabs.com, you need to insert the Strict-Transport-Security HTTP header in the responses. NetScaler Rewrite Policy can do this.

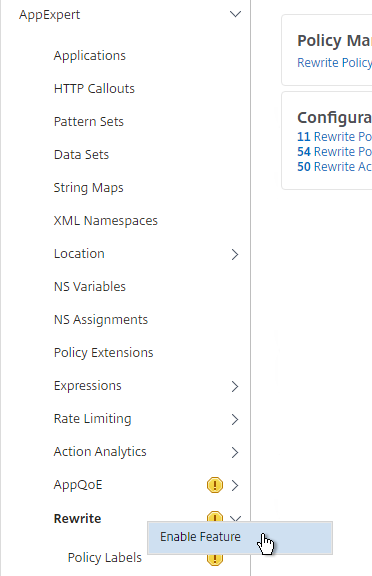
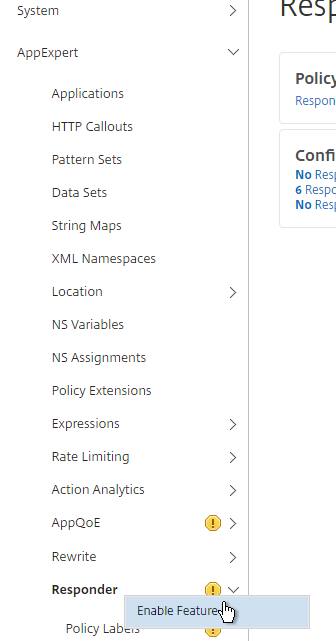
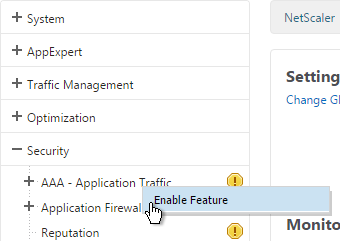
  1. Go to AppExpert > Rewrite, right-click Rewrite, and click Enable Feature.
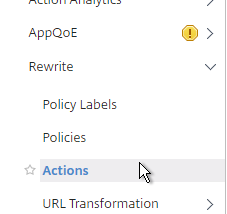
  2. Go to AppExpert > Rewrite > Actions.
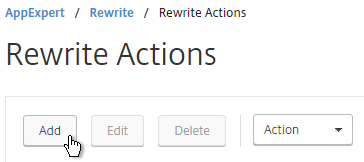
  3. On the right, click Add.
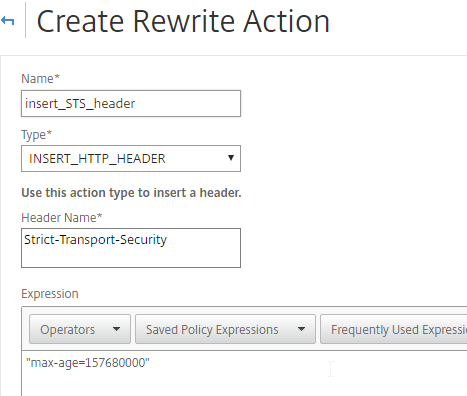
  4. Name the action insert_STS_header or similar.
  5. The Type should be INSERT_HTTP_HEADER.
  6. The Header Name should be Strict-Transport-Security.
  7. The Expression should be the following:
    "max-age=157680000"

  8. Click Create.
  9. On the left, go to AppExpert > Rewrite > Policies.
  10. On the right, click Add.
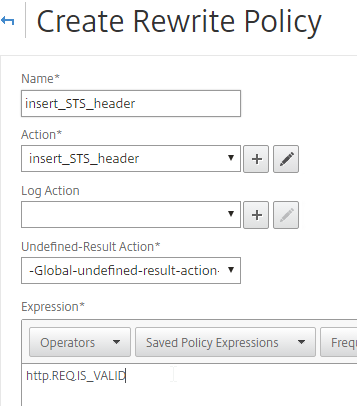
  11. Name it insert_STS_header or similar.
  12. Select the previously created Action.
  13. In the Expression box, enter HTTP.REQ.IS_VALID.
  14. Click Create.
  15. Now you can bind this Rewrite Response policy to HTTP-based SSL vServers.
  16. When editing an SSL vServer, if the Policies section doesn’t exist on the left, then add it from the Advanced Settings column on the right.
  17. In the Policies section on the left, click the plus icon.
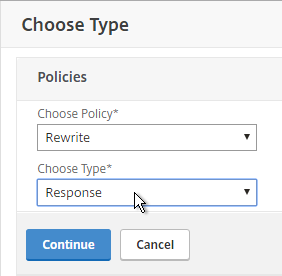
  18. Select Rewrite > Response and click Continue.
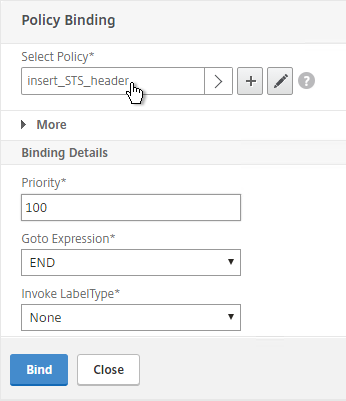
  19. Then select the STS Rewrite Policy and click Bind.
enable ns feature rewrite

add rewrite action insert_STS_header insert_http_header Strict-Transport-Security "\"max-age=157680000\""

add rewrite policy insert_STS_header true insert_STS_header

bind lb vserver MyvServer -policyName insert_STS_header -priority 100 -gotoPriorityExpression END -type RESPONSE

Default SSL Profile

You can use SSL Profiles to package several SSL settings together and apply the settings package (Profile) to SSL vServers and SSL Services. These settings include: disable SSLv3, bind ciphers, bind ECC curves, etc.

There are default SSL Profiles, and there are custom SSL Profiles. The default SSL Profiles are disabled by default. Once the default SSL Profiles are enabled, the default setttings apply to all SSL vServers and all SSL Services, unless you bind a custom SSL Profile. Also, once default is enabled, it’s not possible to disable it.

  • Some features of custom SSL Profiles require default SSL Profiles to be enabled. For example, you cannot configure ciphers in a custom SSL Profile unless the default SSL Profiles are enabled.

If you enable the default SSL Profiles, then it’s not possible to configure SNI for backend (services and service groups).

Default SSL Profiles are intended to provide a baseline SSL configuration for all newly created SSL Virtual Servers and SSL Services. You can still create Custom SSL Profiles to override the Default SSL Profiles.

Enabling the default SSL profile will wipe out any SSL configuration on SSL entities (e.g. SSL Virtual Servers) that do not have a custom SSL profile bound. Citrix offers a script that can read your existing SSL entity SSL configuration and convert them to custom SSL Profiles. See Enabling the Default Profiles at Citrix Docs. The default_profile_scriptcan be downloaded from an individual NetScaler ADC firmware download page under Additional Components. The commands output by the script won’t work until the default SSL Profile is enabled.  💡

To enable the Default SSL profiles:

  1. Make sure you are connected to the appliance using http and not https.
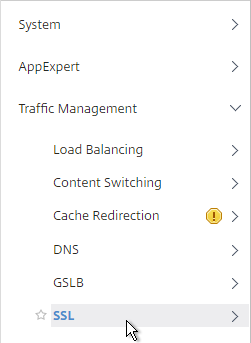
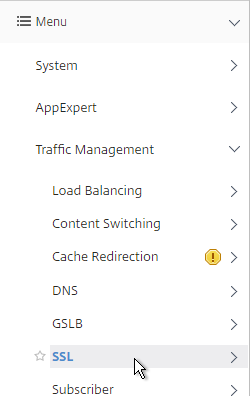
  2. Go to Traffic Management > SSL.
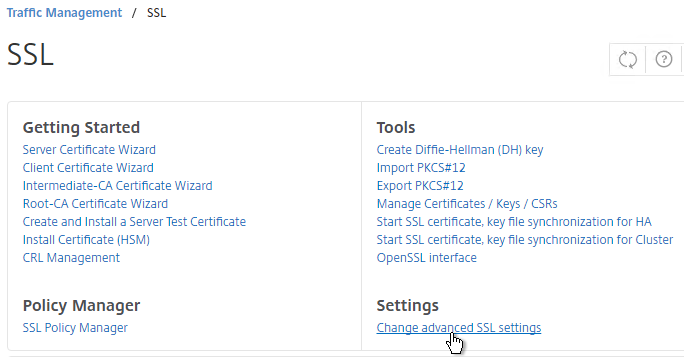
  3. On the right, in the right column, click Change advanced SSL settings.
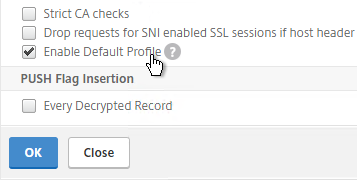
  4. Near the bottom, check the box next to Enable Default Profile. Note: this will change SSL settings on all SSL Virtual Servers to match the default SSL profile. You might want to do this during a maintenance window. Click OK when done.
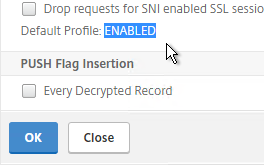
  5. If you go back into Advanced SSL Settings, notice that the Default Profile is enabled and there’s no way to disable it.
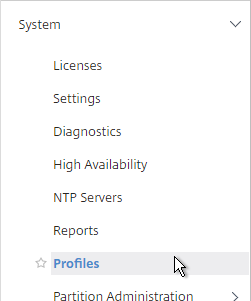
  6. To change the default SSL profile, on the left, go to System > Profiles.
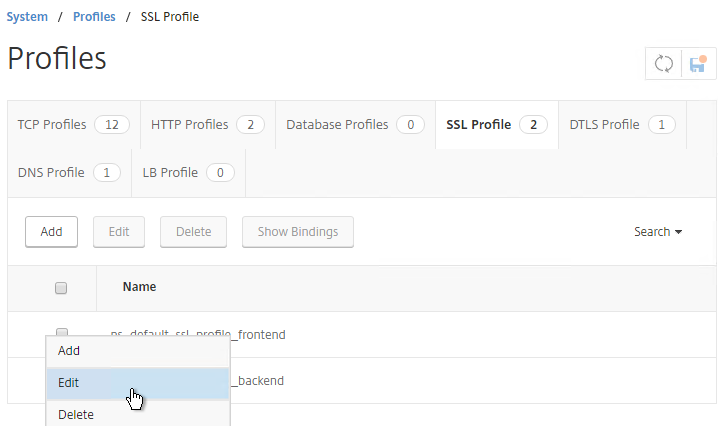
  7. On the right, switch to the SSL Profile tab.
  8. Click the ellipsis next to the frontend or backend default profile and click Edit. Frontend = client-side connections to SSL vServers. Backend = server-side connections (SSL Services and Service Groups).
  9. Or you can create a new custom SSL profile.
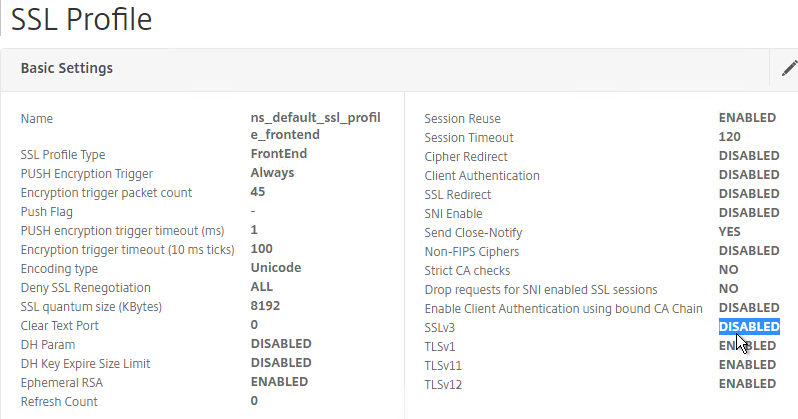
  10. Notice that SSLv3 is disabled by default.
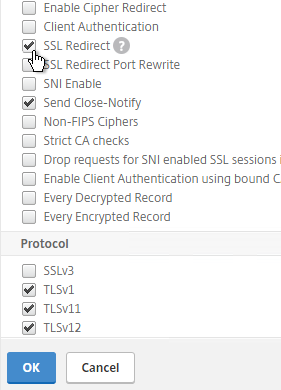
  11. If you do any SSL Offload (SSL on the client side, HTTP on the server side) then you’ll need to edit the Basic Settings section and enable SSL Redirect. Or you can create a new SSL Profile with this option enabled. It’s near the bottom of the section. With this option enabled, any 301/302 redirects from the server with HTTP locations are rewritten to HTTPS locations. You might need this option for StoreFront load balancing if doing SSL Offload.
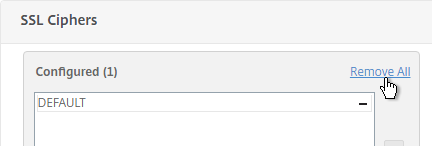
  12. Scroll down to the SSL Ciphers section and click the pencil icon.
  13. Click Remove All and click OK. You must click OK before binding the custom cipher group.
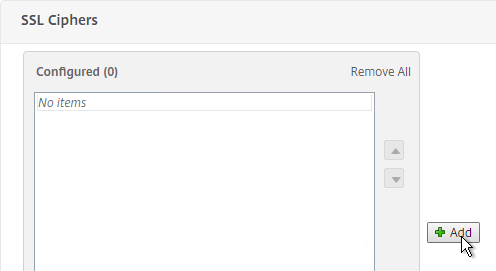
  14. Click the pencil icon again.
  15. Click Add.
  16. Scroll down and select your custom cipher group. Then click the arrow to move it to the right. Then click OK.
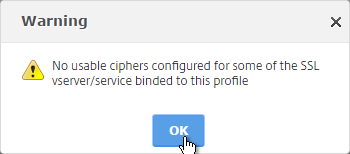
  17. Click OK when you see the No usable ciphers message. Then click Done to close the SSL Profile.
  18. If you edit one of your SSL Virtual Servers (e.g. Load Balancing vServer), there’s an SSL Profile section indicating that the default profile is being used. You can change the binding to a different SSL Profile.
  19. SSL Profiles do not include forcing Strict Transport Security. You’ll still need to create the STS Rewrite Policy and bind it to every SSL vServer as detailed in the next section.

Bind Certificate, Bind Cipher Group, Disable SSLv3, Enable STS

Whether you use SSL Profiles or not, you need to bind certificates and STS Rewrite Policy to every SSL vServer.

If you enabled the Default SSL Profiles feature, you can either leave it set to the Default SSL Profile; or you can change it to a Custom SSL Profile. Or you can bind an SSL Profile without enabling the Default SSL Profiles. If you don’t use the SSL Profiles feature, then you’ll need to manually configure ciphers and SSL settings on every SSL vServer.

Do the following on every SSL vServer:

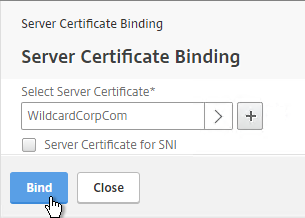
  1. When creating an SSL Virtual Server (e.g. SSL Load Balancing vServer), on the left, in the Certificates section, click where it says No Server Certificate.
  2. Click where it says Click to select.
  3. Select a certificate and click Select.
  4. Click Bind.

    bind ssl vserver MyvServer -certkeyName MyCert
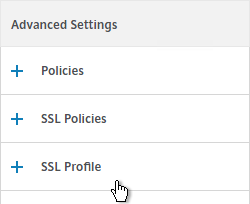
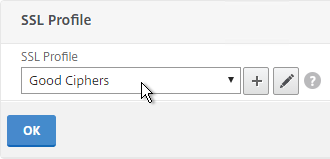
  5. If you want to bind a custom SSL Profile, if Default SSL Profile is enabled, in the SSL Profile section on the left, click the pencil icon.
  6. If the SSL Profile section isn’t on the left, then on the right, in the Advanced Settings section, click SSL Profile
  7. Select your custom SSL Profile and click OK.
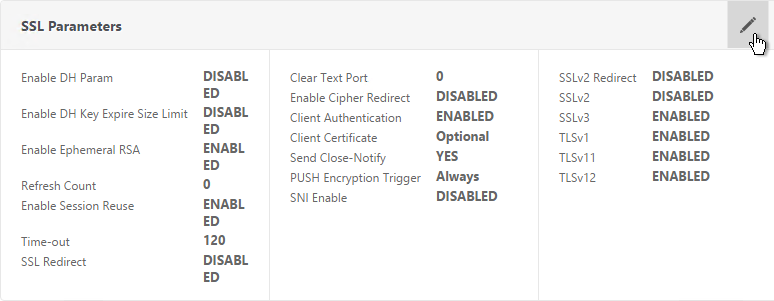
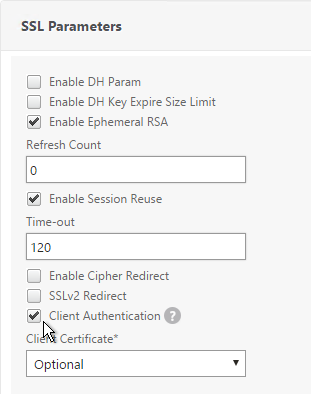
  8. If you didn’t bind an SSL Profile, on the left, in the SSL Parameters section, click the pencil icon.
  9. Uncheck the box next to SSLv3. Make sure TLSv11 and TLSv12 are enabled. Click OK.

    set ssl vserver MyvServer -ssl3 DISABLED -tls11 ENABLED -tls12 ENABLED
  10. If you didn’t bind an SSL Profile, scroll down to the SSL Ciphers section and click the pencil icon.
  11. Click Remove All and click OK. You must click OK before binding the custom cipher group.
  12. Click the pencil icon again.
  13. Click Add.
  14. Scroll down and select your custom cipher group. Then click the arrow to move it to the right. Then click OK.
  15. Click OK when you see the No usable ciphers message.

    unbind ssl vserver MyvServer -cipherName ALL
    bind ssl vserver MyvServer -cipherName Modern
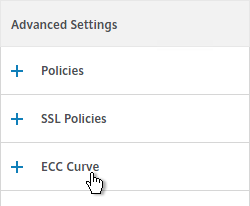
  16. SSL Virtual Servers created on newer versions of NetScaler will automatically have ECC Curves bound to them. However, if this appliance was upgraded from an older version then the ECC Curves might not be bound. If you are not using SSL Profile, then on the right, in the Advanced Settings section, click ECC Curve.
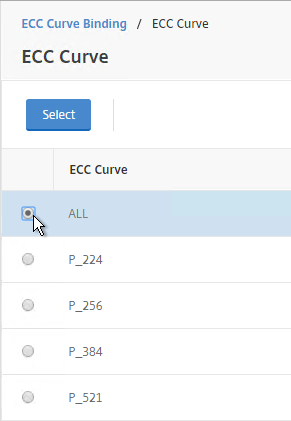
  17. On the left, in the ECC Curve section, click where it says No ECC Curve.
  18. Click to select.
  19. Choose ALL and click Select.
  20. Click Bind.

    bind ssl vserver MyvServer -eccCurveName ALL
  21. If the Policies section doesn’t exist on the left, then add it from the Advanced Settings column on the right.
  22. In the Policies section on the left, click the plus icon.
  23. Select Rewrite > Response and click Continue.
  24. Select the STS Rewrite Policy and click Bind.

    bind lb vserver MyvServer -policyName insert_STS_header -priority 100 -gotoPriorityExpression END -type RESPONSE

If you experience SSL performance problems on a NetScaler MPX, Citrix CTX207005 Performance Issues with NetScaler MPX SSL recommends creating and binding the following TCP Profile:  💡

add ns tcpProfile tcp_test -WS ENABLED -SACK ENABLED -maxBurst 20 -initialCwnd 8 -bufferSize 4096000 -flavor BIC -dynamicReceiveBuffering DISABLED -sendBuffsize 4096000

SSL Tests

After you’ve created an SSL Virtual Server, run the following tests:

SSL Redirect – SSL Load Balancing vServer Method

New in NetScaler 11.1, you can configure SSL Redirect directly in an SSL Load Balancing vServer (port 443) instead of creating a separate HTTP (port 80) Load Balancing vServer.

Limitations:

  • This is only an option for SSL Load Balancing vServers; it’s not configurable in Gateway vServers or Content Switching vServers.
  • Only one Redirect URL can be specified. Alternatively, the Responder method can handle multiple FQDNs to one VIP (e.g. wildcard certificate) and/or IP address URLs.

To configure an SSL Load Balancing vServer to redirect from HTTP to HTTPS:

  1. Edit the SSL Load Balancing vServer (port 443).
  2. In the Basic Settings section, click the pencil icon.
  3. Click More.
  4. In the Redirect from Port field, enter 80.
  5. In the HTTPS Redirect URL field, enter https://MyFQDN. Click Continue twice.

SSL Redirect – Down vServer Method

If you created an SSL Virtual Server that only listens on SSL 443, then users must enter https:// when navigating to the website. To make it easier for the users, create another load balancing Virtual Server on the same VIP but listens on HTTP 80 and then redirects the user’s browser to reconnect on SSL 443.

The Down Virtual Server Method is easy, but the Redirect Virtual Server must be down in order for the redirect to take effect. Another option is to use Responder policies to perform the redirect.

To create the down Redirect Virtual Server:

  1. On the left, under Traffic Management > Load Balancing, click Virtual Servers.

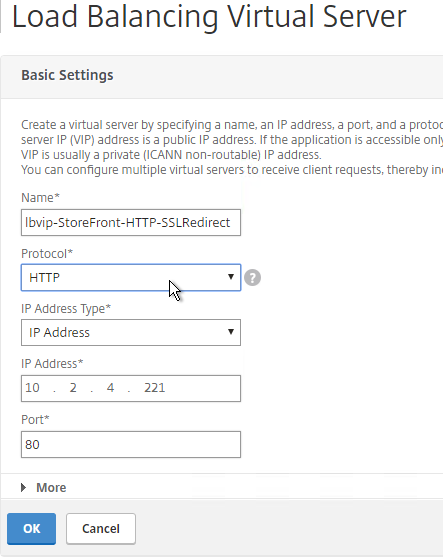
  2. On the right, find an SSL Virtual Server you’ve already created, click the ellipsis next to it, and click Add. Doing it this way copies some of the data from the already created Virtual Server.
  3. Or if you are redirecting NetScaler Gateway, create a new Load Balancing vServer with the same VIP as the Gateway.
  4. Change the name to indicate that this new Virtual Server is an SSL Redirect.
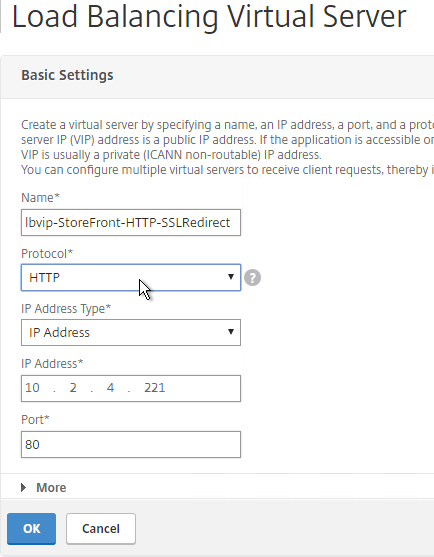
  5. Change the Protocol to HTTP on Port 80.
  6. The IP Address should already be filled in. It must match the original SSL Virtual Server (or Gateway vServer). Click OK.
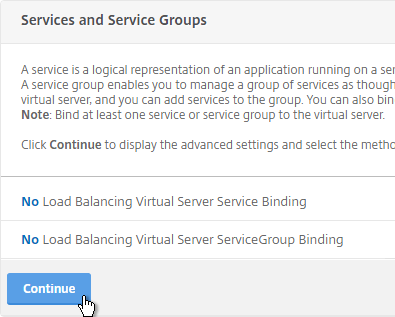
  7. Don’t select any services. This vServer must intentionally be marked down so the redirect will take effect. Click Continue.
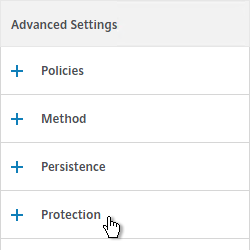
  8. On the right, in the Advanced Settings column, click Protection.
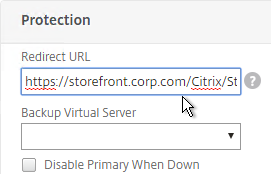
  9. In the Redirect URL field, enter the full URL including https://. For example: https://storefront.corp.com/Citrix/StoreWeb. Click OK.

  10. Click Done.
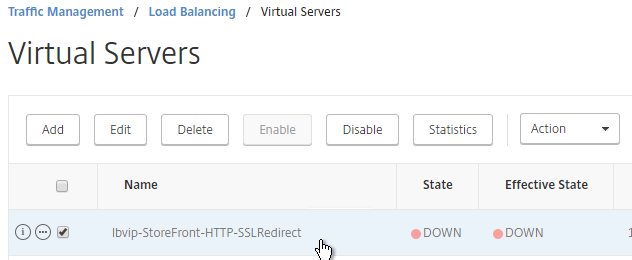
  11. When you view the SSL redirect Virtual Server in the list, it will have a state of DOWN. That’s OK. The Port 80 Virtual Server must be DOWN for this redirect method to work.

SSL Redirect – Responder Method

The Down Virtual Server Method is easy, but the Redirect Virtual Server must be down in order for the redirect to take effect. Another option is to use Responder policies to perform the redirect. This method requires the Redirect Virtual Server to be UP.

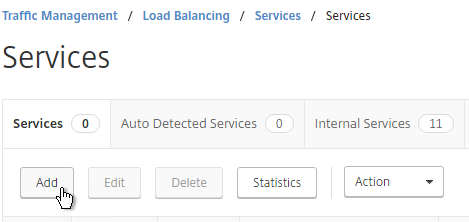
  1. Create a dummy Load Balancing service. This dummy service can be bound to multiple Redirect Virtual Servers. Go to Traffic Management > Load Balancing > Services.
  2. On the right, click Add.
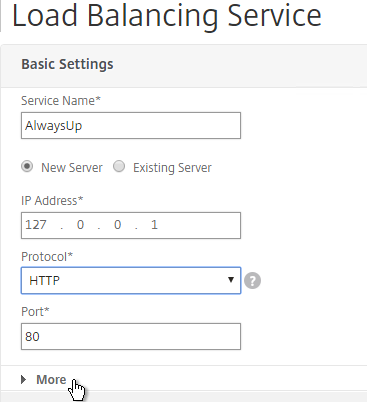
  3. Name it AlwaysUp or similar.
  4. Use a loopback IP address (e.g. 127.0.0.1). After the service is created, it changes to a NetScaler-owned IP.
  5. Click the More link.
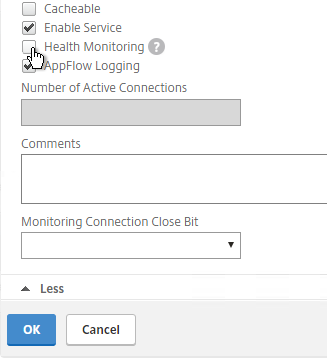
  6. This dummy service must always be UP so uncheck the box next to Health Monitoring. Click OK and then click Done.

    add server 127.0.0.1 127.0.0.1
    add service AlwaysUp 127.0.0.1 HTTP 80 -healthMonitor NO
  7. On the left, expand AppExpert and click Responder.
  8. If Responder is not enabled, right-click Responder and click Enable Feature.

    enable ns feature RESPONDER
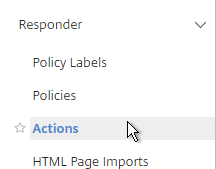
  9. Under Responder, click Actions.
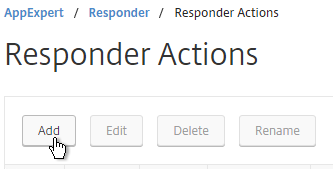
  10. On the right, click Add.
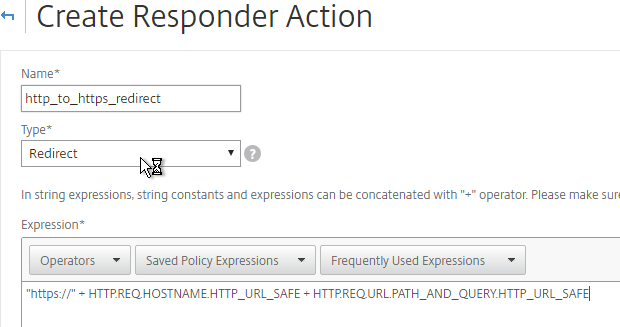
  11. Give the action a name.
  12. Change the Type to Redirect.
  13. Enter an expression. The following expression can be used by multiple Redirect Virtual Servers since it redirects to https on the same URL the user entered in the browser. Or you can create a Responder Action with a more specific Target. Click Create.
    "https://" + HTTP.REQ.HOSTNAME.HTTP_URL_SAFE + HTTP.REQ.URL.PATH_AND_QUERY.HTTP_URL_SAFE

    add responder action http_to_ssl_redirect_responderact redirect "\"https://\" + HTTP.REQ.HOSTNAME.HTTP_URL_SAFE + HTTP.REQ.URL.PATH_AND_QUERY.HTTP_URL_SAFE" -responseStatusCode 302
  14. On the left, under Responder, click Policies.
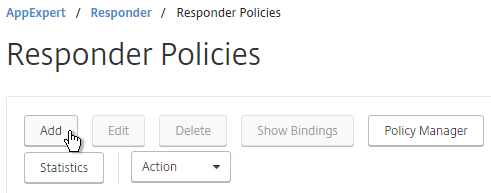
  15. On the right, click Add.
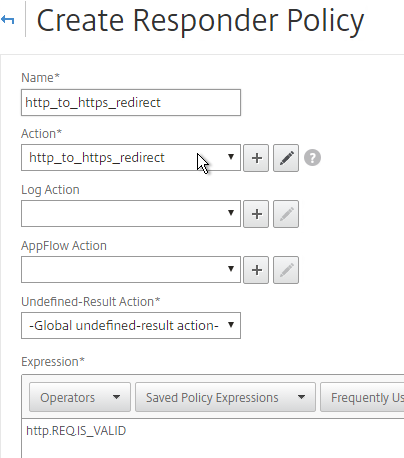
  16. Give the policy a name.
  17. Select the previously created Responder action.
  18. For the expression, enter the following. Then click Create.
    HTTP.REQ.IS_VALID

    add responder policy http_to_ssl_redirect_responderpol HTTP.REQ.IS_VALID http_to_ssl_redirect_responderact
  19. Create a Load Balancing Virtual Server with Protocol HTTP and Port 80. The VIP should match an existing SSL Virtual Server or NetScaler Gateway Virtual Server.

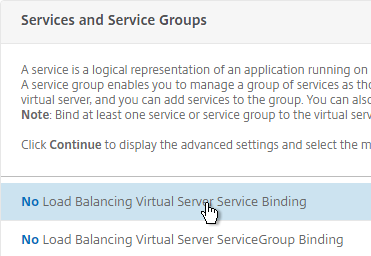
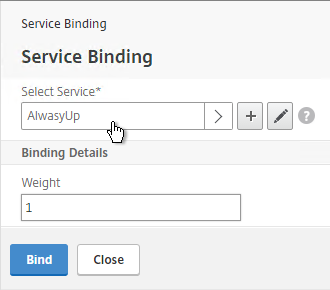
  20. Bind the AlwaysUp service and click Bind. Then click Continue.

  21. On the right, in the Advanced Settings column, click Policies.
  22. Click the plus icon in the top right of the Policies box.
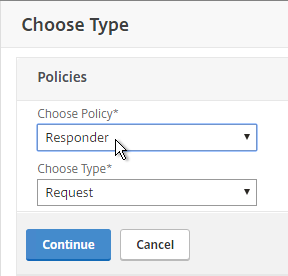
  23. Select Responder and click Continue.
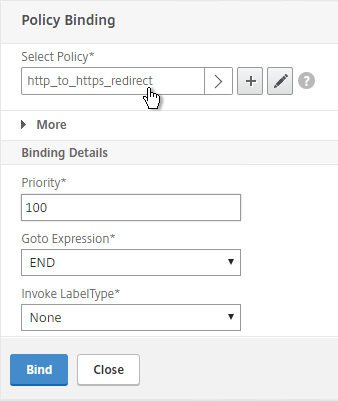
  24. Select the http_to_https Redirect Responder policy and click Bind. Then click Done.

    add lb vserver MyvServer-HTTP-SSLRedirect HTTP 10.2.2.201 80
    
    bind lb vserver storefront.corp.com-HTTP-SSLRedirect AlwaysUp
    
    bind lb vserver storefront.corp.com-HTTP-SSLRedirect -policyName http_to_ssl_redirect_responderpol -priority 100 -gotoPriorityExpression END -type REQUEST
  25. The primary advantage of this method is that the Redirect Virtual Server is UP.

NetScaler 11.1 Certificates

Last Modified: Nov 6, 2020 @ 7:23 am

Navigation

💡 = Recently Updated

Convert .PFX Certificate to PEM Format

You can export a certificate from Windows and import it to NetScaler.

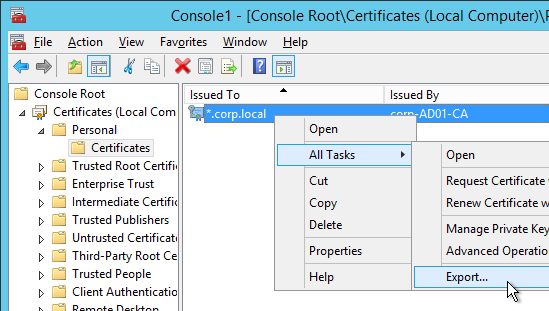
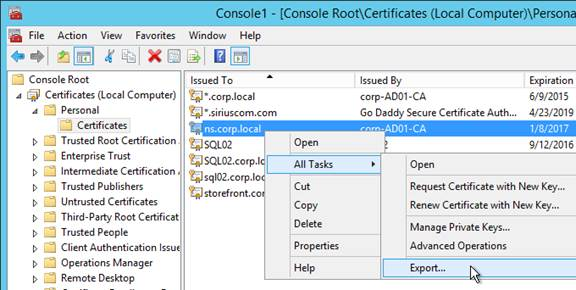
  1. On the Windows server that has the certificate, run mmc.exe and add the certificates snap-in.
  2. Right-click the certificate and click Export.
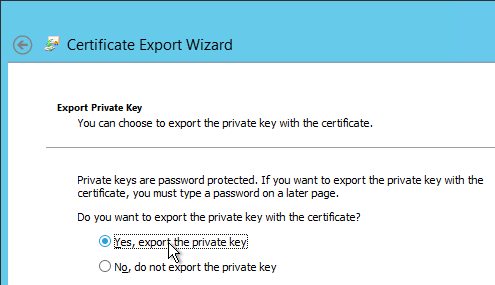
  3. On the Export Private Key page, select Yes, export the private key and click Next.
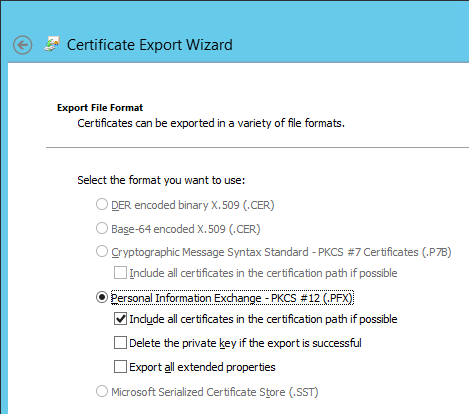
  4. On the Export File Format page, ensure Personal Information Exchange is selected and click Next.
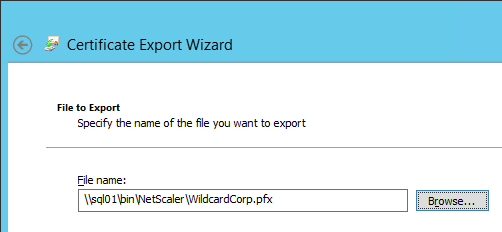
  5. Save it as a .pfx file. Don’t put any spaces in the filename.
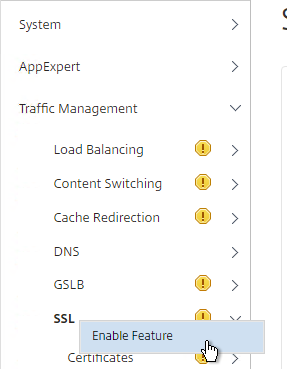
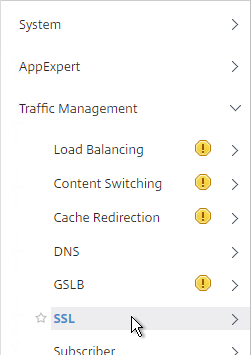
  6. Go to Traffic Management > SSL. If the SSL feature is disabled, right-click it and click Enable Feature.
  7. In NetScaler 11.1, it is no longer necessary to first convert the .PFX file to PEM format since NetScaler will convert it for you automatically. Note: when the PFX is automatically converted to PEM, the key is not encrypted.
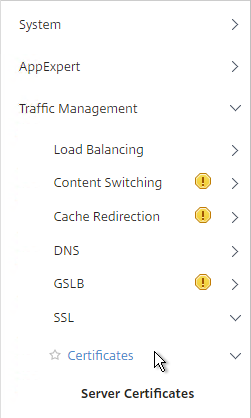
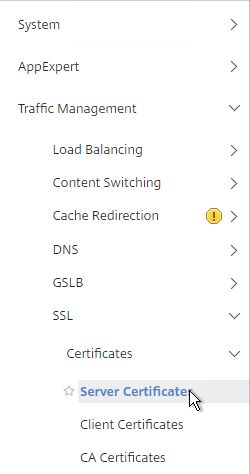
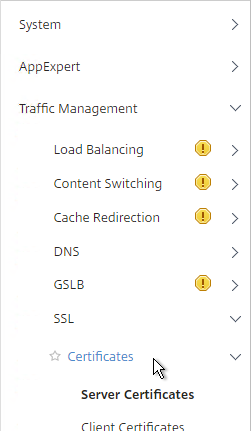
  8. Go to Traffic Management > SSL > Certificates.
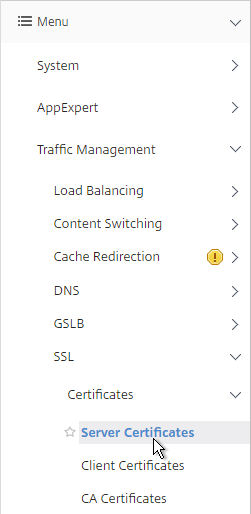
  9. There are now three different certificate nodes. Server Certificates have private keys. These certificates are intended to be bound to SSL vServers.
  10. Client Certificates also have private keys but they are intended to be bound to Services so NetScaler can perform client-certificate authentication against back-end web servers.
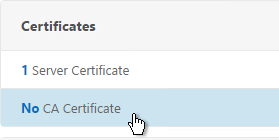
  11. CA Certificates don’t have private keys. These certificates can authenticate client certificates. Or you can link Server Certificates to CA Certificates to create a trust chain.
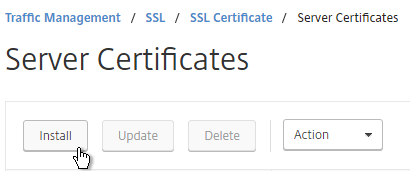
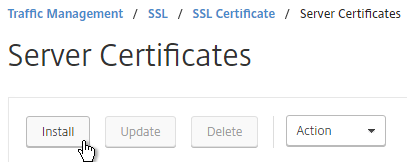
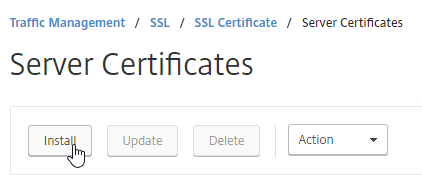
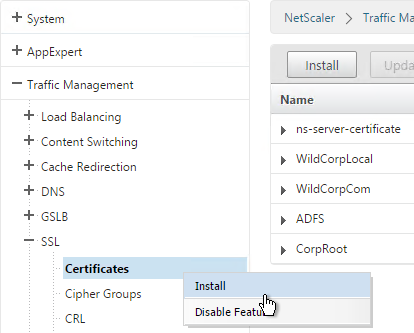
  12. On the left, click Server Certificates. On the right, click Install.
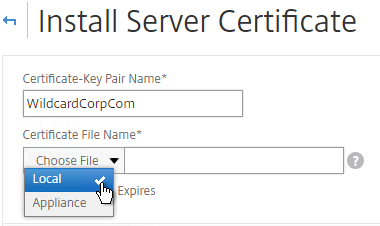
  13. Browse (Local) to the PFX file.
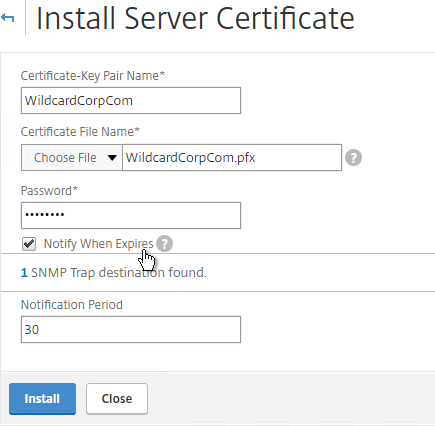
  14. Enter the PFX password, and then click Install.
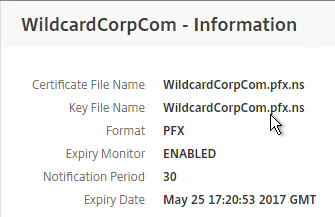
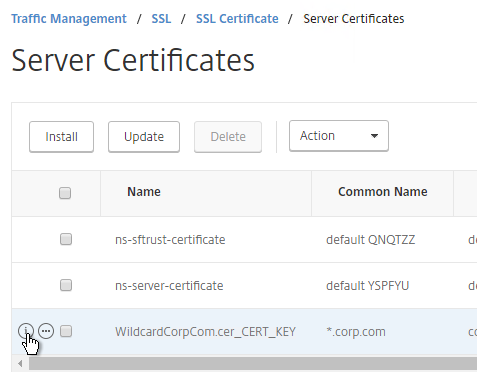
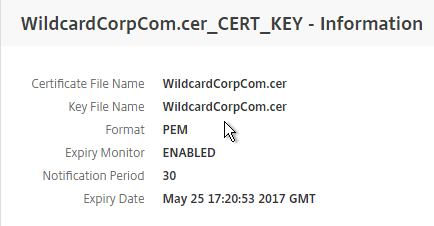
  15. If you click the information icon next to the certificate, you’ll see that NetScaler created a new file with a .ns extension.

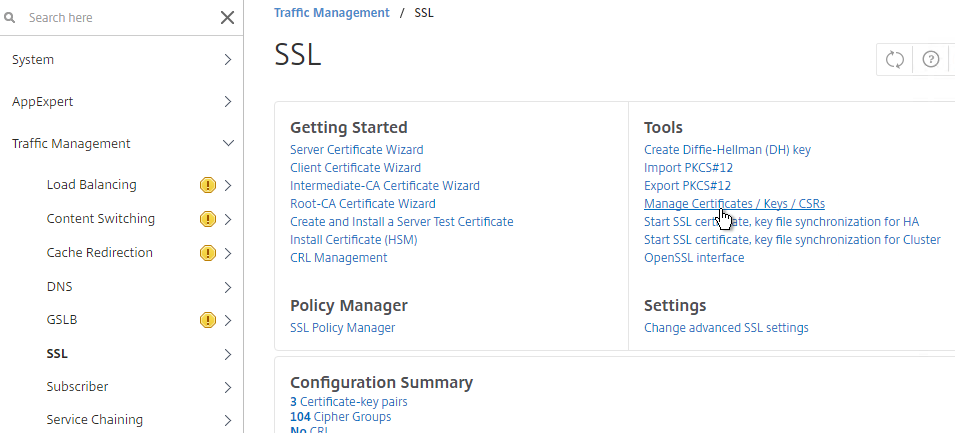
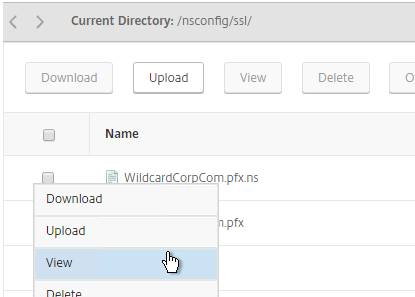
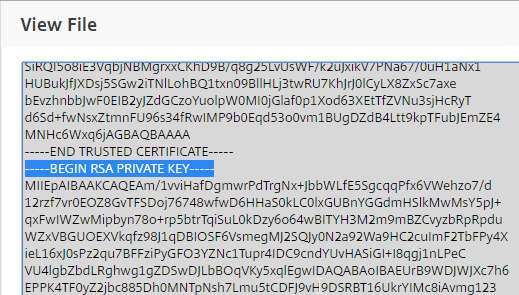
  16. If you look inside this file by going to Traffic Management > SSL > Manage Certificates / Keys / CSRs, notice that the RSA Private Key is not encrypted, encoded, or password protected.


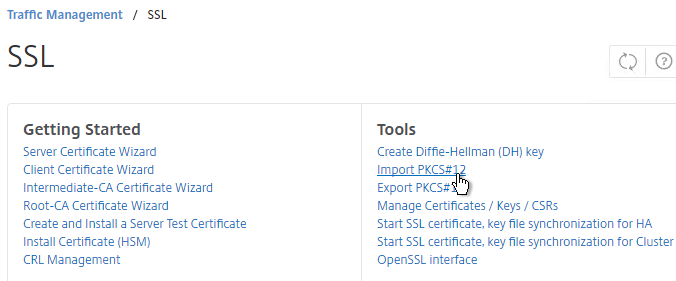
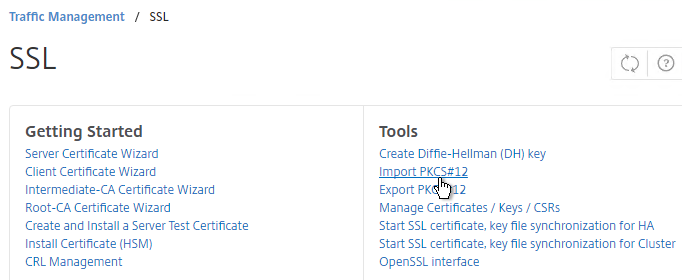
  17. If you want to encrypt your key file (recommended), use the older method of converting from PFX to PEM. In the NetScaler Configuration GUI, on the left expand Traffic Management and click SSL.
  18. In the right column of the right pane, click Import PKCS#12 in the Tools section.
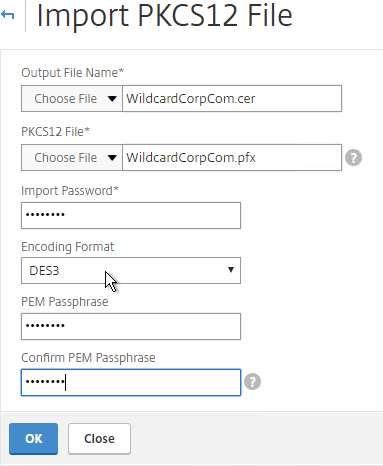
  19. In the Import PKCS12 File dialog box:
    1. In the Output File Name field, enter a name (e.g. Wildcard.cer) for a new file where the PEM certificate and key will be placed.
    2. In the PKCS12 File field, click Browse and select the previously exported .pfx file.
    3. In the Import Password field, enter the password you specified when you previously exported the .pfx file.
    4. Change the Encoding Format selection to DES3. This causes the new Output file to be encrypted.
    5. Enter a password for the Output file and click OK.
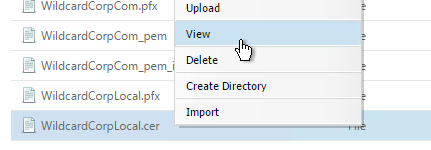
  20. If you browse to the /nsconfig/ssl directory on the NetScaler and view the new .cer file you just created, you’ll see both the certificate and the private key in the same file. You can use the Manage Certificates / Keys / CSRs link to view the files.

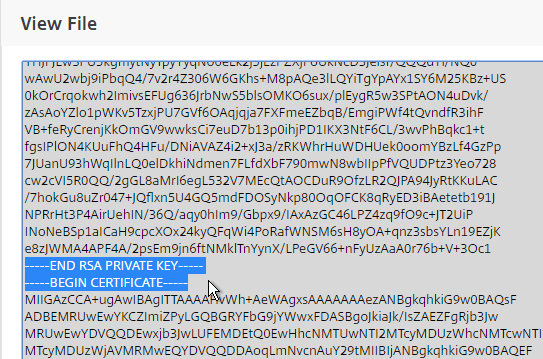
  21. Notice that the file contains both the certificate and the RSA Private key.
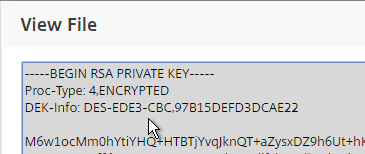
  22. Also, the Private Key is encrypted.
  23. On the left side of the NetScaler Configuration GUI, expand Traffic Management > SSL, and click Certificates.
  24. On the right, click Install.
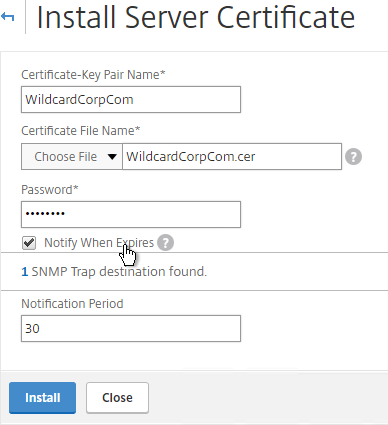
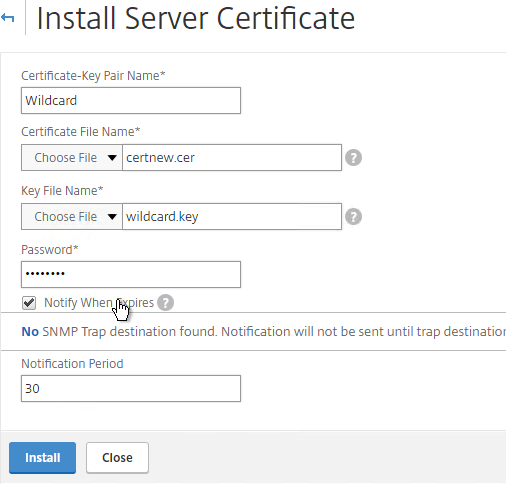
  25. In the Install Certificate dialog box:
    1. In the Certificate-Key Pair Name field, enter a friendly name for this certificate.
    2. In the Certificate File Name field, browse the appliance and select the .cer file you just created.
    3. If the private key is encrypted, enter the password.
    4. If desired, check the box next to Notify When Expires.
    5. Click Install. You can now link an intermediate certificate to this SSL certificate and then bind this SSL certificate to SSL  and/or NetScaler Gateway Virtual Servers.
  26. To automatically backup SSL certificates and receive notification when the certificates are about the expire, deploy Citrix Command Center or NetScaler Management and Analytics System. Also see Citrix CTX213342 How to handle certificate expiry on NetScaler.
  27. You can also export the certificate files and use them on a different NetScaler.

Create Key and Certificate Request

If you want to create free Let’s Encrypt certificates, see John Billekens’ PowerShell script detailed at Let’s Encrypt Certificates on a NetScaler.  💡

You can create a key pair and Certificate Signing Request directly on the NetScaler appliance. The Certificate Signing Request can then be signed by an internal or public Certificate Authority.

Most Certificate Authorities let you add Subject Alternative Names when submitting the Certificate Signing Request to the Certificate Authority and thus there’s no reason to include Subject Alternative Names in the Certificate Signing Request. You typically create a Certificate Signing Request with a single DNS name. Then when submitting the Certificate Signing Request to the Certificate Authority you type in additional DNS names. For a Microsoft Certificate Authority, you can enter Subject Alternative Names in the Attributes box of the Web Enrollment wizard. For public Certificate Authorities, you purchase a UCC certificate or purchase a certificate option that lets you type in additional names.

If you instead want to create a Certificate Signing Request on NetScaler that has Subject Alternative Names embedded in it as request attributes, see Citrix Blog Post How to Create a CSR for a SAN Certificate Using OpenSSL on a NetScaler Appliance. These instructions are performed on the NetScaler command line using OpenSSL. Or you can instead create a Subject Alternative Name certificate on Windows.

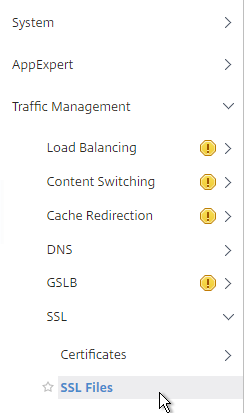
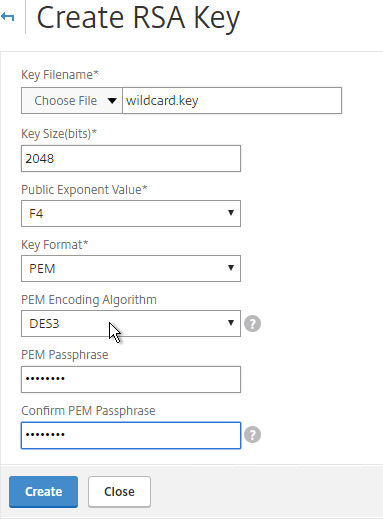
  1. On the left, expand Traffic Management, expand SSL, and click SSL Files.
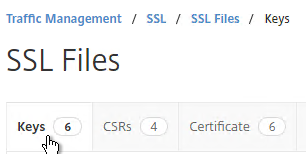
  2. On the right, switch to the Keys tab.
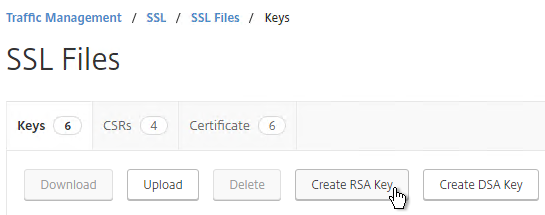
  3. Click Create RSA Key.
  4. Give the .key file a descriptive name.
  5. Set the Key Size to 2048 bits
  6. Set the PEM Encoding Algorithm to DES3 and enter a password. This encrypts the key file.
  7. Click OK. You will soon create a certificate using the keys in this file.
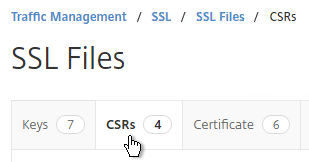
  8. On the right, switch to the CSRs tab.
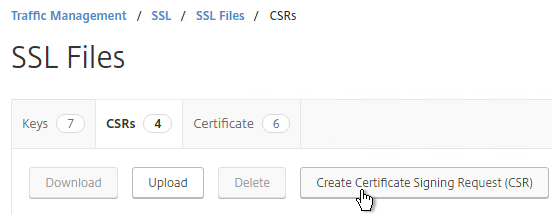
  9. Click Create Certificate Signing Request (CSR).
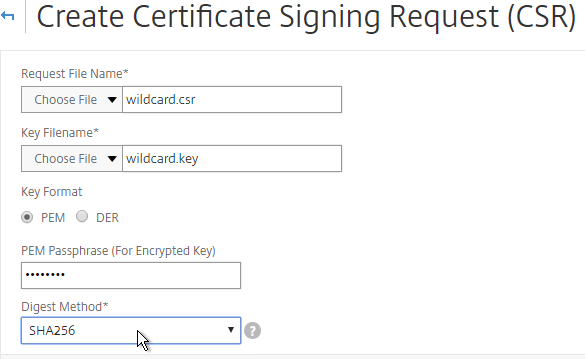
  10. In the Request File Name field, enter the name of a new file.
  11. In the Key Filename field, browse to the previously created .key file.
  12. If the key file is encrypted, enter the password.
  13. Feel free to change the Digest Method to SHA256.
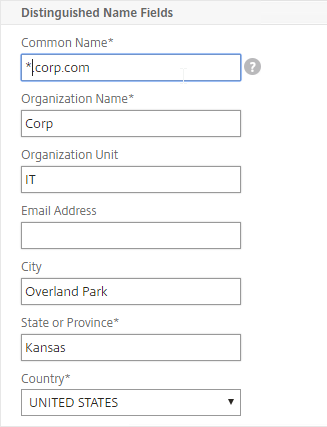
  14. In the Common Name field, enter the FQDN of the SSL enabled-website. If this is a wildcard certificate, enter * for the left part of the FQDN.
  15. In the Organization Name field, enter your official Organization Name.
  16. Enter IT or similar as the Organization Unit.
  17. Enter the City name.
  18. In the State field, enter your state name without abbreviating.
  19. Scroll down and click Create.
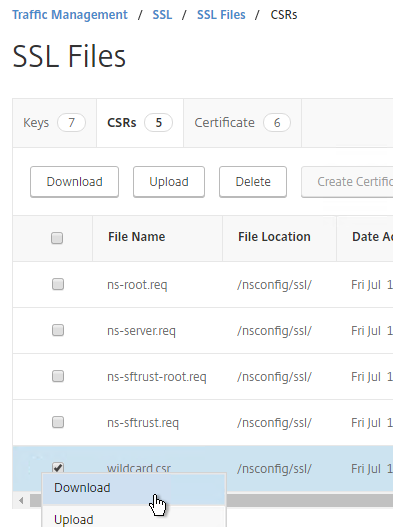
  20. Click the ellipsis next to the new .csr file and Download the file.

  21. You can then open the .csr file with Notepad and send the contents to your Certificate Authority. If the CA asks you for the type of web server, select Apache. Save the CA response as a Base64 file.
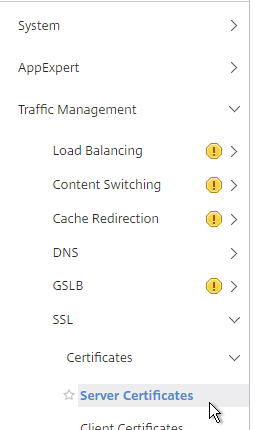
  22. After you get the signed certificate, on the left side of the NetScaler Configuration GUI, expand Traffic Management > SSL > Certificates and click Server Certificates.
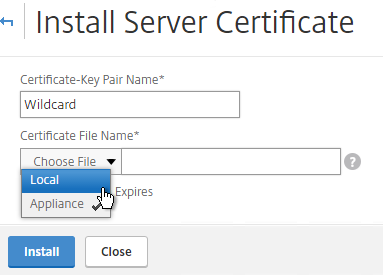
  23. On the right, click Install.
  24. In the Certificate-Key Pair Name field, enter a friendly name for this certificate.
  25. In the Certificate File Name field, browse Local and select the Base64 (Apache) .cer file you received from the Certificate Authority.
  26. In the Private Key File Name field, browse the appliance and select the key file you created earlier.
  27. If the key file is encrypted, enter the password.
  28. If desired, check the box next to Notify When Expires.
  29. Click Install.
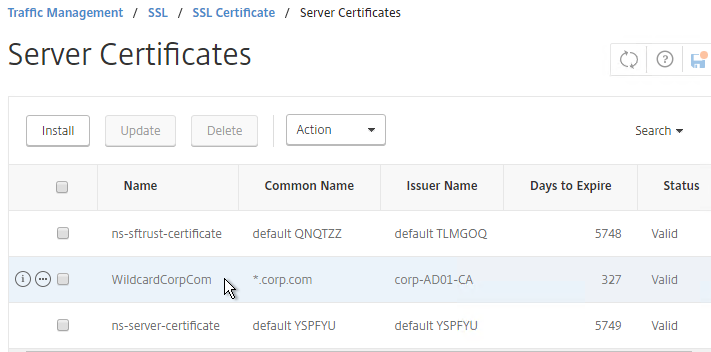
  30. The certificate is now added to the list. Notice the Days to Expire. You can now bind this certificate to any SSL Load Balancing, NetScaler Gateway, or SSL Content Switching Virtual Server.
  31. To automatically backup SSL certificates and receive notification when the certificates are about the expire, deploy Citrix Command Center or Citrix NetScaler Management and Analytics. Also see Citrix CTX213342 How to handle certificate expiry on NetScaler.
  32. You can also export the certificate files and use them on a different NetScaler.

Intermediate Certificate

If your Server Certificate is signed by an intermediate Certificate Authority, then you must install the intermediate Certificate Authority’s certificate on the NetScaler. This Intermediate Certificate then must be linked to the Server Certificate.

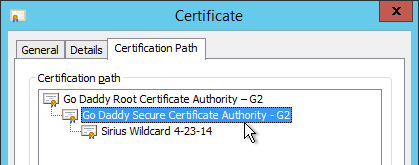
  1. Sometimes the public Certificate Authority will give you the Intermediate certificate as one of the files in a bundle. If not, log into Windows and double-click the signed certificate.
  2. On the Certification Path tab, double-click the intermediate certificate (e.g. Go Daddy Secure Certificate Authority. It’s the one in the middle).
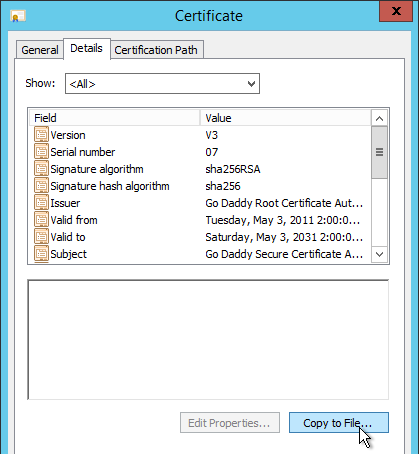
  3. On the Details tab, click Copy to File.
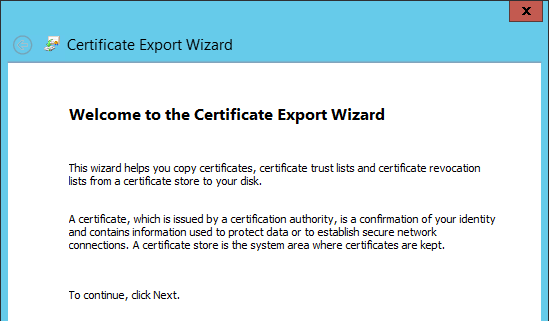
  4. In the Welcome to the Certificate Export Wizard page, click Next.
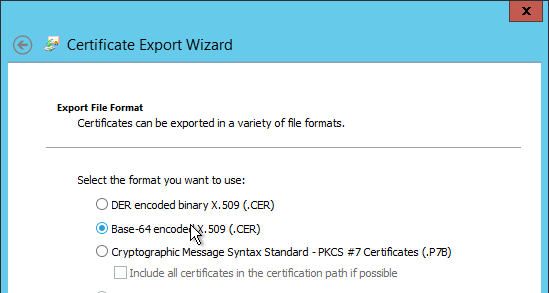
  5. In the Export File Format page, select Base-64 encoded and click Next.
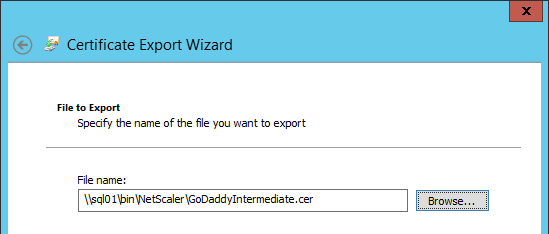
  6. Give it a file name and click Next.
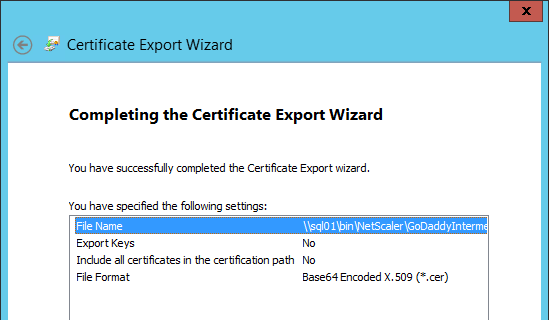
  7. In the Completing the Certificate Export Wizard page, click Finish.
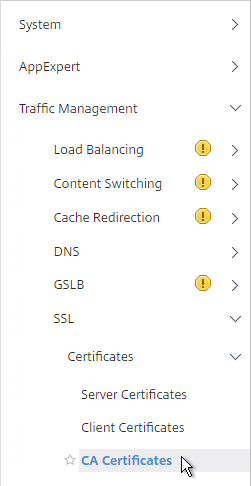
  8. In the NetScaler configuration GUI, expand Traffic Management, expand SSL, expand Certificates, and click CA Certificates.
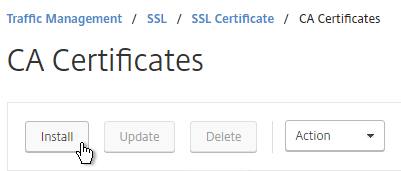
  9. On the right, click Install.
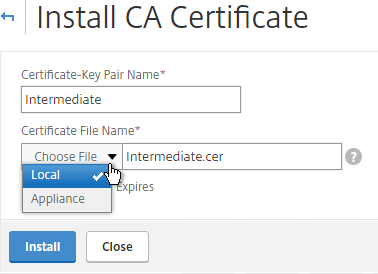
  10. Name it Intermediate or similar.
  11. Browse locally for the Intermediate certificate file.
  12. Click Install.
  13. Go back to Server Certificates.
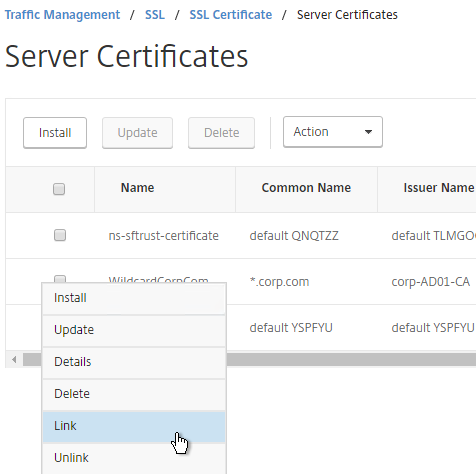
  14. Click the ellipsis next to the server certificate, and click Link.
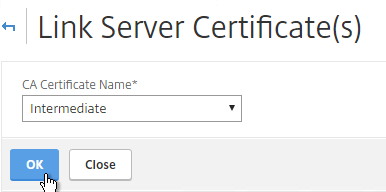
  15. The previously imported Intermediate certificate should already be selected. Click OK.

Export Certificate Files from NetScaler

You can easily export certificate files from the NetScaler and import them to a different NetScaler.

  1. Go to Traffic Management > SSL > Certificates > Server Certificates.
  2. Move your mouse over the certificate you want to export, and then click the information icon on the far left.
  3. Note the file names. There could be one or two file names.
  4. Go to Traffic Management > SSL.
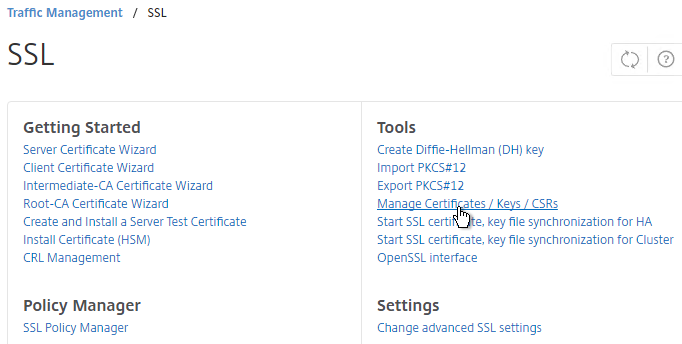
  5. On the right, in the right column, click Manage Certificates / Keys / CSRs.
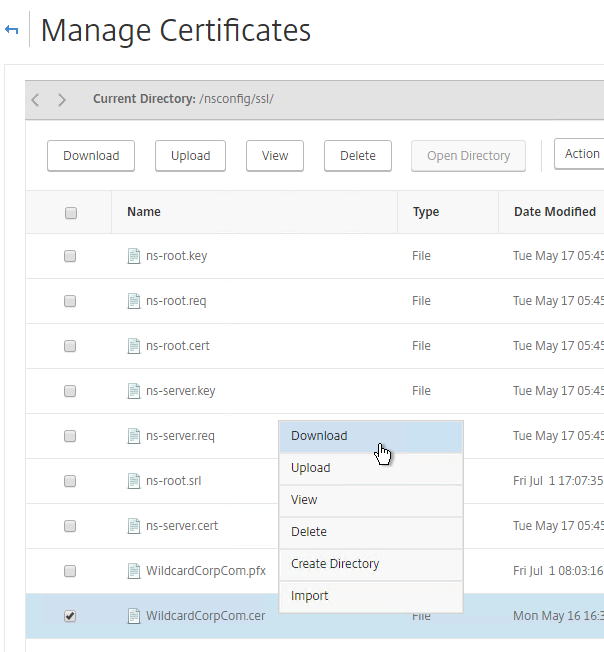
  6. Find the file(s) in the list, right-click it, and click Download.
  7. Also download the files for any linked intermediate certificate.
  8. You can now use the downloaded files to install certificates on a different NetScaler.

Create Certificate with NetScaler as Certificate Authority

If you don’t have an internal Certificate Authority, you can use NetScaler as a Certificate Authority. The NetScaler Certificate Authority can then be used to sign Server Certificates. This is a simple method for creating a new management certificate. The main problem with this method is that the NetScaler root certificate must be manually installed on any machine that connects to the NetScaler.

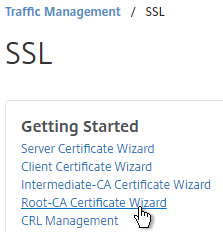
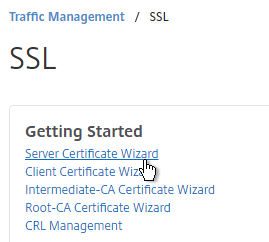
  1. On the left, expand Traffic Management, and click SSL.
  2. On the right, in the left column, click Root-CA Certificate Wizard.
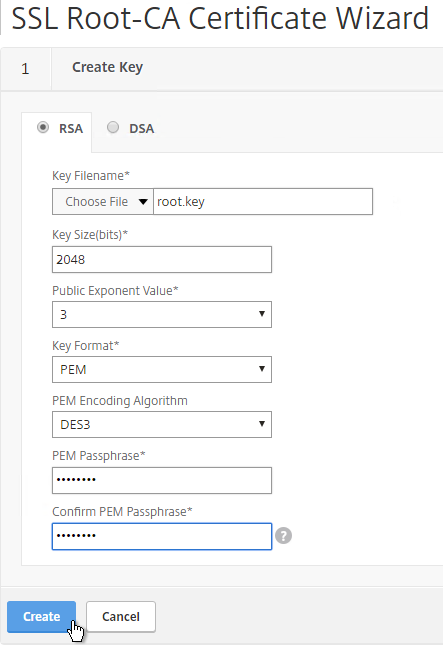
  3. In the Key Filename field, enter root.key or similar. This is a new file.
  4. In the Key Size field, enter at least 2048.
  5. Optionally, to encrypt the key file, change the PEM Encoding Algorithm to DES3, and enter a new password.
  6. Click Create.
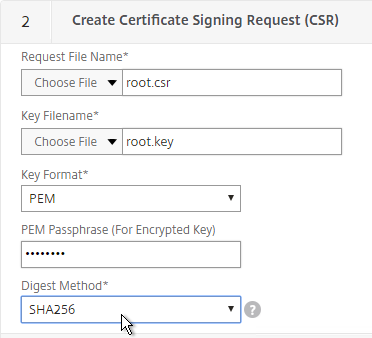
  7. In the Request File Name field, enter root.csr or similar. This is a new file.
  8. If the key file is encrypted, enter the password.
  9. Scroll down.
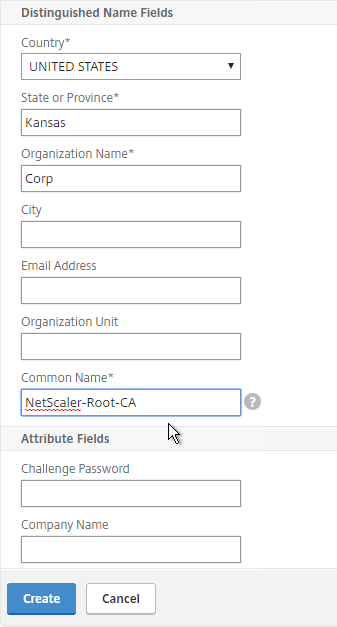
  10. In the State field, enter the non-abbreviated state name.
  11. In the Organization Name field, enter the name of your organization.
  12. Fill in other fields as desired.
  13. In the Common Name field, enter a descriptive name for this Certificate Authority.
  14. Click Create .
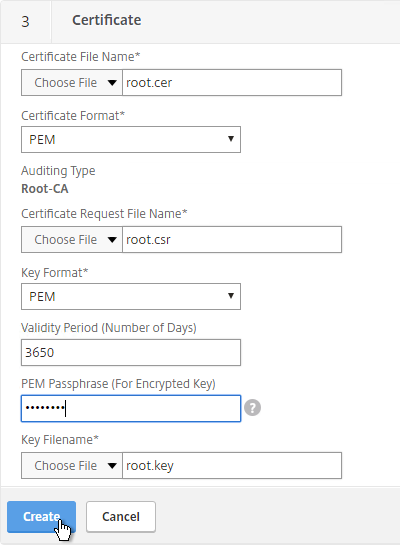
  15. In the Certificate File Name field, enter root.cer or similar. This is a new file.
  16. Change the Validity Period to 3650 (10 years) or similar.
  17. If the key file is encrypted, enter the password in the PEM Passphrase field.
  18. Click Create.
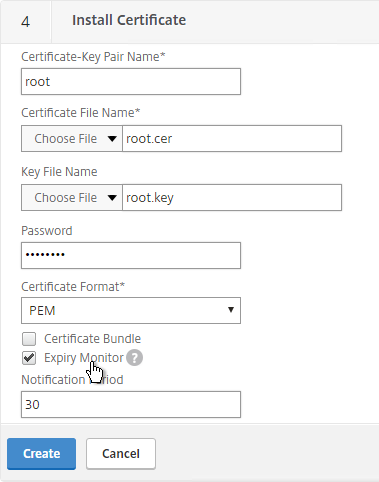
  19. In the Certificate-Key Pair Name field, enter a friendly name for this Certificate Authority certificate.
  20. If the key file is encrypted, enter the password in the Password field.
  21. Click Create.
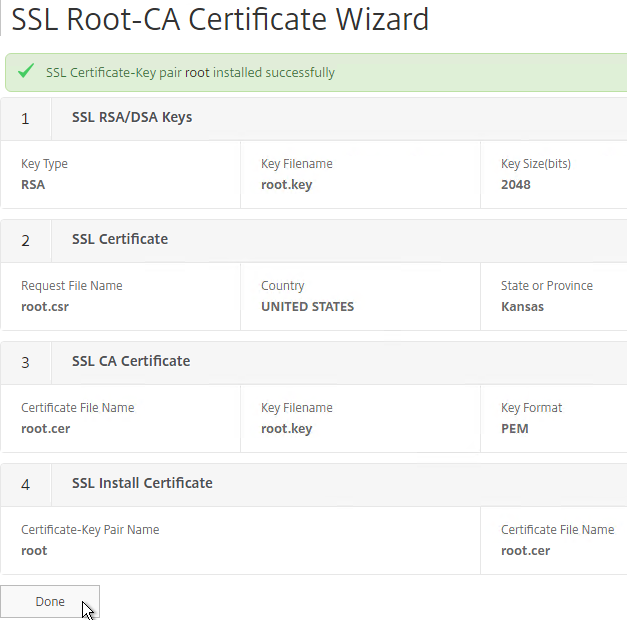
  22. Click Done.
  23. In the right pane, in the left column, click Server Certificate Wizard.
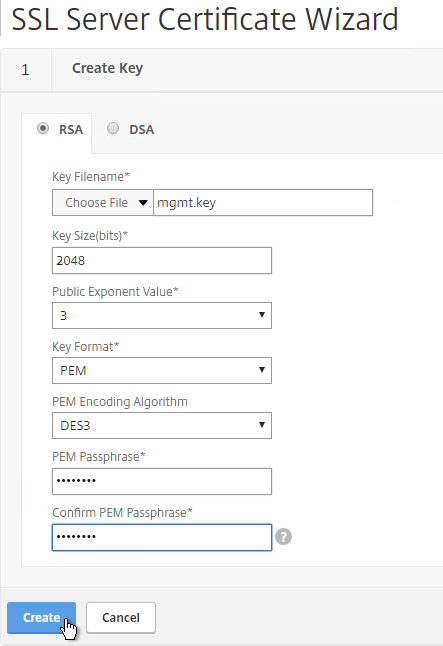
  24. In the Key Filename field, enter mgmt.key or similar. This is a new file.
  25. In the Key Size field, enter at least 2048.
  26. Optionally, to encrypt the key file, change the PEM Encoding Algorithm to DES3, and enter a new password.
  27. Click Create.
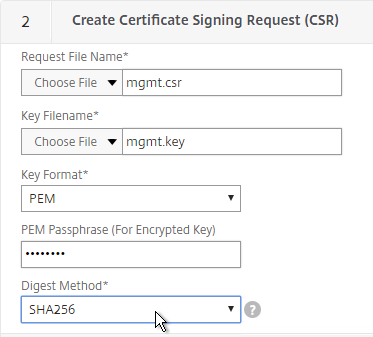
  28. In the Request File Name field, enter mgmt.csr or similar. This is a new file.
  29. If the key file is encrypted, enter the password.
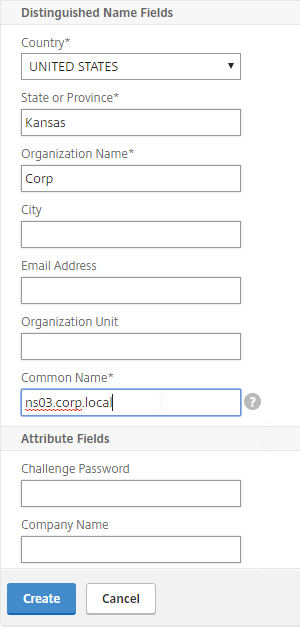
  30. Scroll down.
  31. In the State field, enter the non-abbreviated state name.
  32. In the Organization Name field, enter the name of your organization.
  33. Fill in other fields as desired.
  34. In the Common Name field, enter the hostname (FQDN) of the appliance.
  35. Click Create.
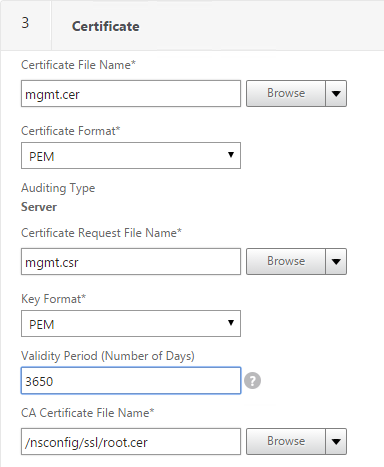
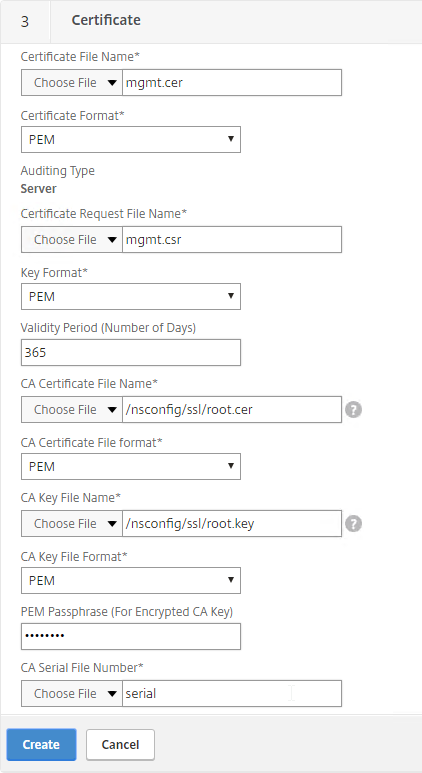
  36. In the Certificate File Name field, enter mgmt.cer or similar. This is a new file.
  37. Change the Validity Period to 3650 (10 years) or similar.
  38. Scroll down.
  39. In the CA Certificate File Name field, browse to the root.cer file.
  40. In the CA Key File Name field, browse to the root.key file.
  41. If the key file is encrypted, enter the password.
  42. In the CA Serial File Number field, enter the name of a new file that will contain serial numbers.
  43. Click Create.
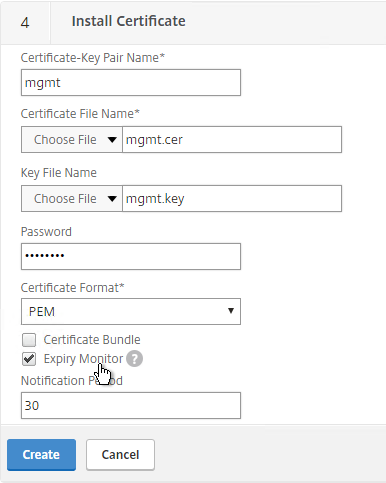
  44. In the Certificate-Key Pair Name field, enter a friendly name for this management certificate.
  45. If the key file is encrypted, enter the password in the Password field.
  46. Click Create.
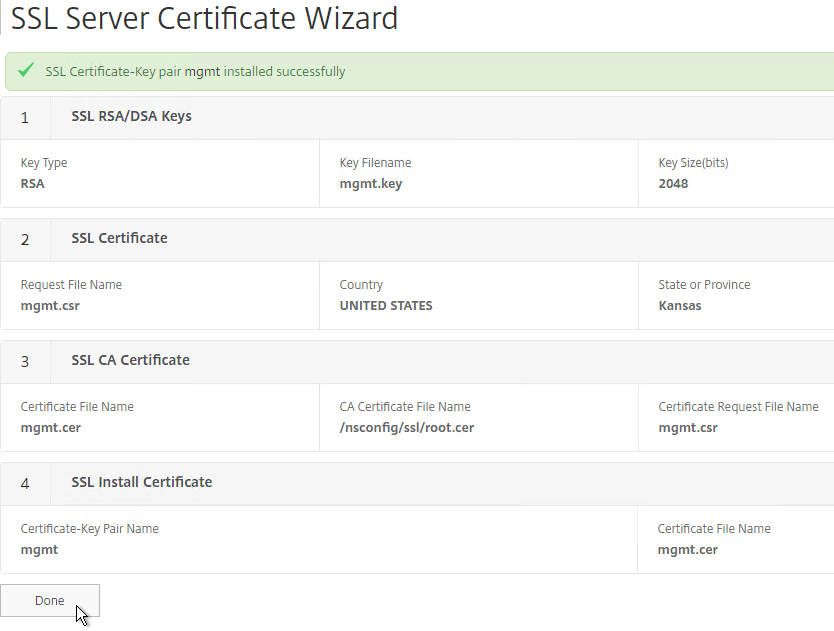
  47.  Click Done.

Default Management Certificate Key Length

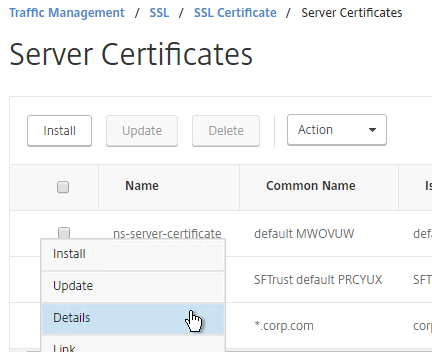
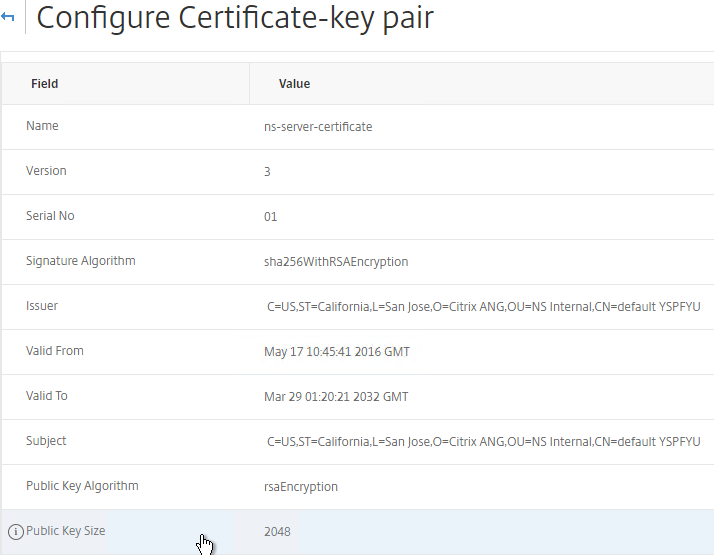
In older NetScaler builds, the default management certificate (ns-server-certificate) key size is only 512 bits. To see the key size, click the ellipsis next to ns-server-certificate and then click Details.


If you try to use Internet Explorer to connect to the NSIP using SSL, Internet Explorer will consider 512 bits to be unsafe and probably won’t let you connect. Notice there’s no option to proceed.

You can configure Internet Explorer to accept the 512-bit certificate by running Certutil ‑setreg chain\minRSAPubKeyBitLength 512 on the same machine where Internet Explorer is running.

When you upgrade to 11.1, the management certificate remains at whatever was installed previously. If it was never replaced, then the management certificate is still only 512 bits. To replace the certificate with a new 2048-bit self-signed certificate, simply delete the existing ns-server-certificate certificate files and reboot.

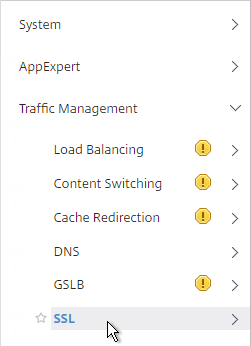
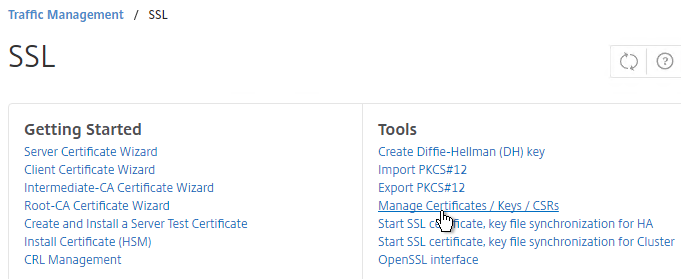
  1. Go to Traffic Management > SSL.
  2. On the right, in the right column, click Manage Certificates / Keys / CSRs.
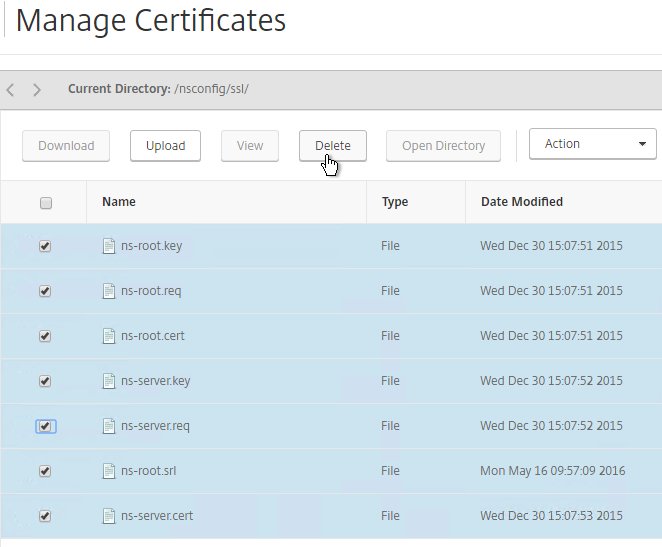
  3. Highlight any file named ns-* and delete them. This takes several seconds.
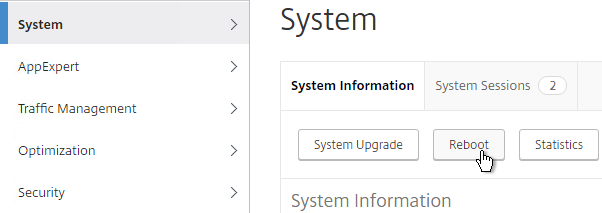
  4. Then go to System and reboot.
  5. After a reboot, if you view the Details on the ns-server-certificate, it will be recreated as self-signed with 2048-bit key size.

Replace Management Certificate

You can replace the default management certificate with a new trusted management certificate.

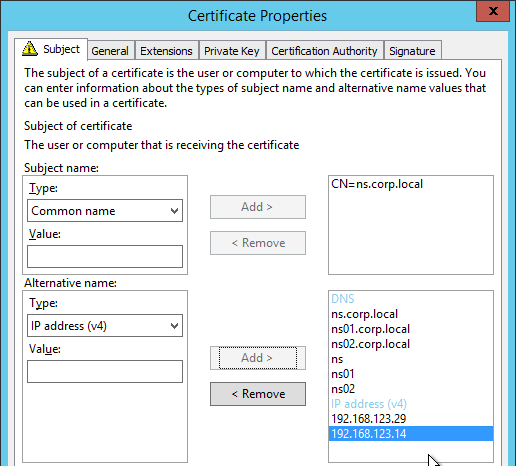
Only one certificate will be loaded on both nodes in a High Availability pair so make sure the management certificate matches the names of both nodes. This is easily doable using a Subject Alternative Name certificate. Here are some names the management certificate should match (note: a wildcard certificate won’t match all of these names):

  • The FQDN for each node NSIP in a High Availability pair. Example: ns01.corp.local and ns02.corp.local
  • The shortnames (left label) for each node NSIP in a High Availability pair. Example: ns01 and ns02
  • The NSIP IP address for each node in a High Availability pair. Example: 192.168.123.14 and 192.168.123.29
  • If you enabled management access on your SNIPs, add names for the SNIPs:
    • FQDN for the SNIP. Example: ns.corp.local
    • Shortname for the SNIP. Example: ns
    • SNIP IP address. Example: 192.168.123.30

If you are creating a Subject Alternative Name certificate, it’s probably easiest to do the following:

  1. Create the certificate using the Certificates snap-in on a Windows box. You can add the Subject Alternative Names in the certificate request wizard. The Subject Alternative Names for the IP addresses must be added as IP address (v4). The other Subject Alternative Names are added as DNS.
  2. Export the certificate and Private Key to a .pfx file.
  3. On the NetScaler, use the Import PKCS#12 tool to convert the .pfx to PEM format. Then follow one of the procedures below to replace the management certificate.

There are two methods of replacing the management certificate:

  • Use the Update Certificate button for ns-server-certificate in the NetScaler GUI. This automatically updates all of the Internal Services bindings too.
    • You cannot rename the certificate in the NetScaler GUI. It remains as ns-server-certificate.
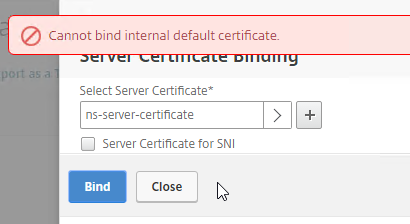
    • ns-server-certificate cannot be bound to Virtual Servers. So make sure it is a dedicated management certificate.
  • Or manually Bind a new certificate to the Internal Services.

Update Certificate Method

The Update Certificate button method is detailed below:

  1. You can’t update the certificate while connected to the NetScaler using https so make sure you connect using http.
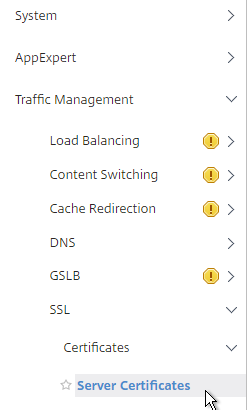
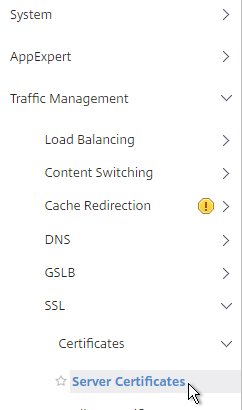
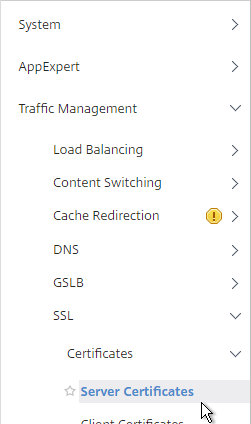
  2. On the left, expand Traffic Management, expand SSL expand Certificates, and click Server Certificates.
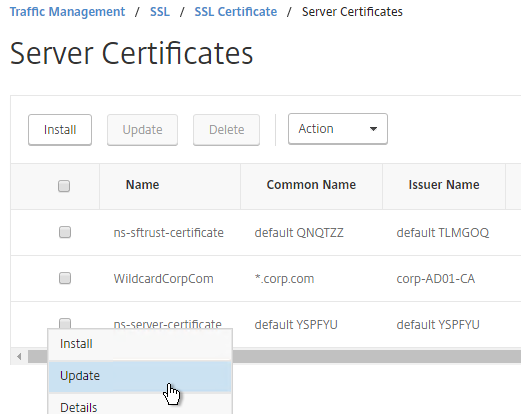
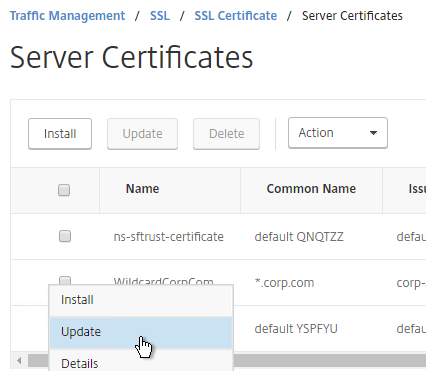
  3. On the right, click the ellipsis next to ns-server-certificate and click Update.
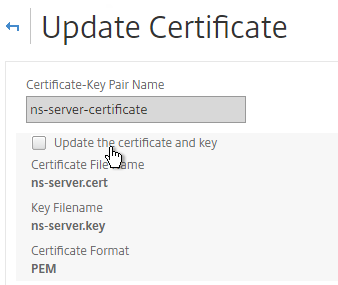
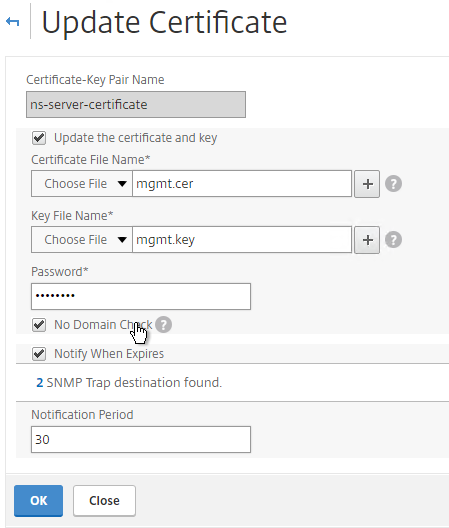
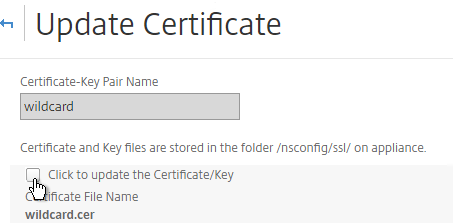
  4. Check the box next to Click to update the certificate and key.
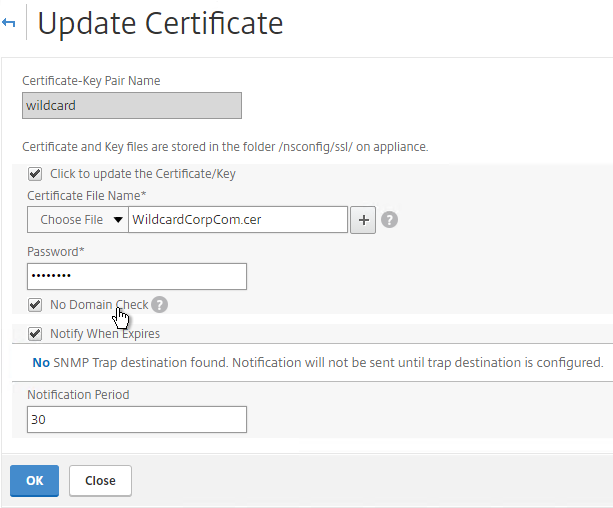
  5. Browse to the new management certificate. It could be on the appliance or it could be on your local machine.
  6. If the PEM certificate is encrypted, enter the password.
  7. Check the box next to No Domain Check. Click OK.
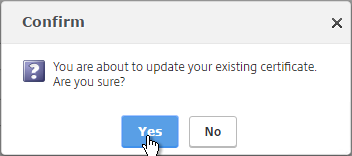
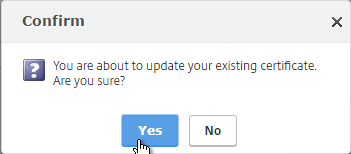
  8. Click Yes to update the certificate.
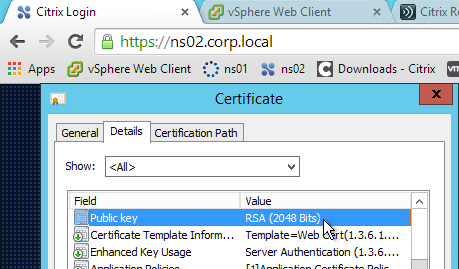
  9. You can now connect to the NetScaler using https protocol. The certificate should be valid and it should have a 2048 bit key.
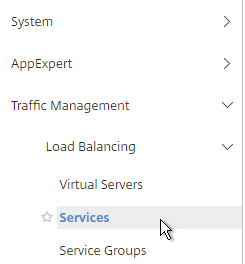
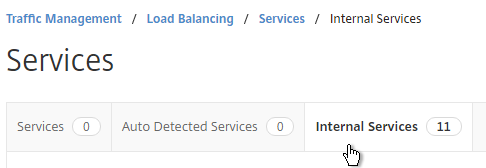
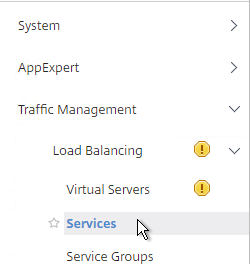
  10. Go to Traffic Management > Load Balancing > Services.
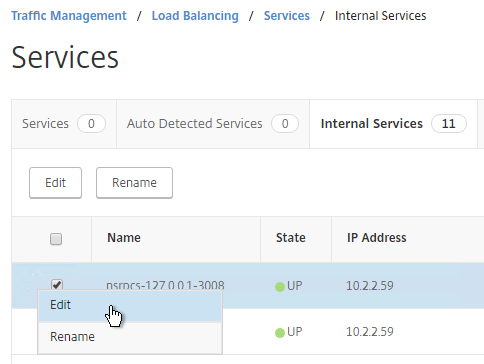
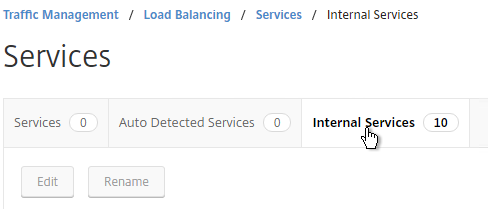
  11. On the right, switch to the Internal Services tab.
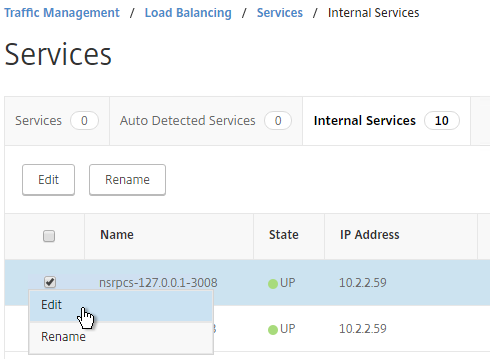
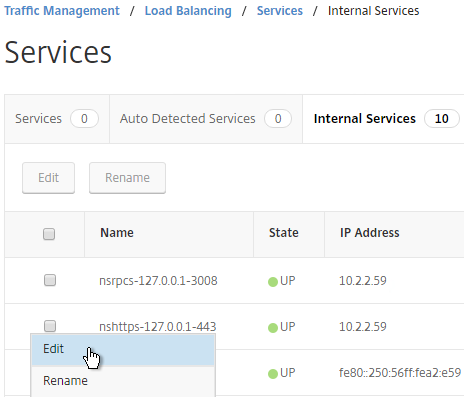
  12. Click the ellipsis next to one of the services and click Edit.
  13. Scroll down to the SSL Ciphers section. Feel free to change the ciphers to a more secure cipher group. NetScaler 11.1 no longer includes RC4 ciphers in the DEFAULT cipher group, but you might want to rearrange the ciphers.
  14. Repeat this for each of the Internal Services.

Manual Binding Method

The manual Binding to Internal Services method is detailed below:

  1. You can’t update the certificate while connected to the NetScaler using https so make sure you connect using http.
  2. On the left, expand Traffic Management, expand SSL, expand Certificates, and click Server Certificates.
  3. On the right, use the Install button to install the new management certificate.
  4. On the left, expand Traffic Management, expand Load Balancing, and click Services.
  5. On the right, switch to the Internal Services tab.
  6. You will see multiple services. Edit one of them.
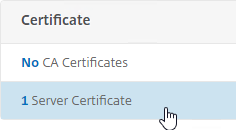
  7. Scroll down and click where it says 1 Server Certificate.
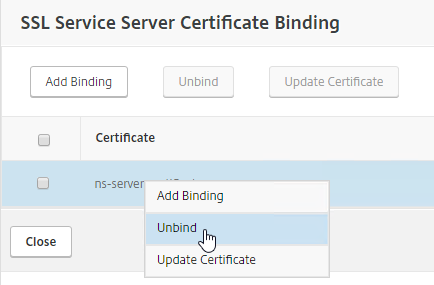
  8. Select the existing management certificate, and click Unbind.
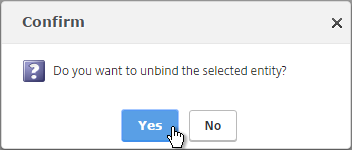
  9. Click Yes to remove the selected entity.
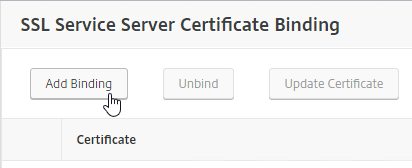
  10. Click Add Binding.
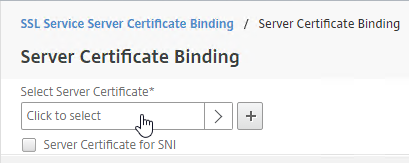
  11. Click where it says Click to select.
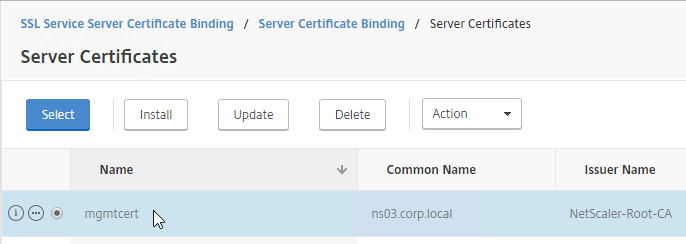
  12. Select the new management certificate, and click Select.
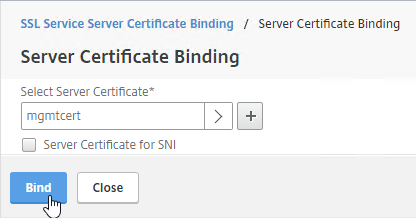
  13. Click Bind, and click Close.
  14. Scroll to the SSL Parameters section, and click the pencil icon.
  15. Uncheck the box next to SSLv3. Make sure TLSv11 and TLSv12 are enabled. Click OK.
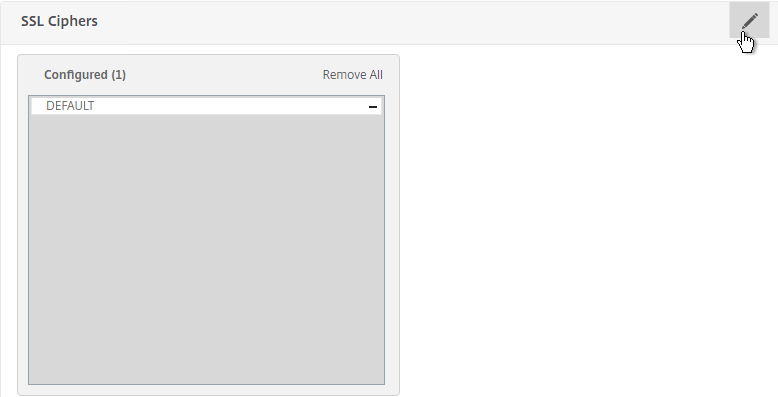
  16. On the left, in the SSL Ciphers section, click the pencil icon.
  17. Select a more secure Cipher Group. NetScaler 11.1 no longer includes RC4 in the DEFAULT cipher group, but the ciphers could be reordered in a more secure order.
  18. Repeat for the rest of the internal services.

Force Management SSL

By default, administrators can connect to the NSIP using HTTP or SSL. This section details how to disable HTTP.

  1. Connect to the NSIP using https.
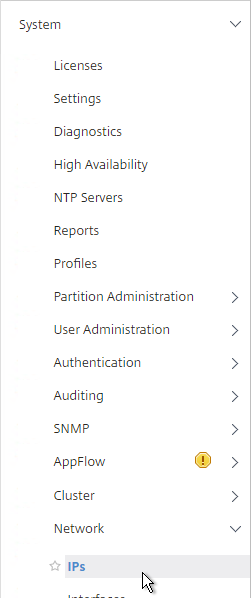
  2. On the left, expand System, expand Network, and click IPs.
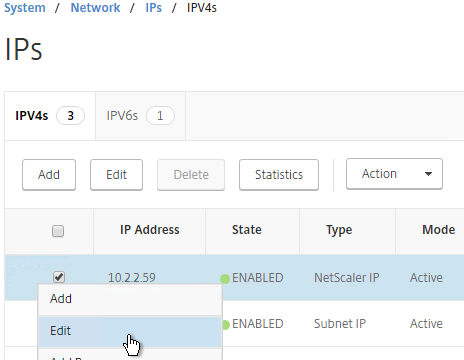
  3. On the right, select your NetScaler IP, and click Edit.
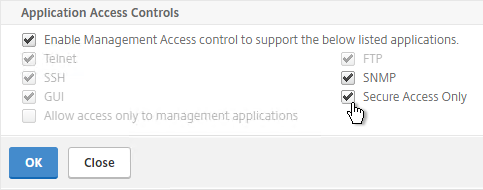
  4. Near the bottom, check the box next to Secure access only, and then click OK.
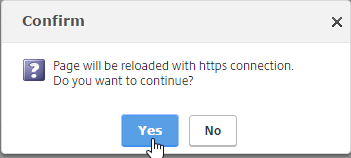
  5. If you are connected using http, the page will reload using https.

    set ns ip 10.2.2.126 -gui SECUREONLY
  6. Citrix CTX204217 How to redirect users from HTTP to HTTPS while accessing NSIP/Management IP. Requires a Responder policy, and a nsapimgr command.
  7. Repeat this on the secondary appliance.
  8. Repeat for any SNIPs that have management access enabled.

SSL Certificate – Update

If your certificate is about to expire, do the following:

  1. Create updated certificate files in PEM format. One option is to create a key file and Certificate Signing Request directly on the NetScaler. Another option is to convert a PFX file to a PEM file. Don’t install the certificate yet, but instead, simply have access to the key file and certificate file in PEM format.
  2. In NetScaler, navigate to Traffic Management > SSL > Certificates > Server Certificates.
  3. On the right, click the ellipsis next to the certificate you intend to update, and click Update.
  4. Check the box next to Click to update the Certificate/Key.
  5. Browse to the updated certificate and key files. If the private key is encrypted, specify the password.
  6. Click Yes to update the certificate.
  7. Click OK. This will automatically update every Virtual Server on which this certificate is bound.
  8. Certificates can also be updated in Citrix Command Center or NetScaler Management and Analytics System.

EUC Weekly Digest – June 25, 2016

Last Modified: Sep 2, 2018 @ 7:52 am

Here are some EUC items I found interesting last week:

XenApp/XenDesktop

XenMobile

StoreFront

ShareFile

VMware

Microsoft

Global Server Load Balancing (GSLB) – NetScaler 11.1

Last Modified: Nov 7, 2020 @ 6:34 am

Navigation

💡 = Recently Updated

GSLB Planning

GSLB is nothing more than DNS. GSLB is not in the data path. GSLB receives a DNS query, and GSLB sends back an IP address, which is exactly how a DNS server works. The user then connects to the returned IP, which doesn’t even need to be on a NetScaler.

GSLB can do some things that DNS servers can’t do:

  • Don’t give out an IP address unless it is UP (monitoring)
    • If the active IP address is down, then give out the passive IP address (active/passive)
  • Give out the IP address that is closest to the user (proximity load balancing)
  • Give out different IPs for internal users vs external users (DNS View)

GSLB is only useful if you have a single DNS name that could resolve to two or more IP addresses. If there’s only one IP address, then use normal DNS instead.

Citrix Blog Post Global Server Load Balancing: Part 1 explains how DNS queries work and how GSLB fits in.

Citrix has a good DNS and GSLB Primer.

When configuring GSLB, don’t forget to ask “where is the data?”. For XenApp/XenDesktop, DFS multi-master replication of user profiles is not supported, so configure “home” sites for users. More information at Citrix Blog Post XenDesktop, GSLB & DR – Everything you think you know is probably wrong!

GSLB Configuration Overview

GSLB Configuration can be split between one-time steps for GSLB infrastructure, and repeatable steps for each GSLB-enabled DNS name.

One-time GSLB Infrastructure configuration

  1. Create ADNS listener on each NetScaler pair – DNS clients send DNS queries to the ADNS listeners. GSLB resolves a DNS query into an IP address, and returns the IP address in the DNS response.
  2. Create GSLB Sites (aka MEP Listener) – GSLB Sites usually correspond to different datacenters. GSLB Sites are also the IP address endpoints for NetScaler’s proprietary Metric Exchange Protocol (MEP), which is used by GSLB to transmit proximity, persistence, and monitoring information.
  3. Import Static Proximity Database – NetScaler includes a database that can be used to determine the geographical location of an IP address. Or you can subscribe to a geolocation service, and import its database.
  4. Delegate DNS sub-zone to NetScaler ADNS – in the original DNS zone, create a new sub-zone (e.g. gslb.company.com), and delegate the sub-zone to all ADNS listeners.

Repeatable GSLB Configuration for each DNS name:

  1. Create one or more GSLB Services per DNS name, and per IP address response – each GSLB Service corresponds to a single IP address that can be returned in response to a DNS Query.
    • Optionally, bind a Monitor to each GSLB Service. Monitors determine if the GSLB Service is up or not.
  2. Create a GSLB Virtual Server per DNS name
    • Bind a DNS name to the GSLB Virtual Server.
    • For active/active – bind multiple GSLB Services to the GSLB Virtual Server, configure a load balancing method (e.g. proximity), and configure site persistence.
    • For active/passive – bind the active GSLB Service. Create another GSLB Virtual Server with passive GSLB Service, and configure as Backup Virtual Server.
  3. Create CNAME records for each delegated DNS name – in the main DNS zone, create a CNAME that maps the original DNS name to the delegated sub-zone. For example, CNAME citrix.company.com to citrix.gslb.company.com.

You will create separate GSLB Services, separate GSLB Virtual Servers, and separate CNAMEs for each DNS name. If you have a bunch of DNS names that you want to GSLB-enable, then you’ll repeat these steps for each GSLB-enabled DNS name.

Each datacenter has a separate ADNS listener IP address. DNS is delegated to all GSLB ADNS Listener IPs, and any one of them can respond to the DNS query. Thus, all NetScaler pairs participating in GSLB should have the same Per-DNS name configuration.

One NetScaler appliance for both public DNS/GSLB and internal DNS/GSLB?

GSLB can be enabled both publically and internally. For public GSLB, configure it on DMZ NetScaler appliances, and expose the DNS listener to the Internet. For internal GSLB, configure it on separate internal NetScaler appliances/instances, and create an internal DNS listener.

Each NetScaler appliance only has one DNS table, so if you try to use the same NetScaler for both public DNS and internal DNS, then be aware that external users can query for internal GSLB-enabled DNS names. As described by Phil Bossman in the comments, you can use a Responder policy to prevent external users from reading internal DNS names.

add policy patset GSLB_INTERNAL
bind policy patset GSLB_INTERNAL internalHostname.gslb.domain.com -index 1
add responder action DNS_Empty_Response respondwith DNS.NEW_RESPONSE
add responder policy GSLB_DNS_Empty_Response "(!(CLIENT.IP.SRC.IN_SUBNET(10.0.0.0/8)||CLIENT.IP.SRC.IN_SUBNET(192.0.0.0/16)||CLIENT.IP.SRC.IN_SUBNET(172.0.0.0/12)) && DNS.REQ.QUESTION.DOMAIN.CONTAINS_ANY(\"GSLB_INTERNAL\"))" DNS_Empty_Response
bind responder global GSLB_DNS_Empty_Response 100 END -type DNS_REQ_DEFAULT

One appliance resolving a single DNS name differently for internal and public

Let’s say you have a single DNS name citrix.company.com. When somebody external resolves the name, it should resolve to a public IP. When somebody internal resolves the name, it should resolve to an internal IP.

For internal GSLB and external GSLB of the same DNS name on the same NetScaler appliance, you can use DNS Policies and DNS Views to return different IP addresses depending on where users are connecting from. See Citrix CTX130163 How to Configure a GSLB Setup for Internal and External Users Using the Same Host Name.

If the Internet circuit in the remote datacenter goes down, then this should affect public DNS, since you don’t want to give out a public IP that isn’t reachable. But do you also want an Internet outage to affect internal DNS? Probably not. In that case, you would need different GSLB monitoring configurations for internal DNS and external DNS. However, if you have only a single GSLB Virtual Server with DNS Views, then you can’t configure different monitoring configurations for each DNS View.

To work around this limitation, create two separate GSLB Virtual Servers with different monitoring configurations. Internal DNS uses a CNAME record to reach the GSLB Virtual Server configured for internal monitoring:

  • External citrix.company.com:
    • Configure NetScaler GSLB for citrix.company.com.
    • On public DNS, delegate citrix.company.com to the NetScaler DMZ ADNS services.
  • Internal citrix.company.com:
    • Configure NetScaler GSLB for citrixinternal.company.com or something like that.
    • On internal DNS, create CNAME for citrix.company.com to citrixinternal.company.com
    • On internal DNS, delegate citrixinternal.company.com to NetScaler internal ADNS services.

Remote Internet Monitoring

For public DNS/GSLB, you don’t want to give out a remote public IP address if that remote public IP address is not reachable. That means the local NetScaler will need to somehow determine if the remote datacenter has Internet connectivity or not. Here are some methods of verifying the remote Internet connection:

  • Route GSLB Metric Exchange Protocol (MEP) across the Internet. If MEP goes down, then all IP addresses associated with the remote GSLB Site are assumed to be down, and thus the local NetScaler will stop giving out those remote IP addresses.
  • Bind explicit monitors to each GSLB Service, and ensure the monitoring is routed across the Internet.

GSLB IP Addresses

GSLB is separate from data traffic. The GSLB IP addresses are separate from the IP addresses needed for data.
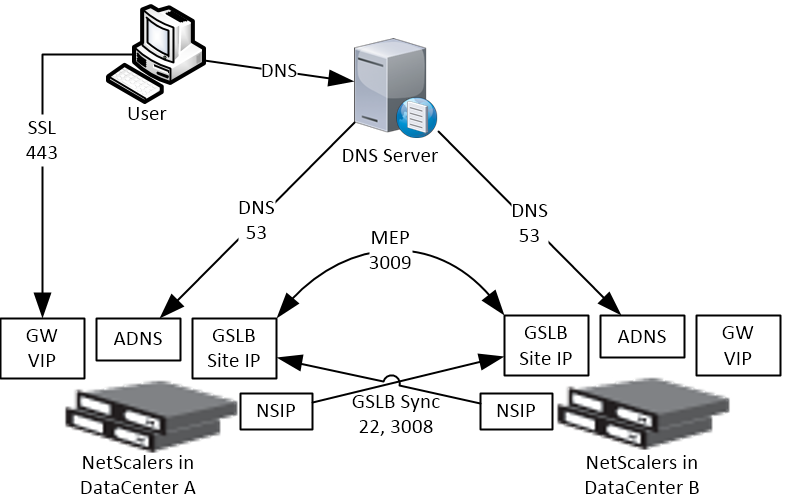
Some GSLB-specific IP Addresses are needed on each NetScaler pair:

  • ADNS Listener IP: A NetScaler IP that listens for DNS queries.
    • The ADNS listener IP is typically an existing SNIP on the appliance.
    • For external DNS, create a public IP for the ADNS Listener IP, and open UDP 53, so Internet-based DNS servers can access it.
    • A single NetScaler appliance can have multiple ADNS listeners – typically one ADNS listener for public, and another ADNS listener for internal.
  • GSLB Site IP / MEP listener IP: A NetScaler IP that will be used for NetScaler-to-NetScaler GSLB communication. This communication is called MEP or Metric Exchange Protocol. MEP transmits the following between GSLB-enabled NetScaler pairs: load balancing metrics, proximity, persistence, and monitoring.
    • GSLB Sites – On NetScaler, you create GSLB Sites. GSLB Sites are the endpoints for the MEP communication. Each NetScaler pair is configured with the MEP endpoints for the local appliance pair, and all remote appliance pairs.
    • TCP Ports – MEP uses port TCP 3009 or TCP 3011 between the NetScaler pairs. TCP 3009 is encrypted.
    • The ADNS IP address can be used as the MEP endpoint IP.
    • MEP endpoint can be any IP – The MEP endpoint IP address can be any IP address and does not need to be a SNIP or ADNS.
    • One MEP IP per appliance – there can only be one MEP endpoint IP address on each NetScaler pair.
    • Route MEP across Internet? – If you route MEP across the Internet, and if the MEP connection is interrupted, then Internet at one of the locations is probably not working. This is an easy way to determine if remote Internet is up or not. If you don’t route MEP across the Internet, then you’ll need to configure every remote-site GSLB Service with a monitor to ensure that the remote Internet is up.
      • Public IPs for MEP Enpoints – if you route MEP across the Internet, then you’ll need public IPs for each publically-accessible MEP endpoint IP address.
      • Public Port for MEP: Open port TCP 3009 between the MEP Public IPs. Make sure only the MEP IPs can access this port on the other NetScaler. Do not allow any other device on the Internet to access this port. Port 3009 is encrypted.
    • GSLB Sync Ports: To use GSLB Configuration Sync, open ports TCP 22 and TCP 3008 (secure) from the NSIP (management IP) to the remote public MEP IP. The GSLB Sync command runs a script in BSD shell and thus NSIP is always the Source IP.
  • Public IP Summary: In summary, for public GSLB, if MEP and ADNS are listening on the same IP, then you need one new public IP that is NAT’d to the DMZ IP that is used for ADNS and MEP (GSLB Site IP).
    • Each datacenter has a separate public IP.
    • DNS is delegated to all public ADNS IP listeners.

ADNS Listener

  1. At System > Network > IPs, identify a NetScaler-owned IP that you will use as the ADNS listener. This is typically a SNIP.
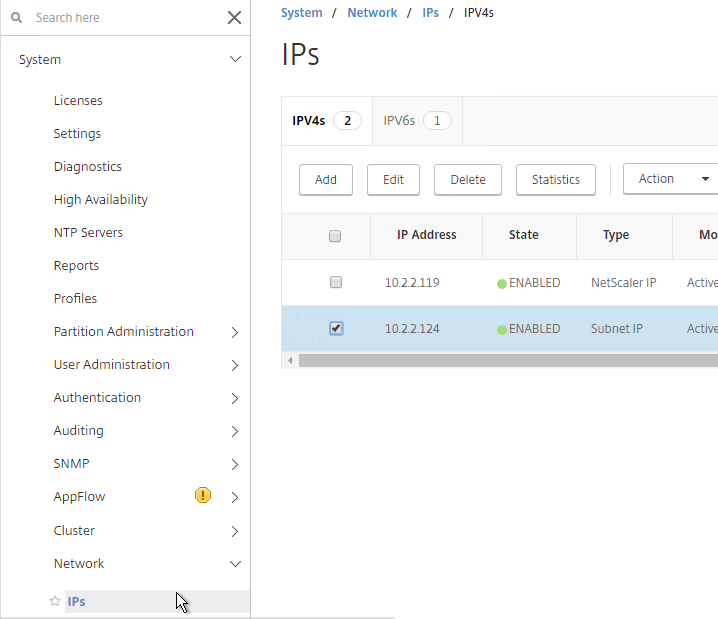
  2. Create a public IP for the ADNS Service IP, and configure firewall rules.
  3. On the left, expand Traffic Management > Load Balancing, and click Services.
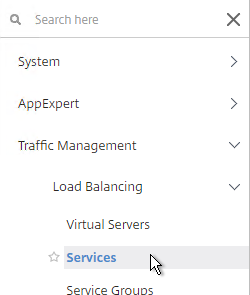
  4. On the right, click Add.
  5. In the Basic Settings section, do the following:
    1. Name the service ADNS or similar.
    2. In the IP Address field, enter an appliance SNIP.
    3. In the Protocol drop-down field, select ADNS.
  6. Click OK.
  7. Scroll down and click Done, to close the Load Balancing Service properties.
  8. On the left of the console, expand System, expand Network, and then click IPs.
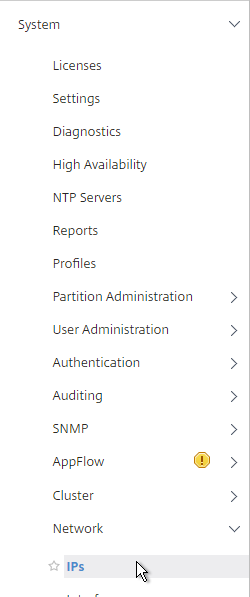
  9. On the right, you’ll see the SNIP is now marked as the ADNS svc IP.
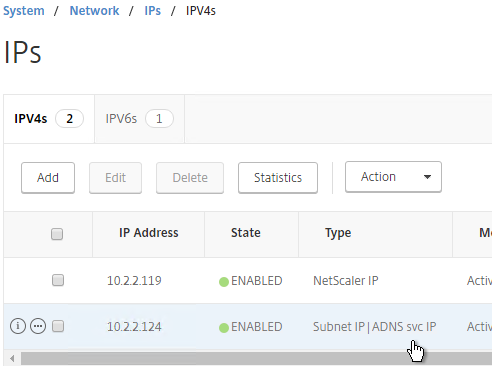
  10. Repeat ADNS configuration on the other appliance pair in the other datacenter.
  11. Your NetScaler appliances are now DNS servers.

DNS Security

  1. NetScaler 11.1 build 51 and newer includes DNS Security Options at Security > DNS Security, which can protect your ADNS service.
  2. To protect ADNS, set the Profile to All DNS Endpoints.

Metric Exchange Protocol

This section details MEP configuration between two GSLB Sites. See Citrix Docs for larger Parent-Child Topology Deployment using the MEP Protocol, including new features in NetScaler 11.1 build 51 and newer.

GSLB Sites

  1. The local GSLB Site IP can be any IP. Or you can use the same SNIP, and same public IP, used for ADNS.
  2. Open the firewall rules for Metric Exchange Protocol.
  3. On the left, expand Traffic Management, right-click GSLB, and enable the feature.
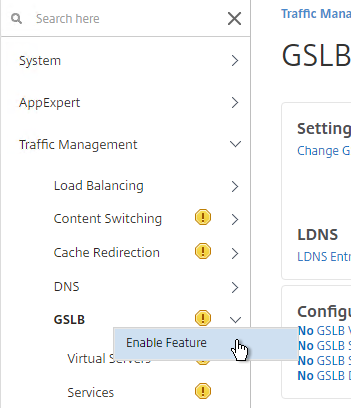
  4. Expand GSLB, and click Sites.
  5. On the right, click Add.
  6. In the Create GSLB Site page, do the following:
    1. We’re adding the local site first. Enter a descriptive name for the local site.
    2. In the Site Type drop-down, select LOCAL.
    3. In the Site IP Address field, enter an IP that this appliance will listen for MEP traffic. This is typically a DMZ SNIP.
    4. For Internet-routed GSLB MEP, in the Public IP Address field, enter the public IP that is NAT’d to the GSLB Site IP.
    5. For internal GSLB MEP, there is no need to enter anything in the Public IP field.
  7. Scroll down, and click Create, to close the Create GSLB Site page.
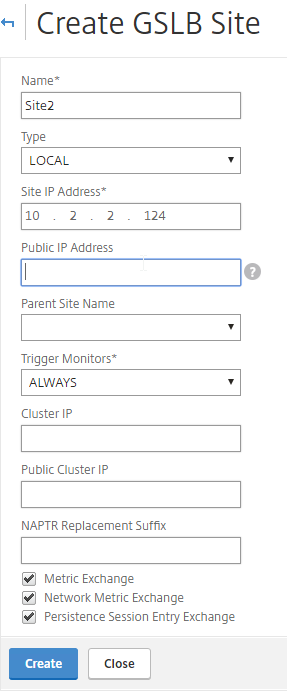
  8. Go back to System > Network > IPs, and verify that the IP is now marked as a GSLB site IP.
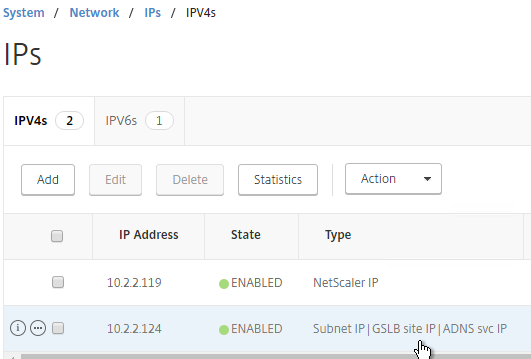
  9. If you want to use the GSLB Sync Config feature, then you’ll need to edit the GSLB site IP, and enable Management Access.

    1. Scroll down, and enable Management Access. SSH is all you need.
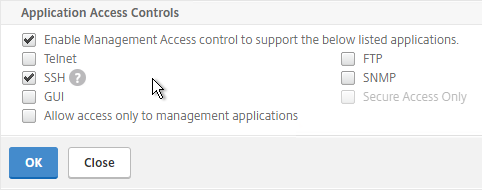
  10. Go to the other appliance pair,and also create the Local GSLB site using its GSLB site IP, and its public IP that is NAT’d to the GSLB site IP.
    1. In System > Network > IPs on the remote appliance, there should now be a GSLB site IP. This could be a SNIP. If GSLB Sync is desired, enable management access on that IP and ensure SSH is enabled.
  11. Now on each appliance add another GSLB Site, which will be the Remote GSLB site.
  12. In the Create GSLB Site page, do the following:
    1. Enter a descriptive name for the remote site.
    2. Select REMOTE as the Site Type.
    3. Enter the other appliance’s actual GSLB Site IP as configured on the appliance. This IP does not need to be reachable.
    4. In the Public IP Address field, enter the public IP that is NAT’d to the GSLB Site IP on the other appliance. For MEP, TCP 3009 must be open from the local GSLB Site IP, to the remote public Site IP. For GSLB sync, TCP 22, and TCP 3008, must be open from the local NSIP, to the remote public Site IP.
  13. Click Create.
  14. Repeat on the other appliance.

RPC

MEP defaults to unencrypted on TCP 3011. To fix that:

  1. On the left, expand System, expand Network, and click RPC.
  2. On the right, right-click the new RPC address (the other site’s GSLB Site IP), and click Edit.
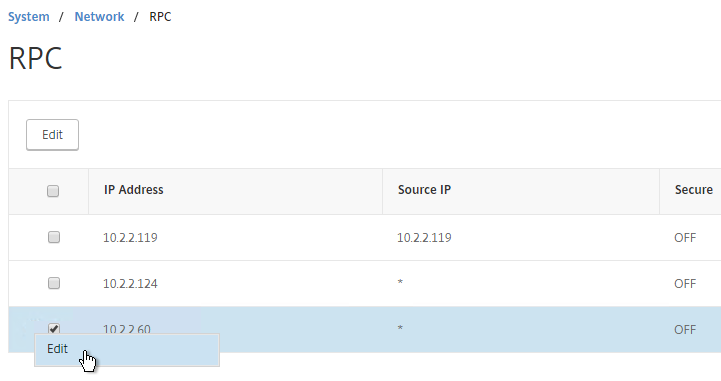
  3. On the bottom, check the box next to Secure.
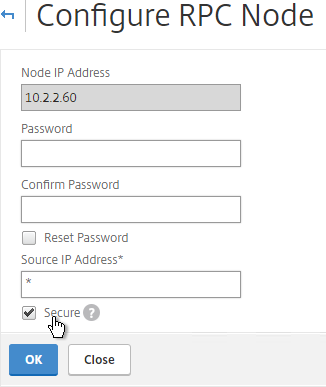
    1. If your local GSLB Site IP is not a SNIP, then you’ll need to change the RPC Node to use the local GSLB Site IP as the source IP. In the Source IP Address field, enter the local GSLB Site IP.
  4. Click OK when done.
  5. Do the same thing on the other appliance.
  6. If you go back to GSLB > Sites, you should see it as active.
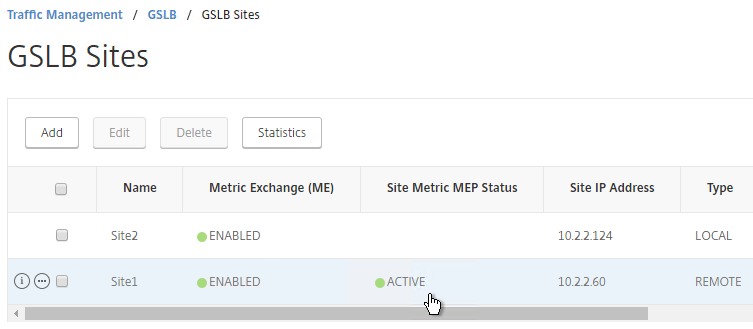
If your MEP connection between GSLB Sites flaps, it might be useful to introduce a delay before remote GSLB Services are marked as Down. In NetScaler 11.1 build 51 and newer:

  1. you can do this at Traffic Management > GSLB, on the right, in the left column, click Change GSLB settings.
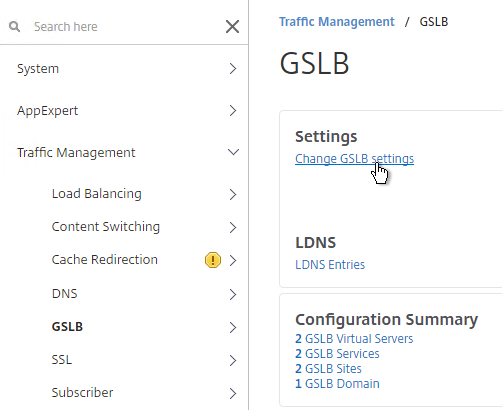
  2. In the GSLB Service State Delay Time (secs) field, enter a delay before the GSLB Services are marked as down when MEP goes down.
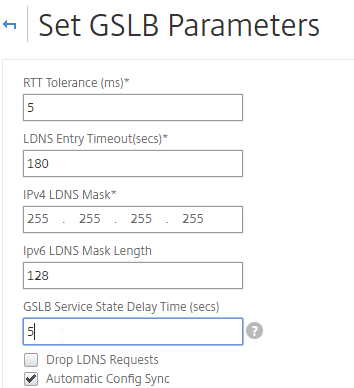
    set gslb parameter -GSLBSvcStateDelayTime 15

Static Proximity Geo Location Database

If you want to use DNS Policies or Static Proximity GSLB Load Balancing or Responders based on user’s location, import a geo location database.

NetScaler has a built-in database at /var/netscaler/inbuilt_db/ that you can use. Or you can download a database. Common free databases are:

For IP2Location, see the blog post Add IP2Location Database as NetScaler’s Location File for instructions on how to import.

Import Built-in Geo database

  1. In the NetScaler GUI, on the left, expand Traffic Management, expand GSLB, expand Location, and click Static Databases.
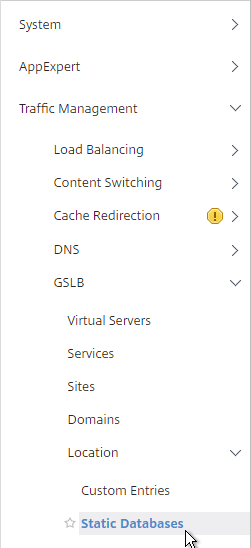
  2. On the right, click Add.
  3. Change the Import From selection to File.
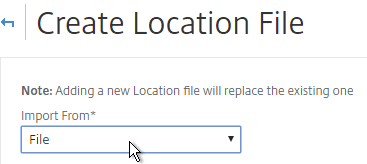
  4. Click Choose File.
  5. Browse to /var/netscaler/inbuilt_db/, and open Citrix_NetScaler_InBuilt_GeoIP_DB.csv. To browse to the directory, select var, and then click Open. Repeat for each directory until you reach /var/netscaler/inbuilt_db.
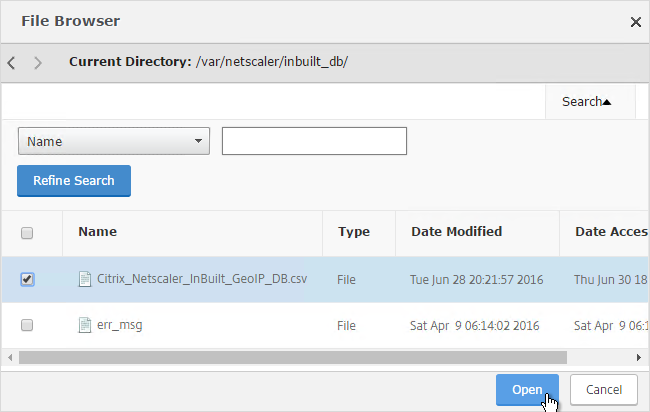
  6. In the Location Format field, if using the built-in database, select netscaler, and click Create.
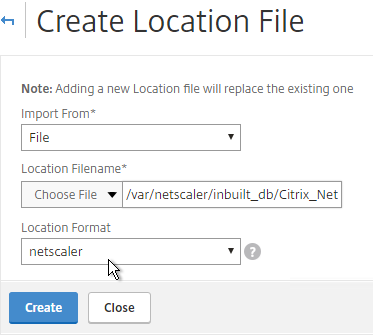
  7. When you open a GSLB Service, the public IP will be translated to a location.
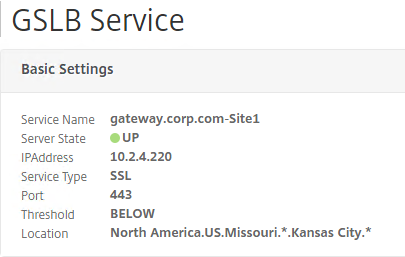
Private IP Blocks

Geo Location databases only contain entries for Public IPs. For Private IPs, do the following:

  1. On the left, expand Traffic Management, expand GSLB, expand Location, and click Custom Entries.
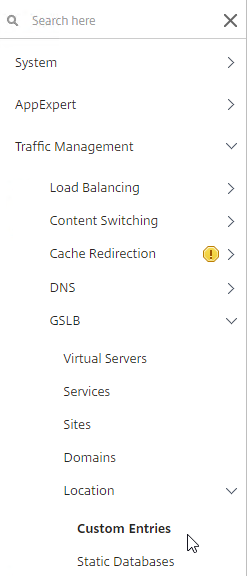
  2. On the right, click Add.
  3. Enter a range of IP addresses for a particular location.
  4. Enter a Location Name in Geo Location format, which is typically six location words separated by periods. You can look in the static proximity database for examples.
  5. Click Create.
  6. Continue creating Custom Entries for other private IP blocks.

Use Geo Locations

You can use the Geo locations in a DNS Policy, static proximity GSLB Load Balancing, or Responders:

GSLB Services

GSLB Services represent the IP addresses that are returned in DNS Responses. The IP addresses represented by GSLB Services do not need to be on a NetScaler, but NetScaler-owned IP addresses (e.g. load balancing VIPs) have additional GSLB Site Persistence options (e.g. cookie-based persistence).

  • Each potential IP address in a DNS response is a separate GSLB Service.
  • GSLB Services are associated with GSLB Sites.
  • GSLB Service configuration is identical for active/active and active/passive. GSLB Virtual Server define active/active or active/passive, not GSLB Services.

GSLB should be configured identically on all NetScaler pairs that are responding to DNS queries. Since you have no control over which NetScaler will receive the DNS query, you must ensure that both NetScaler pairs are giving out the same DNS responses.

To create a GSLB Service:

  1. On the left, expand Traffic Management > GSLB, and click Services.
  2. On the right, click Add.
  3. The service name should be similar to the DNS name that you are trying to GSLB. Include the site name in the service name.
  4. Select one of the GSLB Sites. The IP address you’re configuring in this GSLB Service should be geographically located in the selected GSLB Site.
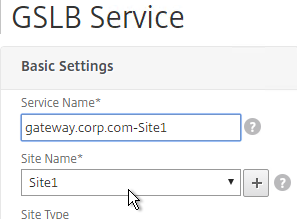
  5. On the bottom part, if the IP address is owned by this NetScaler (Local Site), then select Virtual Servers, and select a Virtual Server that is already defined on this appliance. It should automatically fill in the other fields. If you see a message asking if you wish to create a service object, click Yes. This option is only available when creating a GSLB Service in the Local GSLB Site.
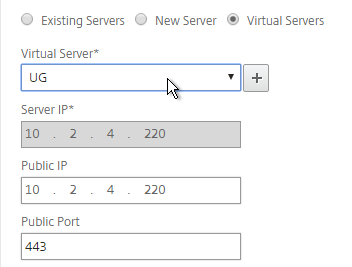
      1. If the IP address is not owned by this NetScaler, then change the selection to New Server, and enter the remote IP address in the Server IP field.
      2. The Server IP field is the IP address that NetScaler will monitor for reachability.
      3. If the remote IP is owned by a different NetScaler that is reachable by MEP, then enter the actual VIP configured on that remote NetScaler. The Server IP does not need to match what is returned to the DNS Query.
  6. In the Public IP field, enter the IP address that will be returned to the DNS Query. If you leave Public IP blank, then NetScaler will copy the Server IP to the Public IP field. For Public GSLB, the Public IP field is usually a Public IP address. For internal GSLB, the Public IP field is usually an internal IP, and probably matches the Server IP.
  7. Scroll up and make sure the Service Type is SSL. It’s annoying that NetScaler doesn’t set this drop-down correctly.
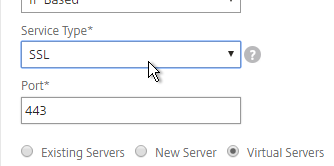
  8. Scroll down and click OK to close the Basic Settings section.
  9. GSLB Service Monitoring – on the right, in the Advanced Settings column, you can click Monitors to bind a monitor to this GSLB Service. Review the following notes before you bind a monitor.

    • Local NetScaler VIP – If the GSLB Service IP is a VIP on the local appliance, then GSLB will simply use the state of the local traffic Virtual Server (Load Balancing, Content Switching, or Gateway). There’s no need to bind a monitor to the GSLB Service.
    • Remote NetScaler VIP – If the GSLB Service IP is a VIP on a remote appliance, then GSLB will use MEP to ask the other appliance for the state of the remote traffic Virtual Server. In both cases. There’s no need to bind a monitor to the GSLB Service.
    • GSLB Monitor overrides other Monitoring methods – If you bind a monitor to the GSLB Service, then MEP and local Virtual Server state are ignored (overridden).
    • Here are some reasons for binding a monitor to the GSLB Service:
      • IP is not on a NetScaler – If the GSLB Service IP is not hosted on a NetScaler, then only GSLB Service monitors can determine if the Service IP is up or not.
      • Monitor remote Internet – For Public DNS, if MEP is not routed through the Internet, then you need some method of determining if the remote Internet circuit is up or not. In that case, you’ll need to bind monitors directly to the GSLB Service. The route of the Monitor should go across the Internet. Or you can ping the Internet router in the remote datacenter to make sure it’s reachable.
      • Traffic Domains – If the GSLB Service IP is in a non-default Traffic Domain, then you will need to attach a monitor, since GSLB cannot determine the state of Virtual Servers in non-default Traffic Domains.
  10. Active/Active Site Persistence – If you intend to do GSLB active/active, and if you need site persistence, then you can configure your GSLB Services to use Connection Proxy or HTTP Redirect. See Citrix Blog Post Troubleshooting GSLB Persistence with Fiddler for more details. This only works with GSLB Service IPs that match Virtual Server VIPs on NetScaler appliances reachable through MEP.
  11. Scroll down, and click Done, to finish creating the GSLB Service.
  12. Create additional GSLB Services for each IP address that will be returned to a DNS query.

Manually Synchronize GSLB Configuration

Copy the GSLB Service Configuration to the remote NetScaler pair. You can either repeat the GUI steps listed above. Or you can do the following:

  1. On the left, expand Traffic Management, and click GSLB.
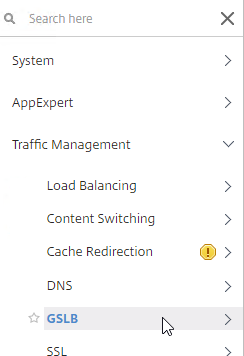
  2. On the right, click View GSLB Configuration.
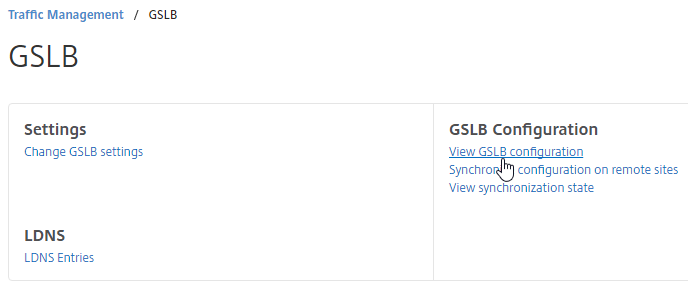
  3. This shows you all of the CLI commands for GSLB. Look for add gslb service commands. You can copy them, and run them (SSH) on other NetScaler pairs that are participating in GSLB.

GSLB Virtual Server

The GSLB Virtual Server is the entity that the DNS name is bound to. GSLB Virtual Server then gives out the IP address of one of the GSLB Services that is bound to it.

For Active/Passive GSLB:

  1. Create a GSLB Virtual Server for the Passive IP address.
    1. Bind the Passive GSLB Service to the Passive GSLB Virtual Server.
  2. Create another GSLB Virtual Server for the Active IP address.
    1. Bind the Active GSLB Service to the Active GSLB Virtual Server.
    2. Configure Backup Virtual Server pointing to the Passive GSLB Virtual Server.
    3. Bind a DNS name to the Active GSLB Virtual Server.
  3. Repeat the GSLB Virtual Server configuration on other NetScaler pairs participating in GSLB.
  4. Delegate the DNS name to NetScaler ADNS.

For Active/Active GSLB:

  1. Create one GSLB Virtual Server.
    1. Bind two or more GSLB Services to the Virtual Server.
    2. Configure the GSLB Virtual Server Load Balancing Method – e.g. Proximity
    3. Configure Site Persistence:
      1. Source IP persistence is configured on the GSLB Virtual Server.
      2. Cookie Persistence is configured on the GSLB Services.
    4. Bind a DNS name to the GSLB Virtual Server.
  2. Repeat the GSLB Virtual Server configuration on other NetScaler pairs participating in GSLB.
  3. Delegate the DNS name to NetScaler ADNS.

Configure the GSLB vServer identically on both appliances:

  1. On the left, expand Traffic Management > GLSB, and click Virtual Servers.
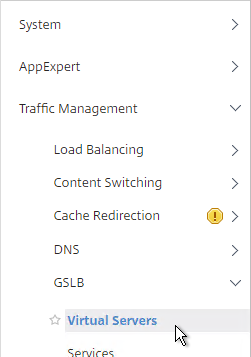
  2. On the right, click Add.
  3. Give the GSLB vServer a descriptive name. For active/active, you can name it the same as your DNS name. For active/passive, you will create two GSLB Virtual Servers, one for each datacenter, so include Active or Passive in the Virtual Server name.
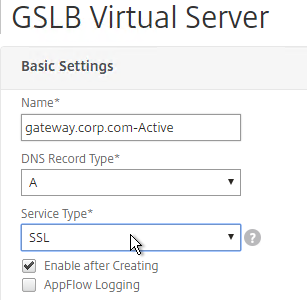
  4. If you intend to bind multiple GSLB Services to this GSLB vServer, then you can optionally check the box for Send all “active” service IPs. By default, GSLB only gives out one IP per DNS query. This checkbox always returns all IPs, but the IPs are ordered based on the GSLB Load Balancing Method and/or GSLB Persistence.
  5. If you configure GSLB to use Static Proximity Load Balancing Method, a new DNS feature called ECS will contain the actual DNS client IP. This dramatically improves the accuracy of determining a user’s location. Without this setting, GSLB can only see the IP address of the user’s configured DNS server instead of the real client IP.

    set gslb vserver <gslb_vserver> -ECS ENABLED -ecsAddrValidation ENABLED
  6. Click OK.
  7. On the left, click where it says No GSLB Virtual Server to GSLBService Binding.
  8. Click the arrow next to Click to select.
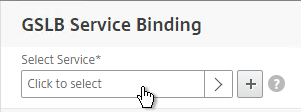
  9. Check the box next to an existing GSLB Service and click Select. If your GSLB is active/passive then only bind one service.
  10. If your GSLB is active/active then bind multiple GSLB Services. Also, you’d probably need to configure GSLB persistence (Source IP or cookies).
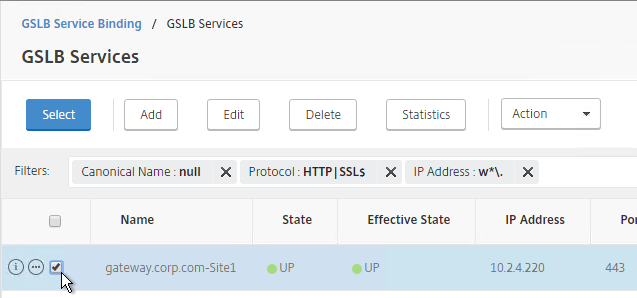
  11. Click Bind.
  12. Click OK.
  13. On the left, click where it says No GSLB Virtual Server Domain Binding.
  14. Enter the FQDN that GSLB will resolve.
  15. If this GSLB is active/passive, there are two options:
    • Use the Backup IP field to specify the IP address that will be handed out if the primary NetScaler is inaccessible or if the VIP on the primary appliance is marked down for any reason.
    • Or, create a second GSLB Virtual Server that has the passive GSLB service bound to it. Don’t bind a Domain to the second GSLB Virtual Server. Then edit the Active GSLB Virtual Server and use the Backup Virtual Server section to select the second GSLB Virtual Server.
  16. Click Bind.
  17. Click OK.
  18. In the ADNS Service section, click OK.
  19. If this is active/active GSLB, you can edit the Method section to enable Static Proximity. This assumes the Geo Location database has already been installed on the appliance.
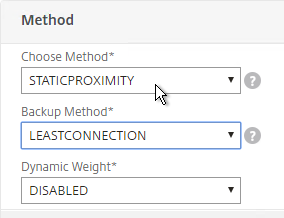
  20. Also for active/active, if you don’t want to use Cookie-based persistence, then you can use the Persistence section to configure Source IP persistence.
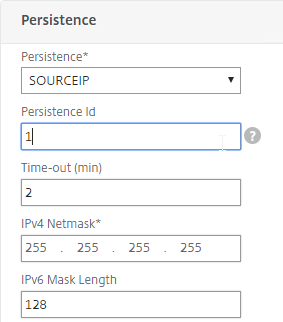
  21. Click Done when done.
  22. If you are configuring active/passive using the backup GSLB Virtual Server method, create a second GSLB Virtual Server that has the passive GSLB service bound to it. Don’t bind a Domain to the second GSLB Virtual Server.
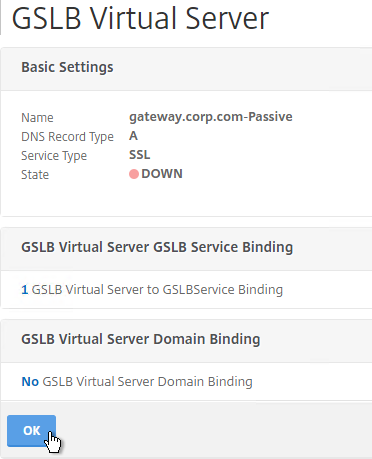
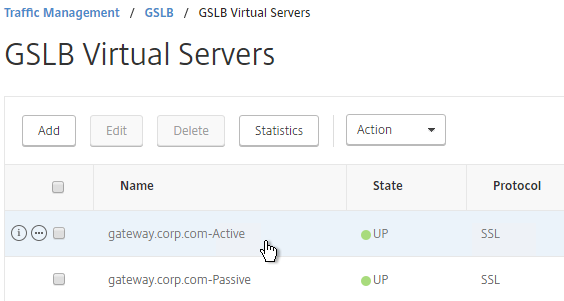
  23. Then edit the Active GSLB Virtual Server and use the Backup Virtual Server section to select the second GSLB Virtual Server.
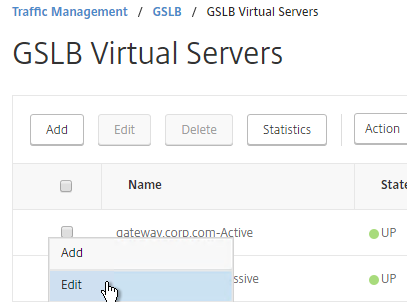
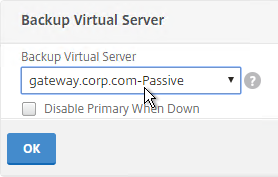
  24. On the left, if you expand Traffic Management > DNS, expand Records, and click Address Records, you’ll see a new DNS record for the GSLB domain you just configured. Notice it is marked as GSLB DOMAIN.
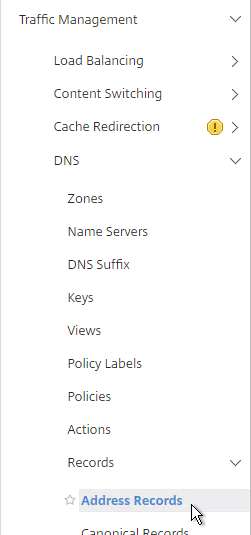
  25. Configure identical GSLB Virtual Servers on the other NetScaler appliance. Both NetScalers must be configured identically. You can also synchronize the GSLB configuration with the remote appliance as detailed in the next section.

GSLB Configuration Synchronization

  1. To manually sync the GSLB configuration from one GSLB Site to another, go to Traffic Management > GSLB.
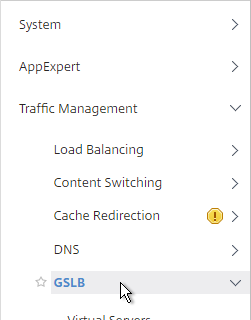
  2. On the right, in the right column, click Synchronize configuration on remote sites.
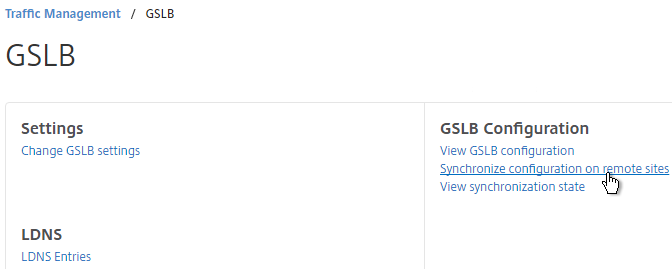
  3. Use the check boxes on the top, if desired. It’s usually a good idea to Preview the changes before applying them. Then click OK to begin synchronization.
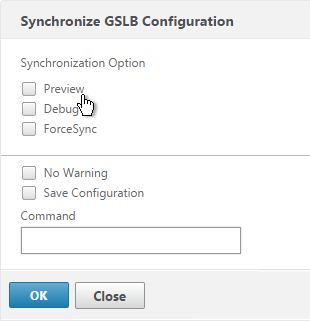
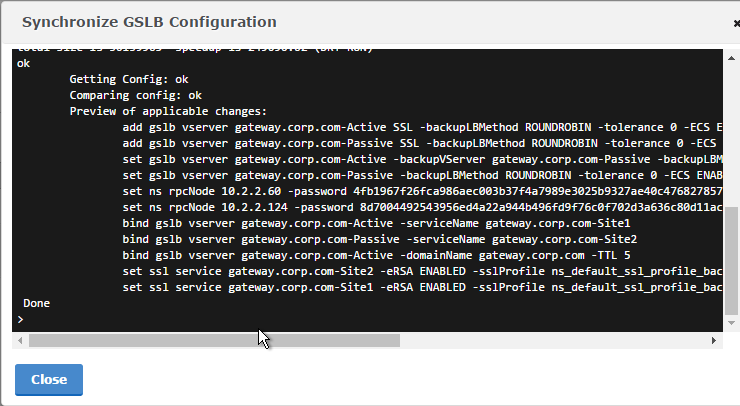
  4. NetScaler 11.1 build 51 and newer has an automatic GSLB Configuration Sync feature, which automatically syncs the GSLB config every 15 seconds. To enable it on the master appliance, go to Traffic Management > GSLB. On the right, in the left column, click Change GSLB settings.
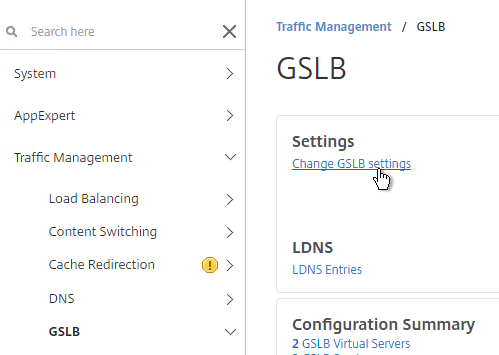
  5. Check the box next to Automatic Config Sync. Only enable this on the one appliance where you are configuring GSLB and want that GSLB config synced to other appliance.
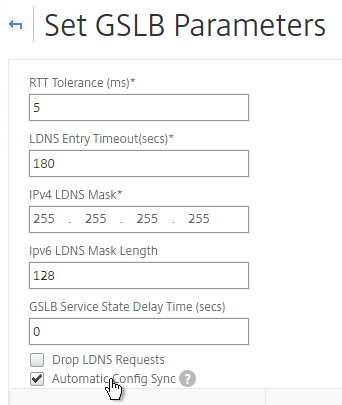
  6. The automatic sync log can be found at /var/netscaler/gslb/periodic_sync.log.
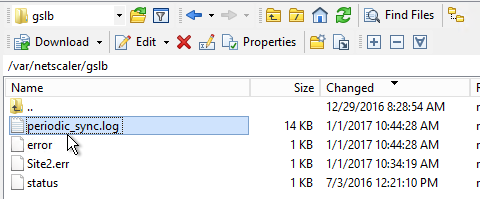
Some notes regarding GSLB Sync:

  • When syncing GSLB Services, it tries to create LB Server objects on the remote appliance. If the GSLB Service IP matches an existing LB Server object, then the GSLB sync will fail. Check the Sync logs for details. You’ll have to delete the conflicting LB Server object before GSLB Sync works correctly.
  • GSLB Sync runs as a script on the BSD shell and thus always uses the NSIP as the source IP.
  • GSLB Sync connects to the remote GSLB Site IP on TCP 3008 (if RPC is Secure) and TCP 22.

Test GSLB

  1. In NetScaler 11.1 build 51 and newer, you can test GSLB DNS name resolution from the GUI by going to Traffic Management > GSLB, and on the right, in the left column, click Test GSLB.
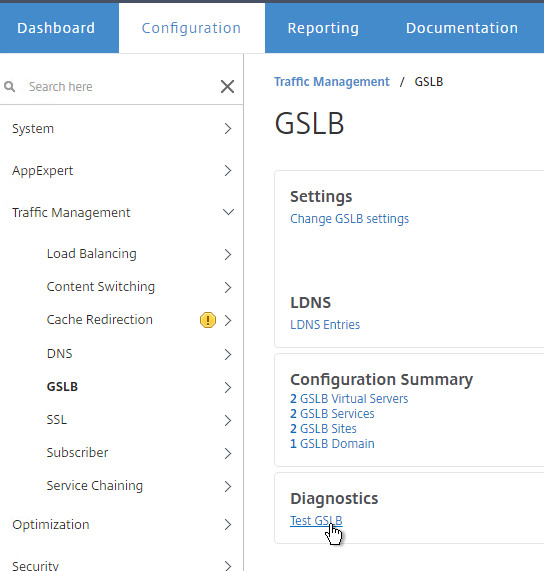
  2. Select a GSLB Domain Name.
  3. Select an ADNS Service IP, and click Test.
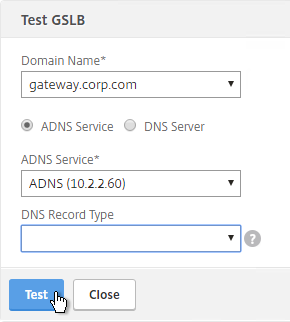
  4. The test performs a dig against the ADNS IP. Verify that the response contains the IP address you expected.
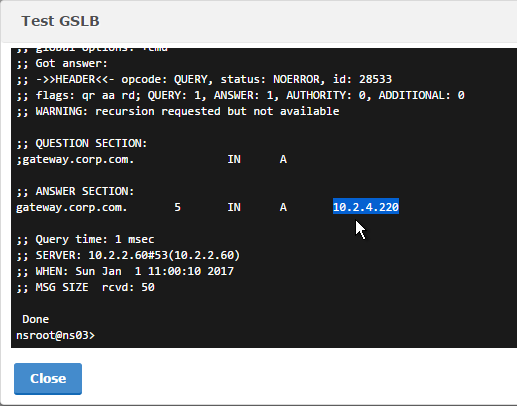
  5. Another method of testing GSLB is to simply point nslookup to the ADNS services, and submit a DNS query for one of the DNS names bound to a GSLB vServer. Run the query multiple times to make sure you’re getting the response you expect.
  6. The NetScaler ADNS services at both GSLB sites should be giving the same response.
  7. To simulate a failure, disable the traffic Virtual Server.
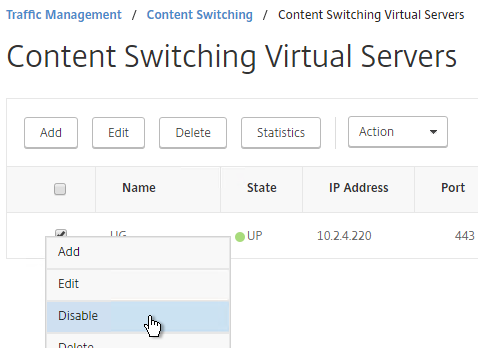
  8. Then the responses should change. Verify on both ADNS services.

  9. Re-enable the traffic Virtual Server, and the responses should return to normal.
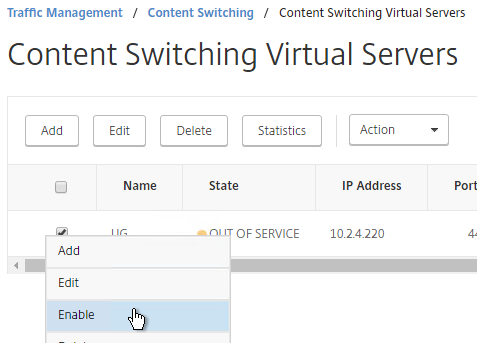

DNS Delegation

If you are enabling GSLB for the domain gateway.corp.com, you’ll need to create a delegation at the server that is hosting the corp.com DNS zone. For public GSLB, you need to edit the public DNS zone for corp.com.

DNS Delegation instructions will vary depending on what product host’s the public DNS zone. This section details Microsoft DNS, but it should be similar in BIND or web-based DNS products.

There are two ways to delegate GSLB-enabled DNS names to NetScaler ADNS:

  • Delegate the individual record. For example, delegate gateway.corp.com to the two NetScaler ADNS services (gslb1.corp.com and gslb2.corp.com).
  • Delegate an entire subzone. For example, delegate the subzone gslb.corp.com to the two NetScaler ADNS services. Then create a CNAME record in the parent DNS zone for gateway.corp.com that is aliased to gateway.gslb.corp.com. When DNS queries make it to NetScaler, they will be for gateway.gslb.corp.com and thus gateway.gslb.corp.com needs to be bound to the GSLB Virtual Server instead of gateway.corp.com. For additional delegations, simply create more CNAME records.

This section covers the first method – delegating an individual DNS record:

  1. Run DNS Manager.
  2. First, create Host Records pointing to the ADNS services running on the NetScalers in each data center. These host records for ADNS are used for all GSLB delegations no matter how many GSLB delegations you need to create.
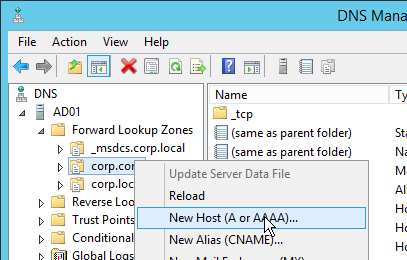
  3. The first Host record is gslb1 (or similar) and should point to the ADNS service (Public IP) on one of the NetScaler appliances.
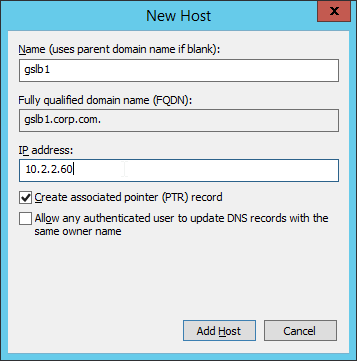
  4. The second Host record is gslb2 and should point to the ADNS Service (public IP) on the other NetScaler appliance.
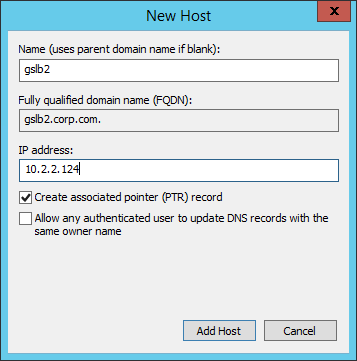
  5. If you currently have a host record for the service that you are delegating to GSLB (gateway.corp.com), delete it.
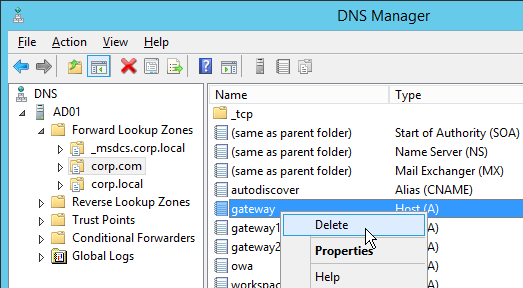
  6. Right-click the parent DNS zone and click New Delegation.
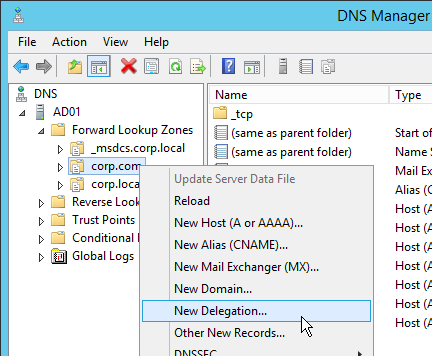
  7. In the Welcome to the New Delegation Wizard page, click Next.
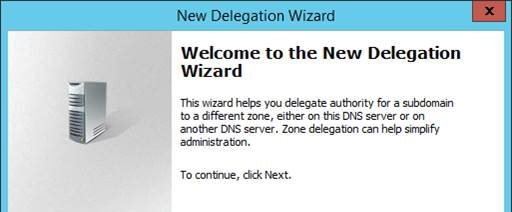
  8. In the Delegated Domain Name page, enter the left part of the DNS record that you are delegating (e.g. gateway). Click Next.
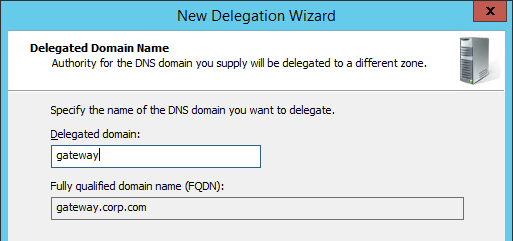
  9. In the Name Servers page, click Add.
  10. This is where you specify gslb1.corp.com and gslb2.corp.com. Enter gslb1.corp.com and click Resolve. Then click OK. If you see a message about the server not being authoritative for the zone, ignore the message.
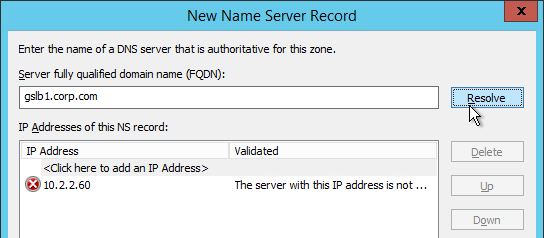
  11. Then click Add to add the other GSLB ADNS server.
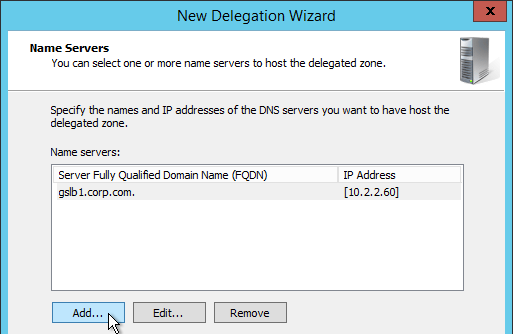
  12. Once both ADNS servers are added to the list, click Next.
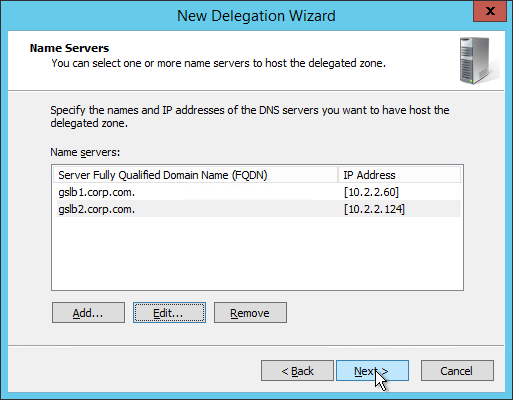
  13. In the Completing the New Delegation Wizard page, click Finish.
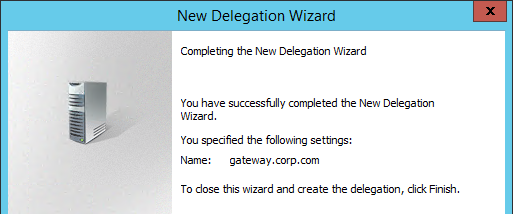
  14. If you run nslookup against your Microsoft DNS server, it will respond with Non-authoritative answer. That’s because it got the response from NetScaler and not from itself.

That’s all there is to it. Your NetScalers are now DNS servers. For active/passive, the NetScalers will hand out the public IP address of the primary data center. When the primary data center is not accessible, GSLB will hand out the GSLB Service IP bound to the Backup GSLB vServer.

Geo Location Database

If you want to use DNS Policies or Static Proximity GSLB Load Balancing or Responders based on user’s location, import a geo location database.

NetScaler has a built-in database at /var/netscaler/inbuilt_db/ that you can use. Or you can download a database. Common free databases are:

For IP2Location, see the blog post Add IP2Location Database as NetScaler’s Location File for instructions on how to import.

To Download GeoLite Legacy:

  1. Download the GeoLite Country database CSV from http://dev.maxmind.com/geoip/legacy/geolite/.
  2. Note: GeoLite City is actually two files that must be merged as detailed at Citrix Blog Post GeoLite City as NetScaler location database. GeoLite Country doesn’t need any preparation.
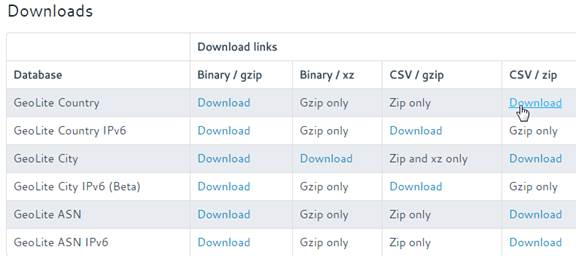
  3. Upload the extracted database (.csv file) to the NetScaler appliance at /var/netscaler/locdb.
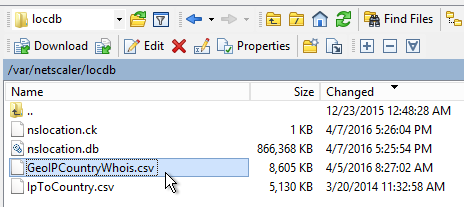
To import the Geo database (including the built-in database):

  1. In the NetScaler GUI, on the left, expand Traffic Management, expand GSLB, expand Location, and click Static Databases.
  2. On the right, click Add.
  3. Change the Import From selection to File.
  4. Click Choose File.
  5. For the built-in database, browse to /var/netscaler/inbuilt_db/ and open Citrix_NetScaler_InBuilt_GeoIP_DB.csv. To browse to the directory, select var and then click Open. Repeat for each directory until you reach /var/netscaler/inbuilt_db.
  6. Or browse to the Geo Location database file you uploaded and open it.
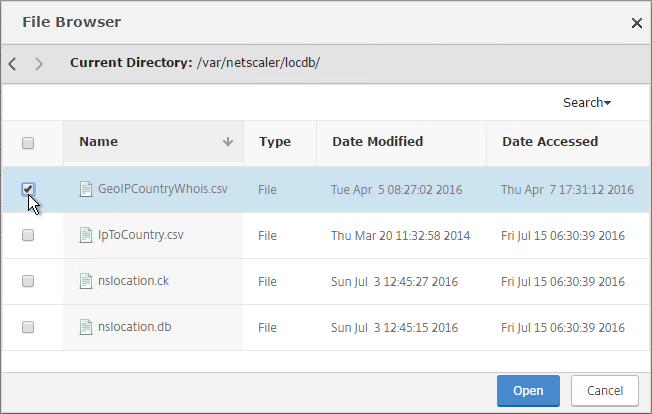
  7. In the Location Format field, if using the built-in database, select netscaler, and click Create.
  8. If using GeoLite Country, select geoip-country and click Create.
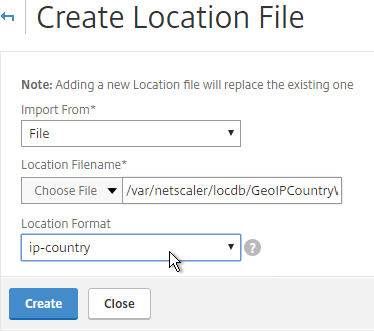
  9. When you open a GSLB Service, the public IP will be translated to a location.

You can use the Geo locations in a DNS Policy, static proximity GSLB Load Balancing, or Responders:
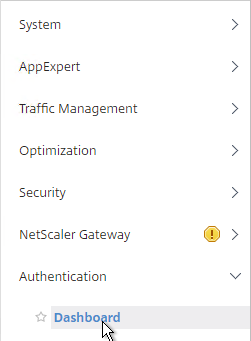
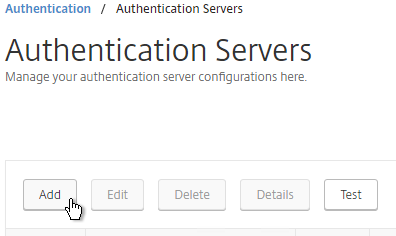
nFactor Authentication for NetScaler Gateway 11

Last Modified: Sep 15, 2018 @ 9:02 am

Navigation

Overview

nFactor lets you configure an unlimited number of authentication factors. You are no longer limited to just two factors. Each authentication factor performs the following tasks:
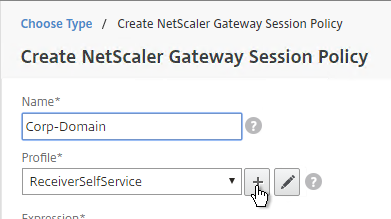
  • nFactor requests credentials from the user. These credentials can be anything supported by NetScaler including:
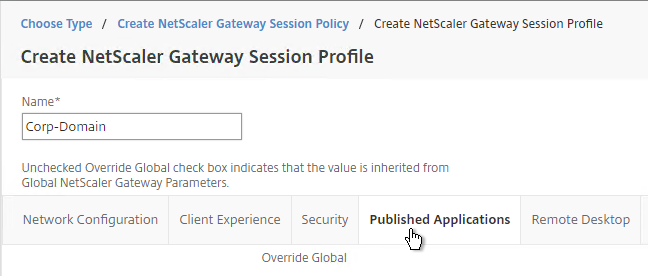
    • SAML
    • Certificate
    • oAuth
    • Kerberos
    • Forms-based authentication (traditional web-based logon page) for LDAP, RADIUS, etc.
      • Multiple passwords can be collected with one form.
      • Or prompt the user multiple times throughout the authentication chain.
      • The logon page can contain a domain drop-down.
  • nFactor evaluates the credentials. The results can be:
    • Authentication success
    • Authentication failure
    • Group extraction
    • Attribute extraction from SAML, Certificate, etc.
  • Based on the evaluation results, do one of the following:
    • Allow access
    • Use authentication evaluation results to select next factor
    • Deny access
  • Multiple factor evaluations can be chained together. The chosen next factor is based on the results of the prior factor. This can continue indefinitely. The next factor can do one of the following:
    • Prompt the user for more credentials
    • Evaluate the already entered next set of credentials
    • Use policy expression to select another next factor (no authentication). This is typically used with group extraction so that groups determine the next factor.

Here are some nFactor use cases, but the combinations are almost limitless:
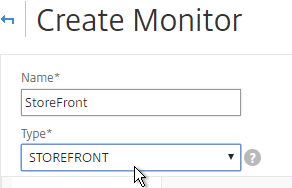
  • Authentication method based on Active Directory group: Logon screen asks for user name only. Extract user’s groups from Active Directory. Based on user’s Active Directory groups, either ask user for certificate, or ask user for LDAP password. If LDAP, the username doesn’t need to be entered again.
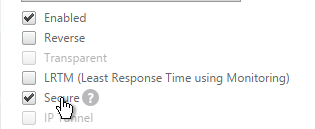
  • Ask for Certificate first:
    • If certificate, perform LDAP
    • If no certificate, perform LDAP + RADIUS
  • Two-factor with passwords checked in specific order: Logon screen with two password fields. Check the first password. If the first password succeeds, then check the second password. This lets you check RADIUS before LDAP.

In NetScaler 11.0 build 62 and newer, you can configure nFactor on AAA authentication servers.

In NetScaler 11.0 build 66 and newer, you can configure nFactor in the AAA feature and bind it to NetScaler Gateway Virtual Servers. Thus NetScaler Enterprise Edition is required.

  • Note: nFactor works with browser clients, but it does not work with Receiver Self-Service (native Receiver).

nFactor configuration summary (detailed instructions below):

  • The first factor (Advanced Authentication Policy and Login Schema) is bound directly to a AAA Virtual Server.
  • Next factors are Authentication Policy Labels that are chained to Advanced Authentication Policies in prior factors.
  • Authentication Profile links AAA nFactor with NetScaler Gateway.

AAA Virtual Server

Create AAA Virtual Server

To use nFactor with NetScaler Gateway, you first configure it on a AAA Virtual Server. Then you later bind the AAA Virtual Server to the NetScaler Gateway Virtual Server.

  1. If AAA feature is not already enabled, go to Security > AAA, right-click AAA and Enable Feature.
  2. Go to Security > AAA > Virtual Servers.
  3. On the right, click Add.
  4. Give the Virtual Server a name.
  5. If you are only using this AAA Virtual Server for NetScaler Gateway, then you can change the IP address Type to Non Addressable. It’s also possible to content switch to AAA.
  6. Enter an Authentication Domain and click OK.
  7. In the Certificates section, click where it says No Server Certificate.
  8. Click to select.
  9. Select a certificate for the AAA Virtual Server and click Select. Since this AAA Virtual Server is not directly addressable, the chosen certificate doesn’t matter.
  10. Click Bind.
  11. Click Continue.
  12. You probably don’t have any Advanced Authentication Policies yet so just click Continue.

AAA Portal Theme

If this AAA Virtual Server is used not just for NetScaler Gateway, but also for traffic management (Load Balancing, Content Switching), then you might want to change the AAA Portal theme.

  1. Go to NetScaler Gateway > Portal Themes and add a theme.
  2. After adjusting it as desired, at the top of the portal theme editing page, Click to Bind and View Configured Theme.
  3. Change the selection to Authentication.
  4. Use the Authentication Virtual Server Name drop-down to select the AAA Virtual Server and click Bind and Preview.

Client Certificate Authentication

If one of your authentication Factors is certificate, then you must perform some SSL configuration on the AAA Virtual Server:

  1. Go to Traffic Management > SSL > Certificates and install the root certificate for the issuer of the client certificates. Root certificates do not have a key file.
  2. Go to Security > AAA > Virtual Servers and edit an existing AAA Virtual Server.
  3. On the left, in the SSL Parameters section, click the pencil icon.
  4. Check the box next to Client Authentication.
  5. Make sure Client Certificate drop-down is set to Optional, and click OK.
  6. On the left, in the Certificates section, click where it says No CA Certificate.
  7. Click to select.
  8. Select the root certificate for the issuer of the client certificates and click Select.
  9. Click Bind.

Login Schema

Login Schema XML File

Login Schema is an XML file providing the structure of forms-based authentication logon pages.

nFactor implies multiple authentication Factors that are chained together. Each Factor can have different Login Schema pages/files. In some authentication scenarios, users could be presented with multiple logon screens.

Or you can have one Factor gather information that can be passed on to later Factors so that the later Factors don’t need to display another Login Schema. This is particularly useful for traditional two-password logon screens (LDAP + RADIUS) since each password is evaluated in a separate Factor:

  • The first password is evaluated in the first factor (e.g. LDAP). If successful, then proceed to the second factor.
  • The second factor (e.g. RADIUS) evaluates the second password. However, the second password has already been entered so there’s no need to ask the user for it again. To prevent a Login Schema from being shown to the user, select noschema (LSCHEMA_INT) in the Authentication Policy Label.

Several Login Schema .xml files are included with NetScaler under /nsconfig/loginschema/LoginSchema. You can easily duplicate and modify these files. You can also download login schemas from support.citrix.com.

After duplicating one of the existing .xml files, you can edit it as desired. You can change the labels. Or you can configure fields to pre-fill information from previous Factors as shown below:

The login schema can also contain a domain drop-down. See CTX201760 nFactor – Domain Drop-Down in First Factor then Different Policy Evaluations Based on Groups for a sample configuration.

Login Schema Profile

To configure a Login Schema Profile:

  1. Create or Edit a Login Schema .XML file based on your nFactor design.
  2. Go to Security > AAA > Login Schema.
  3. On the right, switch to the Profiles tab and click Add.
  4. In the Authentication Schema field, click the pencil icon.
  5. Click the LoginSchema folder to see the files in it.
  6. Select one of the files. You can see a preview on the right. The labels can be changed by editing the file under /nsconfig/loginschema/LoginSchema/.
  7. On the top right, click Select.
  8. Give the Login Schema a name.
  9. You typically need to use the entered credentials elsewhere. For example, you might need to use the username and one of the passwords to later Single Sign-on to StoreFront. Near the bottom of the Login Schema Profile, enter unique values for the indexes. These values can be between 1 and 16.
  10. You can also configure these values on your noschema profiles so that passwords received from a previous factor can be put into a different Index.
  11. Later you reference these index values in a Traffic Policy/Profile by using the expression HTTP.REQ.USER.ATTRIBUTE(#).
  12. Click Create.
  13. Note: if you later edit the Login Schema .xml file, the changes might not be reflected until you edit the Login Schema Profile and select the .xml file again

Login Schema Policy

Login Schemas can be bound directly to a AAA Virtual Server. If one of the Advanced Authentication policies bound directly to the AAA Virtual Server is forms-based, then bind the Login Schema directly to the AAA Virtual Server. If you are binding the Login Schema directly to a AAA Virtual Server, then you must first create a Login Schema Policy expression that is linked to the Login Schema Profile.

Or Login Schemas can be bound to an Authentication Policy Label (described later). If you are binding a Login Schema to an Authentication Policy Label, then there’s no need to create a Login Schema policy expression.

To create and bind a Login Schema Policy:

  1. On the left, go to Security > AAA > Login Schema.
  2. On the right, switch to the Policies tab and click Add.
  3. Use the Profile drop-down to select the Login Schema Profile you already created.
  4. Enter a Default Syntax expression in the Rule box and click Create.
  5. On the left, go to Security > AAA > Virtual Servers and edit an existing AAA Virtual Server.
  6. On the right, in the Advanced Settings column, click Login Schemas.
  7. On the left, in the Login Schemas section, click where it says No Login Schemas.
  8. Click to select.
  9. Select the Login Schema policy and click Select. Only Login Schema Policies appear in this list. Login Schema Profiles (without a policy) do not appear.
  10. Click Bind.

Advanced Authentication Policies

Authentication policies are a combination of policy expression and policy action. If the expression is true, then evaluate the action.

The Action is always an authentication server (LDAP, RADIUS, etc.).

The policy expression can be either in classic syntax, or in the newer default syntax.

The policy type is either Basic or Advanced. Basic policies can only use classic syntax. Advanced policies only use the newer default syntax. Both types of policies use the same Actions (authentication servers).

nFactor requires Advanced Authentication Policies; Basic policies won’t work.

Create Advanced Authentication Policy

You will need Authentication Actions/Servers (e.g. LDAP, RADIUS, CERT, SAML, etc.)

When creating an Advanced Authentication Policy, there’s a plus icon that lets you create Authentication Actions/Servers.

Or you can create Authentication Actions prior to creating the Advanced Authentication Policy. The Authentication Actions are located under the Security > AAA > Policies > Basic Policies > <Action Type> node. On the right, switch to the Servers tab to create the Actions/Servers. Once the Actions are created, use the instructions below to create the Advanced Authentication Policy. There’s no need to create a Basic Authentication Policy.

To create an Advanced Authentication Policy:

  1. Go to Security > AAA > Authentication > Advanced Policies > Policy.
  2. On the right, click Add. You typically create at least one Authentication Policy for each Factor. When you create multiple Authentication Policies for one Factor, NetScaler checks each policy in priority order until one of them succeeds.
  3. Use the Action Type drop-down to select the Action Type (e.g. LDAP). The Action Type depends on your nFactor flow design.
  4. If you don’t currently have any Actions configured, of if you want to create a new one, click the plus icon next to the Action drop-down. The Actions/Servers are created in the normal fashion.
  5. In the Expression box, enter an expression using the Default Syntax. ns_true won’t work because that’s Classic syntax. There’s an Expression Editor link on the right. Or hit Ctrl+Space to see your options. true is a valid Default expression. Click Create when done.
  6. Create more Advanced Authentication Policies as needed for your nFactor design.

Bind Advanced Authentication Policy to AAA

Only the Advanced Authentication Policies for the first Factor are bound directly to the AAA Virtual Server. The Advanced Authentication Policies for the remaining Factors are bound to Authentication Policy Labels as detailed in the next section.

  1. Go to Security > AAA > Virtual Servers.
  2. Edit an existing AAA Virtual Server.
  3. On the left, in the Advanced Authentication Policies section, click where it says No Authentication Policy.
  4. Click to select.
  5. Select the Advanced Authentication Policy and click Select.
  6. The Select Next Factor field can optionally point to an Authentication Policy Label as detailed in the next section. The Next Factor is only evaluated if this Advanced Authentication Policy succeeds.
  7. If this Advanced Authentication Policy fails, then the Goto Expression determines what happens next. If it is set to NEXT, then the next Advanced Authentication Policy bound to this Factor is evaluated. If it is set to END, of if there are no more Advanced Authentication Policies bound to this Factor, then authentication is finished and marked as failed.
  8. Click Bind.

LDAP Group Extraction

Sometimes you only want to extract a user’s groups from Active Directory but have don’t actually want to authenticate with LDAP. These groups can then be used to select the next authentication Factor.

To configure an LDAP Action/Server for only group extraction:

  1. Make sure Authentication is unchecked.
  2. Make sure the Group Attribute and Sub Attribute Name are filled in.

Authentication Policy Label

When configuring the first Factor, you bind two objects to the AAA Virtual Server:

  • Login schema – for forms-based authentication
  • Advanced Authentication Policy

When binding the Advanced Authentication Policy to the AAA Virtual Server, there’s a field to Select Next Factor. If the Advanced Authentication Policy succeeds, then the Next Factor is evaluated.

The Next Factor is actually an Authentication Policy Label.

Authentication Policy Labels contain three objects:

  • Login Schema
  • Advanced Authentication Policies
  • Next Factor – the next Authentication Policy Label

Here’s the flow:

  1. User connects to AAA or NetScaler Gateway Virtual Server.
  2. If forms-based authentication, the Login Schema bound to the AAA Virtual Server is displayed.
  3. Advanced Authentication Policies bound to the AAA Virtual Server are evaluated.
    1. If the Advanced Authentication Policy is successful, go to the configured Next Factor, which is an Authentication Policy Label.
      1. If Next Factor is not configured, then authentication is complete and successful.
    2. If the Advanced Authentication Policy fails, and if Goto Expression is Next, then evaluate the next bound Advanced Authentication Policy.
    3. If none of the Advanced Authentication Policies are successful, then authentication failed.
  4. If the Next Factor Authentication Policy Label has a Login Schema bound to it, display it to the user.
  5. Evaluate the Advanced Authentication Policies bound to the Next Factor Authentication Policy Label.
    1. If the Advanced Authentication Policy is successful, go to the configured Next Factor, which is an Authentication Policy Label.
      1. If Next Factor is not configured, then authentication is complete and successful.
    2. If the Advanced Authentication Policy fails, and if Goto Expression is Next, then evaluate the next bound Advanced Authentication Policy.
    3. If none of the Advanced Authentication Policies are successful, then authentication failed.
  6. Continue evaluating the Next Factor Authentication Policy Label until authentication succeeds or fails. You can chain together an unlimited number of Authentication Policy Labels.

If you are binding a Login Schema to an Authentication Policy Label, then you only need the Login Schema Profile. There’s no need to create a Login Schema Policy.

Not every Factor needs a Login Schema (logon page). It’s possible for a prior Factor to gather all of the credential information and simply pass it on to the next Factor. If you don’t need a Login Schema for a particular Authentication Policy Label, simply select LSCHEMA_INT, which is mapped to noschema. Or create a new Login Schema Profile based on noschema.

Create Authentication Policy Label

To create an Authentication Policy Label:

  1. Authentication Policy Labels are configured at Security > AAA > Policies > Authentication > Advanced Policies > PolicyLabel.
  2. On the right, click Add.
  3. Give the Policy Label a name.
  4. Select a Login Schema Profile. This can be one that is set to noschema if you don’t actually want to display anything to the user. Then click Continue.
  5. In the Policy Binding section, Click to select.
  6. Select an Advanced Authentication Policy that evaluates this Factor. Click Select.
  7. Use the Goto Expression drop-down to select NEXT or END. If you want to bind more Advanced Authentication Policies to this Factor, then select NEXT.
  8. In the Select Next Factor field, if you chain another Factor, Click to select and bind the next Authentication Policy Label (Next Factor).
  9. Or don’t select anything, and if this Advanced Authentication Policy succeeds, then authentication is successful and complete. This ends the chaining.
  10. Click Bind when done.
  11. You can click Add Binding to add more Advanced Authentication Policies to this Policy Label (Factor). Or you can bind Advanced Authentication Policies to the next Policy Label (Next Factor). Click Done.

Bind Authentication Policy Label

Once the Policy Label (Factor) is created, you bind it to an existing Advanced Authentication Policy binding. This is how you chain Factors together.

  1. Either edit an existing AAA Virtual Server that has an Advanced Authentication Policy already bound to it.
  2. Or edit a different Authentication Policy Label.
  3. On the left, in the Advanced Authentication Policies section, click the bindings.
  4. Right-click an existing binding and click Edit Binding.
  5. In the Select Next Factor field, Click to select.
  6. Select the Policy Label for the Next Factor and click Select.
  7. Click Bind.
  8. Click Done.

nFactor for NetScaler Gateway

AAA Authentication Profile

Authentication Profile lets you bind a AAA Virtual Server to NetScaler Gateway. This is what enables nFactor on NetScaler Gateway.

  1. Go to Security > AAA > Authentication Profile.
  2. On the right, click Add.
  3. Give the Authentication Profile a name.
  4. In the Authentication Host field, it wants a URL to redirect users to your AAA Virtual Server. If you do this configuration from the CLI then this field is optional. But in the GUI it is required. NetScaler Gateway does not need to redirect so it doesn’t matter what you enter here.
  5. In the Authentication Virtual Server field, Click to select.
  6. Select the AAA Virtual Server that has Login Schema, Advanced Authentication Policy, and Authentication Policy Labels configured. The AAA Virtual Server does not need an IP address. Click Select.
  7. Then click Create.
  8. Go to NetScaler Gateway > Virtual Servers.
  9. On the right, edit an existing Gateway Virtual Server.
  10. In the Basic Settings section, click the pencil icon.
  11. Click More.
  12. Use the Authentication Profile drop-down to select the Authentication Profile you just created.
  13. If one of your Factors is client certificates, then you’ll need to configure SSL Parameters and CA certificate as detailed in the next section.
  14. When you browse to your Gateway, you’ll see the nFactor authentication screens.

Gateway Client Certificate Authentication

If one of your authentication Factors is certificate, then you must perform some SSL configuration on the NetScaler Gateway Virtual Server:

  1. Go to Traffic Management > SSL > Certificates and install the root certificate for the issuer of the client certificates. Certificate Authority certificates do not need key files.
  2. Go to NetScaler Gateway > Virtual Servers, and edit an existing NetScaler Gateway Virtual Server that is enabled for nFactor.
  3. On the left, in the SSL Parameters section, click the pencil icon.
  4. Check the box next to Client Authentication.
  5. Make sure Client Certificate drop-down is set to Optional, and click OK.
  6. On the left, in the Certificates section, click where it says No CA Certificate.
  7. Click to select.
  8. Select the root certificate for the issuer of the client certificates and click Select.
  9. Click Bind.

nFactor Single Sign-on to StoreFront

When performing Single Sign-on to StoreFront, nFactor defaults to using the last entered password. If LDAP is not the last entered password, then you need to create a Traffic Policy/Profile to override the default nFactor behavior.

  1. Go to NetScaler Gateway > Policies > Traffic.
  2. On the right, switch to the Traffic Profiles tab.
  3. Click Add.
  4. Give the Traffic Profile a name.
  5. In the Protocol section, select HTTP. Scroll down.
  6. In the SSO Expression fields, enter an HTTP.REQ.USER.ATTRIBUTE(#) expression that matches the indexes specified in the Login Schema.
  7. Click Create.
  8. On the right, switch to the Traffic Policies tab and click Add.
  9. Give the policy a name.
  10. Select the previously created Traffic Profile.
  11. Enter a classic expression (e.g. ns_true) and click Create.
  12. Edit an existing NetScaler Gateway Virtual Server.

  13. Scroll down to the Policies section and click the plus icon.
  14. Select Traffic > Request and click Continue.
  15. Select the previously created Traffic Policy.

  16. Bind the Traffic Policy.

Sample Configurations

From Citrix Docs: Sample deployments using nFactor authentication:

  • Getting two passwords up-front, pass-through in next factor. Read
  • Group extraction followed by certificate or LDAP authentication, based on group membership. Read
  • SAML followed by LDAP or certificate authentication, based on attributes extracted during SAML.Read
  • SAML in first factor, followed by group extraction, and then LDAP or certificate authentication, based on groups extracted. Read
  • Prefilling user name from certificate. Read
  • Certificate authentication followed by group extraction for 401 enabled traffic management virtual servers. Read
  • Username and 2 passwords with group extraction in third factor.Read
  • Certificate fallback to LDAP in same cascade; one virtual server for both certificate and LDAP authentication. Read
  • LDAP in first factor and WebAuth in second factor.Read
  • Domain drop down in first factor, then different policy evaluations based on group.Read

Certificate auth: If Successful, LDAP only. If Failure, LDAP+RADIUS

This scenario is described in Citrix Blog Post Configuration Notes on nFactor

The authentication process flows like this:

  1. User connects to NetScaler Gateway.
  2. NetScaler Gateway asks user for certificate.
  3. If user selects a certificate, NetScaler Gateway compares certificate signature to the CA certificate that is bound to the NetScaler Gateway. If it doesn’t match, then user certificate is ignored.
  4. Bound to the NetScaler Gateway Virtual Server is an Authentication Profile, which links NetScaler Gateway to AAA nFactor.
  5. Certificate authentication: The lowest priority number authentication policy on the AAA Virtual Server is Certificate. If there’s a valid user certificate:
    1. Extract the user’s userPrincipalName from the certificate.
    2. Next Factor = policy label that displays a logon screen (Single-factor Login Schema)
    3. The username field is pre-populated with the userPrincipalName attribute extracted from the certificate.
    4. User is prompted to enter the LDAP password only.
    5. LDAP policy/server is configured to use userPrincipalName to login to LDAP.
    6. If successful, NetScaler Gateway authentication is complete. Next step is to Single Sign-on to StoreFront.
    7. If LDAP authentication fails, then NetScaler Gateway authentication fails, and the user is prompted to try LDAP-only authentication again.
  6. LDAP authentication: If certificate authentication fails, try next authentication policy bound to the AAA Virtual Server, which is a different LDAP Policy.
    1. Bound to the AAA Virtual Server is a Dual Factor Login Schema that asks for username, LDAP password, and RADIUS password.
    2. LDAP policy/server is configured to use sAMAccountName to login to LDAP. SAMAccountName means users don’t have to enter full userPrincipalName.
    3. If LDAP authentication is successful:
      1. Put username in Credential Index 1 and put password in Credential Index 2. These will later be used by a Traffic Policy to Single Sign-on to StoreFront.
      2. Proceed to next factor (Policy Label), which is RADIUS.
    4. If LDAP authentication fails, NetScaler Gateway login fails, and the user is prompted to try two-factor authentication again.
  7. RADIUS authentication: the second factor Policy Label is configured with Noschema. This means no additional logon form is displayed because the RADIUS password was already collected in the previous factor.
    1. When multiple passwords are collected, they are tried in order. The first password was used by the previous factor. The second password is tried by this factor (Policy Label).
    2. RADIUS policy/profile attempts authentication.
    3. If RADIUS authentication is successful, NetScaler Gateway authentication is complete. Next step is Single Sign-on to StoreFront.
    4. If RADIUS authentication fails, NetScaler Gateway login fails, and the user is prompted to try two-factor authentication again.
  8. Single Sign-on to StoreFront: NetScaler Gateway uses the last password collected by nFactor to Single Sign-on with StoreFront. If the last password is LDAP, then no additional configuration is needed. If the last password is not LDAP, then a Traffic Policy/Profile is needed.
    1. Bound to the NetScaler Gateway Virtual Server is a Traffic Policy.
    2. The Traffic Policy/Profile users Credential Index 1 for username and Credential Index 2 for Password. These are the same indexes configured in the Dual Factor Login Schema.

The order of configuration doesn’t match the authentication flow because some objects have to be created before others.

# Create Auth vServer, bind server cert, bind CA cert for client certificates
# Enable Optional client certificates
add authentication vserver nFactorAAA SSL 0.0.0.0 443 -AuthenticationDomain corp.com
bind ssl vserver nFactorAAA -certkeyName WildCorpCom
bind ssl vserver nFactorAAA -certkeyName CorpRoot -CA -ocspCheck Optional
set ssl vserver nFactorAAA -clientAuth ENABLED -clientCert Optional -ssl3 DISABLED

# Create auth policy for LDAP-UPN
add authentication ldapAction Corp-UserPrincipalName -serverIP 10.2.2.220 -serverPort 636 -ldapBase "dc=corp,dc=local" -ldapBindDn "corp\\ctxsvc" -ldapBindDnPassword "MyPassword" -ldapLoginName userPrincipalName -groupAttrName memberOf -subAttributeName CN -secType SSL -passwdChange ENABLED
add authentication Policy Corp-UserPrincipalName -rule true -action Corp-UserPrincipalName

# Create PolicyLabel LDAPPasswordOnly with Single-factor Login Schema
add authentication loginSchema SingleAuth -authenticationSchema "/nsconfig/loginschema/LoginSchema/SingleAuth-Corp.xml"
add authentication policylabel LDAPPasswordOnly -loginSchema SingleAuth
bind authentication policylabel LDAPPasswordOnly -policyName Corp-UserPrincipalName -priority 100 -gotoPriorityExpression NEXT

# Create Cert policy and bind to AAA vServer with LDAPPasswordOnly PolicyLabel as Next Factor
# Cert policy must have lower priority number than LDAP-SAM policy
add authentication certAction Cert_Auth_Profile -userNameField SubjectAltName:PrincipalName
add authentication Policy Cert_Auth_Policy -rule true -action Cert_Auth_Profile
bind authentication vserver nFactorAAA -policy Cert_Auth_Policy -priority 100 -nextFactor LDAPPasswordOnly -gotoPriorityExpression NEXT

# Create LDAP-SAM Auth Policy
add authentication ldapAction Corp-Gateway -serverIP 10.2.2.220 -serverPort 636 -ldapBase "dc=corp,dc=local" -ldapBindDn "corp\\ctxsvc" -ldapBindDnPassword "MyPassword" -ldapLoginName samaccountname -groupAttrName memberOf -subAttributeName CN -secType SSL -passwdChange ENABLED
add authentication Policy Corp-SAMAccountName -rule true -action Corp-Gateway

# Create RADIUS Auth Policy
add authentication radiusAction RADIUS-Action -serverIP 10.2.2.42 -serverPort 1812 -radKey MyKey
add authentication Policy RADIUS-Policy -rule true -action RADIUS-Action

# Create Dual-factor Login Schema and bind directly to AAA vServer
# This Login Schema is only shown if Cert auth fails
add authentication loginSchema DualAuth -authenticationSchema "/nsconfig/loginschema/LoginSchema/DualAuth.xml" -userCredentialIndex 1 -passwordCredentialIndex 2
add authentication loginSchemaPolicy DualAuth -rule true -action DualAuth
bind authentication vserver nFactorAAA -policy DualAuth -priority 100 -gotoPriorityExpression END

# Create RADIUS Policy Label with noschema and RADIUS Auth Policy
add authentication loginSchema Noschema -authenticationSchema noschema
add authentication policylabel NoSchema-RADIUS -loginSchema Noschema
bind authentication policylabel NoSchema-RADIUS -policyName RADIUS-Policy -priority 100 -gotoPriorityExpression NEXT

# Bind LDAP-SAM Auth Policy to AAA vServer with RADIUS as next factor
# LDAP-SAM Auth Policy must have higher priority number than Cert Policy
bind authentication vserver nFactorAAA -policy Corp-SAMAccountName -priority 110 -nextFactor NoSchema-RADIUS -gotoPriorityExpression NEXT

# Create Authentication Profile to link AAA with Gateway. Bind to Gateway.
add authentication authnProfile nFactor -authnVsName nFactorAAA -AuthenticationHost aaa.corp.com
add vpn vserver gateway.corp.com SSL 10.2.2.220 443 -icaOnly ON -dtls ON -Listenpolicy NONE -tcpProfileName nstcp_default_XA_XD_profile -appflowLog ENABLED -authnProfile nFactor

# Enable Optional Client certs on Gateway
set ssl vserver gateway.corp.com -clientAuth ENABLED -clientCert Optional -ssl3 DISABLED
bind ssl vserver gateway.corp.com -certkeyName CorpRoot -CA -ocspCheck Optional

# Create Traffic Policy to SSON to StoreFront. Bind to Gateway.
add vpn trafficAction nFactorSSO http -kcdAccount NONE -userExpression "http.req.user.attribute(1)" -passwdExpression "http.req.user.attribute(2)"
add vpn trafficPolicy nFactorSSO ns_true nFactorSSO
bind vpn vserver gateway.corp.com -policy nFactorSSO -priority 100

EUC Weekly Digest – June 18, 2016

Last Modified: Sep 2, 2018 @ 7:51 am

Here are some EUC items I found interesting last week:

NetScaler

StoreFront

XenApp/XenDesktop

Profile Management

Receiver

ShareFile

XenMobile

XenServer

VMware

Microsoft