Navigation
Use this post to build a virtual desktop that will be used as the parent image (aka source image, aka master image, aka gold image) for additional virtual desktops. There’s a separate article for RDS Session Host.
This post applies to all Horizon versions 2006 (aka 8.0) and newer.
- Change Log
- Virtual Hardware
- Windows
- Install Applications
- Antivirus
- Horizon Agent
- Microsoft FSLogix
- Windows OS Optimization Tool
- Snapshot
💡 = Recently Updated
Change Log
- 2025 April 17 – Horizon Agent – updated for Horizon 2503 (8.15), DEM 2503, and OS Optimization Tool 2503.
- 2023 July 7 – added link to VMware 93158 Information about changes in logon timing data format in Horizon form Horizon 8 2111 and Later.
- 2022 Nov 29 – added link to Tristan Tyson On-boarding VMware Horizon View Instant-Clone VDI Pools into Microsoft Defender Advanced Threat Protection.
Virtual Hardware
Omnissa Tech Zone Manually Creating Optimized Windows Images for Horizon VMs
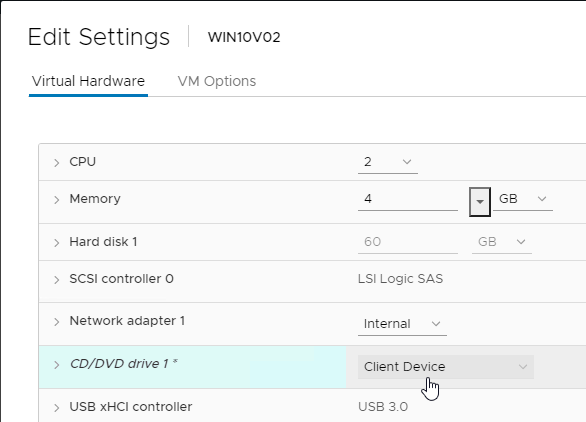
- The virtual desktop pools will use the same hardware specs (e.g., vCPUs, memory size, network label) specified on the master virtual desktop. Adjust accordingly.
- When using Microsoft Teams with Real-Time Audio-Video (RTAV), Omnissa recommends that the virtual desktop have a minimum of 4vCPU and 4 GB RAM. See System Requirements for Real-Time Audio-Video at Omnissa Docs.
- For New Hard disk, consider setting Thin provision.
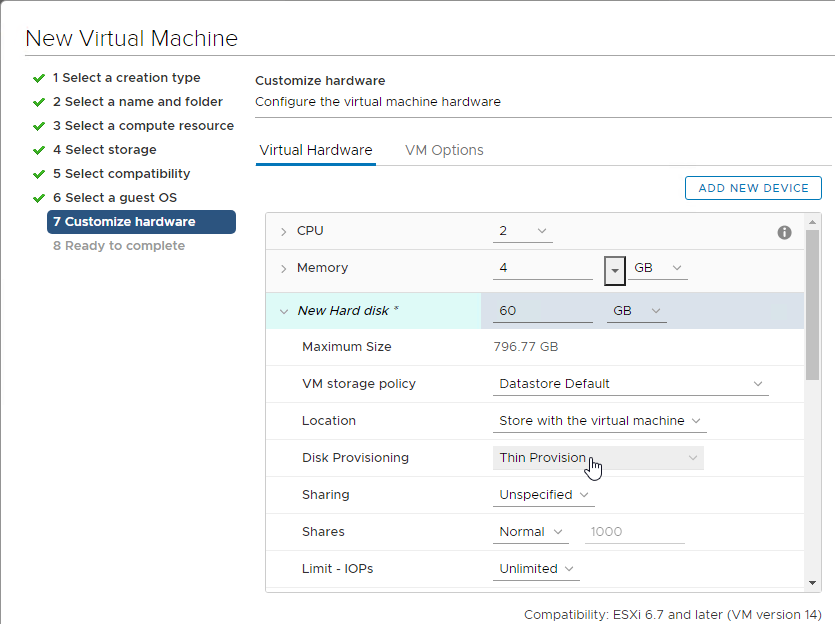
- Make sure the virtual desktop is using a SCSI controller.
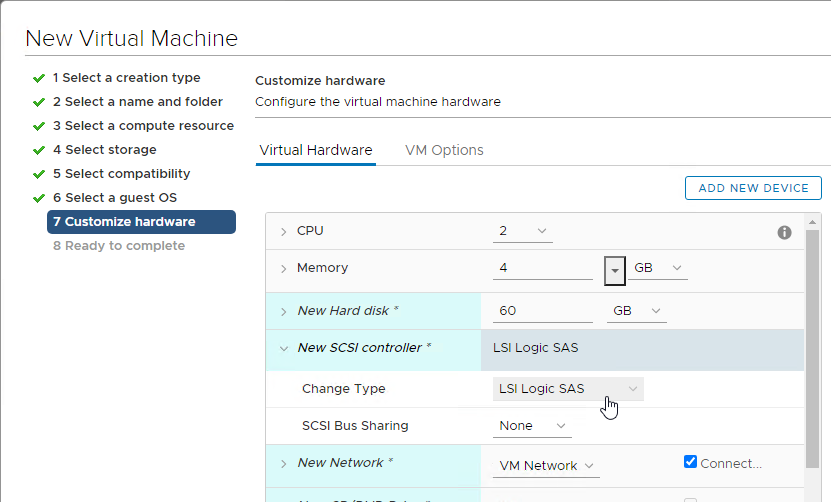
- The master virtual desktop should be configured with a VMXNET 3 network adapter.
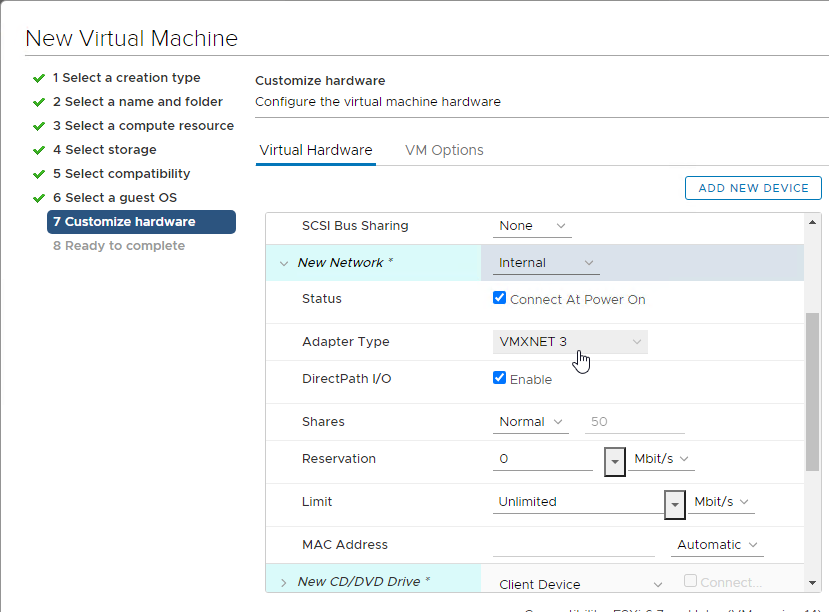
- When building the master virtual desktop, you will probably boot from an ISO.
- Before using Horizon Console to create a pool based off of this master image, ensure the CD/DVD drive points to Client Device and is not Connected. The important part is to make sure that ISO file is not configured.
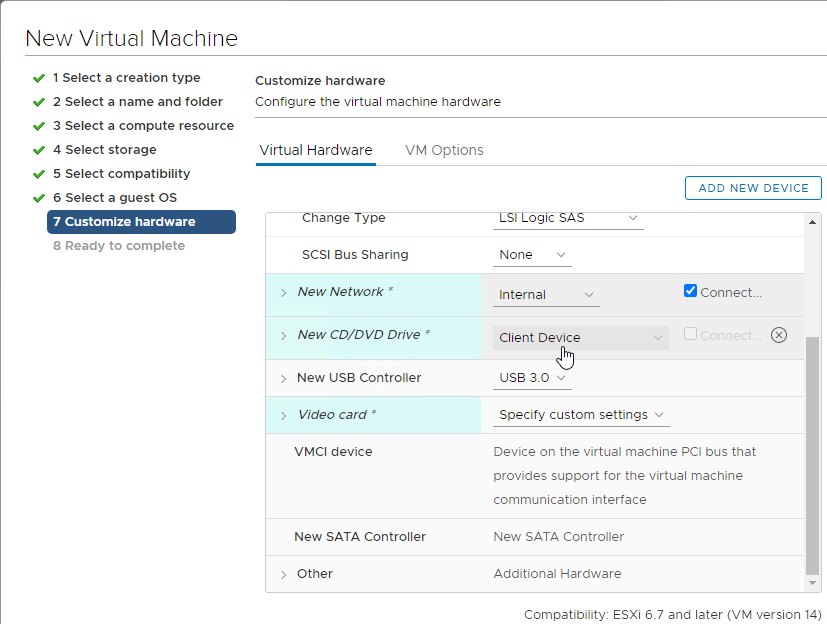
- There’s no need for the Floppy drive so remove it.
- If you have any Serial ports, remove them.
Windows
Omnissa TechZone Manually Creating Optimized Windows Images for Horizon VMs
Preparation
- Windows 11 Versions – Windows 11 is supported with Horizon 2111 (8.4) and newer.
- Windows 11 22H2 is supported with Horizon Agent 2209 (8.7) and DEM Agent 2209 (10.7) and newer.
- Omnissa says don’t add vTPM to the gold image. Instead add the vTPM when creating the Instant Clone pool or Full Clone pool. There are various methods of installing Windows 11 without a vTPM. See Omnissa KB article 85960 Omnissa Horizon and Horizon Cloud readiness for Microsoft Windows 11.
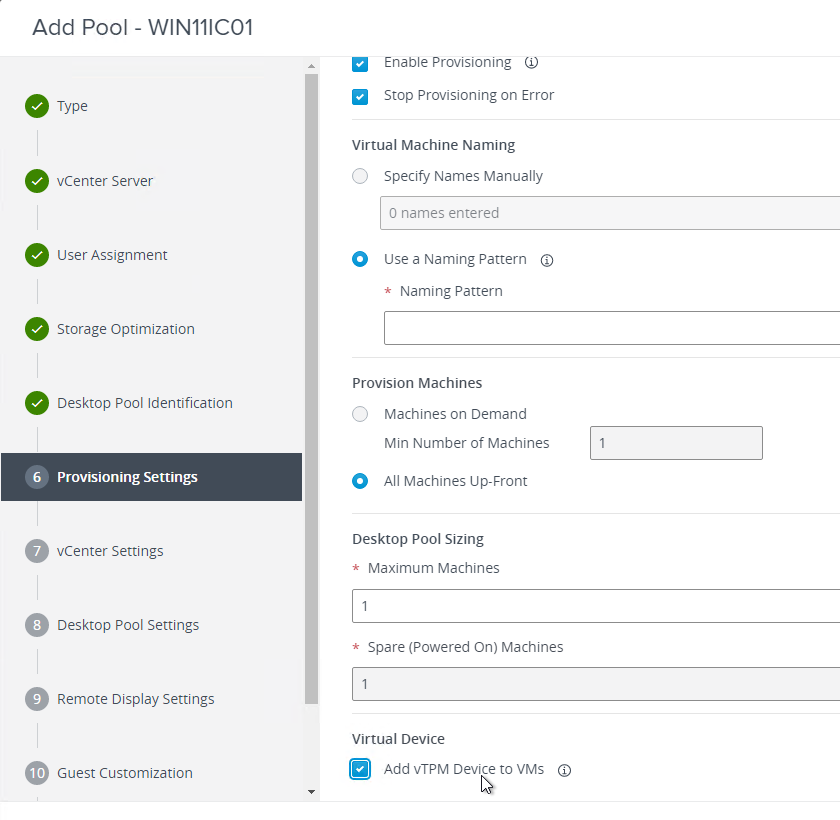
- vTPM requires a Key Provider. vSphere 7 and newer have a Native Key Provider that does not need any additional servers or licenses.
- In vSphere Client, in Inventory, click the vCenter object. On the right, on the Configure tab, scroll down to Key Providers and add a Native Key Provider.

- After it’s added, select it and then click Back-up to activate it.


- In vSphere Client, in Inventory, click the vCenter object. On the right, on the Configure tab, scroll down to Key Providers and add a Native Key Provider.
- Windows 10 Versions
- Omnissa 51663 Windows 10 Guest OS support FAQ for Horizon 7.13.
- Microsoft 365 Apps is not supported on LTSC. See Changes to Office and Windows servicing and support.
- Visual Studio 2017 and newer are not supported on LTSC. See Visual Studio 2019 Product Family System Requirements.
- VMware Tools. Install the latest version of VMware Tools and Guest Introspection (formerly known as vShield Endpoint) Driver prior to installing the Horizon Agent.
- See Omnissa Product Interoperability Matrices for supported versions of VMware Tools with different versions of Horizon Agent.
- For the AppVolumes Agent and Imprivata OneSign agent (if applicable), don’t install them until Horizon Agent is installed.
Power Options
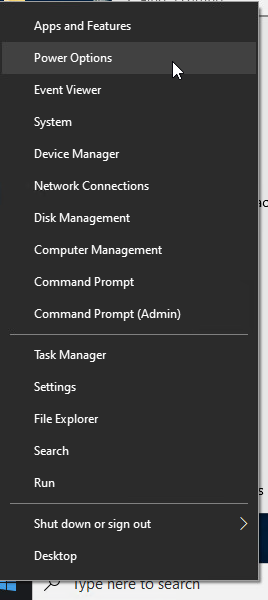
- Run Power Options. Right-click the Start Menu to access Power Options.
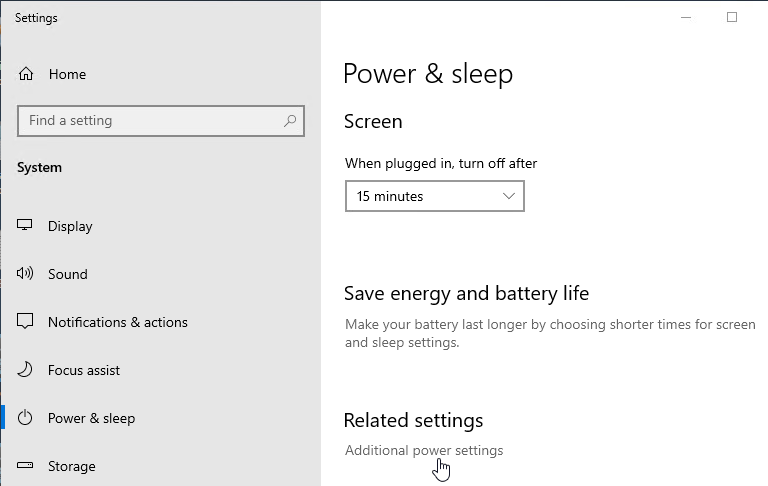
- Click Additional power settings.
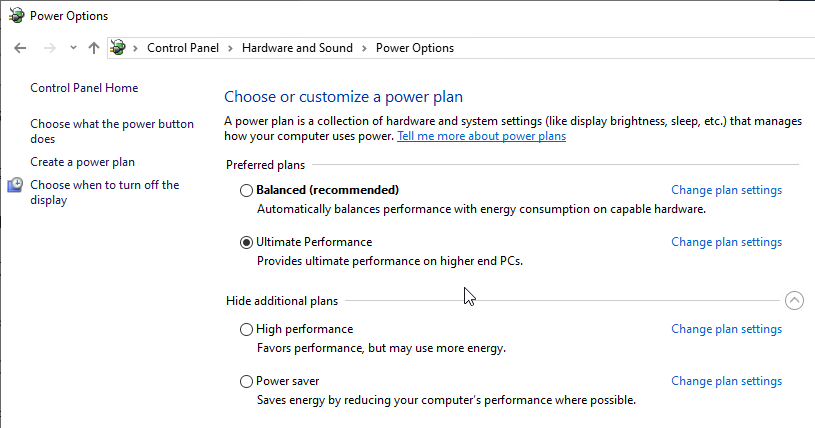
- Select Ultimate Performance, or click the arrow to show more plans, and select High performance.
- Next to the power plan, click Change plan settings.
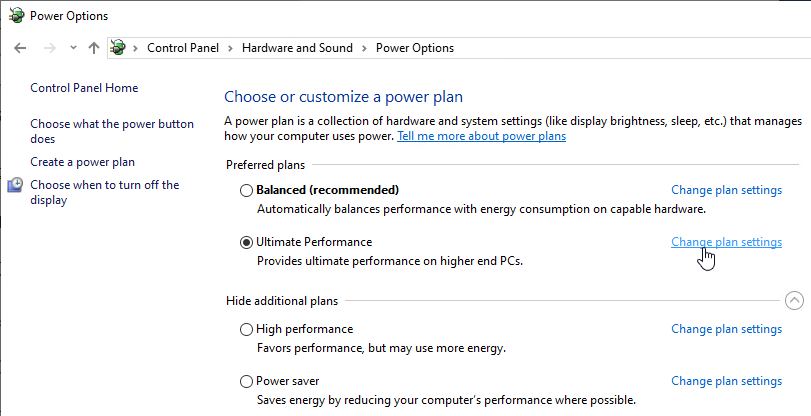
- Change the selection for Turn off the display to Never and click Save changes.
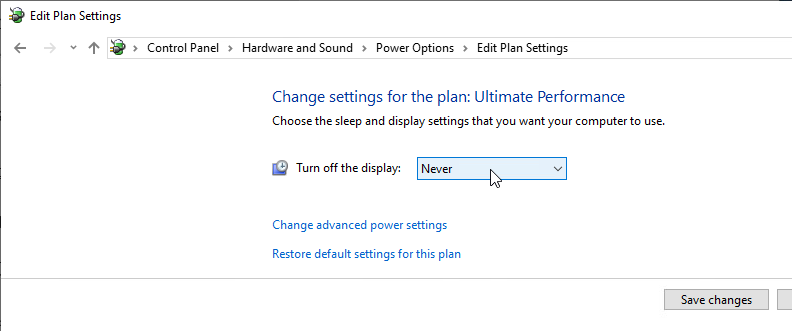
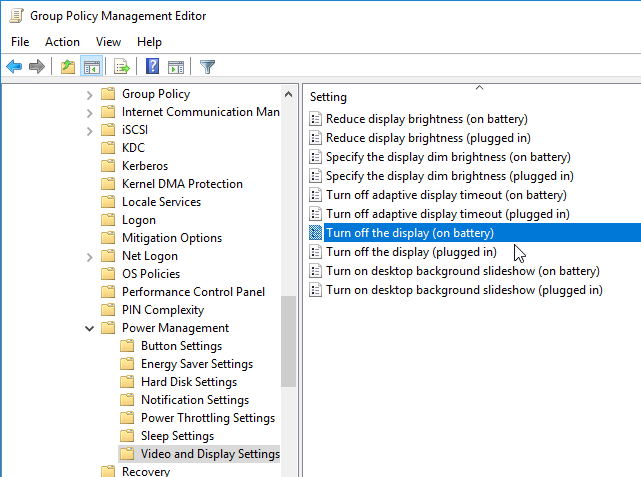
- You can also configure these settings using group policy.
System Settings
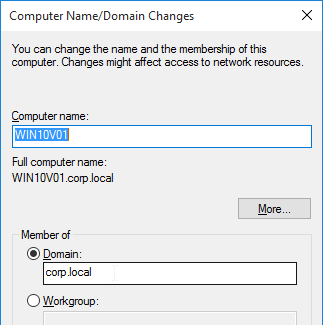
- Domain Join. Use sysdm.cpl to join the machine to the domain. Also see Omnissa 2150495 Computer-based Global Policy Objects (GPOs) that require reboot are not applied on instant clones.
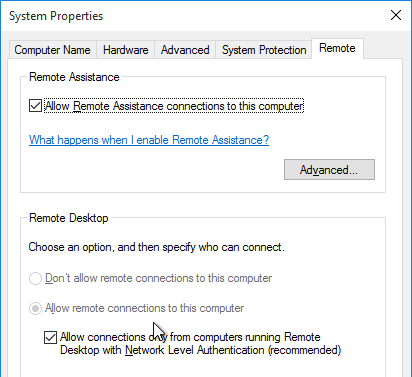
- In System control panel applet (sysdm.cpl), on the Remote tab, enable Remote Desktop.
- Activate Windows with a KMS license if not already activated. Note: only KMS is supported with Instant Clones.
Install Applications
Install applications locally if you want them to be available on all virtual desktops created based on this master virtual desktop.
- Choose installers that install to C:\Program Files instead of to %appdata%. Search for VDI or Enterprise versions of the following applications. These VDI versions do not auto-update so you’ll have to update them manually.
- Google Chrome – Chrome Enterprise
- Microsoft Edge – Edge for Business
- Microsoft Teams – Teams for VDI
- Microsoft OneDrive – Install the sync app per machine
- Zoom – Zoom VDI
- WebEx – WebEx VDI
- Cisco Jabber – Jabber VDI
- Etc.
Or you can use a Layering product (e.g. Omnissa App Volumes, Microsoft MSI-X App Attach, Liquidware FlexApp) or App Streaming (e.g. ThinApp, Microsoft App-V). Note: logins are fastest if apps are installed in the master image. All app layering/streaming technologies introduce a logon delay. You can use Microsoft FSLogix App Masking to hide applications and Start Menu shortcuts that users should not see.
Antivirus
Omnissa Tech Zone Antivirus Considerations in a Horizon Environment contains exclusions for Horizon, App Volumes, Dynamic Environment Manager, ThinApp, etc.
Microsoft’s virus scanning recommendations (e.g., exclude group policy files) – http://support.microsoft.com/kb/822158.
Carbon Black
Interoperability of VMware Carbon Black and Horizon (79180)
Windows Defender Antivirus
Configuring Microsoft Defender Antivirus for non-persistent VDI machines – Microsoft Blog
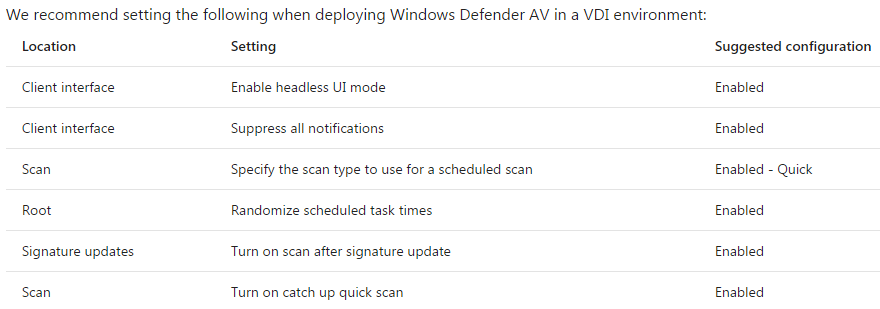
Deployment guide for Windows Defender Antivirus in a virtual desktop infrastructure (VDI) environment – Microsoft Docs
Onboarding and servicing non-persistent VDI machines with Microsoft Defender ATP

For Instant Clones, Defender ATP on-boarding script should run as ClonePrep post-sync script. See Tristan Tyson On-boarding VMware Horizon View Instant-Clone VDI Pools into Microsoft Defender Advanced Threat Protection.
Horizon Agent
Horizon Agent Installation/Upgrade
Install Horizon Agent on the master virtual desktop. Upgrades are performed in-place.
- Latency – In Horizon 2111 (8.4) and newer, maximum latency between the Horizon Agent machine and Connection Server is 120ms. Older versions of Horizon have lower maximum latencies.
- Group Policy – Don’t upgrade Horizon Agent to version 2412 or later until the Horizon group policy settings are reconfigured under the Omnissa nodes instead of under the VMware nodes.
- VMware Tools – Only install Horizon Agent after you install VMware Tools.
- The latest versions of VMware Tools resolve security vulnerabilities.
- If you need to update VMware Tools, uninstall Horizon Agent, upgrade VMware Tools, and then reinstall Horizon Agent.
- See Omnissa Product Interoperability Matrices for supported versions of VMware Tools with different versions of Horizon Agent.
- Horizon 2503 (8.15) is an Extended Service Branch, which is supported for three years from its January 2024 release date.
- Download Horizon Agent 2503 (8.15).

- Run the downloaded Omnissa-Horizon-Agent-x86_64-2503-8.15.0.exe.

- If you want the URL Content Redirection feature, then you must run the Agent installer with the following switches:
/v URL_FILTERING_ENABLED=1 - If you want the UNC Path Redirection feature in 8.7 and newer, then you must run the Agent installer with the following switches:
/v ENABLE_UNC_REDIRECTION=1. You can combine the two switches.

- In the Welcome to the Installation Wizard for Omnissa Horizon Agent page, click Next.

- In the Network protocol configuration page, select IPv4, and click Next.

- In the Custom Setup page, there are several features not enabled by default. Horizon Smart Policies in Dynamic Environment Manager (DEM) can control some of these features but only if the features are installed.
- If you want USB Redirection, then enable that feature.

- Horizon Agent 2006 (8.0) and newer does not include Persona.
- If you want Scanner Redirection, then enable that feature. Note: Scanner Redirection will impact host density.

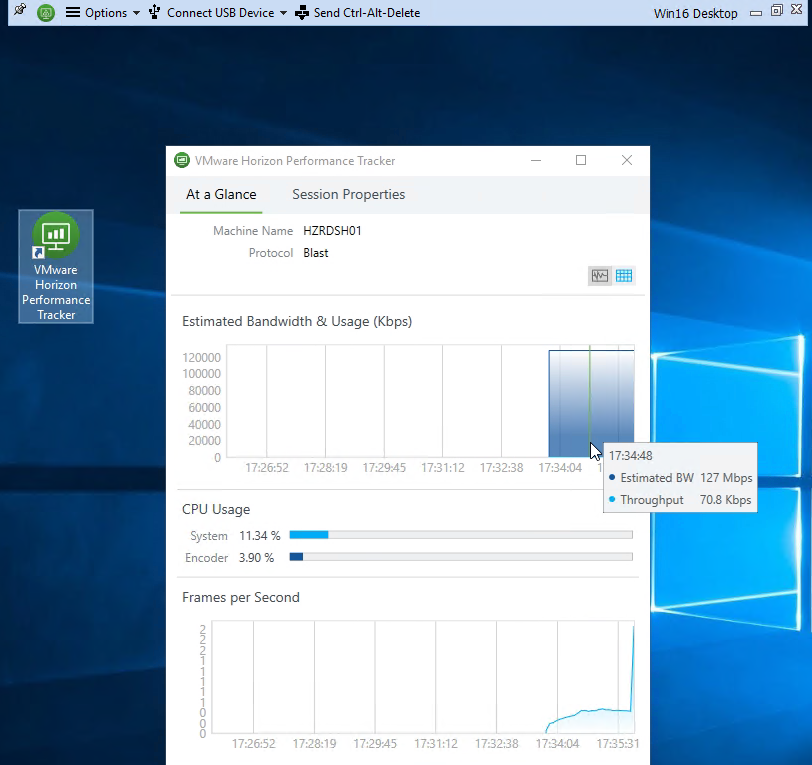
- Horizon Performance Tracker adds a program to the Agent that can show the user performance of the remote session. You can publish the Tracker.

- In Horizon 2206 and newer, Storage Drive Redirection provides faster performance than Client Drive Redirection.

- If you want USB Redirection, then enable that feature.
- Click Next when done making selections.
- If you see the Remote Desktop Protocol Configuration screen, then select Enable and click Next.

- In the Ready to Install the Program page, Horizon Agent 2306 and newer have an option to Automatically restart system on successful completion. Click Install.

- In the Installer Completed page, click Finish.

- Click Yes when asked to restart.

- If you want to know what features were selected during installation, look in HKLM\Software\Omnissa\Horizon\Installer\Features_HorizonAgent (or HKLM\Software\VMware, Inc.\Installer\Features_HorizonAgent). Or look in the installation log files as detailed at Paul Grevink View Agent, what is installed?

- To add features to an existing Horizon Agent installation, use the command line as detailed by Terence Luk at Add features to an existing VMware Horizon View 7.x Agent install.

- To add features to an existing Horizon Agent installation, use the command line as detailed by Terence Luk at Add features to an existing VMware Horizon View 7.x Agent install.
- To verify installation of the URL Content Redirection feature, check for the presence of C:\Program Files\Omnissa\Horizon\Agent\bin\UrlRedirection (or C:\Program Files\VMware\VMware View\Agent\bin\UrlRedirection).

- URL Content Redirection is configured using group policy.
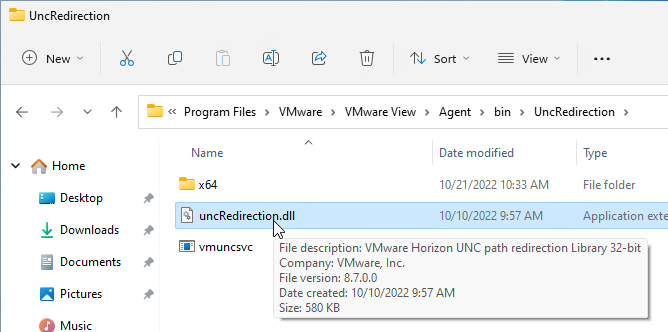
- To verify installation of the UNC Content Redirection feature, check for the presence of C:\Program Files\Omnissa\Horizon\Agent\bin\UncRedirection (or C:\Program Files\VMware\VMware View\Agent\bin\UncRedirection).
Install/Upgrade Dynamic Environment Manager (DEM) Agent
All editions of Horizon 2006 (8.0) and newer are entitled to Dynamic Environment Management (DEM).
- Horizon Standard Edition and Horizon Advanced Edition are entitled to DEM Standard Edition, which only has personalization features that replace Persona. If you are using FSLogix Profile Containers for profiles, then you probably don’t need DEM Standard Edition.
- Horizon Enterprise Edition is entitled to DEM Enterprise Edition, which has all DEM features, including Smart Policies, Privilege Elevation, etc.
DEM 2006 and newer Agents (FlexEngines) require additional configuration to enable DEM Computer Settings. You can either configure registry settings on each DEM Agent machine, or in DEM Agent 2103 and newer you can use an installer command-line switch. Both are detailed at Perform Installation with Computer Environment Settings Support at Omnissa Docs.
- Group Policy Preferences can push these registry keys to the Horizon Agent machines. Or you can manually modify the registry in your master images. The minimum registry values are Enabled and ConfigFilePath as detailed at Perform Installation with Computer Environment Settings Support at Omnissa Docs. For the list of additional registry values, see FlexEngine Configuration for Computer Environment Settings at Omnissa Docs.

- Command line install looks something like below. The command line installer switch sets the same ConfigFilePath and Enabled registry values as shown above.
msiexec /i "\\fs01\bin\Omnissa\DEM\Omnissa-DEM-Enterprise-2503-10.15\Omnissa Dynamic Environment Manager Enterprise 2503 10.15 x64.msi" /qn COMPENVCONFIGFILEPATH=\\fs01\DEMConfig\general

To install DEM Agent:
- Windows 10 Compatibility – See Omnissa 57386 Omnissa Dynamic Environment Manager and Windows 10 Versions Support Matrix
- Make sure Prevent access to registry editing tools is not enabled in any GPO since this setting prevents the FlexEngine from operating properly.
- DEM 2503 (10.15) is an ESB release.
- Based on your entitlement, download either DEM 2503 (10.15) Enterprise Edition. For ESB Horizon, download the DEM version included with your ESB version of Horizon.

- Run the extracted Omnissa Dynamic Environment Manager Enterprise 2503 10.15 x64.msi.

- In the Welcome to the Omnissa Dynamic Environment Manager Enterprise Setup Wizard page, check the box next to I accept and click Next.

- In the Destination Folder page, click Next.

- In Choose Setup Type page, click Custom.

- In the Custom Setup page, click Next. Note: the DEM Management Console is typically installed on an administrator’s machine.

- In the Ready to install Omnissa Dynamic Environment Manager Enterprise page, click Install.

- In the Completed the Omnissa Dynamic Environment Manager Enterprise Setup Wizard page, click Finish.

- If you have PCoIP Zero Clients that map USB devices (e.g. USB drives), then you might have to set the following registry value:
- HKLM\Software\Omnissa\Omnissa VDM\Agent\USB
- UemFlags (DWORD) = 1
- HKLM\Software\Omnissa\Omnissa VDM\Agent\USB
- DEM is enabled using Group Policy and configured using the DEM Management Console.
- DEM can also be enabled without Active Directory (Group Policy); see Omnissa article 2148324 Configuring advanced UEM settings in NoAD mode for details.
Logon Monitoring
See Omnissa 93158 Information about changes in logon timing data format in Horizon form Horizon 8 2111 and Later.
By default, in services.msc, the Omnissa Horizon Logon Monitor service (or VMware Horizon View Logon Monitor service) is not running. Set it to Automatic and start it.

The logon logs are stored at C:\programdata\VMware\VMware Logon Monitor\Logs on each Horizon Agent.
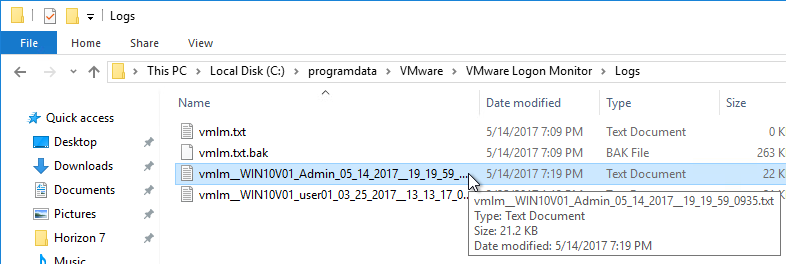
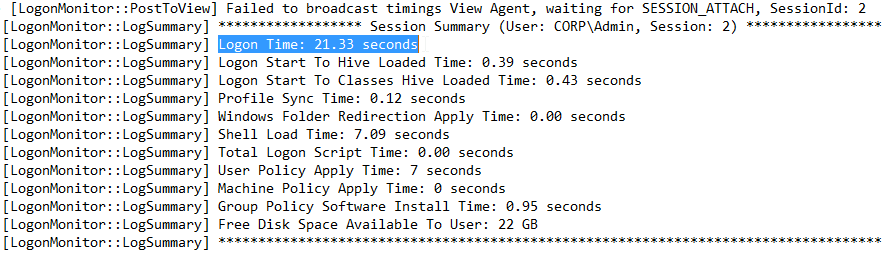
Inside each session log file are logon time statistics.
ClonePrep – Rearm
By default, when Horizon creates Instant Clones, one of the tasks that ClonePrep performs is to rearm licensing. You can prevent rearm by setting the following registry key:
- HKEY_LOCAL_MACHINE\SYSTEM\CurrentControlSet\services\omn-instantclone-ga (or vmware-viewcomposer-ga)
- SkipLicenseActivation (DWORD) = 0x1
Microsoft FSLogix
Why FSLogix?
Microsoft FSLogix has two major features:
- Profile Container is an alternative to DEM Personalization.
- App Masking is an alternative to App Volumes.
DEM has three categories of features: Personalization, User Settings, and Computer Settings. FSLogix Profile Container only replaces the Personalization feature set. You typically do FSLogix Profile Container for profiles and use DEM for User Settings and Computer Settings. Here are some advantages of FSLogix Profile Container over DEM Personalization:
- FSLogix Profile Container saves the entire profile but DEM Personalization requires you to specify each setting location that you want to save. FSLogix is “set and forget” while DEM Personalization requires tweaking for each application.
- At logon, DEM Personalization must download and unzip each application’s profile settings, which takes time. FSLogix simply mounts the user’s profile disk, which is faster than DEM Personalization.
- FSLogix Profile Container has special support for roaming caches and search indexes produced by Microsoft Office products (e.g. Outlook .ost file).
- FSLogix is owned, developed and supported by Microsoft.
Here are some FSLogix Challenges as compared to DEM Personalization:
- FSLogix Profile disk consumes significant disk space. The default maximum size for a FSLogix profile disk is 30 GB per user.
- High Availability for FSLogix Profile disks file share is challenging. The file server High Availability capability must be able to handle .vhdx files that are always open. DFS Replication is not an acceptable HA solution. One option is Microsoft Scale Out File Server (SOFS) cluster. Another option is Nutanix Files.
Omnissa App Volumes has some drawbacks, including the following:
- Completely separate infrastructure that must be built, maintained, and troubleshooted.
- Introduces delays during logon as AppStacks are mounted.
- AppStacks can sometimes conflict with the base image or other AppStacks.
An alternative approach is to install all apps on the base image and use FSLogix App Masking to hide unauthorized apps from unauthorized users. No delays during logon.
Microsoft FSLogix is free for all Microsoft RDS CALs, Microsoft Virtual Desktop Access per-user CALs, and all Microsoft Enterprise E3/E5 per-user licenses. Notice that per-device licenses are excluded. See Eligibility Requirements at Microsoft Docs.
FSLogix Installation
Do the following to install Microsoft FSLogix on the Horizon Agent machine:
- Go to https://docs.microsoft.com/en-us/fslogix/install-ht and click the download link.

- Extract the downloaded .zip file.
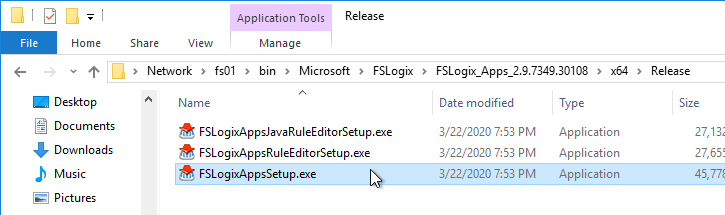
- In the FSLogix \x64\Release folder, run FSLogixAppsSetup.exe.
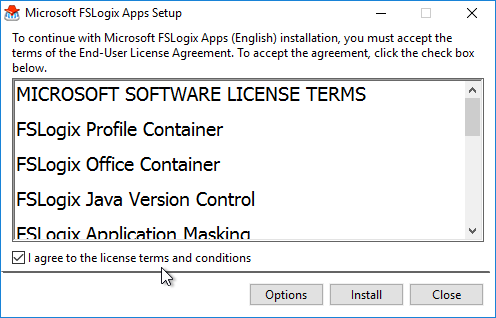
- Check the box next to I agree to the license terms and conditions and click Install.
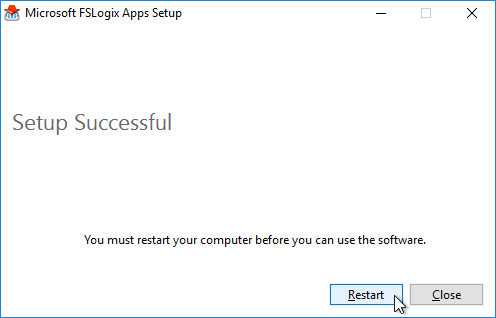
- In the Setup Successful page, click Restart.
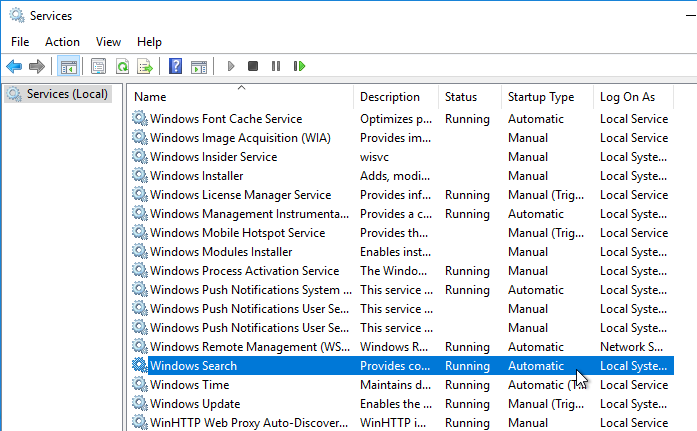
- Make sure the Windows Search service is set to Automatic and Running.
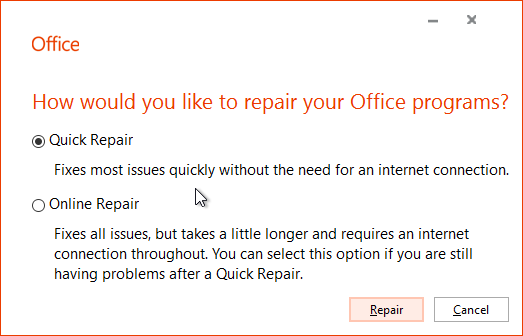
- If Office is already installed, then repair the Office installation after installing and starting the Windows Search Service.
FSLogix is configured through Group Policy or by editing registry values on each FSLogix Agent machine.
Windows OS Optimization Tool
- See Windows OS Optimization Tool for Horizon Guide at Omnissa Tech Zone for details on this tool.
- Download the Windows OS Optimization Tool. Version 2503 supports Horizon 2503.

- Run VMwareOSOptimizationTool-x86_64.exe.

- On the Optimize tab, click Analyze on the bottom of the window.

- Near the top of the window click the Common Options button and make your selections on each of the pages. Click OK when done.


- The top right box named Analysis Summary shows the number of optimizations not yet applied.

- Review the optimizations and make changes as desired. Then on the bottom right, click Optimize.

- The History tab lets you rollback the optimizations.

- The Finalize tab contains tasks that should be run every time you seal your parent image.

- The Update tab lets you re-enable Windows Update so you can update the parent image.

Additional Optimizations
Additional Windows 10 Optimizations
- James Rankin Improving Windows 10 logon time:
- Use Remove-AppXProvisionedPackage to remove Modern apps. See the article for a list of apps to remove. Also see James Rankin Everything you wanted to know about virtualizing, optimizing and managing Windows 10…but were afraid to ask – part #3: MODERN APPS
- Import a Standard Start Tiles layout (Export-StartLayout)
- Create a template user profile
- Carl Luberti (Microsoft) Windows 10 VDI Optimization Script
Snapshot
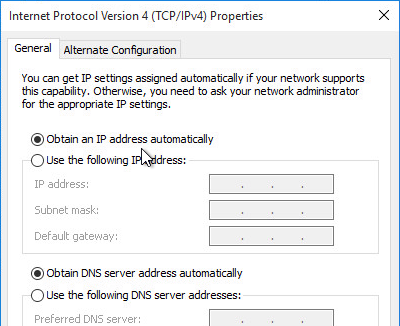
- Make sure the master virtual desktop is configured for DHCP.
- If connected to the console, run ipconfig /release.
- Run antivirus sealing tasks. For example:
- Symantec: Run a full scan and then run the Virtual Image Exception tool – http://www.symantec.com/business/support/index?page=content&id=TECH173650
- Symantec: run the ClientSideClonePrepTool –http://www.symantec.com/business/support/index?page=content&id=HOWTO54706
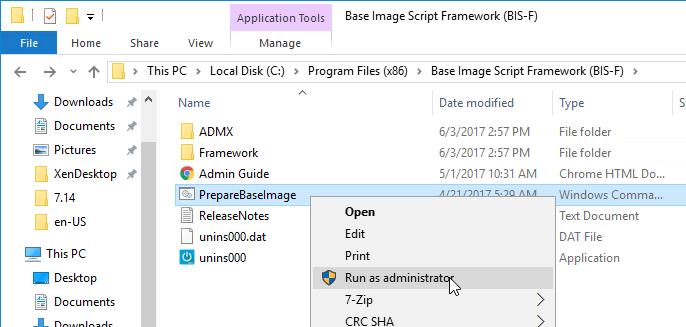
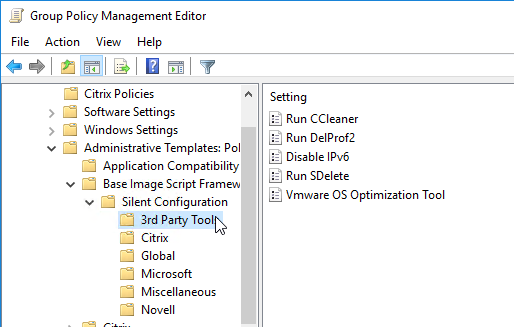
- Base Image Script Framework (BIS-F) automates many image sealing tasks. The script is configurable using Group Policy.
- Shutdown the master virtual desktop.
- Edit the Settings of the master virtual machine and disconnect the CD-ROM. Make sure no ISO is configured in the virtual machine.
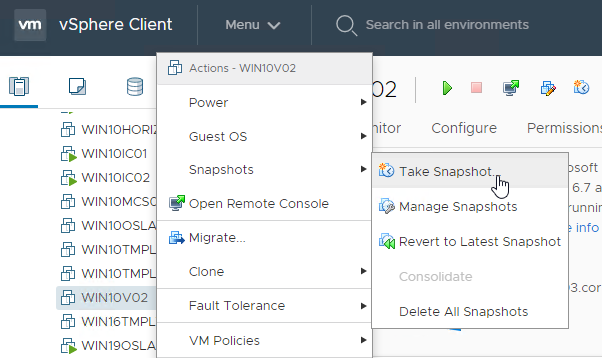
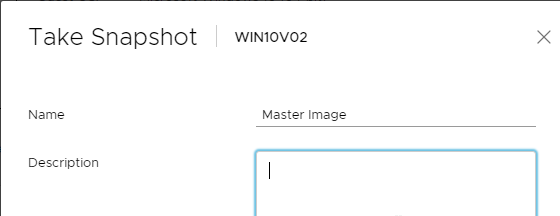
- Take a snapshot of the master virtual desktop. Instant Clones requires a snapshot.
Related Pages
- Back to Omnissa Horizon 8
Greetings Carl,
We have this issue When they open Microsoft Outlooks Application they start the redirection process, get booted over to the Proxy Server since its apart of a 365 instance and then type in their email. They get a Smartcard Prompt “This Card is ready for use.” but no prompt for selecting certificates, nor a pin prompt and are unable to authenticate through to validate their identity to the backend.
When I looked under features installed in reg edit I found smartcard = local but smartcardsingleTS= absent, could that be the problem? How enable smartcartsingleTS?
Can older version of the agent work to get this issue fixed. What would be the agent version?
Thank you,
Hi Yossef,
I have the same problem, everything smartcard authentication works except MS Teams and Office 365 activation. I can select a certificate, but it does not accept it and shows me the selection of reader devices again.
No problem via Web Teams or Office 365 Web.
What I can say, however, is that I don’t have the problem on my GOLD VDI image with agent version 8.8.
Have you found out anything else?
I have already tried this, without success:
To revert to the legacy CryptoAPI standard, change the HKLM\Software\Omnissa\Horizon\Agent\Configuration\UseCryptoAPI registry key value to true.
Greetings Patrick
Hi Patrick,
it doesn’ t seem that there is a fix for this issue yet.
Hi Patrick,
could you please explain what do you mean by “is that I don’t have the problem on my GOLD VDI image with agent version 8.8”?
I opened a ticket with Omnissa, they will release a new agent soon. To fix this issue.
Hello Yossef,
I meant to say that the error does not occur when Horizon Agent 8.8 is installed on the golden image.
I even downgraded my Windows 11 pool from Horizon Agent 8.12 to 8.8.
The problem no longer occurs, but this is not a permanent solution.
I ran into this issue using 8.14 and Omnissa put out a 2412 version of the agent with the fix. I haven’t tested this agent yet. What I am currently using that works on my production pool is Server 2412 with Agent 2306.
Name: Omnissa-Horizon-Agent-x86_64-2412-8.14.0-15477331442.exe
Size: 245.2 MiB
Expires: July 08, 2025
Download: https://sftp.omnissa.com/download?domain=omnissa&id=25cb51fcb0e2432cb6c5d3f2eba9067a-f7fc43964f16407bbc8dc098019bfd68
when i try to login office 365 on vm, windows security window doesn’t recognize my smart card, however when i login to 365 web version, the vm can recognize my smartcard and let me login.
when i looked in the regkey features installed, i found smarcard =local, but smartcardsingleTS = absent. for me it looks like the agent can’t see the driver for the 90meter
Are you back to LSI SAS for disk type and not parvirtual anymore?
I’m not convinced there’s much performance difference. Use whatever your corporate standard is.
Good Morning Carl,
Working through an issue with some peers on a VDI Installation they’ve done. The team recently performed an upgrade groing from Horizon 7 to Horizon 8, They’re using Microsoft 365 with Smartcard Authentication.
Link below references a very similar issue that they are experiencing
Reference link : https://www.reddit.com/r/VMwareHorizon/comments/1f8xnr9/help_horizon_8_upgrade_smartcard_pki/
Smartcard Passthrough is working, Authentication through Horizon View is functioning and they make it through the UAGs no problem, once logged in FSLogic is functioning fine from what i can gather.
When they open Microsoft Outlooks Application they start the redirection process, get booted over to the Proxy Server since its apart of a 365 instance and then type in their email. They get a Smartcard Prompt “This Card is ready for use.” but no prompt for selecting certificates, nor a pin prompt and are unable to authenticate through to validate their identity to the backend.
”
Hey guys so here I am almost 3 months later and we figured it out. I don’t have the link BUT VMWARE put out a new keystone creation script in 2021. It does not show up on google and a coworker literally just dug it up in a KB but we essentially just redid everything and created the keystore with the new script and we’re in business. May the odds be ever in your favor o7.
P.S.A. We’ve had a ticket up with OMNESSA this whole time. They still haven’t figured this out. 😅” This is what was posted on the Reddit page, Im not certain what the 2021 Keystone Creation Script is but definitely interested and was wondering if you might be able to provide some insight on the above issue, or on this script.
The team did recreate the Keystore following this process “https://kb.omnissa.com/s/article/2013044?lang=en_US” but it was a no joy.
Did you ever figure out the solution to this issue? We’re having the same problem with the Microsoft 365 apps. Users can get in just fine, but once they try to smart card authenticate with the apps, they get the same symptoms described above.
We have the same issue with office 365. We can’t find a fix. I rebuilt the image 2 times without firewall or antivirus as a test, still won’t work. The solution you are referring is for login to the server. The issue is we login ok to the server and the vm but we can’t login to office because it doesn’t prompt for pin.
Hi guys, someone can share a golden image ready to deploy? So we can save part of the config.
Thanks
Recent upgrade to 2312.1 (8.12.1) because ESB is good for a single admin show. Does anyone know where an admin could get the JSON file (Omnissa-Horizon-Agent-x86_64-yymm-y.y.y-xxxxxxxx-metadata.json) for Horizon Agent 2312.1 (8.12.1) to support Auto Upgrade Horizon Agent?
Alternatively, does anyone have the URL appropriate for 2312.1/8.12.1 Agent? Only version 2312/8.12.0 is available here: https://softwareupdate.omnissa.com/horizoncloud-v2-agents/packages/Horizon-Enterprise-Agent/.
Hi Carl,
We are using digital signatures to sign documents in Horizon, smartcards are available with USB Readers. USB and Smartcard Redirection options are enabled in Horizon Agent and everything is working fine but noticeably slower than outside VDI (4-5 seconds per document versus 0,8-0,9 second).
Is there anything we could check and configure to optimize the process of signing documents and possibly make it work faster? Any clues?
Hi Carl.
Do you recommend to apply Microsoft Security baseline GPO on instant clone vm’s OU ? Whats the best pratice ?
Hello Carl,
We have stumped against an issue with Win11 24H2 image where we have created it using the WinPE ISO with no vTPM as according to Omnissa document and it’s been working fine in our UAT environment. We cloned that working image to shared storage and registered new VM in production environment but then we couldn’t boot the image. It keeps going quickly through the Preparing to Repair and then cycles all the time. When migrated back to UAT environment it works fine. We have attempted to create new image in the production exactly the same and when booting with WinPE ISO and Win24H2 ISo it does exactly the same.
Both prod and UAT vCenters are 8U3, the same Horizon version and VMtools. It almost seems like there is a difference in vCenters but can’t think of any. Have you ever stumbled against something like it?
Hi. Do you know how I can install Quick Assist onto Windows 11 and get it to apply to all users desktops? With Windows 10, it was embedded into the OS under Accessories. We use FSLogix as our profile solution on non-persistent desktops. I can download it from the Store to the Gold Image and it shows on that as fine, but once I finalise and send out to the Pools, it doesn’t show on the users desktops. We have the Store disabled for users.
Google search shows several threads and websites with instructions to install it for all users.
Is there a way to install a Microsoft Store app (Microsoft To Do, Windows Media Player) on the VM image machine so that it propagates to all the VM’s built from that image? Looks like the basic install goes to the AppData folder for the logged in user, thus it won’t get pushed out to the VM’s from the image. Thanks.
Best option is to rebuild Windows but don’t remove the apps.
Another option is to Google search for legacy/classic versions of those apps that are not Store based.
Otherwise use Add-AppxProvisionedPackage to install it to the machine and then create a logon script to run Add-AppxPackage during every user logon.
Hey Larry,
We are preparing for a full cutover to Windows 11 in our VDI environment and for the past few years we had manually removed all UWP apps and replaced essential ones with the old Windows 10 style apps manually. That solution has aged really poorly. Coincidentally, I now managed our entire Intune environment and Company Portal rollout with Hybrid AzureAD + Co-management along with VDI.
The best way forward to manage core default UWP apps in both environments is to leverage Winget. We use a remediation script in Intune to ensure every corporate device has Winget, required VClibs and Company Portal (Desktop App Installer). This is the way forward both physical and virtual for anything 22H2 and newer.
Here is what I recommend:
Step 1
Use James Rankin’s approach to pull all UWP apps out of your image during initial cleanup or via OS Optimization Tool.
Step 2
Run a script to ensure the base image has Winget, VCLibs and Desktop App Installer. Here is one of ours:
————————————————————————————————————-
# Function to install winget
function Install-Winget {
$wingetInstallerUrl = “https://aka.ms/getwinget”
$wingetInstallerPath = “$env:TEMP\Microsoft.DesktopAppInstaller_8wekyb3d8bbwe.msixbundle”
# Download the winget installer
Invoke-WebRequest -Uri $wingetInstallerUrl -OutFile $wingetInstallerPath
# Install winget
Add-AppxPackage -Path $wingetInstallerPath
# Wait for winget to be installed
Start-Sleep -Seconds 10
}
# Function to install VCLibs
function Install-VCLibs {
$vclibsUrl = “https://aka.ms/Microsoft.VCLibs.x64.14.00.Desktop.appx”
$vclibsPath = “$env:TEMP\Microsoft.VCLibs.x64.14.00.Desktop.appx”
# Download the VCLibs package
Invoke-WebRequest -Uri $vclibsUrl -OutFile $vclibsPath
# Install VCLibs
Add-AppxPackage -Path $vclibsPath
# Wait for VCLibs to be installed
Start-Sleep -Seconds 10
}
# Check if winget is installed
if (-not (Get-Command winget -ErrorAction SilentlyContinue)) {
Install-Winget
} else {
Write-Output “Winget is already installed.”
}
# Check if required VCLibs are installed
$vclibsInstalled = Get-AppxPackage -Name Microsoft.VCLibs.140.00.UWPDesktop -ErrorAction SilentlyContinue
if (-not $vclibsInstalled) {
Install-VCLibs
} else {
Write-Output “VCLibs are already installed.”
}
# Verify VCLibs installation
$wingetInstalled = (Get-Command winget -ErrorAction SilentlyContinue).Source
$vclibsInstalled = Get-AppxPackage -Name Microsoft.VCLibs.140.00.UWPDesktop -ErrorAction SilentlyContinue
#—SETS THE 64BIT INSTALL PATH OF WINGET FOR SYSTEM CONTEXT—#
$ResolveWingetPath = Resolve-Path “C:\Program Files\WindowsApps\Microsoft.DesktopAppInstaller_*_x64__8wekyb3d8bbwe”
if ($ResolveWingetPath){
$WingetPath = $ResolveWingetPath[-1].Path
}
#COMPANY PORTAL
$config
cd $wingetpath
cmd.exe /c “winget.exe install 9WZDNCRFJ3PZ –scope machine –accept-package-agreements –accept-source-agreements –silent –force”
# Verify installation
if (Get-AppxPackage -Name Microsoft.CompanyPortal) {
Write-Output “Company Portal installed successfully.”
} else {
Write-Output “Company Portal installation failed.”
exit 1
}
———————————————————————————————————-
Step 3
Use a script to install the exact UWP apps you want system-wide on all of your golden images and/or physical images. There is a catch here, you need to use the correct script and parameters to force a path for system installs using Winget otherwise when running as admin and in system context it is not aware of Winget.
To get fancy you can look into Winget Auto-Updater (WAU) and use a whitelist to update/manage only the applications you’ve listed below in your install script. There’s also UniGetUI (formerly WingetUI). Microsoft has built-in GPOs for the Desktop App Installer that let you specific where you can install apps from i.e. MSStore, Winget or even your own Winget repo (Wingetty). It is a bit of a rabbit hole but you should rip the bandaid off and either move to Winget or look at a paid service.
Here is an example of our Winget UWP baseline app install script, these all install as the system and are available for all users. I would highly recommend you keep it simple in VDI and only use core Windows UWP apps or apps that will track user data via Microsoft Accounts (like Clock for focus mode sessions and To Do for task lists), managing UWP profiles is a disaster otherwise:
———————————————————————————————————————–
#—INSTALLS, UPDATES OR REPAIRS NUGET AND WINGET—#
Install-PackageProvider -Name NuGet -Force | Out-Null
Install-Module -Name Microsoft.WinGet.Client -Force -Repository PSGallery | Out-Null
Repair-WinGetPackageManager
#—SETS THE 64BIT INSTALL PATH OF WINGET FOR SYSTEM CONTEXT—#
$ResolveWingetPath = Resolve-Path “C:\Program Files\WindowsApps\Microsoft.DesktopAppInstaller_*_x64__8wekyb3d8bbwe”
if ($ResolveWingetPath){
$WingetPath = $ResolveWingetPath[-1].Path
}
#—APPLICATION INSTALL LIST—#
#APP INSTALLER
$config
cd $wingetpath
cmd.exe /c “winget.exe install Microsoft.AppInstaller –scope machine –accept-package-agreements –accept-source-agreements –silent –force”
#WINGET-AUTOUPDATE INSTALLER
$config
cd $wingetpath
cmd.exe /c “winget.exe install Romanitho.Winget-AutoUpdate –scope machine –accept-package-agreements –accept-source-agreements –silent –force”
#COMPANY PORTAL
$config
cd $wingetpath
cmd.exe /c “winget.exe install 9WZDNCRFJ3PZ –scope machine –accept-package-agreements –accept-source-agreements –silent –force”
#WINDOWS CALCULATOR
$config
cd $wingetpath
cmd.exe /c “winget.exe install 9WZDNCRFHVN5 –scope machine –accept-package-agreements –accept-source-agreements –silent –force”
#WINDOWS NOTEPAD
$config
cd $wingetpath
cmd.exe /c “winget.exe install 9MSMLRH6LZF3 –scope machine –accept-package-agreements –accept-source-agreements –silent –force”
#WINDOWS CLOCK
$config
cd $wingetpath
cmd.exe /c “winget.exe install 9WZDNCRFJ3PR –scope machine –accept-package-agreements –accept-source-agreements –silent –force”
#WINDOWS MEDIA PLAYER
$config
cd $wingetpath
cmd.exe /c “winget.exe install 9WZDNCRFJ3PT –scope machine –accept-package-agreements –accept-source-agreements –silent –force”
#PAINT
$config
cd $wingetpath
cmd.exe /c “winget.exe install 9PCFS5B6T72H –scope machine –accept-package-agreements –accept-source-agreements –silent –force”
#MICROSOFT PHOTOS
$config
cd $wingetpath
cmd.exe /c “winget.exe install 9WZDNCRFJBH4 –scope machine –accept-package-agreements –accept-source-agreements –silent –force”
#QUICK ASSIST
$config
cd $wingetpath
cmd.exe /c “winget.exe install 9P7BP5VNWKX5 –scope machine –accept-package-agreements –accept-source-agreements –silent –force”
#SNIPPING TOOL
$config
cd $wingetpath
cmd.exe /c “winget.exe install 9MZ95KL8MR0L –scope machine –accept-package-agreements –accept-source-agreements –silent –force”
#MICROSOFT TO DO: LISTS, TASKS & REMINDERS
$config
cd $wingetpath
cmd.exe /c “winget.exe install 9NBLGGH5R558 –scope machine –accept-package-agreements –accept-source-agreements –silent –force”
———————————————————————————————————————
Hello Carl,
Thank you for your Horizon efforts and work. Can you assist in clarifying a few steps pertaining to persistent GI preparation? Do you perform Sysprep Generalize OOBE for your persistent GI images using OSOT? I generally use customization file for persistent GI(SID, Join Domain, etc…). My GI is always in a non-joined state. Primary reason for asking, Win 11 24H2 is being problematic when adding vTPM and using VMware customization process. Upon customization attempt, device boots to “Recovery” – winload.efi. (Also, I get 24H2 if new off the press….)
I let vCenter run sysprep (customization) for me. Or Horizon Console dedicated pools can run sysprep (customization) for me.
There are different opinions on whether the template machine should be domain-joined or not. For Instant Clones, I always join so that GPOs are applied before the Instant Clones boot. However, with full clones, they have plenty of time to receive and persist the GPO settings.
Have you had/seen any issues with the combination of sysprep(customization) and adding vTPM when cloning from Win11 24H2 GI template? Looking at the Setuperr.log(Sysprep log file) we see following output…Customization attempt device boots into recovery mode. Any thoughts appreciated!
2024-11-13 08:16:51, Error pGetUninstallInterfaceCommon: Failed loading the setupplatform, hr = 0x80070490[gle=0x00000003]
2024-11-13 08:18:04, Error SYSPRP BCD: BiUpdateEfiEntry failed c000000d
2024-11-13 08:18:04, Error SYSPRP BCD: BiExportBcdObjects failed c000000d
2024-11-13 08:18:04, Error SYSPRP BCD: BiExportStoreAlterationsToEfi failed c000000d
2024-11-13 08:18:04, Error SYSPRP BCD: Failed to export alterations to firmware. Status: c000000d
I’m getting this same error 🙁
I only have one pool using persistent clones (this SYSPREP is my only option from the golden template) and figured out how to fix it on the clone itself.. at the winload.efi error power it off, mount the Windows 11 24H2 iso to a virtual DVD drive (add one if needed) and set EFI boot to go to the boot menu, boot to the disc pressing any key and go through the prompts to get to the advanced mode where you can go down to a command prompt.
There you follow these steps, essentially: https://www.niallbrady.com/2021/09/26/fixing-total-identified-windows-installations-0/
Bootrec /fixmbr
Bootrec /fixboot (Note: If this fails with access denied try BOOTSECT /NT60 SYS and then issue the command again)
Then diskpart to give the system volume a drive letter (select volume and then use the assign command), exit that, change disks to that drive and goto EFI\Microsoft\Boot and delete or rename the BCD file there.
Then you can issue this command to rebuild it:
Bootrec /rebuildbcd
–entering a for all detected OSs (should only be the one in most cases)
Once that’s successful use diskpart to select that volume and issue the remove command to unassign the drive letter and exit. Finally reboot with: wpeutil reboot
For me Horizon would finally see the clone go from Customizing status to Available after the next couple of automated reboots.
Interesting that this is a virtual TPM issue…
I’m unsure how Omnissa (or Broadcom) could fix this if it’s more of a Windows thing. The answer files are coming right from vCenter but it’s Horizon Admin that tries to add the vTPM.
This continues to be a problem in 2503, by the way. Just finished upgrading my last golden’s agent to it and it was this one template used for full persistent clones. Tested it by deleting a spare and during the recreation I still had to baby sit the clone and fix this boot issue (tho once done it worked fine). I’ve opened a case. My prior one was never resolved and they just said go speak with Broadcom or Microsoft tho none of them will help given it’s HORIZON that injects the vTPM onto the image and M$ won’t support a use case where Windows 11 was hacked to be installed without TPM lol. Fingers crossed they’ll help now that everything is fully branded Omnissa and it’s still an issue.
Also got winload.efi error after updating Window 11 to 26100.4351 version. This update doing something with TMP and I have to install it with some tricks.
For me solution was to disable Secure Boot on template. VM Options → Boot Option → Secure Boot.
hi,
for many years we’ve used DEM with AppV integration.
In the new versions of the soft there’s still no mention about MSIX / MSIX AppAttach.
Does anyone know if this will be implemented?
rgds
Apps Volumes supports it – https://techzone.omnissa.com/resource/application-packaging-and-delivery-msix-application#additional-resources
Hey Igor,
I’d recommend you ditch the MSIX model. It’s from the older implementation of the Store for Business and for a user-based approach to app installs.
Microsoft is finally moving towards new store system installs and Win32 apps.
We erroneously converted all of our corporate apps from VDI and Software Center to MSIX last year and it really came back to bite us.
In a corporate environment, especially VDI, you should use all MSI (not MSIX) installers where possible and use Win32 apps as System Installs and targeting Devices in Intune/Company Portal.
User-based MSIX installs are a potential management nightmare waiting to happen. You cannot easily target them when they are in the user-context for remediations, it also means each user on a shared device (in our sector, government, essentially every machine is shared) has to reinstall the same app. It also means that dated versions of apps won’t update until the user profile is either removed or the user logs in again. This is less of an issue for VDI but for Co-management/Intune it is a mess.
I’d highly recommend you look into the Intune Training reboot series with this video in particular for why you should build and deploy apps using the recommendations above: https://www.youtube.com/watch?v=HkTF-5co2Qs
Unfortunately, these days we are more and more at the whims of Microsoft. To make matters worse, their documentation and best practices seem to be 5 years behind the actual state of things. If the resource has been published more than a year ago, don’t trust it!
Hello, I am trying to understand how FSLogix masking works and how I know what applications are being masked from a horizon instant clone desktop. Is there a way to find where all masked applications are listed?
Do the FSLogix Rules indicate which applications are masked?
And just to confirm FSLogix masking prevents applications from appearing the Horizon desktop. Is that correct?
Yes. The rules are deployed to C:\Program Files\FSLogix\Apps\Rules. I’m not sure if you can open them using the Rules Editor.
Hi Carl,
Would you be willing to do a segment on Vmware appvol replication between 2 stand alone instances of Horizon with Vsan storage. Most documentation is always referring to using a non attachable NFS share for the replication on Multi site setup. There really isn’t any excellent documentation out there.
Thanks
Hello Carl,
Can you please update the download link for the VMware OS Optimization Tool? Your current link is not valid any more.
Thanks and thank you for your great articles!
Regards,
Hong
Thanks for the suggestion. The download links should be updated now.
I’m having an issue where certain user-based domain-level group policies, such as drive mappings, are more often than not failing to apply on my instant clones. We’ve been banging our head against the walls and can’t figure it out. The error in the logs is “A logon request contained an invalid logon type value.”, and it mentions the domain controller. Almost like the DC (we have many) doesn’t like something about the user logon and won’t let it process GPOs that involve that (intermittently). Does anyone have any clue what might be going on here?
Just a quick question. We are running Windows 10 desktops. In device manager under display adapters it shows Nvidia GRID T4-1B, the VMware Horizon Indirect Display driver and the Microsoft Basic Display adapter. My question is should the Microsoft Basic Display driver be there or just the Nvidia and the VMware Horizon indirect…
Any thoughts on Teams 2.0 and Outlook addin?
We install it (after generalize, or it won’t work at all) with the teamsbootstrapper.exe -p command.
Users have access to the New Teams, but the Outlook (old Outlook, not the new one) addin is not working.
We tried the tricks from MS https://learn.microsoft.com/en-us/microsoftteams/new-teams-vdi-requirements-deploy#teams-meeting-add-in but without success..
Anyone with a solution? We are running FSLogix Hotfix 4.
We are in the same situation, no response from MS…
We are ending up, as temporary solution, to manual copy the plugin files in the user profile folder, using a login script.
if you do the step to remove all store apps, it removes MS teams. You need to allow the MS store and all its app during the osot tool for it to work. Im still running into issue with perfomance on win11
https://detechnischejongens.nl/2024/02/08/dont-delay-upgrade-classic-teams-to-new-teams-in-your-vdi-multisession-environment-before-june-30th/
Wow this guide is better then what VMWare provides.
I do have one issue though and I believe optimization tools have caused it.
About 50% of the time or less a random user after login will not have internet access with Microsoft Office apps. Outlook will not work. Edge will work but can’t sign in. Error 404. Any idea on this? Its driving me nuts.
Really wish there was a perfect template for optimization.
Hi, do you still need to uninstall the agent if you upgrade tools ? Vmware said you no longer need to do this. is that not the case anymore ?
See https://kb.vmware.com/s/article/2078739
Yup, that’s the article I read as well, I am correct: Starting with Horizon 2111, the VMware Indirect Display Driver (IDD) is the default graphics display driver and the VMware SVGA driver is not bundled as part of the Horizon Agent installer. This provides less dependency between specific VMware Horizon and VMware Tools versions going forward
Hello Carl,
Do you know the problem with Win11 and the lag in the taskbar?
After optimizing and rolling out the image with VMware.
Did you know of a workaround or solution?
Thank you
Hi Carl,
Great article! I’ve read a lot of your articles for VMware Horizon, trying to get the idea of it, as I’m new to this!
I have an important question for me, about horizon vdis activation.
We have KMS key, I’ve setup KMS server role, but still not sure how to use it.
How should I point Horizon VDIs to get activate through KMS server?
And since I read about Active Directory activation, how can this be done?
Any help appreciate!
Thank you
For AD-based activation, see https://learn.microsoft.com/en-us/windows/deployment/volume-activation/activate-using-active-directory-based-activation-client
For KMS Server, Windows machines will use DNS to find the KMS Server and automatically activate. But there are minimum thresholds that must be crossed first. AD-based activation doesn’t have these threasholds.
Hi Carl,
when I use an instant clone dedicated desktop, when restoring the guest operating system, the client keeps customizing the operating system, and finally reports a custom timeout. During the removal operation, the client can complete the provisioning normally. I have skipped the windows permission check, can you help me?
Hi Carl,
I want to ask you about MAK activation for Horizon 2312.
Every time we will recompose, MAK count will add +1? How it will work?
And KMS counter will not do the same?
Do you have any activation guidelines link I can read?
Thank you
Here is Horizon’s MAK documentation – https://docs.vmware.com/en/VMware-Horizon/2312/virtual-desktops/GUID-488FF47B-96F4-4F28-836C-6041D8B3745C.html#activating-windows-with-multiple-activation-key-mak-1
I prefer Active Directory-based activation – https://learn.microsoft.com/en-us/windows/deployment/volume-activation/activate-using-active-directory-based-activation-client
Thank you!
Can AD activation to be only for horizon vdis? We also have users not working on horizon, i dont want to mess up everything
It applies to all domain-joined machines.