Navigation
This post applies to all VMware Horizon 7 versions including 7.13.3 (ESB).
- Change Log
- Upgrade
- Install/Upgrade Standard Connection Server
- Install Replica Connection Server
- Horizon Connection Server Certificate
- Horizon Portal:
- LDAP Edits
- Load Balancing
- Remote Desktop Licensing
- Antivirus
- Help Desk Tool – Timing Profiler
- Logon Monitoring
💡 = Recently Updated
Change Log
- 2023 Mar 22 – updated Install sections for Horizon 7.13.3.
- 2022 Mar 11 – updated Install sections for Horizon 7.13.2.
- Removed 7.10 and Horizon Toolbox
- 2021 May 27 – updated Install sections for Horizon 7.13.1.
- 2020 Oct 24 – updated download links for Horizon 7.10.3 (ESB)
- 2020 Oct 16 – updated Install sections for Horizon 7.13.
- 2020 Jun 5 – updated download links for Horizon 7.10.2 (ESB)
- 2020 Mar 18 – updated Install sections for Horizon 7.12.
Upgrade
If you are performing a new install, skip to Install Horizon 7 Standard Connection Server.
Notes regarding upgrades:
- Upgrade all Connection Servers during the same maintenance window.
- Downgrades are not permitted.
- You can snapshot your Connection Servers before beginning the upgrade. To revert, shut down all Connection Servers, then revert to snapshots.
- For Cloud Pod Architecture, you don’t have to upgrade every pod at once. But upgrade all of them as soon as possible.
- Horizon Agents cannot be upgraded until the Connection Servers are upgraded.
- All Connection Servers in the pod must be online before starting the upgrade.
- Upgrade Horizon Composer before upgrading the Connection Servers.
- It’s an in-place upgrade. Just run the Connection Server installer and click Next a couple times.
- If upgrading from version 7.7 or older to version 7.8 or newer, then be aware of authentication changes.
- If upgrading from version 7.7 or older to version 7.8 or newer, then be aware of authentication changes.
- For Security Servers, in Horizon Administrator, go to paired Connection Server, More Commands > Prepare for Upgrade or Reinstallation.
- Downgrades are not permitted.
- Upgrade the Horizon Group Policy template (.admx) files.
- Upgrade the Horizon Agents.
- It’s an in-place upgrade.
- There’s no hurry. Upgrade the Horizon Agents when time permits.
- Upgrade the Horizon Clients.
- Horizon Clients can be upgraded anytime before the rest of the infrastructure is upgraded.
Install Horizon 7 Standard Connection Server
The first Horizon Connection Server must be a Standard Server. Subsequent Horizon Connection Servers are Replicas. Once Horizon Connection Server is installed, there is no difference between them.
A production Horizon Connection Server should have 10 GB of RAM and 4 vCPU.
- In Horizon 7.2 and newer, each Horizon Connection Server can handle 4,000 connections.
- In Horizon 7.1 and newer, each Horizon Connection Server can handle 2,000 connections.
Horizon 7.13.3 is the last release of Horizon 7 and will be supported until May 2023. VMware recommends upgrading all Horizon 7 implementations to Horizon 8.
To install the first Horizon Connection Server:
- Ensure the Horizon Connection Server has 10 GB of RAM and 4 vCPU. Source = Hardware Requirements for View Connection Server at VMware Docs.
- Windows Server 2019 is supported with Horizon Connection Server 7.8 and newer.
- Windows Server 2016 is supported with Horizon Connection Server 7.1 and newer.
- Horizon Composer cannot be installed on the Horizon Connection Server, and vice versa.
- The older Horizon Administrator (/flexadmin) is a Flash-based console. After December 2020, Chrome will no longer support Flash.
- Horizon Console (/newadmin) is HTML5 and does not need Flash.
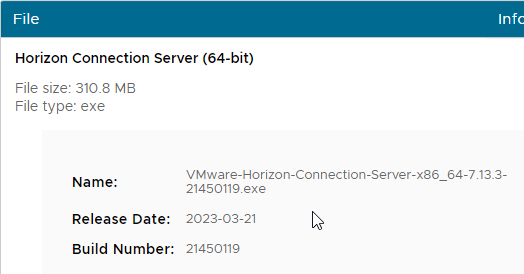
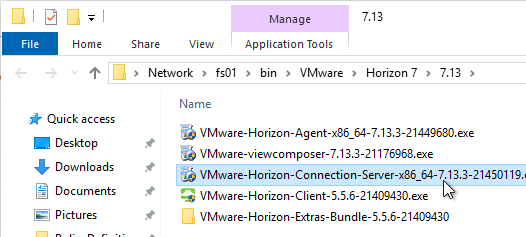
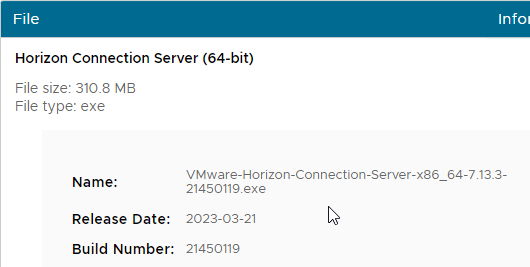
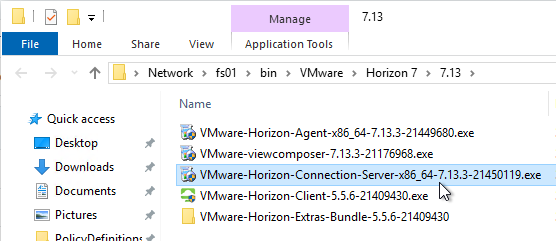
- Download Horizon 7.13.3 View Connection Server.
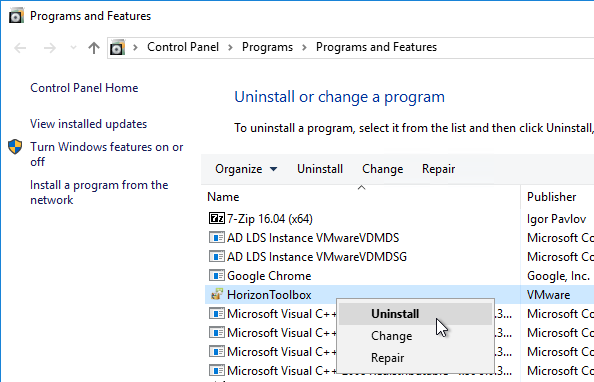
- If Horizon Toolbox is installed, uninstall it.
- Run the downloaded VMware-Horizon-Connection-Server-x86_64-7.13.3.exe.
- In the Welcome to the Installation Wizard for VMware Horizon 7 Connection Server page, click Next.
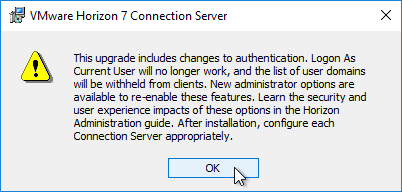
- If you are upgrading from version 7.7 or older to version 7.8 or newer, then acknowledge the authentication changes warning by clicking OK.

- In the License Agreement page, select I accept the terms, and click Next.
- In the Destination Folder page, click Next.
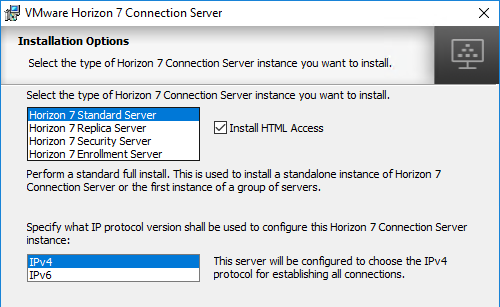
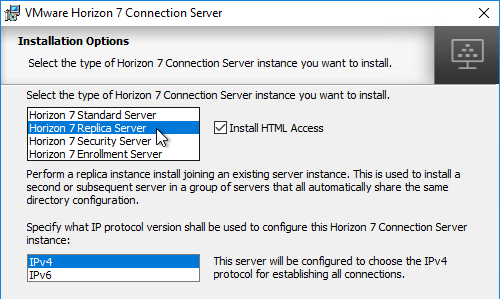
- In the Installation Options page, select Horizon 7 Standard Server, and click Next.
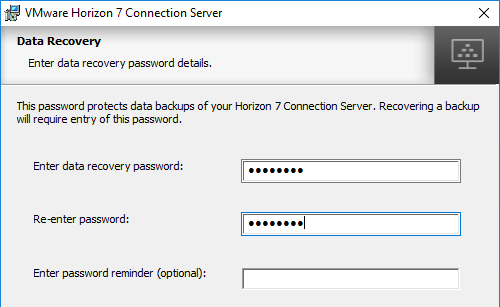
- In the Data Recovery page, enter a password, and click Next.
- In the Firewall Configuration page, click Next.

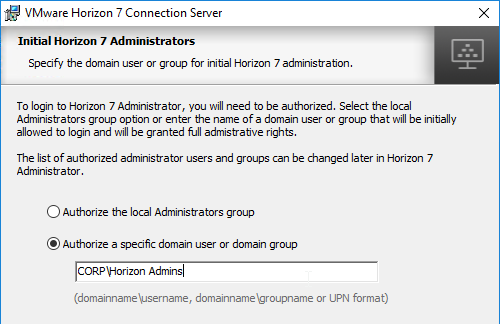
- In the Initial Horizon 7 Administrators page, enter an AD group containing your Horizon administrators, and click Next.
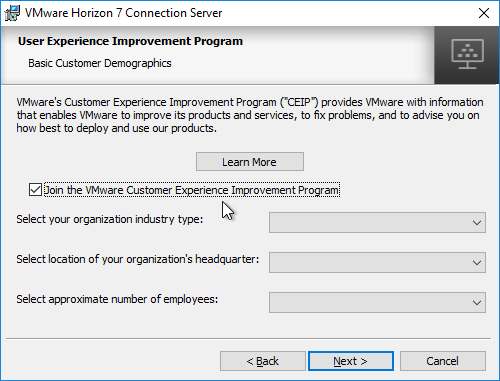
- In the User Experience Improvement Program page, uncheck the box, and click Next.
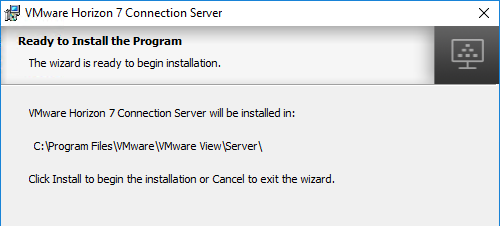
- In the Ready to Install the Program page, click Install.
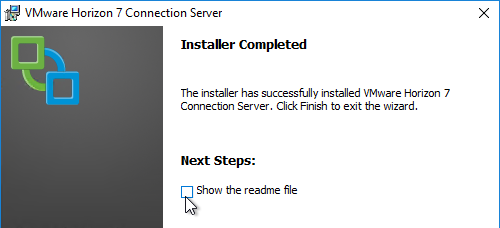
- In the Installer Completed page, uncheck the box next to Show the readme file, and click Finish.
- If you upgraded to Horizon 7.8 or newer and want to re-enable Logon as current user:
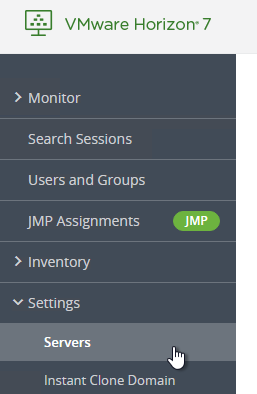
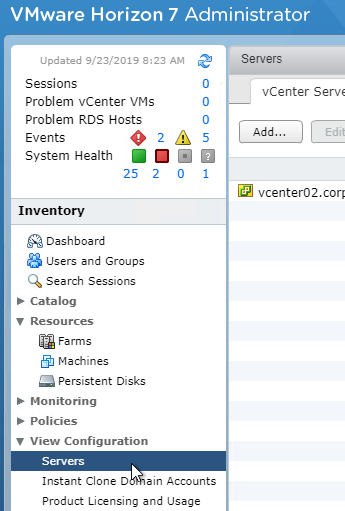
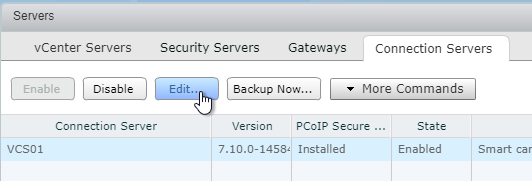
- In Horizon Console 7.10 or newer, on the left, expand Settings and click Servers. Or in Horizon Administrator, on the left, go to View Configuration > Servers.
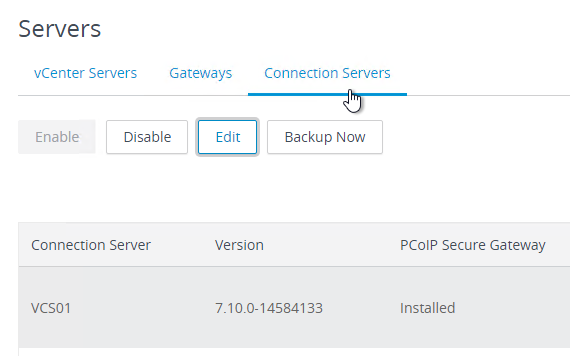
- On the right, switch to the tab named Connection Servers.
- Highlight the server you just upgraded and click Edit.
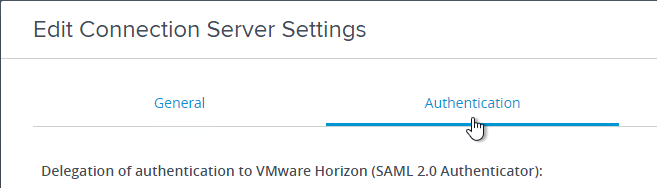
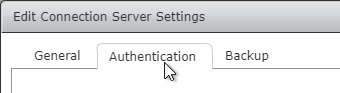
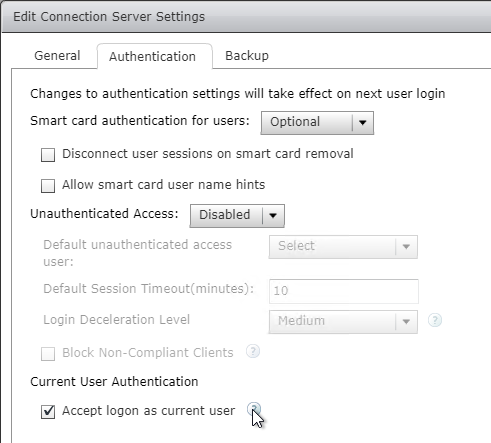
- Switch to the tab named Authentication.
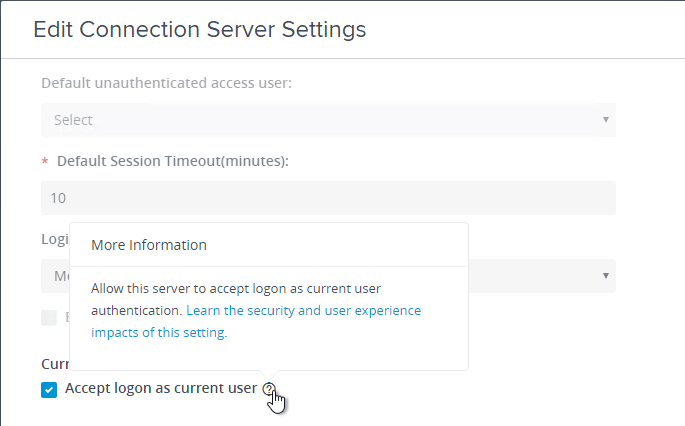
- Scroll down, check the box next to Accept logon as current user and then click OK.
- In Horizon Console 7.10 or newer, on the left, expand Settings and click Servers. Or in Horizon Administrator, on the left, go to View Configuration > Servers.
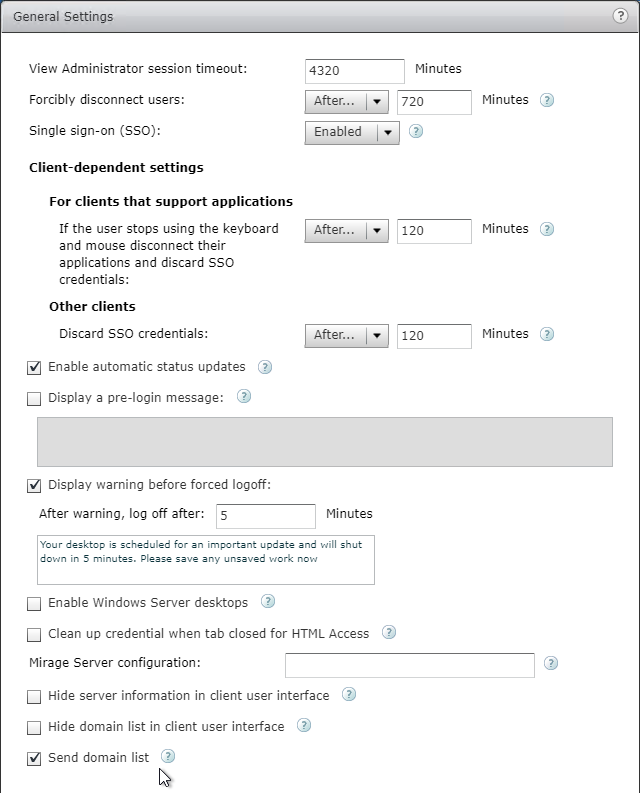
- If you upgraded to Horizon 7.8 or newer and want to re-enable sending the domain list to Horizon Client:
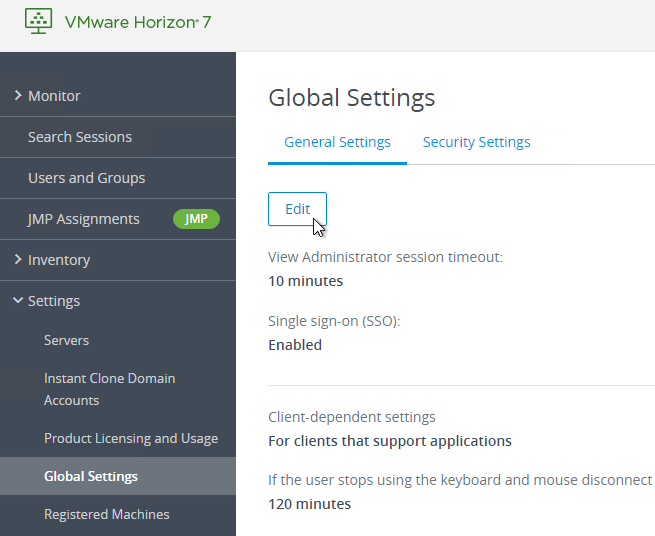
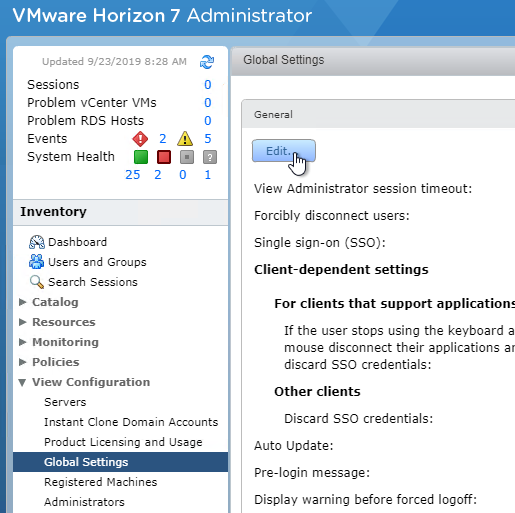
- In Horizon Console 7.10 or newer, on the left, expand Settings and click Global Settings. Or in Horizon Administrator, on the left, go to View Configuration > Global Settings.
- On the right, in the General section, click the Edit button.
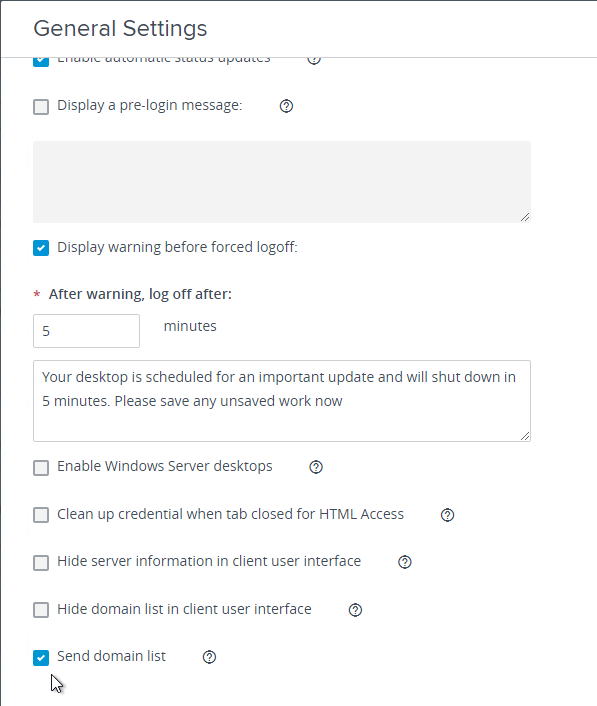
- Near the bottom, check the box next to Send domain list. You might want to uncheck Hide domain list in client user interface. Then click OK.
Install Horizon 7 Replica Connection Server
Additional internal Horizon Connection Servers are installed as Replicas. After installation, there is no difference between a Replica server and a Standard server.
A production Horizon Connection Server should have 10 GB of RAM and 4 vCPU.
- In Horizon 7.2 and newer, each Horizon Connection Server can handle 4,000 connections.
- In Horizon 7.1 and newer, each Horizon Connection Server can handle 2,000 connections.
To install Horizon Connection Server Replica:
- Ensure the Horizon Connection Server has 10 GB of RAM and 4 vCPU.
- Windows Server 2019 is supported with Horizon Connection Server 7.8 and newer.
- Windows Server 2016 is supported with Horizon Connection Server 7.1 and newer.
- Download Horizon 7.13.3 View Connection Server.
- Run the downloaded VMware-Horizon-Connection-Server-x86_64-7.13.3.exe.
- In the Welcome to the Installation Wizard for VMware Horizon 7 Connection Server page, click Next.
- In the License Agreement page, select I accept the terms, and click Next.
- In the Destination Folder page, click Next.
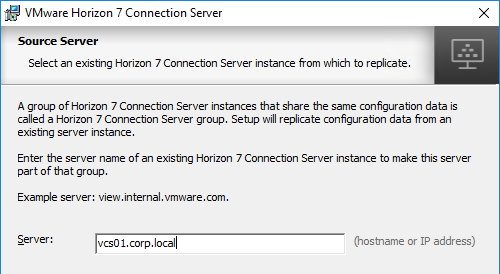
- In the Installation Options page, select Horizon 7 Replica Server, and click Next.
- In the Source Server page, enter the name of another Horizon Connection Server in the group. Then click Next.
- In the Firewall Configuration page, click Next.
- In the Ready to Install the Program page, click Install.
- In the Installer Completed page, click Finish.
- Load balance your multiple Horizon Connection Servers.
Horizon Connection Server Certificate
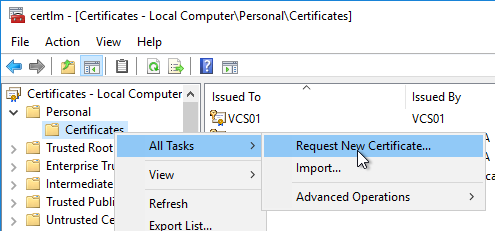
- Run certlm.msc (Windows 2012+). Or run mmc, add the Certificates snap-in, and point it to Computer > Local Machine.
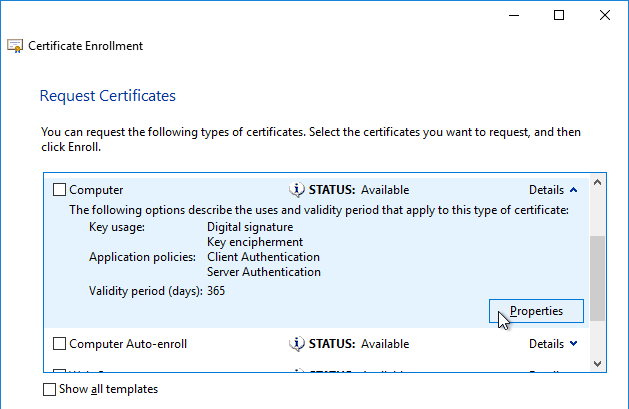
- Request a new certificate with a common name that matches the FQDN of the Connection Server, or import a wildcard certificate.
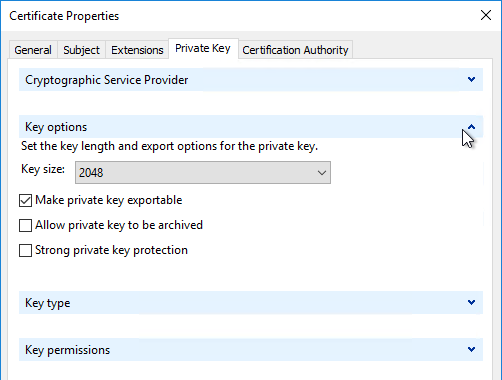
- Note: the private key must be exportable. If using the Computer template, click Details, and then click Properties.
- On the Private Key tab, click Key options to expand it, and check the box next to Mark private key as exportable.
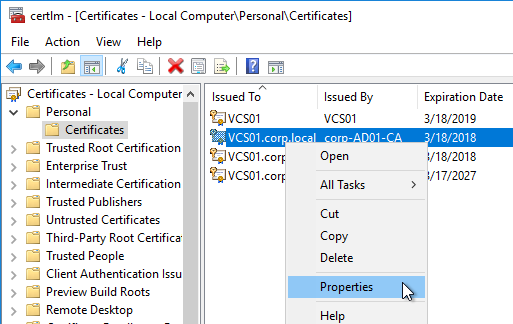
- In the list of certificates, look for the one that is self-signed. The Issuer will be the local computer name instead of a Certificate Authority. Right-click it, and click Properties.
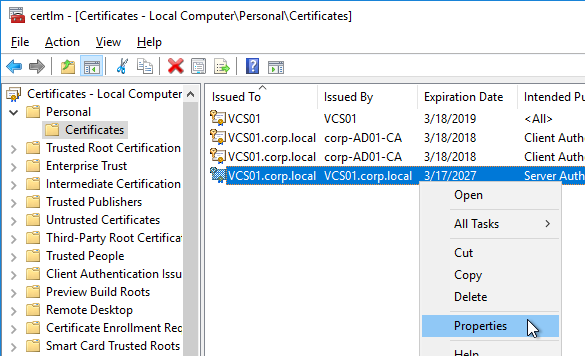
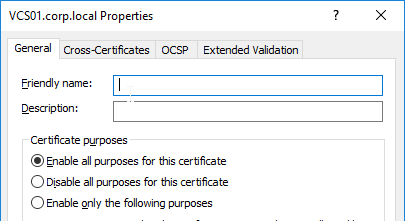
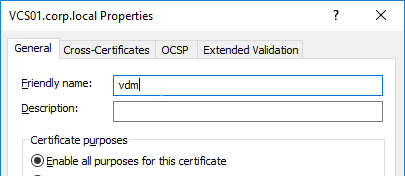
- On the General tab, clear the Friendly name field, and click OK.
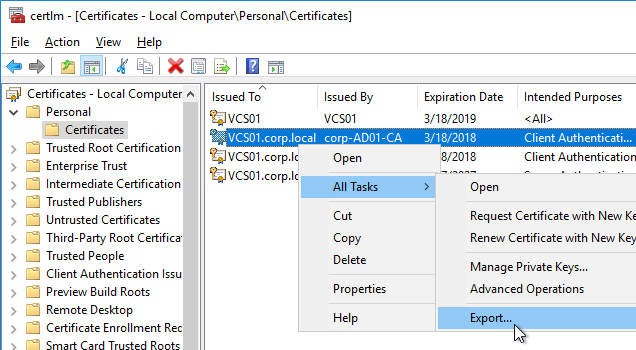
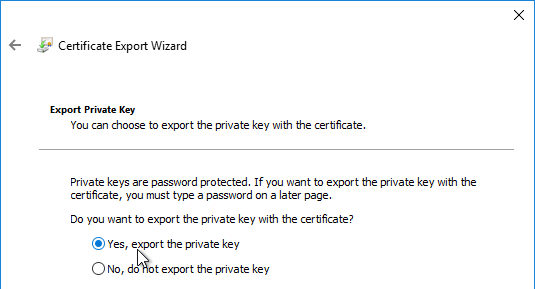
- Right-click your Certificate Authority-signed certificate, and try to export it.
- On the Export Private Key page, make sure Yes, export the private key is selectable. If the option to export the private key is grayed out, then this certificate will not work. Click Cancel.
- Right-click your Certificate Authority-signed certificate, and click Properties.
- On the General tab, in the Friendly name field, enter the text vdm, and click OK. Note: only one certificate can have vdm as the Friendly name.
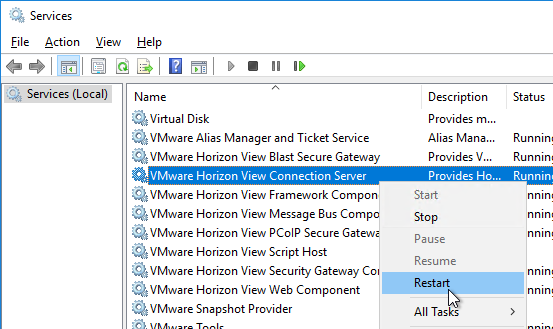
- Then restart the VMware Horizon View Connection Server service. It will take several seconds before you can connect to Horizon View Administrator.
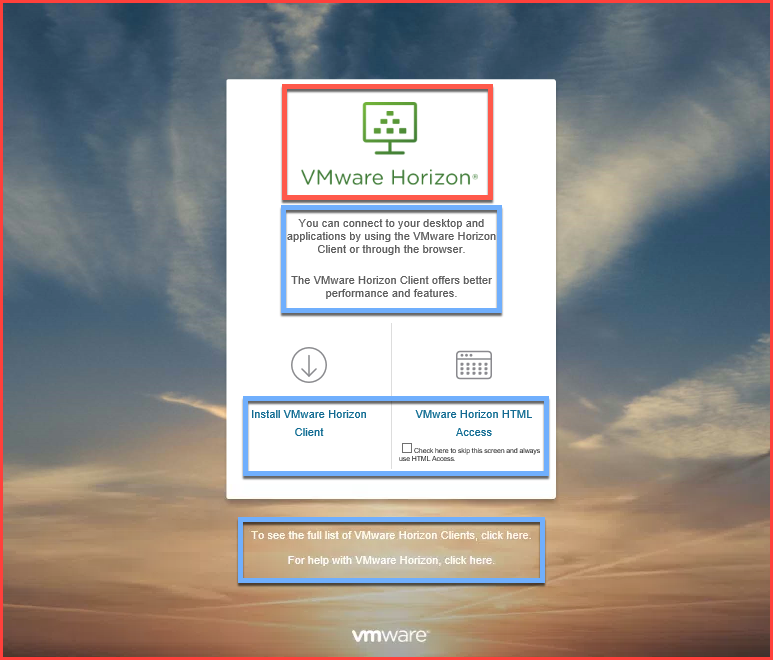
Horizon Portal – Client Installation Link
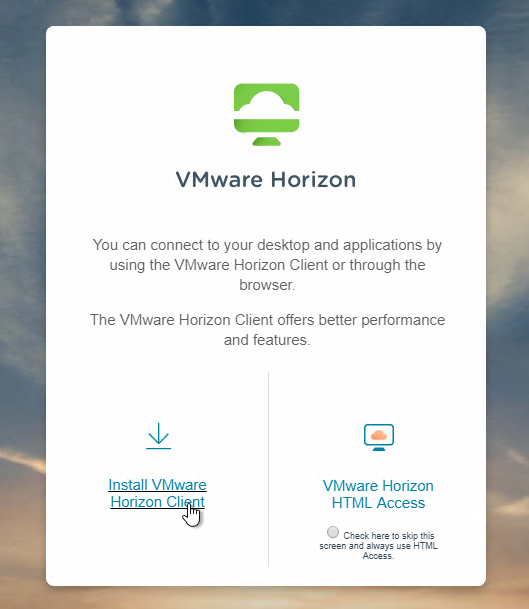
If you point your browser to the Horizon Connection Server (without /admin in the path), the Install VMware Horizon Client link redirects to the VMware.com site for downloading of Horizon Clients. You can change it so that the Horizon Clients can be downloaded directly from the Horizon Connection Server.
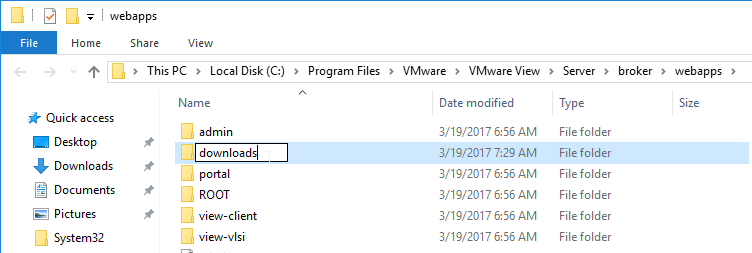
- On the Horizon Connection Server, go to C:\Program Files\VMware\VMware View\Server\broker\webapps.
- Create a new folder called downloads.
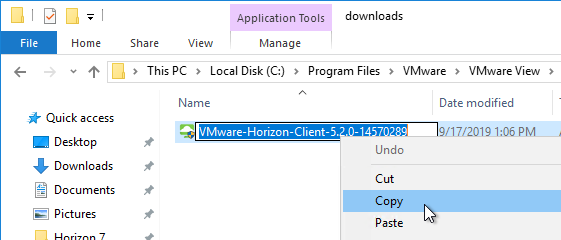
- Copy the downloaded Horizon Client 5.2 for Windows to the new C:\Program Files\VMware\VMware View\Server\broker\webapps\downloads folder.

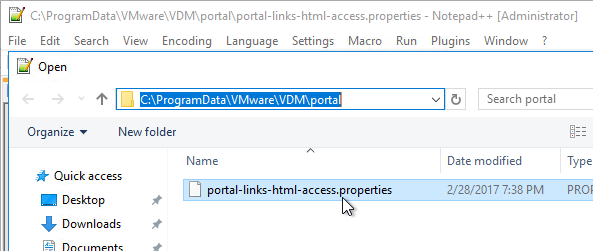
- Run Notepad as administrator.

- Open the file C:\ProgramData\VMware\VDM\portal\portal-links-html-access.properties file with a text editor (as Administrator).
- Go back to the downloads folder, and copy the Horizon Client filename.
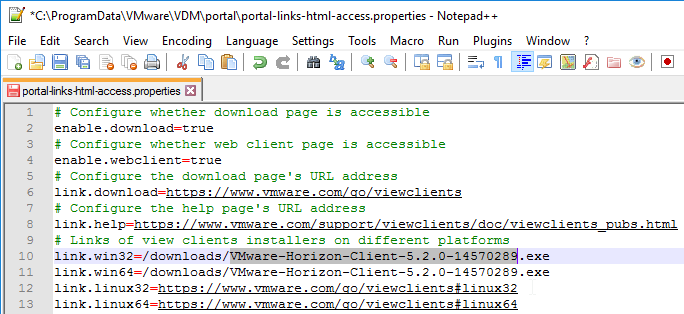
- In Notepad, modify link.win32 and link.win64 by specifying the relative path to the Horizon Client executable under /downloads. Note: In Horizon Client 4.3 and newer, there’s only one Horizon client for both 32-bit and 64-bit. The following example shows a link for the Horizon win64 client.
link.win64=/downloads/VMware-Horizon-Client-5.2.0-14570289.exe
- Then Save the file.
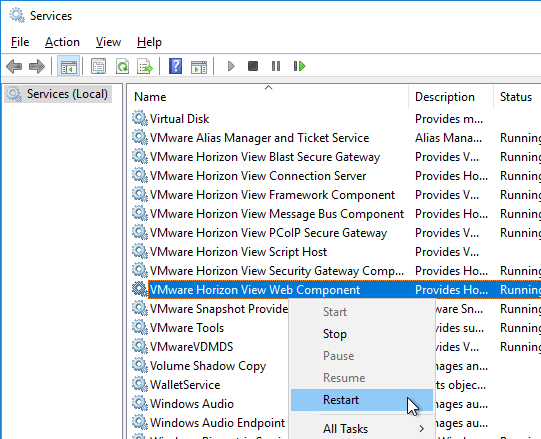
- Restart the VMware Horizon View Web Component service, or restart the entire Connection Server.
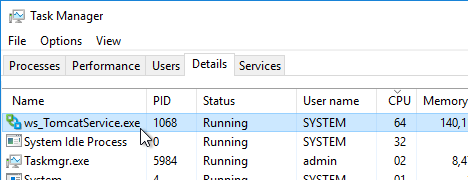
- It will take a few seconds for the ws_TomcatService process to start so be patient. If you get a 503 error, then the service is not done starting.
- Now when you click the link to download the client, it will grab the file directly from the Horizon Connection Server.

- Repeat these steps on each Connection Server.
Portal Branding
Chris Tucker at Horizon View 7.X – Branding the Logon page details how to brand the Horizon 7.1 and newer portal page.
LDAP Edits
Horizon Console Timeout
The HTML5 Horizon Console (https://MyConnectionServer/newadmin) has a default timeout of 10 minutes. Changing the Horizon Administrator timeout will not affect the Horizon Console timeout. You can use adsiedit.msc to increase the Horizon Console timeout.
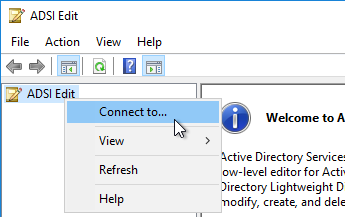
- On the Horizon Connection Server, run ADSI Edit.
- Right-click ADSI Edit, and click Connect to.
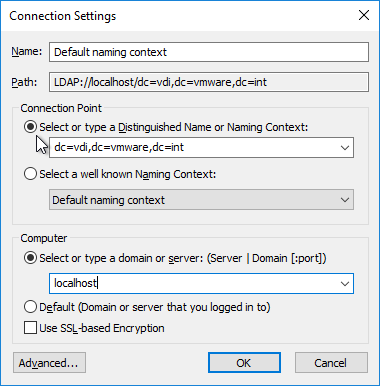
- Change the first selection to Select or type a Distinguished Name, and enter dc=vdi,dc=vmware,dc=int.
- Change the second selection to Select or type a domain or server, and enter localhost. Click OK.
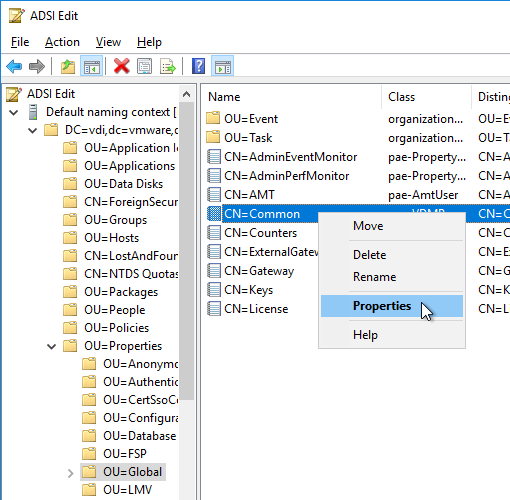
- Navigate to Properties > Global. On the right, double-click CN=Common.
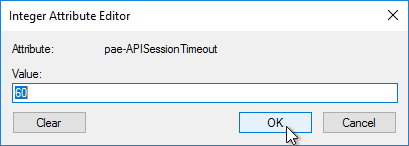
- Scroll down, click to highlight pae-APISessionTimeout, and click Edit.
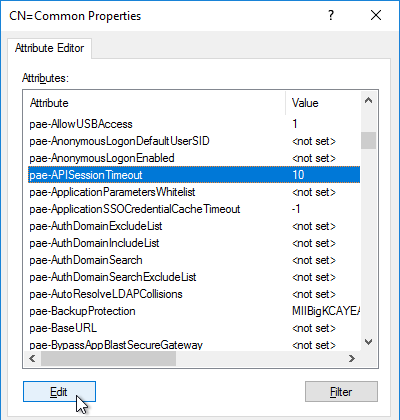
- Enter a value in minutes. Click OK.
Mobile Client – Save Password
If desired, you can configure Horizon Connection Server to allow mobile clients (iOS, Android) to save user passwords.
- On the Horizon Connection Server, run ADSI Edit.
- Right-click ADSI Edit, and click Connect to.
- Change the first selection to Select or type a Distinguished Name, and enter dc=vdi,dc=vmware,dc=int.
- Change the second selection to Select or type a domain or server, and enter localhost. Click OK.
- Navigate to Properties > Global. On the right, double-click CN=Common.
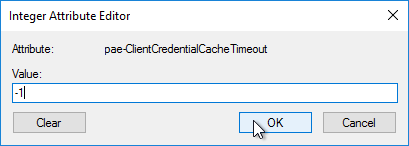
- Scroll down, click to highlight pae-ClientCredentialCacheTimeout, and click Edit.
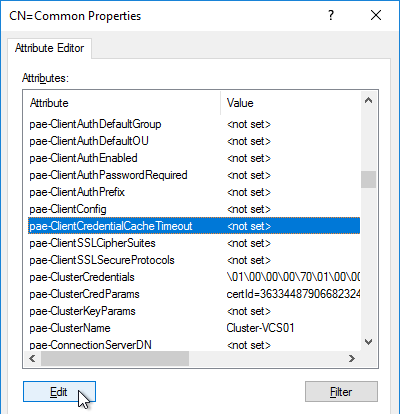
- Enter a value in minutes. 0 = no saving of credentials. -1 = no timeout. Click OK.
Biometric Authentication – iOS Touch ID, iOS Face ID, Fingerprints, Windows Hello
Biometric authentication, including Touch ID, Face ID, Fingerprints, and Windows Hello, is disabled by default. To enable: (source = vDelboy – How to Enable Touch ID in VMware Horizon 6.2 and Configure Biometric Authentication at VMware Docs)
- On the Horizon Connection Server, run ADSI Edit.
- Right-click ADSI Edit and click Connect to…
- Change the first selection to Select or type a Distinguished Name and enter dc=vdi,dc=vmware,dc=int.
- Change the second selection to Select or type a domain or server and enter localhost. Click OK.
- Navigate to Properties > Global. On the right, double-click CN=Common.
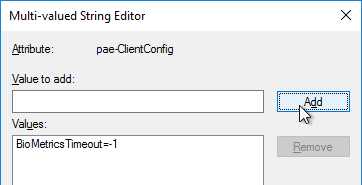
- Find the attribute pae-ClientConfig and double-click it.

- Enter the line
BioMetricsTimeout=-1, and click Add. Click OK. The change takes effect immediately.
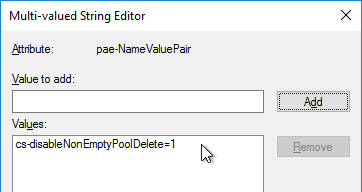
Disallow Non-empty Pool Deletion
Configure View to Disallow the Deletion of a Desktop Pool That Contains Desktop Machines at VMware Docs.
- On the Horizon Connection Server, run ADSI Edit.
- Right-click ADSI Edit and click Connect to…
- Change the first selection to Select or type a Distinguished Name and enter dc=vdi,dc=vmware,dc=int.
- Change the second selection to Select or type a domain or server and enter localhost. Click OK.
- Navigate to Properties > Global. On the right, double-click CN=Common.
- Find the attribute
pae-NameValuePair, and double-click it.

- Enter the line
cs-disableNonEmptyPoolDelete=1, and click Add. Click OK. The change takes effect immediately.
Load Balancing
See Carl Stalhood’s Horizon Load Balancing using NetScaler 12.1.
Remote Desktop Licensing
If you plan to build RDS Hosts, then install Remote Desktop Licensing somewhere. You can install it on your Horizon Connection Servers by following the procedure at https://www.carlstalhood.com/delivery-controller-7-15-ltsr-and-licensing/#rdlicensing.
Antivirus
VMware Tech Paper Antivirus Considerations for VMware Horizon 7: exclusions for Horizon View, App Volumes, User Environment Manager, ThinApp
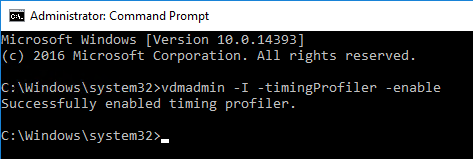
Help Desk Tool Timing Profiler
Horizon 7.2 and newer include a web-based Help Desk Tool. Run the following command to enable the timing profiler on each Connection Server instance to view logon segments.
vdmadmin -I -timingProfiler -enable
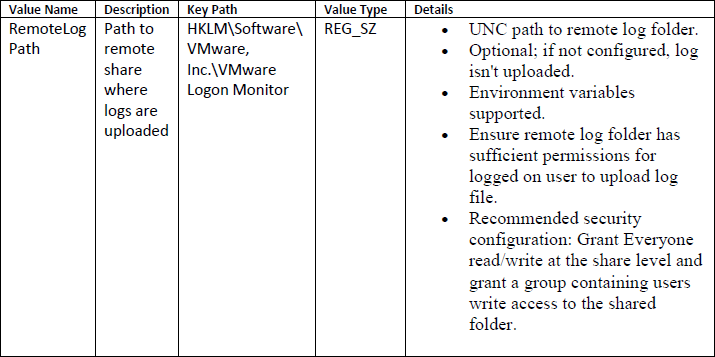
Logon Monitoring
The VMware Logon Monitor Fling is built into Horizon 7.1 and newer.
The logon logs are stored at C:\programdata\VMware\VMware Logon Monitor\Logs on each Horizon Agent. The Fling website has a PDF that explains how to also store them on a file share.
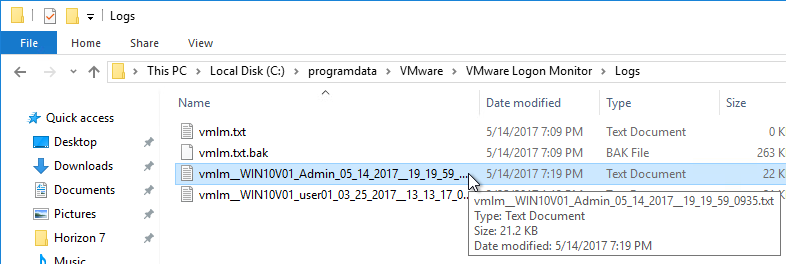
Inside each session log file are logon time statistics. 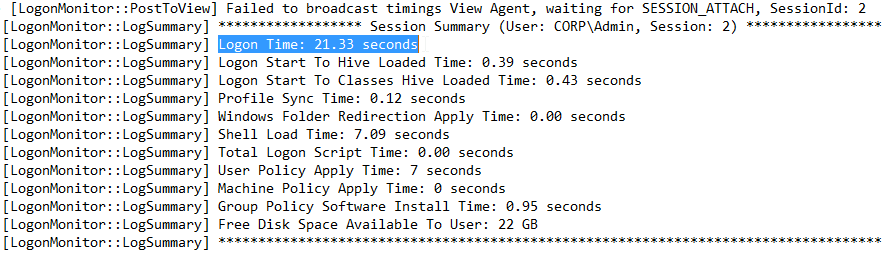
Hi Carl, Thanks for your all articles its all good knowledge to learn from you..!
I have one clarification about Full-Clone Automated pool (Dedicated assignment)
when i rebuild the one of the FC pool machines its deleted and re-created successfully. But the User got assigned some other available machine on the same pool. is there any setting i have to do it from connection server to assign the same existing machine want to assigned the user?
Note:
Connection server Version : 2212.1
Agent version : 8.8 and 8.4 both versions
Kindly help on this…..!
Again Thanks a lot.
Click the pool hyperlink. There’s a Machines tab. Find the machine and there should be an option to Assign User.