Navigation
This article applies to all versions of StoreFront between 2.6 and 3.0.9000 (LTSR CU9). For newer versions, see the newer article.
Here is a collection of optional StoreFront configurations.
- Disable CRL Checking to speed up .NET
- StoreFront can control Receiver Shortcut placement
- PNAgent Authentication
- Hide Applications from the Store
- StoreFront web.config GUI Assistant
- Desktop Autolaunch
- Force desktops to launch full screen
- Store for Anonymous users
- Workspace Control
- Treat Desktops as Applications
- Enable Special Folder Redirection
- Disable “Remember My Password” in Receiver Self-Service
- Remove “Activate” Option from Receiver for Web
- Disable HTML5 Receiver Getting Started Tour
- Customize Appearance of Receiver in StoreFront 3.0
- Customize Appearance of Receiver for Web in StoreFront 2.6
- StoreFront SDK
- StoreFront 3.0 Theme for NetScaler 10.5
- StoreFront 3.0 Portal Theme for NetScaler 11.0
CRL Checking – Disable
When the StoreFront server checks certificate revocation for its locally signed files, a delay can occur before the StoreFront logon page is displayed.
- Run the following PowerShell commands:
Add-PSSnapin Citrix.DeliveryServices.Framework.Commands
Set-DSAssemblyVerification $false
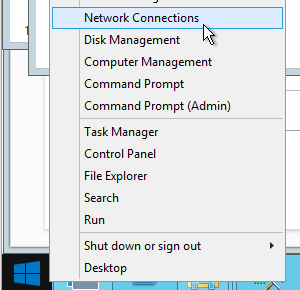
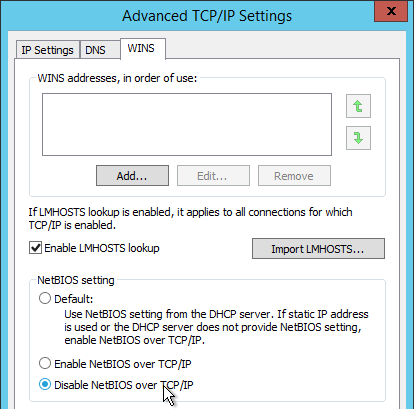
- Another potential tweak to speed up StoreFront is to disable NetBIOS. Right-click the Start Menu and click Network Connections.
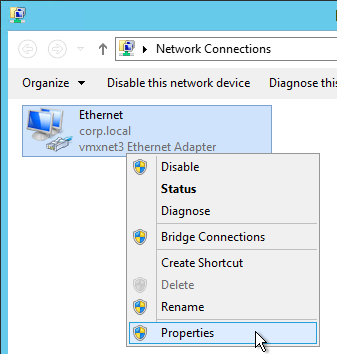
- Right-click the NIC and click Properties.
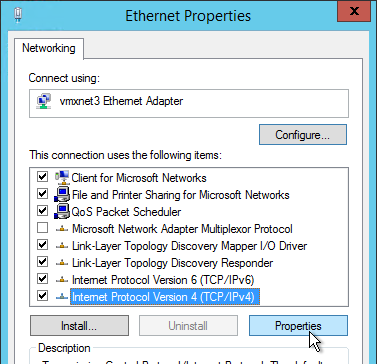
- Highlight Internet Protocol Version 4 and click Properties.
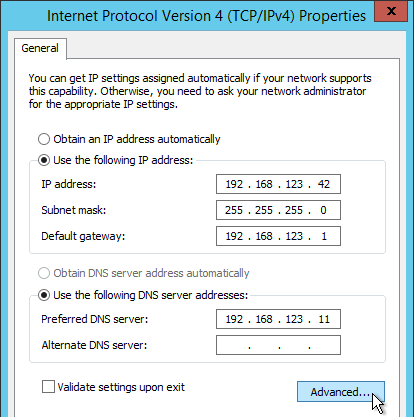
- Click Advanced.
- On the WINS tab, change the selection to Disable NetBIOS over TCP/IP and click OK twice and Close once.
- Repeat on the other StoreFront servers.
Note: According to Microsoft, it is no longer necessary to configure generatePublisherEvidence in C:\Windows\Microsoft.NET\Framework\v4.0.30319\aspnet.config.
Receiver Shortcuts
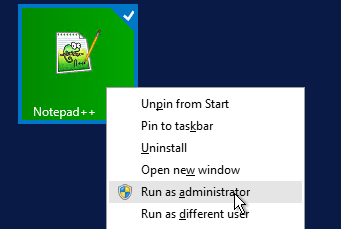
You can use StoreFront to control placement of shortcuts on Receiver machines.
- Run Notepad elevated (as administrator).
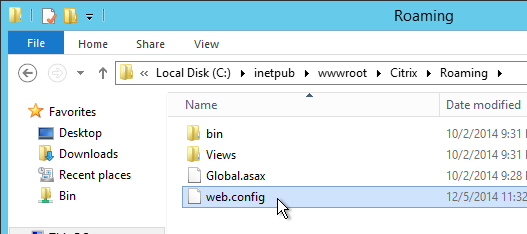
- Edit the file C:\inetpub\wwwroot\Citrix\Roaming\web.config.
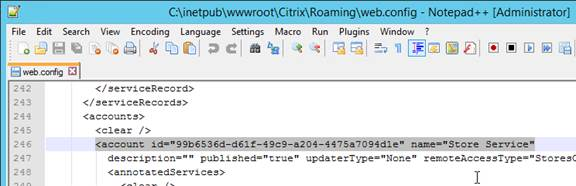
- Search for <account. Find the Store name in the name attribute.
- Scroll down to the first <properties> section located under <annotatedServices>.
- See Using StoreFront account settings to customize app shortcut locations at docs.citrix.com for a list of properties. Add the properties as detailed at docs.citrix.com. The properties should be added after the clear tag.
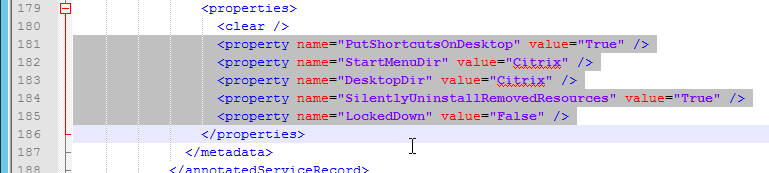
- Note: if subscriptions are enabled in StoreFront then only Favorites are added to the Start Menu and Desktop. If subscriptions are disabled then all applications are placed on the Start Menu or Desktop.
- Close and save the file.
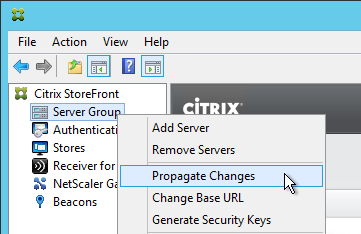
- Then Propagate Changes.
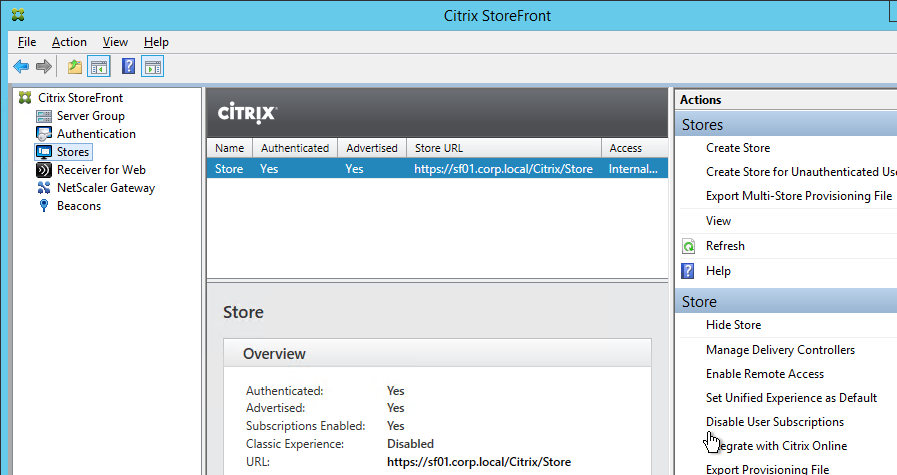
PNAgent Authentication
Single Sign-on
From Configure authentication for XenApp Services URLs at docs.citrix.com: XenApp Services URLs support explicit, domain pass-through, and pass-through with smart card authentication. Explicit authentication is enabled by default. You can change the authentication method, but only one authentication method can be configured for each XenApp Services URL. To enable multiple authentication methods, create separate stores, each with a XenApp Services URL, for each authentication method. To change the authentication method for a XenApp Services URL, you run a Windows PowerShell script.
- On the primary StoreFront server in your deployment, use an account with local administrator permissions to start Windows PowerShell.
- At a command prompt, type the following command to configure the user authentication method for users accessing the store through the XenApp Services URL.
& "C:\Program Files\Citrix\Receiver StoreFront\Scripts\EnablePnaForStore.ps1" –SiteId 1 -ResourcesVirtualPath /Citrix/Store –LogonMethod sson - Propagate changes.
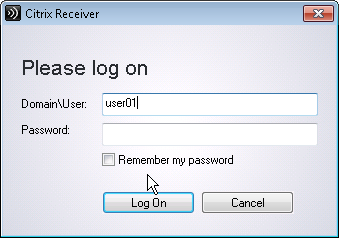
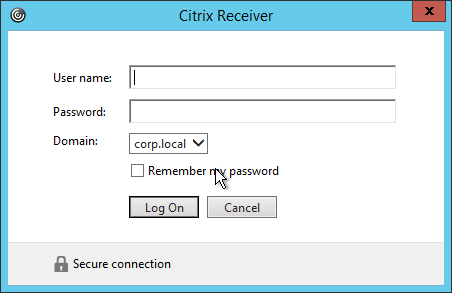
Remember my password
If you leave PNAgent authentication set to Prompt, you can enable the Remember my password box by doing the following:
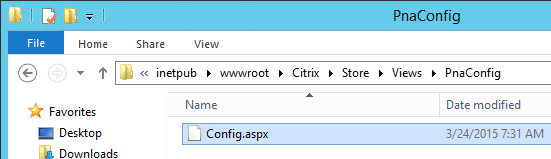
- Run Notepad as Administrator and edit the file C:\inetpub\wwwroot\Citrix\Store\Views\PnaConfig\Config.aspx.
- Near line 74 is EnableSavePassword. Change it to true.
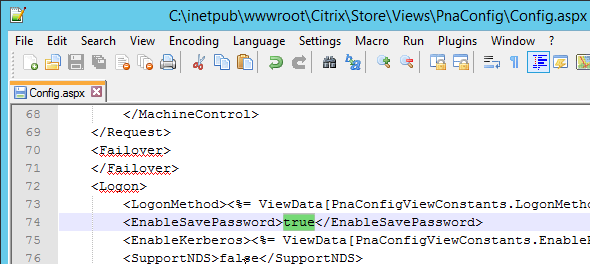
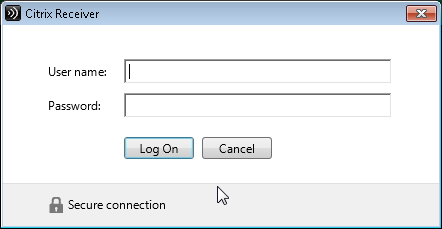
- When PNAgent connects, there should now be a Remember my password checkbox.
Hide Applications
Hide applications from Receiver – http://blogs.citrix.com/2014/03/27/hiding-applications-in-citrix-storefront/. Note: each StoreFront Store has its own filter configuration.
Open PowerShell and run:
$dsInstallProp = Get-ItemProperty -Path HKLM:\SOFTWARE\Citrix\DeliveryServicesManagement -Name InstallDir
$dsInstallDir = $dsInstallProp.InstallDir
& $dsInstallDir\..\Scripts\ImportModules.ps1
To filter by type, run:
Set-DSResourceFilterType -SiteId 1 -VirtualPath "/Citrix/Store" ?IncludeTypes @("Applications")
Default type filters = @(“Applications”,”Desktops”,”Documents”)
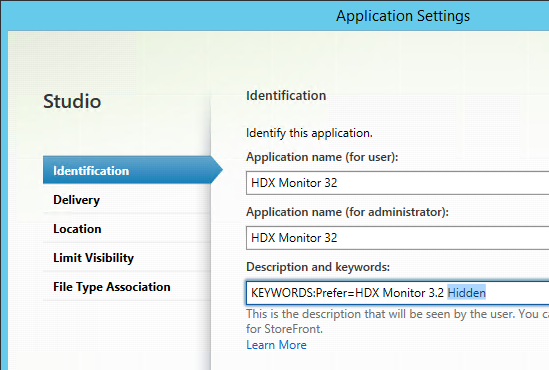
To filter by keyword, run:
Set-DSResourceFilterKeyword -SiteId 1 -VirtualPath "/Citrix/Store" -ExcludeKeywords @("Hidden")
Once the ExcludeKeyword has been defined, add the keyword to a published application description and that application will no longer display in Receiver. This works for both Receiver for Web and Receiver Self-Service (non-browser).
StoreFront web.config GUI Assistant
Jake Rutski Citrix Storefront Configurator is a GUI tool to modify the web.config files in StoreFront 3.0.
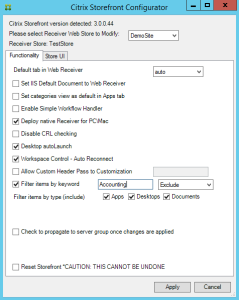
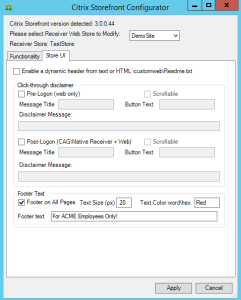
The tool offers a GUI to ease configuration of the StoreFront 1.2/2.0/2.1/2.5 “Receiver for Web”.
Run the tool, the below interface will be shown
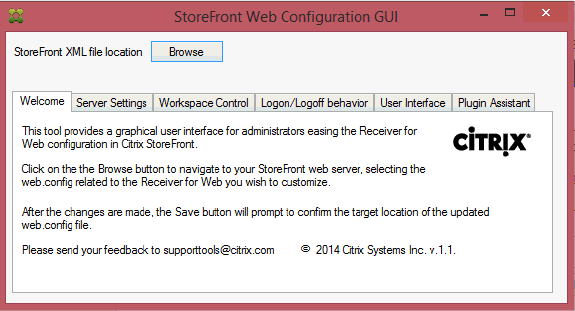
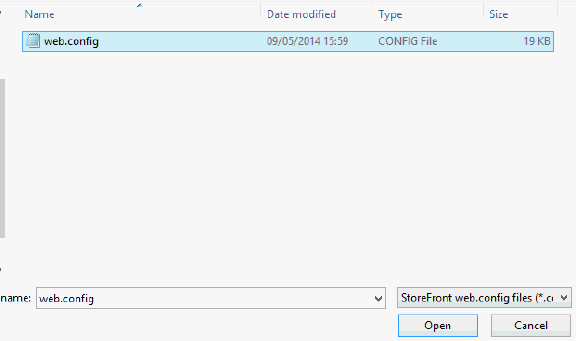
Click on Browse to open the web.config file
The tool will switch to the Server Settings tab and the Save button will appear.
The StoreFront version is shown in the GUI
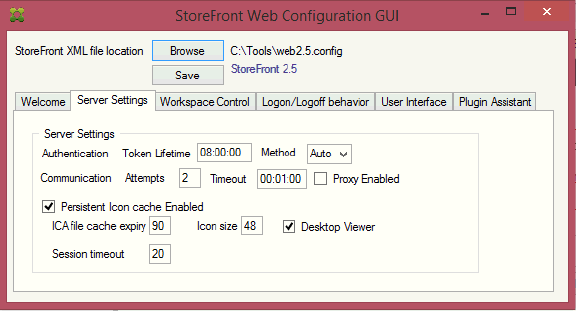
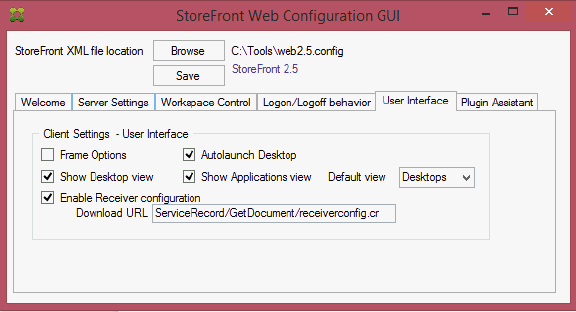
Change the parameters within the different tabs exposed in the GUI and click on the “Save” button to validate the changes.
When clicking “Save”, a backup copy will be created (web.config.bak) at the target location. If the tool is launched from a StoreFront server, a replication process to the other StoreFront servers can be initiated.
Desktop Autolaunch
By default, if only a single desktop is published to the user, Receiver for Web will auto-launch it. You can change this behavior by editing the Receiver for Web site configuration file or by using the GUI Assistant:
- On the StoreFront server, use a text editor to open the web.config file for the Receiver for Web site, which is typically located in the C:\inetpub\wwwroot\Citrix\storenameWeb\ directory, where storename is the name specified for the store when it was created.
- Search for autoLaunchDesktop near line 58.

- Change the value of the autoLaunchDesktopattribute to false to prevent Receiver for Web from automatically starting and accessing a desktop when a user logs on to the site and only a single desktop is available for that user.
Note: The Receiver Self-Service interface does not auto-launch desktops.
Full Screen Desktop
Citrix CTX139762 How to Configure StoreFront to Start Published Desktops in Full Screen Mode: This article describes how to configure StoreFront to start published desktops in Full Screen Mode.
- Open the file C:\inetpub\wwwroot\Citrix\Store\App_Data\default.ica on the StoreFront server(s) with notepad (as Administrator)
- Add the line:
[Application]
DesktopViewer-ForceFullScreenStartup=On
- In older versions of StoreFront, it should be true instead of On.
- Save the file
- Open the command prompt (cmd) and run iisreset.
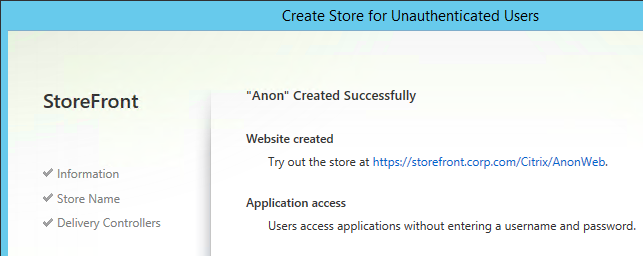
Store for Anonymous
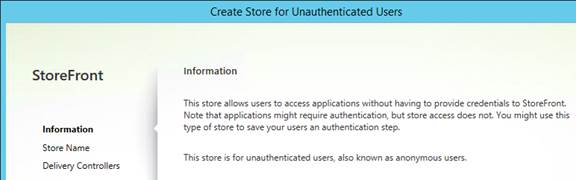
If you intend to publish applications to anonymous users then you can create a StoreFront store that does not require authentication. Note: anonymous stores only work internally (no NetScaler Gateway).
- On the VDAs, create and configure anonymous accounts.
- In Citrix Studio, configure a Delivery Group to accept unauthenticated (anonymous) users.
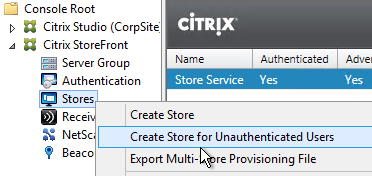
- In the StoreFront Console, on the left, click Stores. On the right, click Create Store for Unauthenticated Users.
- In the Information page, click Next.
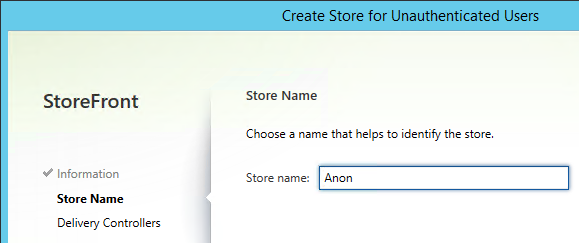
- In the Store Name page, enter a new store name and click Next.
- In the Delivery Controllers page, click Add.
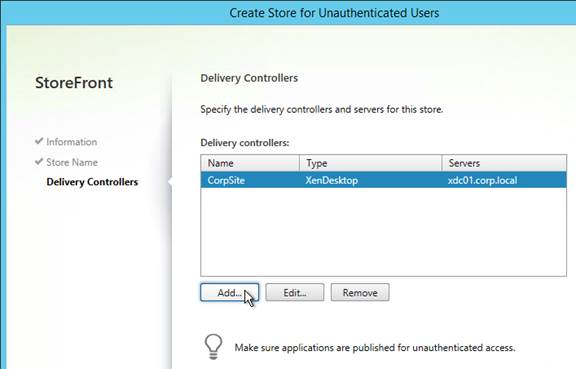
- Enter the name of your XenApp farm (e.g. CorpSite).
- Add all of your XenApp Controllers.
- Change the Transport type to HTTP. Click Add.

- Click Create when you are done creating deployments.
- Click Finish.
Workspace Control
Workspace Control reconnects user sessions. It can be disabled. Or configure various reconnection options.
Citrix Blog Post Workspace Control: When You DON’T Want to Roam details complete session reconnection configuration instructions for XenApp, Remote Desktop Services, StoreFront, and Receiver.
Receiver for Web
To edit Workspace Control in Receiver for Web, edit the file C:\inetpub\wwwroot\Citrix\StoreWeb\web.config and edit the attributes of the following line:
<workspaceControl enabled="true" autoReconnectAtLogon="true" logoffAction="disconnect" showReconnectButton="false" showDisconnectButton="false" />
Receiver Self-Service
Citrix Blog Post – How to Disable Workspace Control Reconnect: For Receiver for Windows, workspace control can be managed on client devices by modifying the registry. Please see this Knowledgebase Article for how to implement it. This can also be done for domain-joined client devices using Group Policy.
StoreFront 2.6 introduces a configuration to disable workspace control reconnect in the Store Service for all receivers. This can be managed by using PowerShell or by editing web.config.
Using PowerShell
Make sure that you close the Admin Console. Run the following code snippet to import the StoreFront PowerShell modules:
& C:\Program Files\Citrix\Receiver StoreFront\Scripts\ImportModules.ps1
Workspace control reconnect can then be turned on/off by the PowerShell command Set-DSAllowSessionReconnect. For example, if you would like turn off workspace control reconnect for a store in /Citrix/Store, the following command will configure the store appropriately:
Set-DSAllowSessionReconnect -SiteId 1 -VirtualPath /Citrix/Store -IsAllowed $false
Editing web.config
Open C:\inetpub\wwwroot\Citrix\Store\web.config in a text editor. Locate the line that looks like:
<resourcesService id="f01f7dc4-7f28-4bc1-b8fb-7c0db9570d20" storeLockedDown="false" anonymousStore="false" allowSessionReconnect="true" />
Change the value of allowSessionReconnect to false to disable workspace control reconnect or true to enable it.
Treat Desktops as Applications
From Treating All Desktops as Applications at Citrix Blog Post What’s New in StoreFront 3.0: Desktops are treated differently from applications in StoreFront/Receivers. They are placed in a separate Desktop tab and in the case of Receiver for Web, they are not reconnected with workspace control. In some use cases, it is desirable to treat desktops as applications so that they are placed together with applications and get reconnected as part of workspace control. With StoreFront 2.x, you have to add the TreatAsApp keyword to all published desktops to achieve this effect. StoreFront 3.0 enables you to configure treating all desktops as applications at the store level without the need of adding the TreatAsApp keyword to all the published desktops. This is configurable using a PowerShell cmdlet.
& "C:\Program Files\Citrix\Receiver StoreFront\Scripts\ImportModules.ps1"

Set-EnhancedEnumerationOptions -siteId 1 -storeVirtualPath /Citrix/Store `
-treatDesktopsAsApps $true
Special Folder Redirection
From Configure special folder redirection at docs.citrix.com: With Special Folder Redirection configured, users can map Windows special folders for the server to those on their local computers. Special folders refer to standard Windows folders, such as \Documents and \Desktop.
- Open PowerShell as administrator (elevated).
- Run & “C:\Program Files\Citrix\Receiver StoreFront\Management\Cmdlets\AdminServiceLoader.ps1″ to load the modules.

- Run the following command:
Set-DSClientSettings -SiteId 1 -VirtualPath /Citrix/Store -SpecialFolderRedirectionAllowed $true

Receiver Self-service – Disable “Remember My Password”
By default, when Receiver Self-Service connects internally to StoreFront, the user is able to check the box next to Remember my password. Note: When connecting through NetScaler Gateway, this checkbox is never available.
This can be disabled by making a change on the StoreFront server. This procedure is documented by John Ashman at Citrix Discussions and Prevent Citrix Receiver for Windows from caching passwords and usernames at docs.citrix.com.
- Note that this procedure seems to prevent Receiver for iOS from adding accounts.
- On the StoreFront server, run a text editor elevated (as administrator).
- Open the file
C:\inetpub\wwwroot\Citrix\Authentication\App_Data\Templates\UsernamePassword.tfrm.

- Go to line 20, which should start with
@SaveCredential. - To comment out the line, wrap it in
@*and*@. Save the file when done.
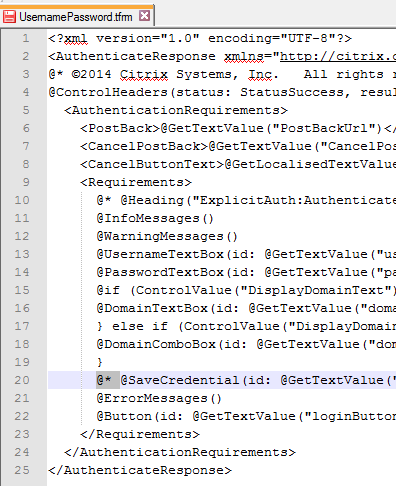
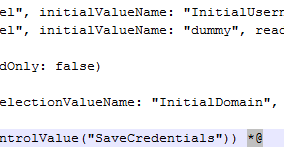
- Now the Remember My Password checkbox is gone.
“Activate” Option in Web Page – Disable
From Citrix Discussions: to disable the “activate…”; function for Citrix receiver for windows that is visible when a user clicks their username in the upper right hand corner of Receiver for Web:
- Browse to C:\inetpub\wwwroot\Citrix\”NameoftheStoreWeb”\
- Open config
- Locate the following line.
<receiverConfiguration enabled=”true” downloadURL=”ServiceRecord/GetDocument/receiverconfig.cr” /> - Change the true to false
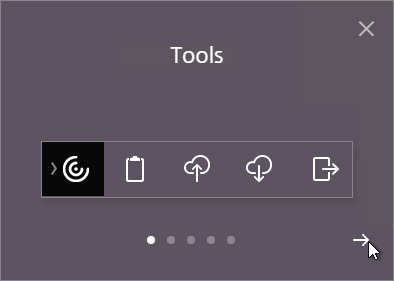
HTML5 Receiver Getting Started Tour
The first time a user connects to HTML5 Receiver, the user is prompted to tour the interface.
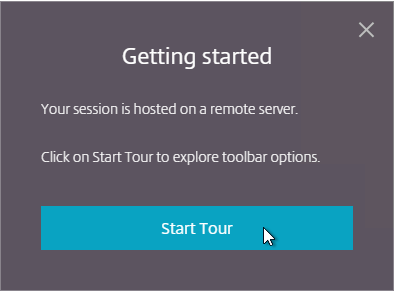
The Getting Started Tour can be disabled by doing the following:
- Edit the file C:\Inetpub\wwwroot\Citrix\StoreWeb\custom\script.js.
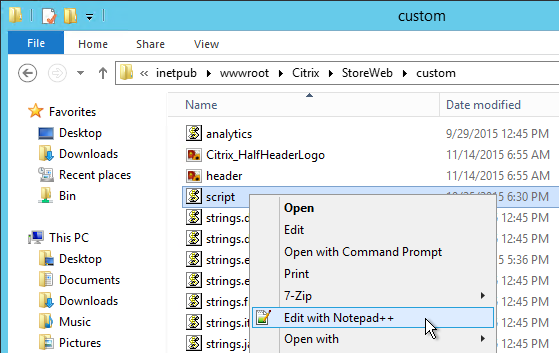
- At the bottom of the file, add Feng Huang’s code from First time user tutorial at discussions.citrix.com. Make sure the quotes are straight quotes and not curly quotes.
localStorage["showFtu"] = false;

Customize Receiver UI in StoreFront 3.0
StoreFront 3.0 customizations are visible in both Receiver for Web and in Receiver Self-Service.
If you are load balancing StoreFront and want to put the server name on the webpage, see Nicolas Ignoto Display server name with Citrix StoreFront 3.

Nicolas Ignoto Lab: Part 22 – Ultimate StoreFront 3 customization guide contains many StoreFront customizations including:
- Add disclaimer
- Change logo/background
- Add header
- Add text
- Change colors
- Etc.
Citrix Blog Post Citrix Customization Cookbook contains a collection of customizations including:
- Add Static or dynamic (read from file) text to the header and/or footer of the login page.
- Click-through disclaimer before or after login page
- Footer for every page
- Default to Folder view when visiting the Apps tab
- Change default text
- Change background images for featured categories
- Background image
Citrix Blog Post Storefront 3 Web Customization: Branding Your Deployment describes the following how to modify CSS to customize the appearance of StoreFront 3.0:
- Background images
- Logon button
- Colors for page and text
- How to view the mobile version of the page
- CSS for mobile pages
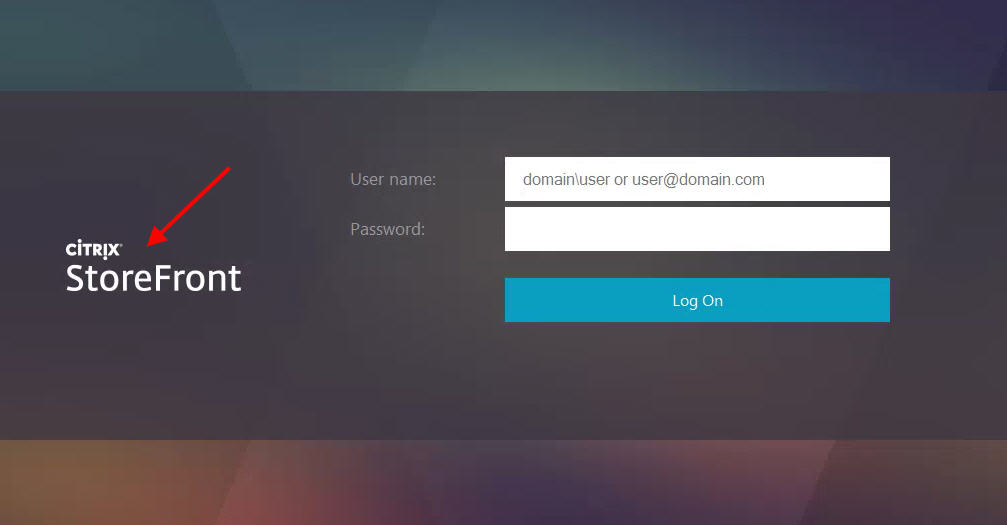
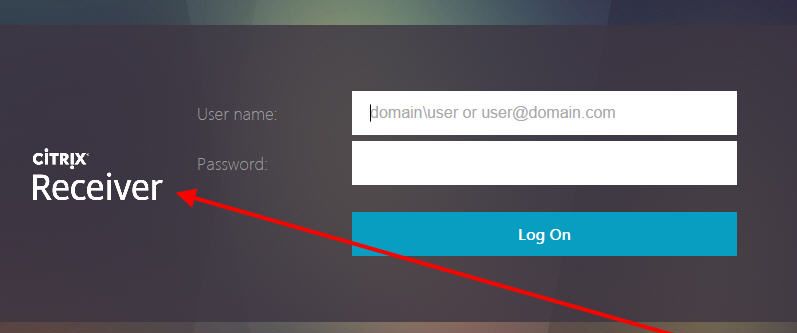
Jason Samuel Upgrading Citrix StoreFront 2.6 to StoreFront 3.0 – Things to Know details how to change the StoreFront logo to a Receiver logo.
Citrix Blog Post StoreFront 3.0: Message Customization describes how to add a scrolling message to the top of the screen. This is displayed in both Browsers and Receivers.


Migrate Web Interface features to StoreFront at Docs.citrix.com details how to configure Web Interface features in StoreFront. This includes:
- Enable return to last folder
- Header logo
- Pre-logon welcome message
- Logon screen customization
- Footer text
StoreFront 3.0 Receiver Customization APIs are detailed at Citrix Developer. Use the Receiver Customization API to brand or customize your end users’ app and desktop selection experience beyond capabilities provided in the StoreFront admin console. Customizations apply to latest Web, Chrome, Windows, Mac and Linux clients, and will be extended to mobile devices in future releases.
An example use case for the StoreFront 3.0 APIs is Citrix Blog Post Citrix Recipe Box: StoreFront Approvals. This is code for StoreFront that requires workflow approval when a user subscribes to an app.
Citrix Blog Post Receiver X1 APIs describes the following:
- Overview of the CSS classes that can be customized.
- Override Citrix’s JavaScript functions to modify behavior – exclude or restyle apps, change a sort order, add a warning message etc.
- How to force X1 UI to display in either phone or larger mode.
Citrix Blog Post X1 Customization: Going deeper with CSS describes the following:
- Use CSS (/custom/style.css) to style the three custom regions (#customTop, #customBottom, #customScrollTop). Shown below in red, blue, and pink.
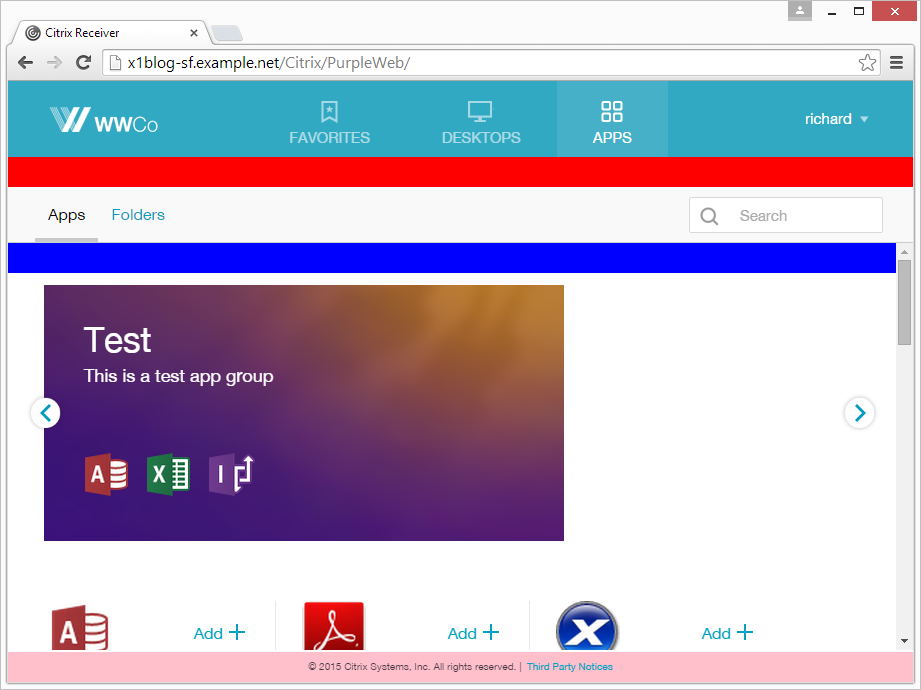
- Marker classes for showing/hiding or highlighting parts of the UI: large display, small display, high DPI, Favorites view, Desktops view, Apps view, appinfo view.
Citrix Blog Post Scripting X1 describes the following:
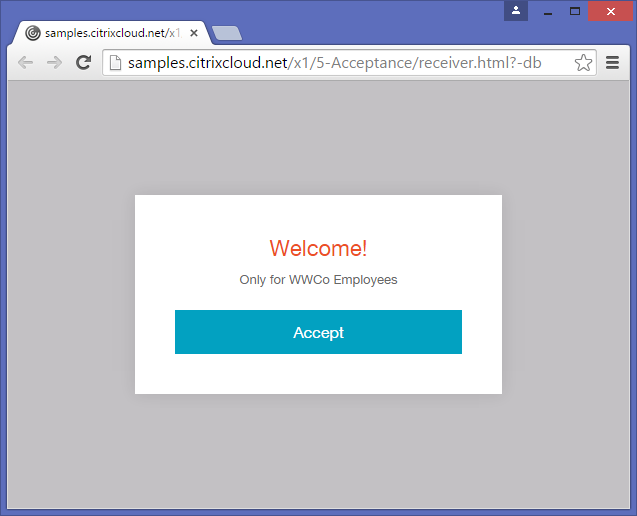
- JavaScript code to display an Acceptance dialog box before users can login.
- Use JQuery to add HTML code to custom regions (e.g. #customScrollTop) including using CSS to hide the HTML code unless a specific tab is selected by the user.
Citrix Blog Post – Rewriting the Session ClientName from StoreFront: I would like to offer the following customisation DLL which can apply client name rewrites based on a template. The customisation template can be any string, but where that string contains a particular token, the token will be replaced by some information from the User Context. If the intent was just to replace the ClientName with the user name, the template is then just “$U”. More details and the .dll file are in the blog post.
StoreFront Store Customization SDK at Citrix Developer: The Store Customization SDK allows you to apply custom logic to the process of displaying resources to users and to adjust launch parameters. For example, you can use the SDK to control which apps and desktops are displayed to users, to change ICA virtual channel parameters, or to modify access conditions through XenApp and XenDesktop policy selection. Key Customization Points:
- Post-Enumeration
- Post-Launch ICA File
- Post-Session Enumeration
- Access Conditions (pre-launch and pre-enumeration)
- Provider List
- Device information
Citrix Blog Post Adding a Language to StoreFront 3.0: A new language pack is comprised of a culture definition file, a string bundle file and a custom string bundle file. See the Blog Post for more details.
To change the StoreFront page title, see Sam Jacobs How to Change the Page Title in Citrix Receiver 3.x at mycugc.org.


Customize Receiver for Web in StoreFront 2.6
These customizations apply to Receiver for Web only. They do not apply to Receiver Self-Service or NetScaler Gateway.
Citrix Blog post Receiver for Web UI Themes: White Theme and Dark Theme.
The Citrix blog post Customizing Receiver for Web 2.5 applies to StoreFront 2.6 except for the changes detailed in the blog post Customizing Receiver for Web 2.6. Here are some customizations detailed in these blog posts:
- Hyperlink in the Footer Area – for example, contact the help desk
- Pre-login (Disclaimer) and Post-login (Announcement) Messages
- Display Client IP Address
- Display StoreFront server name
Citrix blog post – How to Add a Custom Banner to the Logon Page of StoreFront 2.x, Director 7.x, or Citrix License Server 11.x: Some customers require that all levels of authentication (all logon pages) display security banners which outline the rights to privacy (or lack thereof) when accessing their sites. In this case, a simple change to the web page code results in the addition of text – a security banner – near the authentication fields which is visible each time a user logs onto the site. This article contains information about the customization of the logon page of StoreFront, Director, and Citrix License Server web pages.
From Citrix Discussions: Just realized that you probably should not modify the original files. All StoreFront modifications are done by adding CSS/Javascript into the /contrib directory, which overrides the default values. You would simply create a file called *custom.wrstrings.en.js* (for English) in that directory, replacing just the values that you wish to override.
More customizations are detailed Citrix Knowledgebase article Customizing the Receiver for Web User Interface including:
- Language strings and Language Pack
- CSS Customization
- Javascript Customization
From Daniel Ruiz – Customizing Citrix StoreFront 2.6 including Pre-Login message page: The following customizations include the following:
- Pre-Login message page
- Front Page with custom logo and title header
- App/Desktop page with custom logo, user client IP
- Apps/Desktop Tab on top with Disable user multiclick
- Page footer
From Czerno blog – Redirect Citrix Storefront to a different page at log off: To make Storefront redirect to a different page rather than just sit at the “You have logged off successfully” page, edit the “custom.wrstrings.en.js” file in the contrib folder of the Web Store. By default this will be located at “C:\inetpub\wwwroot\Citrix\<StoreName>Web\contrib”. If you have not created any customizations, select everything in the file and replace with the following:
(function ($) {
$.localization.customStringBundle('en', {
YouAreLoggedOff: 'You have logged off successfully. <br>'
+'You are being redirected to <Enter your web page here or delete this line>'
+'<script type="text/javascript">'
+'window.location.replace("http://www.czerno.com");'
+'</script>'
});
})(jQuery);
StoreFront SDK
Use the Store Customization SDK to apply custom logic to the process of displaying resources to users and to adjust launch parameters. For example, you can use the SDK to control which apps and desktops are displayed to users, to change ICA virtual channel parameters, or to modify access conditions through XenApp and XenDesktop policy selection.
Requires Visual Studio to create .dll files that replace the ones bundled with StoreFront.
StoreFront 3.0 Theme for NetScaler 10.5
You can make the NetScaler Gateway 10.5 logon page look like the Receiver for Web in StoreFront 3.0. Daniel Ruiz NetScaler Gateway front page à la StoreFront 3.0 has instructions for manually editing the NetScaler Gateway theme to match StoreFront 3.0. Or visit Citrix Blog Post X1 Skin for NetScaler Gateway for an already developed theme package.
- Download the theme from the Citrix Blog post.
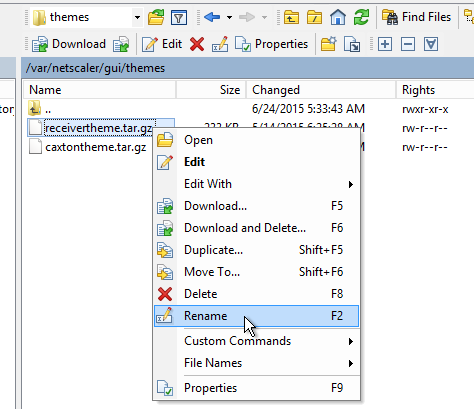
- WinSCP to the NetScaler and switch to /var/netscaler/gui/themes.
- On the right, rename the existing receivertheme.tar.gz file.
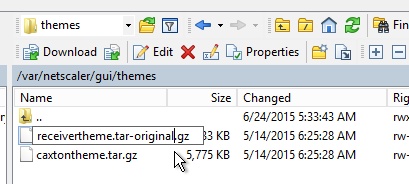
- On the right, rename the existing receivertheme.tar.gz file.
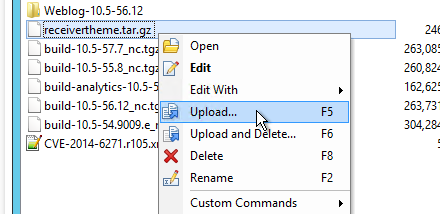
- Upload the theme that was downloaded from the Citrix Blog post.
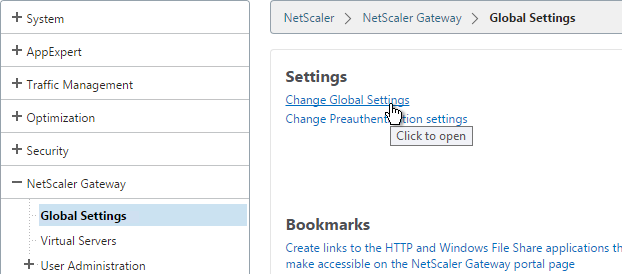
- In NetScaler GUI, go to NetScaler Gateway > Global Settings > Change Global Settings.
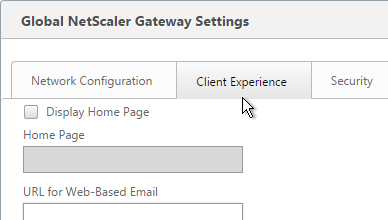
- Switch to the Client Experience tab.
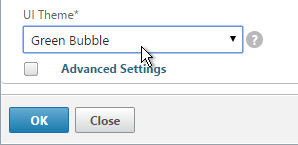
- At the bottom, if the current UI Theme is Green Bubble, change it to Default. Then go back into the screen and change it back to Green Bubble. This causes the theme to reload. Click OK.
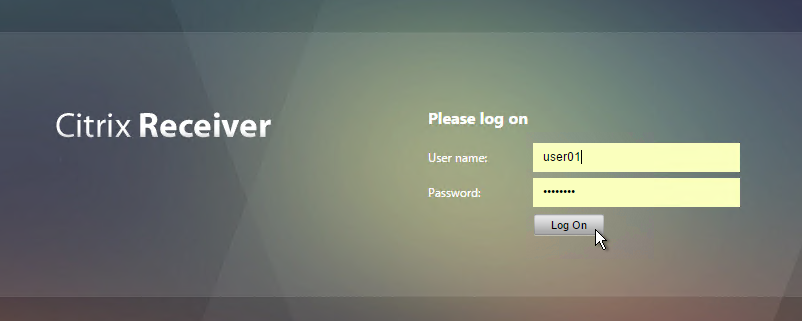
- The logon page should now look more like Receiver for Web in StoreFront 3.0.
StoreFront 3.0 Portal Theme for NetScaler 11
See NetScaler Gateway 11 > Portal Themes. Build 62 and newer have a built-in X1 theme.
Related Pages
- StoreFront Basic Configuration
- StoreFront Favorites / Subscriptions – disable, replicate, control, etc.
- NetScaler Gateway 10.5
Anonymous and android
I’m trying to get my Android handscanner to work with Anonymous Logon.
I have created a Delivery Group to accept unauthenticated (anonymous) users and store for Unauthenticated Users.
Everything works fine from a computer and IOS device, but not from an Android device.
What am I missing, please advise me.
Receiver for Android do not currently support Anonymous Logon.
Hi,
My users are not connecting via netscaler, they go to storefront
Users do not want to keep type their usename in receiver for ios (only password), the @SaveCredential line is not commented out but it keeps prompting for both username and password credentials. How can I save / cache the username?
We have a requirement to display a snippet of text containing the companies domain password requirements when the StoreFront site prompts to change. For example, when the user is “Set to change password at Next Logon” it shows a screen that says a password expired – How do I change that text to include a note that the Password cannot be the same as last 10, Need Upper, Lower, Number, Symbol? I cannot find anyone who has done this on Storefront. I inherited this and it was done on Web Interface 5.4, not sure how though.
“C:\inetpub\wwwroot\Citrix\StoreAuth\App_Data\Templates\ChangePassword.tfrm” references some variables that you might be able to change in a language file (“C:\inetpub\wwwroot\Citrix\StoreWeb\custom\strings.en.js”)
Hi Carl, Is there a away to change the icon look and feel in storefront , so not just the size ? We’re looking to differentiate Windows 10 and Windows 7 icons distinctly. Thanks
Hey Carl
XenApp 7.11
Storefront and Delivery Controllers on 2012R2 servers
VDA are 2008r2 servers
Clients are win 7 ent. Fully Patched (non-domain joined – local user logon)
Receiver 14,7 with RTME 2.2 (un-configured because we present the URL a the webpage)
User are presented a webpage logon to storefront
I am having an issue (out of the blue)
I have [Application]
DesktopViewer-ForceFullScreenStartup=On
as defined by you and Citrix (https://support.citrix.com/article/CTX139762.?_ga=2.236033601.1333841936.1500392391-59609355.1500392390)
it was working fine until today.
today, after logon via webpage, users are presented with a full-screen desktop
it remains full screen (shoing Group policy processing in the full screen mode)
However, the issue that happens is once the desktop is displayed, it is equivalent to 800×600 size within the full screen.
the Receiver Display preferences will modify the settings to allow for the full screen to be utilized but those settings are not regenerated if the user logs off and back on (it is back to the 800×600 dekstop again)
I have reviewed all settings in the storefront, default.ica and web.config – nothing has changed.
I have done a reset and even a remove/reinstall of the receiver – no change
Can anyone suggest where i might have the issue coming from?
All servers (storefront and controllers) have been restarted
I have a screenshot, (but i cant see how i can embed it here)
Many thanks
RESOLVED
https://support.citrix.com/article/CTX131867?_ga=2.267034574.1333841936.1500392391-59609355.1500392390
Hi Carl,
In storefront 3.9 is there a away to provide users information with regards to whether there VM is available, and the option to restart ? I saw it in earlier versions but just wondering if it was removed from 3.9. thanks
For dedicated virtual desktops, you should be able to right-click the icon and restart it.
Hi carl – thanks for the reply. I see this option in storefrontweb but is there a way to have this available in \SSON site ? thanks
Is there a way to Remove the “Reset Profile” button from the director webpage while looking at a session? This renames my shared-redirected start menu and messes everyone up.
Could you please, let us know, what kind of profile management solution is used on the VDA? Or how the profile is redirected? We currently don’t have a way to disable this button
If you create a new Role in Studio > Administrators > Roles, you can simply not check Director > Reset User Profiles.
Thanks Carl, yes Custom administrator can do this,. Something I missed
Hello Carl
Is self service considered receiver for Windows as well? If so then wsconnect can be set either through via rexiever admx correct. The settings on storefront only control receiver for web?
Or does that control client side as well?
Self Service refers to the GUI (icon collection program) that is included with Receiver. You can use the ICA engine portion of Receiver from a browser without ever touching SelfService.
WSCReconnectMode registry key applies to SelfService. Workspace Control in StoreFront is in the Receiver for Web (browser) portion of the console.
Ok so self service mode like u stated is the GUI. That u hit open on in receiver. Which is reciever for Windows
Self service mode disabled. Then apps on desktop isn’t self service mode. Correct? Still reciever for Windows
Both above are controlled either with reg keys u mentioned or reciver based admx correct? Along with the check box in the store setting to not allow sessions to reconnect correct?
Receiver for web is were I control WS control on manage reciever for web.
But know for reciever for web.
I was asked the details and wanted to make sure I totally understood it right.
Is above accurate
Selfservice.exe is still the module that is grabbing the icons and putting them on the Start Menu. It’s not just a UI. When Selfservice.exe grabs the icons, it also checks for existing sessions.
Thank you I get that as well. Just trying to get clarification on my last comment
WSCReconnectMode applies to selfservice.exe, whether it runs in UI mode or not. It does not apply to Browser accessing the icons.
Hi Carl, do you know if it’s possible to force all shortcuts into the root of the start menu regardless of what is configured in the application within AppCenter? The combinations of STARTMENUDIR and UseCategoryAsStartMenuPath don’t give us what we need and we can’t change the folder configuration of the application itself (as other clients are also using it).
STARTMENUDIR defines the relative path at the root no problem, but then creates whatever folders the application is configured with underneath it. UseCategoryAsStartMenuPath is no good as it isn’t the ‘client application folder’ we are trying to override, but the configuration within the ‘Application shortcut placement / add to the client’s Start Menu / Start menu folder (citrixCitrix XenApp Plugin only)’ setting. This is XenApp 6.5 with StoreFront 3.6 and Receiver 4.4.2000.
We are trying this on Windows 10. I know you only get one folder deep anyway, but we want to remove all folders and have everything in the root, even if the published apps are configured with a folder. I’ve started poking around in the config.aspx and web.conf files but still struggling. Thank you.
I don’t see anything for this in https://docs.citrix.com/en-us/receiver/windows/4-3/ica-overview-receiver-config/receiver-windows-configure-app-delivery-wrapper.html. You might have to call Citrix Support and submit a feature request.
Thanks mate. I ended up using the StoreFront SDK to override the path attribute on enumeration in the ‘Resources customization’ point – works a treat!
I used the ‘EnumerationResultModifier_Example_CallCenter.cs’ file as a reference starting point, removed all the logic I didn’t need and just set r.path = “\\” for every resource in the enumeration. Nice and fast.
I will also comment out the tracing to ensure I don’t impact performance. Deployment is really easy, you just overwrite the existing StoreCustomization_Enumeration.dll file in StoreFront and propagate the changes. Gotta update the class name in the sample file as per the SDK PDF documentation. Took about an hour to read the docco, look at the sample and get something compiled.
You may be able to get it to work using the Storefront mods in this discussion thread. Note that these were updated for SF 3.X. This workaround depends on treating the desktop you want to launch as a regular published app. I’ve haven’t performed this trick myself – just noting that it is something you can try.
http://discussions.citrix.com/topic/347786-storefront-21-auto-launch-application/#entry1886496
Hello Carl.
Should auto launch of a desktop work when using XenApp Services Site? Environment variable are as such… StoreFront 3.7, XenApp 7.6 for Win7 VDI’s and NetScaler 10.5. I only have 1 desktop published to my test user. CCM is being used to configure the Wyse terminal and I set up a Gateway via the NetScaler to the Wyse terminal (AIO) connects directly to the XenApp Services site. Authentication occurs just fine and I can log into the Wyse terminal and see my desktop, but it won’t autolaunch. I can click on the icon and the desktop will launch, just not automatically. Any ideas?
Thank you.
Shane
What OS on your Wyse? I know ThinOS has a parameter for auto launch.
But icons don’t auto-launch in regular Receiver. See http://support.citrix.com/article/CTX200337
The Wyse OS is ThinOS, so unfortunately, the Receiver is Wyse’s version and not the full Citrix version. From what I understand, the ThinOS parameter for auto-launch is only available if using the .ini file for configuration. We are using Wyse’s Cloud Configuration Manager (CCM) and it does not offer the same parameter.
In StoreFront, there is an option in the Receiver for Web settings to auto-launch a desktop if only 1 desktop is assigned to the user. But that setting is not working for the XenApp Services Site, so I was wondering if there was a trick to get the desktop to auto-launch when using StoreFront. These Wyse All in One’s (AIO’s) are connecting remotely from an at home user’s Internet provider through a NetScaler to get the resources. Everything is working fine except for auto-launch.
Interestingly enough, auto-launch is working for same scenario with the difference being when the Wyse AIO’s are connecting remotely from an at home user’s Internet provider directly to a Web Interface 5.4 back-end using Citrix Secure Gateway (CSG).
Wyse isn’t offering any help on this saying it’s a Citrix issue. We are finally moving away from Web Interface and CSG and moving to remote access via NetScaler’s and StoreFront. This is a big issue for us if this functionality has been lost.
Appreciate any advice/help you might have to offer.
Thanks Carl.
Hi Carl, do you know if Receiver 4.4 can autolaunch a Desktop/App? I see you have it noted that it will not. Trying to pop a desktop in a 6.5 farm with the DesktopLock experience, just without the DesktopLock and using only Receiver. If so, the tested version of StoreFront.
What about SelfService.exe -qlaunch?
http://support.citrix.com/article/CTX200337
Hello Carl, great site and I appreciate all the info you put on here. I wanted to run something by you. I setup the Citrix policy to allow special folder redirection on XenApp 7.8 and the setting did not work. I then found your article showing how to enable special folder redirection on Storefront 3.0 https://www.carlstalhood.com/storefront-tweaks/#special
My questions are does the Citrix policy not have any effect when setting it to allow or deny and when you enable it on Storefront does that mean it is on for everyone? The reason for these questions is I could not get special folder redirection to work with just the Citrix policy applied to a delivery group. I set it up on Storefront as true and now it is working but it is working for all the other delivery groups we don’t need it applied to. I even went into the policy that was only applied to one delivery group and setup the rest of the delivery groups to deny and it is still mapping everyone’s desktop and My Doc and not just the servers in the delivery group the policy is applied to. Any help is appreciated, thanks.
Hey Carl, I am trying to use the Special Folder redirection for a certain group of users. I loaded the cmdlets and then run the Set-DSClientSettings -SiteId 1 -VirtualPath /Citrix/Store – SpecialFolderRedirectionAllowed $true command. It seems to run until it needs to update the registry. I then get a message stating DS:\DeliveryServices\wing\resources\settingsgroups\default\launch doesn’t exist? Inside powershell it always shows as PS:\ so I am not sure what is happening here. Any ideas?
Is Store the name of your store?
Carl, is there a way in Storefront to force icon refresh with a time parameter, like with Web Interface? In WI my PnAgent icons refresh every hour, so that when I add or remove a user group to a published app, they see the icon change in an hour, or what ever is specified. Thanks.
I’m not aware of anything other than timing out and requiring users to login again. If you post your question to discussions.citrix.com, the product managers frequently reply.
Hi Carl,
I am unable to see change Password option on StoreFront (2.5 v) log in page.Can you suggest what are the options need to check.
Through NetScaler Gateway? If so, I think it was fixed in one of the StoreFront builds.
Or Direct? If so, did you enable Password Changes in Authentication Settings?
Is there another way to speed up load times of the website?
First launch? Or every connection?
Are you blocking Internet connections or require a proxy to get to the Internet?
On every connection to storefront it takes around 2 minutes for the page to load, when i enter the proxy in IE11 it goes really fast (5 seconds). I’ve already tried the
generatePublisherEvidence to fasle.
What machine are you running the browser on? Try running procmon or fiddler or WireShark or similar to see what communication is timing out.
It is trying to connect to globalsign but it cannot because there is no proxy set. Do you have any suggestions?
Browser? Or IIS?
If Browser, maybe go to Tools > Internet Options, on Advanced tab, deselect Check Certificate Revocation.
Most of my proxy environments allow CRL checking to bypass the proxy.
Hi Carl – a hopefully simple question but one that has been driving me nuts. A customer simply wants to change the font color of the “Your session has timed out due to inactivity.” message on the Storefront for Web from white to black. I have used a CSS inspector, but still can’t seem to find the element to change this. Any idea?
In the new X1 theme, the class is .messageBoxText
Thanks for the response! This is Storefront 2.6, unfortunately.
I want to customize the storefront launch parameters (2.6). I will be placing links to documents that I need to launch from a word or any other application that I can send command line parameters to and launching a storefront application (2.6) I would like to pass in the the location of a document. I assume that this is not available out of the box. I am assuming I will need to somehow pass a parameter to the storefront to accomplish this.
I have looked at the storefront sdk’s and I have not seen any example of passing parameters in but I assume it can be done.
Can you shed some light on this?
Thanks
Carl, please note the remarks section of the following: https://msdn.microsoft.com/en-us/library/bb629393(v=vs.110).aspx
Since moving to ASP.Net 4.x configuring the generatePublisherEvidence has no effect on assembly load times.
Thanks John. I think I originally got those instructions from the forums. Let me know if anything else needs to be changed.
Hi,
I’m getting a no logon methods available error with Microsoft Edge browser but the same is working with IE11.
I’m using Storefront 3.0, Receiver 4.4.
Any thoughts on this issue?
Thanks,
Suren
What Authentication Methods do you have enabled? Pass-through only?
Hi Carl,
Yes, we have enabled Domain Pass-Through and Pass-through from NetScaler Gateway.
Thanks,
Suren
Did you get this working?
receivertheme.tar.gz is no longer available on the sharefile site/room – https://citrix.sharefile.com/d-s0a446bdb94c46b1b Any idea where I may be able to find it?
Leave a comment on the blog post and ask them to update the link. You can also setup the background manually by grabbing it from a StoteFront server.
That’s exactly what I did.
This page really helped too: https://ivancacic.com/netscaler-gateway-customisation-receiever-x1storefront-2-7
Thanks!
Also – http://danielruiz.net/2015/07/13/citrix-netscaler-gateway-client-choices-branding/
In regards to hiding apps, is there a way to hide an app in Storefront, but have it appear as a desktop shortcut with the Native Receiver?
I am trying to publish apps in folders on Storefront, but have one of the apps show up on users desktops outside of the folder structure. The only way I’ve found to avoid the folder structure on the desktop is to publish a second app, but then it will show up in Storefront in two places.
See UseCategoryAsDesktopPath at http://docs.citrix.com/en-us/receiver/windows/4-4/receiver-windows-44-about/receiver-for-windows-4-4-fixed-issues.html
Is anything else needed for Special Folder Redirection to work beside the set-dsclientsettings command? We’re using Receiver 4.3 and Storefront 3 and I can’t seem to get it to work. Thanks.
Are client drives enabled?
Yes and they show correctly. Just no special folder redirection.
Do you have a GPO that configures regular folder redirection? You might have to disable that one.
Thanks for the reply, we did have folder redirection set up in a our standard user policy. I created a loop back policy in replace mode without folder redirection setup and deleted the user profiles. No we get no folder redirection, but still no Special Folder Redirection either. I feel like I’m just missing something really simple. Is there anything that needs to be done in the Receiver client?
Hi Carl, the older versions of StoreFront handled customizations by putting them in the contrib directory, but now I see that version 3 uses the custom directory for this purpose, even though the contrib directory still works. Do you think this means that in the next version or two, the contrib directory will no longer be supported for customizations? Next Question: On the homepage that displays the icons I would like to reduce the size of the icon tiles, so I can get more icons per page, have you seen code to do this? Thanks.
See my replies at http://discussions.citrix.com/topic/367757-storefront-3-console-feature-to-modify-icon-sizes/
Hi Carl, I have configured Citrix receiver 4.3 ( configured with Store front 2.6) to populate published application under start menu folder. When I launch a published application from the start menu single sing on works, and if I launch any published desktop it prompts for the credential. Would you able to assist me why single sing not working for published desktop.
Do both icons go to the same VDA? Anything in Event Viewer on the VDA?
Yes, both app and desktop are pointed to the same server. I couldn’t see any events related to this issue
Hi Raj,
Did you find the solution for the issue
Hi Mahammad,
SSON is working when I used Citrix receiver 4.4. Currently facing different issue with the latest receiver, Icons are not creating under start menu automatically when I login to the server, need to refresh citrix receiver to populate. I have raised a case with Citrix waiting for their assistance.
Thanks for this info. Really great. I do have one question…
Is there a way to move the Details tab at the side of the icons to below them?
Thanks!!
Maybe with the CSS edits. Try posting your question to http://discussions.citrix.com. There are some Citrix employees and other people that might have a quick solution.
Hi Carl,
Is there a way to allow anonymous access through the gateway? I’ve set up a storefront store for anonymous access, one vda server hosting apps to allow anonymous access, and my Netscaler is set to authenticate through a different domain, but once it authenticates with that domain, then give access to the storefront server and resources.
Thanks,
David L.
Are you asking how to disable authentication at the Gateway?
Or are you asking how to allow anonymous apps through a non-anonymous store? If you publish an app to anonymous users, I believe it shows up for all users and not just thruogh anonymous stores.
I kind of figured it out with a combination of your articles – which I told our Citrix and Netscaler reps about who were very interested and impressed – and this article – https://discussions.citrix.com/topic/356955-public-unautheticated-anonymous-app-publishing-using-netscaler-105-and-storefront-26/
I have to lock it down more but the story is this.
There is a general domain we don’t have admin right on, but we do have a user with read capability, and I can bind to it. So using your article I was able to set up an authentication server. We don’t trust the domain, they don’t trust us, and we have no user names and passwords from it, and nor do we want them.
But, I needed to use that domain for authentication on the netscaler, then pass the users across to my storefront server for them and the vda servers so they could run apps.
I set up a storefront with anonymous access, allowed the specific vda server anonymous access, and then used the article above to insert the code in to the store\web.config
Now I have a way for people to access the applications from outside our network, but still have to authenticate, even though we don’t have those usernames and passwords but someone else does.
Carl,
Just have a small question. If you have some featured app groups normally if you click a group then a new screen opens with all the applications (like this):
http://imgur.com/vT12HiN
But I don’t want to open a new page for the applications, I just want them to appear at the bottom of the homepage so users don’t have to click back to see the appgroups again.
Now at the bottom of the app groups all the applications are shown. I only want to show the applications there of the App group a user selects.
Can you help me out on this? I’m sure I’m missing something.
Kind Regards,
Neal
Anyone? 🙂
Have you posted at discussions.citrix.com? There are a couple Citrix employees that sometimes post code to achieve functionality.
Is there any way to create a Message Tab just like in Web interface 5.3?
You can use the customization insertion points to create popup windows to display messages. See /custom/script.js for an example. Otherwise I’m not aware of any easy way to create a Message Tab.
Yes you can:
add this to /custom/script.js:
CTXS.ExtensionAPI.addViewButton(“Helpclass”,”Help”, “Help);
$(“#customScrollTop”).html(“ Put HTML heare :)”);
and to /custom/style.css:
.Helpclass{ display:none;
font-size:20px;
}
.Helpclass-view .HelpclassPage { display:block; }
*/
Sorry the the blog destroyed my html…
Yes you can add a ne new tab:
here the script:
https://drive.google.com/a/punktis.de/file/d/0B3ywRF-4dJPiTVY3RV8wTUtLZFU/view?usp=sharing
here a screenshot:
https://drive.google.com/a/punktis.de/file/d/0B3ywRF-4dJPiaDY4MlRpY254RFU/view?usp=sharing
Best Regards
Hi
I am trying to add the Help button to Storefront 3.x as you describe. The button appears and it opens a new page within Storefront. However, I am not able to get it to display my html code/file. It just shows a blank page. What am I doing wrong?
I have tried the following variations in \custom\script.js without success:
CTXS.ExtensionAPI.addViewButton(“Helpclass”, “Help | About”, “Help”);$(“#customScrollTop”).html(“ HelpAbout.html”);
CTXS.ExtensionAPI.addViewButton(“Helpclass”, “Help | About”, “Help”);$(“#customScrollTop”).html(“ custom/HelpAbout.html”);
CTXS.ExtensionAPI.addViewButton(“Helpclass”, “Help | About”, “Help”);$(“#customScrollTop”).html(“ HelpAbout.html”);
The style.css code seems to work fine.
Hi,
can you help me?
how can i localize the text in a message box in different language? I did not understand the help.
message box params object
{
localize: If true, then any string matching a key in the localization dictionary will be localized.
messageText: Text to show
messageTitle: Title for message box
okButtonText: Optional button text (defaults to ok)
cancelButtonText: Optional button text for a second button (defaults to cancel)
okAction: Function to call if OK is clicked
cancelAction: Function to call if Cancel is clicked. (If omitted, only a single button is shown)
}
Best Regards
Have you seen https://www.citrix.com/blogs/2015/09/25/adding-a-language-to-storefront-3-0/?
Thanks for posting. I think this is only for new language.
I only want to add to values for messageText and messageTitle in english and german. I have add them to custom\strings.en.js and custom\strings.de.js . But It did not work.
Best regards
Constantin
The language string bundles are at C:\inetpub\wwwroot\Citrix\StoreWeb\receiver\js\localization. Is that what you’re looking for?
mh no :). Thats are the standard localization.
I want to translate a message box in english and german. I want to use the custom\strings.de.js and custom\strings.en.js . But i don’t know how.
Javascript in script.js for a Messagebox:
CTXS.Extensions.beforeDisplayHomeScreen = function (callback) {
CTXS.ExtensionAPI.showMessage({
localize:true,
messageTitle: “Information!”,
messageText: “Maintance at XX”,
okButtonText: “Accept”,
okAction: callback
});
};
I think i have to create “variables” for messageTitle, messageText and okButtonText.
I finally figured it out and it’s easier than I expected. Edit “C:\inetpub\wwwroot\Citrix\StoreWeb\custom\strings.en.js” and add a new string. Then set your MessageText to the name of the hash table index, in quotes. For example, my strings file contains:
(function ($) {

    $.localization.customStringBundle("en", {

        LogOn: "Log On",

        InstallReceiver: "Click to Install Receiver",

	WelcomeMessage: "Howdy!",

	WelcomeTitle: "Hello from Corp!"

    });

})(jQuery);
My script.js contains:
CTXS.Extensions.beforeLogon = function (callback) {doneClickThrough = true;
CTXS.ExtensionAPI.showMessage({
localize: true,
messageTitle: "WelcomeTitle",
messageText: "WelcomeMessage",
okButtonText: "Accept",
okAction: callback
});
Yeah worked for me :). Thanks Mh were was my mistake before….:).
Can you Change the text from the okButtonText: “Accept”, ? This did not worked for me.
Hi Carl, is there a way to configure Storefront just like Web Interface, disabling ICA proxy at Store level, so the clients could establish a direct connection to the VDI, leaving authorization at NS? We are using GSLB, accessing from Linux Thin Clients via web site. All the clients are in a secure lan, no connection from the Internet is allowed.
On the WI it’s easy to do because we can configure secure access in Direct Mode instead of Gateway Direct so the clients are connecting on 2598 port to the XA/XD resources. And if I configure a Callback we can do pass-through even with Linux Thin Clients.
I tried to set Remote access to NONE, but it doesn’t work. On the Storefronts I get an error “A request was sent to service ‘xxx_xxx’ that was detected as passing through a gateway. However no gateways are configured for this service”.
Thank you
See Set-DSFarmsWithNullOptimalGateway at http://docs.citrix.com/en-us/storefront/3/configure-high-availability-for-stores/sf-configure-ha.html#par_anchortitle_dd84
Carl, many thanks for this comprehensive list of install instructions. you have saved me so much time hunting around for info, hotfixes etc. If only Citrix kept an up to date similar build list!
Hi Carl,
How to control active session(not disconnected) reconnect for specific citrix users, Can we limit workspace control reconnect to specific users or it is done as generic change for all users?
Thanks in advance
If using Receiver you can change it on the Receiver side. But in a browser, I think you can make the change on the client side. Web Interface had a client-side cookie that controlled it. If the FQDN is not in Trusted Sites then I wonder if Workspace Control won’t work.
Hi Carl,
Currently I’m trying to configure Citrix receiver 3.4 to use storefront 2.6 for PN agent. Part of configuration I’m trying create the Citrix published application icon to populate under one of the folder in start menu, which is not working not working for me.
Icon are getting populated in the start menu root, but I would like to place those icons into a single folder.
My guess is you need to edit the file “C:\inetpub\wwwroot\Citrix\Store\Views\PnaConfig\Config.aspx” and specify the Start Menu folder.
Thanks after 4weeks struggle finally I can see the icons on start menu subfolder.
I have updated the below TAG where you need to replace the foldername with their desired name, might be useful for others who are trying to configure in Citrix receiver 3.4
true
FOLDERNAME
RootFolder root=”programs” modifiable=”true” forcedefault=”false”>foldername</RootFolder
Edit the file C:\inetpub\wwwroot\Citrix\Roaming\web.config didn’t work for my case, do I still need to modify registry settings when using this method to publish apps shortcuts to desktop/startmenu?
You might have to remove the account from Receiver and re-add it. Are you trying to put all apps on the desktop? Do you have subscriptions enabled? If so, you might have to subscribe (Favorite) first.
Only to populate subscribed apps on desktop/startmenu, and user will have to subscribe it from receiver self-service instead of storefront in order to have shortcuts populated. is there anyway to populate the subscribed apps straight from storefront without the need to launch receiver?
Yep. See https://www.carlstalhood.com/storefront-basic-configuration/#autofavorite
I have installed Store Front 3.0
I have changed the ” Log On” to ” Login” name, but the button in the Login page still shows Log On. Any idea where to change it?
Thanks.
It seems to be in several places. One place is “C:\inetpub\wwwroot\Citrix\Authentication\App_Data\resources\ExplicitFormsCommon.en.resx”. After changing it, run iisreset.
I found that disabling NETBIOS over TCPIP improves the web page loading speed quite a bit, even with 3.0
Added. Thanks.
Off topic question
What are the risks of running Access 97 on Server 2012 platform for xenapp 7.6?
other than access 97 isn’t supported.
If you can get it to work then go for it. No recent security patches for the app.
GREAT INFORMATION HERE! Not to add a request – but the biggest complaint we are getting is with how large the icons are in Receiver Web/Storefront 3.0 – would be great to have a write-up on shrinking these 25%! Thank you much
Just the icon? You can edit C:\inetpub\wwwroot\Citrix\StoreWeb\custom\style.css, add a style for
.storeapp-iconand set the width and height to 45px. I found the class by using Google Chrome’s Inspect Element.To shrink more than just the icon, here’s a start.
.storeapp-details-link { height:94px; } .storeapp-icon { height:45px; width:45px; } .storeapp-list .storeapp, .storeapp-list .folder { width: 202px; }Use the PowerShell cmdlet to configure “Treat Desktops as Applications”. However I am seing the effect only on the “Receiver for Web”, where I now have only two Tabs “FAVORITES, APPS”.
The Desktops are still placed on separate tab on “Citrix Receiver” native client and the three Tabs persist “FAVORITES, DESKTOPS, APPS”.
I thought this configuration was to have effect on both. Or what could have gone wrong?
I just tried it and in Native Receiver Self-Service it moved the Desktop to my Apps tab. After launching Receiver I had to click Refresh Apps before it would make the adjustments.
Thanks Carl, refresh did the trick.
I would have expected rebooting the client to have resolved it as well, This I did severaly before posting.
Thanks Carl,
Excellent article.
Just what I was looking for!
Great Article…
Help.
Enable Remember my password – in Windows and android – all good. But IOS (Macbook) last version recevier – When PNAgent connects, there should now not be a Remember my password checkbox. Why?
I just tried Receiver for Mac 12.0 and when I point it to a PNAgent path (e.g. https://storefront.corp.local/Citrix/Store/PNAgent/config.xml) it allows me to save my password. Are you maybe connecting to native StoreFront through NetScaler Gateway?
No, NetScaler Gatevay, disabled
http://storefront.corp.local/Citrix/Store/PNAgent/config.xml – simple http
Does it work if you use https? Receiver usually requires https.
Hi Carl.
Just been configured to use http, people are working. one server. On citrix xenapp 7.6. and VDA. The machine catalog one machine-this server. To convert to https have to remove the delivery groups, and this will have non-functional users. This is user windows and android.
So all the same, you can remember the password for MAC, use http?
Thanks in advance
I personally never do pure http for StoreFront and I always insist on https.
To implement https, simply install a cert on the StoreFront server and bind it to IIS. Then in StoreFront console change the Base URL. Then in Receiver, remove any existing account and re-add it. I assume you are not load balancing.
Hi Carl, do you know if it is possible to display the description of published applications anywhere in Storefront? With Web Interface this was possible.
Thank you
In the plus menu, if you hove your mouse over the app then the description is displayed.
That is a problem, since our stores are mandatory 🙂 So no plus menu available here.
In StoreFront 3.0, you can click Details next to the app to see the description.
+1. Thanks Carl. I often saw you helping people on CItrix support forums. Another great help for the community. Thanks a lot
Great Article . Thanks for all the valuable information.
In store
name authenticated advertised store url access
store service yes yes Internal network only
authentication method only “User name and password”, netscaler gateway dont use. Connect to store is via a local area network.
http://trm14.***/citrix/store/pnagent/config.xml
Try this (I haven’t tried it yet):
Open the file C:\inetpub\wwwroot\Citrix\Store\Views\PnaConfig\config.aspx
Find “EnableSavePassword” and set it to True
I just updated the page with the instructions – https://www.carlstalhood.com/storefront-tweaks/#pnagent
true
no result
wrong. Very good, work. Thank you!!
Which Receiver are you running? If you are running Receiver Self-Service (SelfService.exe) and using it to connect to a PNAgent URL then I don’t think it lets you save the password. However, if you are running Receiver Enterprise (PNAgent.exe) 3.4, then you should see the save password box. If you are running Receiver Self-Service, you should be pointing it to a Store path instead of to PNAgent path. Try posting your question to http://discussions.citrix.com
enter – true and restart receiver(exit/start) – enable “Remember My Password”
Thank you, veru much.
Help.
Enable Remember my password – in Windows and android – all good. But IOS (Macbook) last version recevier – When PNAgent connects, there should now not be a Remember my password checkbox. Why?
how enable “Remember My Password”?
use http, use store, Authentication – login/pass
setting to default
@SaveCredential(id: @GetTextValue(“saveCredentialsId”), labelKey: “ExplicitFormsCommon:SaveCredentialsLabel”, initiallyChecked: ControlValue(“SaveCredentials”))
but…box “Remember My Password” receiver -off
help
If you are connecting through NetScaler Gateway then Receiver won’t let you save the password. This is only valid for internal connections that go directly to StoreFront.
Nice article, we were working on upgrading to NetScaler 10.5 and StoreFront and especially the certificate check and GUI tool came in handy
Carl can you tell me how to make the Apps button higher priority over the Desktops button, when logging into Storefront 2.6 you do not need to click the Apps button.
Also I have a white theme and when clicking icons inside of a folder, the Main button at the top of the page is default white, so I need to change the color. Thanks.
Hi Bob, you should be able to edit C:\Inetpub\wwwroot\Citrix\StoreWeb\web.config and set defaultView to apps. This is detailed at https://www.carlstalhood.com/storefront-tweaks/#tabs