Navigation
This article applies to all versions of StoreFront between 2.6 and 3.0.9000 (LTSR CU9). For newer versions, see the newer article.
Here is a collection of optional StoreFront configurations.
- Disable CRL Checking to speed up .NET
- StoreFront can control Receiver Shortcut placement
- PNAgent Authentication
- Hide Applications from the Store
- StoreFront web.config GUI Assistant
- Desktop Autolaunch
- Force desktops to launch full screen
- Store for Anonymous users
- Workspace Control
- Treat Desktops as Applications
- Enable Special Folder Redirection
- Disable “Remember My Password” in Receiver Self-Service
- Remove “Activate” Option from Receiver for Web
- Disable HTML5 Receiver Getting Started Tour
- Customize Appearance of Receiver in StoreFront 3.0
- Customize Appearance of Receiver for Web in StoreFront 2.6
- StoreFront SDK
- StoreFront 3.0 Theme for NetScaler 10.5
- StoreFront 3.0 Portal Theme for NetScaler 11.0
CRL Checking – Disable
When the StoreFront server checks certificate revocation for its locally signed files, a delay can occur before the StoreFront logon page is displayed.
- Run the following PowerShell commands:
Add-PSSnapin Citrix.DeliveryServices.Framework.Commands
Set-DSAssemblyVerification $false
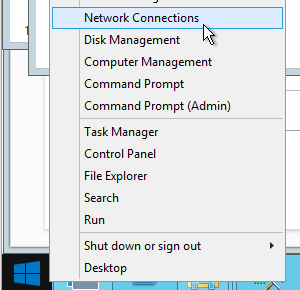
- Another potential tweak to speed up StoreFront is to disable NetBIOS. Right-click the Start Menu and click Network Connections.
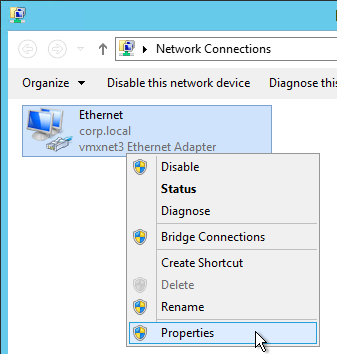
- Right-click the NIC and click Properties.
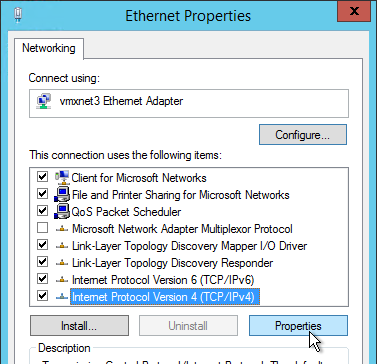
- Highlight Internet Protocol Version 4 and click Properties.
- Click Advanced.
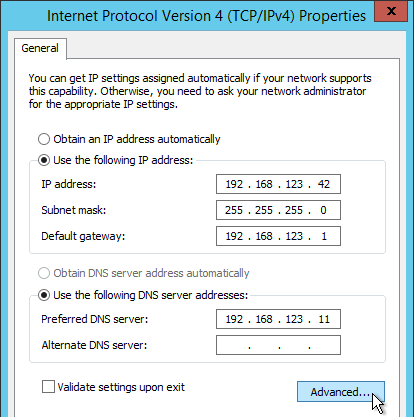
- On the WINS tab, change the selection to Disable NetBIOS over TCP/IP and click OK twice and Close once.
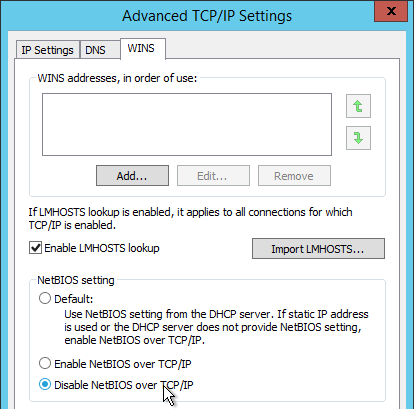
- Repeat on the other StoreFront servers.
Note: According to Microsoft, it is no longer necessary to configure generatePublisherEvidence in C:\Windows\Microsoft.NET\Framework\v4.0.30319\aspnet.config.
Receiver Shortcuts
You can use StoreFront to control placement of shortcuts on Receiver machines.
- Run Notepad elevated (as administrator).
- Edit the file C:\inetpub\wwwroot\Citrix\Roaming\web.config.
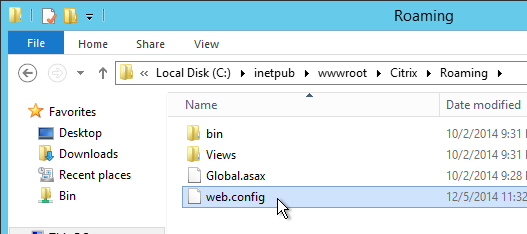
- Search for <account. Find the Store name in the name attribute.

- Scroll down to the first <properties> section located under <annotatedServices>.
- See Using StoreFront account settings to customize app shortcut locations at docs.citrix.com for a list of properties. Add the properties as detailed at docs.citrix.com. The properties should be added after the clear tag.

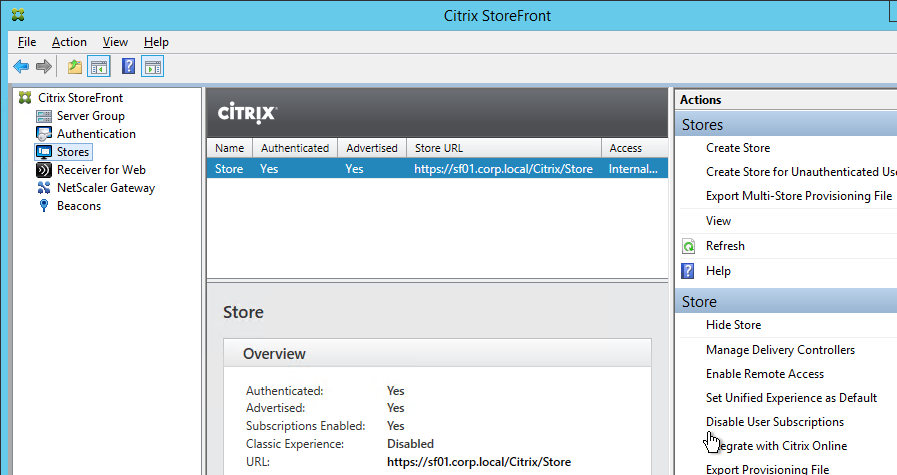
- Note: if subscriptions are enabled in StoreFront then only Favorites are added to the Start Menu and Desktop. If subscriptions are disabled then all applications are placed on the Start Menu or Desktop.
- Close and save the file.
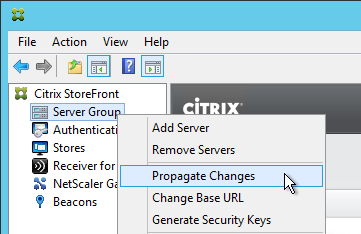
- Then Propagate Changes.
PNAgent Authentication
Single Sign-on
From Configure authentication for XenApp Services URLs at docs.citrix.com: XenApp Services URLs support explicit, domain pass-through, and pass-through with smart card authentication. Explicit authentication is enabled by default. You can change the authentication method, but only one authentication method can be configured for each XenApp Services URL. To enable multiple authentication methods, create separate stores, each with a XenApp Services URL, for each authentication method. To change the authentication method for a XenApp Services URL, you run a Windows PowerShell script.
- On the primary StoreFront server in your deployment, use an account with local administrator permissions to start Windows PowerShell.
- At a command prompt, type the following command to configure the user authentication method for users accessing the store through the XenApp Services URL.
& "C:\Program Files\Citrix\Receiver StoreFront\Scripts\EnablePnaForStore.ps1" –SiteId 1 -ResourcesVirtualPath /Citrix/Store –LogonMethod sson - Propagate changes.
Remember my password
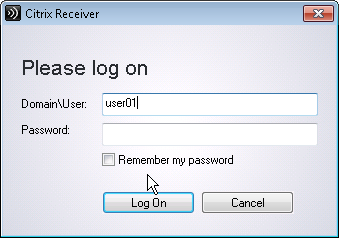
If you leave PNAgent authentication set to Prompt, you can enable the Remember my password box by doing the following:
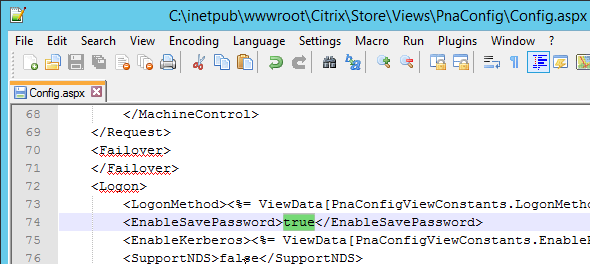
- Run Notepad as Administrator and edit the file C:\inetpub\wwwroot\Citrix\Store\Views\PnaConfig\Config.aspx.

- Near line 74 is EnableSavePassword. Change it to true.
- When PNAgent connects, there should now be a Remember my password checkbox.
Hide Applications
Hide applications from Receiver – http://blogs.citrix.com/2014/03/27/hiding-applications-in-citrix-storefront/. Note: each StoreFront Store has its own filter configuration.
Open PowerShell and run:
$dsInstallProp = Get-ItemProperty -Path HKLM:\SOFTWARE\Citrix\DeliveryServicesManagement -Name InstallDir
$dsInstallDir = $dsInstallProp.InstallDir
& $dsInstallDir\..\Scripts\ImportModules.ps1
To filter by type, run:
Set-DSResourceFilterType -SiteId 1 -VirtualPath "/Citrix/Store" ?IncludeTypes @("Applications")
Default type filters = @(“Applications”,”Desktops”,”Documents”)
To filter by keyword, run:
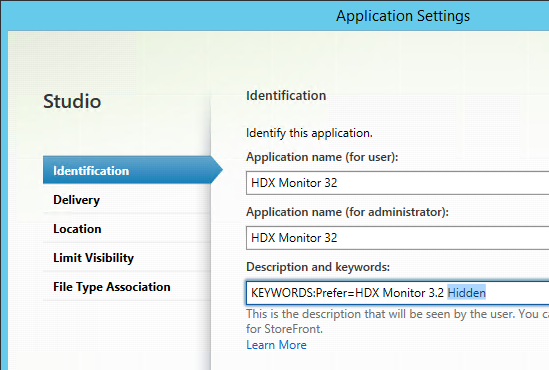
Set-DSResourceFilterKeyword -SiteId 1 -VirtualPath "/Citrix/Store" -ExcludeKeywords @("Hidden")
Once the ExcludeKeyword has been defined, add the keyword to a published application description and that application will no longer display in Receiver. This works for both Receiver for Web and Receiver Self-Service (non-browser).
StoreFront web.config GUI Assistant
Jake Rutski Citrix Storefront Configurator is a GUI tool to modify the web.config files in StoreFront 3.0.
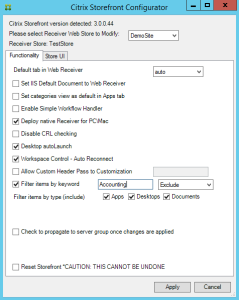
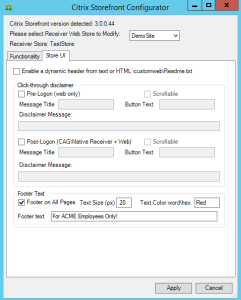
The tool offers a GUI to ease configuration of the StoreFront 1.2/2.0/2.1/2.5 “Receiver for Web”.
Run the tool, the below interface will be shown
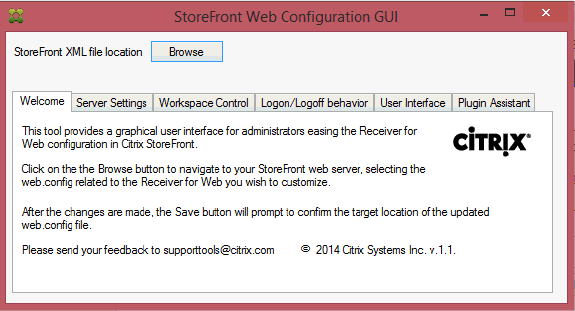
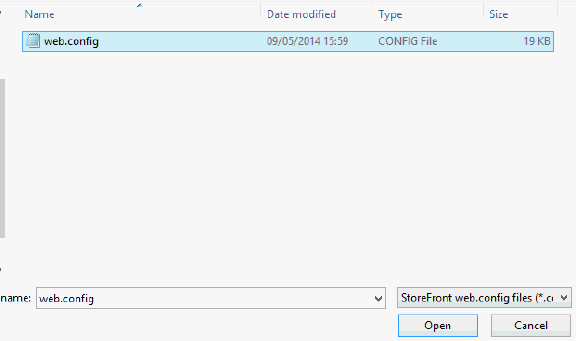
Click on Browse to open the web.config file
The tool will switch to the Server Settings tab and the Save button will appear.
The StoreFront version is shown in the GUI
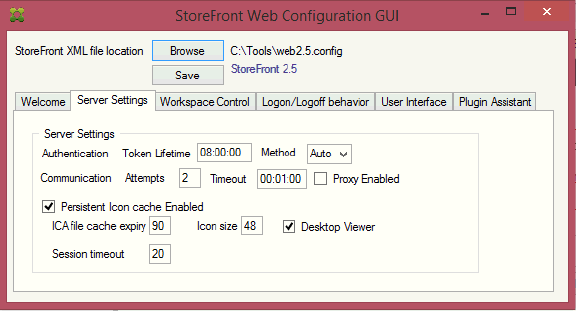
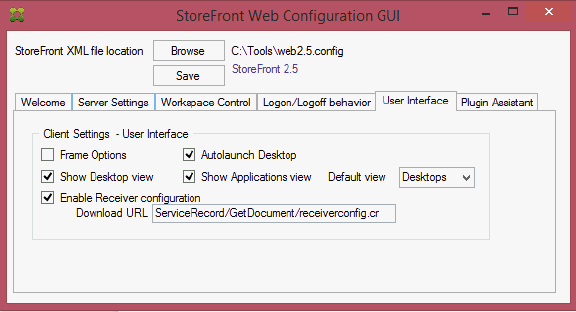
Change the parameters within the different tabs exposed in the GUI and click on the “Save” button to validate the changes.
When clicking “Save”, a backup copy will be created (web.config.bak) at the target location. If the tool is launched from a StoreFront server, a replication process to the other StoreFront servers can be initiated.
Desktop Autolaunch
By default, if only a single desktop is published to the user, Receiver for Web will auto-launch it. You can change this behavior by editing the Receiver for Web site configuration file or by using the GUI Assistant:
- On the StoreFront server, use a text editor to open the web.config file for the Receiver for Web site, which is typically located in the C:\inetpub\wwwroot\Citrix\storenameWeb\ directory, where storename is the name specified for the store when it was created.
- Search for autoLaunchDesktop near line 58.

- Change the value of the autoLaunchDesktopattribute to false to prevent Receiver for Web from automatically starting and accessing a desktop when a user logs on to the site and only a single desktop is available for that user.
Note: The Receiver Self-Service interface does not auto-launch desktops.
Full Screen Desktop
Citrix CTX139762 How to Configure StoreFront to Start Published Desktops in Full Screen Mode: This article describes how to configure StoreFront to start published desktops in Full Screen Mode.
- Open the file C:\inetpub\wwwroot\Citrix\Store\App_Data\default.ica on the StoreFront server(s) with notepad (as Administrator)
- Add the line:
[Application]
DesktopViewer-ForceFullScreenStartup=On
- In older versions of StoreFront, it should be true instead of On.
- Save the file
- Open the command prompt (cmd) and run iisreset.
Store for Anonymous
If you intend to publish applications to anonymous users then you can create a StoreFront store that does not require authentication. Note: anonymous stores only work internally (no NetScaler Gateway).
- On the VDAs, create and configure anonymous accounts.
- In Citrix Studio, configure a Delivery Group to accept unauthenticated (anonymous) users.
- In the StoreFront Console, on the left, click Stores. On the right, click Create Store for Unauthenticated Users.
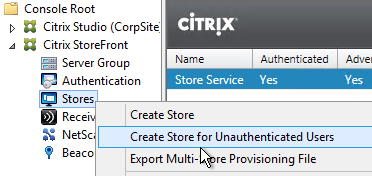
- In the Information page, click Next.

- In the Store Name page, enter a new store name and click Next.
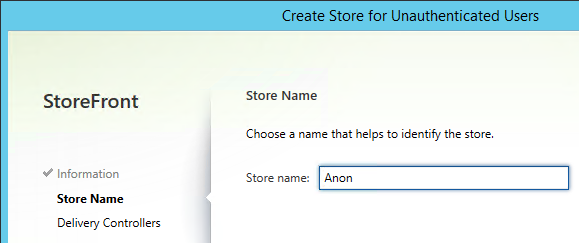
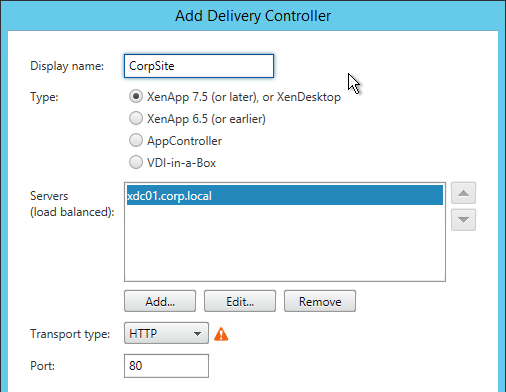
- In the Delivery Controllers page, click Add.
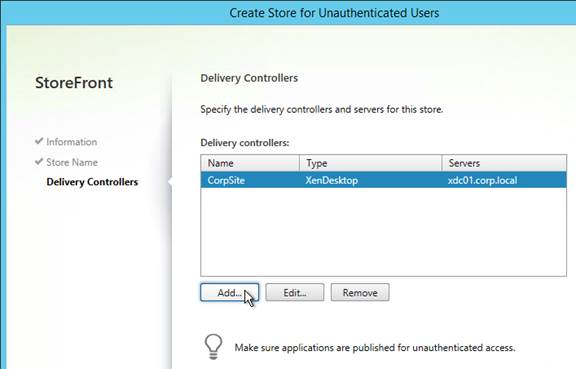
- Enter the name of your XenApp farm (e.g. CorpSite).
- Add all of your XenApp Controllers.
- Change the Transport type to HTTP. Click Add.
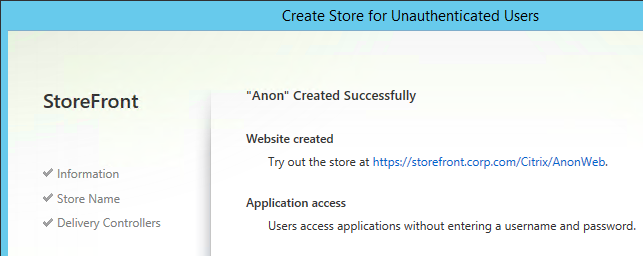
- Click Create when you are done creating deployments.
- Click Finish.
Workspace Control
Workspace Control reconnects user sessions. It can be disabled. Or configure various reconnection options.
Citrix Blog Post Workspace Control: When You DON’T Want to Roam details complete session reconnection configuration instructions for XenApp, Remote Desktop Services, StoreFront, and Receiver.
Receiver for Web
To edit Workspace Control in Receiver for Web, edit the file C:\inetpub\wwwroot\Citrix\StoreWeb\web.config and edit the attributes of the following line:
<workspaceControl enabled="true" autoReconnectAtLogon="true" logoffAction="disconnect" showReconnectButton="false" showDisconnectButton="false" />
Receiver Self-Service
Citrix Blog Post – How to Disable Workspace Control Reconnect: For Receiver for Windows, workspace control can be managed on client devices by modifying the registry. Please see this Knowledgebase Article for how to implement it. This can also be done for domain-joined client devices using Group Policy.
StoreFront 2.6 introduces a configuration to disable workspace control reconnect in the Store Service for all receivers. This can be managed by using PowerShell or by editing web.config.
Using PowerShell
Make sure that you close the Admin Console. Run the following code snippet to import the StoreFront PowerShell modules:
& C:\Program Files\Citrix\Receiver StoreFront\Scripts\ImportModules.ps1
Workspace control reconnect can then be turned on/off by the PowerShell command Set-DSAllowSessionReconnect. For example, if you would like turn off workspace control reconnect for a store in /Citrix/Store, the following command will configure the store appropriately:
Set-DSAllowSessionReconnect -SiteId 1 -VirtualPath /Citrix/Store -IsAllowed $false
Editing web.config
Open C:\inetpub\wwwroot\Citrix\Store\web.config in a text editor. Locate the line that looks like:
<resourcesService id="f01f7dc4-7f28-4bc1-b8fb-7c0db9570d20" storeLockedDown="false" anonymousStore="false" allowSessionReconnect="true" />
Change the value of allowSessionReconnect to false to disable workspace control reconnect or true to enable it.
Treat Desktops as Applications
From Treating All Desktops as Applications at Citrix Blog Post What’s New in StoreFront 3.0: Desktops are treated differently from applications in StoreFront/Receivers. They are placed in a separate Desktop tab and in the case of Receiver for Web, they are not reconnected with workspace control. In some use cases, it is desirable to treat desktops as applications so that they are placed together with applications and get reconnected as part of workspace control. With StoreFront 2.x, you have to add the TreatAsApp keyword to all published desktops to achieve this effect. StoreFront 3.0 enables you to configure treating all desktops as applications at the store level without the need of adding the TreatAsApp keyword to all the published desktops. This is configurable using a PowerShell cmdlet.
& "C:\Program Files\Citrix\Receiver StoreFront\Scripts\ImportModules.ps1"

Set-EnhancedEnumerationOptions -siteId 1 -storeVirtualPath /Citrix/Store `
-treatDesktopsAsApps $true
Special Folder Redirection
From Configure special folder redirection at docs.citrix.com: With Special Folder Redirection configured, users can map Windows special folders for the server to those on their local computers. Special folders refer to standard Windows folders, such as \Documents and \Desktop.
- Open PowerShell as administrator (elevated).
- Run & “C:\Program Files\Citrix\Receiver StoreFront\Management\Cmdlets\AdminServiceLoader.ps1″ to load the modules.

- Run the following command:
Set-DSClientSettings -SiteId 1 -VirtualPath /Citrix/Store -SpecialFolderRedirectionAllowed $true

Receiver Self-service – Disable “Remember My Password”
By default, when Receiver Self-Service connects internally to StoreFront, the user is able to check the box next to Remember my password. Note: When connecting through NetScaler Gateway, this checkbox is never available.
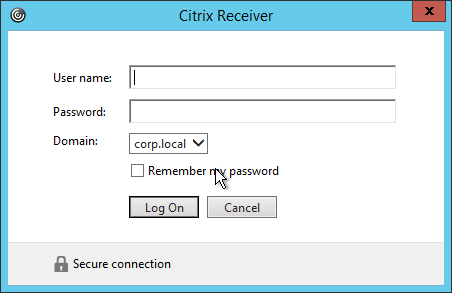
This can be disabled by making a change on the StoreFront server. This procedure is documented by John Ashman at Citrix Discussions and Prevent Citrix Receiver for Windows from caching passwords and usernames at docs.citrix.com.
- Note that this procedure seems to prevent Receiver for iOS from adding accounts.
- On the StoreFront server, run a text editor elevated (as administrator).
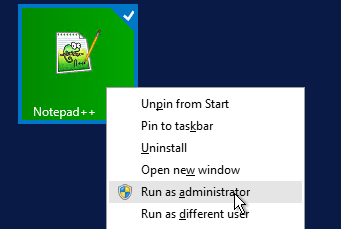
- Open the file
C:\inetpub\wwwroot\Citrix\Authentication\App_Data\Templates\UsernamePassword.tfrm.

- Go to line 20, which should start with
@SaveCredential. - To comment out the line, wrap it in
@*and*@. Save the file when done.
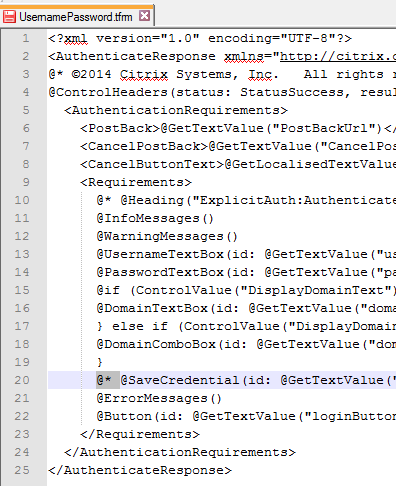
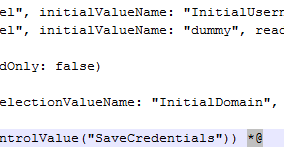
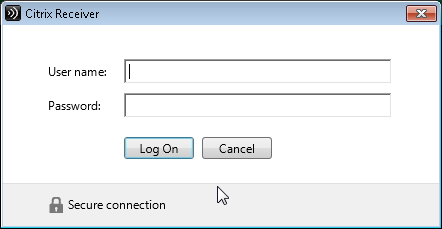
- Now the Remember My Password checkbox is gone.
“Activate” Option in Web Page – Disable
From Citrix Discussions: to disable the “activate…”; function for Citrix receiver for windows that is visible when a user clicks their username in the upper right hand corner of Receiver for Web:
- Browse to C:\inetpub\wwwroot\Citrix\”NameoftheStoreWeb”\
- Open config
- Locate the following line.
<receiverConfiguration enabled=”true” downloadURL=”ServiceRecord/GetDocument/receiverconfig.cr” /> - Change the true to false
HTML5 Receiver Getting Started Tour
The first time a user connects to HTML5 Receiver, the user is prompted to tour the interface.
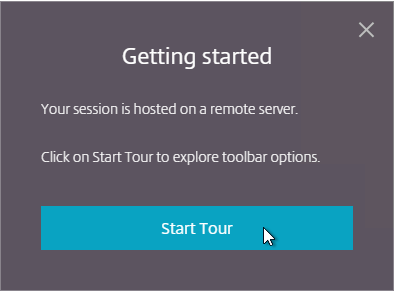
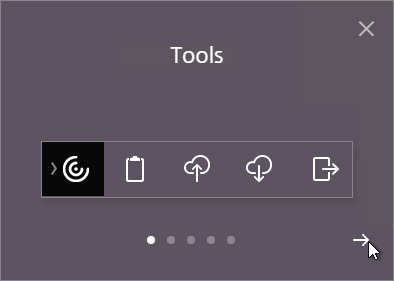
The Getting Started Tour can be disabled by doing the following:
- Edit the file C:\Inetpub\wwwroot\Citrix\StoreWeb\custom\script.js.
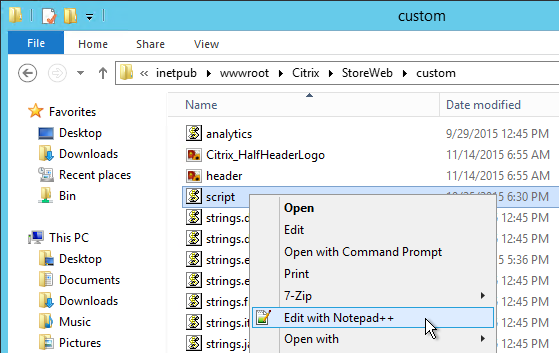
- At the bottom of the file, add Feng Huang’s code from First time user tutorial at discussions.citrix.com. Make sure the quotes are straight quotes and not curly quotes.
localStorage["showFtu"] = false;

Customize Receiver UI in StoreFront 3.0
StoreFront 3.0 customizations are visible in both Receiver for Web and in Receiver Self-Service.
If you are load balancing StoreFront and want to put the server name on the webpage, see Nicolas Ignoto Display server name with Citrix StoreFront 3.

Nicolas Ignoto Lab: Part 22 – Ultimate StoreFront 3 customization guide contains many StoreFront customizations including:
- Add disclaimer
- Change logo/background
- Add header
- Add text
- Change colors
- Etc.
Citrix Blog Post Citrix Customization Cookbook contains a collection of customizations including:
- Add Static or dynamic (read from file) text to the header and/or footer of the login page.
- Click-through disclaimer before or after login page
- Footer for every page
- Default to Folder view when visiting the Apps tab
- Change default text
- Change background images for featured categories
- Background image
Citrix Blog Post Storefront 3 Web Customization: Branding Your Deployment describes the following how to modify CSS to customize the appearance of StoreFront 3.0:
- Background images
- Logon button
- Colors for page and text
- How to view the mobile version of the page
- CSS for mobile pages
Jason Samuel Upgrading Citrix StoreFront 2.6 to StoreFront 3.0 – Things to Know details how to change the StoreFront logo to a Receiver logo.
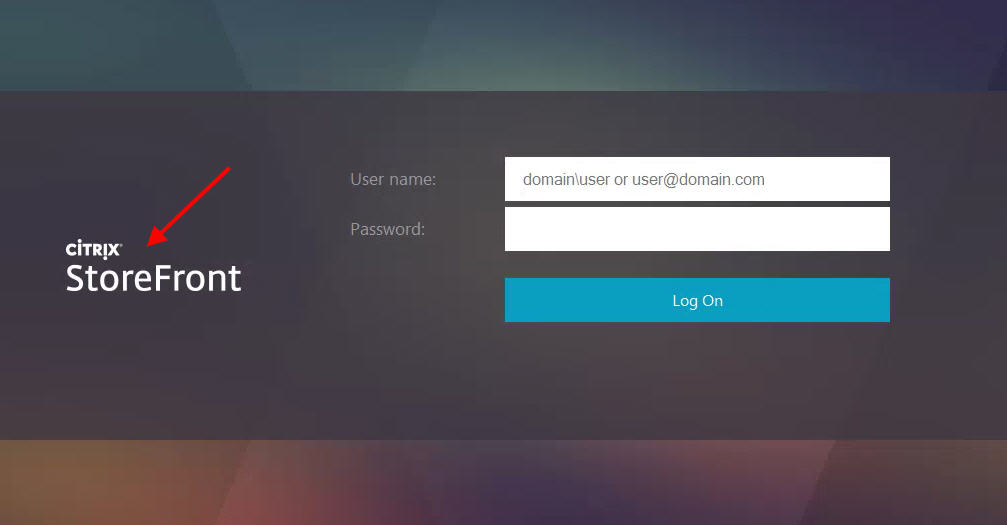
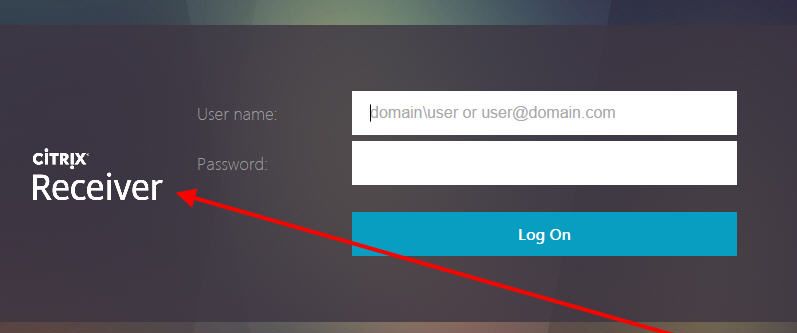
Citrix Blog Post StoreFront 3.0: Message Customization describes how to add a scrolling message to the top of the screen. This is displayed in both Browsers and Receivers.


Migrate Web Interface features to StoreFront at Docs.citrix.com details how to configure Web Interface features in StoreFront. This includes:
- Enable return to last folder
- Header logo
- Pre-logon welcome message
- Logon screen customization
- Footer text
StoreFront 3.0 Receiver Customization APIs are detailed at Citrix Developer. Use the Receiver Customization API to brand or customize your end users’ app and desktop selection experience beyond capabilities provided in the StoreFront admin console. Customizations apply to latest Web, Chrome, Windows, Mac and Linux clients, and will be extended to mobile devices in future releases.
An example use case for the StoreFront 3.0 APIs is Citrix Blog Post Citrix Recipe Box: StoreFront Approvals. This is code for StoreFront that requires workflow approval when a user subscribes to an app.
Citrix Blog Post Receiver X1 APIs describes the following:
- Overview of the CSS classes that can be customized.
- Override Citrix’s JavaScript functions to modify behavior – exclude or restyle apps, change a sort order, add a warning message etc.
- How to force X1 UI to display in either phone or larger mode.
Citrix Blog Post X1 Customization: Going deeper with CSS describes the following:
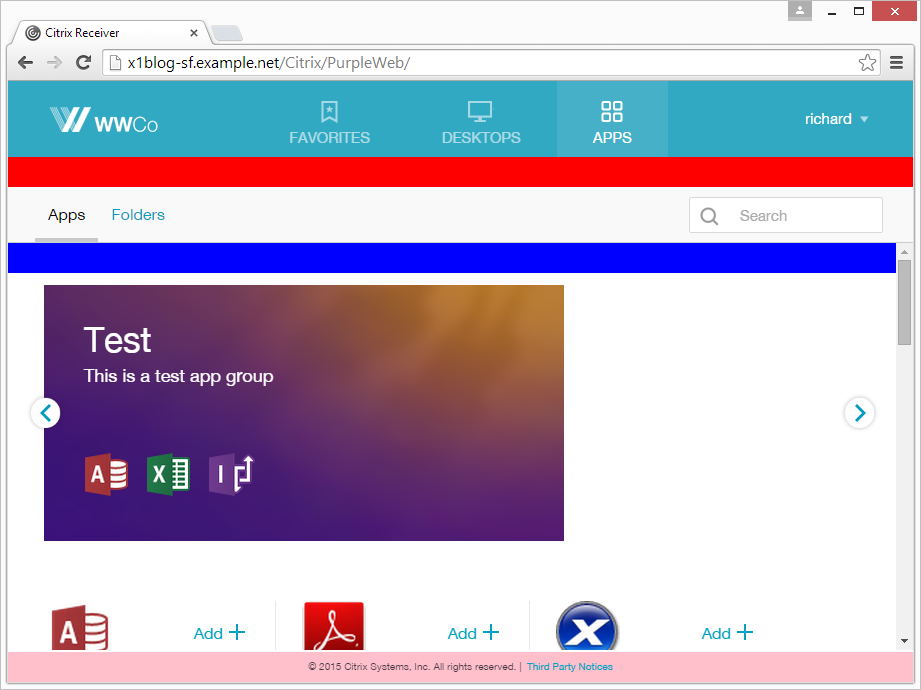
- Use CSS (/custom/style.css) to style the three custom regions (#customTop, #customBottom, #customScrollTop). Shown below in red, blue, and pink.
- Marker classes for showing/hiding or highlighting parts of the UI: large display, small display, high DPI, Favorites view, Desktops view, Apps view, appinfo view.
Citrix Blog Post Scripting X1 describes the following:
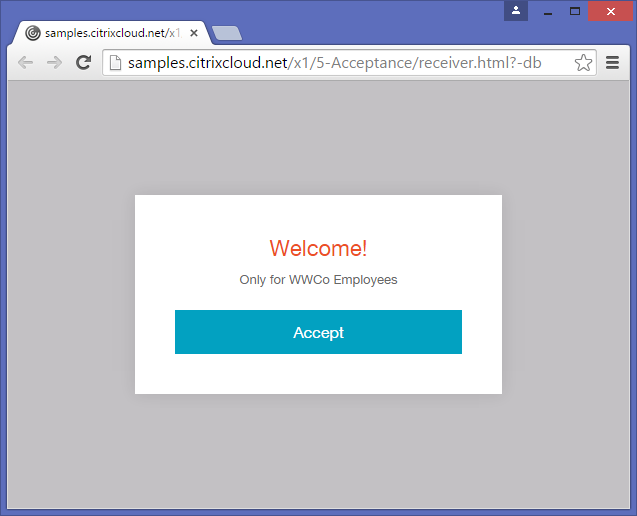
- JavaScript code to display an Acceptance dialog box before users can login.
- Use JQuery to add HTML code to custom regions (e.g. #customScrollTop) including using CSS to hide the HTML code unless a specific tab is selected by the user.
Citrix Blog Post – Rewriting the Session ClientName from StoreFront: I would like to offer the following customisation DLL which can apply client name rewrites based on a template. The customisation template can be any string, but where that string contains a particular token, the token will be replaced by some information from the User Context. If the intent was just to replace the ClientName with the user name, the template is then just “$U”. More details and the .dll file are in the blog post.
StoreFront Store Customization SDK at Citrix Developer: The Store Customization SDK allows you to apply custom logic to the process of displaying resources to users and to adjust launch parameters. For example, you can use the SDK to control which apps and desktops are displayed to users, to change ICA virtual channel parameters, or to modify access conditions through XenApp and XenDesktop policy selection. Key Customization Points:
- Post-Enumeration
- Post-Launch ICA File
- Post-Session Enumeration
- Access Conditions (pre-launch and pre-enumeration)
- Provider List
- Device information
Citrix Blog Post Adding a Language to StoreFront 3.0: A new language pack is comprised of a culture definition file, a string bundle file and a custom string bundle file. See the Blog Post for more details.
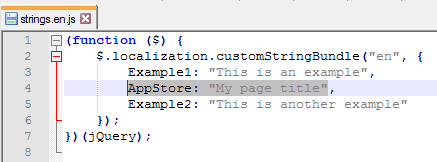
To change the StoreFront page title, see Sam Jacobs How to Change the Page Title in Citrix Receiver 3.x at mycugc.org.

Customize Receiver for Web in StoreFront 2.6
These customizations apply to Receiver for Web only. They do not apply to Receiver Self-Service or NetScaler Gateway.
Citrix Blog post Receiver for Web UI Themes: White Theme and Dark Theme.
The Citrix blog post Customizing Receiver for Web 2.5 applies to StoreFront 2.6 except for the changes detailed in the blog post Customizing Receiver for Web 2.6. Here are some customizations detailed in these blog posts:
- Hyperlink in the Footer Area – for example, contact the help desk
- Pre-login (Disclaimer) and Post-login (Announcement) Messages
- Display Client IP Address
- Display StoreFront server name
Citrix blog post – How to Add a Custom Banner to the Logon Page of StoreFront 2.x, Director 7.x, or Citrix License Server 11.x: Some customers require that all levels of authentication (all logon pages) display security banners which outline the rights to privacy (or lack thereof) when accessing their sites. In this case, a simple change to the web page code results in the addition of text – a security banner – near the authentication fields which is visible each time a user logs onto the site. This article contains information about the customization of the logon page of StoreFront, Director, and Citrix License Server web pages.
From Citrix Discussions: Just realized that you probably should not modify the original files. All StoreFront modifications are done by adding CSS/Javascript into the /contrib directory, which overrides the default values. You would simply create a file called *custom.wrstrings.en.js* (for English) in that directory, replacing just the values that you wish to override.
More customizations are detailed Citrix Knowledgebase article Customizing the Receiver for Web User Interface including:
- Language strings and Language Pack
- CSS Customization
- Javascript Customization
From Daniel Ruiz – Customizing Citrix StoreFront 2.6 including Pre-Login message page: The following customizations include the following:
- Pre-Login message page
- Front Page with custom logo and title header
- App/Desktop page with custom logo, user client IP
- Apps/Desktop Tab on top with Disable user multiclick
- Page footer
From Czerno blog – Redirect Citrix Storefront to a different page at log off: To make Storefront redirect to a different page rather than just sit at the “You have logged off successfully” page, edit the “custom.wrstrings.en.js” file in the contrib folder of the Web Store. By default this will be located at “C:\inetpub\wwwroot\Citrix\<StoreName>Web\contrib”. If you have not created any customizations, select everything in the file and replace with the following:
(function ($) {
$.localization.customStringBundle('en', {
YouAreLoggedOff: 'You have logged off successfully. <br>'
+'You are being redirected to <Enter your web page here or delete this line>'
+'<script type="text/javascript">'
+'window.location.replace("http://www.czerno.com");'
+'</script>'
});
})(jQuery);
StoreFront SDK
Use the Store Customization SDK to apply custom logic to the process of displaying resources to users and to adjust launch parameters. For example, you can use the SDK to control which apps and desktops are displayed to users, to change ICA virtual channel parameters, or to modify access conditions through XenApp and XenDesktop policy selection.
Requires Visual Studio to create .dll files that replace the ones bundled with StoreFront.
StoreFront 3.0 Theme for NetScaler 10.5
You can make the NetScaler Gateway 10.5 logon page look like the Receiver for Web in StoreFront 3.0. Daniel Ruiz NetScaler Gateway front page à la StoreFront 3.0 has instructions for manually editing the NetScaler Gateway theme to match StoreFront 3.0. Or visit Citrix Blog Post X1 Skin for NetScaler Gateway for an already developed theme package.
- Download the theme from the Citrix Blog post.
- WinSCP to the NetScaler and switch to /var/netscaler/gui/themes.
- On the right, rename the existing receivertheme.tar.gz file.
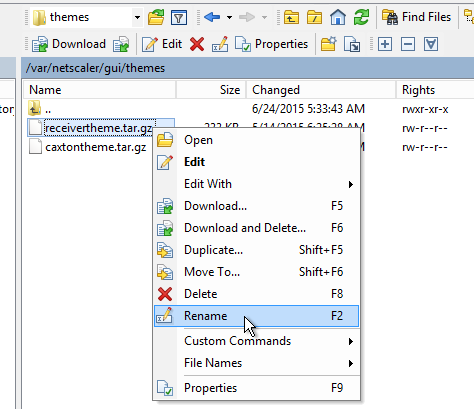
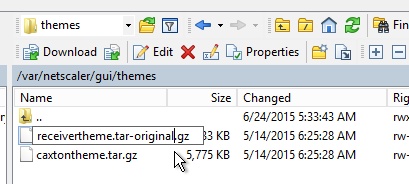
- On the right, rename the existing receivertheme.tar.gz file.
- Upload the theme that was downloaded from the Citrix Blog post.
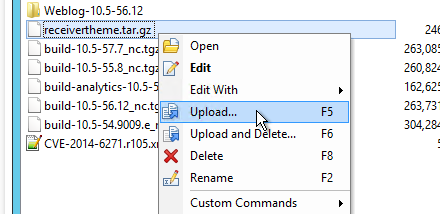
- In NetScaler GUI, go to NetScaler Gateway > Global Settings > Change Global Settings.
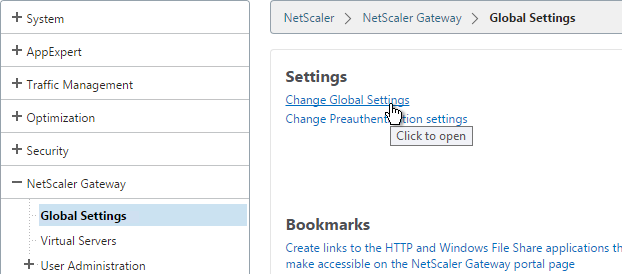
- Switch to the Client Experience tab.
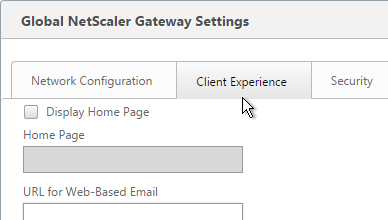
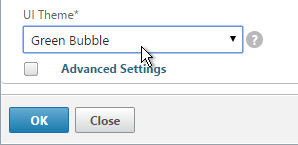
- At the bottom, if the current UI Theme is Green Bubble, change it to Default. Then go back into the screen and change it back to Green Bubble. This causes the theme to reload. Click OK.
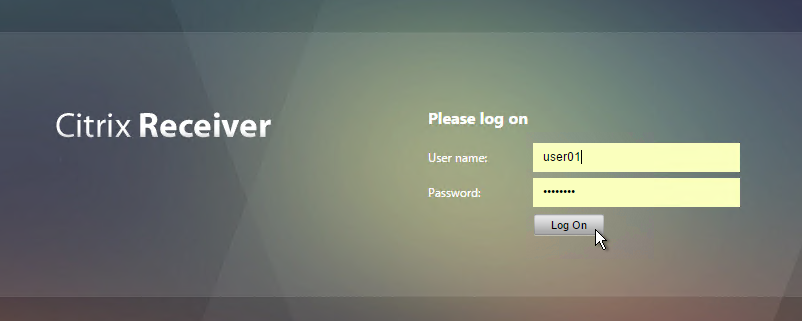
- The logon page should now look more like Receiver for Web in StoreFront 3.0.
StoreFront 3.0 Portal Theme for NetScaler 11
See NetScaler Gateway 11 > Portal Themes. Build 62 and newer have a built-in X1 theme.
Related Pages
- StoreFront Basic Configuration
- StoreFront Favorites / Subscriptions – disable, replicate, control, etc.
- NetScaler Gateway 10.5
Ok I may be missing something here but is there a way to disable the Application Tile from dropping down the Actions and Descriptions box? The users just want to click the tile and launch the application.
There might be a way of modifying the HTML code but that’s beyond me. It would take some time to see what the site is currently doing and then adjust it for this request. Sam Jacobs (https://www.linkedin.com/in/samjacobsctp/) is known for these kinds of customizations.
Just upgraded to build 2203 and as before still get issue of slow loading the page, as above done the tweaks. Any other recomendations to improve this
Hello
is it possible to restrict some domains from “Domain pass-through” (SSON authentication) in Storefront 1912CU3?
I already did a filter with only trusted domains for “User name and password” (explicit auth.), but it seems there is no way for passthru
thanks in advance & regards
Hello Carl,
Having an issue, hope you can assist me. Users are logging to storefront putting credentials and then after clicking on the application (suppose notepad), the xenapp server is asking for the credentials. After entering them, the app gets launched.
I have enabled Domain Passthrough on storefront and TrustXMLService on the broker, but still it is asking for username and password. Adding the storefront URL to trusted websites didn’t work as well.
Is pass-through also enabled in Workspace app? https://www.carlstalhood.com/workspace-app-for-windows/#auth
HI Carl
links for Autolaunch Application are broken
i need to autolaunch an application for anonymous users
One option is to first add the store to Workspace app. Then create a shortcut or script that runs “receiver.exe -qlaunch MyAppName”. Then you somehow trigger (e.g. logon script or Startup folder) that command to run.
Try adding the following to the bottom of style.css (in the custom folder):
.toolbar-home-header {
position: absolute !important;
right: 50px !important;
display: block !important;
}
Hi Sam, thank you for your post — this did indeed move the “Welcome Jim Dunn” near the right instead of the left… which is better… but I am hoping to regain the previous configuration, where the GEAR is replaced with my username…
Do you know if that’s possible? I have turned in a ticket to Citrix as well.
Jim,
Remove the prior mods I mentioned.
Back up style.css and script.js.
Put the following into style.css:
.header-search-container {
position: absolute;
right: 30px;
}
.settings-button {
display: inline !important;
margin-right: 0px !important;
margin-top: 0px !important;
}
.dropdown-menu-top {
display: inline-block !important;
}
.user-display-name {
margin-top: 15px !important;
}
.embedded-settings-icon-svg {
margin-top: 22px !important;
margin-right: 20px !important;
}
… and put the following into script.js:
CTXS.Extensions.afterDisplayHomeScreen = function() {
$(‘.header-search-container’).insertAfter(‘.toolbar-left’)
$(‘.dropdown-menu-top’).insertBefore(‘#userMenuBtn’);
};
-Sam
Sam, your solution worked (putting my username to the left of the gear). Impressive!! That is perfect… but only if using HTML5. The WorkspaceApp still just shows the “gear” and no username.
Jim,
That’s not really HTML5 … it’s actually StoreFront (otherwise known as Receiver for Web). While the Workspace App is *supposed* to mimic customizations to StoreFront, it’s a compiled, fat-client application, and I really don’t know of any way to modify it.
I’ll do some digging, but I doubt if I’ll find anything … sorry.
-Sam
As far as the gear is concerned, the gear and the dropdown arrow is a single inline image. In order to remove the gear, you would need to replace it with an image of just a dropdown arrow.
-Sam
I’ve noticed on the latest StoreFront, both html5 and workspace, I don’t see my username in the top-right corner anymore??? Can anyone figure out how to get our username back (in the top right??)
When I click the gear icon I can see my username.
Yes, but in XenApp 6.5, your name was always there when logged in, instead of the “gear”. We have medical staff sharing multiple computers and they expect to see their name before using the machine.
I’ve been trying to find a way to change the “gear” back to the username, but so far have been unsuccessful.
Yes, I can also see my username when I click the gear-dropdown… but in XenApp 6.5 we could see our username in place of the gear… do you know of any way to get that back??? (and, Carl, thank you so much for all your help over the years!!!)
Hi,
we use WorkspaceApp 1911 and have some unwanted behavior:
If i log out from Workspace App, the app icons stay.
How to clear the apps on logoff/exit? And wehre to configure it? Client or storefront?
Address resolution type
Use the Advanced Settings page to specify the type of address to request from the server. The default is DnsPort. From the Address resolution type drop-down menu on Advanced Settings, select one of the following:
Dns
DnsPort
IPV4
IPV4Port
Dot
DotPort
Uri
NoChange
What is the difference between Dns and DnsPort? Actually I do not understand any of these in this place? I cannot find any explanation about this setting? Its use and impact?
Could any one shed some light on this?
It used to be possible to change the ICA Port number so I think DnsPort returns VDA FQDN:Port while Dns just returns VDA FQDN and the client will use the default ICA ports.
Can storefront do keyword filtering on resources coming from xenapp 6.5?
I think so. Just add KEYWORDS to the published app description.
I thought so too. I added KEYWORDS: and its didn’t seem to work.
Can we save password for receiver for web if connecting from external domain by using MPLS?
Storefront 1811
Workspace app 1812
For “Treat Desktops as Applications”: do I need to run the PS Cmdlet on every Storefront Server? Or gets the setting replicated?
I think it modifies one of the web.config files. Then Propagate copies the web.config file to the other servers.