Navigation
- Monitor to verify that StoreFront is UP
- Server Objects
- Service Group
- Virtual Server
- SSL Redirect
- StoreFront Base URL
- Subscriptions/Favorites Replication Load Balancing
Monitor
Note: This is a Perl monitor, which uses the NSIP as the source IP.
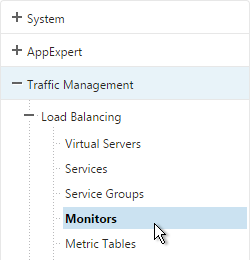
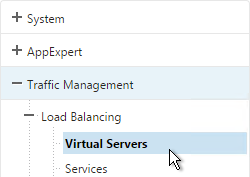
- On the left, expand Traffic Management, expand Load Balancing, and click Monitors.
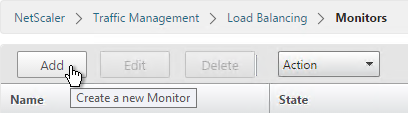
- On the right, click Add.
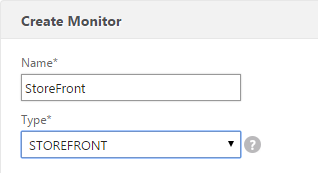
- Name it StoreFront or similar.
- Change the Type drop-down to STOREFRONT.
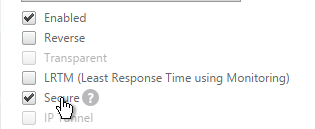
- If you will use SSL to communicate with the StoreFront servers, then scroll down, and check the box next to Secure.
- Scroll up, and switch to the Special Parameters tab.
- In the Store Name field, enter the name of your store (e.g. MyStore) without spaces.
- Click Create.
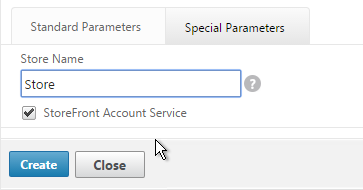
add lb monitor StoreFront STOREFRONT -scriptName nssf.pl -dispatcherIP 127.0.0.1 -dispatcherPort 3013 -secure YES -storename Store
Servers
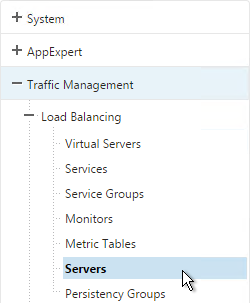
- On the left, expand Traffic Management, expand Load Balancing, and click Servers.
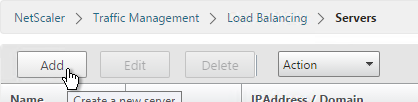
- On the right, click Add.
- Enter a descriptive server name, usually it matches the actual server name.
- Enter the IP address of the server.
- Enter comments to describe the server. Click Create.
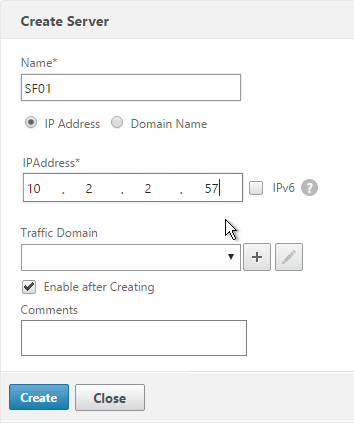
- Continue adding StoreFront servers.

add server SF01 10.2.2.57
add server SF02 10.2.2.58
Service Group
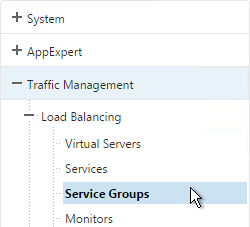
- On the left, expand Traffic Management, expand Load Balancing, and click Service Groups.
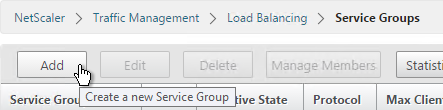
- On the right, click Add.
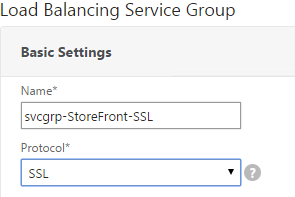
- Give the Service Group a descriptive name (e.g. svcgrp-StoreFront-SSL).
- Change the Protocol to HTTP or SSL. If the protocol is SSL, ensure that the StoreFront Monitor has Secure checked.
- If the protocol is SSL, then from Netscaler 11 and Storefront 3.0 load balancing broken at discussions.citrix.com: “Uncheck TLS1.2 and then check it again on Service Group, then it work!”
- Scroll down and click OK.
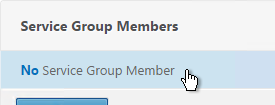
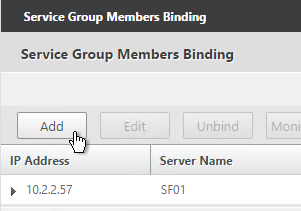
- Click where it says No Service Group Member.
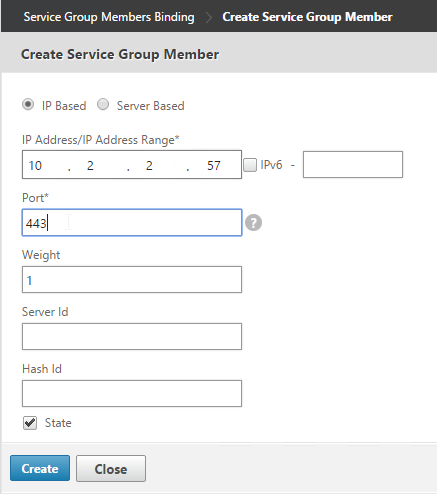
- If you did not create server objects then enter the IP address of a StoreFront Server. If you previously created a server object then change the selection to Server Based and select the server objects.
- Enter 80 or 443 as the port. Then click Create.

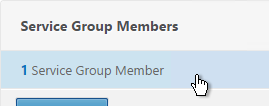
- To add more members, click where it says 1 Service Group Member and then click Add. Click Close when done.
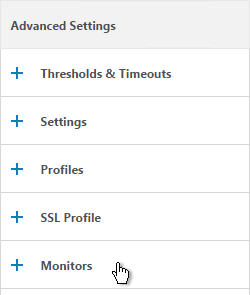
- On the right, under Advanced Settings , click Monitors.
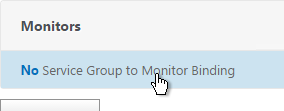
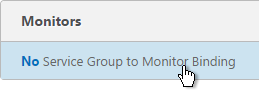
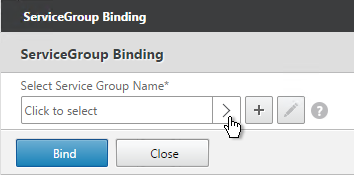
- Click where it says says No Service Group to Monitor Binding.
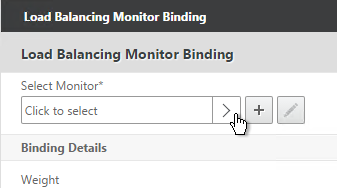
- Click the arrow next to Click to select.
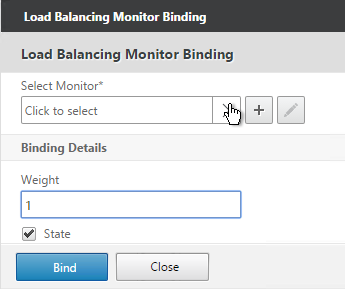
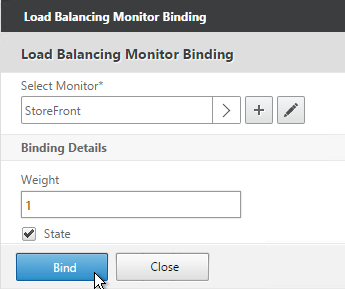
- Select the StoreFront monitor and click Select.

- Then click Bind.
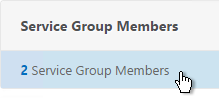
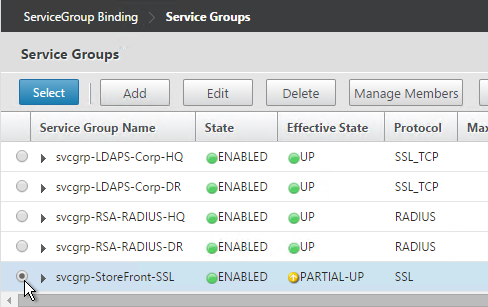
- To verify that the monitor is working, on the left, in the Service Group Members section, click the Service Group Members line.
- Highlight a member and click Monitor Details.
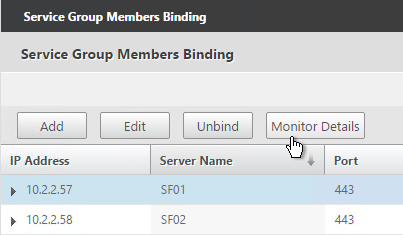
- The Last Reponse should be Success – Probe succeeded. Click Close twice.

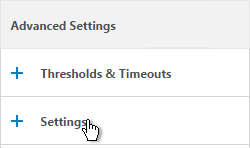
- On the right, under Advanced Settings, click Settings.
- Check the box for Client IP and enter X-Forwarded-For as the Header. Then click OK.

- Then click Done.
add serviceGroup svcgrp-StoreFront-SSL SSL -maxClient 0 -maxReq 0 -cip ENABLED X-Forwarded-For

bind serviceGroup svcgrp-StoreFront-SSL SF01 443
bind serviceGroup svcgrp-StoreFront-SSL SF02 443
bind serviceGroup svcgrp-StoreFront-SSL -monitorName StoreFront
- If the Service Group is http and you don’t have certificates installed on your StoreFront servers (aka SSL Offload), then you’ll need to enable loopback in StoreFront.
- In StoreFront 3.5, you enable it in the GUI console.
- In StoreFront 3.0, run the following commands on the StoreFront 3.0 servers as detailed at Citrix Blog Post What’s New in StoreFront 3.0.
& "C:\Program Files\Citrix\Receiver StoreFront\Scripts\ImportModules.ps1"

Set-DSLoopback -SiteId 1 -VirtualPath /Citrix/StoreWeb -Loopback OnUsingHttp
Load Balancing Virtual Server
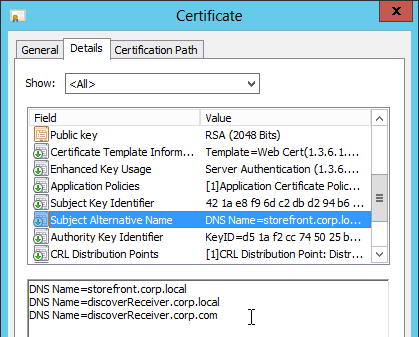
- Create or install a certificate that will be used by the SSL Offload Virtual Server. This certificate must match the DNS name for the load balanced StoreFront servers. For email discovery in Citrix Receiver, the certificate must either be a wildcard (*.corp.local) or have a subject alternative name for discoverReceiver.domain.com (domain.com = email address suffix)
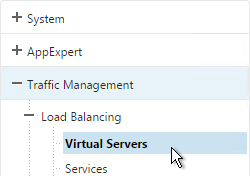
- On the left, under Traffic Management > Load Balancing, click Virtual Servers.
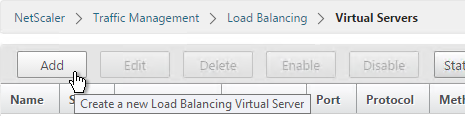
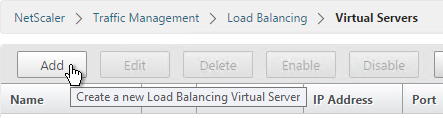
- On the right click Add.
- Name it lbvip-StoreFront-SSL or similar.
- Change the Protocol to SSL.
- Specify a new internal VIP.
- Enter 443 as the Port.
- Click OK.

add lb vserver lbvip-StoreFront-SSL SSL 10.2.2.221 443 -persistenceType SOURCEIP -timeout 60
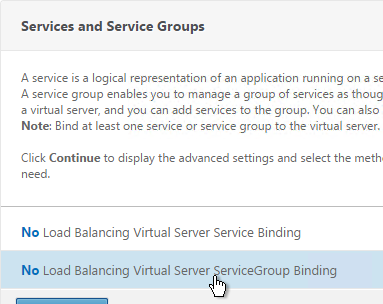
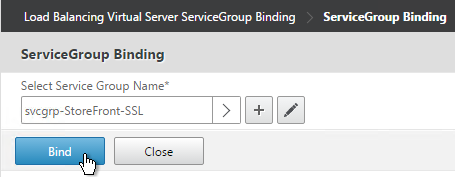
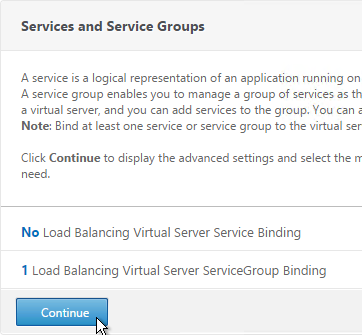
- On the left, in the Services and Service Groups section, click where it says No Load Balancing Virtual Server ServiceGroup Binding.
- Click the arrow next to Click to select.
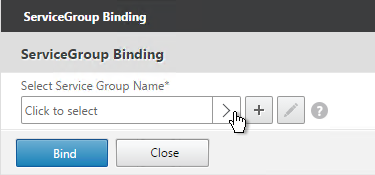
- Select your StoreFront Service Group, and click Select.
- Click Bind.
bind lb vserver lbvip-StoreFront-SSL svcgrp-StoreFront-SSL
- Click OK.
- Click where it says No Server Certificate.
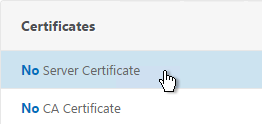
- Click the arrow next to Click to select.
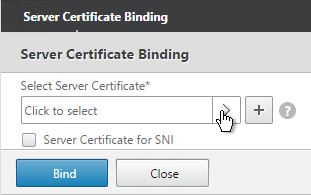
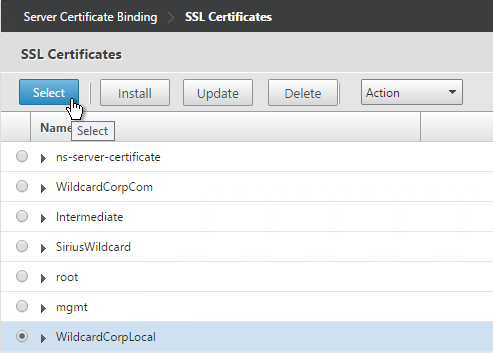
- Select the certificate for this StoreFront Load Balancing Virtual Server, and click Select.
- Click Bind.
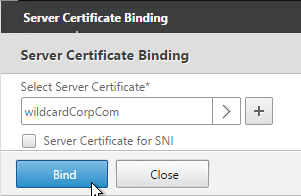
bind ssl vserver lbvip-StoreFront-SSL -certkeyName WildCorpCom
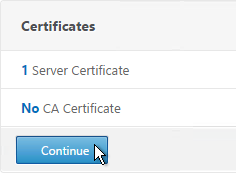
- Click Continue.
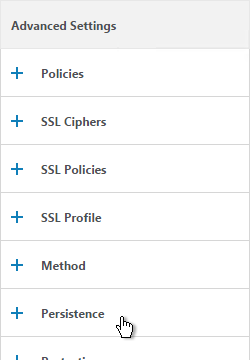
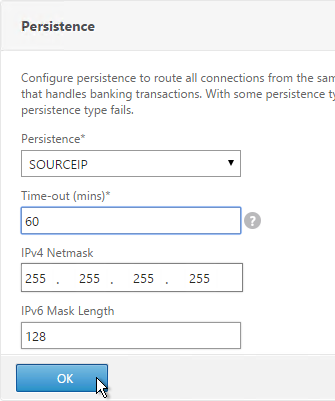
- On the right, in the Advanced Settings column, click Persistence.
- Select SOURCEIP. Do NOT use COOKIEINSERT persistence or Android devices will not function correctly.
- Set the timeout to match the timeout of Receiver for Web.
- The IPv4 Netmask should default to 32 bits.
- Click OK.
- If the NetScaler communicates with the StoreFront servers using HTTP (aka SSL Offload – 443 on client-side, 80 on server-side), and if you have enabled the Default SSL Profile, then you’ll either need to edit the default profile to include the SSL Redirect option or create a new SSL Profile with the SSL Redirect option enabled and bind the SSL Profile to this vServer.
- If the default SSL Profile is not enabled then you’ll need to edit the SSL Parameters section here and at the top right, check the box next to SSL Redirect. Otherwise the Receiver for Web page will never display.
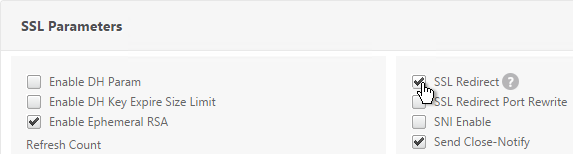
set ssl vserver lbvip-StoreFront-SSL -sslRedirect ENABLED -ssl3 DISABLED
- If you haven’t enabled the Default SSL Profile, then perform other normal SSL configuration including: disable SSLv3, bind a Modern Cipher Group, and enable Strict Transport Security.
bind ssl vserver lbvip-StoreFront-SSL -certkeyName MyCert

set ssl vserver lbvip-StoreFront-SSL -ssl3 DISABLED -tls11 ENABLED -tls12 ENABLED

unbind ssl vserver lbvip-StoreFront-SSL -cipherName ALL

bind ssl vserver lbvip-StoreFront-SSL -cipherName Modern

bind ssl vserver lbvip-StoreFront-SSL -eccCurveName ALL

bind lb vserver lbvip-StoreFront-SSL -policyName insert_STS_header -priority 100 -gotoPriorityExpression END -type RESPONSE
When connecting to StoreFront through load balancing, if you want to put the server name on the StoreFront webpage so you can identify the server, see Nicolas Ignoto Display server name with Citrix StoreFront 3.

SSL Redirect – Down vServer Method
If you created an SSL Offload Virtual Server that only listens on SSL 443, users must enter https:// when navigating to the website. To make it easier for the users, create another load balancing Virtual Server on the same VIP that listens on HTTP 80 and then redirects the user’s browser to reconnect on SSL 443.
This procedure details the Down vServer method of performing an SSL redirect. An alternative is to use the Responder method.
- On the left, under Traffic Management > Load Balancing, click Virtual Servers.
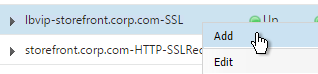
- On the right, find the SSL Virtual Server you’ve already created, right-click it and click Add. Doing it this way copies some of the data from the already created Virtual Server.
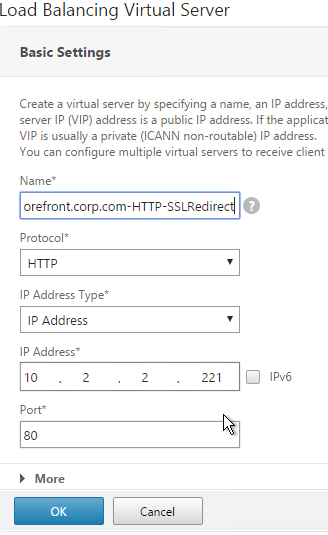
- Change the name to indicate that this new Virtual Server is an SSL Redirect.
- Change the Protocol to HTTP on Port 80.
- The IP Address should already be filled in. It must match the original SSL Virtual Server.
- Click OK.
- Don’t select any services. This vServer must intentionally be marked down so the redirect will take effect. Click Continue.

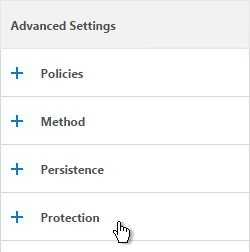
- On the right, in the Advanced Settings column, click Protection.
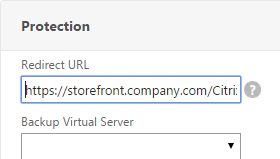
- In the Redirect URL field, enter the full URL including https://. For example: https://storefront.company.com/Citrix/StoreWeb. Click OK.

- Click Done.

add lb vserver lbvip-storefront-HTTP-SSLRedirect HTTP 10.2.2.201 80 -redirectURL "https://storefront.corp.com"
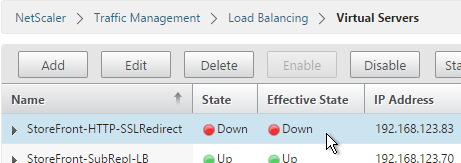
- When you view the SSL redirect Virtual Server in the list, it will have a state of DOWN. That’s OK. The Port 80 Virtual Server must be DOWN for the redirect to work.
StoreFront Base URL
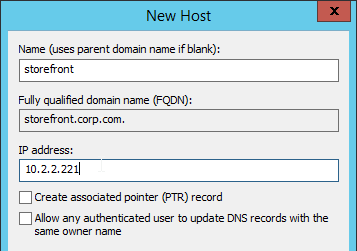
- Create a DNS Host record that resolves to the new VIP.
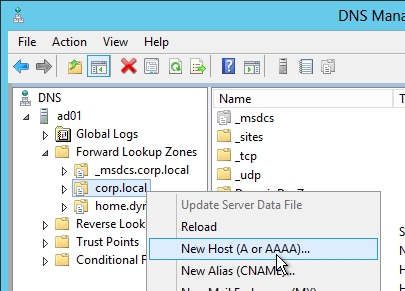
- The DNS name for StoreFront load balancing must be different than the DNS name for NetScaler Gateway. Unless you are following the Single FQDN procedure.
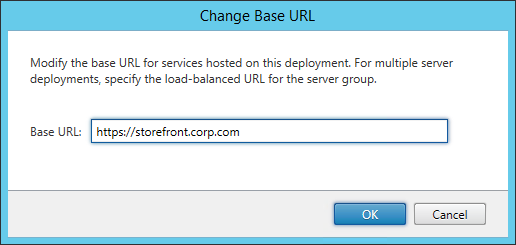
- In the Citrix StoreFront console, right-click Server Group and click Change Base URL.
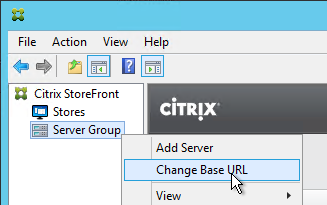
- Enter the new Base URL in https://storefront.corp.com format. This must match the certificate that is installed on the load balancer. Click OK.
Subscription Replication Load Balancing
If you have multiple StoreFront clusters (separate datacenters), you might want to replicate subscriptions between them. StoreFront subscription replication uses TCP port 808. To provide High Availability for this service, load balance TCP port 808 on the StoreFront servers. See Configure subscription synchronization at Citrix Docs for more information.
- On the left, expand Traffic Management, expand Load Balancing, and click Service Groups.
- On the right, click Add.
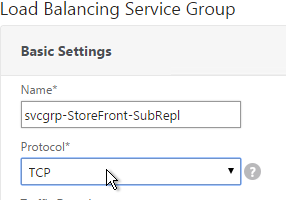
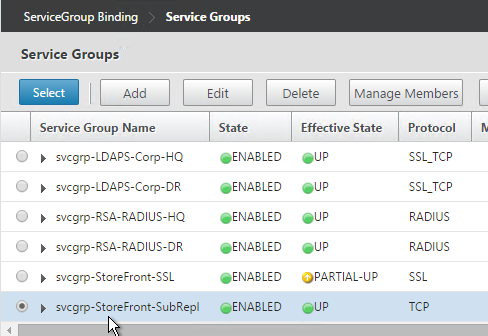
- Give the Service Group a descriptive name (e.g. svcgrp-StoreFront-SubRepl).
- Change the Protocol to TCP.
- Scroll down and click OK.
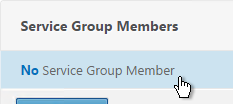
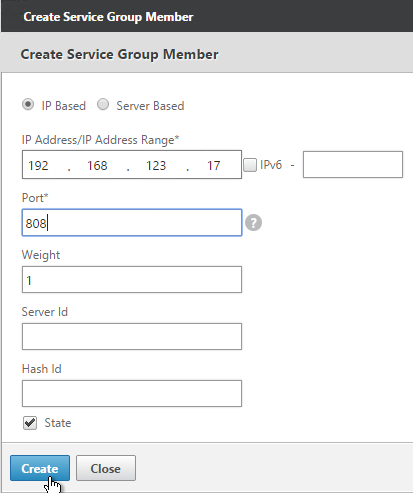
- Click where it says No Service Group Member.
- In the IP Address field, enter the IP address of a back-end StoreFront server.
- Enter 808 as the port. Then click Create.
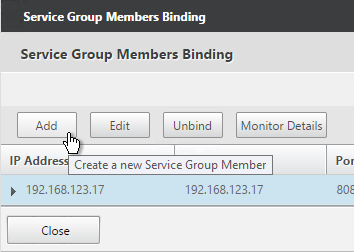
- To add more members, on the left, in the Service Group Members section, click where it says 1 Service Group Member.
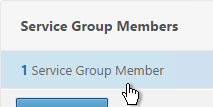
- Click Add to add a member. Click Close when done.
- On the right, under Advanced Settings, click Monitors.
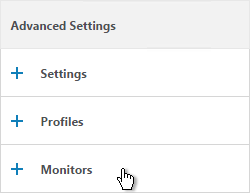
- Click where it says No Service Group to Monitor Binding.
- Click the arrow next to Click to select.
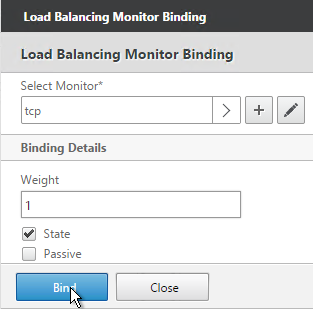
- Select the tcp monitor, and click Select.
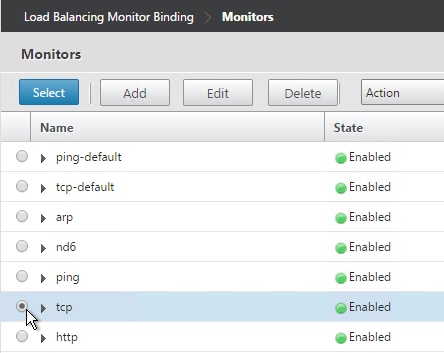
- Then click Bind, and click Done.

add serviceGroup svcgrp-StoreFront-FavRepl TCP
bind serviceGroup svcgrp-StoreFront-FavRepl SF01 808
bind serviceGroup svcgrp-StoreFront-FavRepl SF02 808
- On the left, under Traffic Management > Load Balancing, click Virtual Servers.
- On the right click Add.
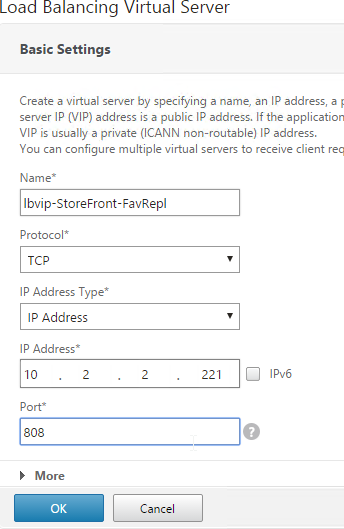
- Name it lbvip-StoreFront-SubRepl or similar.
- Change the Protocol to TCP.
- Specify the same VIP that you used for SSL Load Balancing of StoreFront.
- Enter 808 as the Port.
- Click OK.
- Click where it says No Load Balancing Virtual Server ServiceGroup Binding.
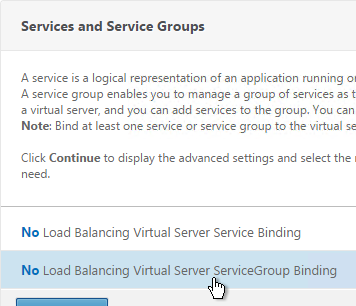
- Click the arrow next to Click to select.
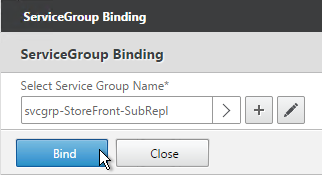
- Select your StoreFront Subscription Replication Service Group, and click Select.
- Click Bind.
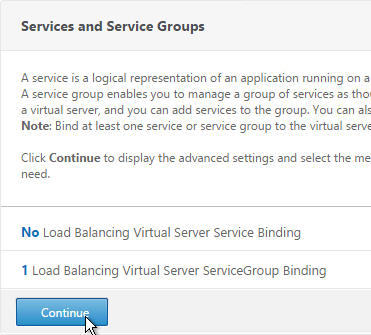
- Click Continue.
- Then click Done.

add lb vserver lbvip-StoreFront-FavRepl TCP 10.2.2.201 808 -persistenceType SOURCEIP -timeout 5

bind lb vserver lbvip-StoreFront-FavRepl svcgrp-SF-FavRepl
Hi,
Need to redirect a url: http://storefront.abc.com to a json output like {“hi”:”hello”}
I think you’re asking for a Responder of type *Respond With*, which lets you specify any HTTP response, probably including a JSON body.
Hi Carl,
In the previous Netscaler versions (10-) I was able to configure it in such a way that my Receiver for Android would do a kind of integrated login (popup requested user/password). Now when I get into Netscaler using Receiver, I get the usual webpage, which is not the best experience (have to zoom in to get the fields). Is there a fix for that?
Also, can you please add Netscaler 12 to the site’s menu?
In StoreFront Console, if you disable Unified Experience, then I suspect that Android will behave differently. I don’t have a good solution for this.
I’ve been avoiding NetScaler 12 due to many issues. One of these days I’ll update my content.
Hi Carls,
Good Day. I need your help
We have netscaler MPX5500 in our citrix environment. Client is asking if we remove the Netscaler and to present the StoreFront directly out to the internet, then how we will secure the Citrix environment. How we do the encryption without netscaler?
Any NAT? Do you have multiple VDAs? If so, then you need NetScaler to proxy all VDA ICA connections through a single NAT’d IP. Otherwise, you’d need public IPs (and NAT) for each VDA.
Hi Carl,
Good Day
I just want to ask here how we can secure out citrix environment without netscaler. Netscaler provides SSL VPN and WAF, but if we do not have netscaler then how we do the encryption to secure the enviroment.
Carl, do you have similar article for DDC load balancing in netscaler?
I am getting “An SSL connection could not be established: The server sent a security certificate identifying testddc1.domain.com, but the SSL connection was to testddc.domain.com. This message was reported from the Citrix XML Service at address https://testddc.domain.com:443/scripts/wpnbr.dll. The specified Citrix XML Service could not be contacted and has been temporarily removed from the list of active services.”
Load Balancing of DDC is not necessary, and probably won’t work due to Kerberos. See http://virtualization.vanbragt.net/articles/general-articles/load-balancing-citrix-delivery-controllers-via-a-load-balancer-necessity
thank you. So F5 doesnt have DDC monitoring capability, similar to netscaler?
Their iApp can load balance Delivery Controllers. I suspect it has a special monitor.
Do you know if this is this still true for the more recent versions of StoreFront and NetScaler/ADC?
Yep, For your information. Apparently Netscaler (10.5 Build 57.7.nc) load balancing with StoreFront 3.7, monitor always show DOWN the “Service Group”. Netscaler (10.5 Build 57.7.nc) load balancing with StoreFront 3.6 works well.
Hi,
Might be worth mentioning that if you name your store with white spaces such as “My Corp Store”, the store name you should enter for the monitor is “MyCorpStore”, since there will be no whitespaces in the actual virtual directory URL. Just found this out myself and figured it might be worth sharing 🙂
Good point. Thanks for pointing it out.
Carl – excellent blog as always. Quick typo
4. Change the Type drop-down to STORERONT. (Missing an F in StoreFront)
Fixed. Thanks for pointing it out.
I figure I’ve tried everywhere else might as well try here since you’re so knowledgeable about this.
I see you turned on X-Forwarded-For on the service group, which I have done as well. I have a Netscaler Gateway who’s session policy uses my load balanced vServer for Storefront. It works perfectly fine as you have set up. But now I am getting the request to setup Broker Access Policy Rules on some Delivery Groups to filter on Client IP, specifically we want to only allow traffic from a specific External (public) IP to be allowed in through the gateway, to limit it so users have to be in a specific office to access the Delivery Group (removing their ability to work from home, or wherever).
I can easily set up the Broker Access Policy Rule, but it doesn’t see the actual client (external/public) IP it only ever sees the Netscaler SNIP, even though I’ve turned on Client IP on the service and put in X-Forwarded-For.
Do you have any ideas why that may be?
I’d really like this to work because it looks like my only other option is trying to convince the company to buy Netscaler Universal licenses for every concurrent connection so that I can use Smart Access to do the same thing… if I can avoid that it’d be awesome.
You might have to open a support case on this. I saw somebody else with the same issue.
That’s what I was figuring as well, sadly company let their XD licensing expire earlier this year (just missed it) and now I’m waiting the few days it takes citrix to process the renewal to get me support again, was hoping I could find something online in the interim but keep running into walls.
Thanks for the quick reply!
Matt, if you did get any support from Citrix or otherwise figured this out, please drop a note here, Stalhood’s being the Madden for the new generation it’s where we all end up when we’re stumped. My client have the same problem now – despite adding the “X-Forwarded-For” parameter to our Netscaler-based load balancer service group, the SNIP is still used by BrokerAccessRules as ClientIP, breaking filtering on the Endpoint IPs. PS: Did you also try to use the ClientName filter? Seems broken too :-(.
My problem was that I was trying to use a Storefront-website to access resources, and of course the browser was not able to report either ClientIP or Client name. The ClientIP will be reported as the load balancer IP and the Client name will be the generated WebReceiver ID string (WRxxxxxxxxxx). When you (as most perhaps do) use the full Receiver to establish a connection and populate your app containers with icons (builitin, startmenu and/or desktop), I think the filters should work (at least – the Storefront/DDC channel should provision the correct ClientIP and Client name information from the client).
Thank you very much
So by doing this
SSL Offload = 443 SSL on front end, 80 HTTP on back end. Just enter the correct port numbers/protocols in VServer and Services
Then binding the cert.
SSL offload will occur to the backend?
Without the need to install the SSL on Storefront.
Thank you as well for clarifying this.
Yes
Thank you. I am needing to do SSL offloading from a VIP. I remember the SSL offload option a while back, but I guess now it SSL redirect? How do I go about doing SSL offloading from a VIP that points to storefront?
SSL Offload = 443 SSL on front end, 80 HTTP on back end. Just enter the correct port numbers/protocols in VServer and Services.
If “SSL Redirect” SSL Parameter is enabled, if the back-end web server sends a 301/302 redirect that contains a Location header with an http URL instead of https, NetScaler will rewrite it to https. It doesn’t do anything more than that.
Hello Carl is this correct
So in order to do ssl offloading I need to create a new ssl profile and enable ssl redirect then bind it to my vip that will direct traffic to storefront. Then do the vip down server method to take http traffic and redirect to https?
Yes, if you’re using SSL Profiles.
So in order to do ssl offloading I need to create a new ssl profile and enable ssl redirect then bind it to my vip that will direct traffic to storefront. Then do the vip down server method to take http traffic and redirect to https?
do you know if there is a supported way to put the delivery controllers behind the netscalers with GSLB?
Which communication? If between StoreFront and XML then you can load balance it. If between VDAs and Controllers then no.
What are you trying to achieve? It’s not recommended to stretch a farm across data centers. At least not until they complete the zones feature.
Vda’s and controllers. Not stretching, but active/passive datacenters.
Trying to achieve a graceful failover between datacenters without having separate gpo’s and ou’s to define ddc’s in the passive datacenter. Let gslb handle it.
Hi Carl,
I have a question, if i have the storefront server hosted on 2 different subnets (1 subnet in each datacenter) what do i need to config on the netscaler to get it up and running. I tried to add a additional SNIP, and that automatically created a direct route. But as the second subnet is not direct connected. It will not work. Is there a possiblity to get it working without the additional SNIP but with adding a route with a gateway to the second subnet?
Of course. If the default gateway is not sufficient, go to System > Network > Routes and add a route to the other subnet using a router on a subnet connected to the NetScaler.
Can that only be accomplished using storefront 3.5? We’re using 3.0.1 currently (part of the long term service release) for 7.6
It’s more difficult with 3.0.1 since you have to edit XML files to configure farm failover and/or active/active home sites. It’s much easier in 3.5.
Welp looks I’m going to upgrade to 3.5 then. thank you sir!
Carl do you have any documentation for setting up HA for netscaler gateway and storefront across two data centers? I”m just wondering if I need to create a virtual server and polices on each netscaler and point them to the respected site storefront server then setup GSLB. First time I’m trying to tackle this and want to make sure I have the right idea.
Some of that is documented at https://www.carlstalhood.com/storefront-3-5-configuration-for-netscaler-gateway/ and https://www.carlstalhood.com/global-server-load-balancing-gslb-netscaler-11/.
In the section: “Load Balancing Virtual Server”, I don’t see the netscaler commands for steps 3-23. Do you happen to have them in your ns.conf and can post them?
I just added a few commands. Thanks for noticing.
Unfortunately I keep changing my mind about vServer naming so the screenshots, CLI commands, etc. are inconsistent. One of these days I’ll fix it.
thanks, much appreciated — your blog is proving invaluable in bridging the gap left behind with Citrix documentation.
Hi Carl,
I need to understand the failover concept of Storefront 3.5 for single datacenter were we place two storefront server and in the event of one sf server shutdown how the users will get the login my doubt since we configure replication of two storefront server but the base url is of the first sf which we configure and add the second sf server . so how if create a virtual name and ip to map with the sf server which have the fully qualified domain name of the first sf server incase when the primary sf get shutdown how the vip reach the second server since the name mapped is the first sf server . hope I will get the answer and need the steps to configure the same .
You typically configure a load balancing VIP (on a NetScaler) and point users to that VIP (DNS name). Then if one of the servers fails, the load balancer will detect it and direct traffic to the remaining server.
Hi Carl,
I’m running Storefront 3.0.1.55 with the Citrix 4.4 client and a VPX 11.0 build 64.34 in between. I need to both load balance the Storefront servers for internal access and access them from the outside using the VPN Gateway and 2-dactor auth.
I have selected both the “Username and Password” and the “Pass-Throughfrom NetScaler” for the Authentication Methods
When attempting to access the Storefront through the loadbalancer I keep getting the message “Can not complete your request.” when trying to access it.
Sofar I found the things that I believe I shoud do:
NetScaler
– publish gateway on “https://citrix.fake.net/Citrix/storeWeb” using ip 10.0.0.1
– publish loadbalancer on “https://storefront.fake.net”using 10.0.0.2
– Only enable TLS1.2
– Enable SSL Redirect
Storefront
– Set-DSLoopback -Loopback OnUsingHttp
– base url = http://storefront.fake.net, external url https://citrix.fake.net/Citrix/storeWeb/
I’ve redone this several times – and in several environments, but no luck. I’m missing something, but can’t figure out what.
My previous attempt, this didn’t matter as I needed to vpn both in and outside (partially because I needed radius on both sides), this time I definitely need just a loadbalanced storefront on the inside.
Cheers
What are you seeing in Event Viewer > Applications and Services > Citrix Delivery Services?
Unfortunately nothing more then the usuals
– Configuration replication has ended after a request from ‘Storefront1’.
– Citrix Receiver for Web has started.
– The web application has started.
That’s been bogging me as well. I’ve been clicking about afterwards added and removed another webstore, removed and readded authentication schemes and changed other few things back and forth as well amongst which Client IP Persistence on the Storefront Load Balance VS… which I shamefully forgot.
It does seem to work now on this particular system and I have rerouted the existing VPN gateway to use the load-balanced VS as to the previous implemented round-robin solution. which also works now, except for the Receiver. That one keeps coming back with the notification “Your change could not be saved due to an invalid configuration of the account”
I suspect this has to do with the http configuration of the storefront, but I’m not entirely sure. Reviewing the .cr file that can be download from the portal when activating tells me it wants to connect to the internal base URL of http://storefront.fake.net. I do have found some references about that suggest this isn’t allowed in Receiver, but having changed the base URL in storefront in the past to https has broken the entire setup all together. Something I can’t afford here. Do you have anything on that? should I do some content rewrite rules on the VSLB to make the CR file content change the rule to https:// to fix that?
https is definitely required for the Base URL. After changing it, configure loopback using HTTP.
There are issues with NetScaler talking to Windows using TLS 1.2. See http://support.citrix.com/article/CTX205578
I get the error bellow when executing this command:
Set-DSLoopback -SiteID 1 -VirtualPath “/Citrix/Store01” -Loopback OnUsingHttp
Set-ItemProperty : Cannot find path ‘DS:\DeliveryServices\webReceiver\ServerSettings\communication’ because it does not exist.
At C:\Program Files\Citrix\Receiver StoreFront\Management\Cmdlets\WebReceiverModule.psm1:686 char:5
+ Set-ItemProperty -Path “${AppPath}DeliveryServices\webReceiver\ServerSetting …
+ ~~~~~~~~~~~~~~~~~~~~~~~~~~~~~~~~~~~~~~~~~~~~~~~~~~~~~~~~~~~~~~~~~~~~~~~~~~~~~~~~
+ CategoryInfo : ObjectNotFound: (DS:\DeliverySer…s\communication:String) [Set-ItemProperty], ItemNotFoundException
+ FullyQualifiedErrorId : PathNotFound,Microsoft.PowerShell.Commands.SetItemPropertyCommand
Try /Citrix/Store01Web
Hello Carl!
I’m aware that StoreFront 2.6 does not support TLS 1.2. Trying to Load Balance 2 SF 2.6 servers with NetScaler MPX 11 and it works but with mixed results. The problem is: If TLS 1.2 only enabled on frontend (virtual server) and all protocols except ssl 3.0 on backend (Service Group) I always get Error: “Cannot complete your request”. But If I enable all protocols on frontend except ssl 3.0 and any on backend everything works right (even if I enable TLS 1.2 only on backend). Client connects to SF with TLS 1.2 by default, but TLS 1.0 also accepted (if configured manually in IE on client side). NetScaler VPX does not have such problem maybe because it supports TLS 1.0 only on backend.