Navigation
This article applies to StoreFront 3.0.9000 and older. For newer versions, see the newer article.
- Change Log
- Installation / Upgrade to 3.0.9000
- Rename Default Store
- Edit HOSTS File to resolve Gateway and StoreFront FQDNs
- SSL Certificate on StoreFront servers
- SSL Encryption of Delivery Controllers
- StoreFront Base URL
- Authentication Configuration
- Remove Citrix Online Icons
- Receiver for HTML5 – Enable and Upgrade
- Receiver for Web – Timeout
- Receiver for Web – Pass-through Authentication
- Unified Receiver Experience
- Customize Receiver Appearance
- Default Tab
- Propagate Changes to other StoreFront servers in Server Group
- Default Web Page in IIS to redirect to Receiver for Web
- Receiver Deployment:
- Auto-favorite Published Apps
💡 = Recently Updated
Change Log
- 2020 Nov 20 – updated article for StoreFront 3.0.9000
- 2020 Sep 8 – updated article for StoreFront 3.0.8001 to fix a security vulnerability
- 2019 Aug 21 – updated article for StoreFront 3.0.8000 to fix a security vulnerability
- 2019 Feb 8 – updated article for StoreFront 3.0.7000
- 2018 Sep 18 – updated article for StoreFront 3.0.6000
Installation / Upgrade
StoreFront Versions – The following StoreFront versions have very similar configurations:
- XenApp/XenDesktop 7.6.9000 (LTSR CU9) comes with StoreFront 3.0.9000.
- StoreFront 3.0.8001. – fixes a security vulnerability
- XenApp/XenDesktop 7.6.8000 (LTSR CU8) comes with StoreFront 3.0.8000. – 3.0.8000 was released early to fix a security vulnerability
- XenApp/XenDesktop 7.6.7000 (LTSR CU7) comes with StoreFront 3.0.7000.
- XenApp/XenDesktop 7.6.6000 (LTSR CU6) comes with StoreFront 3.0.6000.
- XenApp/XenDesktop 7.6.5000 (LTSR CU5) comes with StoreFront 3.0.5000.
- XenApp/XenDesktop 7.6.4000 (LTSR CU4) comes with StoreFront 3.0.4000.
- XenApp/XenDesktop 7.6.3000 (LTSR CU3) comes with StoreFront 3.0.3000.
- XenApp/XenDesktop 7.6.2000 (LTSR CU2) comes with StoreFront 3.0.2000.
- XenApp/XenDesktop 7.6.1000 (LTSR CU1) comes with StoreFront 3.0.1000.
- XenApp/XenDesktop 7.7 ISO comes with StoreFront 3.0.1. You can upgrade it from the 7.6 LTSR CU3 media.
- The XenApp/XenDesktop 7.6.0 ISO comes with StoreFront 2.6. If you installed StoreFront on your Delivery Controllers, then it is version 2.6, and you can upgrade it to 3.0.8000.
Server Selection – StoreFront can be installed directly on your Delivery Controllers. When installing Delivery Controller, simply leave the box checked to install StoreFront. If you let Delivery Controller install StoreFront, it will create a default store named /Citrix/Store. See below to rename this store.
Or you can install StoreFront 3.0.9000 on separate servers. You can even install StoreFront on your existing Web Interface servers (make sure Web Interface is installed first).
Citrix Blog Post StoreFront 3.0 Scalability recommends StoreFront servers to be sized with 4 vCPU and 8 GB RAM.
After installation, NT SERVICE\CitrixConfigurationReplication and NT SERVICE\CitrixClusterService must remain in the Administrators group on both StoreFront servers or propagation will fail.
Install / Upgrade StoreFront 3.0.9000
Download StoreFront 3.0.9000.
- For new installs, there’s no need to install prerequisites (e.g. IIS) since the StoreFront installer will do it for you.
- If upgrading from older StoreFront:
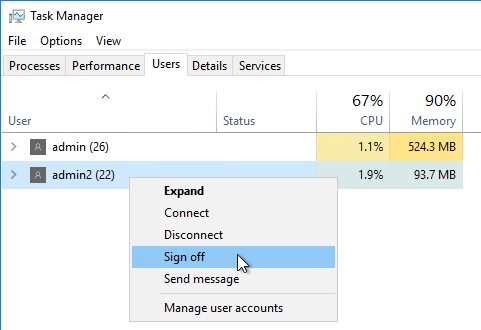
- Other Users – Use Task Manager > Users tab to logoff any other user currently logged into the machine.
- Close all MMC and PowerShell consoles.
- Stop the World Wide Web Publishing Service.
- Stop all StoreFront services.
- Other Users – Use Task Manager > Users tab to logoff any other user currently logged into the machine.
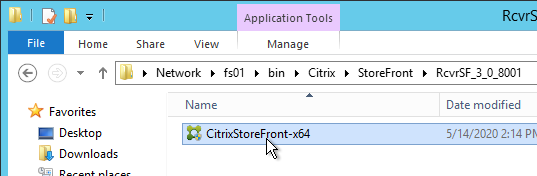
- Go to the downloaded and extracted RcvrSF_3_0_8001 folder and run CitrixStoreFront-x64.exe.
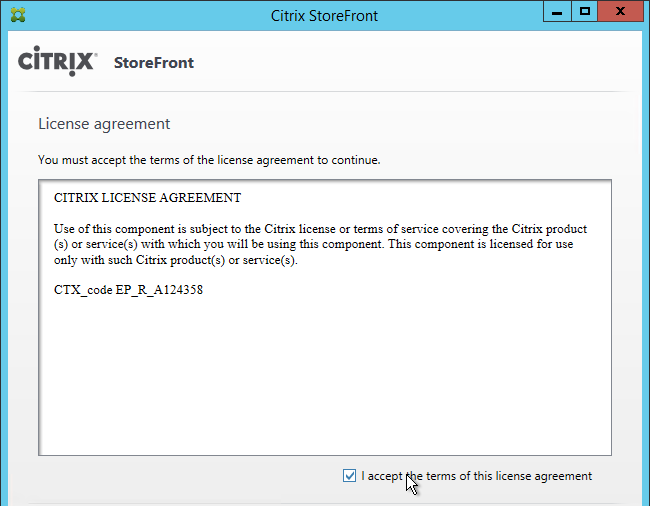
- In the License Agreement page, check the box next to I accept the terms, and click Next.
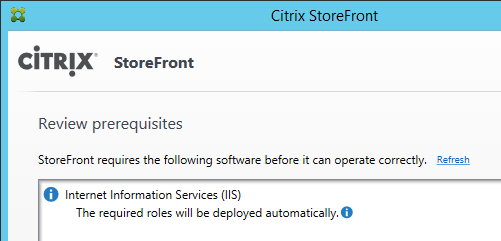
- In the Review prerequisites page, click Next.
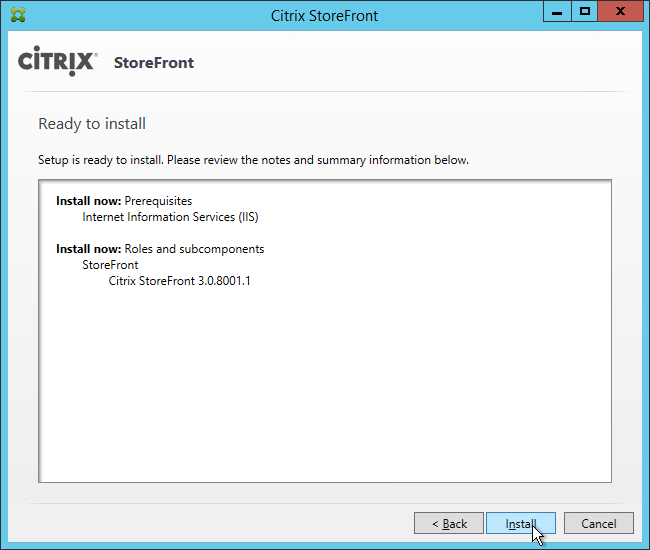
- In the Ready to install page, click Install.
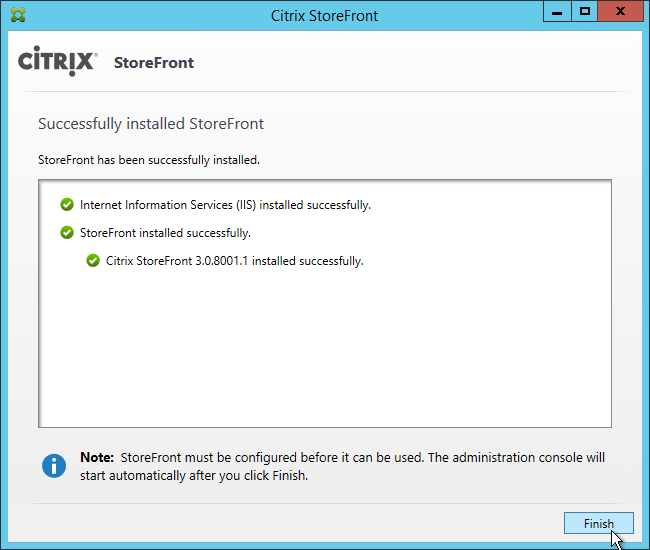
- In the Successfully installed StoreFront page, click Finish.
- If this is a new install, skip to the next section (Initial Configuration).
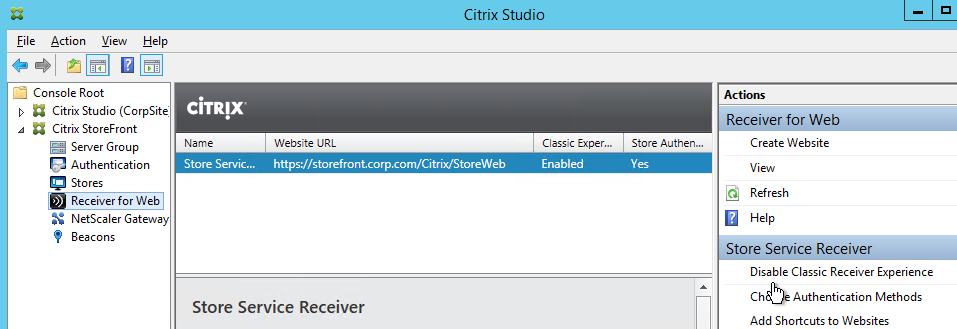
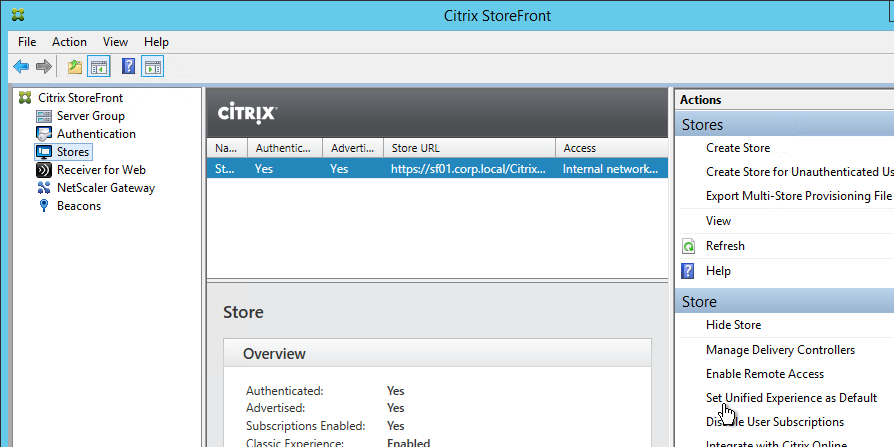
- After upgrading, in StoreFront Console, go to Receiver for Web and Disable Classic Receiver Experience.
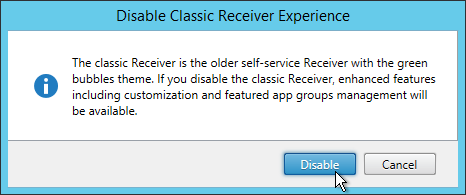
- Click Disable.
- Go to Stores and on the right, click Set Unified Experience as Default.
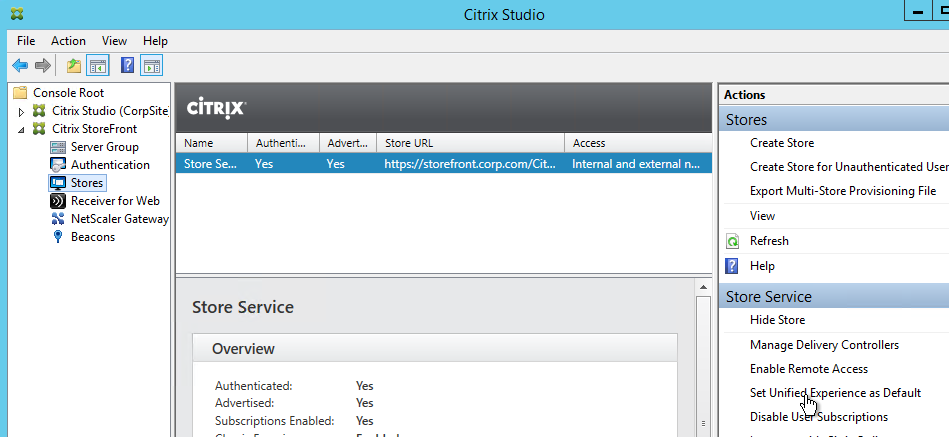
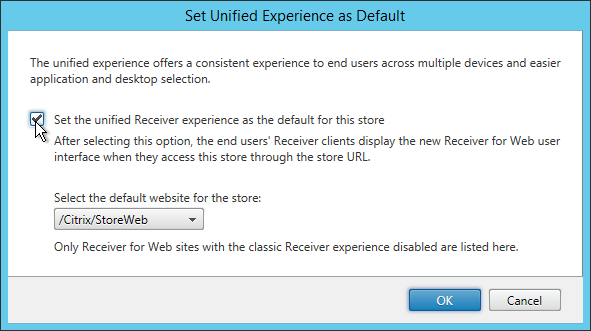
- Check the box next to Set the unified Receiver experience as the default for this store and click OK.
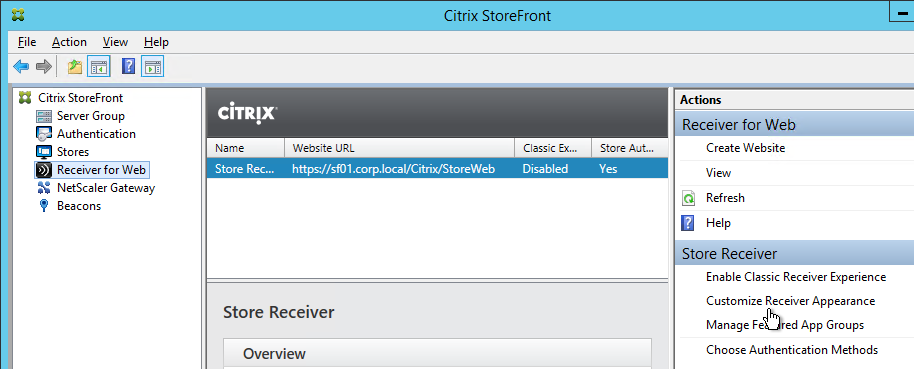
- Go back to Receiver for Web and use the Configure Receiver Appearance and Manage Featured App Groups links to customize the webpage.
Initial Configuration
If this is a new install of StoreFront, do the following:
- In PowerShell, run Set-ExecutionPolicy Unrestricted.
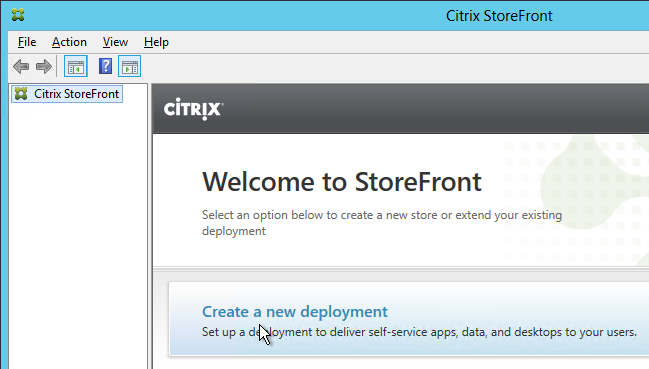
- The management console should launch automatically. If not, launch Citrix StoreFront from the Start Menu.

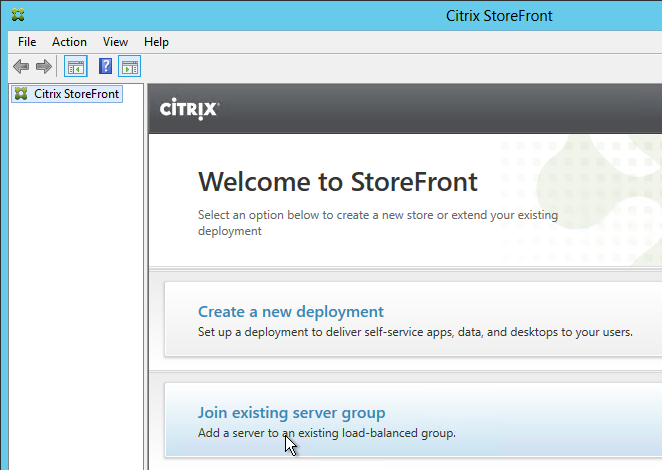
- In the middle, click Create a new deployment.
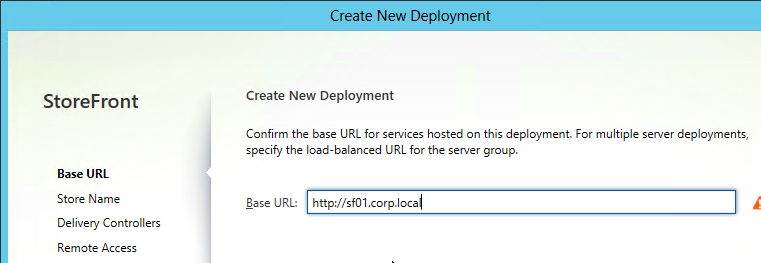
- In the Base URL page, if you installed an SSL certificate on the StoreFront server, then the Hostname should already be filled in. If SSL is not configured yet then you can leave it set to the server name and change it later once you setup SSL and load balancing. Click Next.
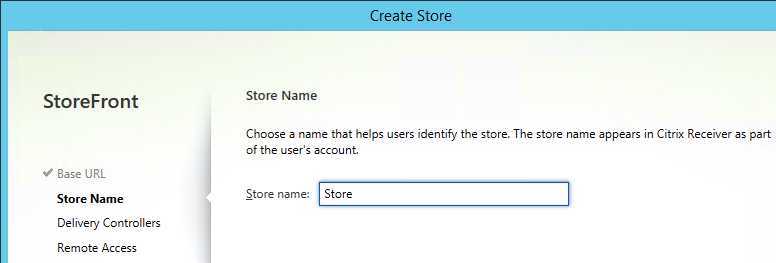
- In the Store Name page, enter a name for the store and click Next. The Store name entered here is part of the URL path. And users see this name in their local Receiver Accounts list.
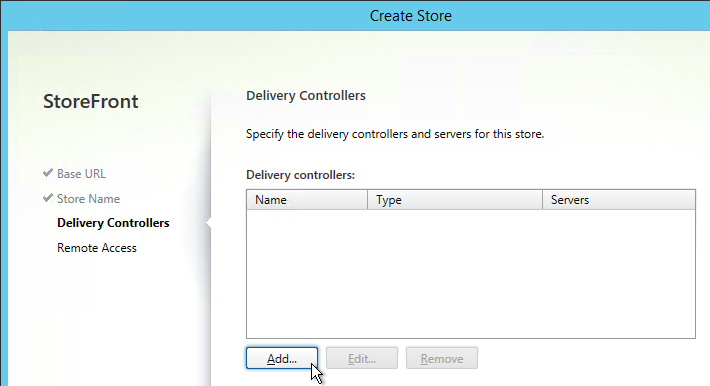
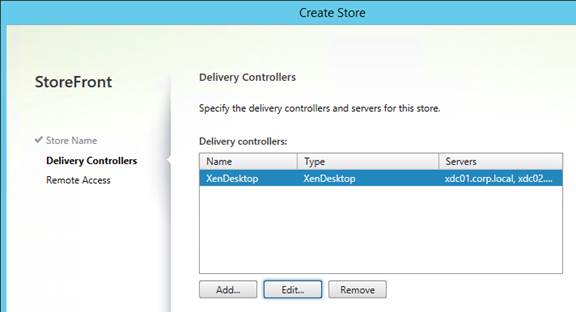
- In the Delivery Controllers page, you can one set of Delivery Controllers per XenApp farm or XenDesktop site. Click Add.
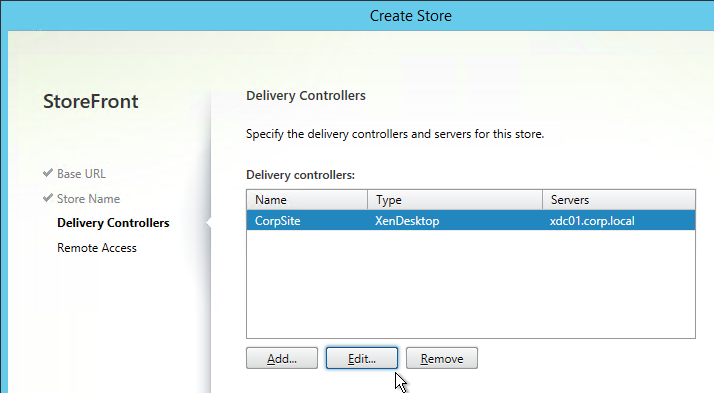
- Change the Type to XenDesktop.
- Enter a descriptive name for the XenApp/XenDesktop 7.6 or newer site/farm. This name does not need to match the actual site/farm name. And users don’t see this name.
- Add the two Controllers. Change the Transport Type to HTTP. Click OK. It’s also possible to set the Transport type to HTTPS if certificates are installed on your Delivery Controllers.

- If you have multiple XenDesktop sites/farms feel free to add them now. Or you can add older XenApp farms. Click Next when done.
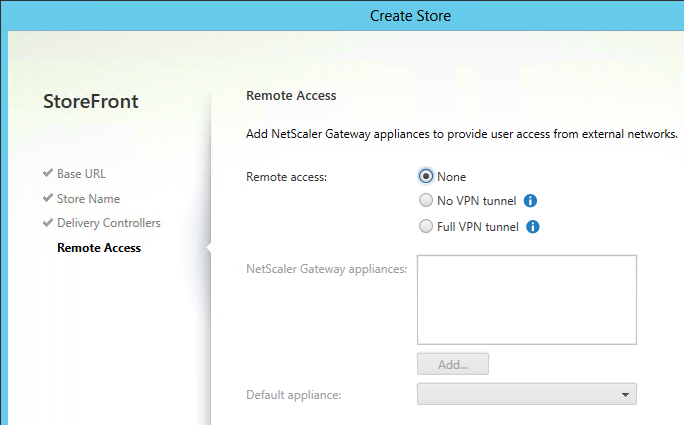
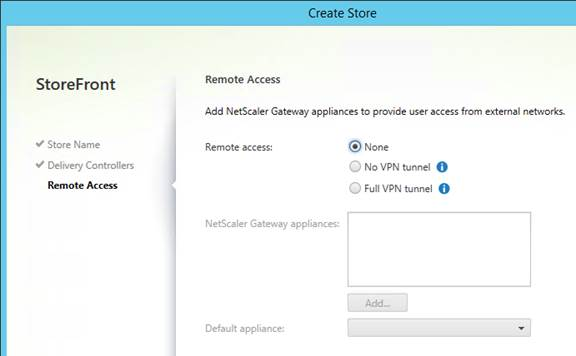
- In the Remote Access page, select None and click Create. You can configure StoreFront to use NetScaler Gateway later.
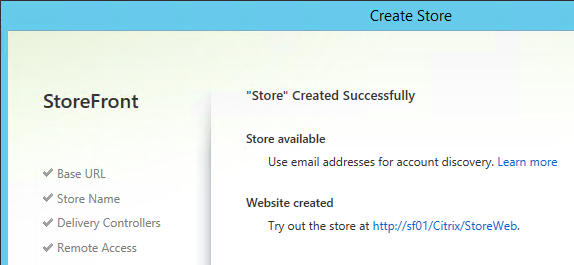
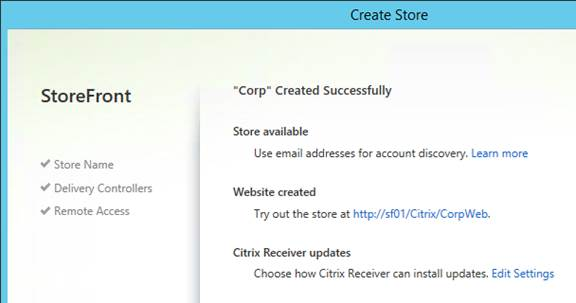
- In the Created Successfully page, click Finish.
Second StoreFront Server
After installation of the second server, NT SERVICE\CitrixConfigurationReplication and NT SERVICE\CitrixClusterService must remain in the Administrators group on both StoreFront servers or propagation will fail.
- Install StoreFront 3.0.9000 on the second server.
- On the 2nd server, create/import the SSL certificate and bind it to the Default Web Site.
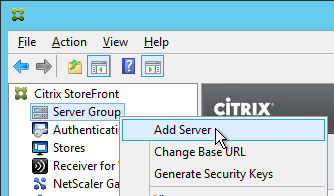
- Login to the first StoreFront server. In the StoreFront management console, right-click Server Group, and click Add Server.
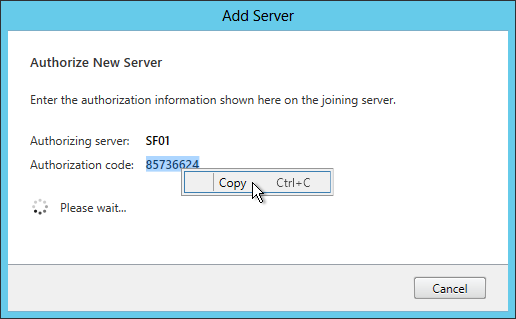
- Copy the Authorization code.
- Login to the second StoreFront server and launch the StoreFront Console. In the middle, click Join existing server group.
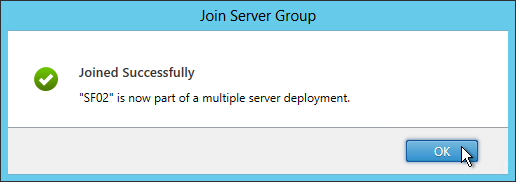
- In the Join Server Group page, enter the name of the first StoreFront server and enter the Authorization code copied earlier. Click Join.

- Then click OK.
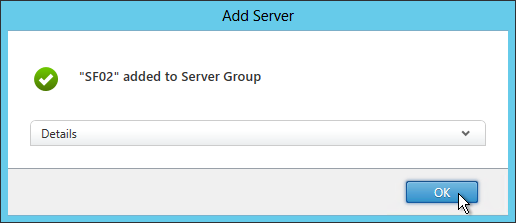
- Go back to the first server. Click OK.
- All changes made on one StoreFront server must be propagated to the other StoreFront server. When changing StoreFront web.config files, change them on one StoreFront server use the StoreFront Console to Propagate Changes to the other StoreFront servers.
Store Name – Rename
When you install XenDesktop Delivery Controller, you are given the option of installing StoreFront on the same server. If you let the Delivery Controller installer also install StoreFront then the StoreFront on the Controller will have a default store name of /Citrix/Store. If you don’t like the default Store Name then you will need to remove the store and re-add it.
- In the StoreFront console, on the left click Stores.
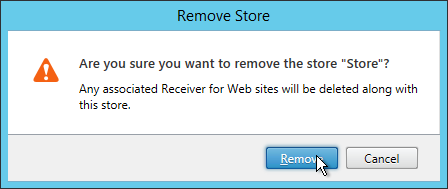
- Highlight the store and on the bottom right click Remove Store.
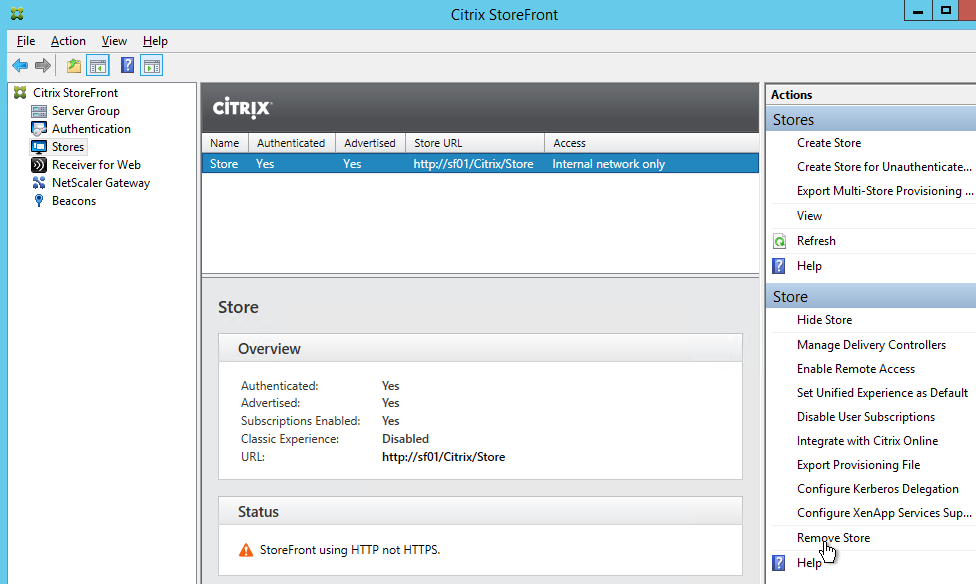
- Click Remove.
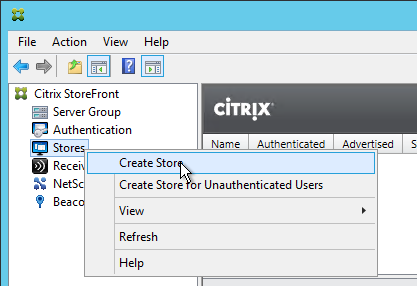
- On the left, right-click Stores and click Create Store.
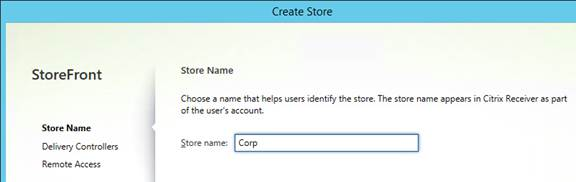
- In the Store Name page, enter a name. This name becomes part of the path (/Citrix/StoreName) and is displayed in Receiver. Click Next.
- In the Delivery Controllers page, add farms and click Next.
- In the Remote Access page, leave it set to None and click Create.
- In the Created Successfully page, click Finish.
HOSTS File
StoreFront 3.0 is smart enough to do a loopback connection to the local StoreFront server instead of sending traffic through the load balancer. For more information see No More Editing of Hosts File at Citrix Blog Post What’s New in StoreFront 3.0.
However, if you have StoreFront servers in multiple datacenters then you are probably using GSLB-enabled DNS names and StoreFront needs to resolve these names to VIPs in the local datacenter. Edit the HOSTS file (C:\Windows\System32\Drivers\Etc\HOSTS) on each StoreFront server with the following entries:
- StoreFront Load Balancing FQDN (e.g. Citrix.corp.com) = Load Balancing VIP in the local datacenter.
- NetScaler Gateway Callback FQDN (e.g. CitrixCB.corp.com) = NetScaler Gateway VIP in the local datacenter.
SSL Certificate
StoreFront requires SSL. You will save yourself much heartache if you install valid, trusted certificates. There are two options for StoreFront SSL:
- SSL Offload: Use NetScaler to do SSL Offload and load balancing. In this scenario NetScaler does SSL encryption on the client side but uses clear-text HTTP on the StoreFront side and thus there is no need for certificates on the StoreFront servers. The SSL certificate on the NetScaler must match the DNS name that resolves to the load balancing VIP for StoreFront.
- SSL End-to-end: In this scenario, NetScaler does encryption on the client-side but also re-encrypts before sending traffic to the StoreFront servers. This requires certificates on the StoreFront servers.
NetScaler usually does not verify server-side certificates so it doesn’t matter what name is in the cert that is installed on the StoreFront servers. However, some other load balancers do verify the cert and thus the cert on the StoreFront servers should match the FQDN of the StoreFront server.
If StoreFront is installed on your Delivery Controllers then both functions share the same IIS website and the same SSL certificate. If you want to enable SSL for the Delivery Controller (XML) connection, then the cert name on each server must match the FQDN of the Delivery Controller. One option is to create an SSL certificate with the following Subject Alternative Names: the StoreFront load balanced DNS name and each of the Delivery Controller FQDNs. Then import this one certificate on all StoreFront/Delivery Controllers servers and load balancers. Or a wildcard certificate could match all of these names.
In any case, be aware of the Subject Alternative Name requirements for email-based discovery in Citrix Receiver. Email discovery in Citrix Receiver requires the certificate to not only match the StoreFront load balanced DNS name but the certificate must also match discoverReceiver.email.suffix. Usually the only option to match both names is with Subject Alternative Names. If you have multiple email suffixes then you will need multiple Subject Alternative Names, each beginning with discoverReceiver.email.suffix. If you configure Subject Alternative Names, don’t forget to add the load balanced name as one of the Subject Alternative Names.
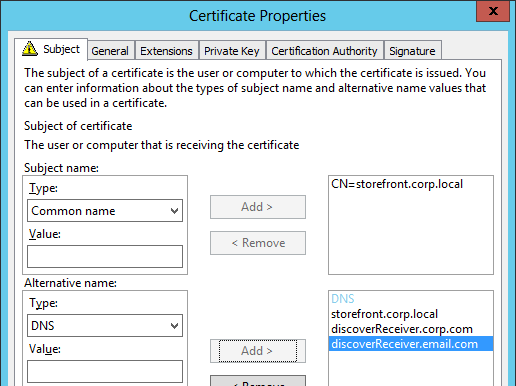
When you view a Subject Alternative Name certificate, on the Details tab, click Subject Alternative Name to verify that all names are listed, including the DNS name that resolves to the load balancing VIP.

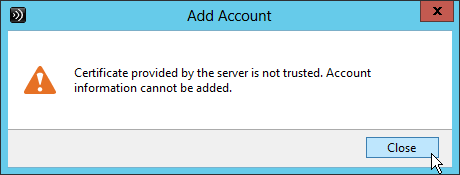
When attempting email discovery in Receiver, if the certificate does not match discoverReceiver.email.suffix then users will see this message:
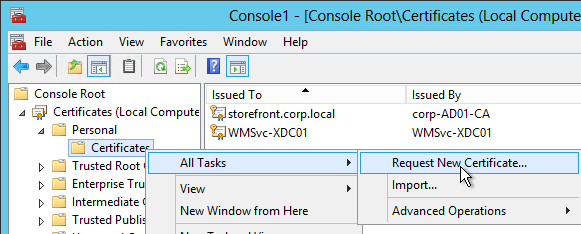
- The Certificates MMC snap-in can be used to create an internal certificate signed by a Microsoft Certificate Authority. The MMC method allows you to specify Subject Alternative Names.
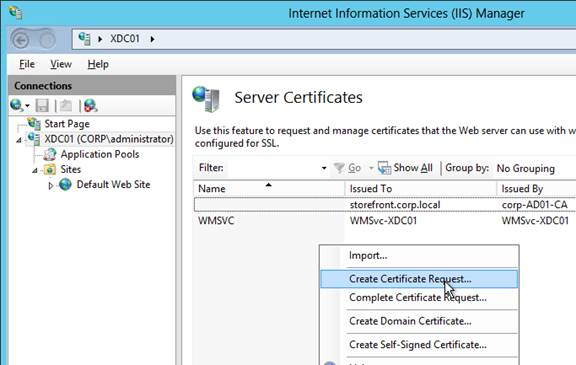
- Or use the Server Certificates feature in IIS Manager to create or import a certificate.
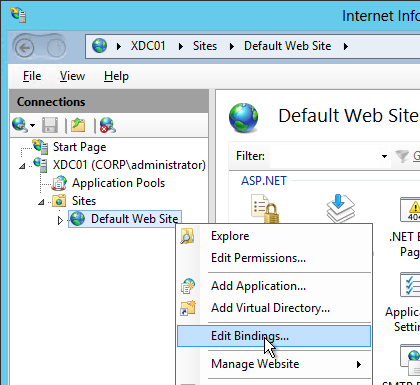
- After the certificate has been created/imported on the StoreFront Server, in IIS Manager, right-click the Default Web Site and click Edit Bindings.
- Click Add.
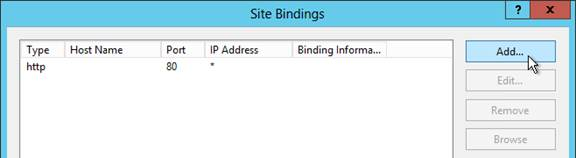
- Change the Type to https and select the SSL certificate. Click OK and then click Close.
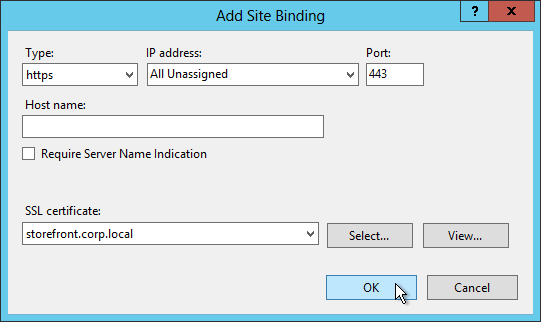
- Next step: change the Base URL inside StoreFront Console.
Delivery Controllers – SSL
Delivery Controllers can be SSL enabled by using one of two methods:
- If IIS is installed on the Delivery Controller, simply install/create a certificate, and bind it to the Default Web Site.
- If IIS is not installed on the Delivery Controller, then you need to run a command line program as described at CTX200415 Secure XML traffic between StoreFront and Delivery Controller 7.x. Or use Ray Kareer’s script at Binding your SSL Server Certificate to the Citrix Broker Service at CUGC.
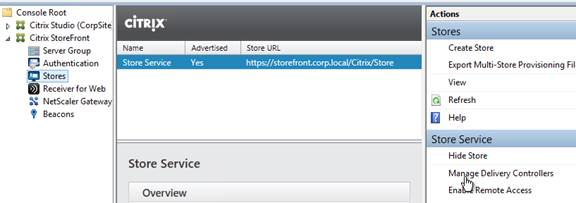
Once SSL certificates are installed on the Delivery Controller servers, then you can configure the Store to use SSL when communicating with the Delivery Controllers.
- In the StoreFront Console, on the left click Stores.
- On the bottom-right, click Manage Delivery Controllers.
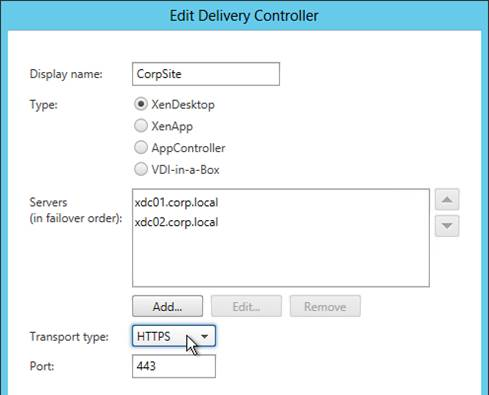
- Highlight the deployment and click Edit.
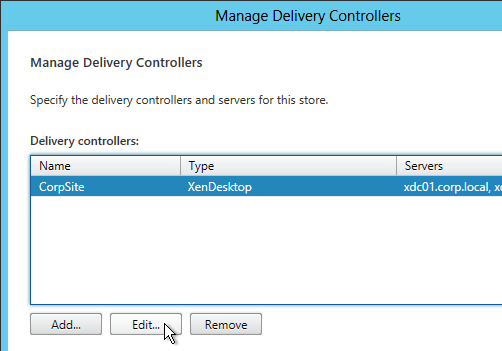
- Change the Transport type to HTTPS.
- Make sure the Delivery Controller servers are entered using their FQDNs. These FQDNs must match the certificates installed on those servers.
- Click OK twice.
Base URL – Change
The StoreFront Base URL should point to a URL with a FQDN that resolves to a load balancing VIP that load balances the StoreFront servers. Receiver uses this Base URL to connect to StoreFront. If remote, Receiver will first connect to NetScaler Gateway and then use Gateway to proxy a connection to the Base URL.
If you are not following the Single FQDN procedure then the FQDN used for load balancing of StoreFront (Base URL) must be different than the FQDN used for NetScaler Gateway.
The StoreFront Base URL must be https. Receivers will not accept clear-text http URLs. This is true even for remote connections that are proxied through NetScaler Gateway.
- Configure load balancing of the StoreFront servers, including SSL certificate.
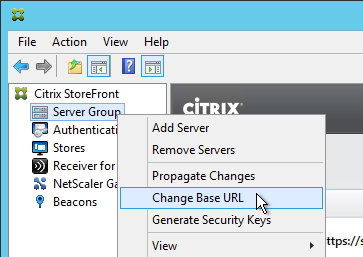
- In the Citrix StoreFront console, right-click Server Group and click Change Base URL.
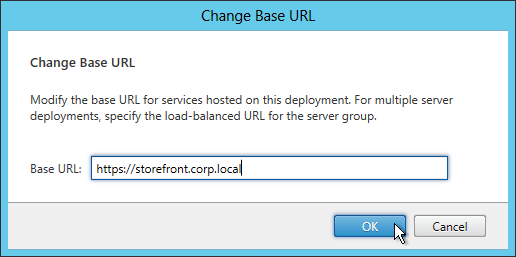
- Enter the new Base URL in https://citrix.corp.com format. This must be https. Receivers will not accept http URLs.
- If the Base URL is https but you don’t have certificates installed on your StoreFront servers (aka SSL Offload) then you’ll need to run the following commands on the StoreFront servers. See No More Editing of Hosts File at Citrix Blog Post What’s New in StoreFront 3.0.
& "C:\Program Files\Citrix\Receiver StoreFront\Scripts\ImportModules.ps1"

Set-DSLoopback -SiteId 1 -VirtualPath /Citrix/StoreWeb -Loopback OnUsingHttp
Authentication Configuration
If StoreFront is not in the same domain (or trusted domain) as the users, then you can configure StoreFront 3.0 to push authentication to the Delivery Controllers. See XML service-based authentication at docs.citrix.com. Note: StoreFront must still be a member of domain but the particular domain doesn’t matter.
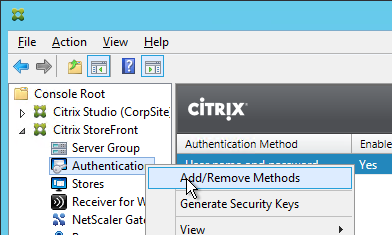
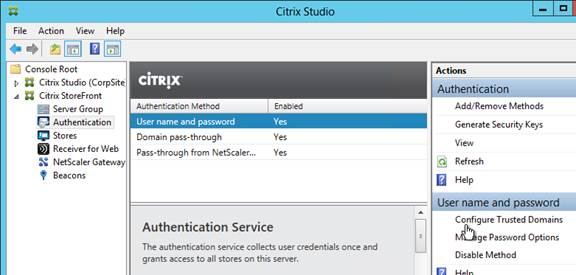
- In the Citrix StoreFront console, on the left, right-click Authentication and click Add/Remove Methods.
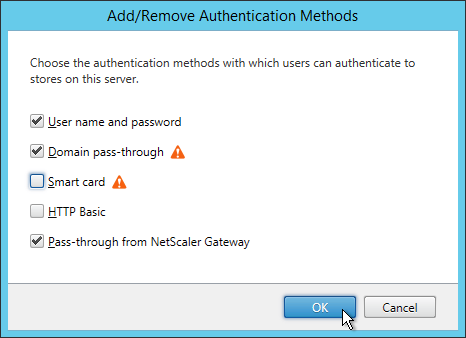
- Check the boxes next to Domain pass-through and Pass-through from NetScaler Gateway. Click OK.
- If you intend to enable pass-through authentication from Receiver Self-Service or from Receiver for Web, run the command
Set-BrokerSite -TrustRequestsSentToTheXmlServicePort $Truefrom a Windows PowerShell command prompt on a Controller. In XenApp 6.5, this is a Citrix Policy > Computer > Trust XML Requests.
 - With User name and password highlighted in the middle, click Configure Trusted Domains on the bottom-right.
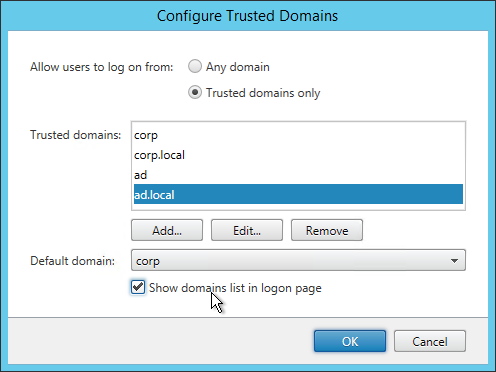
- Select Trusted domains only, click Add, and enter the domain names (NetBIOS and DNS). The DNS suffix is needed if doing userPrincipalName authentication.
- Select one of the domains as the default.
- If desired, check the box next to Show domains list in logon page. Click OK.
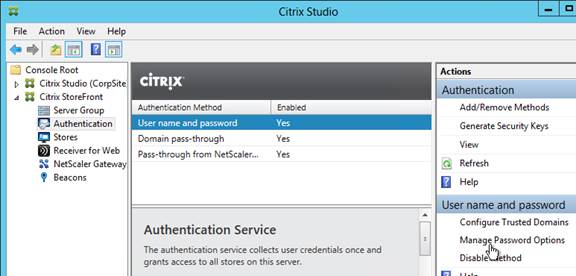
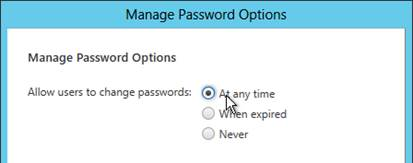
- With User name and password highlighted in the middle, click Manage Password Options in the bottom right.
- Make your selection and click OK.
- From Feng Huang at discussions.citrix.com: you can change the password expiration warning period by editing /Citrix/Authentication/web.config. Set showPasswordExpiryWarning to Custom and set passwordExpiryWarningPeriod to your desired number of days.

- Be careful with password changes. Any time somebody changes their password through StoreFront, a profile will be created for that user on the StoreFront server. Use a tool like delprof2.exe to periodically delete these local profiles.
Citrix Online Integration
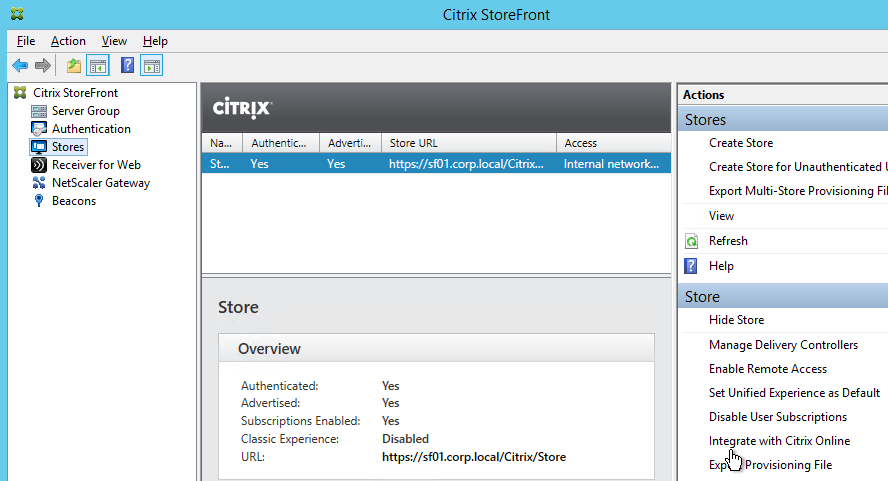
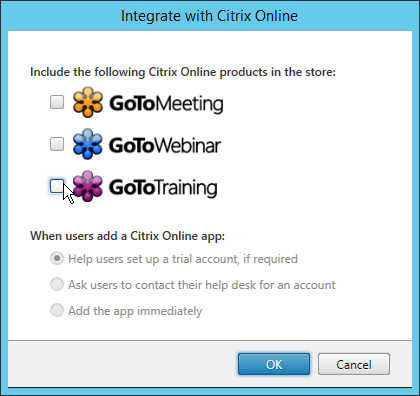
- StoreFront might be configured to add the Citrix Online icons to Receiver. To remove them, on the left click Stores and on the right click Integrate with Citrix Online.
- Uncheck all three boxes and click OK.
Receiver for HTML5 – Enable and Upgrade
By default, Receiver for HTML5 is not enabled.
- In the StoreFront console, on the left, click Receiver for Web.
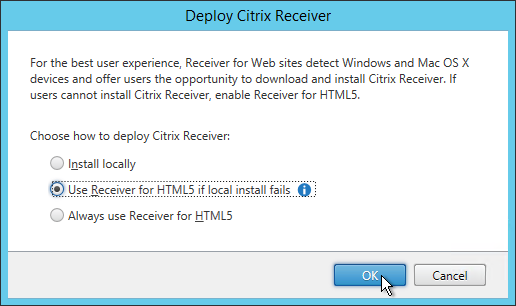
- On the bottom right, click Deploy Citrix Receiver.
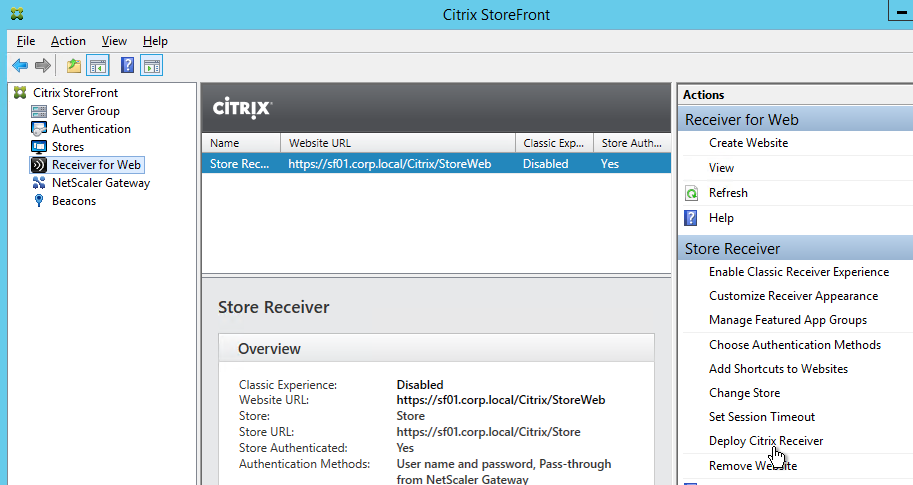
- Change the option to Use Receiver for HTML5 if local install fails, and then click OK.
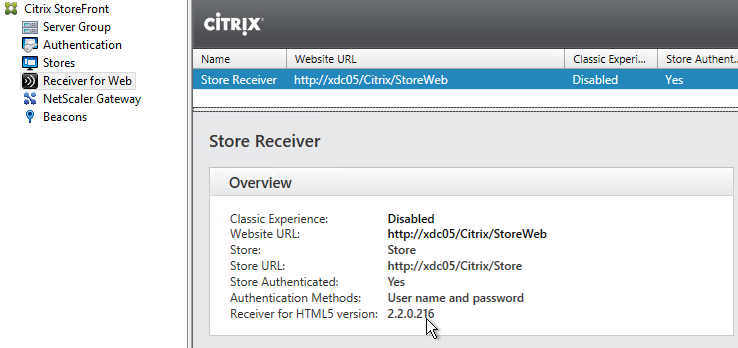
- To see the installed version of HTML5 Receiver, click the Receiver for Web node on the left. The version is displayed in the middle pane, in the bottom half.
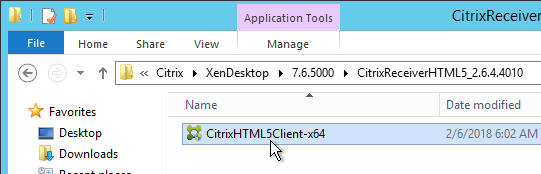
- Download the latest Receiver for HTML5 and install it on one of the StoreFront servers. It installs silently. When you propagate changes, the Receiver for HTML5 should be copied to the other server.
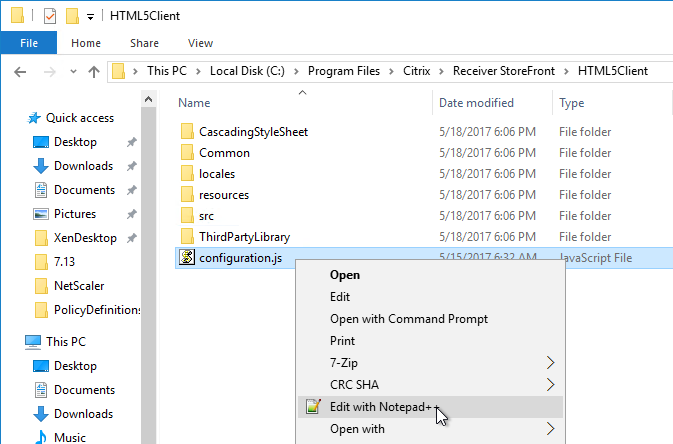
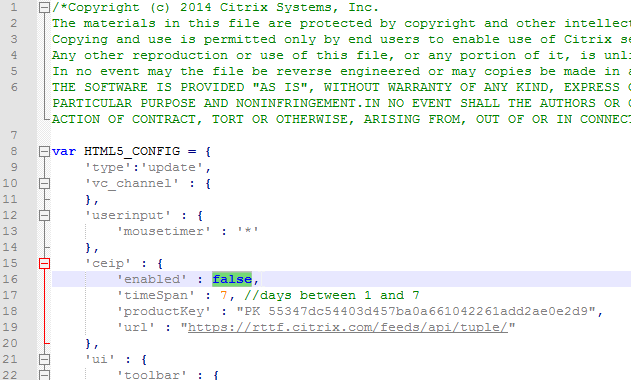
- Customer Experience Improvement Program (CEIP) is enabled by default. To disable it, edit the file “C:\Program Files\Citrix\Receiver StoreFront\HTML5Client\configuration.js”.
- Search for the ceip section and change it to false.
- HTML5 Receiver 2.6.4 adds an experimental multimonitor feature. You can enable it by setting multiMonitorto true.

- HTML5 Receiver 2.6.4 improves PDF printing in Chrome and Firefox. Enable it by setting supportedBrowsersto true.

- HTML5 Receiver 2.6.2 has an experimental printing feature where in the remote app, after printing to the Citrix PDF printer, the second print dialog opens in the current tab instead of a different tab. To enable this feature, on the StoreFront server, edit C:\Program Files\Citrix\Receiver StoreFront\HTML5Client\configuration.js and set openWithinSession to true. Note: this setting changed in 2.6.4 and newer.

- When printing from HTML5 Receiver to the Citrix PDF Printer, the user must click Continue to show the PDF. You can get rid of this prompt in 2.5.1 and newer. In the configuration.js file, scroll down to the line containing printDialog and set it to true.


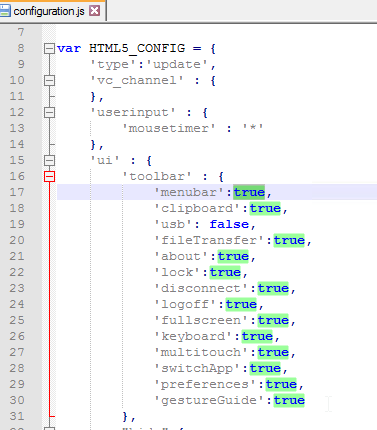
- From Configuring toolbar at Citrix Docs: The new toolbar can be disabled or customized by editing the file C:\Program Files\Citrix\Receiver StoreFront\HTML5Client\configuration.js.
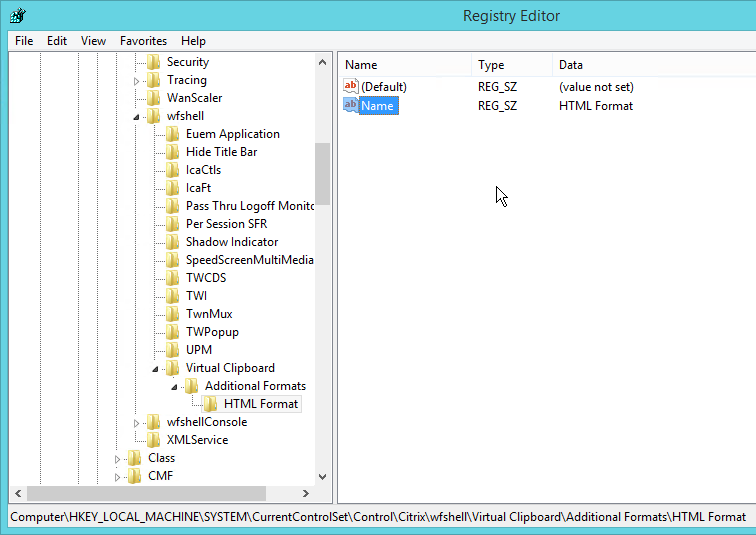
- From Enhanced clipboard support at Citrix Docs: To enable enhanced clipboard support, on every VDA set the registry value HKEY_LOCAL_MACHINE\SYSTEM\CurrentControlSet\Control\Citrix\wfshell\Virtual Clipboard\Additional Formats\HTML Format\Name=”HTML Format”. Create any missing registry keys. This applies to both virtual desktops and Remote Desktop Session Hosts.
- Citrix Blog Post Receiver for HTML5 and Chrome File Transfer Explained:
- How to use the toolbar to transfer files
- Citrix Policy settings to enable/disable file transfer
- VDA registry settings to control file transfer
- HTML5Client\Configuration.js settings for client-side configuration
- How to view HTML5Client log file
- In the StoreFront console, on the left, right-click Server Group, and click Propagate Changes.

- Optionally, install Citrix PDF Printer on the VDAs. The PDF printer is in the Additional Components section of the HTML5 Receiver download page. This PDF printer is only used with Receiver for HTML5, and not with regular Receiver.

- Note: as of Receiver for HTML 2.0, it’s no longer necessary to install App Switcher on the VDAs.
- StoreFront can be configured to launch HTML5 applications in the same Receiver for Web tab instead of creating a new tab. See Configure Citrix Receiver for HTML5 use of browser tabs at Citrix Docs for more information.
Receiver for Web Timeout
- On the left, click Receiver for Web.
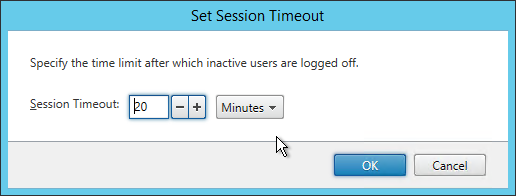
- On the right, click Set Session Timeout
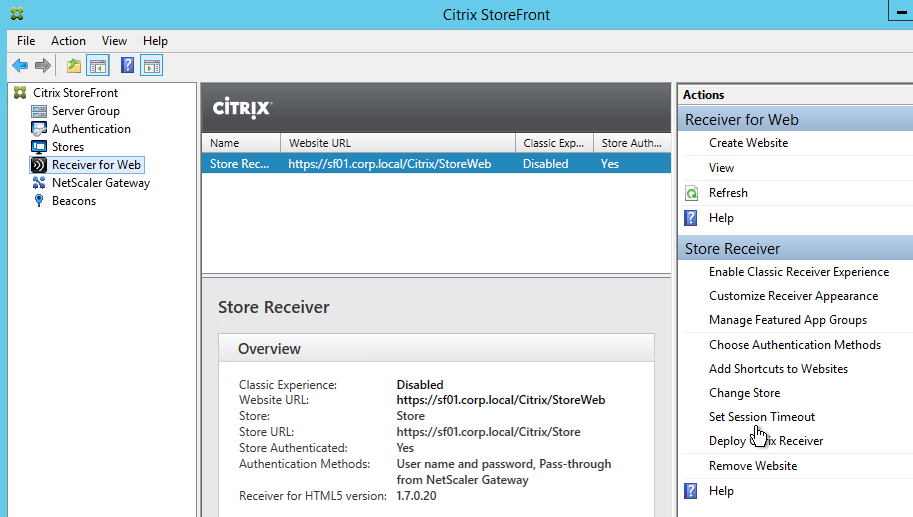
- Set the timeout as desired and click OK.
- The session timeout in StoreFront 3.0 is not being reset correctly when a user launches an application. See Michael Bednarek’s code at discussions.citrix.com that fixes the problem.
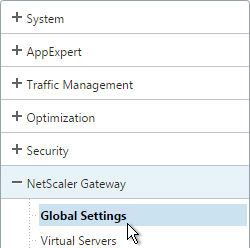
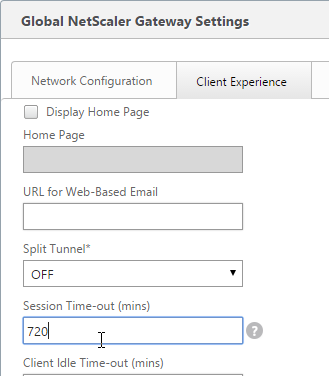
- If you are using a NetScaler, you will need to change the Global Session Timeout located at NetScaler Gateway > Global Settings > Change Global Settings > Client Experience > Session Time-out (mins).
Receiver for Web Pass-through Authentication
If you enabled Pass-through auth in the Authentication node it does not enable it from Receiver for Web. If you enable it in Receiver for Web, additional configuration is required on the Receiver side to fully enable pass-through auth.
- On the left, click Receiver for Web
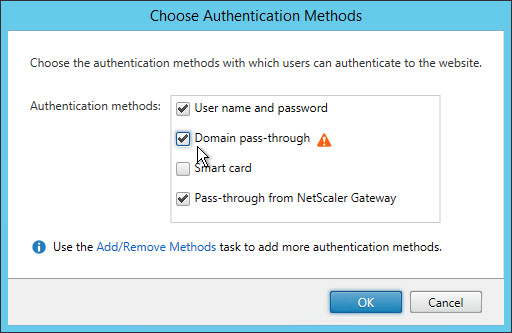
- On the right, click Choose Authentication Methods.
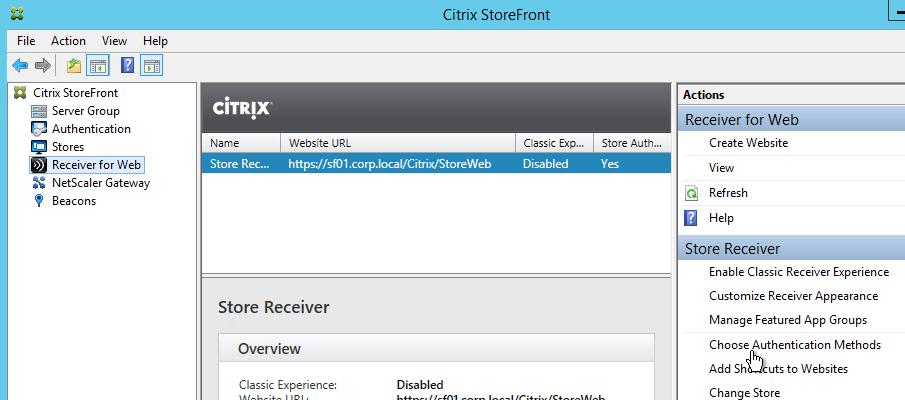
- If desired, check the box next to Domain pass-through. Click OK.
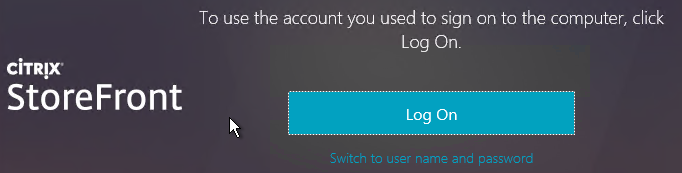
- If the StoreFront URL is in the browser’s Local Intranet zone then you’ll see a prompt to automatically Log On. This only appears once.
- If you try to launch an icon it will ask you to login to Windows. To fix this, you must also enable pass-through authentication on the client side (Receiver).
Unified Receiver Experience
If you did a clean install of StoreFront 3.0 or newer then the newer Receiver UI will already be enabled and you can skip this section.
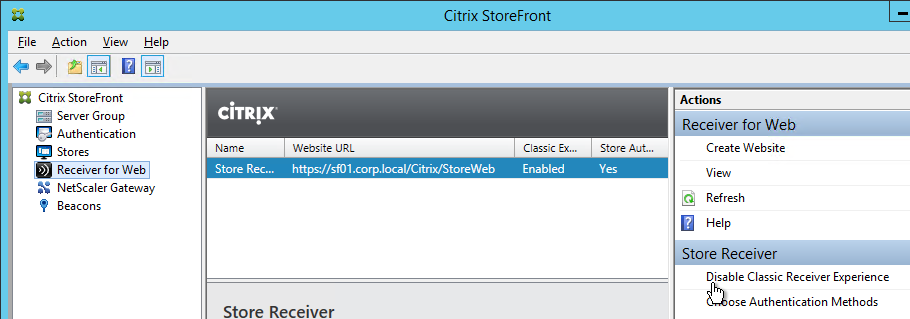
If you upgraded from an older StoreFront then you can disable the Classic UI to enable the newer UI.
- On the left, click Receiver for Web.
- On the right, click Disable Classic Receiver Experience.
- Click Disable.

- On the left, click Stores. On the right, click Set Unified Experience as Default.
- Check the box next to Set the unified Receiver experience as the default for this store and click OK.

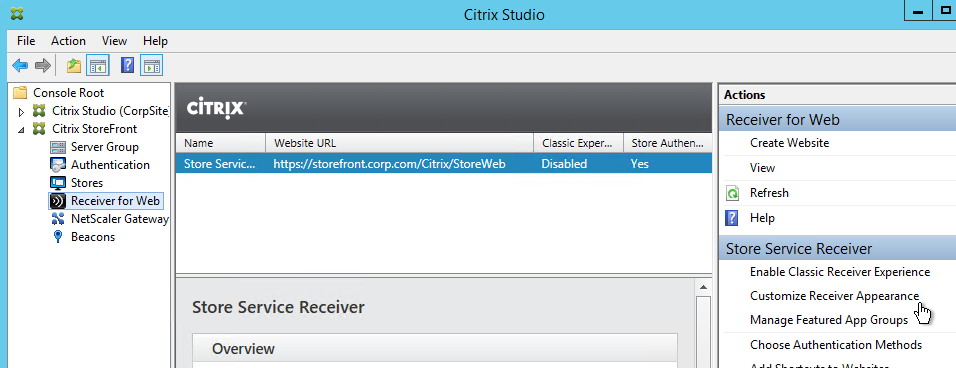
Customize Receiver Appearance
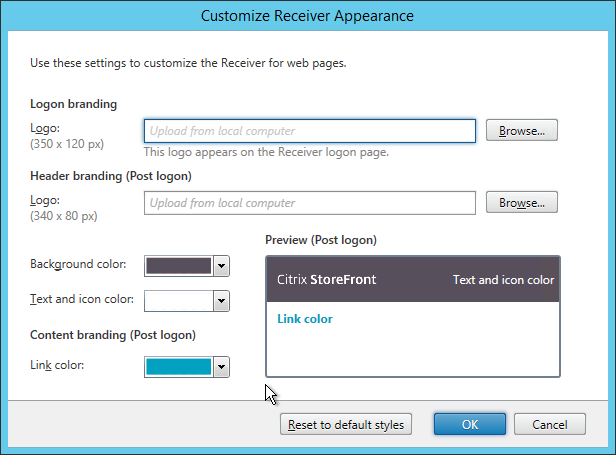
If the Unified Receiver appearance is enabled, you can go to Receiver for Web > Customize Receiver Appearance to change logos and colors. Additional customization can be performed using the SDK.
You can also Manage Featured App Groups.
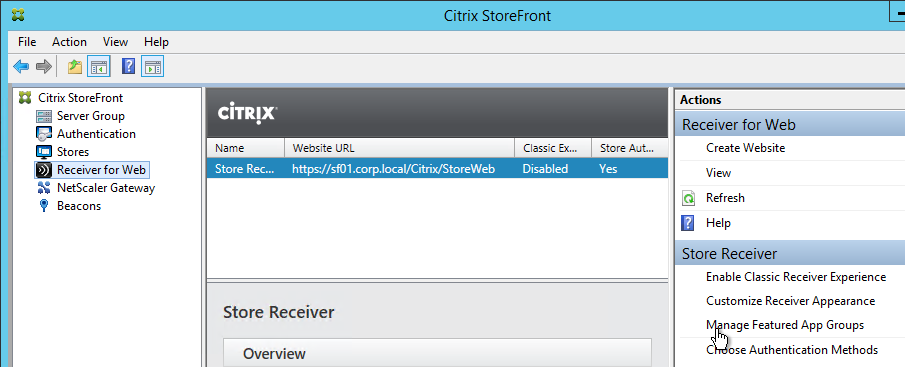

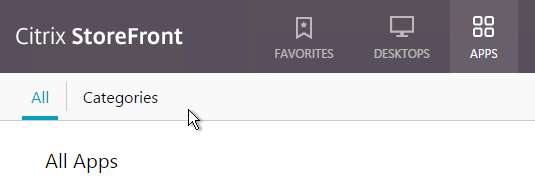
These Featured App Groups are displayed at the top of the Apps > All page.
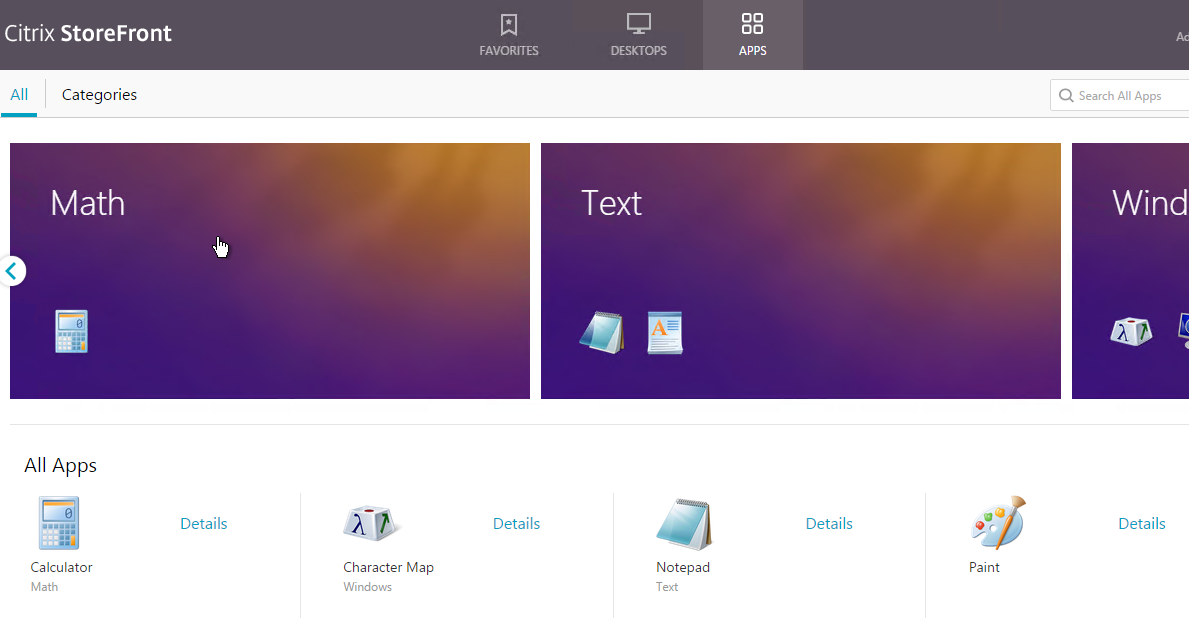
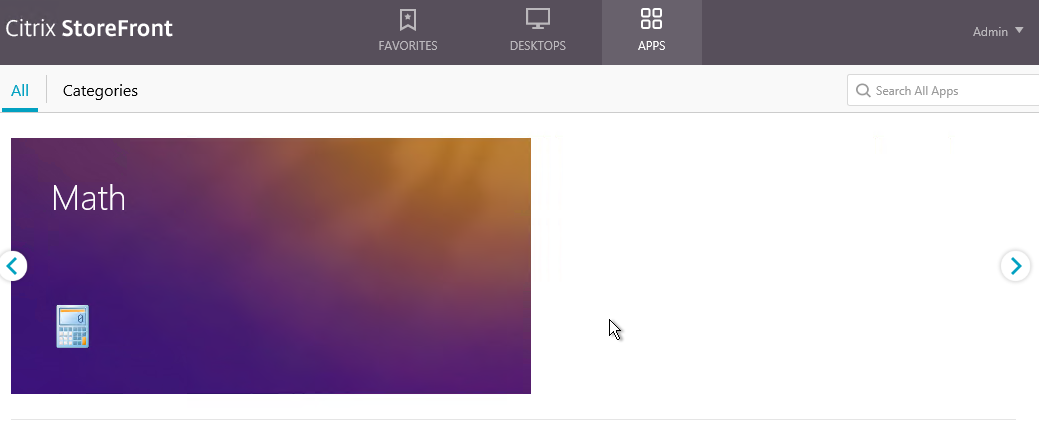
By default, Featured App Groups are displayed with continual horizontal scrolling. This is OK if you have several Featured App Groups but doesn’t look right if you only have one Featured App Group.
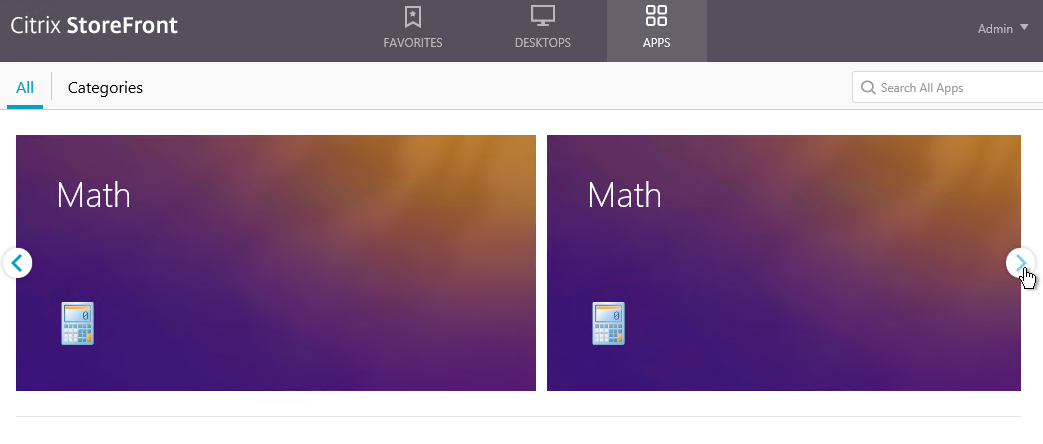
Michael Bednarek has posted some code at Citrix Discussions to disable the continuous horizontal scrolling. Also see CTX202415 StoreFront Featured Apps Group Appears More Than Once.
Additional StoreFront and Receiver customizations are available through the StoreFront APIs.
Default Tab
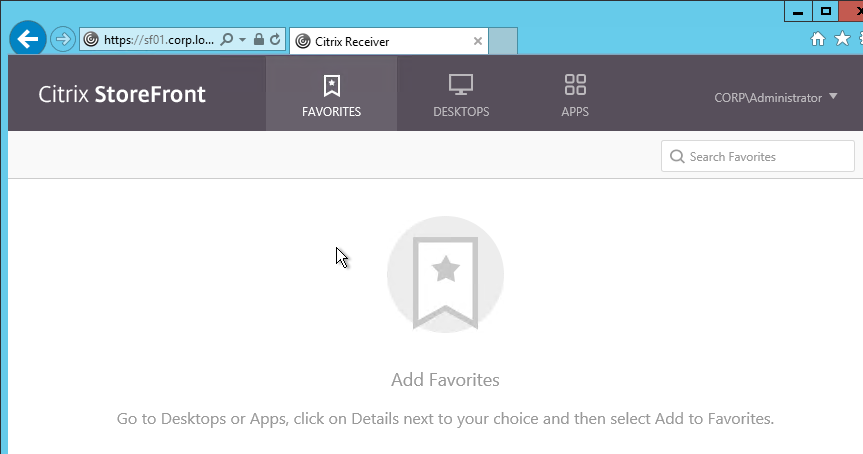
- By default, when a user logs in to StoreFront, the Favorites tab is selected. Users can go to other tabs to add icons to the list of Favorites.
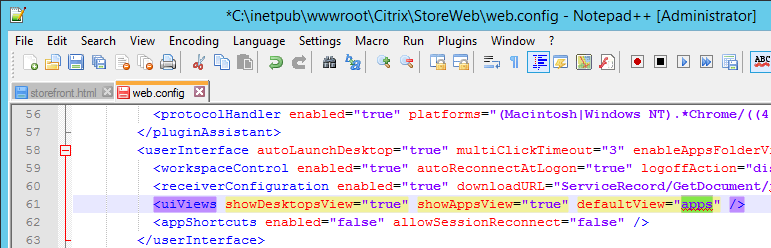
- You can change the default tab to something other than Favorites by editing C:\inetpub\wwwroot\Citrix\StoreWeb\web.config in an elevated text editor.
- Search for defaultView or scroll to line 61. Change the defaultView to apps or desktops, or leave it set to the default of auto. Auto will select a tab in the following priority order depending on which tabs (views) are enabled: Favorites > Apps > Desktops.
- If you change it to default to the Apps view, then you might also want to default to the Categories view instead of the All view.
- You can do this by adding the following code to C:\Inetpub\wwwroot\Citrix\StoreWeb\custom\script.js. More details at discussions.citrix.com.
CTXS.Extensions.afterDisplayHomeScreen = function (callback) {
     CTXS.ExtensionAPI.navigateToFolder('/');
};

CTXS.Extensions.onViewChange = function (viewName) {
  if (viewName == 'store') {
    window.setTimeout(function () {
    CTXS.ExtensionAPI.navigateToFolder('\\');
    }, 0);
  }
};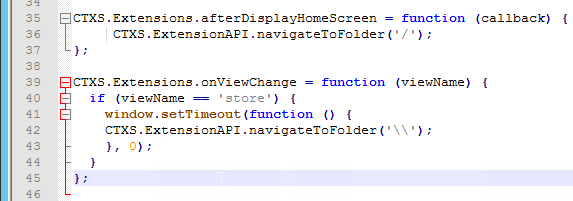
- Then when you login to StoreFront you’ll see Apps > Categories as the default view. This works in Receiver too.
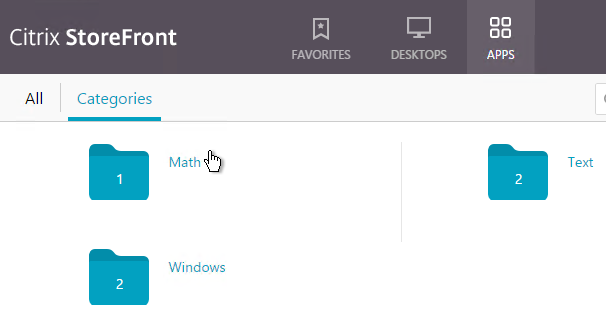
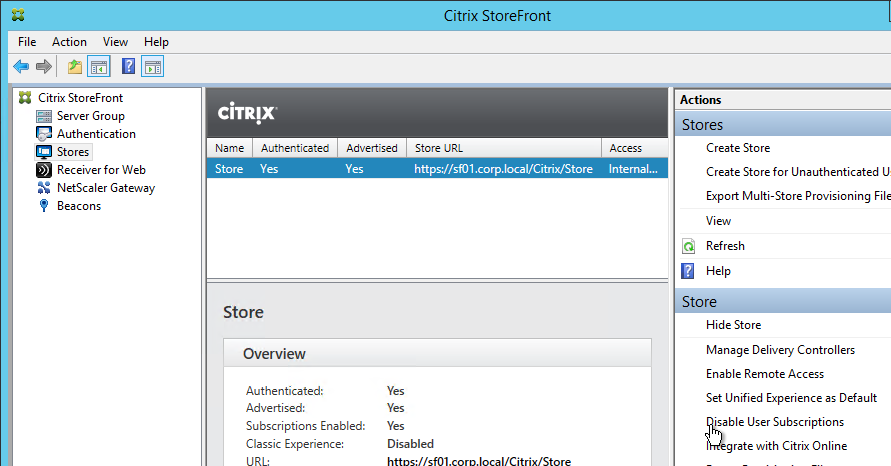
- To completely remove the Favorites tab, in the StoreFront Console, go to Stores > Disable User Subscriptions.
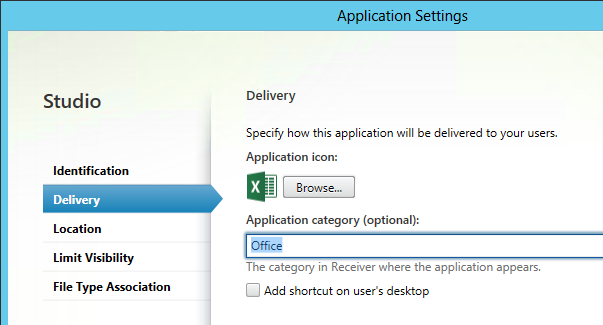
- When publishing applications in Studio, specify a Category so the applications are organized into folders.
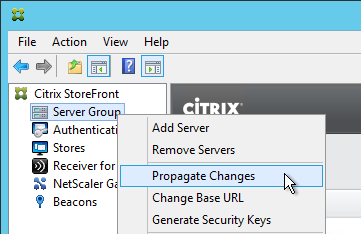
Propagate Changes
Any time you make a change on one StoreFront server, you must propagate the changes to the other StoreFront server.
- In the StoreFront console, on the left, right-click Server Group and click Propagate Changes.
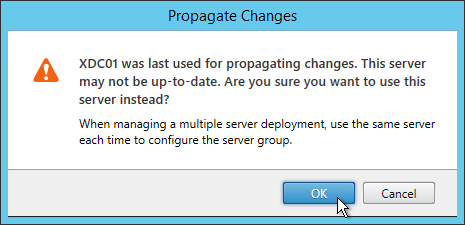
- You might see a message saying that you made changes on the wrong server.
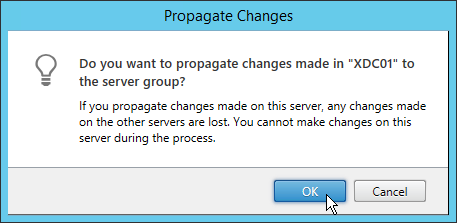
- Click OK when asked to propagate changes.
- Click OK when done.

IIS Default Web Page
Citrix CTX133903 How to Make Storefront the Default Page within the IIS Site. To make a Storefront Web site the default page within the IIS site, complete the following procedure:
- Open Notepad and paste the following text:
<script type="text/javascript">
<!--
window.location="/Citrix/StoreWeb";
// -->
</script>
Note: Replace /Citrix/StoreWeb to the correct path to your Store’s Web site, if required. You can also put https://StoreFrontFQDN in the location field.
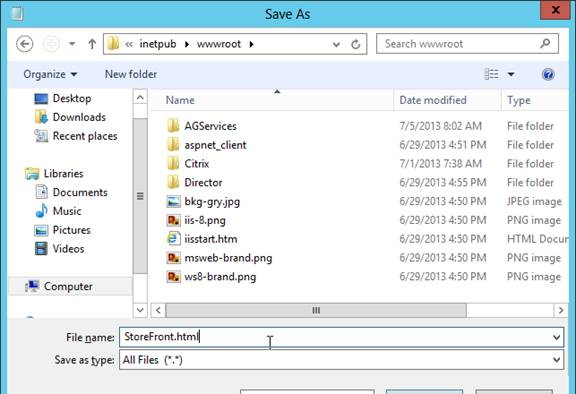
- Select File > Save As and browse to the IIS folder, by default the C:\inetpub\wwwroot is the IIS folder.
- Select the Save as type to All types.
- Type a file name with an html extension, and select Save.
- Open IIS Manager.
- Select the SERVERNAME node (top-level) and double-click Default Document, as shown in the following screen shot:

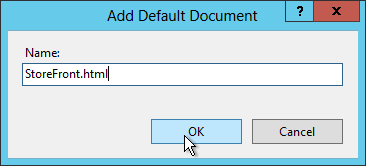
- Select Add…,
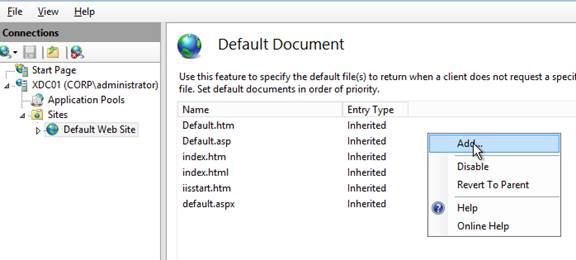
- And enter the file name of the .html file provided in Step 4.
- Ensure the .html file is located at the top of the list, as shown in the following screen shot:
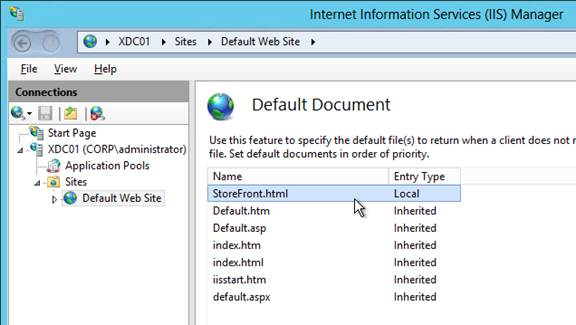
- Repeat these steps on every StoreFront server.
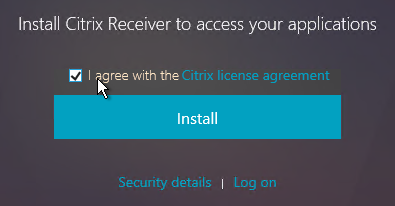
Deploy Citrix Receiver from StoreFront
If you performed a standalone install of StoreFront, then it is configured to tell users to pull Receivers from Citrix’s website. Follow this section to configure StoreFront to download Receivers directly from the StoreFront server.
Or if you installed StoreFront 2.6 using the XenApp/XenDesktop 7.6 autoselect.exe and later upgraded it to StoreFront 3.0.9000, then StoreFront will probably have local Receiver clients that need to be upgraded. Both procedures are covered in this section.
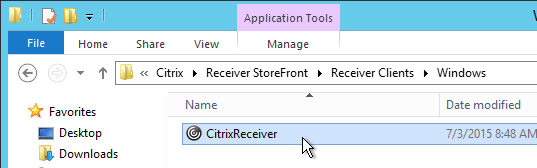
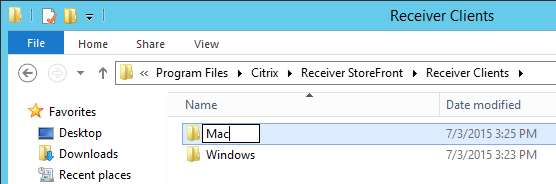
- Go to C:\Program Files\Citrix\Receiver StoreFront\Receiver Clients\. Create a Windows folder if it doesn’t exist.
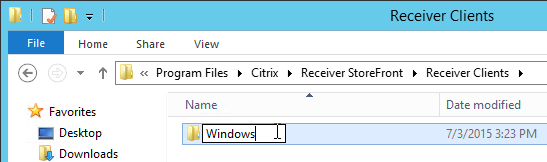
- In the Windows folder, paste the downloaded Receiver 4.9.9002 LTSR for Windows, overwriting the existing file if one exists. Rename the file the CitrixReceiver.exe if it isn’t already. Do this on both StoreFront servers.
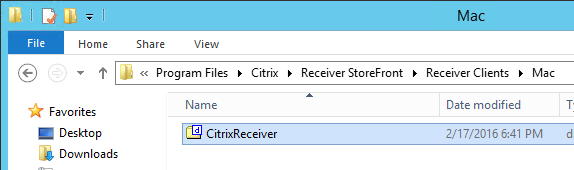
- Go back up to the Receiver Clients folder and create a Mac folder if one doesn’t exist.
- Copy the downloaded Receiver for Mac 12.9.1 to C:\Program Files\Citrix\Receiver StoreFront\Receiver Clients\Mac. Overwrite the existing file if one exists. Rename the file to CitrixReceiver.dmg.
- Go to C:\inetpub\wwwroot\Citrix\StoreWeb and edit the file Web.config. If UAC is enabled you’ll need to run your text editor elevated.
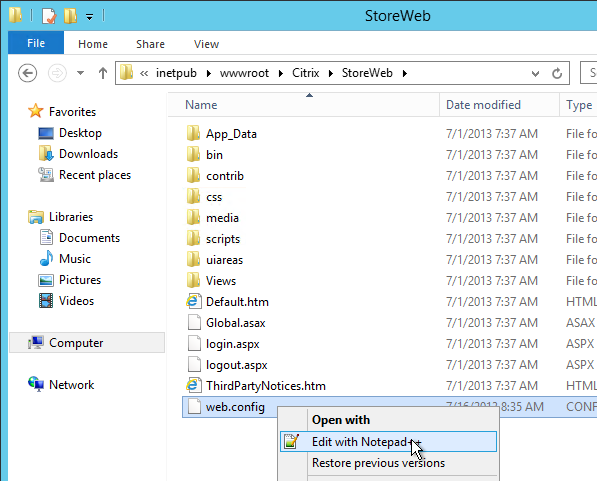
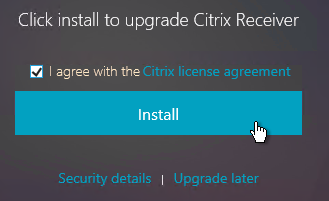
- Scroll down to the pluginAssistant section (line 52). If desired, change upgradeAtLogin to true. This will enable StoreFront to check the installed version of Receiver and offer to upgrade.

- If the win32 and macOS paths point to downloadplugins.citrix.com, you can change the paths to a local folder so that the Receiver is downloaded directly from StoreFront instead of from Citrix.com. Simply change http://downloadplugins.citrix.com to clients. Also, change the file names so they match the ones on your StoreFront servers.

- Close and save the file.
- Propagate Changes to the other StoreFront servers.
- When users connect to Receiver for Web, they will be prompted to install or upgrade. Note: this only applies to Receiver for Web. Receiver Self-Service will not receive this prompt.
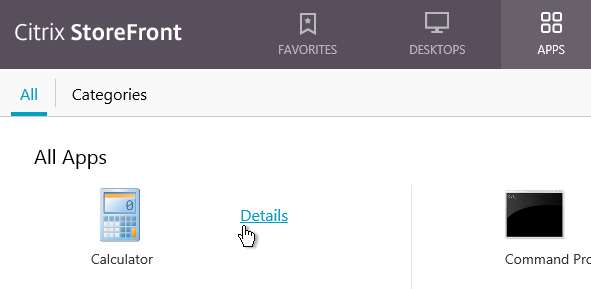
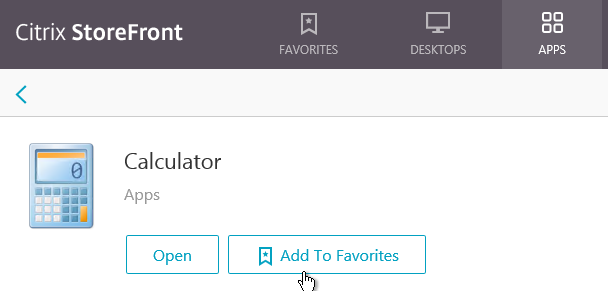
Auto-Favorite
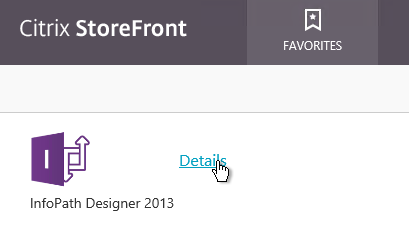
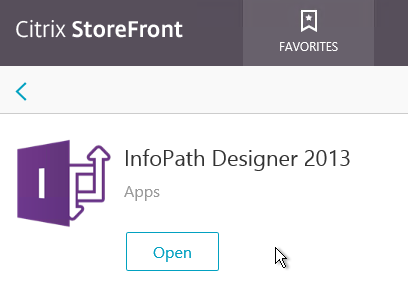
To force a published application to be favorited (subscribed), use one of the following keywords in the published application description:
- KEYWORDS: Auto = the application is automatically subscribed. But users can remove the favorite.
- KEYWORDS: Mandatory = the application is automatically subscribed and users cannot remove the favorite.
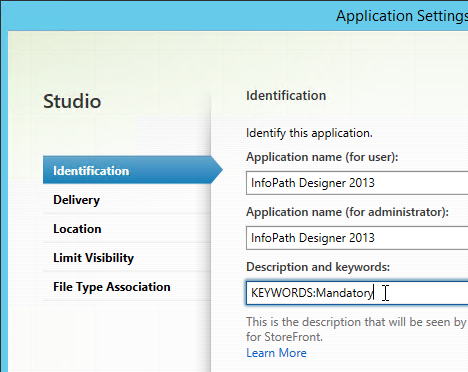
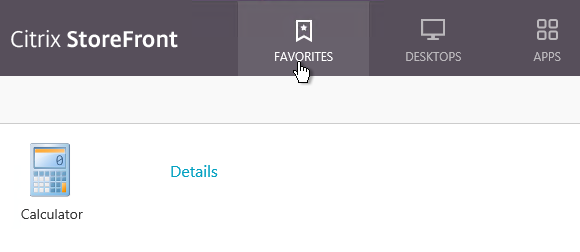
With Mandatory applications there is no option to remove the application from Favorites.
Related Topics
StoreFront Subscriptions – disable, control, replicate, etc.
StoreFront Tweaks – customize RFWeb, SSON for PNAgent, etc.
Hello Carl,
Am using Storefront 2203 CU5 with F5 APM used as load balancer and published URL via F5 for external users. Till now Authentication was being performed with User ID, Password & RSA secure token.
Now Client wants to replace this RSA with SAML SSO, without FAS & ADC appliance is this possible to achieve.
On F5 APM level people has configured for SAML which is working perfectly, post SAML authentication completed, Storefront URL redirected back to logon page and looking for credentials (User ID & Password) to complete login.
Is there any possibilities to overcome this present challenge… Thanks.
StoreFront also has native support for SAML. Or APM can use Kerberos to authenticate to StoreFront.
Without FAS, each VDA will prompt users to enter Windows credentials.
Is there a way to force a minimum version of the Citrix Workspace to launch a published desktop? We see at the citrix director (home) devices/users are using Citrix receiver v14.xx or older versions of Citrix Workspace.
Citrix Cloud Device Posture service can do it. Otherwise, you might need to write a logon script that checks client version and then displays a message to the user and logs off the user.
We are in the process of building out a new environment. We currently have a storefront server in old and will have a storefront server in new. This is all in the same Forest\Domain. Old environment is 1912 and the new environment is 2203. Can a the old delivery controller live both in old environment and new environment, until we have everyone migrated over?
Both StoreFront servers can point to the same Delivery Controller. Is that what you’re asking?
Hi Carl,
Thank you for your effort. I have a problem with Single Sign On when configuring a gateway for the storefront. If I login using the gateway URL on browsers, single sign on is working correctly. while we try to login from Citrix Workspace directly, Single Sign on isn’t working. I think it can’t capture the credentials from gateway login. I have read a lot of documents, but nothing is working.
What kind of Single Sign On?
Is your Gateway configured with an Authentication Profile and Advanced Authentication Policies?
Hello Carl,
We have a standalone Citrix server where DDC and Storefront are configured, version 7.6, a valid certificate binded in the IIS, Citrix services all running, server name matching the certificate and store correctly, server rebooted, where we get an error “Cannot complete your request” when launching the Storefront page.
We also have a Netscaler, and after credential are send on Netscaler the same error message is displayed “Cannot complete your request”.
Do you have an ideea what the issue can be?
Thank you in advance.
What do you see in StoreFront Server > Event Viewer > Applications and Services > Citrix Delivery Services?
Link is broken “The session timeout in StoreFront 3.0 is not being reset correctly when a user launches an application. See Michael Bednarek’s code at discussions.citrix.com that fixes the problem.”
Citrix deleted a bunch of content.
Try https://web.archive.org/web/20200501192915/https://discussions.citrix.com/topic/367163-receiver-for-web-set-session-timeout/
This Citrix link in the article is dead….
https://support.citrix.com/article/CTX200415
Looks like this is the new link…
https://support.citrix.com/article/CTX218986
Thanks for pointing that out. I just updated the link.
Hello Carl,
We are facing an issue with live sessions and passwords expiring during the session breaking the FSLogix service. The default notification for an expiring password on the VDI (Server 2019 – Standard Windows notification), is not obvious enough to our users. If we set Storefront to do a customised reminder, how is that presented? Is it just a simple warning of consider changing, or does it provide the option for the users to change it there and then?
Kind Regards
Tatyana Saar
If password is expired then StoreFront will ask for a new password. Otherwise, StoreFront will simply remind of upcoming expiration but there’s a place in the user’s menu (click username on the top right) to change the password.
Hi Carl,
Hope you are doing well.
Can we upgrade Storefront from 2.5 version to 3.5 direct?
Yes. https://docs.citrix.com/en-us/storefront/3-12/install-standard.html#upgrade-storefront
Hello Carl,
Is it possible to install Storefront, Delivery Controller and License server in one server?
Yes. It works and is supported. It’s actually the default.
hello Carl,
My file is only for external users receiving the local ip. how can I Do for solve this?
in the local network is ok!
Thanks.
HI Carl,
Thanks for this. In a Citrix cloud implementation, we don’t see all the options listed in the store front console. I only see Stores and Server group. There is also no receiver! We are now faced with the Workspace app. having configured everything pretty much close to how you have specified, I can browse to the store and login.
But the workspace client fails to populate the icons and show any life on the client machines. Essentially my users have to type in the url and then it show the apps available.
In our earlier xenapp 6.5 implementation, Citrix receiver put the available apps icons on the user desktop. I think I have configured the workspace app to do the same but it’s just refusing to do anything. Where / how do I start a logical troubleshooting process for this issue?
Thanks for any help.
The Link for “XenDesktop 7 – Bind Cert to XML Service Without IIS Integration” is down.
Thanks for pointing that out. When CUGC changed platforms the old links stopped working. I just replaced it with a new link.
Thank your for this Blog.
We have Xenapp 6.5 (6.5.0 build 6682) with HF XA650W2K8R2x64R06 on Win 2008 R2 Standard SP1
7 servers in a Farm with Web Interface 5.4.59 and Secure Gateway 3.3.2.
Users within the office use the Citrix receiver to login into the site Citrix App server to use the company desktop.
The Secure Gateway uses a certificate and the users log into the WI to get their app when away from the office.
However most browsers will states the site is unsecured. Because WI 5.4 does not support TLS 1.2 even though IIS 7.5.7600 does support it with on 7.5.7600.
Even worse is that newer Apple IOS will not allow this unsecured connection, so the Apple users are locked out from using the company app/desktop.
So StoreFront is the web UI which does support the newser TLS 1.2 and 1.3.
Made a clone of the XenApp server with IIS to trial upgrading to StoreFront.
Installing StoreFront 3.5 (or even 3.15) end up with the these results.
The browser come back with an error ‘Cannot complete your request.’
Found in the Event viewer
****
Event Viewer, Applications and Services, Citrix, Citrix Delivery Services
Log Name: Citrix Delivery Services
Source: Citrix Receiver for Web
Event ID: 17
Task Catagory: (3002)
—
Failed to run discovery
Citrix.Web.DeliveryServicesProxy.ConfigLoader.DiscoveryServiceException, ReceiverWebConfigLoader, Version=3.5.0.0, Culture=neutral, PublicKeyToken=null
An error occurred while contacting the Discovery Service
at Citrix.Web.DeliveryServicesProxy.ConfigLoader.Discovery.AppendConfigurationFromDiscoveryService(WebReceiverConfigSection section)
at Citrix.Web.DeliveryServicesProxy.ConfigLoader.Discovery.RunDiscovery(WebReceiverConfigSection configSection)
at Citrix.Web.Proxy.Filters.DiscoveryComplete.OnAuthorization(AuthorizationContext filterContext)
System.Net.WebException, System, Version=4.0.0.0, Culture=neutral, PublicKeyToken=b77a5c561934e089
The remote server returned an error: (404) Not Found.
Url: https://csg.unipac.ca/Citrix/UnipacRemoteAccess/discovery
ExceptionStatus: ProtocolError
ResponseStatus: NotFound
at System.Net.HttpWebRequest.GetResponse()
at Citrix.DeliveryServicesClients.Utilities.HttpHelpers.ReceiveResponse(HttpWebRequest req)
at Citrix.DeliveryServicesClients.Discovery.RequestHandler.DiscoveryHttpRequestHandler.GetDocument(String url)
at Citrix.Web.DeliveryServicesProxy.ConfigLoader.Discovery.AppendConfigurationFromDiscoveryService(WebReceiverConfigSection section)
—
***
All suggestions found on the Internet have not solved this issue.
Any suggestions or resolutions that will solve this would be greatly appreciated.
Thank you for this service
In StoreFront Console, click your Store. On the bottom right is Manage Receiver for Web. Click Edit. In the Advanced Settings page, in the third line (loopback), set it to OnUsingHttp.
Hi Carl,
The link to Matt Boldholdt’s script for binding a cert to XML w/o IIS is now broken. Do you know where a copy of the script can be found?
Thanks!
Sorry Carl, I wasn’t clear: for now, I am only looking to upgrade StoreFront to a version that is:
1) Compatible with Netscaler 12.x
2) Compatible with XenApp 6.5
3) Will run on Win2008 R2
Is there a StoreFront version that meets all 3 requirements? And how do I upgrade from 2.5.2?
Thank you so much!
StoreFront 7.15 (aka 3.12) can do all three. It should be a simple in-place upgrade from 2.5.2. Snapshot the machine before beginning the upgrade.
Hi Carl- I have a XA 6.5 farm with StoreFront 2.52 (running on Win2008 R2) and NetScaler 10.5 (70.5nc).
I need to deploy MFA using nFactor, so I suppose I must upgrade both StoreFront and NetScaler.
What versions of each product would you recommend? Thank you.
If 2008 R2, then I think 7.15 CU6 is the last supported version.
Upgrading the OS version will take more effort, but in that case you can do 1912 CU1.
NetScaler should be upgraded to the latest build of ADC 12.1. Note: if you have custom themes on your Gateway, then you’ll have to redo them as Portal Themes after the upgrade.
Hi Carl
Was looking for some guidance for the following situation:
We have 3 URL’s pushed in StoreFront Account List in Workspace App/Receiver GPO. 2 are stores that we host an d 1 is a NetScaler URL for External App our users need to get to.
We have also Set the following Regkey to force Workspace App/Receiver to use “All Accounts” via GPP Update – HKEY_LOCAL_MACHINE
Key path Software\Citrix\Dazzle
Value name CurrentAccount
Value type REG_SZ
Value data AllAccount
AND
HKEY_LOCAL_MACHINE
Key path Software\WOW6432Node\Citrix\Dazzle
Value name CurrentAccount
Value type REG_SZ
Value data AllAccount
AND
HKEY_CURRENT_USER
Key path Software\Citrix\Dazzle
Value name CurrentAccount
Value type REG_SZ
Value data AllAccount
Issue we have is Workspace App/Receiver is not defaulting to “All Accounts” it only goes to the first Store in the Accounts List. When we change it to All Accounts in UI when we open UI we start to get duplicate Icons on Start Menu which is then saved when users logoff in there UPM Profile.
Do you know of a better solution to enabling “All Accounts” for Workspace App/Receiver?
PS: Environment is 1912 LTSR with SF 1912.0.0.40 and Workspace App 1911
Thanks in advance
A better option is to configure a single store for all apps. You can use SmartAccess to control icon visibility.
Or you can resolve the FQDN to different StoreFront servers depending if the user is internal or external and configure icon filtering accordingly.
As to why “AllAccount” is not working, I don’t know. You’d probably have to open a support case.
If you set Storefront to deploy workspace and force the version check–does this work via gateway the same, or does it need to be done on the ADC as well?
It works through Gateway. Have you tried it?
Hello Carl,
You have mentioned about setting session timeout. I want to redirect to a custom url after session time out. Now its redirecting back to citrix.com to enter the citrix credentials. Please let me know how to redirect to custom url when session times out ? Thanks
Carl,
It appears there is an issue installing StoreFront 1906 and 1909 with certain versions of VMware tools installed.
https://discussions.citrix.com/topic/403845-1906-clean-install-error/
We ran into this issue while setting up new 2016 servers and trying to install StoreFront 1906. The installations were incomplete and didn’t function properly even if the installation succeeded.
We ended up staying with server 2016 but installed VMware tools 11 and StoreFront 1909.
Mike
Dear Carl,
I have a strange issue; Have two farms XenApp 6.5 and XenApp 7.15. Both farms are aggregated on the Storefront 1811. Application enumeration of the XenApp 6.5 intermittent fails and the users get to see only the apps of the XenApp 7.15 farm. Storefrontserver keeps trying to get the XML and it takes about one hour or longer until everything is restored.
XenApp 6.5 XML trust is on port 80. XenApp 6.5 enumeration via secure gateway and webinterface works fine but not via Storefront. Storefront keeps generating errors “Citrix servers could not be processed because it contains invalid XML”
Eventlogs are generated: The XML document sent by the Citrix servers could not be processed because it contains invalid XML. This message was reported from the XML Service at address http://hostname/scripts/wpnbr.dll. The specified Citrix XML Service could not be contacted and has been temporarily removed from the list of active services.
All the Citrix XML Services configured for farm XenApp6.5 failed to respond to this XML Service transaction.
The Citrix XML Service at address hostname:80 has passed the background health check and has been restored to the list of active services.
Maybe one of the icons assigned to a published app is too big? I’ve seen specific icons prevent it from working.
Hi Carl, I also wanted to ask if its just possible to replicate StoreFront subscriptions between two different StoreFront groups that are part of different sites. Both Sites will be kept in synch using other scripting methods so that in the event we need to perform maintenance in Citrix, we can simply turn one site down and with GSLB in place, users will go to the other site to launch their applications.
Or would it make sense to set in each StoreFront server group all the Delivery Controllers between both sites on each StoreFront Store? If that is the way to do it, then what happens if we take one of the sites down and a storefront is trying to enumerate an application from a delivery controller that is currently under maintenance?
Yes, you can replicate subscriptions – https://www.carlstalhood.com/storefront-subscriptions/#replication
If StoreFront can’t communicate with a Delivery Controller (or farm), then StoreFront skips it and those icons won’t be visible.
I am wondering if just setting each app tagged as “MANDATORY” would save me a lot of headache. Reading about this it seems like this is a fragile solution. If a user connects to side A and saves an icon as a favorite, then the next day they log in and routed to side B, would their favorite still be there if we replicated that? The problem will be figuring out “who wins” and how often to replicate.
Is there a way to script the creation of a “server group” after the base URL and Stores are created on the first server? Currently we have a script that will create the new stores, set the delivery controllers, set proper authentication , bind the certificate to the site, and change the base url to HTTPS and add all the custom branding. We are debating on just pushing the script to update the other web servers and not create a Server Group. But what are the pros/cons of having a server group vs not having one? Other than replicating changes, what else does it buy us? I don’t see us making very many configuration changes in Storefront and if we do, I see just updating the version or using the script to clear the configuration and re-deploy.
Server Group members automatically replicate subscriptions. I also think they replicate authentication.
You can export StoreFront configuration and import to a different StoreFront server. https://docs.citrix.com/en-us/storefront/current-release/export-import-storefront-config.html
I am not sure that would work but I could be wrong. We have two different sites with their own set of StoreFront servers. We are using GSLB to load balance between the two sites. Even though they will have the same application published between them, I am not sure it could be possible to replicate subscriptions from one server group from one site to another server group in a different site. Reading the instructions it looks like the delivery controller names need to be the same between both server groups and that is not the case for us.
It also does not seem possible to script a “server group” creation through a script. We are using Team Foundation Server to deploy StoreFront with creation of a new Store but may end up just pushing out the specific site configuration to each SF server for each site.
I am wondering if it would be more simple to just tag all the applications as “MANDATORY” so it will force it to show up in the users Start Menus and in Receiver?
Hi Carl,
I build a new SF server and all roles in a same server like SF,DDC,License,Database and My website is open locally but when I entered my credentials then getting error “cannot complete your request”. I have checked everything but no luck. All SF settings as per best practice and Studio is configured with best practice. Authentication via AD. I have installed 7.15 CU5. Please suugest
What do you see in StoreFront Server > Event Viewer > Applications and Services > Citrix Delivery Services?
Hello Carl,
Where we can setup the authentication of user to happen from AD or DDC.
You mean this? https://docs.citrix.com/en-us/storefront/current-release/configure-authentication-and-delegation/xml-authentication.html . I’m not sure of minimum StoreFront version needed for this feature.
Question , Can i add a new 7. x delivery controller to a 2.6 Storefront , I currently have a “very old ” mixed 4.5 and 6.5 farm (so two delivery controllers setup in the 2.6 store and I want to add a new 7.x DC to that Storefront , anyone know if thats supported , cheers Devereux
It shouldn’t be a problem. Make sure you add the 7.x Controllers to a new farm entry, not one of the existing farm entries.
Hi sir what is the difference between store and receiver for web
Store is an XML interface for various Receiver clients.
Receiver for Web is an HTML interface. Receiver for Web communicates with the Store to get the list of icons.
Hi Carl. Just an update on the issue with the CTX134123 prompt and for the benefit of others. Under “Configure Store Settings” in Storefront, under Optimal HDX Routing, edit the option for “Direct HDX connection” and be sure to NOT have the Delivery Controller option checked. If you added a Netscaler Gateway and connecting through it, you’ll see the option for Netscaler listed as well. You need to map the Delivery Controller to the Netscaler via “checkbox” since you are now connecting via Netscaler. So here it goes again (path to fix). Start at –>your Storefront server–>Configure Store Settings–>Optimal HDX Routing–> Uncheck the Controller option for Direct HDX connection and map it instead to your Netscaler. Hope this helps someone out there with the CTX134123 issue.
Thanks this did help!
I’m getting the Citrix Workspace app cannot create a secure connection in this browswer. Please refer to Citrix Knowledge Center article CTX134123
Leo, were you able to fix this error? I am having exactly the same error on internal users. externally receiver and HTML5 works fine..
Carl, thank you for your quick response. Sorry, its a Netscaler Gateway 12.0.53.22 with the virtual server for ICA direct to storefront. I have it set to HTML5 only so the local receiver should be out of the equation…I would think? I just tried connecting with my local receiver and it connected just fine to the VDA but the problem is through any web browser through my Netscaler
Hi could you please help me with “why the users are not getting redirected to storefront when logging to netscaler?”
What do the users see? Usually the Session Policy/Profile has the wrong address in the Web Interface Address field.
hi Carl,
How to configure two storefront url for two different region with two separate url to access the respective citrix application and desktops.
Same server? Or different server? It’s easier with different StoreFront servers. Then configure both of them to access the same farm.
Or are you asking about Citrix Gateway?
I have an issue with the password change field not showing up in Chrome but works in IE. Any advise to look at? Thanks!
Getting this error no matter how I set the transport port. “There are no apps or desktops available to you at this time.”
Tried HTTPS and HTTP.
Installed on one Azure VM everything (Controller, StoreFront, License Server, SQL Express) except VDA servers. Trying to publish using XenApp only.
Confirmed registered, confirmed seeing Storefront in Delivery Groups.
No Netscaler yet, was trying to confirm basic install first. Trying POC with new Farm.
What do I need to troubleshoot? I found several articles, only change was if I set everything to HTTPS then I get Connect error in Citrix Receiver for web.
It does seem like Delivery Controller is conflicting with StoreFront, but I don’t know how to confirm.
Default website is StoreFront.
Thanks for any help.
Denise
What do you see in StoreFront Server > Event Viewer > Applications and Services > Citrix Delivery Services?
These two repeating Informational events:
The HTTP response indicates the underlying connection was closed.
A socket has been forcibly destroyed by the transaction layer.
Is that for the XML communication? Or for the communication between StoreWeb and Store?
For the latter, in StoreFront Console, right-click your Store, click Manage Receiver for Web, click Configure, click Advanced page, in third row, set Loopback to OnUsingHttp.
Same message, do I need to restart IIS or anything?
I just saw this message in event viewer:
None of the Citrix XML Services configured for farm Controller are in the list of active services, so none were contacted
This suggests that the Store could not communicate with the Delivery Controller. Right-click your Store, click Manage Delivery Controllers. You should have one entry – edit it. Transport Type should be HTTP, and Port should be 80. Make sure StoreFront can resolve the DNS name. Try telnet from StoreFront to the Delivery Controller on port 80.
StoreFront and Delivery Controller are on the same server. This is XA 7.15 LTSR.
SF is using HTTP port 80. SF Is the default IIS website.
I have tried changing Citrix Servers to use IP and it made no difference, so I set it back to FQDN.
Does Citrix Quick Launch work? https://support.citrix.com/article/CTX219718
If not, then I suspect it’s a problem with the Deliver Controller. All services are running? Maybe do a Test Site from within Studio?
The Broker Services binds to http.sys. Make sure you don’t have any non-IIS port 80 software installed.
QuickLaunch keeps prompting for a target resource. Like it does not see the Delivery Controller. I am running this from one of the VDA servers. Tried IP and FQDN.
QuickLaunch ask for Target, it is not seeing Delivery Controller.
Hi Carl,
This is working now. I made a mistake in the Delivery Controller settings in StoreFront. Thanks for your help.
Denise
Environment: XenApp 7.11, Storefront 3.7.0.39, HTML 5 Receiver 2.5.2.312. When using HTML 5 applications open in same browser tab. For example, the Receiver for Web Site is on one browser tab. If I then open MS Word it opens in a new separate browser tab (as expected). However, when I open another application “MS Excel” it initially launches in a new browser tab but then merges/consolidates into the same browser tab where MS Word is on. Session sharing is enabled by default, however, can I have multiple apps such as MS Word and MS Excel on different browser tabs? Note:
The behavior describe above is experienced in Internet Explorer and Chrome.
As we still have both XenApp 6.5 and 7.11 running, we do not see the issue above in the XenApp 6.5 environment. In 6.5, all applications launched in HMTL 5 are given a separate browser tab and session sharing is also enabled in the 6.5 environment.
Newer VDAs have a built-in app switcher for HTML5. ARe you able to switch apps in the one tab?
Yes, I am able to switch applications using App Switcher. However, the user community got used to having the HMTL 5 published applications launched in separate browser tabs when we were solely on XenApp 6.5. Now that we are running both XenApp 6.5 and XenApp 7.11 in parallel they want the same behavior. Is there a registry key that can be set to modify the browser tab behavior?
Storefront 3.9.0.56 is being used and I’m clicking on Detect Receiver button but it was not offering anything for download . Eventlogs on the server has the below warning
Event ID 4 : The Receiver for Windows package file could not be found at the path: ‘clients/Windows/CitrixReceiverWeb.exe’
For testing I trying to hit the server directly with hostname,which was giving certificate warning That seems to be creating the issue , putting a host file entry to pointing to specific server is working well
Google Chrome
With Chrome, you have to click the Detect Receiver button and then it might offer a Receiver.
I’ve seen issues with mixed HTTP/HTTPS content. Do you see a shield icon in your address bar?
What version of StoreFront? You might need newest version to support newest browser.
Hi Carl,
We tried to implement Citrix Receiver Deployment through storefront in our environment , how ever its not working well . We tried it on a machine with no receiver installed, it does not give the download option
Only available option is to click ” Already Installed” hyperlink
What browser?
Hi carl,
It would be helpful for me if you could clear my doubts
1. We are using xenapp service sites and I have made restrictions by hiding deaktops on one store and hiding applications on the other. I have used powershell import-module to achieve this seperation but it’s working well on website url. I am not getting the desired result in receiver (pna agent). Both desktops and applications are visible from receiver . How to hide desktops or applications while using service site as well.
2. How to set a default store in xenapp service site because I couldn’t set differet stores as default. If I make change on one store the other store is also getting changed automatically. Is it possible to enable two different default stores.
Thank you in advance.
Does Receiver Self-Service (not PNAgent) hide the icons correctly?
If you need two different default stores, then you probably need separate StoreFront servers with separate URLs.
If the user is not part of the AD group that gives them access to the auto-added Favorite application(via keyword) would they still see it and not have access to the application?
No. That’s why the page is called “Limit Visibility”. Users not assigned to the published app won’t see the published app.
Hi, is there a way to prevent storefront from enumerating app from delivery groups that are in maintenance mode?
Hi Carl
Having some trouble with HTML5. We currently use a valid wildcard certificate on Storefront servers on Storefront 3.11.
We can get to apps but when launching we get this error. Do we need SSL on VDAs as well or is there any way round this?
Any help appreciated.
Thanks
CTX134123 was error sorry
Hi Carl
Having some trouble with HTML5. We currently use a valid wildcard certificate on Storefront servers on Storefront 3.11 and testing without Netscaler currently.
We can sign in and get to apps using HTML5 but when launching an app we get an error described in CTX134123.
Is there any other way round using Netscaler or having direct SSL to VDAs?
Any help appreciated.
Thanks
Web Browsers tend to require SSL for WebSockets. I’ve only seen SSL on VDA and NetScaler Gateway handle the WebSockets connection.
Hi Carl. I’m getting this same error which refers me to ctx134123. I have a netscaler and trying to connect netscaler. I also notice on the storefront server event viewer “the XML service….”No workstation available”. I confirmed my netscaler virtual server is up and I have a cert from Godaddy just installed. I also confirmed my VDAs are up and operational. I even ran a citrix health check. What can I do to fix it? Please let me know. Thanks in advance
When you say “NetScaler”, what kind of Virtual Server do you mean? Is it a Load Balancing Virtual Server (aka direct to StoreFront)? Or is it NetScaler Gateway Virtual Server (aka ICA Proxy)?
When you launch an icon, is it opening a new tab in your browser? If so, then that means the browser did not detect your locally installed Receiver/Workspace. In your browser, click your name on the top right, and click Change Citrix Receiver. Click the blue button to Detect Receiver.
Hello Carl,
While opening the receiver for web URL it shows as Citrix Receiver on the browser tab, Is it possible to change this name into some other? Thanks
Hello Carl,
We have to segragate our test servers from the production by migrating test servers (VDA and application servers) in a new subnet. We will use same AD, will just add RODC in this vlan. Do we need to add delivery controller and storefront in this new subnet ? Thanks in advance.
Can the VDAs route to the existing Delivery Controllers on port 80? If yes, then they can register with the existing Delivery Controllers.
StoreFront talks to Delivery Controllers, not VDAs.