Navigation
This page contains generic SSL instructions for all SSL-based Virtual Servers, including: Load Balancing, Citrix Gateway, Content Switching, and AAA.
- Change Log
- Preparation:
- Custom Cipher Group
- Strict Transport Security Rewrite Policy
- SSL Profiles – Default and Custom
- SSL vServer Configuration – Bind Cert, Ciphers, ECC, and enable HSTS
- SSL Test
- SSL Redirect Methods:
💡 = Recently Updated
Change Log
- 2019 Mar 4 – SSL Redirect – Responder Method – changed AlwaysUp service IP to a fake IP instead of a loopback IP
- 2018 Dec 2 – Custom Cipher Group – added TLS 1.3 ciphers
- 2018 Sep 27 – added link to Netscaler SSL Protocol’s Used (SSLv3, TLS1.0, etc) at Citrix Discussions.
- Updated several screenshots for ADC 12.1
- 2018 May 19 – updated Custom Cipher Group with info from Citrix Blog Post Scoring an A+ at SSLlabs.com with Citrix NetScaler – Q2 2018 update
- 2018 Feb 1 – In SSL Profiles section, add conversion script info from Enabling the Default Profiles at Citrix Docs
Custom Cipher Group
NetScaler 12.0 build 59 and newer have TLS 1.2 ciphers in the DEFAULT_BACKEND cipher group. Prior builds of NetScaler 12.0 do not include these ciphers.
References:
- Citrix Blog Post Scoring an A+ at SSLlabs.com with Citrix NetScaler – Q2 2018 update
- Ciphers available on the Citrix ADC appliances at Citrix Docs
- Ryan Butler has a PowerShell script at Github that can automate NetScaler SSL configuration to get an A+
To get an A+ at SSL Labs, create a custom secure cipher group:
- Enable SSL Secure Renegotiation.
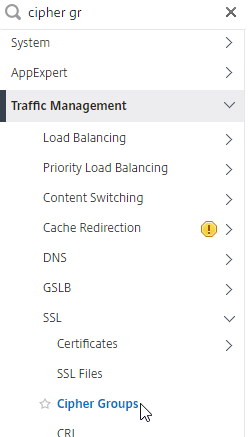
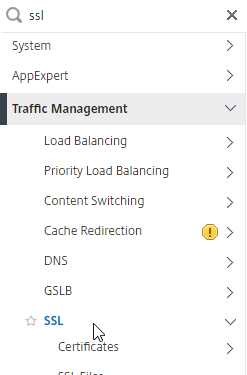
- On the left, go to Traffic Management > SSL.
- On the right, in the right column, click Change advanced SSL settings.

- Find Deny SSL Renegotiation, and set the drop-down to NONSECURE.
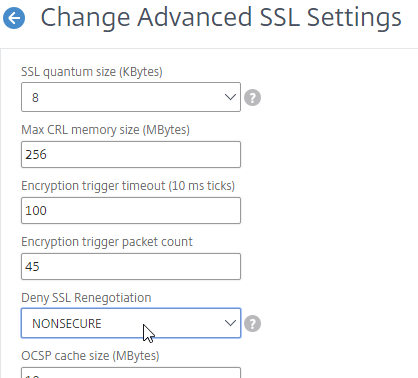
- Scroll down and click OK.

set ssl parameter -denySSLReneg NONSECURE
- The easiest way to create a cipher group is from the CLI. See Citrix Blogs Scoring an A+ at SSLlabs.com with Citrix NetScaler – Q2 2018 update for cipher group CLI commands. Putty (SSH) to the NetScaler and paste the following commands.
Note: The TLS 1.3 ciphers are not in the Citrix Blog Post. If your NetScaler build supports TLS 1.3, then you can add TLS 1.3 ciphers to the cipher group. Make sure the TLS 1.3 ciphers listed first (top of the list).
add ssl cipher ssllabs-smw-q2-2018
bind ssl cipher ssllabs-smw-q2-2018 -cipherName TLS1.3-AES256-GCM-SHA384 -cipherPriority 1
bind ssl cipher ssllabs-smw-q2-2018 -cipherName TLS1.3-CHACHA20-POLY1305-SHA256 -cipherPriority 2
bind ssl cipher ssllabs-smw-q2-2018 -cipherName TLS1.3-AES128-GCM-SHA256 -cipherPriority 3
bind ssl cipher ssllabs-smw-q2-2018 -cipherName TLS1.2-ECDHE-ECDSA-AES128-GCM-SHA256
bind ssl cipher ssllabs-smw-q2-2018 -cipherName TLS1.2-ECDHE-ECDSA-AES256-GCM-SHA384
bind ssl cipher ssllabs-smw-q2-2018 -cipherName TLS1.2-ECDHE-ECDSA-AES128-SHA256
bind ssl cipher ssllabs-smw-q2-2018 -cipherName TLS1.2-ECDHE-ECDSA-AES256-SHA384
bind ssl cipher ssllabs-smw-q2-2018 -cipherName TLS1-ECDHE-ECDSA-AES128-SHA
bind ssl cipher ssllabs-smw-q2-2018 -cipherName TLS1-ECDHE-ECDSA-AES256-SHA
bind ssl cipher ssllabs-smw-q2-2018 -cipherName TLS1.2-ECDHE-RSA-AES128-GCM-SHA256
bind ssl cipher ssllabs-smw-q2-2018 -cipherName TLS1.2-ECDHE-RSA-AES256-GCM-SHA384
bind ssl cipher ssllabs-smw-q2-2018 -cipherName TLS1.2-ECDHE-RSA-AES-128-SHA256
bind ssl cipher ssllabs-smw-q2-2018 -cipherName TLS1.2-ECDHE-RSA-AES-256-SHA384
bind ssl cipher ssllabs-smw-q2-2018 -cipherName TLS1-ECDHE-RSA-AES128-SHA
bind ssl cipher ssllabs-smw-q2-2018 -cipherName TLS1-ECDHE-RSA-AES256-SHA
bind ssl cipher ssllabs-smw-q2-2018 -cipherName TLS1.2-DHE-RSA-AES128-GCM-SHA256
bind ssl cipher ssllabs-smw-q2-2018 -cipherName TLS1.2-DHE-RSA-AES256-GCM-SHA384
bind ssl cipher ssllabs-smw-q2-2018 -cipherName TLS1-DHE-RSA-AES-128-CBC-SHA
bind ssl cipher ssllabs-smw-q2-2018 -cipherName TLS1-DHE-RSA-AES-256-CBC-SHA
bind ssl cipher ssllabs-smw-q2-2018 -cipherName TLS1-AES-128-CBC-SHA
bind ssl cipher ssllabs-smw-q2-2018 -cipherName TLS1-AES-256-CBC-SHA
- Or you can create the cipher group using the GUI.
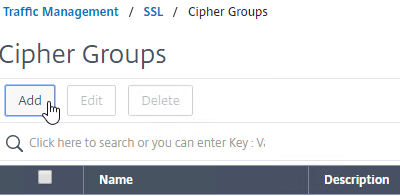
- Go to Traffic Management > SSL > Cipher Groups.
- On the right, click Add.
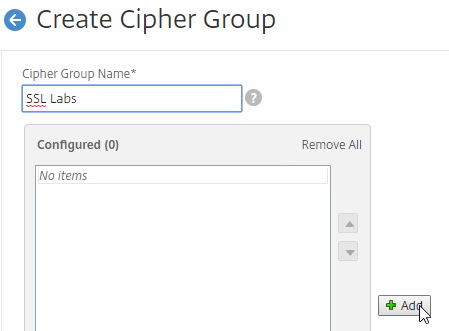
- Name it SSL Labs or similar.
- In the middle, click Add.
- Use the search box to find a particular cipher.
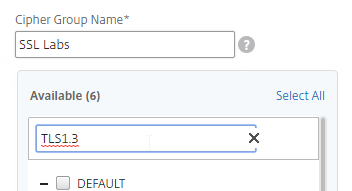
- Check the box next to one of the results, and click the arrow to move it to the right.
- For TLS 1.3 support, add the TLS 1.3 ciphers first.
- Then add the ciphers from Citrix Blog Post Scoring an A+ at SSLlabs.com with Citrix NetScaler – Q2 2018 update.

- Use the up and down arrows to order the ciphers. NetScaler prefers the ciphers on top of the list, so the ciphers at the top of the list should be the most secure ciphers (TLS 1.3).
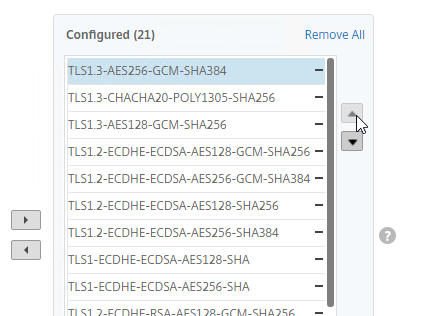
- On the right, click Add.
- Click Create when done.

- Go to Traffic Management > SSL > Cipher Groups.
Strict Transport Security – Rewrite Policy Method
To get an A+ at SSLLabs.com, you need to insert the Strict-Transport-Security HTTP header in the responses. NetScaler Rewrite Policy is one method of doing this. Another method is to enable HSTS in an SSL Profile, or enable it in SSL Parameters on a SSL vServer.
To create a Rewrite Policy that inserts the Strict-Transport-Security HTTP header:
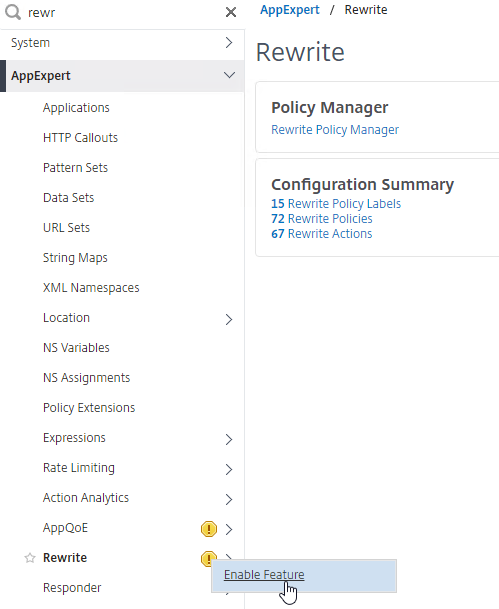
- On the left, expand AppExpert, right-click Rewrite, and click Enable Feature.
- Create the Rewrite Action:
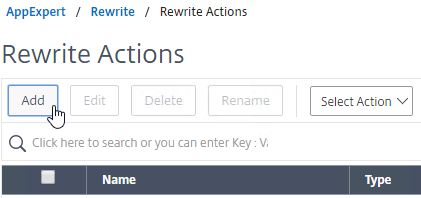
- Go to AppExpert > Rewrite > Actions.
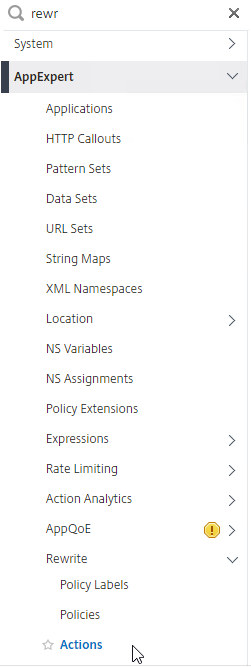
- On the right, click Add.
- Name the action insert_STS_header or similar.
- The Type should be INSERT_HTTP_HEADER.
- The Header Name should be Strict-Transport-Security.
- The Expression should be the following:
"max-age=157680000"
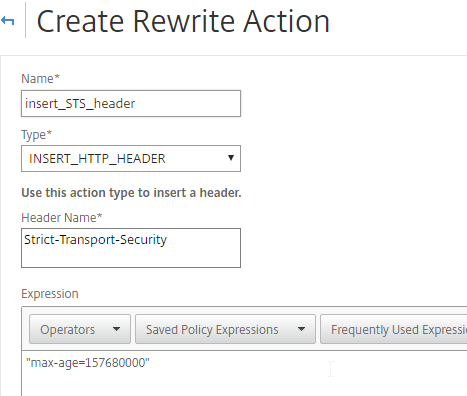
- Click Create.
- Go to AppExpert > Rewrite > Actions.
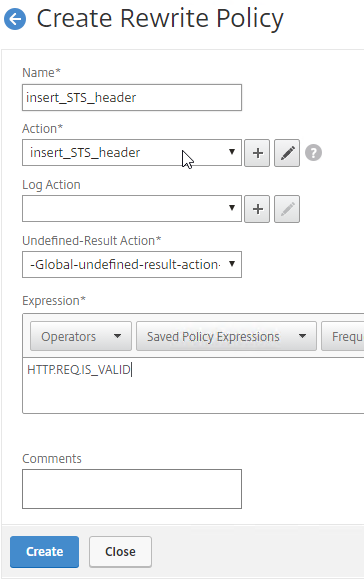
- Create the Rewrite Policy:
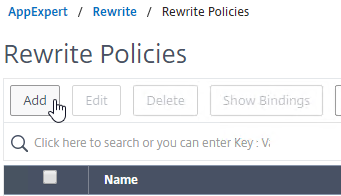
- On the left, go to AppExpert > Rewrite > Policies.
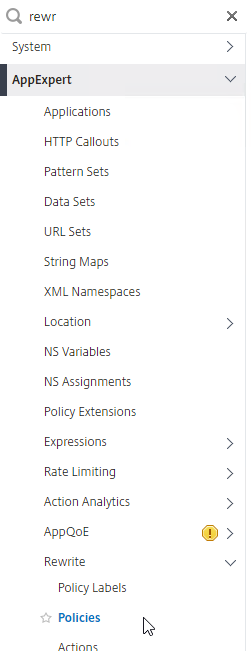
- On the right, click Add.
- Name it insert_STS_header or similar.
- Select the previously created Action.
- In the Expression box, enter HTTP.REQ.IS_VALID.
- Click Create.
- On the left, go to AppExpert > Rewrite > Policies.
- Now you can bind this Rewrite Response policy to HTTP-based SSL vServers.
- When editing an SSL vServer (Gateway vServer, Load Balancing vServer, etc.), if the Policies section doesn’t exist on the left, then add it from the Advanced Settings column on the right.
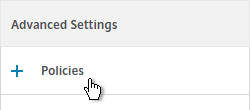
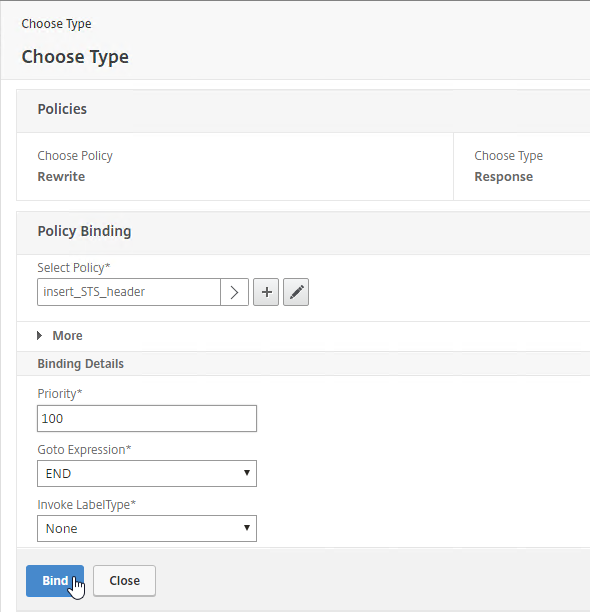
- On the left, in the Policies section, click the plus icon.

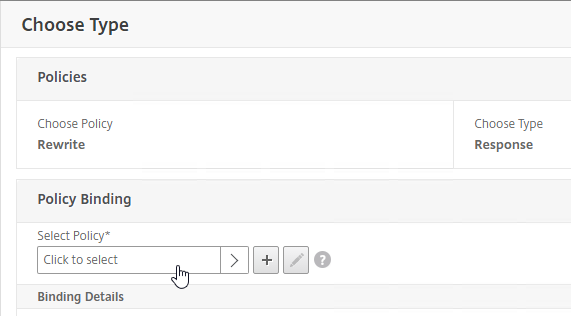
- Change the Choose Policy drop-down to Rewrite.
- Change the Choose Type drop-down to Response, and click Continue.

- Click where it says Click to select.
- Click the radio button next to insert_STS_header, and click Select.
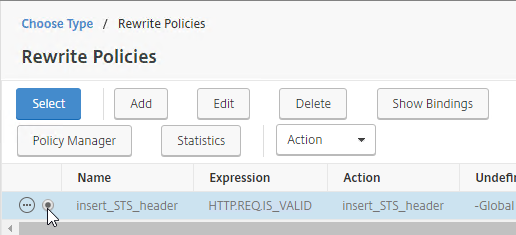
- Click Bind.
- When editing an SSL vServer (Gateway vServer, Load Balancing vServer, etc.), if the Policies section doesn’t exist on the left, then add it from the Advanced Settings column on the right.
enable ns feature rewrite

add rewrite action insert_STS_header insert_http_header Strict-Transport-Security "\"max-age=157680000\""

add rewrite policy insert_STS_header true insert_STS_header

bind lb vserver MyvServer -policyName insert_STS_header -priority 100 -gotoPriorityExpression END -type RESPONSE
SSL Profiles – Custom and Default
You can use SSL Profiles to package several SSL settings together, and apply the settings package (Profile) to SSL-based Virtual Servers and SSL-based Services. These SSL settings include:
- Disable SSLv3
- Bind secure ciphers
- Bind ECC curves
- Enable HSTS (Strict Transport Security), etc.
There are default SSL Profiles, and there are custom SSL Profiles. The default SSL Profiles are disabled by default, because they would impact every SSL-based Virtual Server and Service on the appliance. Once default SSL Profiles are enabled, you cannot disable the default SSL Profiles.
- Some features of custom SSL Profiles require default SSL Profiles to be enabled. For example, you cannot configure ciphers in a custom SSL Profile unless the default SSL Profiles are enabled.
Default SSL Profiles are intended to provide a baseline SSL configuration for all newly created SSL Virtual Servers and SSL Services. You can still create Custom SSL Profiles to override the Default SSL Profiles.
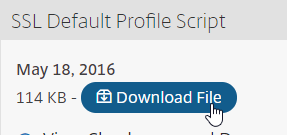
Enabling the default SSL profile will wipe out any SSL configuration on SSL entities (e.g. SSL Virtual Servers) that do not have a custom SSL profile bound. Citrix offers a script that can read your existing SSL entity SSL configuration and convert them to custom SSL Profiles. See Enabling the Default Profiles at Citrix Docs. The default_profile_script can be downloaded from an individual NetScaler ADC firmware download page under Additional Components. The commands output by the script won’t work until the default SSL Profile is enabled. 💡
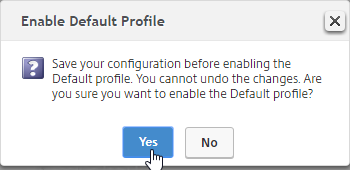
To enable Default SSL profiles
Enabling Default SSL Profiles is irreversible.
- Make sure you are connected to the appliance NSIP using http, and not https.
- Go to Traffic Management > SSL.
- On the right, in the right column, click Change advanced SSL settings.

- Near the bottom, check the box next to Enable Default Profile. Note: this will change SSL settings on all SSL Virtual Servers to match the default SSL profile. You might want to do this during a maintenance window.
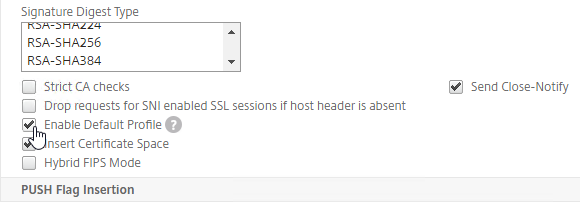
- Click OK to close Change Advanced SSL Settings.

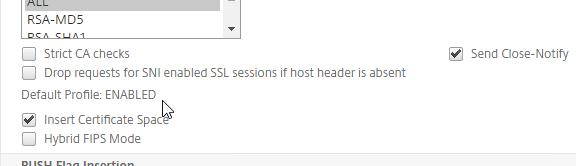
- If you go back into Change Advanced SSL Settings, notice that the Default Profile is enabled, and there’s no way to disable it.
To create a custom SSL Profile
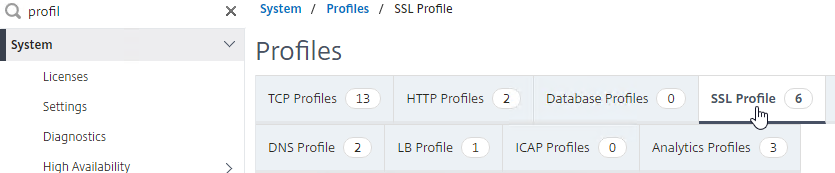
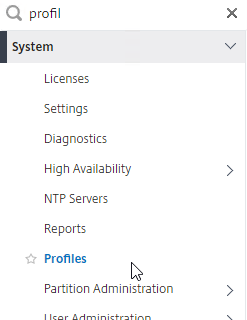
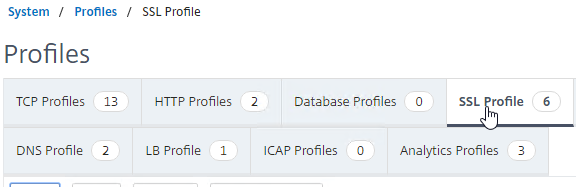
- On the left, expand System, and click Profiles.
- On the right, switch to the SSL Profile tab.
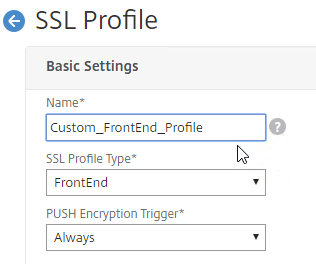
- Click Add.

- Enter a name.
- Change the SSL Profile Type to FrontEnd or BackEnd.
- Configure SSL Profile settings as desired (see below for some recommendations).
- Click Add.
- After the SSL Profile is created, edit any SSL-based Virtual Server.
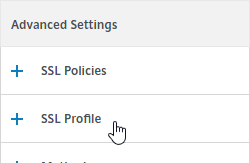
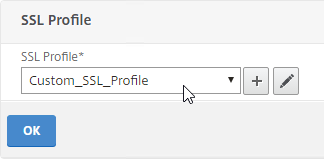
- On the right, in the Advanced Settings column, click SSL Profile to add the section.
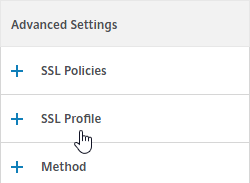
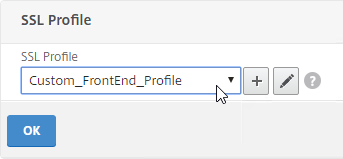
- On the left, scroll down to the SSL Profile section, and select an SSL Profile. Click OK to close the SSL Profile section.
- On the right, in the Advanced Settings column, click SSL Profile to add the section.
Recommended SSL Profile Settings
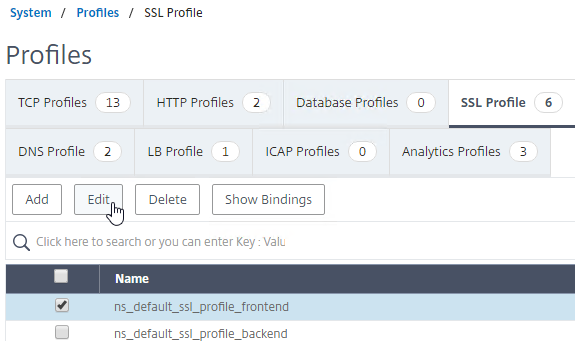
- On the left, expand System, and click Profiles.
- On the right, switch to the SSL Profile tab.
- Either create a new SSL Profile, or edit the default frontend or backend profile. This section focuses on a FrontEnd profile.
- Frontend = client-side connections to SSL Virtual Servers.
- Backend = server-side connections (SSL Services and Service Groups).
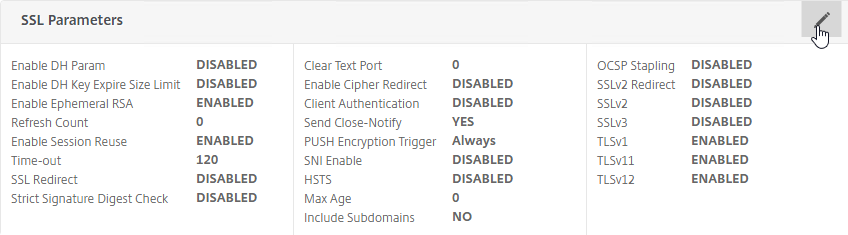
- Click the pencil icon in the Basic Settings section.
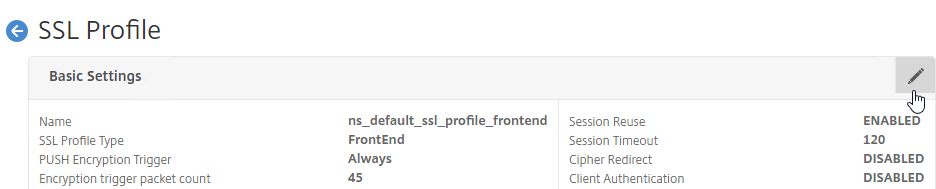
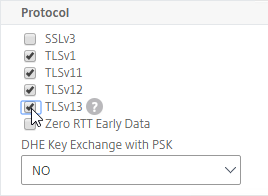
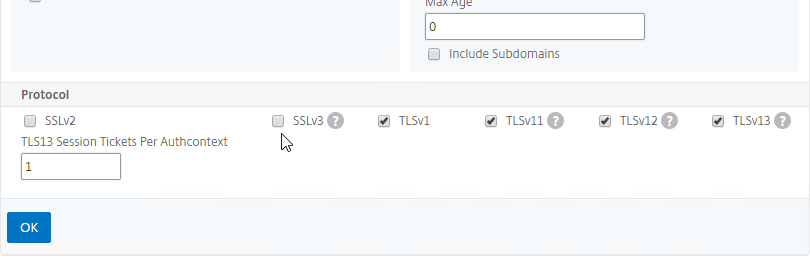
- Scroll all the way down to the Protocol section.
- Notice that SSLv3 is already unchecked.
- You can optionally uncheck TLSv1 and TLSv11.
- TLSv13 is an option in NetScaler 12.1 build 49 and later. If you enable this, then make sure your cipher group includes TLS 1.3 ciphers.
- To log SSL Protocol usage, see NetScaler SSL Protocol’s Used (SSLv3, TLS1.0, etc) at Citrix Discussions.
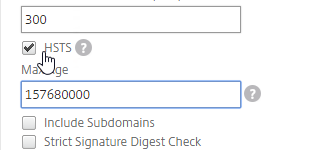
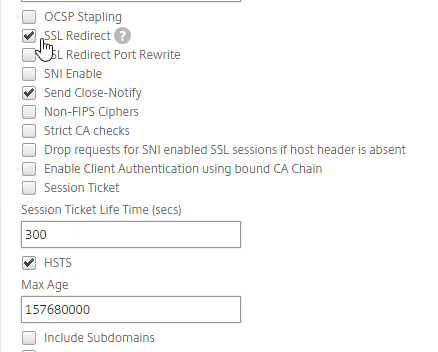
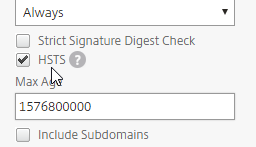
- To enable Strict Transport Security (HSTS), scroll up a little, and check the box next to HSTS.
- Enter 157680000 in the Max Age box.
- Note: enabling HSTS in the Default SSL Profile seems to break Native OTP. Enabling HSTS in a Rewrite policy works fine.
- If you do any SSL Offload (SSL on the client side, HTTP on the server side), then you’ll need to enable SSL Redirect. It’s above HSTS. With this option enabled, any 301/302 redirects from the server with HTTP Location headers are rewritten to HTTPS Location headers. You might need this option for StoreFront load balancing if doing SSL Offload (port 80 to the StoreFront servers). Note: this setting might be more appropriate in a custom SSL Profile instead of the default SSL Profile.
- Click OK when done modifying the Basic Settings section.

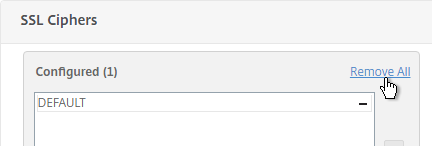
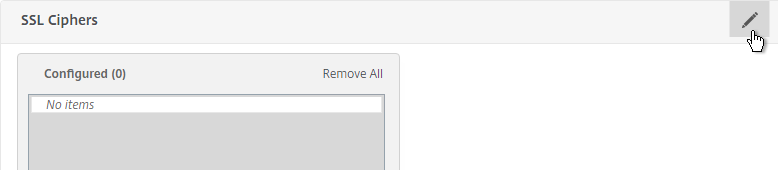
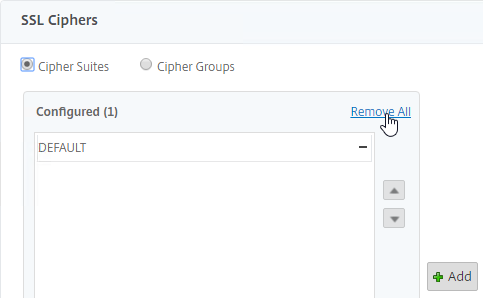
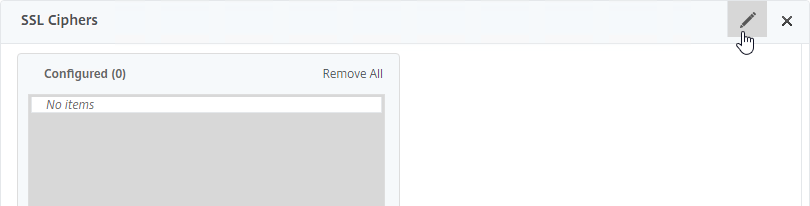
- Scroll down to the SSL Ciphers section, and click the pencil icon.
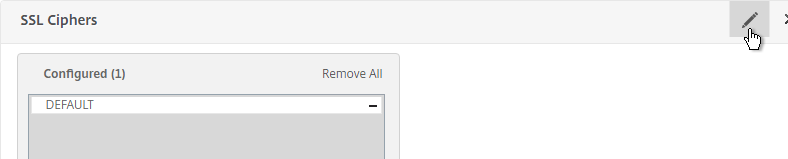
- Click Remove All, and click OK. You must click OK before binding the custom cipher group.

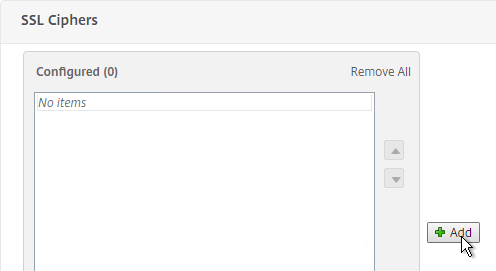
- Click the pencil icon again.
- Click Add.
- Scroll down, and select your custom cipher group (e.g. SSL Labs). Click the arrow to move it to the right.
If you enabled TLS 1.3, then make sure your cipher group includes TLS 1.3 ciphers.
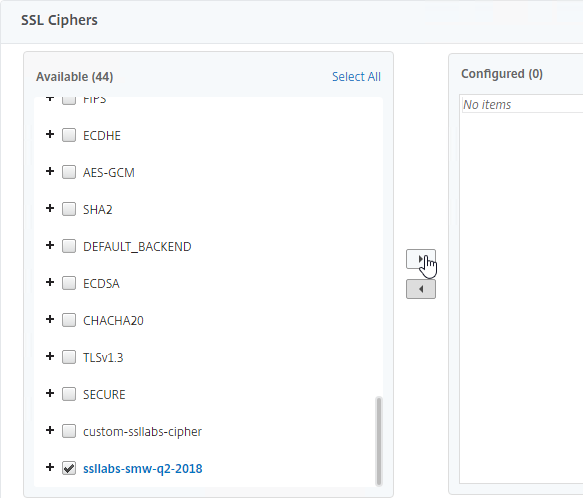
- Click OK to close the Custom Ciphers section.
- If you make changes to the Custom Cipher Group, then you might have to edit the SSL Profile, remove the Custom Cipher Group, and rebind it.
- Click Remove All, and click OK. You must click OK before binding the custom cipher group.
SSL vServers – Bind Certificate, Bind Cipher Group, Disable SSLv3, Enable STS
If you enabled the Default SSL Profiles feature, you can either leave the vServer configured with the Default SSL Profile; or you can change the vServer to use a Custom SSL Profile.
If you don’t use the Default SSL Profiles feature, then you’ll need to manually configure ciphers and SSL settings on every SSL vServer.
Do the following on every SSL vServer:
- When creating an SSL Virtual Server (e.g. SSL Load Balancing vServer), on the left, in the Certificates section, click where it says No Server Certificate.

- Click where it says Click to select.

- Click the radio button next to a certificate ,and click Select.

- Click Bind.

bind ssl vserver MyvServer -certkeyName MyCert
- Click where it says Click to select.
- You can bind a Custom SSL Profile:
- Find the SSL Profile section on the left, and click the pencil icon.

- If you don’t see the SSL Profile section on the left, then add the SSL Profile section from the Advanced Settings column on the right.
- If you don’t see the SSL Profile section on the left, then add the SSL Profile section from the Advanced Settings column on the right.
- Select a Custom SSL Profile, and click OK.
- Find the SSL Profile section on the left, and click the pencil icon.
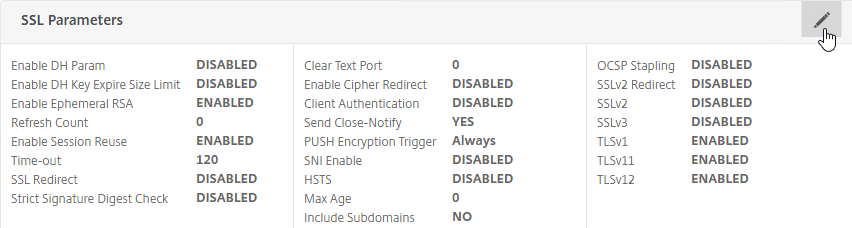
- If default SSL Profiles are not enabled:
- On the left, in the SSL Parameters section, click the pencil icon.
- Uncheck the box next to SSLv3.
- Make sure TLSv12 is checked.
- TLSv13 is an option in NetScaler 12.1 build 49 and higher. If you enable this, then make sure your cipher group includes TLS 1.3 ciphers.
- You can optionally uncheck TLSv1 and TLSv11.
- Click OK.
set ssl vserver MyvServer -ssl3 DISABLED -tls12 ENABLED
- To log SSL Protocol usage, see Netscaler SSL Protocol’s Used (SSLv3, TLS1.0, etc) at Citrix Discussions.
- If you didn’t bind an SSL Profile, scroll down to the SSL Ciphers section, and click the pencil icon.
- Click Remove All, and click OK. You must click OK before binding the custom cipher group. In other words, you will need to click OK at least twice during the procedure.
- Click the pencil icon again.
- Change the selection to Cipher Groups.
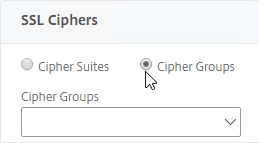
- Select your custom cipher group. It’s probably at the bottom of the list. If you enabled TLS 1.3, then make sure your cipher group includes TLS 1.3 ciphers. Then click OK.

unbind ssl vserver MyvServer -cipherName ALL
bind ssl vserver MyvServer -cipherName ssllabs-smw-q2-2018
- On the left, in the SSL Parameters section, click the pencil icon.
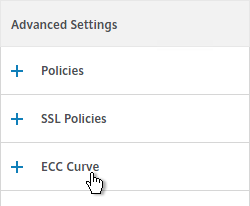
- SSL Virtual Servers created on newer versions of NetScaler will automatically have ECC Curves bound to them. However, if this appliance was upgraded from an older version, then the ECC Curves might not be bound. If you are not using SSL Profile, then on the right, in the Advanced Settings column, click ECC Curve.
- On the left, in the ECC Curve section, click where it says No ECC Curve.
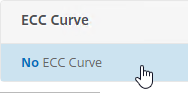
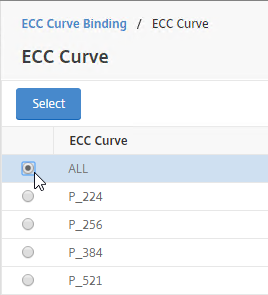
- Click where it says Click to select.
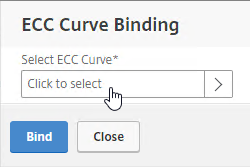
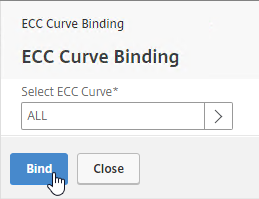
- Click the radio button next to ALL, and click Select.
- Click Bind.
bind ssl vserver MyvServer -eccCurveName ALL
- On the left, in the ECC Curve section, click where it says No ECC Curve.
- If HSTS is not enabled in a bound SSL Profile, you can enable it in SSL Parameters, or you can enable it by binding a Rewrite policy.
- To enable HSTS by configuring SSL Parameters:
- On the left, find the SSL Parameters section, and click the pencil icon. This section is only present if Default SSL Profiles are not enabled. Don’t configure this if you bound a Custom SSL Profile.
- In the right column, check the box next to HSTS.
- Enter 157680000 in the Max Age box.
- Note: enabling HSTS in the Default SSL Profile seems to break Native OTP. Enabling HSTS in a Rewrite policy works fine.
- Click OK to close SSL Parameters.

- On the left, find the SSL Parameters section, and click the pencil icon. This section is only present if Default SSL Profiles are not enabled. Don’t configure this if you bound a Custom SSL Profile.
- If enabling HSTS in an SSL Profile or SSL Parameters causes technical issues, then bind a Rewrite policy instead:
- If the Policies section doesn’t exist on the left, then add it from the Advanced Settings column on the right.
- On the left, find the Policies section, and click the plus icon.
- Change the Choose Policy drop-down to Rewrite.
- Change the Choose Type drop-down to Response, and click Continue.
- Click where it says Click to select.
- Click the radio button next to the insert_STS_header policy, and click Select.
- Click Bind.
bind lb vserver MyvServer -policyName insert_STS_header -priority 100 -gotoPriorityExpression END -type RESPONSE
- If the Policies section doesn’t exist on the left, then add it from the Advanced Settings column on the right.
If you experience SSL performance problems on a NetScaler MPX, Citrix CTX207005 Performance Issues with NetScaler MPX SSL recommends creating and binding the following TCP Profile:
add ns tcpProfile tcp_test -WS ENABLED -SACK ENABLED -maxBurst 20 -initialCwnd 8 -bufferSize 4096000 -flavor BIC -dynamicReceiveBuffering DISABLED -sendBuffsize 4096000
SSL Tests
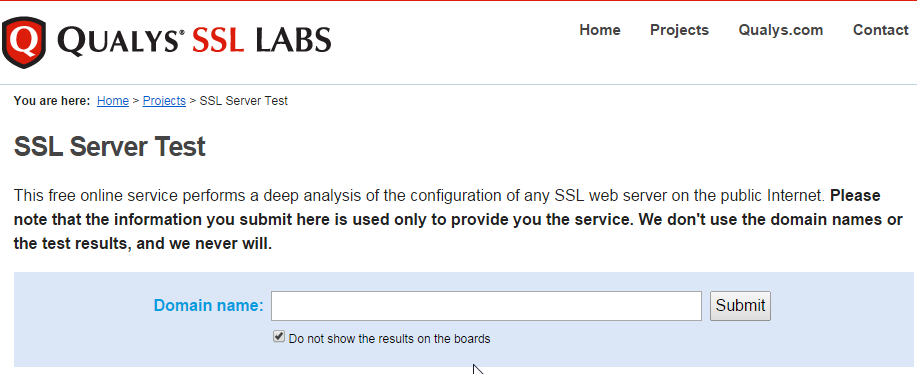
After you’ve created an SSL Virtual Server and configured SSL settings, run the following test:
- Go to https://www.ssllabs.com/ssltest/ and check the security settings of the website. Check the box next to Do not show the results on the boards.
SSL Redirect – Methods
There are typically three methods of performing SSL Redirect (http to https) in NetScaler:
- Load Balancing Virtual Server Method – enable SSL Redirect directly on the Load Balancing Virtual Server. This is the easiest method.
- This option is not available for Gateway Virtual Servers and Content Switching Virtual Servers.
- There’s nothing in the GUI to indicate that the SSL Virtual Server is also listening on port 80.
- Down vServer Method – create a new Load Balancing Virtual Server on Port 80, and configure the Redirect URL for when it is down.
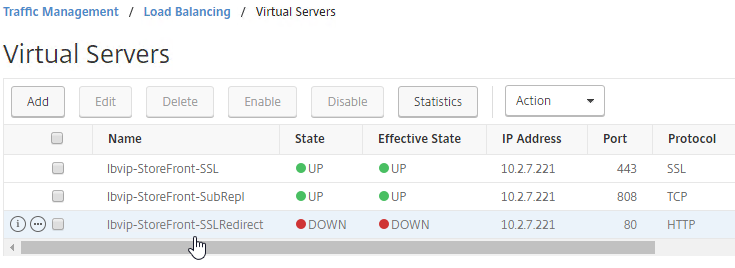
- The Virtual Server must be DOWN for the Redirect to occur. These Virtual Servers are shown as Red instead of Green.
- Responder Method – create a new Load Balancing Virtual Server on Port 80, and bind a Responder policy that redirects to https.
- The Responder policy only works if the Virtual Server is UP, which means it is shown as Green.
- Some setup tasks are required – create the AlwaysUP service, and create the Responder Policy. But once setup is complete, it only requires slightly more steps than the Down vServer method.
SSL Redirect – SSL Load Balancing vServer Method
You can configure SSL Redirect directly in an SSL Load Balancing vServer (port 443) instead of creating a separate HTTP (port 80) Load Balancing vServer.
Limitations:
- This is only an option for SSL Load Balancing vServers; it’s not configurable in Gateway vServers or Content Switching vServers.
- Only one Redirect URL can be specified. Alternatively, the Responder method can handle multiple FQDNs to one VIP (e.g. wildcard certificate) and/or IP address URLs.
To configure an SSL Load Balancing vServer to redirect from HTTP to HTTPS:
- Edit the SSL Load Balancing vServer (port 443).
- In the Basic Settings section, click the pencil icon.
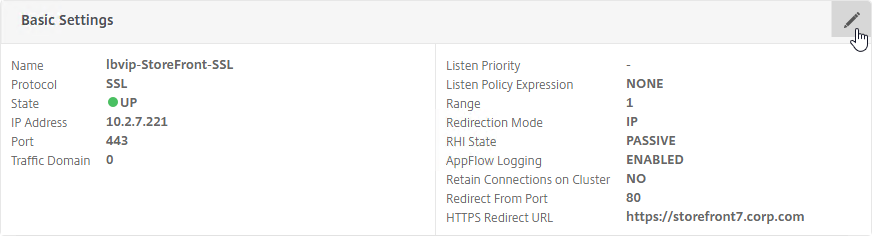
- Click More.
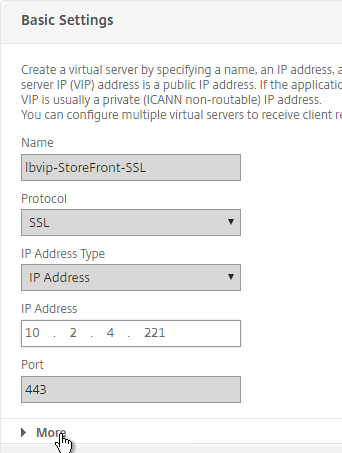
- In the Redirect from Port field, enter 80.
- In the HTTPS Redirect URL field, enter https://MyFQDN.
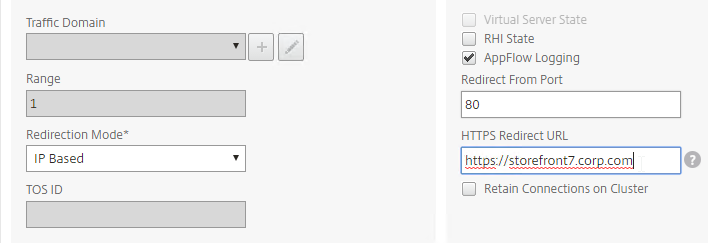
- Click Continue twice.

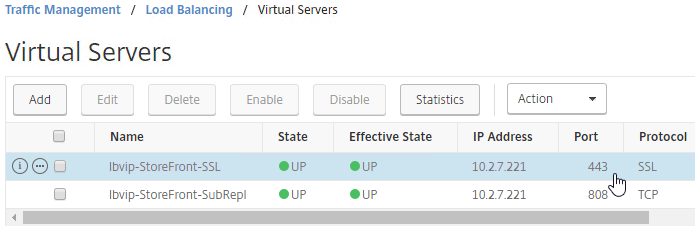
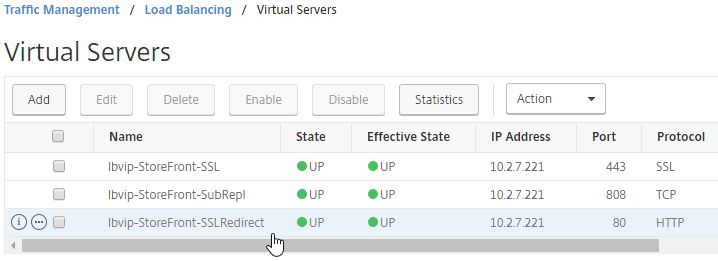
- When you view the list of Load Balancing Virtual Servers, there’s no indication that it’s listening on port 80.
SSL Redirect – Down vServer Method
If you created an SSL Virtual Server that only listens on SSL 443, then users must enter https:// when navigating to the website. To make it easier for the users, create another load balancing Virtual Server on the same VIP, but listens on HTTP 80, and then redirects the user’s browser to reconnect on SSL 443.
The Down Virtual Server Method is easy, but the Redirect Virtual Server must be down in order for the redirect to take effect. Another option is to use Responder policies to perform the redirect.
To create the down Redirect Virtual Server:
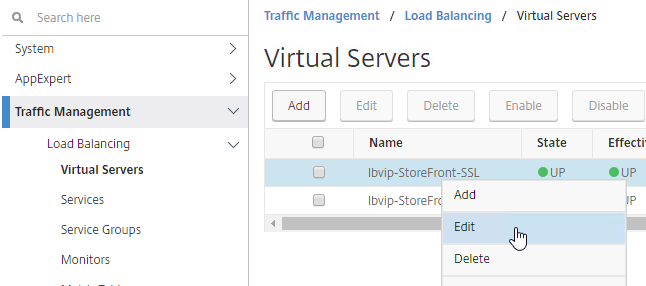
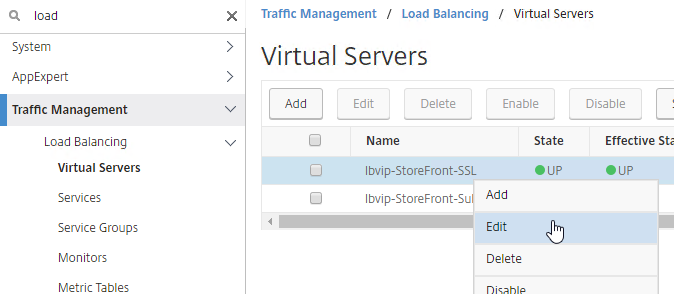
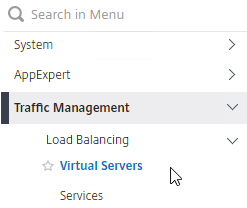
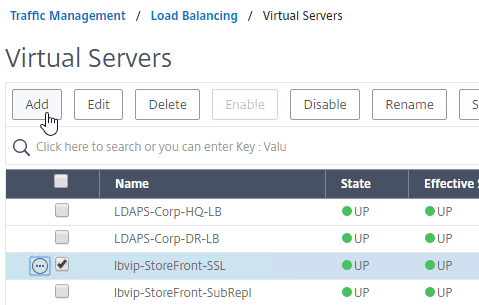
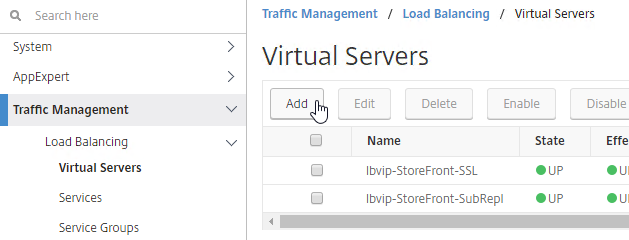
- On the left, under Traffic Management > Load Balancing, click Virtual Servers.
- On the right, right-click an SSL Virtual Server you’ve already created, and click Add. Doing it this way copies some of the data from the already created Virtual Server.
- Or, if you are redirecting NetScaler Gateway, create a new Load Balancing vServer with the same VIP as the Gateway.
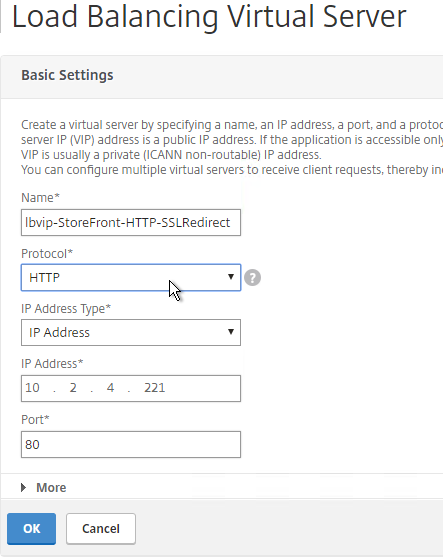
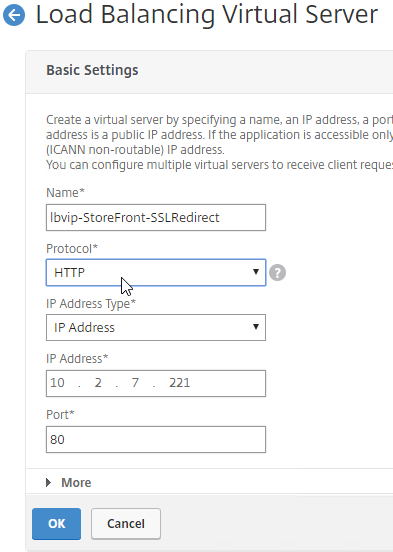
- Change the name of the Virtual Server to indicate that this new Virtual Server is an SSL Redirect.
- Change the Protocol to HTTP on Port 80.
- The IP Address should already be filled in. It must match the original SSL Virtual Server (or Gateway vServer). Click OK.
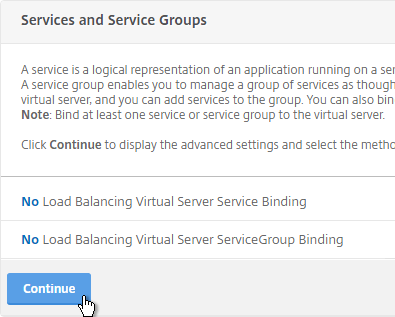
- Don’t bind any services. This vServer must intentionally be marked down so the redirect will take effect. Click Continue.
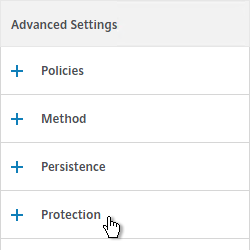
- On the right, in the Advanced Settings column, click Protection.
- On the left, in the Protection section, in the Redirect URL field, enter the full URL including https://. For example: https://storefront.corp.com/Citrix/StoreWeb.
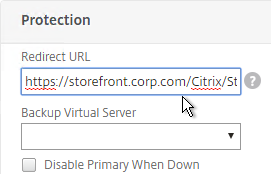
- Click OK to close the Protection section.

- Click Done.

- When you view the SSL redirect Virtual Server in the list, it will have a state of DOWN. That’s expected. The Port 80 Virtual Server must be DOWN for this redirect method to work.
SSL Redirect – Responder Method
The Down Virtual Server Method is easy, but the Redirect Virtual Server must be down in order for the redirect to take effect. Another option is to use Responder policies to perform the redirect. This method requires the Redirect Virtual Server to be UP.
Responder Method Setup Tasks
- Create a dummy Load Balancing service. This dummy service can be bound to multiple Redirect Virtual Servers.
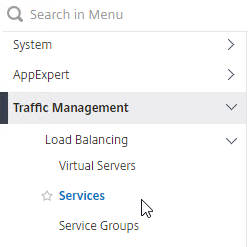
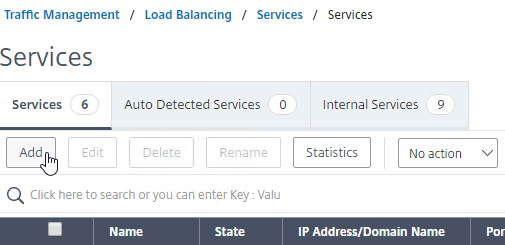
- Go to Traffic Management > Load Balancing > Services.
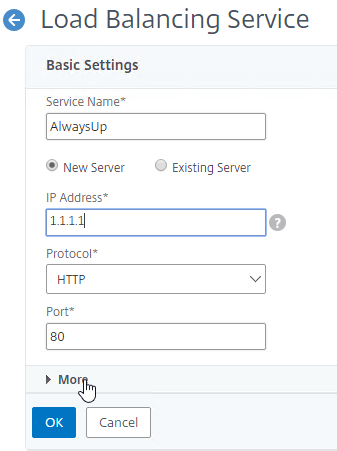
- On the right, click Add.
- Name the service AlwaysUp or similar.
- Enter a fake IP address. Try not to use any IP address owned by the Citrix ADC to avoid being able to access the ADC management web page.
- Click the More link.
- This dummy service must always be UP, so uncheck the box next to Health Monitoring.
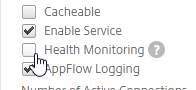
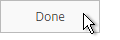
- Click OK, and then click Done to close the Load Balancing Service.

add server 1.1.1.1 1.1.1.1
add service AlwaysUp 1.1.1.1 HTTP 80 -healthMonitor NO
- Go to Traffic Management > Load Balancing > Services.
- Create the Responder Action:
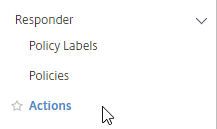
- On the left, expand AppExpert, and click Responder.
- If Responder feature is not enabled, right-click Responder, and click Enable Feature.
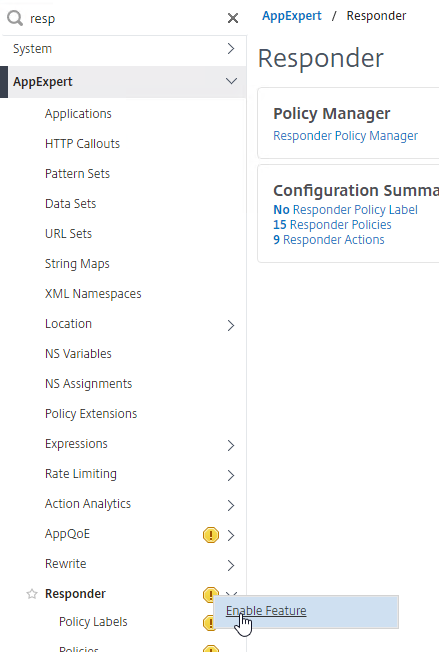
enable ns feature RESPONDER
- Under Responder, click Actions.
- On the right, click Add.
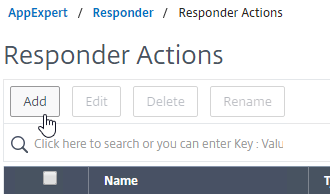
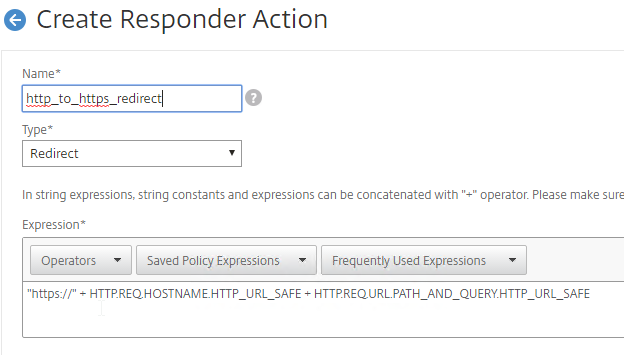
- Give the action a name.
- Change the Type to Redirect. If you leave this set to Respond With then it won’t work.
- Enter an expression. The following expression redirects to https on the same URL the user entered in the browser. Or you can create a Responder Action with a more specific Target. Click Create.
"https://" + HTTP.REQ.HOSTNAME.HTTP_URL_SAFE + HTTP.REQ.URL.PATH_AND_QUERY.HTTP_URL_SAFE
add responder action http_to_ssl_redirect_responderact redirect "\"https://\" + HTTP.REQ.HOSTNAME.HTTP_URL_SAFE + HTTP.REQ.URL.PATH_AND_QUERY.HTTP_URL_SAFE" -responseStatusCode 302
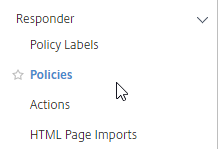
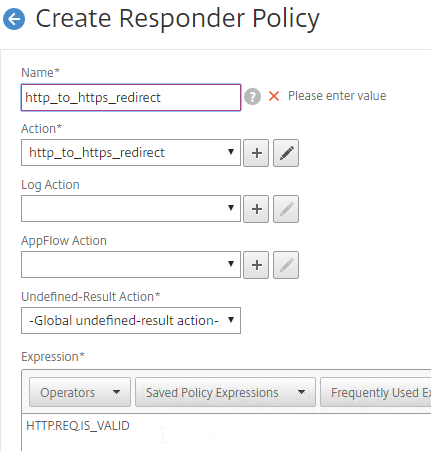
- Create the Responder Policy:
- On the left, under Responder, click Policies.
- On the right, click Add.

- Give the policy a name.
- Select the previously created Responder action.
- For the expression, enter the following. Then click Create.
HTTP.REQ.IS_VALID
add responder policy http_to_ssl_redirect_responderpol HTTP.REQ.IS_VALID http_to_ssl_redirect_responderact
- On the left, under Responder, click Policies.
Enable Redirect using Responder Policy
- Create a Load Balancing Virtual Server with Protocol HTTP, and Port 80. The VIP should match an existing SSL Virtual Server or NetScaler Gateway Virtual Server.
- Bind the AlwaysUp service.
- In the Services and Service Groups section, click where it says No Load Balancing Virtual Server Service Binding.
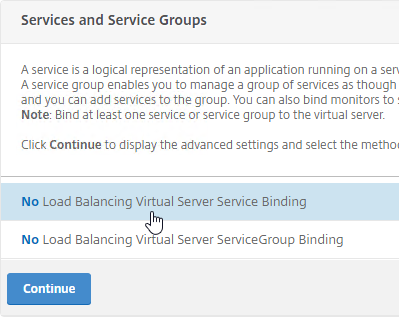
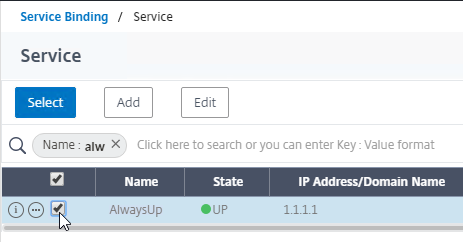
- Click where it says Click to select.
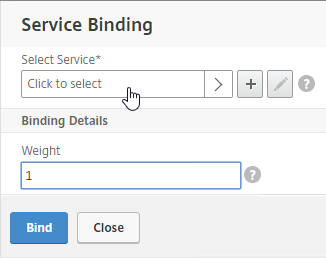
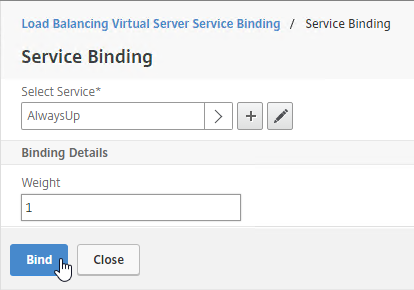
- Check the box next to AlwaysUp, and click Select.
- Click Bind.
- Click Continue to close Services and Service Groups.

- In the Services and Service Groups section, click where it says No Load Balancing Virtual Server Service Binding.
- Bind the Responder Policy:
- On the right, in the Advanced Settings column, click Policies.
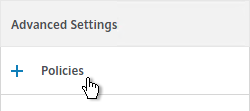
- On the left, scroll down to the Policies section, and click the plus icon in the top right of the Policies box.

- Change the Choose Policy drop-down to Responder. Click Continue.

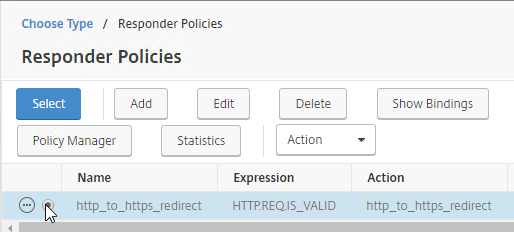
- Click where it says Click to select.
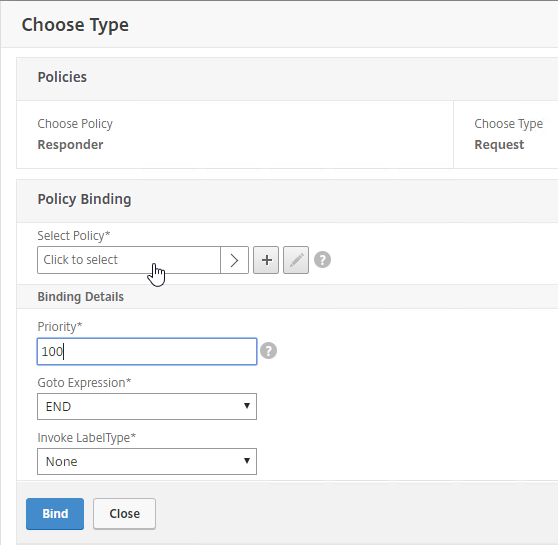
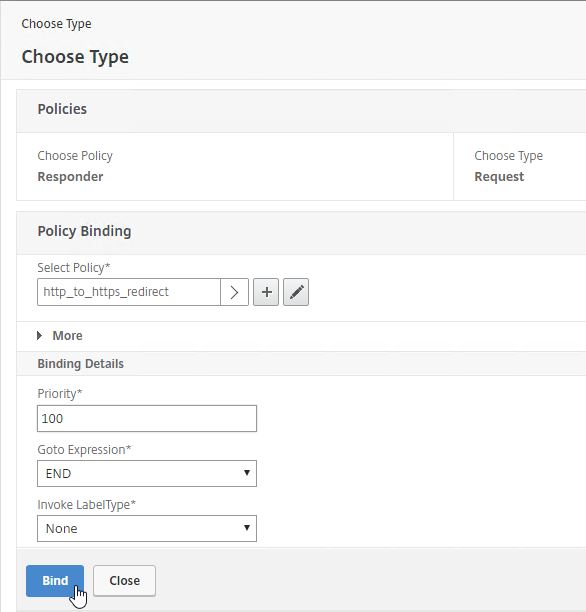
- Click the radio button next to the redirect Responder policy, and click Select.
- Click Bind.
- Then click Done to close the Load Balancing Virtual Server.

add lb vserver MyvServer-HTTP-SSLRedirect HTTP 10.2.2.201 80

bind lb vserver storefront.corp.com-HTTP-SSLRedirect AlwaysUp

bind lb vserver storefront.corp.com-HTTP-SSLRedirect -policyName http_to_ssl_redirect_responderpol -priority 100 -gotoPriorityExpression END -type REQUEST
- On the right, in the Advanced Settings column, click Policies.
- The primary advantage of this method is that the Redirect Virtual Server is UP.
Hi Carl, do you know if the rewrite policy/action method works in 12.1.xx? I tried this method and bound it to the Citrix Gateway Virtual Server without success according to the tenable scans. I noticed the documentation for 12+ only seems to reference the SSL profile method. For what it’s worth, the scans came back clean with the SSL profile method. Thanks for all your help with bridging the gap in vendor documentation.
Hi Carl, how can i redirect http (Port 80) to https (Port 443) on my Citrix Netscaler Gateway, my license don*t let me use LoadBalancer?
You should still have Virtual Servers and Services. Create a Virtual Server using the Gateway VIP and port 80. Add the Protection setting and enter the redirect URL.
Sorry there are no protection settings on my right side under advanced settings… i have Version 13 of NetScaler Gateway.
Hi Carl, thank you so much for your contributions re: Citrix Netscaler, the SSL hardening notes/pointers are fantastic. I have a quick question, I have enabled secure ciphers group (only TLS v1.2) for our Netscaler Gateway running on VPX v12+. I recall being able to run ssllabs test and seeing A+ (back in April) but now I get “Assessment failed: Unable to connect to the server”. I have checked all the tips provided in this guide but unless I am missing something, I am at a loss. Are you able to provide further comments on what else can I try?
Hi Carl, one question … about the LB METHODs, if I choose to select a HASH Method how can I identify the hash on the actual request? in other words, if the LB vsrv creates a hash for a user where can i see that hash? is it on a specific table on the netscaler or can i see it in a specific header on the http request?
Hi Carl,
Appreciate everything you do for the community!
Can you tell me the precedence of SSL Policies and CS policies when bound to a CS VIP?
Thank You!
I’m guessing they happen at the SSL Decrypt step, which happens before Content Switching. https://docs.citrix.com/en-us/citrix-adc/13/getting-started-with-citrix-adc.html#processing-order-of-features
Hello Carl,
I am looking for a solution to remove the https from URL’s and redirect to a deeplink path ( the URL is not static )
https://navision://client:80/run?servername=EMPIRE_STRIKES&database=EmpireProductie&company= WS&target=Form 5098&view=SORTING(Field1)&position=Field1=0(T19-1174814)&servertype=MSSQL
Must be change into the following with no HTTP because it is a DeepLink path
navision://client:80/run?servername=EMPIRE_STRIKES&database=EmpireProductie&company=Eigen Haard WS&target=Form 5098&view=SORTING(Field1)&position=Field1=0(T19-1174814)&servertype=MSSQL
For client-side requests, your LB vServer can be listening on HTTPS 443 but your Services can be HTTP on port 80.
If your web server is sending responses with links containing HTTPS and you want those links changed to HTTP, then you’ll need to bind a Rewrite policy. Here’s an example that rewrites http to https but you can reverse it. https://support.citrix.com/article/CTX122916
Thank you very much for the quick response Carl,
In this case it is not a webserver but it is a microsoft dynamic DeepLink Path
Hey Carl, I don’t know if you experienced this but if I activate TLS1.3 in my SSL profile (along with ciphers) it doesn’t work.
If I am doing the configuration manually on the VIP (SSL Parameters) instead of using my SSL profile it works.
THEN, if I switch back to my SSL profile it does work…. Weird behavior…
Citrix ADC version is 12.1-50.28
Is There way we can filter/block username ID on vServers? . Note: Users not getting authenticated via Netscalers. Thank you
If NetScaler is not authenticating the user, then how would the NetScaler know who the user is? Maybe in an HTTP Header? Or a HTTP Callout to an external website has a mapping of IP addresses to user names?
Great article as always! Just wondering why all those TLS1-* ciphers are getting an A+ when its being deprecated all ver the place?
SSL Labs is looking for the top priority ciphers.
Carl, TLS 1.3 requires the TLS 1.3 Ciphers which you do not have on your custom cipher suite. I’ve also recently ran into an issue with TLS 1.3 being enabled on the netscaler, and users with the latest 70.x version of Chrome released in Oct. 2018 which now has TLS 1.3 enabled by default. If TLS 1.3 is enabled on the netscaler and the user is using the latest version of Chrome the webpage/gateway will not load and they will get this error: ERR_SSL_VERSION_INTERFERENCE.
Thanks for pointing this out. I added some info about the TLS 1.3 ciphers.
Very nice article – thanks Carl! Any chances You could provide the official Citrix KB that says ssl redirect is not supported on CS vServer?
Hi Carl,
Very nice article! I am trying to find an official Citrix KB saying that SSL redirect is not possible on CS vServer but no luck. Do You happen to have the link or KB number covering that?
Are you referring to the SSL Redirect options under Basic Settings > More? Last time I checked it’s not an option on Content Switches.
I am referring to the SSL redirect option under SSL parameters under a SSL CS vServer.
The “SSL Redirect” setting under SSL Parameters probably doesn’t do what you think it does. If the web server sends back a 302 redirect with a Location header set to http, NetScaler rewrites the response Location header to https. This is for “response”, not “request”.
If you’re looking for client-side http to https redirection, then LB vServers have a “Redirect from Port” and “HTTPS Redirection URL” under Basic Settings > More. Content Switch vServers do not have that option. But you can create a port 80 LB vServer with a Responder to do the redirection.
Thanks Carl!
Hi Carl, I have a question about using HTTP expressions on a responder policy (using it for rate limiting) for SSL traffic. I bound my responder globally using REQ_OVERRIDE but it does not work (I am rate limit where HTTP.REQ.METHOD.EQ(POST)). As the global override policy gets evaluated first, I am thinking maybe the decrypt has not happened at this point & maybe the policy need to be bound to the vs-ssl vserver in order to parse the HTTP header? Is this correct? Does the ADC decrypt happen only when the traffic hits the ssl vserver? Thank you in advance!
Decrypt happens before Responder. I’m not aware of any difference for global-bind vs vserver-bind. https://docs.citrix.com/en-us/citrix-adc/current-release/getting-started-with-citrix-adc.html#packet-flow
Hi Carl,
Wouldn’t it be better to use a dummy IP address (e.g. 1.1.1.1) for the AlwaysUp service as using 127.0.0.1 means that if the admin hadn’t bound the responder policy correctly (or not at all) in error then this would present the admin logon to someone accessing it via a browser? (I know because I made this error myself!).
Potential security issue, especially if the service was presented to the Internet?
I’ve seen that too. I don’t see any reason why you can’t use any unused IP address. https://support.citrix.com/article/CTX120664 Shows both lookback and non-loopback address.
I’m trying to do this redirect and I can’t get it to work. When I get to the Enable Redirect using Responder Policy section, I try to add the http vserver and it won’t let me…it says “resource already exists”. I’m entering a different name but the same VIP. Any ideas?
The port number is 80? Do you have another vServer on the same VIP and port 80?
Yes, port 80. No I don’t have any other vservers with the same VIP on 80. I got it to work though…I had to use the VIP of the Netscaler Gateway vServer.