Navigation
This article applies to all 7.x versions of Citrix Provisioning, including 2411, 2402 LTSR, and 2203 LTSR.
- Change Log
- General Preparation
- Pagefile
- VMware ESXi/vSphere
- Hyper-V
- Antivirus
- Boot ISO
- Install Provisioning Target Device Software
- Target Device Software Tweaks – prevent drive for cache, excessive retries, hide Provisioning icon
💡 = Recently Updated
Change Log
- 2024 Dec 4 – updated Target Device Software section for version 2411
- 2023 Dec 23 – Converting BIOS vDisks to UEFI at Citrix Docs.
General Preparation
- In Provisioning 2311 and newer, make sure the VDA machine is UEFI instead of BIOS. If not, see Converting BIOS vDisks to UEFI at Citrix Docs.
- Build the VDA like normal.
- Update VMware Tools.
- Join the machine to the domain.
- Chrome and Edge – CTX212545 PVS 7.6 CU1: Write cache getting filled up automatically recommends disabling Google Chrome automatic updates.
Pagefile
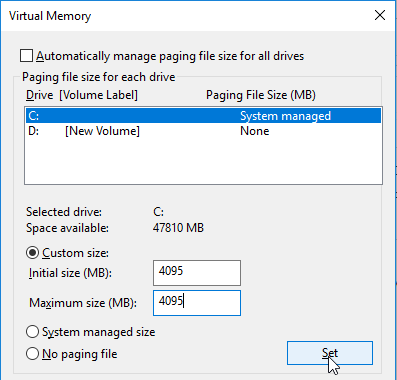
Ensure the pagefile is smaller than the cache disk. For example, if you allocate 20 GB of RAM to your Remote Desktop Session Host, and if the cache disk is only 15 GB, then Windows will have a default pagefile size of 20 GB and Citrix Provisioning will be unable to move it to the cache disk. This causes Citrix Provisioning to cache to server instead of caching to your local cache disk (or RAM).
The cache disk size for a session host is typically 15-20 GB. The cache disk size for a virtual desktop is typically 5 GB.
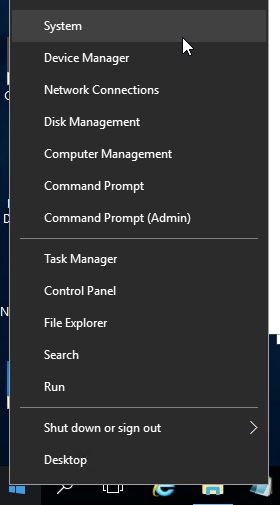
- Open System. In 2012 R2 and newer, you can right-click the Start button, and click System.
- For older versions of Windows, you can click Start, right-click the Computer icon, and click Properties. Or find System in the Control Panel.
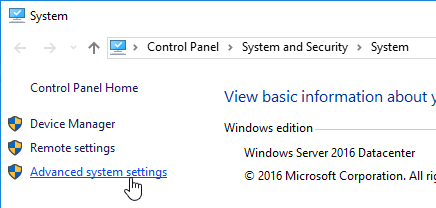
- Click Advanced system settings.
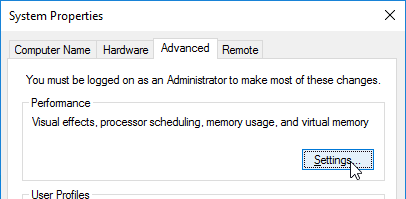
- On the Advanced tab, click the top Settings button.
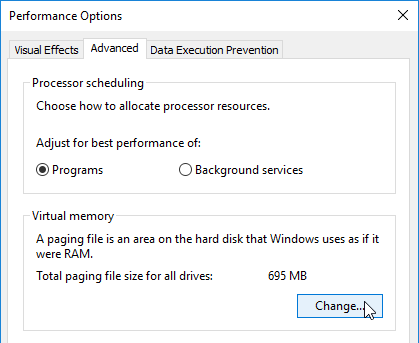
- On the Advanced tab, click Change.
- Either turn off the pagefile or set the pagefile to be smaller than the cache disk. Don’t leave it set to System managed size. Don’t forget to click the Set button. Click OK several times.
VMware ESXi/vSphere
VMXNET3
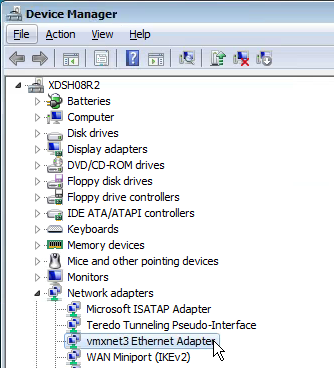
E1000 is not supported – For VMware virtual machine, make sure the NIC is VMXNET3. E1000 is not supported and will affect performance.
View hidden adapters in Device Manager and delete any ghost VMXNET3 NICs.
- At the command prompt, type the following lines, pressing ENTER after each line
set devmgr_show_nonpresent_devices=1
start devmgmt.msc
- Open the View menu, and click Show hidden devices.
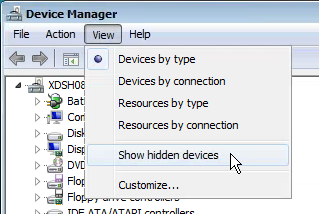
- Expand Network adapters, and look for ghost NICs (grayed out). If you see any, remove them.
SATA Controller
Citrix Provisioning does not support the SATA Controller that became available in ESXi virtual machine hardware Version 10. Change the CD/DVD Drive to IDE instead of SATA.
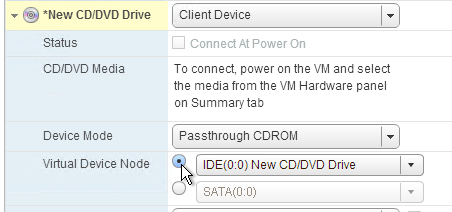
Then remove the SATA Controller.

NTP
Ensure that the ESXi hosts have NTP enabled.
DHCP
After creating the vDisk, follow the instructions at Provisioning Services 6 Black Screen Issue to clear any DHCP address in the vDisk.
Slow Boot Times
Citrix Provisioning Target Devices in VMware ESX boot slow intermittently after upgrading the ESX hosts from 5.0 to 5.1.
Citrix CTX139498 Provisioning Services Target Devices Boot Slow in ESX 5.x: Use the following command to disable the NetQueue feature on the ESX hosts:
esxcli system settings kernel set -s netNetqueueEnabled -v FALSE
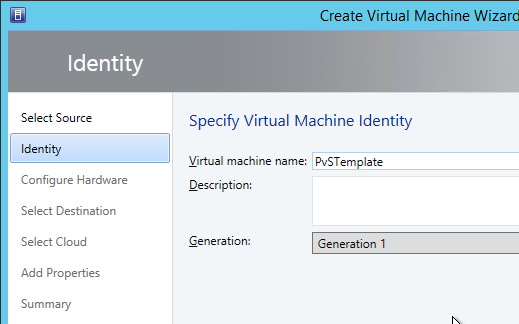
Hyper-V
- Generation 2 support is available in Citrix Provisioning 7.8 and newer.
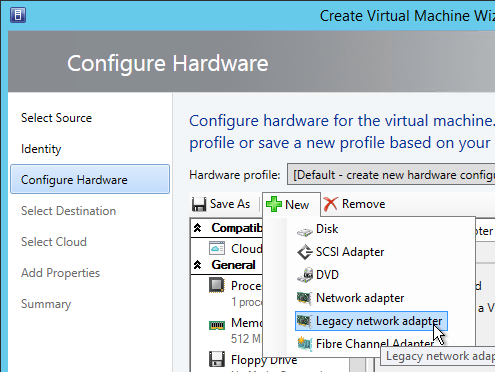
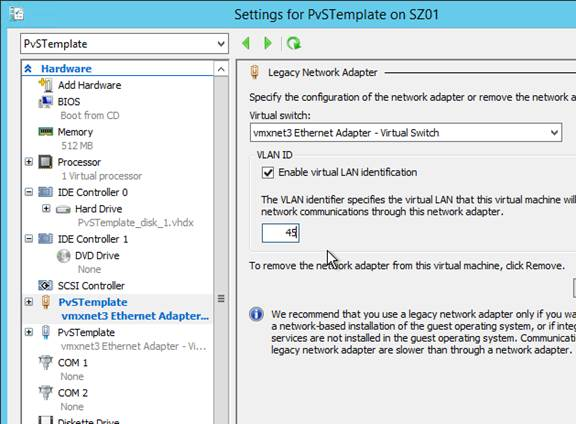
- If Generation 1, each Hyper-V Citrix Provisioning Target Device must have a Legacy network adapter. Legacy NIC supports Network Boot, while the Synthetic NIC does not.
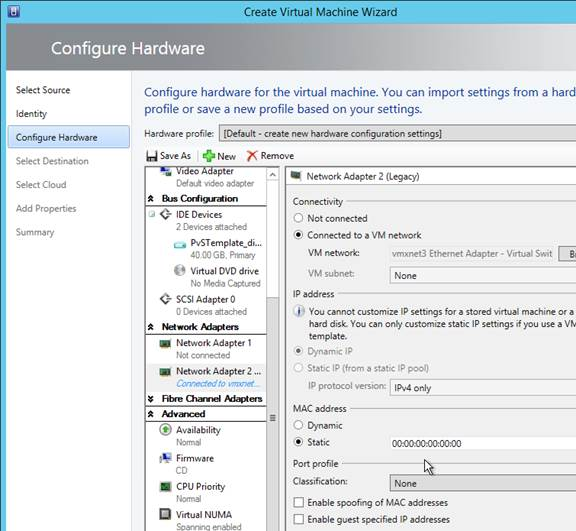
- Give the Legacy Network Adapter a Static MAC address. If you leave it set to all zeros then VMM will generate one once the VM is deployed.
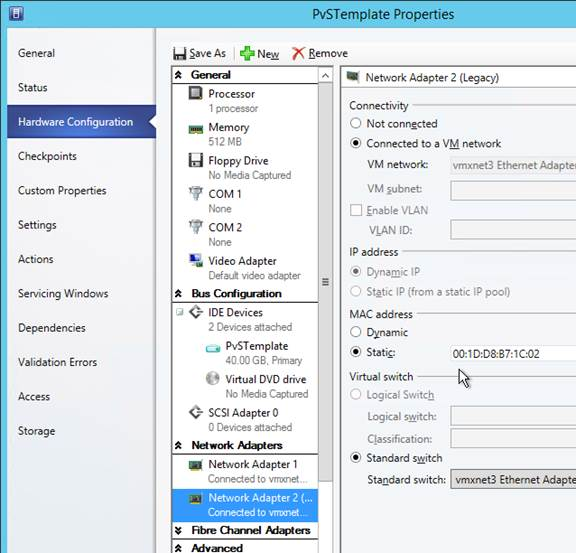
- When you reopen the virtual machine properties there will be a Static MAC address.
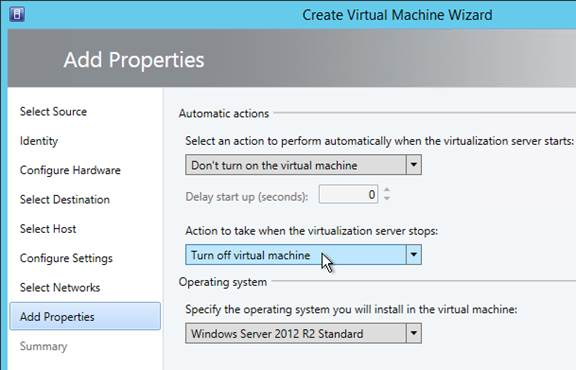
- Set the Action to take when the virtualization server stops to Turn off virtual machine. This prevents Hyper-V from creating a BIN file for each virtual machine.
- To set a VLAN, either create a Logical Network and Network Site.
- Or use Hyper-V Manager to set the VLAN on each virtual machine NIC.
Antivirus Best Practices
Citrix’s Recommended Antivirus Exclusions
Citrix Tech Zone: Endpoint Security, Antivirus, and Antimalware Best Practices.
Citrix Blog Post Citrix Recommended Antivirus Exclusions: the goal here is to provide you with a consolidated list of recommended antivirus exclusions for your Citrix virtualization environment focused on the key processes, folders, and files that we have seen cause issues in the field:
- Set real-time scanning to scan local drives only and not network drives
- Disable scan on boot
- Remove any unnecessary antivirus related entries from the Run key
- Exclude the pagefile(s) from being scanned
- Exclude Windows event logs from being scanned
- Exclude IIS log files from being scanned
See the Blog Post for exclusions for each Citrix component/product including StoreFront, VDA, Controller, and Provisioning. The Blog Post also has links to additional KB articles on antivirus.
Sophos
Sophos Anti-Virus for Windows 2000+: incorporating current versions in a disk image, including for use with cloned virtual machines: This procedure will make sure that the produced target/cloned computers:
- Get their distinct identity with Enterprise Console, under which they can be subsequently managed.
- Have the desired version of Sophos Anti-Virus already installed and configured on the created image.
Kaspersky
CTX217997 BSOD Error: “STOP 0x0000007E CVhdMp.sys with Kaspersky antivirus: install Kaspersky Light Agent using the /pINSTALLONPVS=1 switch.
Boot ISO
You can create a Citrix Provisioning boot ISO for your Target Devices. This is an alternative to PXE.
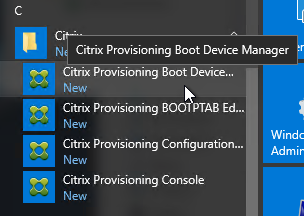
- On the Provisioning server, run Citrix Provisioning Boot Device Manager.
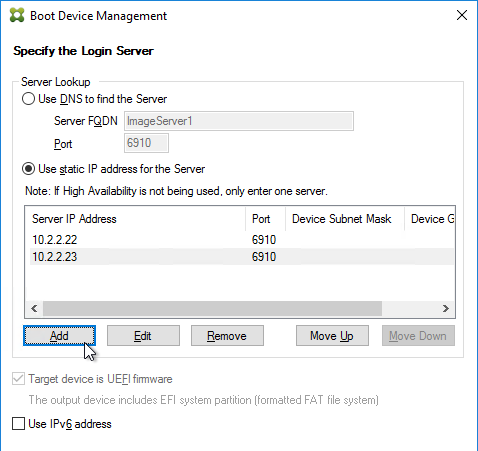
- In the Specify the Login Server page, add the IP addresses of Provisioning servers.
- Check the box next to Target device is UEFI firmware. Click Next.
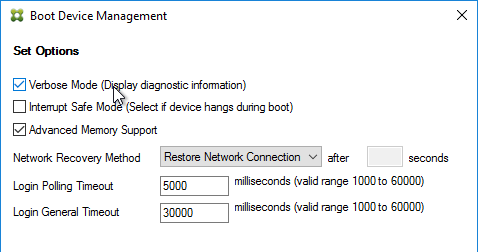
- In the Set Options page, check the box next to Verbose Mode, and click Next.
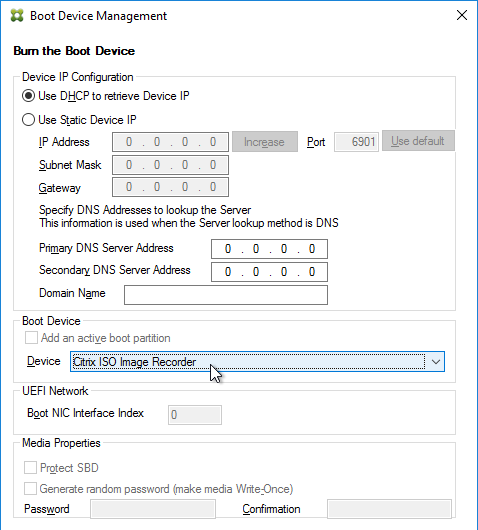
- In the Burn the Boot Device page, do not click Burn. If you do, then you will have a very bad day. Instead, look in the Boot Device section, and change it to Citrix ISO Image Recorder. Then you can click Burn.
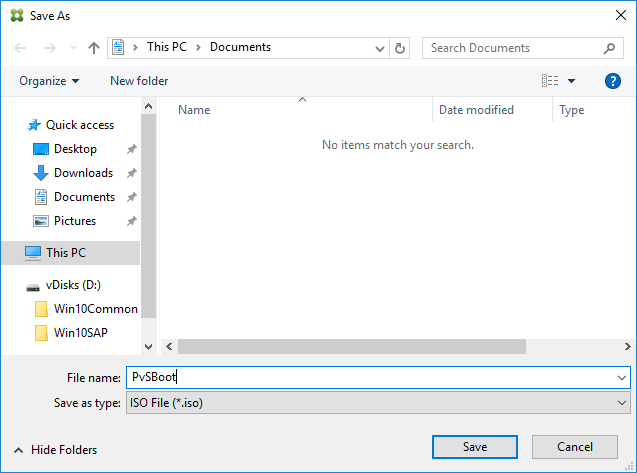
- Save the iso and upload it to a datastore or VMM library.
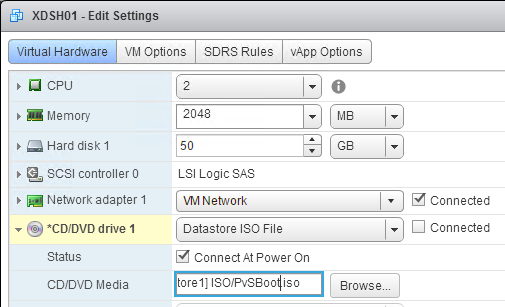
- You can now configure your Target Devices to boot from this ISO file.
Target Device Software Installation
The Target Device Software version must be the same or older than the Citrix Provisioning server version.
The install instructions for all Target Device versions 2411 and older are essentially the same.
Do the following on the master VDA you intend to convert to a vDisk. Try not to install this while connected using RDP or ICA since the installer will disconnect the NIC.
- Ghost NICs – Your Target Device might have ghost NICs. This is very likely to occur on Windows 7 and Windows 2008 R2 VMs when using VMXNet3. Follow CTX133188 Event ID 7026 – The following boot-start or system-start driver(s) failed to load: Bnistack to view hidden devices and remove ghost NICs.
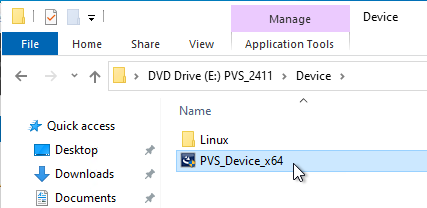
- Go to the downloaded Citrix Provisioning and run PVS_Device_x64.exe.
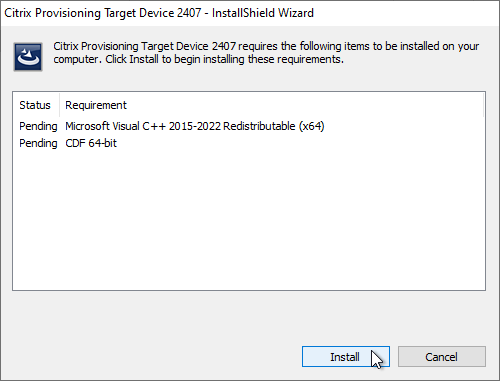
- If you see a requirements window, then click Install to install prerequisites.
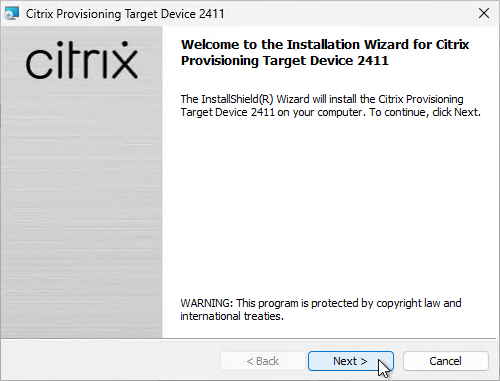
- In the Welcome to the Installation Wizard for Citrix Provisioning Target Device x64 page, click Next.
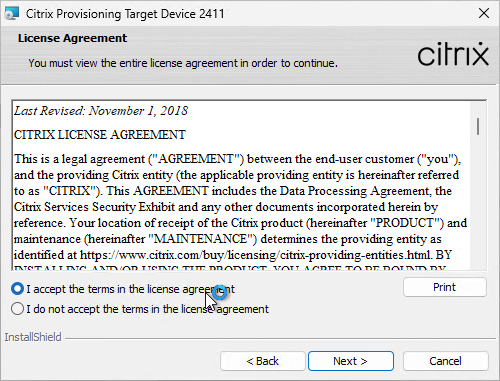
- In the License Agreement page, select I accept, and click Next.
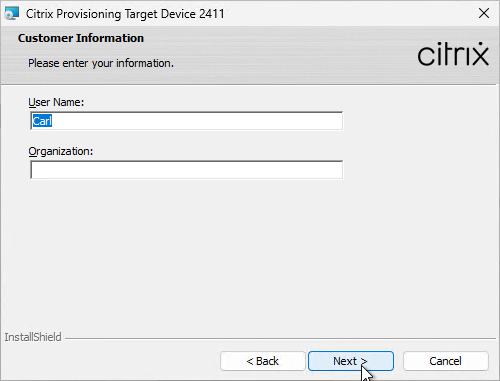
- In the Customer Information page, click Next.
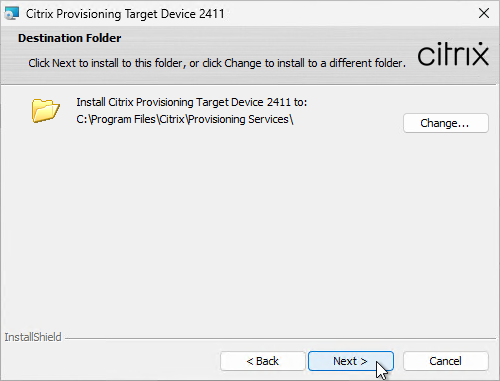
- In the Destination Folder page, click Next.
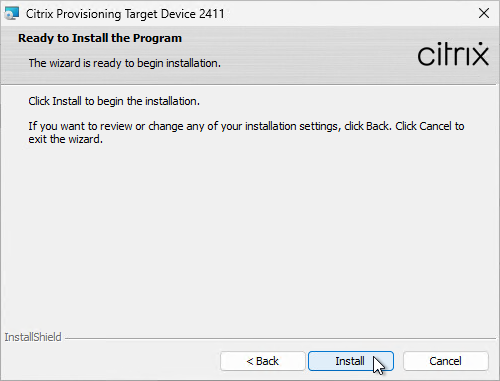
- In the Ready to Install the Program page, click Install.
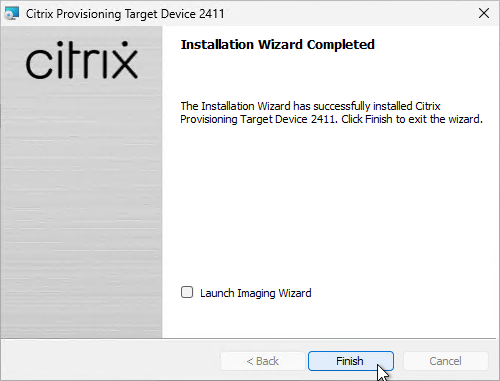
- In the Installation Wizard Completed page click Finish.
- Click Yes if prompted to restart.
- The Imaging Wizard launches. Review the following tweaks. Then proceed to converting the Master Image to a vDisk.
Target Device Software Tweaks
Asynchronous I/O
Prevent Drive for Write Cache
From Citrix Community PVS Target Device wrong drive letters: The driver that determines which partition to place the local cache searches for a file named: {9E9023A4-7674-41be-8D71-B6C9158313EF}.VDESK.VOL.GUID in the root directory. If the file is found it will not place the write cache on that disk.
Excessive Retries
If VMware vSphere, make sure the NIC is VMXNET3.
Hide Citrix Provisioning Systray Icon
From Citrix CTX572340 Hide “Virtual Disk status” icon from System tray on the endpoints: Add the reg value below:
- HKLM\Software\Citrix\ProvisioningServices\StatusTray
- ShowIcon (DWORD) = 0
This however will disable to all users, even Admins. Solution: Apply the HKCU key below based on Group membership (Group Policy Preferences > Item Level Targeting):
- HKEY_CURRENT_USER\SOFTWARE\Citrix\ProvisioningServices\StatusTray
- ShowIcon (DWORD) = 0
Once that is in place the icon will go away.
Hi Carl,
We have published a Desktop for end users which is supported by 40 servers in the backend. These 40 servers are streamed through PVS. Write Cache is set to Local Hard Disk. We find that very often the Write Cache disk gets full. Earlier these servers were running with 2016 image and no issue with write cache. Recent, we moved all these servers to 2019 image and write cache started fill-up very quickly.
Something is creating files or modifying files on the C: drive. There are tools and techniques to help identify what files are changing. Cached user profiles are one example.
Thanks for the suggestion. I will check further.
I would find a VDA experiencing the problem and run something like treesize to view what is consuming your disk, you can drill into a user’s profile, if you have O365 or MS Edge, you will see some sharp increases with those.
Thanks Brian & Carl for the suggestion, I am able to sort what is causing the write cache filling up by running the Procomon.
One more observation, 2019 servers page file utilization is high whereas it was normal with 2016. Any suggestion.
Hi Carl, Good day! In our Citrix environment, prod images are getting replicated to DR , VM tools update had been done on the prod one and replicated to DR and everything was working fine for months. Last week we got backup failure error for few of the DR targets not all targets. And I got to check the issue yesterday and found VMtools for those targets in DR got upgraded to 12.4.0 while the other DR targets have the one from prod which is 12.3.5. Back up is still failing for those targets with upgraded VMware tools. what could be the issue here? Thanks in advance!
I have created a vDisk from a master that is joined to the domain, everything works fine, I use a “maintenance” target device to boot that vDisk in read/write mode, all is good.
Now, I want to swap the vDisk attached to that “maintenance” target device for one that was created using Citrix App Layering. That vDisk has never been joined to the domain. When that vDisk boots up using the maintenance target device it is not joined to the domain and I have to use some local admin credentials to login.
Is that expected?
Do I have to manually re-join the maintenance target device to the domain using that new vDisk?
I would have thought that perhaps the target device domain-joined status would have applied to this new vDisk but it does not appear so.
I think the image needs to be joined to the domain so PVS can swap out the computer name and password.
Great Stuff!
We have set the pagefile to be on the cache drive but now every time someone logs on they get a windows Performance popup window that all that can be done is click ok or cancel. Running Windows 2019 Server, 1912 LTSR CU8
Hello Carl,
I have a master image with 2 NICs, one for streaming and the other one to connect to Management Network. However when I rollout a VDI from a template, it only connects the Streaming NIC. This is a VMware based infrastructure. Am I missing something here..
Carl,
In your first step that says “Build the VDA like normal.” – what is normal exactly? Your VDA build page contains a lot of useful information but at what point do I stop in that VDA build page to continue with the master device configuration?
1. Is it okay to install the VDA software BEFORE installing the master device software?
2. In the domain join instructions, I see that your master image device is turned off and booting from the hard disk. Should I expect that master image device to be joined to the domain once I turn it back on? That is not the behavior I am seeing on my end.
1. Yes
2. For the original machine, the computer object in the domain will probably have the wrong password, so you’ll need the local admin account to login. However, PVS managed machines will have computer accounts managed by PVS. But yes, the vDisk should be joined to the domain and PVS will manage the computer password.
So, I can basically go through all the applicable steps in the VDA build page BEFORE installing the master target device without seeing any issues?
So after I join to the domain, as a next step I should switch to vDisk boot (from Hard Disk) and the machine should theoretically be domain joined at that point? If it isn’t, do you have any suggestions? Citrix’s documentation is less than forthcoming on this.
Hallo Carl,
What would be the best practice/option in configuring the pagefile in “Virtual Memory”, to leave it on C:\ “SystemDrive”, or move it unto the cache disk?
Thanks
If you leave it on C: then PVS should automatically move it to the cache disk. Make sure the pagefile is smaller than the cache disk.
If you untick the Automatically manage page file and leave no paging file, does PVS automatically move it to cache drive?
Hi Carl,
Environment: Citrix Workspace 1912. I deployed windows 2019 VDAs from PVS in vmware 7.0.3. During restart randomly few of them stuck at the start after getting Server IP address and Clilent IP address. I am using BDM. Any suggestions please.
Thank you,
Victor
Hello Carl,
for your information.
In section General Preparation -> Citrix CTX131611 – Known Hardware Related Provisioning Services Issues the link (https://www.carlstalhood.com/pvs-master-device-preparation/) seems to be broken.
Kind regards
Bernd
Thanks for pointing that out. Citrix has been removing old articles so I removed it to. I found some copies of the article on other blogs.
While running provisioning services wizard getting error after entering SQL address .Error the domain/ user does not have access to the farm.
It works fine for 7.15cu 3 but as soon as we install 7.15cu7 or cu8 it gives this error
Is your Windows account in the SQL Server’s server role named Public?
error: “Citrix Provisioning Target Device x64 2203.0.0 does not support Personal vDisk.”
uninstalling and reinstalling did not help.
Steps:
1. P2PVS to reverse image
2. Boot from Disk and disconnect from legacy PVS server (7.15)
3. Uninstall all Citrix software
4. Delete remaining Citrix folders and reg keys
5. Reboot
6. Install XenApp 2203 – Restart
7. Install target device software 2203
error: “Citrix Provisioning Target Device x64 2203.0.0 does not support Personal vDisk.”
Is User Personalization Layer installed? If so, remove it from the VDA.
Sorry, I meant personal vDisk. Do you see the personal vDisk folder on the C: drive?
We use PVS 2112 on a Windows Server 2019. After we have created a new version and then promoted it, a black screen appears during the boot process after the Windows logo is displayed and the VM no longer responds. On the PVS server, however, you can see how the vDisk (avhdx file) keeps getting bigger for a while in the background.
We set the DHCP lease time to 1 day, set the CD/DVD controller to IDE and removed the SATA controller.
We use VMWare version 6.7.
My PVS Imaging Wizard is – when it boots from EFI mode does not connect to VMXNEt3 as shown in your screenshot; unable to get to that screenshot; so unable to create the Vdisk. Please guide further.
hi Carl! Is it possible to stream PVS VDA’s with PVRDMA-Adapter instead of VMXNET3? I have all necessary components (lossless packet flow on the switch, RDMA adapter…) if is is possible and the PVS & VDA are on the same host and has the PVRDMA Adapter instead of VMXNET3, than there is no network traffic, it goes right from RAM to RAM. Only if the VMs hosted on different esxi hosts, RDMA comes to pass…
I don’t know. If you ask you question at https://discussions.citrix.com/forum/1354-provisioning-server-for-datacenters/ then somebody might have an answer.
Dear Carl, thank you very much for help! All I have learned about Citrix I learned from your blog. THANKS SO MUCH!!
I didn’t get an answer (from march!), do you have an idea??
Have you tried it?
Hi Carl, i have a question if you can help me.
I am currently migrating my citrix environment from vmware to hyperV (for the hosts where my workers are only)
Currently i have converted half of my base images from vmware format VHD to hyperV format vhdx with no issue (vms are booting from the new VHDX image on hyperV streamed from PVS)
i faced an issue now with the rest of my base images, where after converting them to vhdx they are not booting through VPS (blue screen with message related to CVhdMP.sys)
any idea what might cause this issue? since i made sure there are no networks related to vmware in the base iamge (under device manager –> hidden networks)
I had this (BSOD) when i needed to make an implace upgrade from an win10 os. You might need to restream the vhdx back to a real Vm with Hardisc. Then uninstall pvs target device software and reinstall it and stream the image back as a new base image to your vhdx location. It seems PVS target device Software have problems with altering the Image too deep like converting or inplace upgrades etc. Dont know if this is the case but try it at least.
this is probably due to the missing hardware ID
What happens if VMware tools is not installed and not running on the PVS image? Will that cause performance issues? currently I dont have it running and wondering if it would improve things on my PVS machines
I assume it gives you access to VMXNET3 NIC.
Hello,
I’m new…
Is there a way to set prov schema to create new VM (VMW) with secure boot disabled?
Master Image has this parameter disabled already but it doen’t work for newly created VDI (used with UPL)
I’d like to use PS…
Thanks everybody
Roberta
Dear Carl,
We have created VM on ESXi 6.7 which is set to BIOS. We are getting error “”downloading tsddbm.bin”.
However, in testing we found, when we change it to EFI machine boots up without any error.
– We have created ISO without UEFI.
– We are using PVS 7.15 LTSR CU6.
This is the first Win10 VM we are creating with PVS. However, there are multiple Win2016 VMs are running in the environment.
Does BIOS supported with BDM ISO. Please suggest.
hi Carl,
in the process of Convert to vDisk – Imaging Wizard Method
1) vdisk is created just ok
2) but then when re-booting the VM with PXE, after logging in to finalize the PVS Imaging process I am getting this error:
Failed to finish DoSnapshotSet.
: VSS_E_UNEXPECTED_PROVIDER_ERROR
see below more on the Imaging Wizard log:
————————-
: Initializing volumes…
: Discovering Volumes…
: Destination is \\?\Volume{0000c1c9-0000-0000-0000-10000000000
: Destination is \\?\Volume{0000c1c9-0000-0000-0000-40240000000
: Volume to Volume started at Saturday, August 08, 2020 15:17:1
: Gathering Volume Shadow Copy Writer metadata…
: Adding volume \\?\Volume{e3f155db-0000-0000-0000-100000000000
: Adding volume \\?\Volume{e3f155db-0000-0000-0000-402400000000
: Preparing for backup…
: Gathering writer status…
: Committing shadow copies…
: Failed to finish DoSnapshotSet.
: VSS_E_UNEXPECTED_PROVIDER_ERROR
: Failed to snapshot. (0x80
: Aborting Volume Shadow Copy…
: Volume to Volume stopped at Saturday, August 08, 2020 15:17:3
: Volume to Volume lasted 21.7 seconds
: Physical to Disk stopped at Saturday, August 08, 2020 15:17:3
: Physical to Disk lasted 23.6 seconds
: Physical to Provisioning Services vDisk stopped at Saturday,
: Physical to Provisioning Services vDisk lasted 25.2 seconds
————————-
By the way Services:
Microsoft Software Shadow Copy Provider and
Volume Shadow Copy
are both running just fine.
Any ideas ?
Edi
thank you
If you run “vssadmin list providers”, what providers do you see? Also check “vssadmin list writers” for status.
Thank you much Carl for your reply.
Indeed, I had a 2nd provider I wasn’t aware of till you make me aware of it.
Fixed this and all worked like a charm.
I have a feeling I may return with more questions soon :-).
Hi Carl,
I am just wondering, what can I do to have my 2nd provider ( that I’ve removed now so I can have the Image into vDisk ) also ?
Checking the writers were all Stable and no Errors.
Do you have any hints of how could I get with the 2nd provider and have the Image into vDisk working ?
Thank you.
Edi
Maybe install it in the vDisk when in Private/Maintenance mode?
Will look into that, thank you Carl.
Well done and joining the others in congratulating you with these posts and articles published here.
Edi
Greetings Carl,
I was looking at the section on Disabling Network Offload and the link to Ingmar’s website is no longer valid. https://www.ingmarverheij.com/citrix-pvs-optimize-endpoint-with-powershell/
Looks like he is hung up his admin hat. 🙁
That’s unfortunate. I just removed the link.
Hi Carl,
I have created a Windows Template(Win1019H2/20H1 and Win2019 Server) on ESXi6.7U3 with VMXNET3 and IDE0 CD/DVDDRIVE (and of course removing the SATA controller).
If I do start PVS Imaging on the VM(which I am creating from scratch, like Mounting the OS ISO, installing VMware Tools etc) with exactly the same VM Hardware Config as Template, it works flawlessly; but, whenever I do deploy VM from the template and try PVS Imaging, it fails(after reboot, when rest of the imaging should have automatically started after PXE Boot and logging in), saying : Imaging Wizard did not restart. Please Check your network boot configuration and restart the device.
I don’t understand, what is wrong with Template Deployed VMs. Please help.
Does the PVS Tray icon show the vDisk is attached? When Imaging Wizard won’t start again, I manually run “C:\Program Files\Citrix\Provisioning Services\P2PVS.exe”
Running P2PVS.exe manually, it says:
From: This Machine
To: Citrix Provisioning vDisk
A Citrix Provisioning vDisk was not found.
I can see, Virtual Disk Icon as Inactive
Then your target did not boot into PVS correctly. If you’re using Boot ISO, is your target configured to attach the ISO and boot from the ISO?
I am PXE Booting my target. The other VM (created from Scratch, not from template, but with exactly same config as Template) are working fine. I tried with both PXE and BDM ISO, the independent VMs work fine, but the template created VMs have issues in booting to PVS.
I even tried, creating a PVS-Device and corresponding vDisk from PVS Console and boot, but, with Template created VMs, it doesn’t work.
Do we have any standard set of rules to create PVS Target Device Template
Is your machine using EFI instead of BIOS? EFI has different instructions than BIOS. Are Targets and PVS on the same subnet? Or different subnets?
yes Carl, the target and PVS Server are on the same subnet. It’s an EFI target device.
Did you configure DHCP Scope Option 11? https://support.citrix.com/article/CTX208519
Anyone had issues with Citrix PVS 1912 CU1 causing target device freezing in failover between PVS servers?
Target device 7.15 CU5 and 1903 seem to work but not 1912 or higher.
Hi Carl, I noticed Citrix recommends installing the VDA after a new master image has been imported into PVS. In other words, don’t install anything on a new image other than drivers, hypervisor tools, and PVS client until the image has successfully been imported into PVS and then streamed to a maintenance device. Then you can install the VDA and other apps. https://support.citrix.com/article/CTX200813
Has it been your experience that installing the VDA prior to PVS works successfully? Would be curious to hear your thoughts. Thanks!
I don’t think I’ve noticed any difference one way or the other.
Hello Carl,
I’m trying to imaging a Windows Server 2019 using PVS. The problem is that after I’ve created the vdisk, every target device will boot and will get the same ip of my gold image. I’ve never set up a static ip address, always used DHCP.
Any idea?
I’m using Citrix PVS 1912
Are you using a boot ISO with IP address hard coded?
Nope, I’m booting my target device using PXE from Provisioning. Actually I forgot to mention that I have two network cards, one is used for streaming and the other one only for the LAN.
No, I’m using the PXE from PVS. I have two nics on my target device, one for streaming traffic and one for LAN traffic.
Hi Carl,I’m Trying to capture the Win10 image with BDM option,Post reboot vm able to reach PVS server and down tsbbdm.bin after that receiving ‘No bootable drives or no os error’.
I’m Using PVS 7.15 ltsr CU5
Did you manually add the device to Citrix Provisioning Console? If so, did you set the Device to boot from Hard Disk instead of from vDisk?
I’m Trying to create a master image ,I have followed the steps which you have mentioned in the site.Installed PVS Target device and Run image wizard,verfied target device boot from Hard disk.post reboot target device contact the pvs server downloaded the Bootstrap file,Virtual Disk found message.later showing ‘No bootable drives have been found or no os error’
I have an exisiting domain joined VDA and want to create a template/vDisk for PVS. Do I need to generalize the clone of the VDA before import into PVS?
Nope. When you convert to PVS, it’s still in Private Image mode so you can continue to make changes before you switch it to Standard Image mode.
Hey Carl,
“Disable Network Offload” is according to Carl Websters HealthCheck not anylonger needed from PVS 6.0 upwards.
What’s your take on that?
Best Regards
Sascha
I’ve seen recent discussions indicating it might not be needed.
Any news on this? Hoping 1912 or 2203 have this fixed.
Hi, gigantic newbie question here! I want to use RAM Caching with overflow to disk. Do I create / attach the ntfs partition/disk to my VM, or do I create a NTFS partition on my XenServers?
Create a new disk. Or let the Citrix Virtual Desktops Setup Wizard create the disks for you. https://www.carlstalhood.com/pvs-create-devices/#wizard
Can someone point me in the direction of steps to properly add a write cache drive to a vdisk/Win10 target device? Do you create the vdisk first, then connect in private mode and add the drive, or just have the XD creation wizard do everything when you run it.
Thanks!
If you’re using the XD wizard to create Target Devices then it the wizard can create them for you. Otherwise, simply create a drive and format it with NTFS.
Hi carl,
i was building a windows 10 vdi non-persistent through PVS but I can’t boor from the network after the first step of imaging. I did the following:
– I created Windows 10 in vmware with two harddisk (D: drive for the write cache)
– I installed Windows 10 and vmTool
– I installed pvs Target Device software and started the imaging wizard ( After this I see the created vdisk and image in
provisioning server PVS Console)
– After booting the image to Network (ISO) I get an error:
An operating system wasn’t found. Try disconnecting any drives that don’t contain an operating system.
Any idea’s what i am missing?
thx
Is PVS Server in the same subnet as the Target Device? If not, then you’ll need to configure a Boot ISO or TFTP load balancing plus DHCP Options.
Hi Carl,
It was indeed in a different vlan but I just changed it to the same vlan and I get the same error. I use Boot ISO.
I red somewhere that if you remove the D: drive it worked. I am not sure if that is the way I should do it.
I see the same issue that someone had
https://discussions.citrix.com/topic/354868-problem-booting-win8-from-bdm-iso-for-pvs71/
Hello experts. I have been having problems with TFTP lately so I decided to switch over to BDM boot. I am using the XDSetupWizard to deploy the TDs. I can get the machines to boot but the cache disk is not formatted so it drops back to server cache. When I login to the TD, I see the BDM partition of 8MB and a non-initialzed disk with the size that I specified in the XD Wizard. I tried it both with a disk attached to the template and without.
I enabled TD logging but it is not writing the log files to the PVS server as specified here – https://support.citrix.com/article/CTX236308
Any ideas would be appreciated. Thanks.
My master image is built with VMXNET3 but when i push this out it update 5 XenApp server with E100E and one with VMXNET3 adapter how can i force it to push all VMXNET3 ?
Which Citrix Provisioning Wizard are you using? Does your VM Template also have VMXNET3?
MCS in XenApp 7.15 and VMware and yes Master image has VMXNET3 adapter
Check your template, pvs uses a template for the hardware.
when we consider Desktop OS for providing Non-Persistent VDI, should we have 2 NIC (Normal NIC (1G) & Legacy NIC (10G)) or only 1 NIC ((10G)) is sufficient?
Is your hypervisor Hyper-V?
hmm after i set the Registry for Asynchronous I/O, my image stopped working. Right after loading the right vdisk the VM was Stuck on the screen where i see the IP of my machine, pvs server, cache mode and vdisk name.
Here’s a thread – https://discussions.citrix.com/topic/403687-asynchronous-io-in-pvs-creates-extreme-slowdown/
its probably because pvs and target device version are 7.15 LTSR CU4 and not 1906….
Thanks for the Link!
Do you know if other vmware virtual nic device types can be used?
I saw that the newer paravirtual adapter has supposedly better performance in some scenarious but Citrix has no specific recommendations for PVS and when I talked to their support they also had no recommendation or guidance.
The default is the LSI logic one
Citrix App Layering used to not support it but I don’t think that’s true any more. Otherwise, I don’t have any opinion on it.
Have you got Asynchronous I/O working? When turned on (1903 across the board) in the PVS checkbox everything crawls to a halt and performance is pretty much unusable. Just logging into a windows 10 VM takes around 20 minutes and there are tons and tons of excessive retries.
Replying to myself here – even in the latest version of PVS you still HAVE to edit the registry key manually on your target device VDA for async I/O to work. Do this before you enable the checkbox.
What keys?
Windows released a patch at the end of January that fixed the Server 2019 and Windows 10 1809 incompatibility issues. I’ve tested this in my environment and no longer get the pagefile message. Just thought I’d post about it so others who have been waiting for the fix can start testing.
1912 cu2, new PVS environment, using BDM partition, only happens with new targets. Targets boot fine and get to windows 2019 login, but then power off after just a short amount of time. This occurs with pvs target and VDA installed in the master, and also with just the pvs target software installed. If I power them back on they boot fine and VDA registers if installed, only seems to be a problem on target creation.
I have the same ‘issue’, however because the systems are fine after booting again I tend to ignore it.