Navigation
This article applies to all 7.x versions of Citrix Provisioning, including 2411, 2402 LTSR, and 2203 LTSR.
- Change Log
- PXE Tester
- Convert to vDisk – Imaging Wizard Method
- Join Device to Domain
- Boot from vDisk
- Save Clean Image
- KMS
- Seal the vDisk
- Defrag the vDisk
- Standard Image Mode
- vDisk High Availability
- Create Cache Disk – vSphere
- Create Cache Disk – Hyper-V
- Verify Write Cache Location
💡 = Recently Updated
Change Log
- 2019 Jun 23 – KMS– new Accelerated Office Activation option in Provisioning 1906
- 2019 Jun 8 – vDisk HA – added link to Citrix Blog Post The vDisk Replicator Utility is finally finished!
- 2018 Sep 3 – renamed Provisioning Services to Citrix Provisioning
- 2018 June 9 – vDisk HA – added link to Citrix Blog Post vDisk Replicator Utility
- 2018 Jan 14 – in Defrag vDisk section, added note that ELM App Layering doesn’t need defrag. Source = Gunther Anderson at Performance considarations? at Citrix Discussions
- 2017 Dec 14 – in Imaging Wizard > Boot from PVS section, added P2PVS.exe
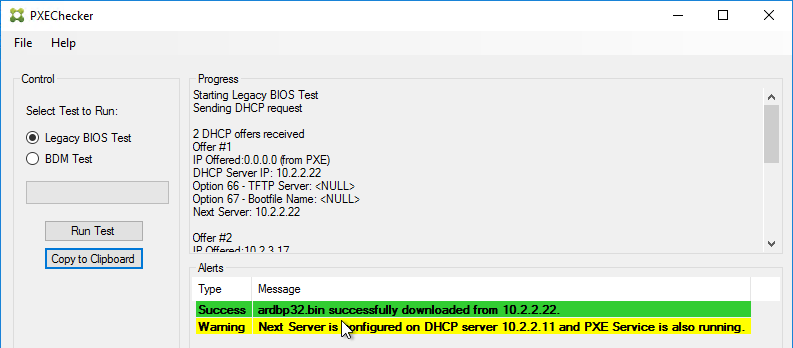
PXE Tester
If you will use PXE, download CTX217122 PXEChecker to the master machine.
The TFTP portion won’t work unless the client-side firewall is disabled.

To verify functioning PXE, run PXEChecker, and Run Test in Legacy BIOS mode. Or you can do a BDM Test (see the article for details).
Convert to vDisk – Imaging Wizard Method
The Imaging Wizard connects to a Citrix Provisioning server to create a vDisk (.vhdx file) and a device (database entry with device’s MAC address). Once that’s done, the machine reboots and the conversion process begins. You can also do all of these steps manually.
- In the Citrix Provisioning Console, create a Store to hold the new vDisk.
- In the Citrix Provisioning Console, create a Device Collection to hold the new Target Device. This could be a Device Collection for Updater machines.
- The Imaging Wizard will ask you to enter a new machine name. You can’t use the existing machine name because Citrix Provisioning needs to create a new Active Directory account so Citrix Provisioning will know the new machine’s computer password.
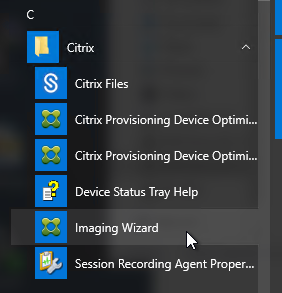
- If the Imaging Wizard is not already running, launch it from the Start Menu.
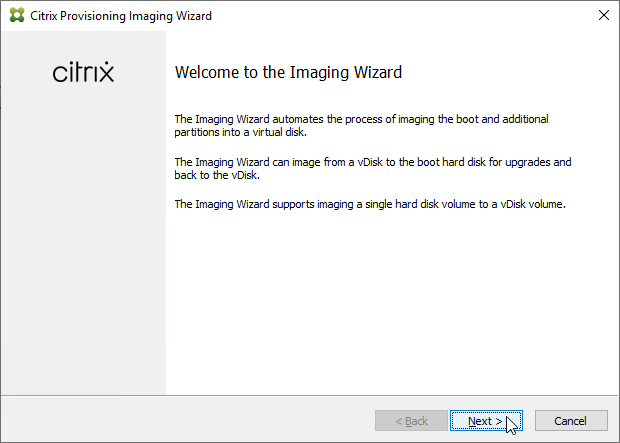
- In the Welcome to the Imaging Wizard page, click Next.
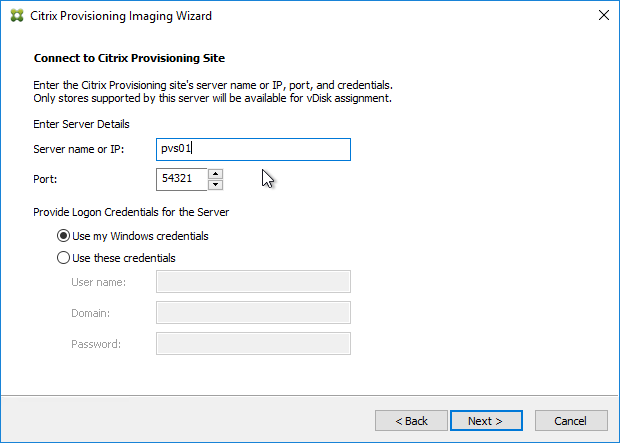
- In the Connect to Citrix Provisioning Site page, enter the name of a Citrix Provisioning server, and click Next.
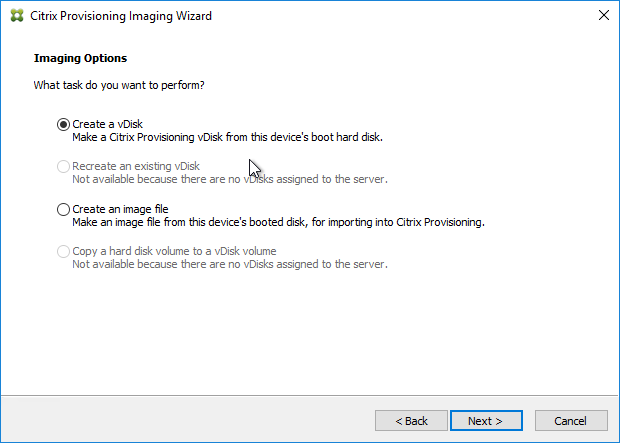
- In the Imaging Options page, click Next to create a new vDisk. Alternatively, you can select Create an image file.
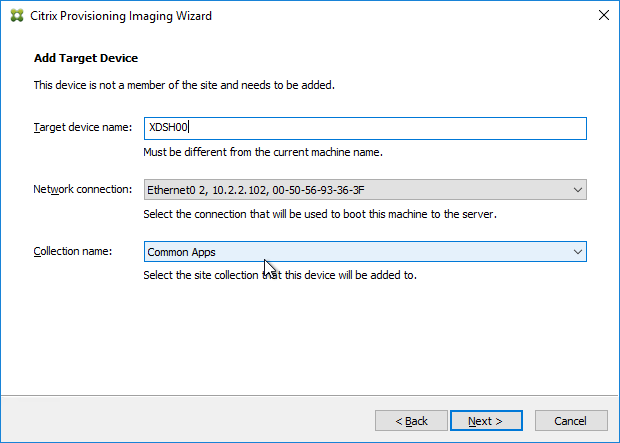
- In the Add Target Device page, enter a new unique name for the new Target Device.
- Select a Collection name and click Next.
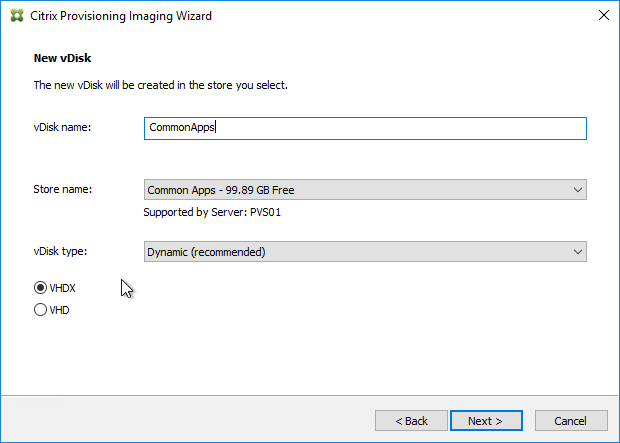
- In the New vDisk page:
- Enter a name for the vDisk.
- Select an existing Store name.
- Leave vDisk type set to Dynamic and VHDX.
- Click Next
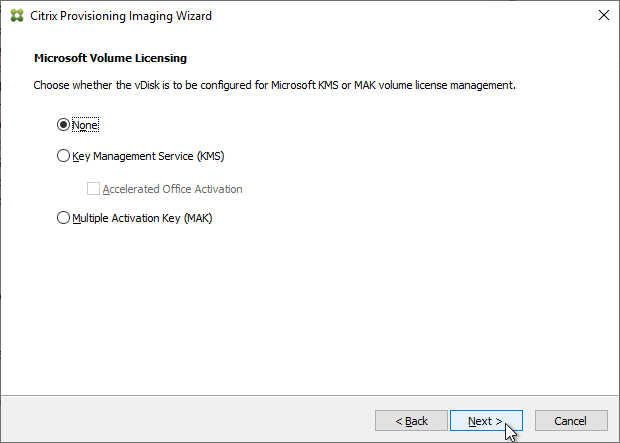
- In the Microsoft Volume Licensing page, select None, and click Next. We’ll configure this later when switching to Standard Image mode.
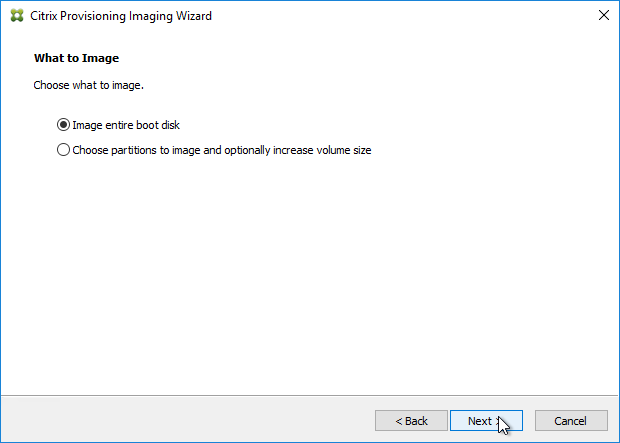
- In the What to Image page, leave it set to Image entire boot disk, and click Next.
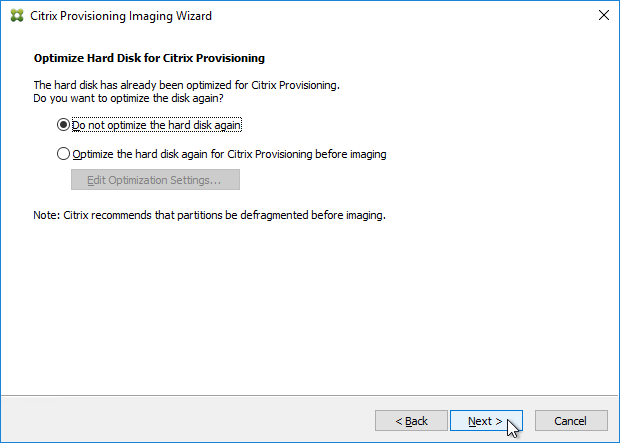
- In the Optimize Hard Disk for Citrix Provisioning page, click Next.
- Shown below are the optimizations it performs.
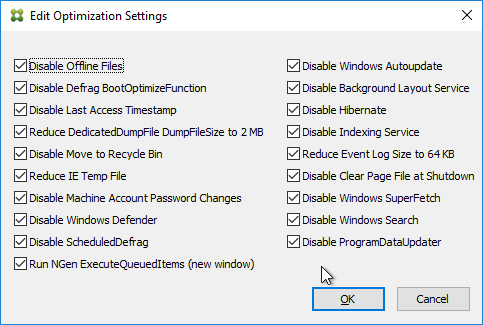
- Shown below are the optimizations it performs.
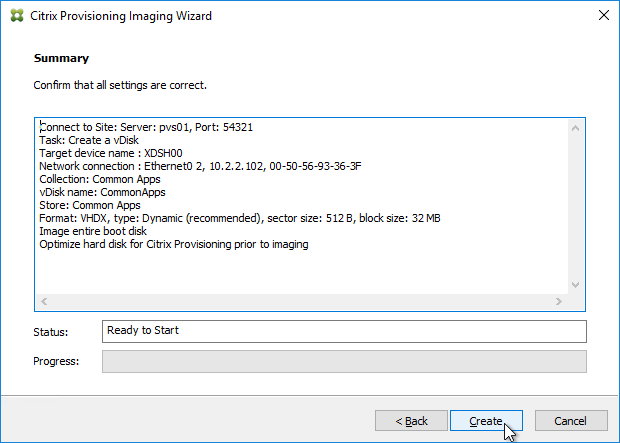
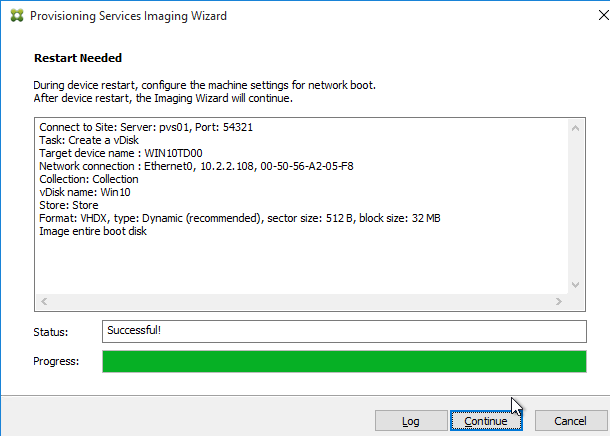
- In the Summary page, click Create.
- In the Restart Needed page, click Continue.
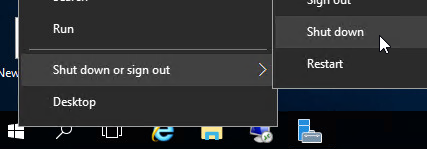
- When asked to reboot, click No.
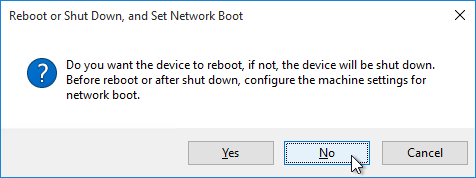
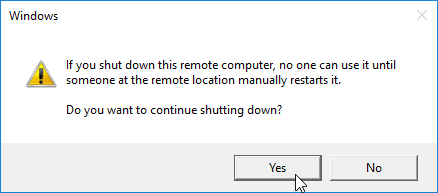
- Then click Yes to shut down the machine. This gives you time to reconfigure the machine to boot from the network or ISO. The vDisk conversion process cannot continue until you are booted from Citrix Provisioning.
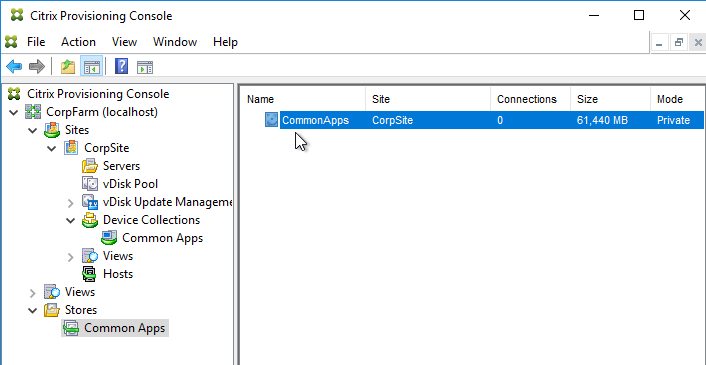
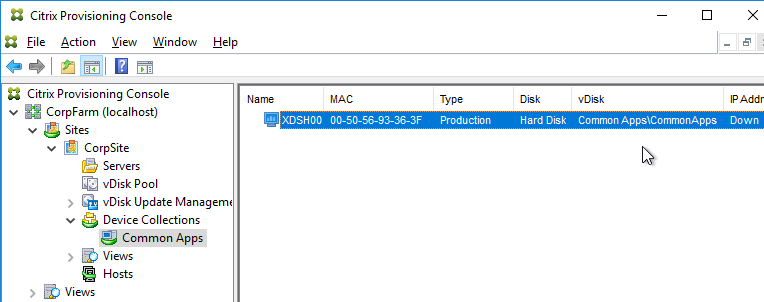
- If you look in the Citrix Provisioning console, in the Store, you will see a new vDisk in Private Image mode. Currently there is nothing in this vDisk. The new vDisk is sized the same as the machine you ran Imaging Wizard from. You might have to Refresh the display to see the new vDisk.
- In the chosen Device Collection, you will see a new Target Device record that is configured to boot from Hard Disk, and is assigned to the new vDisk. You might have to Refresh the display to see the new Device.
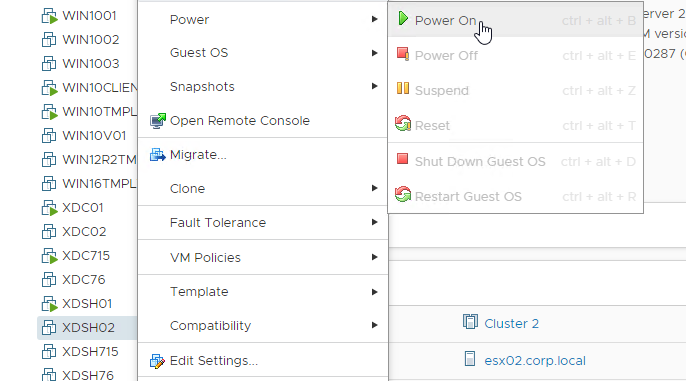
Boot from Network or ISO
- Power off the Target Device.
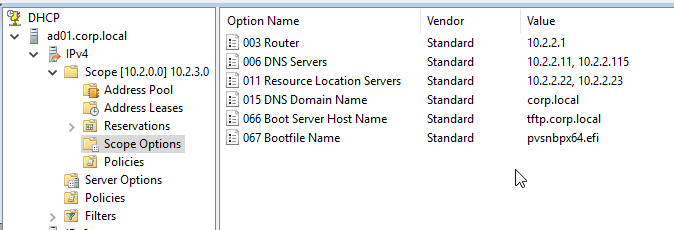
- If the Target Devices are on the same subnet as the Provisioning Servers, then you don’t need to configure DHCP Scope Options 66 or 67.
- EFI/UEFI devices require DHCP Scope Option 11 as described at CTX208519 Configuring PVS for High Availability with UEFI Booting and PXE service. DHCP Scope option 11 can have multiple PVS Server addresses.
- EFI/UEFI devices require DHCP Scope Option 11 as described at CTX208519 Configuring PVS for High Availability with UEFI Booting and PXE service. DHCP Scope option 11 can have multiple PVS Server addresses.
- If the Target Devices are on a different subnet than the Provisioning Servers, then machines can use a Boot ISO that has UEFI enabled. Or configure DHCP Scope Options 66 and 67.
- For DHCP Scope option 66, you can only configure one TFTP Server address. For HA, you can enter a DNS name that does DNS round robin to multiple Citrix Provisioning servers. Or use Citrix ADC to load balance the TFTP service on the PVS servers.
- Configure DHCP scope option 67 with the correct file name. For the EFI file name. See Unified Extensible Firmware Interface (UEFI) pre-boot environments at Citrix Docs.
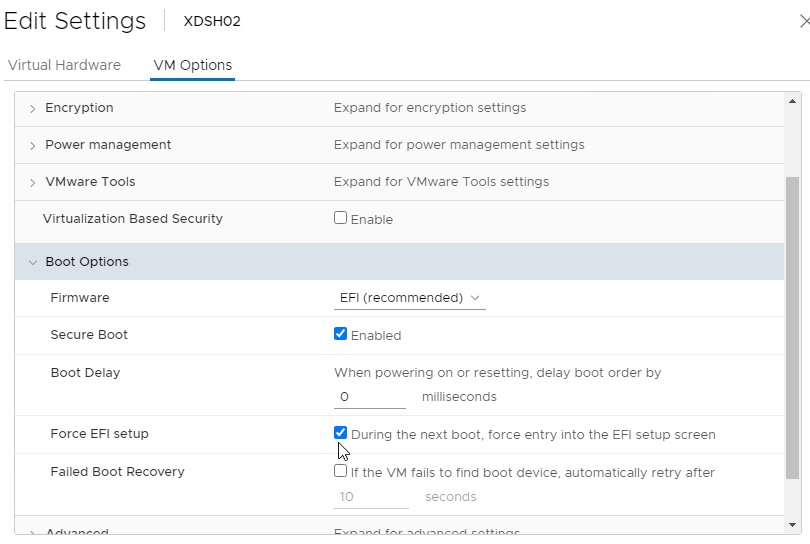
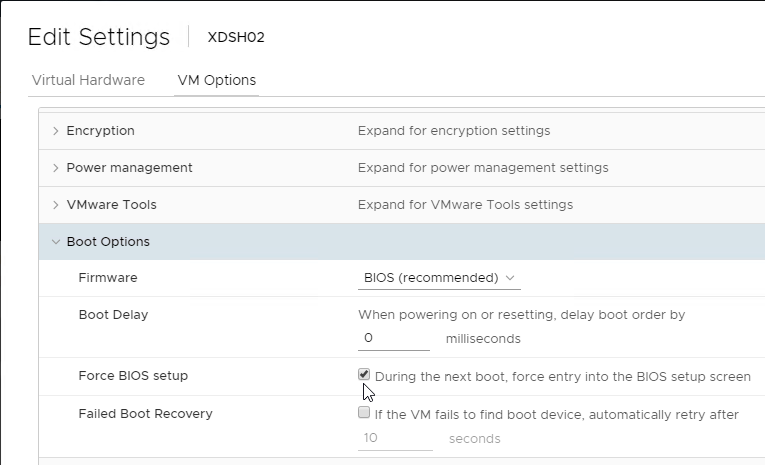
- For vSphere Client, edit the settings of the virtual machine.
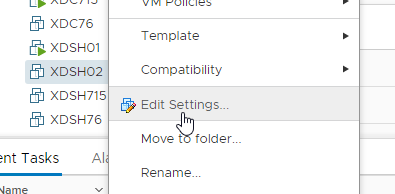
- Switch to the VM Options tab.
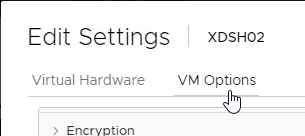
- In the Boot Options section, check the box to Force EFI Setup, or Force BIOS Setup.
- If vSphere, and booting from an ISO:
- Switch to the Virtual Hardware tab.
- Expand CD/DVD drive 1 and connect the virtual machine’s CD to the Datastore ISO File named PvSBoot.iso.
- Make you check Connect At Power On.
- Make sure the CD-ROM is IDE, and not SATA.
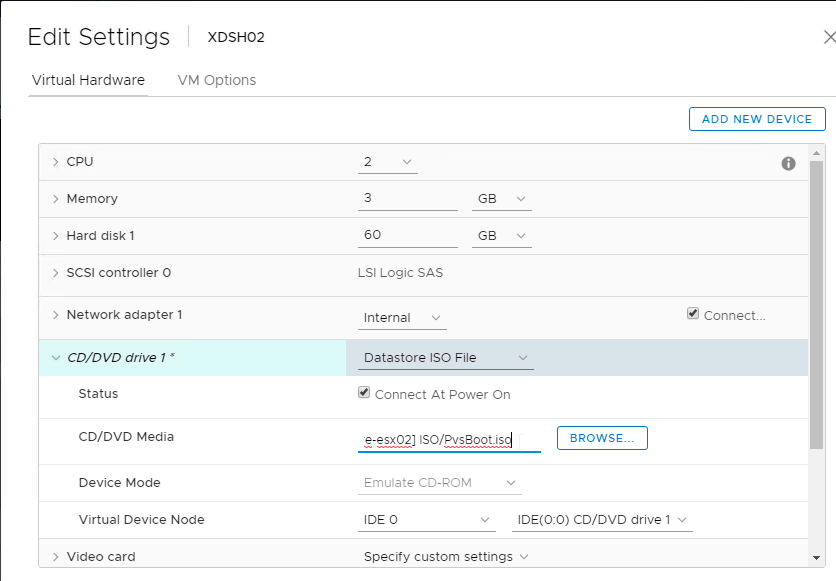
- Also, remove any SATA controller.

- Click OK to close the virtual machine settings.
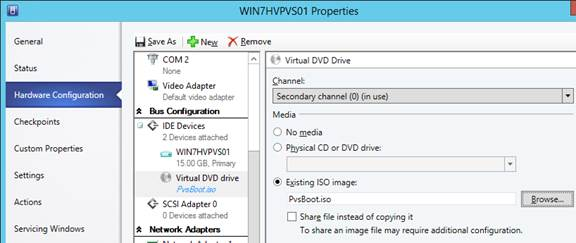
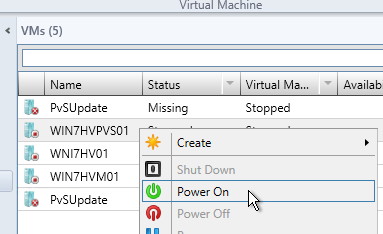
- If Hyper-V:
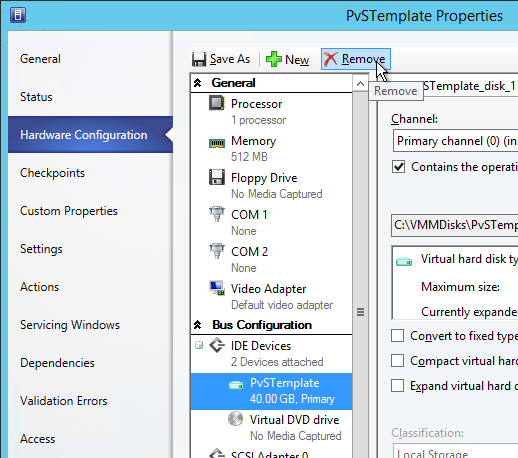
- In VMM, edit the virtual machine properties
- Switch to the Hardware Configuration page.
- If booting from ISO, in the Virtual DVD drive page, assign the ISO from the library.
- Switch to the Hardware Configuration > Firmware page
- Move PXE Boot or IDE Hard Drive to the top.

- Click OK to close the virtual machine properties.
- Power on the virtual machine.
- If vSphere EFI:
- Boot the virtual machine.
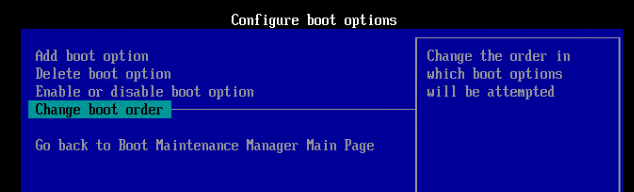
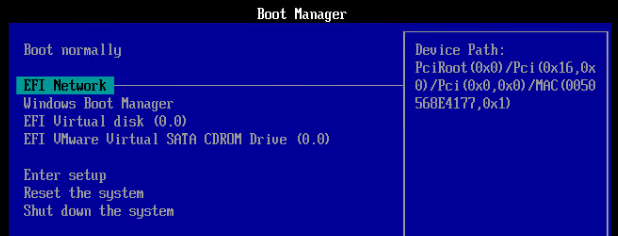
- In the Boot Manager, don’t select a boot option. Instead, go to Enter Setup.
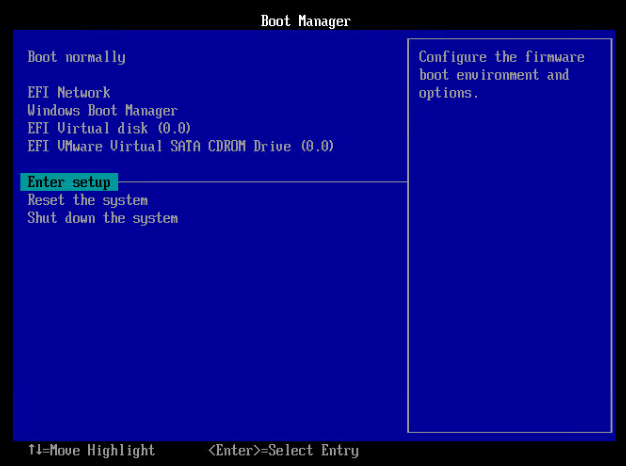
- Go to Configure boot options.
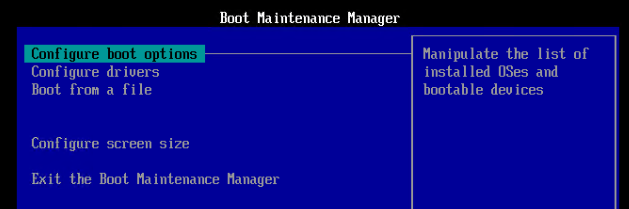
- Go to Change boot order.
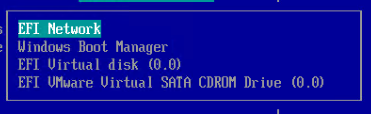
- Press <Enter> on Change the order.
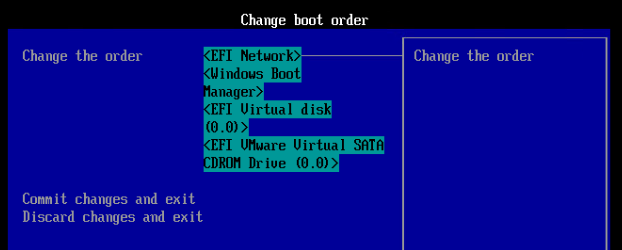
- Use the plus icon on your number pad to move EFI Network to the top.
- Commit changes and exit.
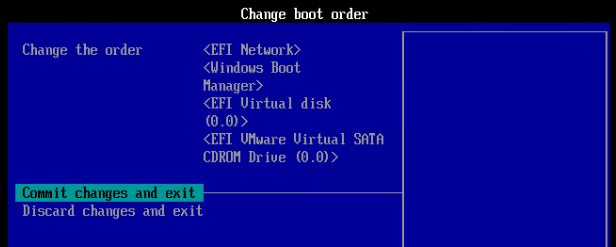
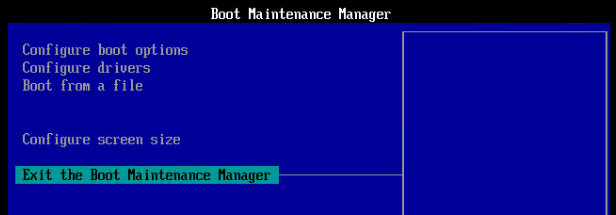
- Exit the Boot Maintenance Manager.
- Now boot from EFI Network.
- If vSphere BIOS:
- Boot the virtual machine.
- In the Virtual Machine’s console, on the Boot tab, move Network boot or CD-ROM Drive to the top.
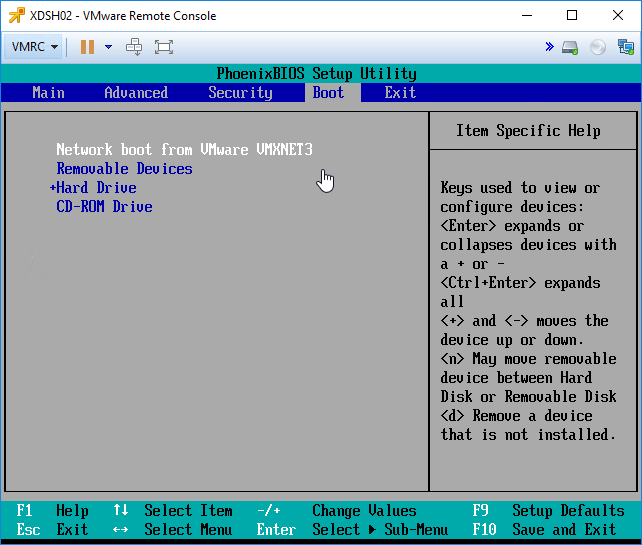
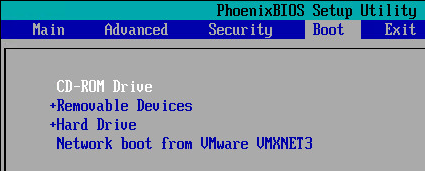
- Press F10 to close the BIOS Setup Utility.
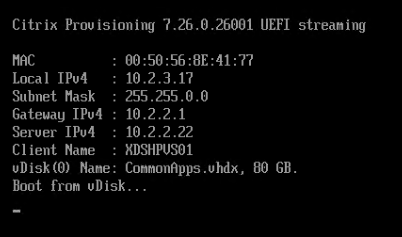
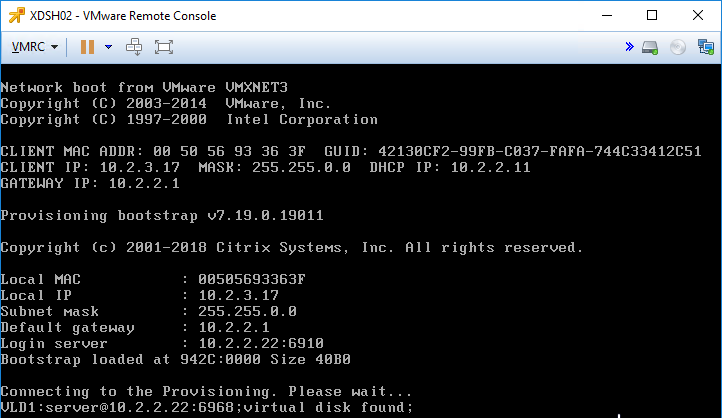
- You should see the virtual machine boot from a Citrix Provisioning server and find the vDisk.
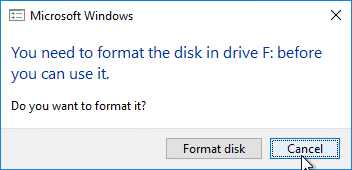
- Once the machine has booted, login. If you see a Format Disk message, just ignore it, or click Cancel. The Imaging Wizard will format it for you.
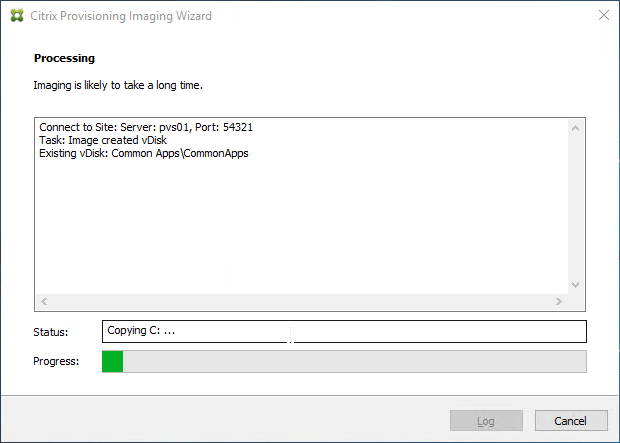
- The conversion wizard will commence. It will take several minutes to copy the files from C: drive (local hypervisor disk) to vDisk (Citrix Provisioning disk) so be patient.
- If the Imaging Wizard does not successfully copy the local drives to the vDisk, first make sure the vDisk is mounted by opening the systray icon.
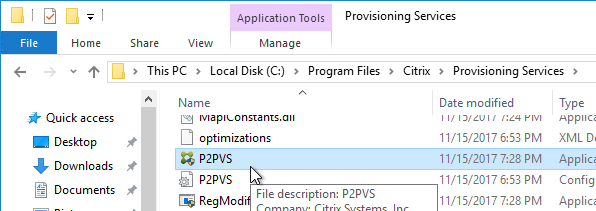
- Then you can manually start the conversion by running C:\Program Files\Citrix\Provisioning Services\P2PVS.exe.

- If the Imaging Wizard does not successfully copy the local drives to the vDisk, first make sure the vDisk is mounted by opening the systray icon.
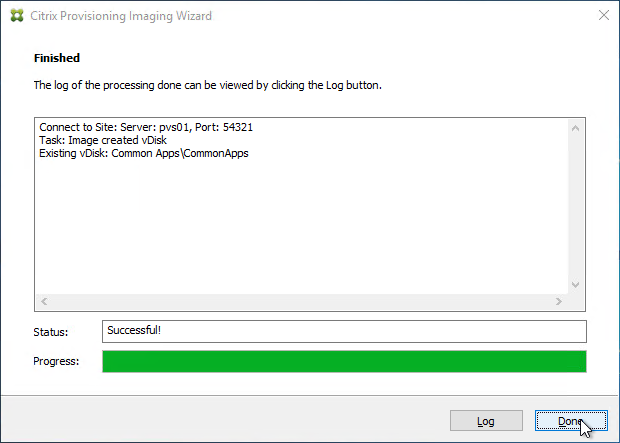
- When done, click Done. It might prompt you to reboot. Reboot it, log in, and then shut it down.
Master Target Device – Join to Domain
Citrix Provisioning must learn the password of the Target Device’s Active Directory computer account. To achieve this, use the Citrix Provisioning Console to create or reset the computer account.
Do not use Active Directory Users & Computers to manage the Target Device computer account passwords. Creating, Resetting, and Deleting Target Device Active Directory computer objects must be done from inside the Citrix Provisioning Console so Citrix Provisioning will know the computer’s password. Citrix Provisioning will automatically handle periodic (default 7 days) changing of the computer passwords.
- In the Citrix Provisioning Console, right-click the new Target Device, expand Active Directory, and click Create Machine Account.

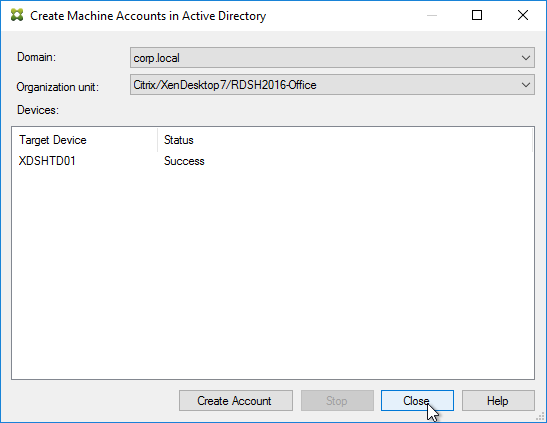
- Select the correct OU in which the Active Directory computer object will be placed, and click Create Account.
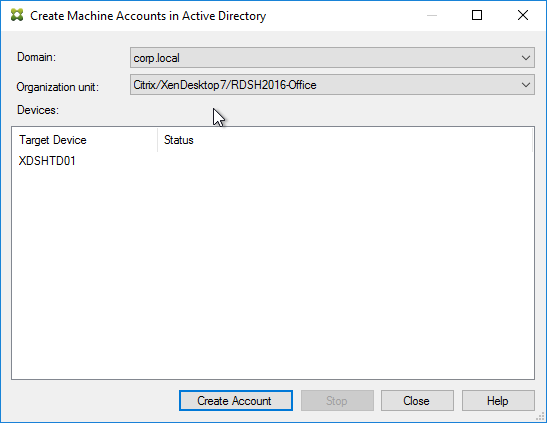
- Then click Close.
Boot from vDisk
- In the Citrix Provisioning Console, go to the Device Collection.
- Right-click the new device, and click Properties.
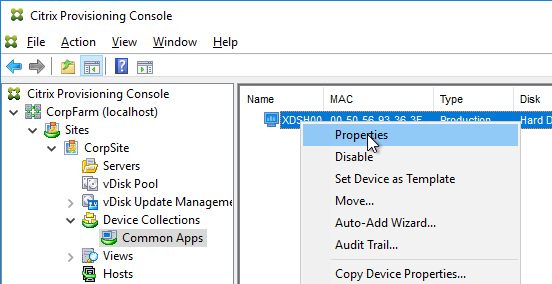
- On the General tab, set Boot from to vDisk.
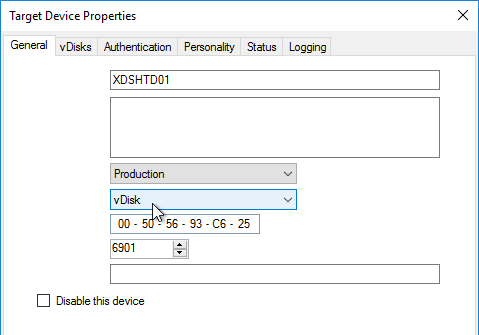
- Restart the Target Device.
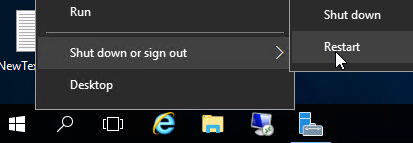
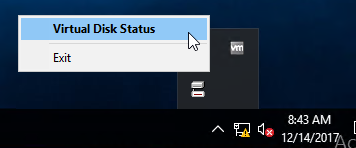
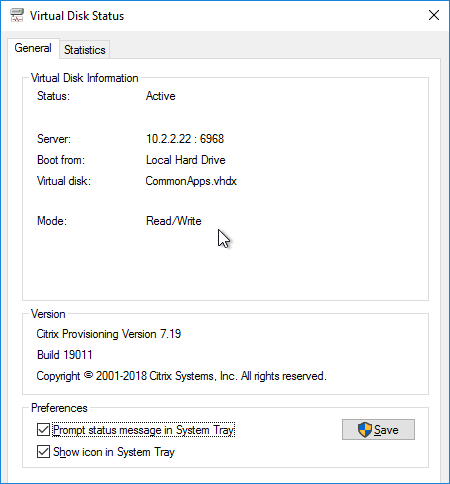
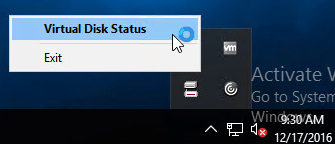
- At this point it should be booting from the vDisk. To confirm, in the systray by your clock is an icon that looks like a disk. Double-click it.
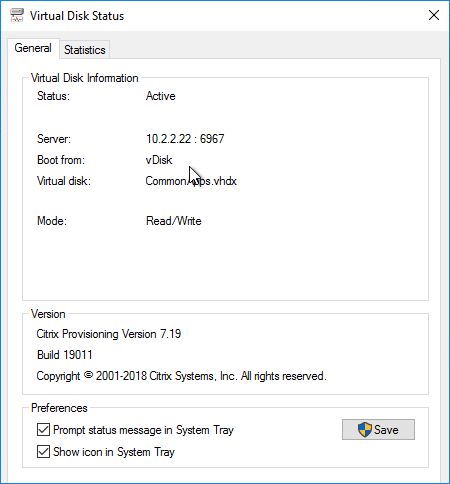
- The General tab shows it Boot from = vDisk, and the Mode = Read/Write.
vDisk – Save Clean Image
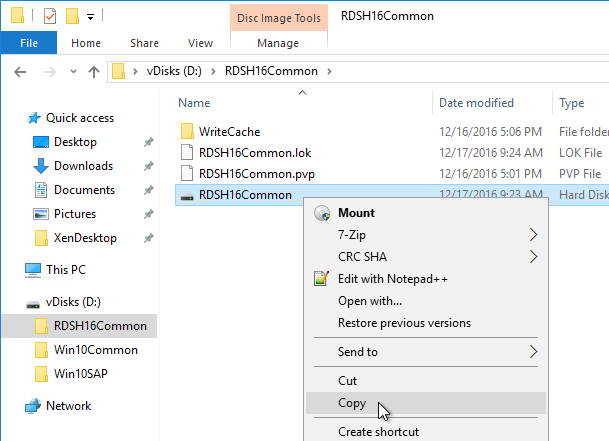
If you have not yet installed applications on this image, you can copy the VHDX file and keep it as a clean base image for future vDisks.
- If this vDisk is in Private Image mode, first power off any Target Devices that are accessing it.
- Then you can simply copy the VHDX file and store it in a different location.
If you later need to create a new vDisk, here’s how to start from the clean base image:
- Copy the clean base image VHDX file to a new folder.
- Rename the file to match your new Image name.
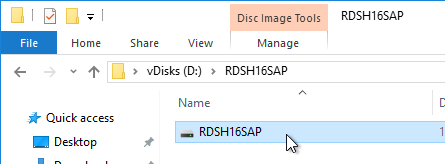
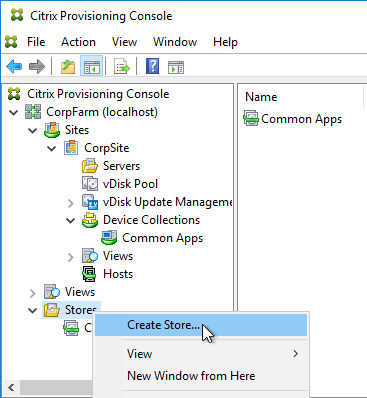
- In the Citrix Provisioning Console, create a new Store, and point it to the new folder.
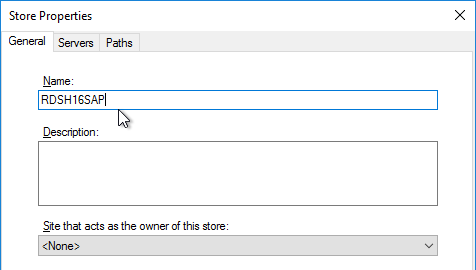
- Give the new Store a name.
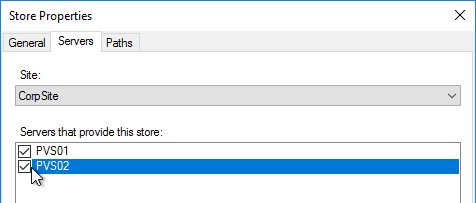
- On the Servers tab, select all Provisioning servers.
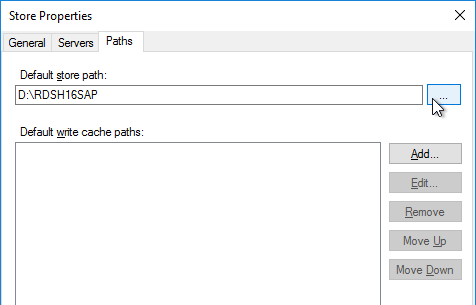
- On the Paths tab, enter the path to the new folder. Click OK.
- Click OK when asked to create the default write cache.

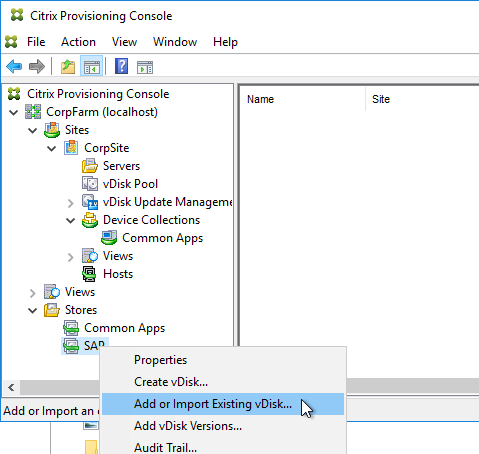
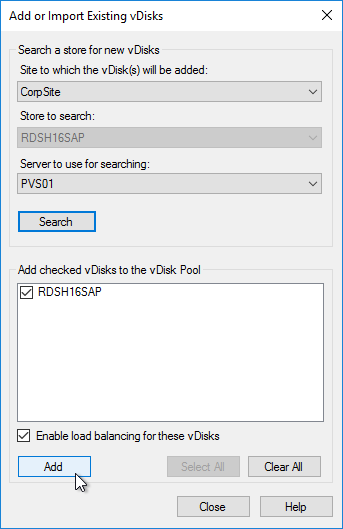
- Right-click the new store and click Add or Import Existing vDisk.
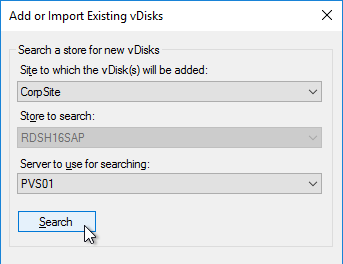
- Click Search.
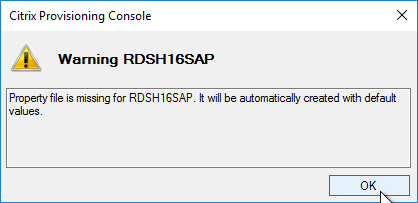
- Click OK if prompted that a new property file will be created with default values.
- Click Add, click OK, and then click Close.
- You can now assign the new vDisk to an Updater Target Device and install applications.
KMS
Skip this section if you are using Active Directory-based Activation instead of KMS Server.
This only needs to be done once. More information at CTX128276 Configuring KMS Licensing for Windows and Office.
- Make sure the Citrix Provisioning services are running as an account that is a local administrator on the Provisioning Servers. Citrix Provisioning needs to mount the vDisk but only local administrators can mount VHDX files.
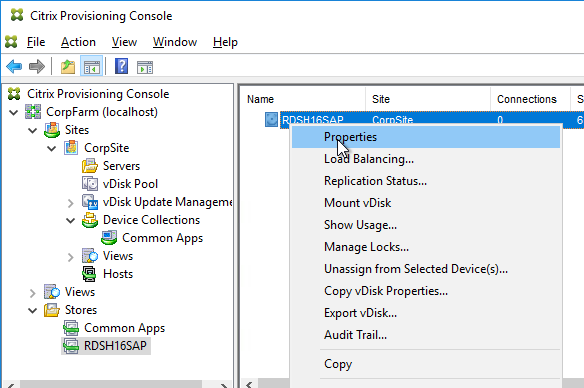
- In the Citrix Provisioning Console, right-click on the virtual disk, and select Properties.
- Click on the tab named Microsoft Volume Licensing, and set the licensing option to None. Click OK.

- Boot an Updater device from the vDisk in Private Image mode.
- Login to Windows and rearm the system for both Windows and Office, one after the other.
- For Windows Vista, 7, 2008, and 2008R2: Run cscript.exe slmgr.vbs -rearm
- For Office (for 64-bit client): C:\Program Files(x86)\Common Files\Microsoft shared\OfficeSoftwareProtectionPlatform\OSPPREARM.EXE
- For Office (for 32-bit client): C:\Program Files\Common Files\Microsoft shared\OfficeSoftwareProtectionPlatform\OSPPREARM.EXE
- A message is displayed to reboot the system, DO NOT REBOOT- Instead, run sealing tasks and then shut down the Target Device.
- In the Citrix Provisioning Console, right-click on the virtual disk, and select Properties.
- Click on the tab named Microsoft Volume Licensing, and set the licensing option to Key Management Services (KMS).
- In Citrix Provisioning 1906 and newer, also check the box next to Accelerated Office Activation.
- Click OK.

Note: After streaming the vDisk to multiple Target Devices, Administrators can validate that the KMS configuration was successful by verifying that the CMID for each device is unique.
- For Windows: Run cscript.exe slmgr.vbs –dlv
- For Office: Run C:\Program Files\Microsoft Office\Office16\cscript ospp.vbs /dcmid
Also see Citrix Blog Post Demystifying KMS and Provisioning Services
vDisk – Seal
Do the following sealing steps every time you switch from Private Image mode to Standard Image mode, or promote a Maintenance Image to Test or Production.
- Run antivirus sealing tasks. See VDA > Antivirus for links to various antivirus vendor articles.
- Citrix Blog Post Sealing Steps After Updating a vDisk contains a list of commands to seal an image for Citrix Provisioning.
- Citrix Blog Post PVS Target Devices & the “Blue Screen of Death!” Rest Easy. We Can Fix That has a reg file to clear out DHCP configuration.
- Shut down the target device.
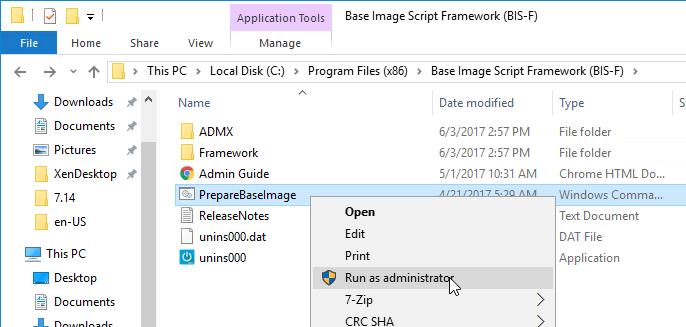
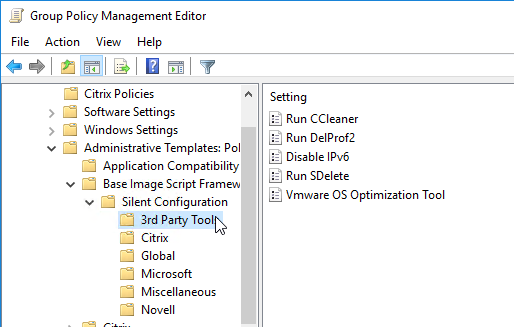
- Note: Base Image Script Framework (BIS-F) automates many sealing tasks. The script is configurable using Group Policy.
Defrag the vDisk
In the Citrix Blog Post Size Matters: PVS RAM Cache Overflow Sizing, Citrix recommends defragmenting the vDisk.
If the vDisk was created by App Layering ELM, then Gunther Anderson at Performance considarations? at Citrix Discussions says there’s no point in doing a defrag.
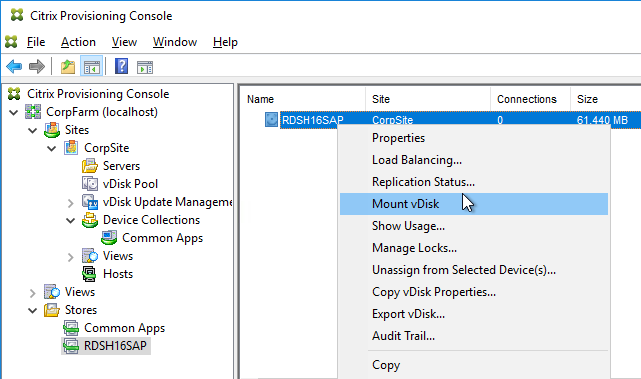
- While still in Private Image mode, right-click the vDisk, and click Mount vDisk.
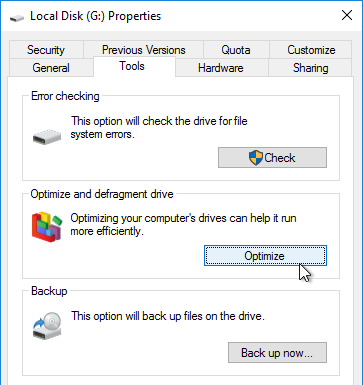
- In File Explorer, find the mounted disk, right-click it, and click Properties.

- On the Tools tab, click Optimize.
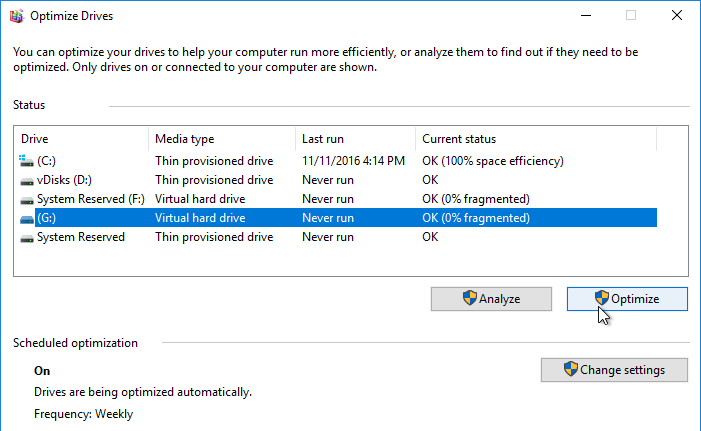
- Highlight the mounted drive and click Optimize.
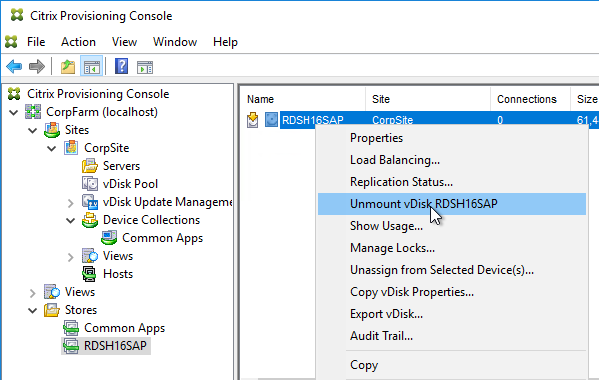
- When done, back in Citrix Provisioning Console, right-click the vDisk, and click Unmount vDisk.
Standard Image Mode
- In the Citrix Provisioning Console, go to the vDisk store, right-click the vDisk, and click Properties.
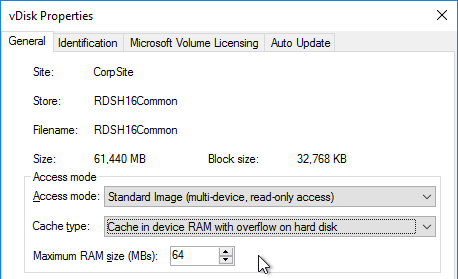
- On the General tab:
- Change the Access Mode to Standard Image.
- Set the Cache Type to Cache in device RAM with overflow on hard disk. Don’t leave it set to the default cache type or you will have performance problems. Also, every time you change the vDisk from Standard Image to Private Image and back again, you’ll have to select Cache in device RAM with overflow on hard disk.
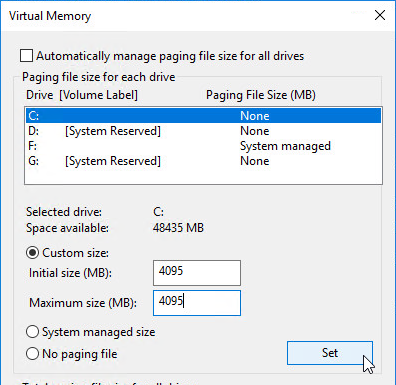
- Change the Maximum RAM size to a higher value. For virtual desktops, set it to 512 MB or larger. For Remote Desktop Session Hosts, set it to 4096 MB or lager. Make sure your Target Devices have extra RAM to accommodate the write cache.
- On the bottom of the General tab is a new checkbox to disable cleanup of cached secrets. By default, Citrix Provisioning 7.12 and newer will delete any cached credentials. This behavior can be disabled by checking the box.
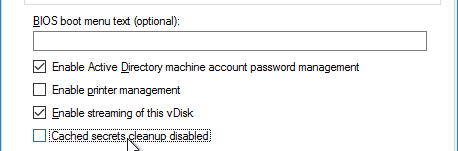
- Click OK when done.
vDisk – High Availability
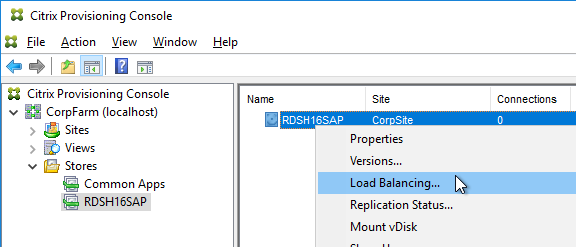
- In the Citrix Provisioning Console, right-click the vDisk, and click Load Balancing.
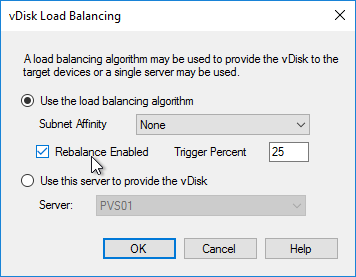
- Ensure Use the load balancing algorithm is selected. Check the box next to Rebalance Enabled. Click OK.
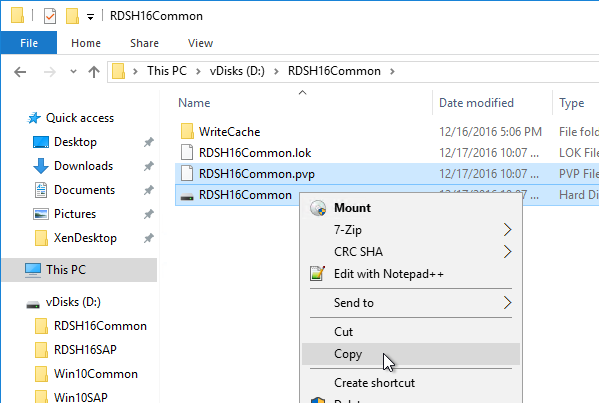
- Go to the physical vDisk store location (e.g. D:\Win2016Common) and copy the .vhd and .pvp vDisk files for the new vDisk. Do not copy the .lok file.
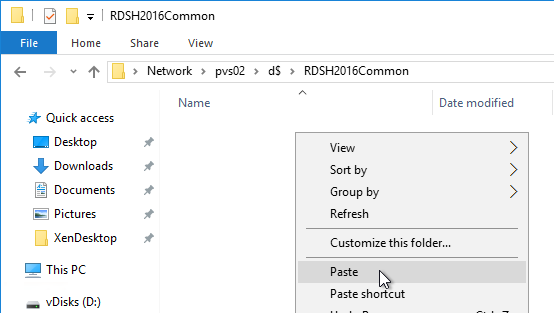
- Go to the same path on the other Provisioning Server and paste the files. You must keep both Provisioning Servers synchronized.
- Another method of copying the vDisk files is by using Robocopy:
Robocopy D:\vDisks\ \\pvs2\d$\vDisks *.vhd *.avhd *.pvp *.vhdx *.avhdx /b /mir /xf *.lok /xd WriteCache /xo
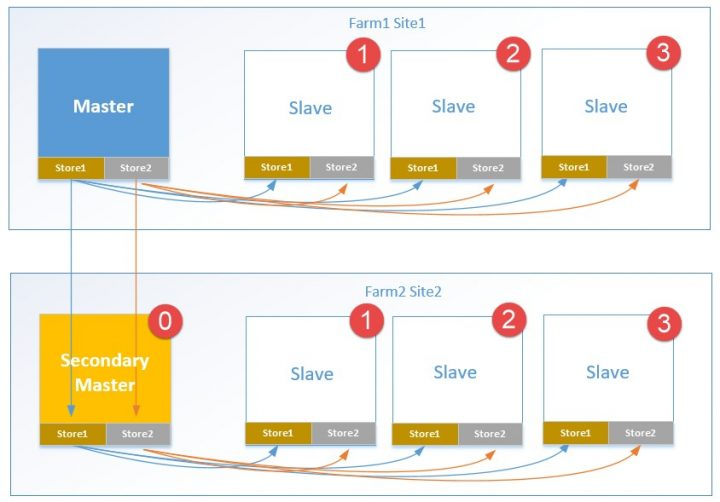
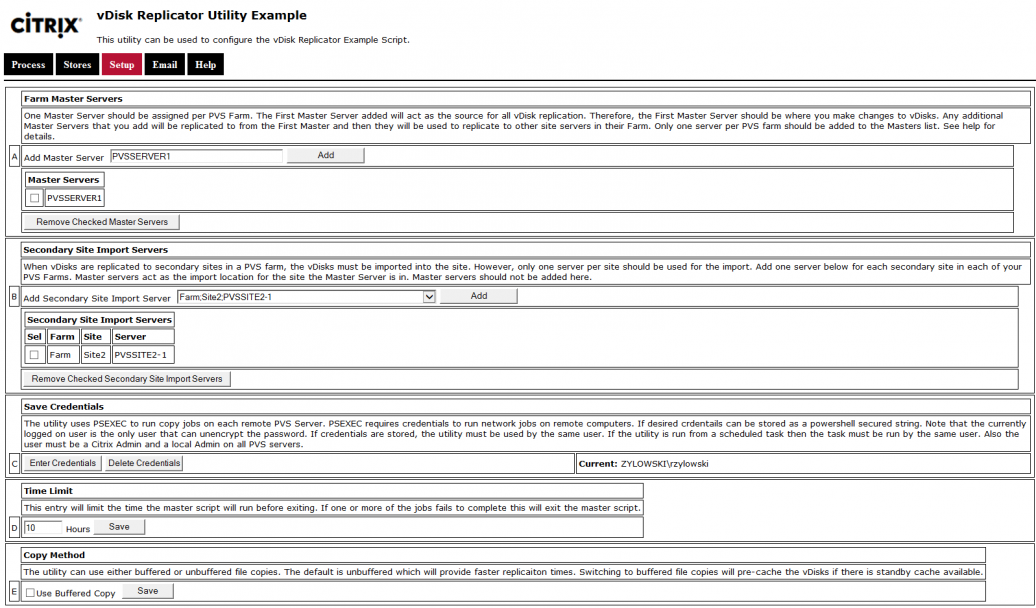
- Citrix Blog Post The vDisk Replicator Utility is finally finished! has a GUI utility script that can replicate vDisks between Citrix Provisioning Sites and between Citrix Provisioning Farms.
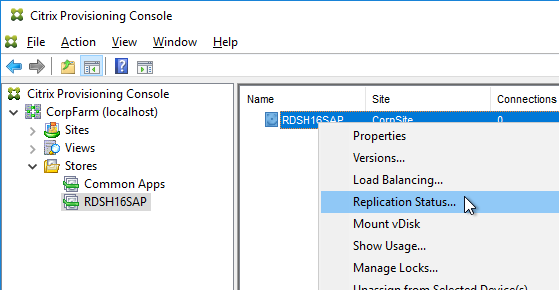
- In the Citrix Provisioning Console, right-click the vDisk, and click Replication Status.
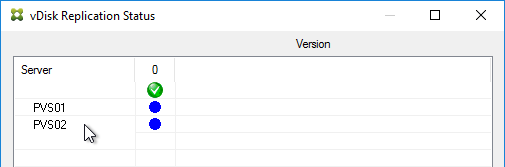
- Blue indicates that the vDisk is identical on all servers. If they’re not identical then you probably need to restart the Citrix PVS Stream Service and the Citrix PVS SOAP Service. Click Done when done.
Cache Disk – vSphere
Here are vSphere instructions to remove the original C: drive from the Master Target Device, and instead add a blank cache disk.
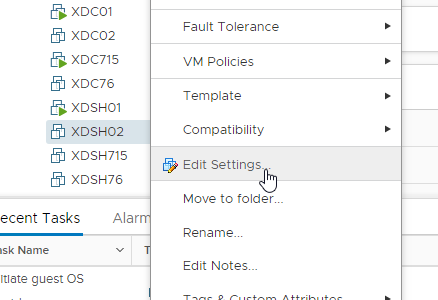
- In vSphere Client, right-click the Master Target Device, and click Edit Settings.
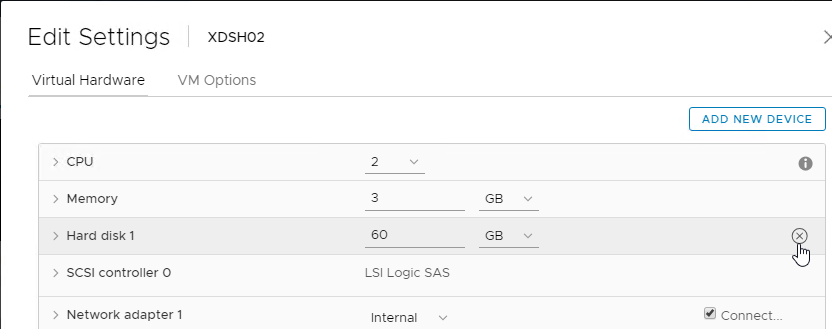
- Select Hard disk 1, and click the x icon. Click OK.
- Edit the Settings of the virtual machine again.
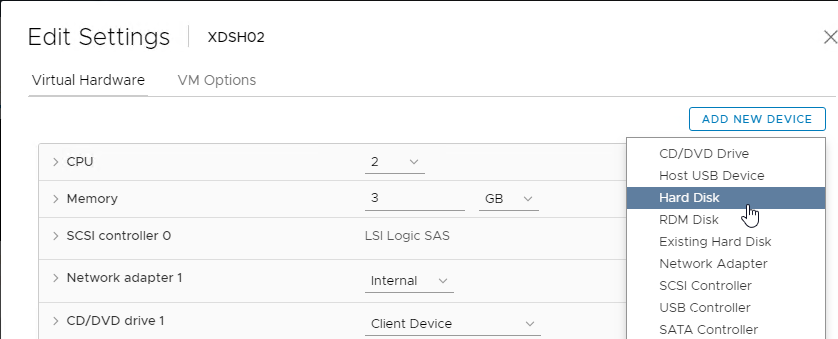
- On the top right, click Add New device, and select Hard Disk.
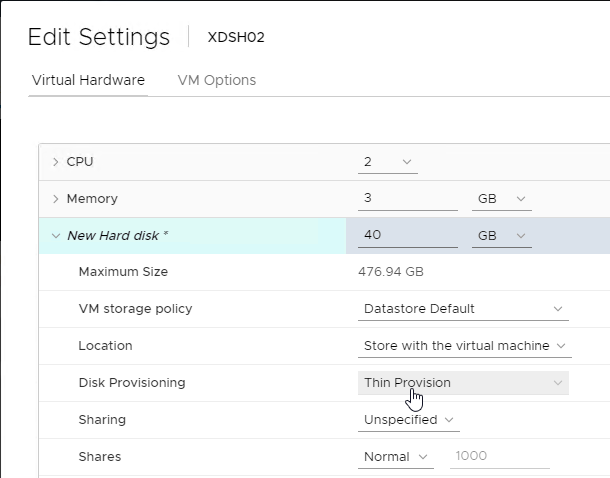
- This is your cache overflow disk. Size is based on the type of VDA.
- 40 GB is probably a good size for session hosts.
- For virtual desktops this can be a smaller disk (e.g. 5 GB).
- Note: the pagefile must be smaller than the cache disk.
- Expand the newly added disk, and set Disk Provisioning to Thin provision if desired. Click OK when done.
- Configure group policy to place the Event Logs on the cache disk.
- Boot the Target Device and Verify the Write Cache Location.
Cache Disk – Hyper-V
Remove the original C: drive from the Target Device and instead add a cache disk.
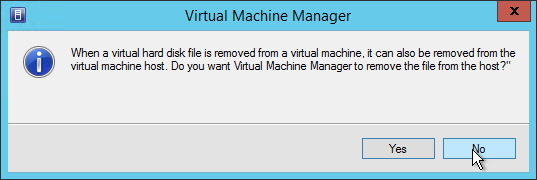
- Edit the settings of your Citrix Provisioning master virtual machine and remove the existing VHD.
- Make a choice regarding deletion of the file.
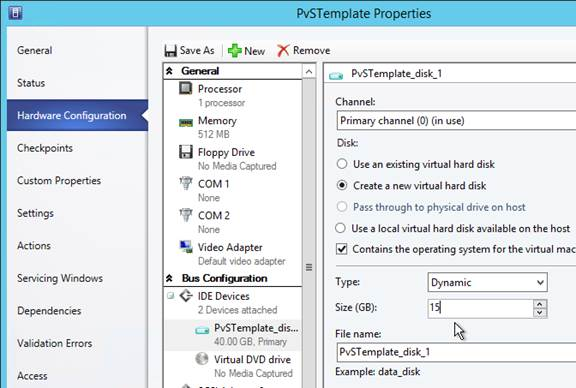
- Create a new Disk.
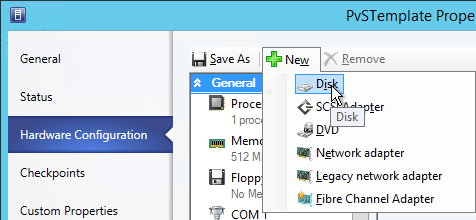
- This is your cache overflow disk. 15-20 GB is probably a good size for session hosts. For virtual desktops this can be a smaller disk (e.g. 5 GB). Note: the pagefile must be smaller than the cache disk. Click OK when done.
- Configure group policy to place the Event Logs on the cache disk.
Verify Write Cache Location
- Boot the target device virtual machine.
- Open the Virtual Disk Status window by clicking the Citrix Provisioning disk icon in the system tray by the clock.
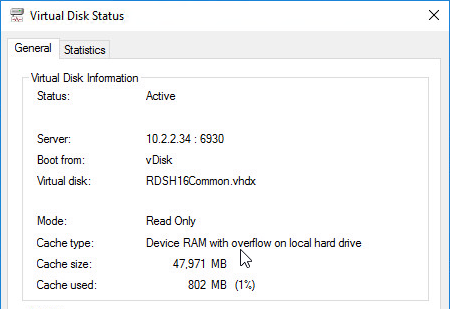
- Make sure Mode is set to Read Only and Cache type is set to device RAM with overflow on local hard drive.
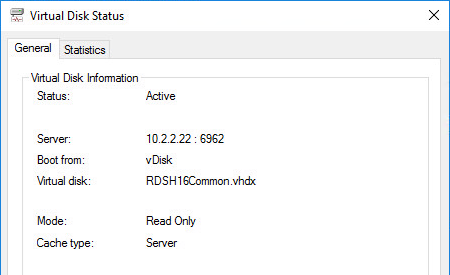
- If Cache type says server, then follow the next steps:
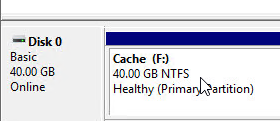
- For the cache disk, if machine uses BIOS, then only MBR is supported. GPT only works with EFI/UEFI machines.
- The cache disk must be a Basic disk, not Dynamic.
- Format the cache disk with NTFS.
- Make sure the pagefile is smaller than the cache disk. If not it will fail back to server caching.
- After fixing the problem and rebooting, the Cache Type should be device RAM with overflow on local hard drive.
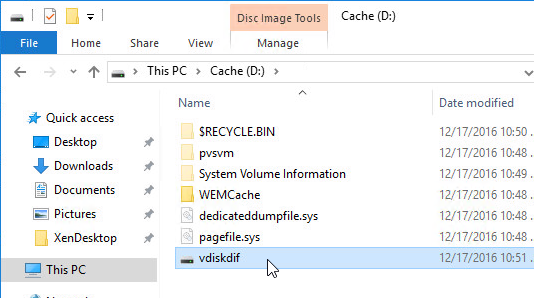
- To view the files on the cache disk, go to Folder Options, and deselect Hide protected operating system files.
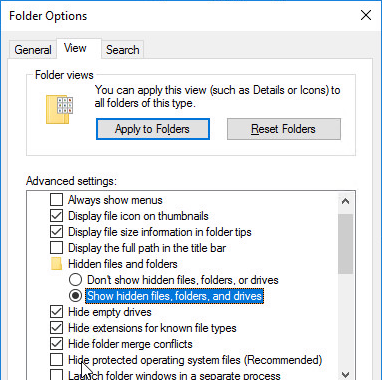
- On the cache disk, you’ll see the pagefile, and the vdiskdiff.vhdx file, which is the overflow cache file.
Hi Carl!
I kind of hope you could help me with this one.
Im having issues with page file redirection to cache disk on Windows Server 2019. The issue behaves exactly as described in https://support.citrix.com/article/CTX241494, Im aware this is only Windows 10 1803 but it behaves the same way.
I have been working on this for a couple of days now and tried everything (it feels like) but i cant get it to work. The page file is not redirected to the cache disk. This is the first time im doing this with WS2019 but i have done it several times on 2012 and 2016 so i know the steps.
The components are Citrix Hypervisor 8.2, Provisioning Services 2009 on Windows Server 2019 Datacenter, Target device software at same version and Target devices on Windows Server 2019 Datacenter.
I have created Windows 10 Target Devices in the same environment with no issues regarding page file redirection.
Do you have any tips on how to troubleshoot this?
Are you setting the pagefile maximum size? If so, is it smaller than the free space on the cache disk?
Yes, im setting Initial size and Maximum size to the same amount (8192MB). The Cache disk is 40GB with enough free space. The vdiskdif file is written to the cache disk and i also redirected log files here.
You aren’t the only one. Citrix also states GPT isn’t supported in multiple KBs. (CTX139478, CTX219743) Is it bad that I trust your documentation over what Citrix publishes? They have never really kept up to date or consistency in the last 20 years with documentation.
I still see guidance to not use GPT for write cache. “For the cache disk, only MBR is supported. GPT will not work.” However, we recently built a Windows 2016 with UEFI that requires GPT and the write cache seems to still work as I caused RAM to overflow to disk. Can I assume this information is old and I am safe to use GPT for write cache or do I need to convert to MBR?
I appear to be deficient in EFI instructions. I just tested write cache and it seems to work with GPT and UEFI.
Hi Carl
We have a situation where we are migrating the PVS environment from one data center to another data center, where we will be having a new KMS server (new Hostname and IP)
So can you please let me know if the below steps are sufficient for the successfully update the KMS
1) On Vdisk properties set Microsoft Volume Licensing tab and set the licensing option to None, Put the Vdisk in private mode and boot the server (Windows 2012R2)
2) Rearm the Office 2013 %ProgramFiles%\Microsoft Office\%Office%\OSPPREARM.EXE
3) rearm the Vdisk, Run cscript.exe slmgr.vbs -rearm
4) shutdown the Vdisk , set the licensing option to KMS in Vdisk properties
5) Stream Vdisk to boot multiple images
let me know any further steps needs to be taken care.
If your vDisks already have KMS enabled, then you shouldn’t have to do this again. The Targets should find KMS using DNS. Just copy the vDisk and .pvp files.
Note: Active-directory based activation tends to be more reliable than KMS.
Hi Carl
Thanks for the reply, in continuation with my query if the Vdisk is already in use in th new DC (it’s been streamed to many servers) with KMS1 server and then we want to update the KMS server to new hostname KMS2 do we need to follow the rearm process or still the target will find the KMS.
If you used the slmgr.vbs /skms command, you should be able to run it without changing KMS settings in PVS.
If you’re not doing /skms, then it will use DNS to find the KMS server.
The Citrix Provisioning KMS setting instructs PVS to remove the CMID when switching the vDisk to Standard Image mode. That shouldn’t have any effect on what KMS server it uses.
Hi Carl, a lil bit confused here. I followed your guide to convert master target device (Pre-built with apps etc) and created a Vdisk which is showing 2 extra drives G: is same size as C: so i’m guessing that’s the duplicated OS partition and H: says System reserved. Don’t have the luxury of rebuilding the VM so what can i do to rectifiy this please?
Which drives contain the partitions you’re looking at? The vDisk drive should only have the partitions that you converted from the original machine. The machine’s local drive should be blank, or near blank, and should only be used for caching, assuming you’re booting from the vDisk drive.
So the writecache doesn’t get created and not shown when i mount the vdisk or when i assign it to a shell VM. Starting all over now VM is set at 100gb and 40 for write cache (formatted as NTFS) pagefile configured on C with a static size. Looking at https://support.citrix.com/article/CTX125740 it does reference where to set your System drive and write cache on step 7 but i didn’t see that option in CVAD 1912 when running the imagine wizard. I also got the “Windows created a temporary warning” when i first fired up the VM
Also, is it worth completely removing the 2nd hard drive from the VM before capturing the vdisk?
I usually don’t add a second disk until I’m booting from the vDisk. The second disk is only for caching and serves no purpose without vDisk booting.
Hi Carl, Not sure how you manage to patiently answer all the queries and questions here but excellent work! We find all your how-to articles super useful. My query though, is that after creating a new Gold Image and vDisk, I seem to have more than few drives in my vDisk when try to make a change in it in maintenance mode. When I compare it with the existing Gold Image in Production, it has two extra drives!
PVS creates a cache disk for storage of memory cache overflow. But that’s only one disk. MCS might have a second disk for identity info but Citrix Provisioning does not need an identity disk. By drive, do you mean separate disks? Or do you mean extra partitions on one disk?
Yeah extra disk on the Master Device. when I create a new version of vDisk and put it to maintenance mode to apply my changes, I get duplicates of System reserved and System drive! Is there a step where we have to drop (or make offline) the original disk attached to the Master device! While I have your attention, can I also squeeze another questions in; when I put the vDisk in test mode and try it on a different Target device, I get the blue screen. Is that because my Target device was not created with this new Master Device shell?
I assume you copied a template to create your Target Device. That template probably has a drive that has Windows installed. I would reconfigure the template with a blank disk (no Windows).
Blue screens are usually because the hardware and disk assignments on the second target device don’t match the first. I usually remove the drive from the original master. Add a new blank drive for caching. Then clone the master to additional target devices so the new target devices have the same hardware as the original master.
Built a brand new VM and used it to create a new vDisk, then formatted the VM disk to a big enough drive for Pagefile, Cache and diff disk. That sorted the duplicated volumes.Thanks.
As for the blue screen, the intention is to assign the new vDisk to all the existing target devices; It would save me heaps of time if I didn’t have to create a new template and series of new target devices off that template.
Citrix Provisioning has a Wizard that can clone your template so you don’t have to do it manually.
Hi Carl, I am using this to learn about Citrix and PVS (1912). Is there any chance you could create a flowchart on the whole PVS process. I am finding it hard to follow the steps.
Richard.
https://www.carlstalhood.com/provisioning-services/ shows the typical order of implementation.
There is some design info at https://docs.citrix.com/en-us/provisioning/current-release/architecture.html and https://docs.citrix.com/en-us/xenapp-and-xendesktop/7-15-ltsr/citrix-vdi-best-practices/design/design-userlayer4.html#provisioning-services-2
Hi Carl
What would be the configuration to force PVS to use a specific drive (disk) for “Write cache”.
We do not want it to be written to the first available drive-letter “D:\”, because this disk is already designated for other fuctions.
The idea is to force it on for example “G:\”, which might be the third disk on the client device
Try this – https://discussions.citrix.com/topic/334593-move-writecache-file-to-arbitary-drive/page/2/#comment-1772156
Thanks carl.
The configuration did the magic, only more than I was expected.
I was hoping to keep my drive letters as they were, but the configuration rearranged these.
This would have an effect on the application already programmed.
The changes is required on already provisioned persistent desktop-VDA. Thought the changes would be much transparent to users.
PVS just want to use a lower letter drive.
Hi Carl, Hope you are doing fine.
I have setup a 7.15 LTSR CU3 citrix farm with PVS, we have a created a Vdisk , but he client requirement is to have an additional Drive N of 10GB to be part of the Vdisk/image how do we go abt doing it?
We tried the below…
We have SCSI drives and HP Simplivity HCI platform, we added a additional Drive to the VM Template which shows up but when the client installs his applications on C Drive(vDisk) there are few application data which has to go to the N Drive 10GB, but in the Master Target server the N drive get the data but the VMs provisioned from the target device/Template does not carry the application data in the N Drive. Any suggestions please, as we are running short of deadline to fix this issue. Appreciate your quick help.
Are you using the XenDesktop Setup Wizard? If so, see https://support.citrix.com/article/CTX237313
Yes we are using XenDesktop Setup Wizard (XDSW), with BDM, and we have already used the registry entry and set it to 0. We have two drives in the VM Template one is D drive of 40GB for Write Cache and N Drive of 10GB , when we run the XDSW we set the Write cache to 0 when prompted by the XDSW, both the D and the N drives are showing up in the Provisioned VMs come from the Template but still the user says that when he installs the Application on the Master target device,with the vdisk in private mode, the Application data goes to the N Drive but the same Application data does not show up in the N Drives of the Provisioned VMs from the same vDisk and VM Template.
Thank you for your quick response Carl.
Is the N partition on the same disk as the C partition?
No,N drive is a separate Drive just like the D drive , both the drives are in the VM which we converted to a template , using VCenter.
The vDisk you update only contains the C: partition. To update the other partitions on other disks, you’d need a script or similar to copy files to every target device.
Thank you Carl, we added additional space to the C drive,created two partition in it one with C drive 80 GB and one with N drive 10 GB and we were able to select both the partition while running the imaging wizard and it created both the drives and it solved our issue.
Thank you for all your support. Much appreciated.
Someone that have success with creating a pvs image of a server 2019 yet? I have done everything, the image is creating correct and i can stream this image, but the problem accour when i boot it in standard mode, when i log in the system just say that there is a problem with the pagefile setup. But if i boot it in private mode, the pagefile is correct. This is because when i standard it try to move it to the next writable letter, but it just cant put it there or something else. If i look in pagefile properties there you set all this, i can see that system have removed all the pagefiles. Nothing is ticked, so it says NONE on c-drive and d-drive (cache disk)
Just after 2019 install i took a server 2016 iso and created an empty machine and make a vhdx file, that worked well and then i streamed it and the pagefile was correct in standard mode. I did the exact same procedure when installing both operating systems and also the rest with imageing and pvs stuff, there must be something with server 2019. I have tried 7.15 CU3, 7.18 and 1808, all the same.
I use same target device in PVS so it is same write cache disk, so i dont thing there is a problem with the target either.
Anyone, please put me in the right direction here, i have spent many days now to solve this and i feel that i have tested everything. I dont have more things now in my mind that i can do as test.
I have the same issue with Windows 10 Release 1809. From my point of view this is related to the new OS releases. 3 days testing and no idea how to fix this problem. Imaging to vdisk and Streaming to the tragt device works fine, but the system always complans about the pagefile.
I rellay hope someone else has an idea…
Kind regards,
Marco
It seems the problem is caused by VMware´s hotplug capabilities. The vm harddisk / controller is recognized as hot-plugable, which does not allow to locate a pagefile on it. If you define the VM advanced config Parameter according to https://kb.vmware.com/s/article/1012225, PVS will able to redirect the pagefile to the write cache disk.
Carl, I’ve completed the P2PVS option for creating the vhdx vdisk (I also completed with imaging wizard to same effect). The hard disk boots fine, (no sata drive on vm). When I get to the step of changing the target device back to boot from Vdisk (instead of hard disk), everything starts to load fine. However, following the windows icon the image blue screens with an error of “system thread exception not handled”. Which seems to be such a generic error code. Have you seen this? When I’m booted to the hard disk, and vdisk is showing attached on the vdisk status, I can browse the newly copied volume without issue.
Right, I noticed that was a typical symptom or cause in the other comments. I should have included in my statement below that there is NO sata controller connected. Nor has there ever been. Any other thoughts?
chris hoyle says:
September 27, 2018 at 10:58 am
I’m having a similar issue. Post TD installation, I’m setting the vm to boot to cd (ide0:0). In pvs the TD is set to boot to Hard disk with the new disk assigned. I don’t understand this method, but I assume it has to do with booting to the hard disk getting the new, blank vDisk mounted. During the initial boot, it connects to pvs and finds the vDisk, but just stalls at that point. Will not go into the rest of the boot process. Any thoughts what could cause this? Boots fine to the hard disk, and upon logging in, the imaging wizard will continue to prompt “imaging process didn’t start, do you want to restart again”
Hello Carl,
I have an environment with single PVS server and local vdisk storage running PVS 7.18 on Windows Server 2016 under Hyper-V on WIndows Server 2016. My master target device runs Windows 10 1804 and I need to create target devices from the master. I have followed the procedure to the letter and still cannot get the vdisk to be created by the Imaging Wizard. When the master target reboots with PXE boot as the first boot option, i can see that the master gets ip configuration from dhcp but it finally boots from hard disk with message “the imaging wizard did not restart. Please check your network boot configuration”.
The PXEChecker tool reports successful operation of DHCP/PXE/TFTP on the PVS server.
I checked the event log and PVS log on the PVS server and master target and there is no exception or error message. There are only errors in Citrix CDFControl tool run on the PVS server, error is “tmf file not found. fail to find tmf file in searching path:”.
I had similar case as per https://discussions.citrix.com/topic/389362-imaging-wizard-did-not-restart-error/ but this time disabling secure boot and removing the DVD drive did not fix the issue.
I followed instructions at https://support.citrix.com/article/CTX133193, none fixed the issue. I also followed instructions at https://support.citrix.com/article/CTX133188 and I noticed that there is indeed a ghosted NIC which however is created by the installation of the PVS target device software itself. That means that the ghosted NIC is uninstalled when the PVS target device software is uninstalled. Is this expected behavior? Am I missing something specific to Windows 10 1804 master targets? Any ideas?
Hi Carl:
During the Image Creation process, I click “No” so that my Imaging VM shuts down. I then change the Boot order on that VM (this is vSphere 6.0) to “Boot from VMXNET3” in the BIOS… Start the VM (where I’m expecting to go back into Windows so that the Image Creation process can complete)… PXE-boot works fine, and the Windows logo appears… the spinning circle of dots, 2 or 3 times… and then…. NOTHING. The boot process “freezes” right there… I’ve let it stand like that for more than 40 minutes, to no avail… On the PVS server, on the TD (created during the first part of Image Creation) I made sure “Type” is “Maintenance” and “Disk” says “Hard Disk”… made sure the Windows Firewall on my PVS Server is Disabled… What could be causing this “freeze” at loading the OS, at this point in the process?
Did you change the CD-ROM to IDE instead of SATA?
Yes, I tried that just now. Went over all the Settings very carefully to make sure I got it all right. When trying to boot the Target Device (made during the first half of the Imaging Wizard process) from (my Imaging Machine)’s HARD DRIVE (as specified in the Device Collection), it just freezes at the Windows logo screen…
Yes… it still freezes at the Windows logo screen…
Carl, any other thoughts on this? Also, isn’t there a PVS expert who you sometimes refer us to? Thanks very much.
If you post your question to Citrix Discussions, then Carl Fallis will sometimes respond.
I’m having a similar issue. Post TD installation, I’m setting the vm to boot to cd (ide0:0). In pvs the TD is set to boot to Hard disk with the new disk assigned. I don’t understand this method, but I assume it has to do with booting to the hard disk getting the new, blank vDisk mounted. During the initial boot, it connects to pvs and finds the vDisk, but just stalls at that point. Will not go into the rest of the boot process. Any thoughts what could cause this? Boots fine to the hard disk, and upon logging in, the imaging wizard will continue to prompt “imaging process didn’t start, do you want to restart again”
I’ve seen that when the VMware virtual machine has a SATA controller installed.
Right: In my case, I totally removed the CD/DVD drive AND I totally removed the SATA Controller from the VM. After that, the Image Creation process worked great. No more hangs at the Windows logo just prior to copying to the vDisk (back inside the Master device)…
Hi Carl,
I installed the PVS TDS 7.15.1 on a new machine I want to bnimage but my PVS Server is still runing 7.6.1
Is it the reason why I cannot run the wizard successfully ?
Kind regards
Yvan
Tuesday, April 24, 2018 16:52:56
04/24/18 16:52:56: Provisioning Services 7.15.1 Copyright (c) 2001-2017 Citrix Systems, Inc. All rights reserved.
04/24/18 16:52:56: Microsoft Windows 6.2.9200 Server
04/24/18 16:52:56: Suite=0x00000010
04/24/18 16:52:56: Processor Architecture: x64
04/24/18 16:52:56: Number of processors: 2
04/24/18 16:52:56: WindowsFreePercentage that can be set in [parameters] section of P2PVS.ini: 25
04/24/18 16:52:56: PartitionOffsetBase that can be set in [parameters] section of P2PVS.ini: 1048576
04/24/18 16:52:56: VolumeDiscoveryTimeoutAsSeconds that can be set in [parameters] section of P2PVS.ini: 30
04/24/18 16:52:56: VolumeShadowCopyPollTimeAsMs that can be set in [parameters] section of P2PVS.ini: 0
04/24/18 16:52:56: A Provisioning Services vDisk was not found.
04/24/18 16:52:58: Loading ImagingWizardM.dll
04/24/18 16:53:13: Connecting to server:
04/24/18 16:53:13: SoapServer version: 7.6, ImagingWizard version: 7.15
04/24/18 16:53:13: The format field does not exist.
04/24/18 16:53:13: The format field does not exist.
04/24/18 16:53:13: The format field does not exist.
04/24/18 16:53:13: The format field does not exist.
04/24/18 16:53:13: The format field does not exist.
04/24/18 16:53:13: The format field does not exist.
04/24/18 16:53:13: The format field does not exist.
04/24/18 16:53:13: The format field does not exist.
04/24/18 16:53:14: The format field does not exist.
04/24/18 16:53:14: The {0} command does not exist.
04/24/18 16:53:15: Task selected: Create a vDisk
04/24/18 16:53:15: GetStoreFreeSpace: 404854
04/24/18 16:53:15: GetStoreFreeSpace: 109638
04/24/18 16:53:15: GetStoreFreeSpace: 404854
04/24/18 16:53:15: GetStoreFreeSpace: 404854
04/24/18 16:53:15: GetStoreFreeSpace: 109638
04/24/18 16:53:15: GetStoreFreeSpace: 404854
04/24/18 16:53:15: GetStoreFreeSpace: 109638
04/24/18 16:53:15: GetStoreFreeSpace: 109638
04/24/18 16:53:15: GetStoreFreeSpace: 109638
04/24/18 16:54:54: CreatevDisk: xappia_v1 in Store: xappia with MB size: 56320 vhd fixed: false sector size: 512 block size: 2 MB
04/24/18 16:54:54: The format parameter is not valid.
04/24/18 16:54:54: Create vDisk failed
Correct. The PVS Server must be same or newer than the target.
Thanks for the swift feedback, you do deserve the golden medal for a such commitment !
Hi Carl
I am getting following error when I try to create Vdisk from Master image. Any Idea how to fix this ?
04/02/18 05:19:08: Destination is \\?\Volume{000158f8-0000-0000-0000-100000000000}.
04/02/18 05:19:08: Destination is \\?\Volume{000158f8-0000-0000-0000-501f00000000}.
04/02/18 05:19:08: Volume to Volume started at Monday, April 02, 2018 05:19:08
04/02/18 05:19:08: Gathering Volume Shadow Copy Writer metadata…
04/02/18 05:19:21: Adding volume \\?\Volume{00006c17-0000-0000-0000-100000000000}\ to snapshot…
04/02/18 05:19:22: Adding volume \\?\Volume{00006c17-0000-0000-0000-501f00000000}\ to snapshot…
04/02/18 05:19:22: Preparing for backup…
04/02/18 05:19:22: Gathering writer status…
04/02/18 05:19:23: Committing shadow copies…
04/02/18 05:19:23: Failed to finish DoSnapshotSet.
04/02/18 05:19:23: VSS_E_INSUFFICIENT_STORAGE
04/02/18 05:19:23: Failed to snapshot. (0x8004231F)
04/02/18 05:19:23: Aborting Volume Shadow Copy…
04/02/18 05:19:23: Volume to Volume stopped at Mond
It seems to indicate that you don’t have enough free space – VSS_E_INSUFFICIENT_STORAGE
Hi Carl,
I’m having the same problem. It’s unclear why or where there is insufficient storage. I’m trying to image a 60GB disk of which 27 GB is free to a network location which has 200 GB free disk space. Any idea why it keeps throwing up an insufficient storage error? Where do I need to create space?
Thanks for your time
Fixed it myself. I was attempting to re-image having just installed the 1912 CU1 client. That’s when I kept getting the error. I deleted the 1912 CU1 client and went back to 1909. Problem solved 🙂 Has anyone else come across this problem with 1912 CU1? It does however mean that my servers are running 1912 CU1 and my clients are still on 1909
Hi Carl
Very helpful article. We are in the process of setting up a XA/XD 7.15 environment with PVS ( BDM )
Referring to the section Boot from Network or ISO, once the imaging wizard has run – the VM is booting from ISO and makes a connection to the PVS server – post that the template box ( windows 7 ) goes into Windows Repair startup – the vdisk is created in PVS but conversion does not start post boot.
The PVS server has the firewall switched and the following ports enabled 6969 6910 -6930, 69, 5432154322,
Would you be able to advise where to look ?
I have this same problem; did you ever find a resolution?
Carl,
I am still having problems with getting the cache type. I am still in standard image mode and did set the page file. I haven’t done the private mode setup since we import our vDisks. I have changed the vDisk drive letter to D. All the other parameters are correct. MBR, Simple, NTFS.. What am I missing? We’re on 7.15. I did not setup the environment, BTW.
any assistance would be great.
Hi Carl,
I started imaging wizard, after rebooting from network Virtual Desktop status is inactive and target device is currently not accessing this vdisk. I Checked vdisk in store and target device appeared on device collections and I even checked pxecheck.
Either the machine didn’t actually boot from the network, or there’s a communication problem between the Target Device software driver and the PVS server. Firewall is open? What’s the NIC type on the Target Device? What hypervisor?
Having a strange issue, when installing the VDA (7.13) in the vDisk, the WriteCache disk is suddenly non-persistent. Things saved to the writecache is lost at reboot, things deleted are back after a reboot?
Using PVS 7.13 with HyperV.
Tried several installation orders, but issue keeps coming back..
ESET?
No, McAfee. We do have one image which does work properly, but no information on how this image was created (which components were installed in which order). When deploying a new server using the XenDesktop wizard a writecache disk is created, but not formatted. Trying to look for differences between the two vDisks, so far noticed a missing key WriteCacheSize in HKLM\System\CurrentControlSet\services\bnistack\pvsagent.
Well, after some testing it looks like a (Microsoft) policy is responsible for the strange behavior, now finding out which policy is breaking the PVS functionality..
(Moved the computers to a location with less policies applied, works fine)
Hi Everyone. I so happy about you Guides Carl, as I am currently setup a huge Citrix Farm. Currently I run into a problem with imaging Process. I needed another 2008R2 VDA to publish a specific App that needs SMB1 enabled. I already created a 2008R2 Image(vdisc) successfull for all the other apps. I took the same Template did the VDa Setup and then the pvs Setup. When Imaging the Device, Collection and vdisc gets created. Then I shutdown the TD and change to boot from pxe (vmxnet3)
Then I boot the Server, it does find PVS and get the vdisk (vdisc found) and start booting to the OS. Then after a while, it restarts and then I get asked of I want to boot Windows normally or do a repair. I can repeat this forever.
When changeing back to boot from Harddisc all seems fine.
What did I miss? Why does the new TD not boot up correctly so I can Finish the imageing process?
Thank you in advance for reply!
Check C:\Windows\System32\Drivers\pci.sys. What is the modified date? It should be June 2011 or newer.
Did you delete ghost NICs?
Hi Carl, than you for that fast Answer. The pci.sys is date 23.03.2016, has file version 6.1.7601.23403.
I checked for Ghost Nics but there is none. What exactly i a ghost Nic? I cannot see any hidden network card, but there are some visible network cards in device manager.
I have: Microsoft ISATAP Adapter, RAS Async Adapter, vmxnet3 Ethernet Adapter and this Wan miniport Nics for several Protokolls. the same Nics are still present in my working 2k8R2 image which I’ve done before.
regards
I fixed the problem. I did not have much time and just restarted the whole os install again (vda, pvs) and images successfully. The Error was an Error 40. I misstyped the Folder where the vdisc should be placed in. However vdisc was created but could not boot afterwards. I also forgot to Add the Site that will be owner of the Store in PVS I think that was the problem. I found it out later, when recreated the Folder and Store. NVM thanks!
Hi Carl,
I followed your steps up to step 17 in “Convert to vDisk – imaging wizard method” and the imaging wizard did not start after reboot.
The following error displayed “Imaging Wizard Restart Errro – Imaging Wizard did not restart. Please check your network boot configuration….” instead of Step 9 in “Boot from Network or ISO”
Do you have any ideas ?
Regards,
Jen
You can run “C:\Program Files\Citrix\Provisioning Services\P2PVS.exe” manually. Assuming the machine is actually connected to the vDisk.
Hello Carl,
1) How can you configure PVS to use a drive letter other than default D: for the write cache, e.g. use drive Q?
2) Also can a separate drive letter be used with a Windows crash dump disk, separate from the write cache? Or is the pagefile, crash dump and other system files stored by default in a single write cache disk?
3) Can you point to general recommendations for write cache disk sizing?
Hi Carl
After converting to vDisk, do you remove the pagefile.sys still present on C of the image ?
I think this pagefile is not useful anymore and take space on my vDisk.
Regards,
Stephane
I don’t. When you boot from a vDisk, it moves the pagefile to the D: drive. However, I do recommend shrink the size of the pagefile.
OK thanks
But you mean shrink the size of the pagefile before converting to vDisk ?
Before Standard Image mode, yes. It needs to be smaller than the cache disk. You can shrink it before conversion if you prefer.
4.Change the Maximum RAM size to a higher value. For virtual desktops, set it to 512 MB or larger. For Remote Desktop Session Hosts, set it to 4096 MB or lager. Make sure your Target Devices have extra RAM to accommodate the write cache.
Scenario – Windows 7 VM – 16GB Memory Allocated and 10GB Write Cache, if I set it to 512MB maximum ram size, when does it use the 512mb maximum ram size? Or do I need to assign 16GB memory as maximum ram size before it uses the 10gb write cache data.
Writes go the RAM cache first (512 MB in your case). Once the RAM cache is full, it spills over to the 10 GB Write Cache disk.
If I assign it the same as the Memory – 16GB also in RAM cache, would this be a good idea?
Windows Page File config on C: is set to none and D: set to 256
I cannot get past step 11 (MS Licensing) On step 10 when I click next, it crashes the wizard.
What am I doing wrong?
I’ve done this all on previous versions but for some reason it is not working. PVS 7.13
I am tempted to roll back to an earlier version.
I had a similar problem with the VDA media for 7.12
I had to roll back to 7.6 in order for the DDC to register the VM (I did this as a 1:1 vm not a pvs one)
So basically I am almost done with the farm but I cannot get a VHD going…
Something to consider, I tried to do things reversed and manual (Create the vdisk ahead of time, pxe to it, image to it, etc)
When I went to create vdisk, I name it and then click next the PVS console crashes with a lengthy exception error.
“Retry limit exhausted error”
which I also get when I run the imaging wizard and click next after setting up the image info (hostname, etc)
but it continues to step 10. Then when I click next it crashes.
I am attempting to run a split NIC configuration where PVS has NIC 1 – main LAN NIC 2 isolated vlan for streaming to hosts. Could this be the issue? The VDA gold VM has NIC 1 – main Lan NIC 2 on the PVS Vlan of its NIC 2
Should there be any problem if VDA is installed after the Master-Device must have been converted to vDisk?
Thanks
Carl, I followed this procedure to take a XenApp 6.5 vm and convert it to a vDisk. Everything went as planned but now that it is done the vDisk will not boot on the target device. It does the PVS boot process fine and then when the OS should be loading it just sits at a black screen for a bit and then shuts down. Any thoughts on what this might be?
VMware? If so, were the Ghost NICs removed? And is the SATA Controller removed?
I apologize Carl. I should have given more details. This is XenServer 7.0, PVS 7.12 and running on Cisco UCS.
Hi Carl,
With XD 5.6, besides pooled desktop groups, I had a dg with 50 pvd machines running w7.
I have now a XD 7.6 LTSR platform in place.
According to http://docs.citrix.com/en-us/xenapp-and-xendesktop/7-6-long-term-service-release/xad-whats-new/long-term-service-release.html, PVD is still excluded for the LTSR compliance.
As I’m not a PVD fan either, I intend to create a persistent desktops DG for several support teams.
Are tools like BNImage or Disk2VHD pvd agnostics ? In other words, if I run BNimage on a PVD machine, is it possible to create a vdisk containing the full image content (win7 os part taken from the vdisk the machine booted on plus the pvd part). I will then convert the vdisk to vmdk file, put it on a vmfs store and use it when creating my vm.
Of course, I you have a better/quicker approach, I take it 😉
Kind regards
Yvan
I don’t think I’ve tried converting a PvD to a full clone. But after conversion, you would have to remove the PvD software, or at least disable it.
Hi Carl, for symantec AV do you recommend or seen any setup with redirecting the virus definitions to another drive other than C drive, since PVS is involved and streaming? I was thinking of creating another drive (other than the write cache disk) on the template as to redirect virus definitions there so that the machines aren’t redownloading them at reboot each time until an update to vdisk is done. What do you think?
Hi Carl,
We want to have two different Windows 7 Desktops
One for our Systems Team – giving them the ability to install applications – That would be persistent – static VM which would require a PvD drive (We can only use B,K,O or U as P: is already in use, would that be ok)
Our users to have 1-1 non-persistent – do we need a PvD drive is we don’t want them to install applications and for us to control it via Master Image?
Do we create the PvD drive before we install VDA Agent and then the PVS Software?
Can the VDA be 7.6 LTSR, while the pvs target software is 7.1
Per machine looking to do WBC (10GB) and PvD (15GB) – is that enough?
Apologies I mean can the VDA be 7.6 LTSR CU1 and the PVS Target be 7.6.2, our PVS Servers are still behind on 7.6.0.5019
Or do we have to keep them all on the same version, so VDA 7.6.5026. PVS 7.6.5019
PvS servers must be upgraded before you upgrade the Target Device Software.
The VDA software can be upgraded any time since there’s no official connection between PvS and XD other than the XD Setup Wizard in the PvS Console.
The PvD drive is created by the XenDesktop Setup Wizard. See http://carlwebster.com/citrix-xendesktop-7-7-provisioning-services-7-7-and-the-xendesktop-setup-wizard-with-write-cache-and-personal-vdisk-drives/
Before you start using PvDs, make sure you know how to back them up, replicate them, and restore them.
For virtual desktops, your sizes are probably fine.
Thanks Carl, always a big help
How do you replicate, backup and restore them?
I followed websters guide, createf the drives as stub holders. But not create the simple volume and left unallocated.
Ran xendesktop wizard successfully for 3 provisioned machines, the storages for wbc and pvd are created.
Where do I set the paging files? On the master image still in standard mode? Will i need to create the simple volume now on the master image or leave it unallocated as the article shows?
You’ll have to figure out a way to backup and restore PvDs. This is one reason I’m not a fan of PvD.
PvS will move the pagefile to the cache disk automatically. But make sure the pagefile is smaller than the cache disk.
Thanks
Do I have to do it in the master image or individually on each target device?
My master image hasn’t allocated the D:, there is 10gb but not created as simple volume as websters guide?
Any reason why he leaves both drives unallocated?
Do I need to put it in standard mode> allocate volume and page file to D:?
If pagefile is on C:, PvS will move it to D: automatically, assuming it can fit in D:. You’re welcome to boot a Maintenance Version (Private Mode) vDisk and manually configure the pagefile settings.
Thanks Carl,This worked just fine and as described.
How can I move a vdisk from one partition to another? We are running out of space and have created a new location to store vdisks.
In PvS console, just point your vDisk store to the new location.
Hello Carl, here’s a fun question. Is it advisable to do an offline defrag when a vdisk is in maintenance and not private mode? Both allow writes, but citrix seems unclear on the distinction with regards to an offline defrag. Getting downtime to do private mode is very hard, so being able to merge a vdisk into maintenance and doing an offline defrag would be best. Any advice?
Congrats on the great blog.
Wouldn’t defragging a snapshot just make it bigger?
I agree. But I mean putting the vdisk into a merged base state in maintenance mode and doing an offline defrag. Does that help shed any light on recommendations?
Merged base is no longer a snapshot so that should be fine. I can’t remember if it lets you mount a merged base. Another option is to defrag it and import it as a new vDisk.
Hi Carl,
During the “seal” steps it is recommended to stop the DHCP Client service and import the regkey to clear the DHCP config.
However, as soon as the DHCP service is stopped, the connection with the PVS server (and vDisk) is lost, and the server stops responding.
If the regkey alone is imported without stopping DHCP, the values in the registry are not added.
Any advise on this?
Hey Carl, after you switch your first target device to boot from the vdisk (which now still has the hard disks attached), What are the recommended steps to do with the target device? Make it into a template? Clone it to an update machine? Thank you sir!
Did you follow the steps to change it to Standard Image mode and enable HA? Then you can follow https://www.carlstalhood.com/pvs-create-devices/
I use 4096mb ram as overflow out of 20GB memory with 25gb write cache with no issues
Carl,
What would be the recommended “Maximum RAM Size” for PVS Ram with overflow on hard disk? Using Server 2008 R2. Currently set at 2048MB but im noticing its filling up quite fast after reboots.
Are you referring to the target devices (vDisk)? For RDSH, I normally set it to 4 GB or higher. More RAM = less IOPS. Citrix has found around 4 GB to reduce IOPS by 90%.
Yes. Target device RAM Write Cache is what im referring to. Using 2008 R2 servers as RDSH. But only using 2GB
Hey Carl, I read religiously your blogs, and they are very helpful..
I’m trying to setup PvS 7.8 for the first time… Everything was going well until I tried to capture my master image (2008 R2, vSphere, EFI, hardware version 10, VMXNET3). My uEFI PXE is working properly, because the VM is redirected to “Citrix Provisioning Services 7.8.0.8001 UEFI streaming). I get an address by DHCP, but the VM stays “stuck” on “connecting to 10.20.0.74 (the IP of my PVS server)…
Any hints would be appreciated… 🙂
Thx!
I haven’t tried EFI yet. Not sure it’s useful on vSphere. Try posting your question to discussions.citrix.com. The PvS product manager reads the posts there.
For an unknown reason, there was a problem with permissions in my SQL database. Rerunning the config wizard (on my PVS servers) solved it… Thx!
Carl –
Your guides have been a godsend. Thank you! A quick question – I see that you’ve mentioned both booting from Network and ISO options. What are your feelings about configuring with a boot partition? We’ve configured this in our environment in a test setting and it seems to work well, but I haven’t really seen any documentation mention it. As such I’m leery on using it in production until I see it blessed by someone who knows what they’re doing.
Boot partition works fine but is difficult to change. Basically you’d have to delete and re-create the VMs. Not a big deal.
Carl! You saved the day! Thanks for all your documentation and dedication to Citrix
Hi Carl –
Great site and series of articles! We are just in the process of rolling out XenApp/Desktop 7.6.3 with provisioning services 7.7 (single server). I’m just labing the whole thing out but i’m stuck at Create/Delete/Reset Machine Accounts from AD.
I get the following error when attempting to Create/Delete/Reset Machine Accounts
Failed: Unable to perform the requested Search: Error Code: 0, message: ,provider : LDAP Provider. (21)
Single DC running Windows 2008 R2 (2008 R2 FFL/DFL).
The PVS service account has the following permissions:
Database – sysadmin
PVS Server – Local Admin
Citrix Studio – Machine Creation
AD – Domain Admin
There doesn’t seem to be anything in the event log.
The config should be pretty much identical to what you’ve documented.
Any thoughts?
Thanks!
Does your account have permission? It should be using your account, not the service account.
You will also get that same error if the Machine Object is no longer in Active Directory, and you try to Reset or Delete.
Carl, I’m getting very strange behavior and perhaps you can help. I am working with NVIDIA GRID vGPU on vSphere 6 and PVS 7.6. When I installed the NVIDIA video drivers, I got a black screen on the vSphere Console so my workaround is to use RDP. I will figure out the vSphere Console issue later as that is not my huge concern right now. My problem is the Target Device was created fine. As long as the TD is set to boot from Hard Disk, I can ping and RDP into the virtual machine. When I change it to boot to vDisk, I can no longer ping and I can’t RDP. What is strange is it does seem to boot up fine. Its all green check marks in the PVS Console. I verified the IP address it is using through the vSphere Client and the PVS Console. What could be stopping the networking on the TD once I change it to vDisk?
Single NIC?
What OS version? If 2008 R2, did you install 2550978 (pci.sys)? Did you check for ghost NICs?
Is the firewall enabled? Maybe DNS or AD is not working properly so Windows thinks it’s not on the domain network and thus enables the Public firewall.
Thanks Carl,
Some Xendesktop sessions freeze intermittently:
Error: provisioning service virtual disk – connection lost
Can last for a few seconds to a minute and then says “provisioning service virtual disk – connection restored”
any ideas?
Hi Carl;
Thank you for all you do! Your posts are extremely valuable for small shop Citrix operators such as myself. 🙂
I’ve spent some time Googleing and researching but am having a hard time finding information about block sizes. Maybe it means I don’t have to worry about it as much as I am… but when setting up my vDisk storage I had to pick block sizes on my SAN volume, on the NTFS volume, and for the VHD file itself.
Am I fine with 4K default sizes on the SAN and NTFS volume and 2MB on the VHD file? Or could I tweak these and improve my performance? I’m caching on the target devices, not the PVS servers.
Thanks!
Curtis
On the PvS server side, I don’t think it matters. The PvS server should have enough RAM to cache the vDisk in memory and thus there should be very little disk activity. The only exception is Private Mode vDisks and I only recommend those for image updates.
Client-side caching is a different story. You have RAM caching to help with that.
Hi Carl,
Hope you can help me here.
I have been trying to create a Write Cache disk for the targets but only the Master device can see it.
I have read somewhere prob from Carl Webster that on PVS 7.6 the disk on the Master Image should be left unformatted and that the targets do that on boot, but previously I formatted them but not on PVS 7.6.
I have tried both methods and no joy 🙁
I successfully created PVS disks before for another client but that was on Xenapp 6.5 also and an older version of PVS.
I am going mad here trying to get this to work.
The hyper visor is Xenserver, disk part says disk 0 for cache and disk 1 for streaming.
Hope someone can help
Cheers
Mike
When you use the XenDesktop Setup Wizard, it automatically adds a cache disk and formats it. If you use the Streamed VM Setup Wizard then I don’t think it adds or formats the cache disk. I usually add an empty formatted cache disk to my template and that works.
Hi Carl, I keep receiving a “Failed: Unable to save Active Directory change. Ensure the appropriate permissions exist to perform this task…” message when trying to join the device to domain. Do i need my AD rights delegated?
Hi Jig,
Is this issue fixed ? i too have the same problem
Sir,why havent you used Xen Server as an hypervisor
I work mostly with mid-to-large sized enterprises and vSphere is the hypervisor that they use with some of them dabbling in Hyper-V. I think Carl Webster has PvS instructions that are more specific to XenServer.
Hi Carl
I am testing PVS 7.6 in my test lab on VMware workstation 11. I was able to create 2012R2 vDisk successfully but when trying to boot from the vDisk, the streaming does not happen. I was able to network boot the target and the target can find the PVS server and got the vDisk found message but is not proceeding afterwards. I tried
Changing the network adapter from e1000 to vmxnet3
Changed the hard disk and CD drive from SATA to IDE and removed IDE before vDisk creation
I have enabled PVS server logging into Eventviewer and could not find any error in the PVS server.
I am wondering how to proceed on this. Appreciate your assistance.
I suspect that Workstation is not supported for PvS and I have no experience with it. You can try searching or posting at discussions.citrix.com
Hi Carl, As usual Excellent Article.
I am trying PVS in my single host Hyper-V lab. I have XA 7.6 Master VMs and targets are created manually on hyper-v (No SCVMM. What I am finding is that my targets have their write cache going to server (checked the WC partition is formatted with MBR) even though the vDisk is configured with ‘RAM with overflow to disk’
1. Is it possible to create 2 or 3 targets manually from the master VM (without using SCVMM) that will use RAM cache with overflow to disk as WC location? if yes please let me know how this can be done?
2. In my PVS server, I cannot power manage (start or shutdown) the devices. How would I configure PVS to power manage VMs in the hypervisor?
1. Make sure the pagefile is smaller than the cache disk. Also, make sure the cache disk is formatted with NTFS partition. The XenDesktop Setup Wizard can do this for you or make sure your template has formatted disk.
2. I’m guessing Hyper-V doesn’t support Wake-on-LAN. But once the targets are booted you can send them a shutdown command from PvS console assuming the TD Agent is running.
Great tutorial! The only problem I have is on “Verify Write Cache Location”, step 3a, my target device from which I created the golden image recognizes write cache disk as #1, not zero. Due to that, it keeps writing cache to PVS server. If I create new target devices, they are good to go. I guess I attached the write cache disk before capturing the image, and that screw up my target device.
Is there an easy way to invert the disk numbering?
What hypervisor? In vSphere, you can power off the VM, edit the settings, and you can change the SCSI from 0:1 to 0:0. When creating the PvS template, I always clone the original VM so the hardware is as identical as possible.
It’s a similar thing with xenserver as above