Navigation
This article applies to all 7.x versions of Citrix Provisioning, including 2411, 2402 LTSR, and 2203 LTSR.
- Change Log
- Target Device Template – vSphere
- Target Device Template – Hyper-V
- Citrix Virtual Desktops Setup Wizard
- Target Device Power Operation
- Update BDM Partition
- Citrix Studio Machine Catalog of Citrix Provisioning Machines
- Write Cache Disk
💡 = Recently Updated
Change Log
- 2023 Dec 23 – Update BDM Partition – BDM Update can specify Boot Servers.
- 2023 Dec 23 – Converting BIOS vDisks to UEFI at Citrix Docs.
- 2023 Sept 17 – Citrix Virtual Desktops Setup Wizard – updated screenshots for new features in PVS 2308
- 2019 Jun 23 – Citrix Studio Catalog of Citrix Provisioning Machines – new Export Devices wizard in Provisioning 1906
- 2018 Nov 7 – XenDesktop Setup Wizard – added link to Ray Reyes Automate PVS Target Device and VM Creation
- 2018 Sep 3 – replaced Provisioning Services with Citrix Provisioning
- 2018 Apr 1 – in XenDesktop Setup Wizard section, added links to Start-PvsProvisionXdMachines at What’s New in Provisioning Services 7.17 at Citrix Docs, and Chris Twiest Create new Citrix Provisioning target devices, including VMware VM’s, DHCP reservation and AD accounts from a CSV file with PowerShell
Target Device Template – vSphere
The hardware of the additional target devices must match the original virtual machine so that the drivers contained in the vDisk continue to function. The easiest way to preserve the hardware configuration is to clone the original virtual machine.
- Shut down the original virtual machine.
- Edit the Settings of the virtual machine and make sure there is a blank, formatted cache disk.

- Citrix Provisioning 2311 and newer only support UEFI. See Converting BIOS vDisks to UEFI at Citrix Docs.
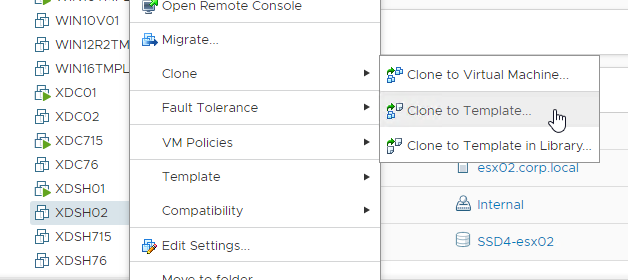
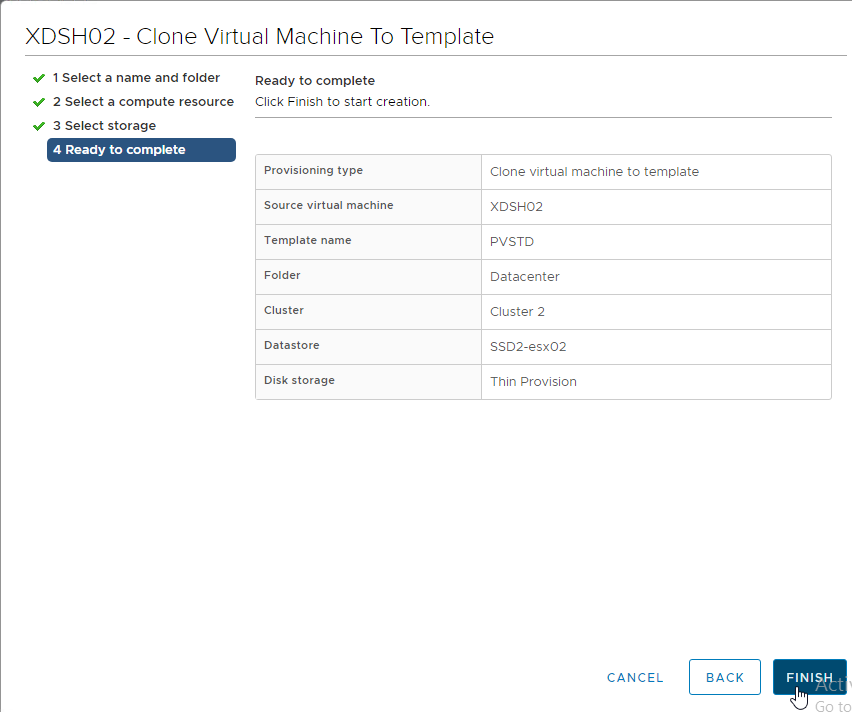
- In the vSphere Client, right-click the original virtual machine, expand Clone, and click Clone to Template. The new machine must be a Template and not a regular virtual machine.
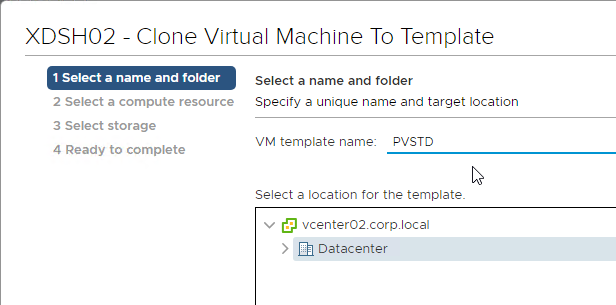
- In the Select a name and folder page, enter a name for the template, and click Next.
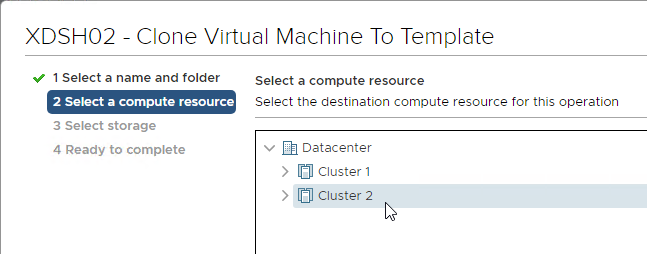
- In the Select a compute resource page, select the cluster and click Next.
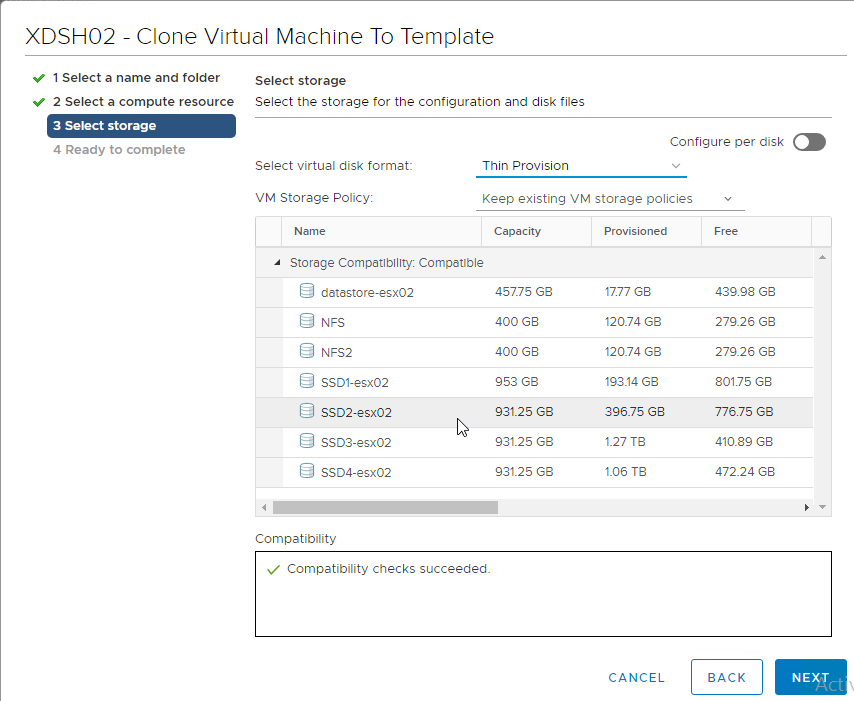
- In the Select storage page, select a datastore for the template and click Next. Note: if you use the Citrix Provisioning wizards to create Target Devices, the new machines will be created on the same datastore as this template.
- In the Ready to complete page, click Finish.
Target Device Template – Hyper-V
If you store the template in the library then you might see the issue described in CTX128750 Hyper-V Synthetic Network Interface Card Reinitializes on New Target Devices. The article recommends cloning a real VM instead of a template VM but this might not work for Citrix Provisioning Citrix Virtual Desktops Setup Wizard.
- Edit the Properties of the original virtual machine and make sure there is a blank, formatted cache disk.
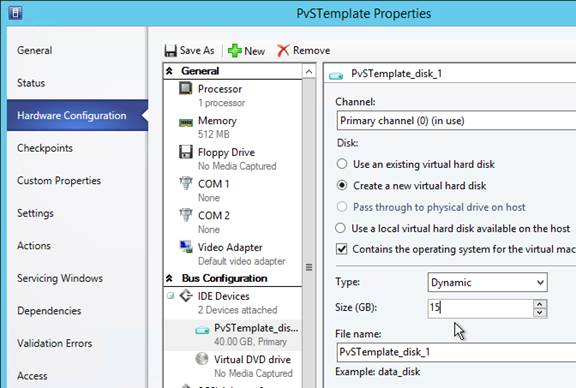
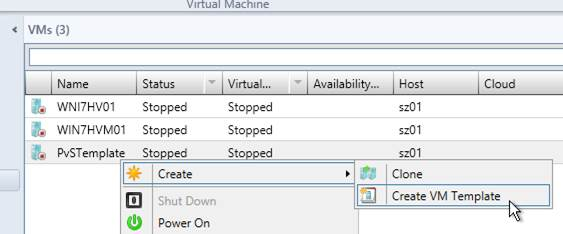
- Right-click the original virtual machine, expand Create and click Create VM Template.
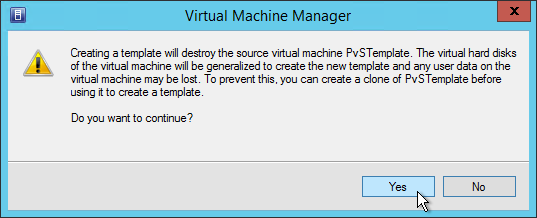
- Click Yes to acknowledge that the source virtual machine will be destroyed.
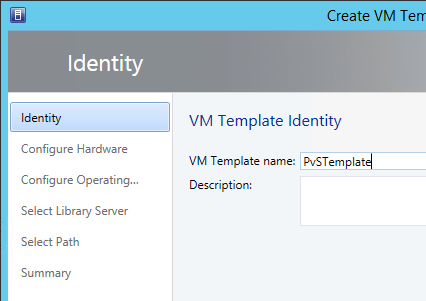
- In the VM Template Identity page, give the template a name and click Next.
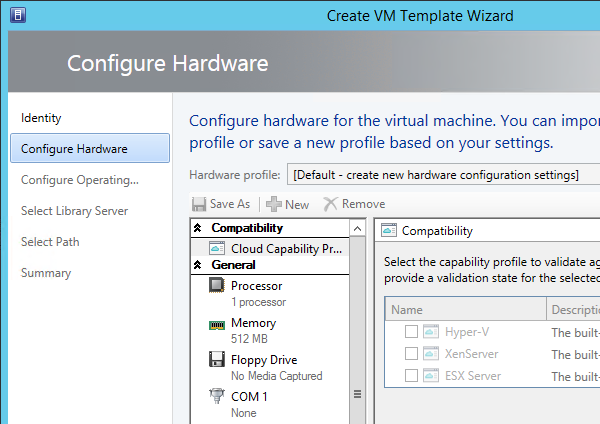
- In the Configure Hardware page, click Next.
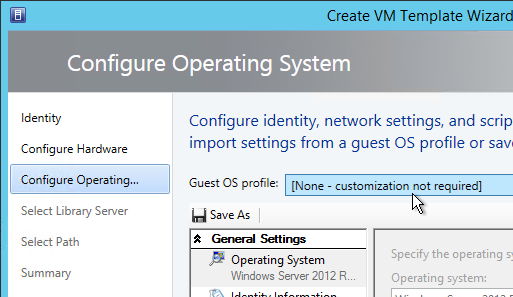
- In the Configure Operating System page, select None – customization not required, and click Next. There is no need to run SysPrep.
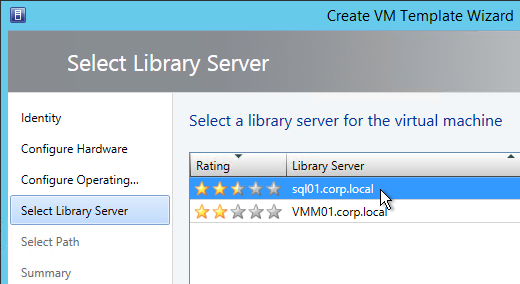
- In the Select Library Server page, select a library server, and click Next.
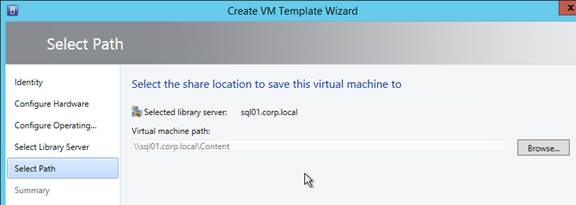
- In the Select Path page, click Browse to select a share, and click Next.
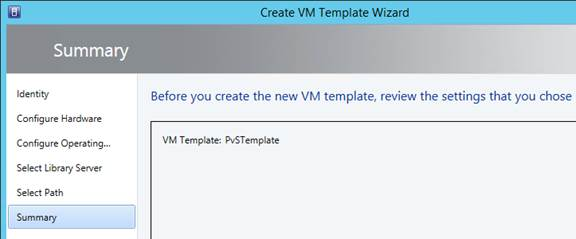
- In the Summary page, click Create.
Citrix Virtual Desktops Setup Wizard
The easiest way to create a bunch of Target Devices is to use the Citrix Virtual Desktops Setup Wizard that is built into the Citrix Provisioning Console. This wizard used to be named XenDesktop Setup Wizard.
If you prefer to script much of this wizard, see:
- Start-PvsProvisionXdMachines at APIs at Citrix Docs.
- Chris Twiest Create new Citrix Provisioning target devices, including VMware VM’s, DHCP reservation and AD accounts from a CSV file with PowerShell
- Ray Reyes Automate PVS Target Device and VM Creation
Do the following to launch the Citrix Virtual Desktops Setup Wizard:
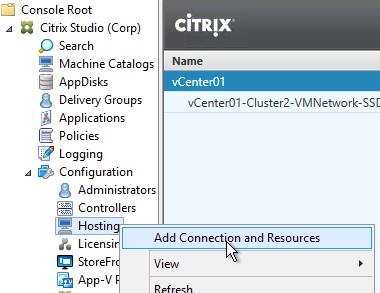
- The Citrix Virtual Desktops Setup Wizard uses the Hosting Resources defined in Citrix Studio, so configure Citrix Studio > Configuration > Hosting with destination datastores and networks for the new Target Devices. For maximum control over datastore placement, create a separate Hosting Resource per datastore.
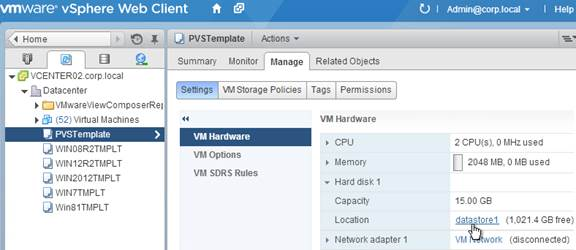
- Make sure the Template Target Device is on the same datastore that you want the new Target Devices to be stored on.
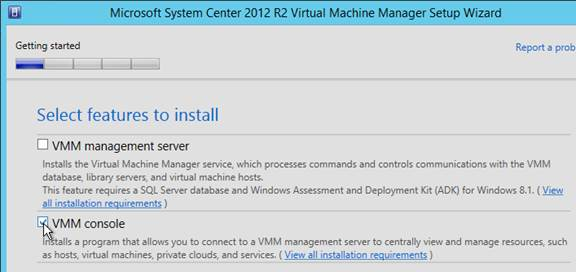
- If Hyper-V, make sure the VMM Console is installed on the same machine as the Citrix Provisioning Console.
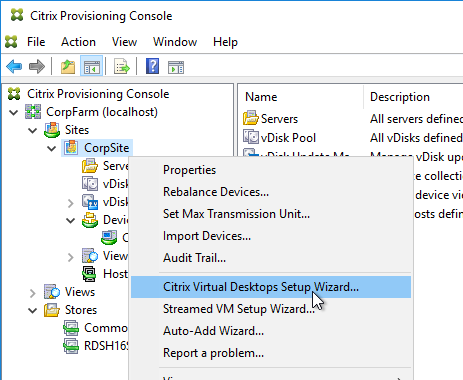
- In the Citrix Provisioning Console, right-click the site, and click Citrix Virtual Desktops Setup Wizard.
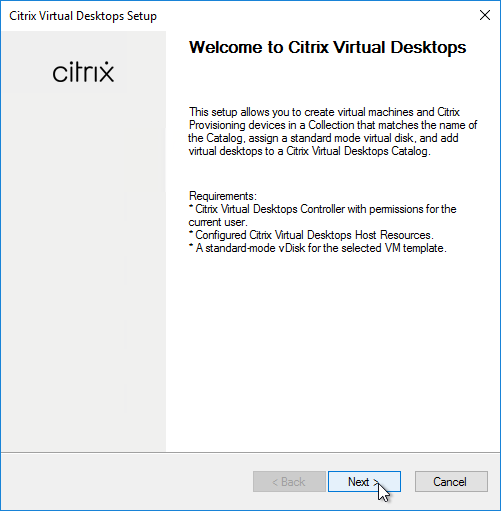
- In the Welcome to Citrix Virtual Desktops page, click Next.
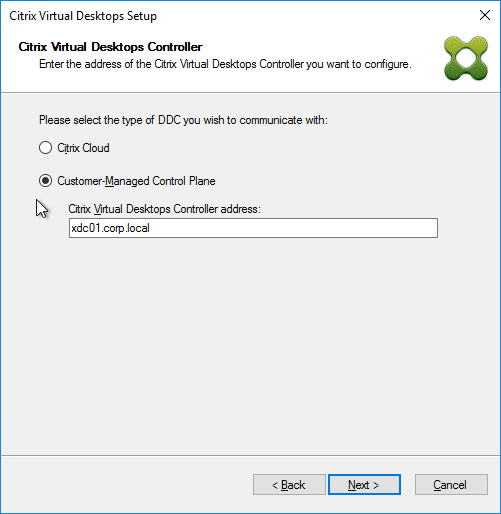
- In the Citrix Virtual Desktops Controller page, choose Customer-Managed Control Plane, enter the name of a Delivery Controller, and click Next.
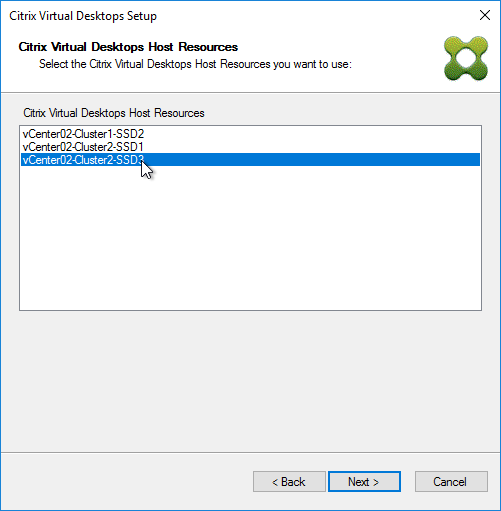
- In the Citrix Virtual Desktops Host Resources page, select a hosting resource. This list comes from the Hosting Resources created inside Studio. Click Next.
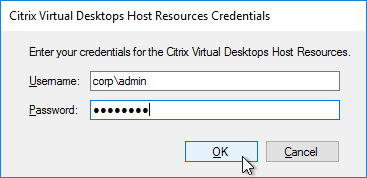
- Use a service account to login to vCenter or SCVMM when prompted. Citrix Provisioning might use these credentials later to power manage the target devices.
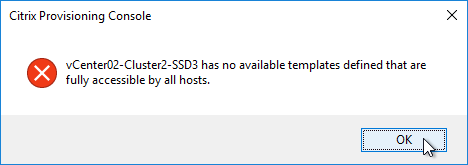
- If you see a message about no available templates, then you need to move your virtual machine template to this datastore.
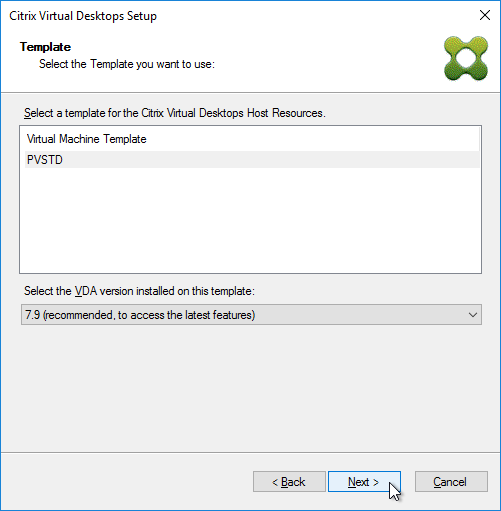
- In the Template page, select the Target Device template, and click Next.
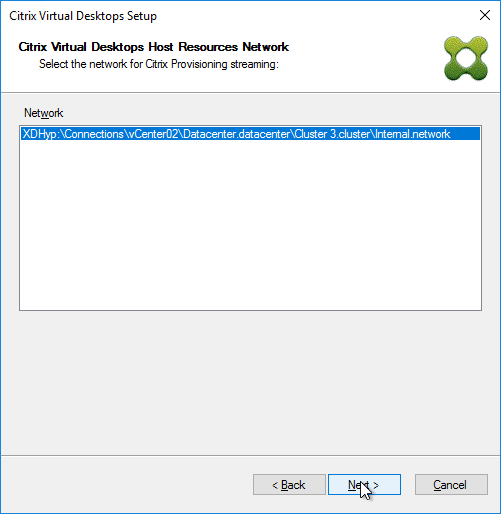
- In the Citrix Virtual Desktops Host Resources Network page, select a network and click Next.
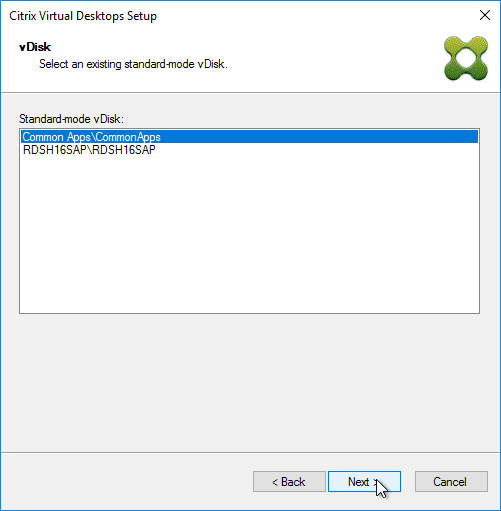
- In the vDisk page, select the Standard Image vDisk and click Next.
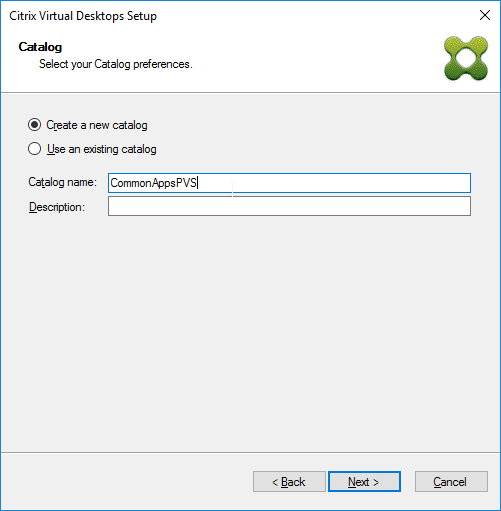
- In the Catalog page, enter a name for a new catalog, and click Next. Or you can add machines to an existing catalog.
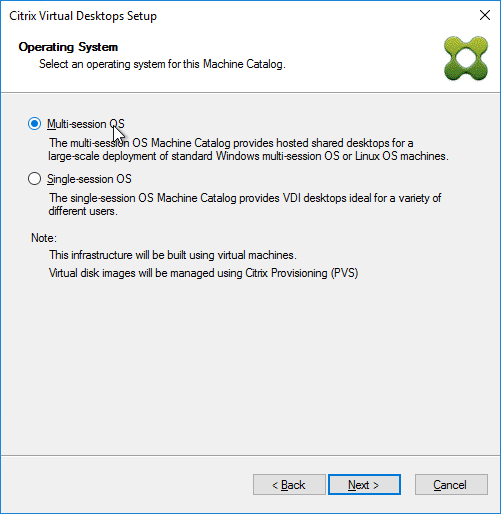
- In the Operating System page, make your selection, and click Next.
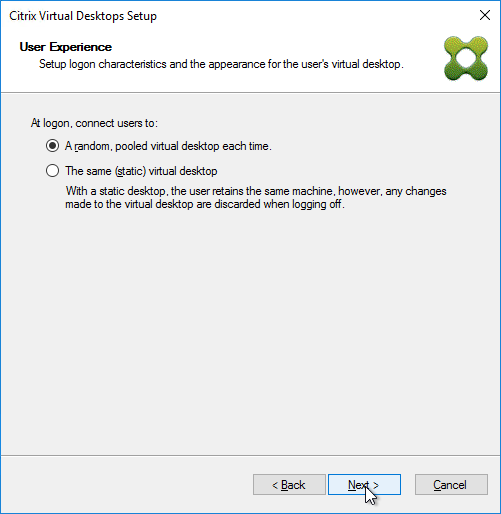
- If you selected Single-session OS, then in the User Experience page, select random or static, and click Next.
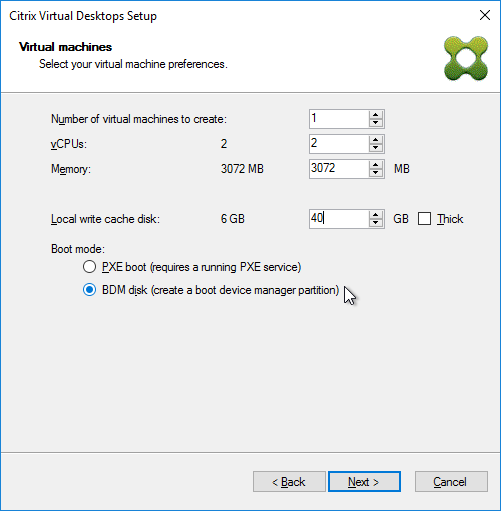
- In the Virtual machines page:
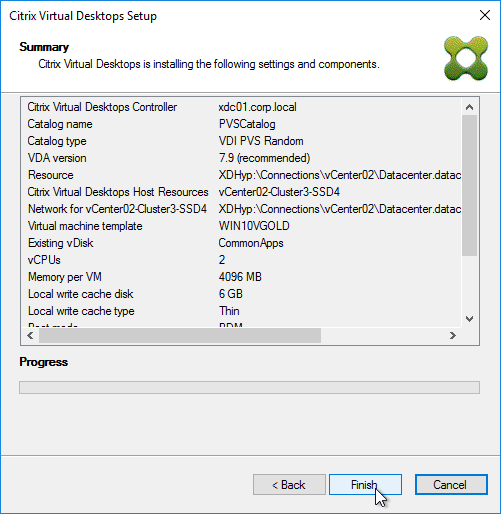
- Enter the number of machines you want to create.
- Enter the number of vCPUs for each new virtual machine. For RDSH, you usually add between 4 and 8 vCPUs.
- Enter the amount of Memory for each new virtual machine.
- To accommodate the Citrix Provisioning vDisk memory cache, add 256 MB (virtual desktop) or 4 GB of RAM (Remote Desktop Session Host) to the Memory. See Citrix Blog Post Size Matters: PVS RAM Cache Overflow Sizing for more information.
- Specify the size of the cache disk: 20-40 GB for session hosts, or 5-10 GB for virtual desktops.
- Any disks attached to the template will be ignored/discarded. To keep the disk in the template, see CTX237313 PVS XDSW retain template disks.
- Select BDM disk or PXE boot.
- For PXE boot, the Target Devices must be on the same VLAN as the Provisioning servers.
- BDM disk burns the boot image into the new virtual machine’s disk. BDM Disk supports target devices on a different subnet than the Provisioning servers. Make sure the Target Device VM template does not have any Boot ISOs configured.
- Click Next.
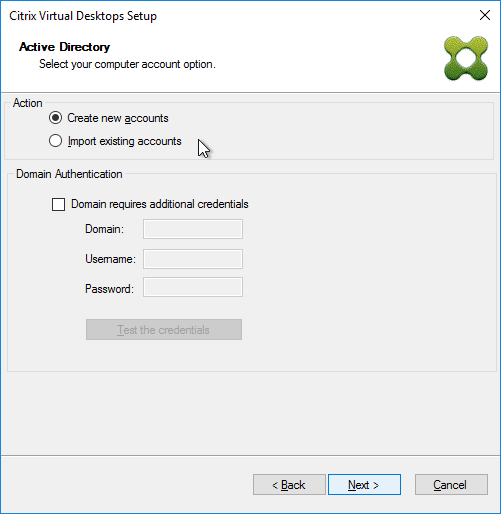
- In the Active Directory page, PVS 2308 and newer let you create computer accounts in untrusted domains. Click Next.
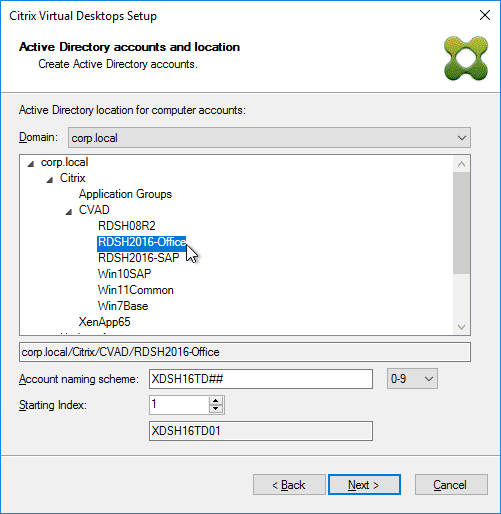
- In the Active Directory accounts and location page
- Select an OU.
- Enter a naming pattern for the new machines. Use ## to represent numbering.
- Select a Starting Index.
- Click Next.
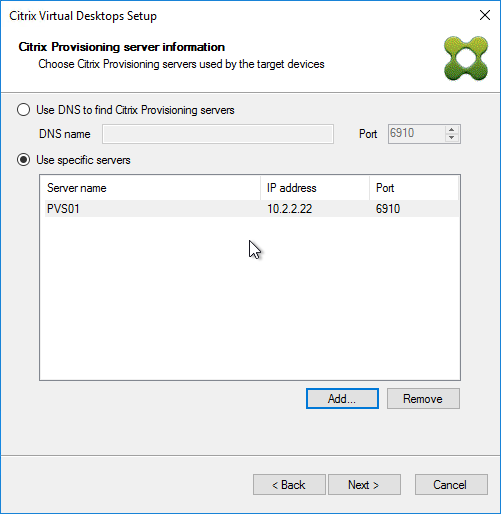
- In the Citrix Provisioning server information page, PVS 2308 and newer let you enter boot addresses that work for UEFI targets. Choose or enter your boot PVS servers and click Next.
- In the Summary page, click Finish to start creating the machines. The wizard will power on the machines so it can format the cache disk.
- Then click Done. PVS 2407 and newer have a button to View Logs.

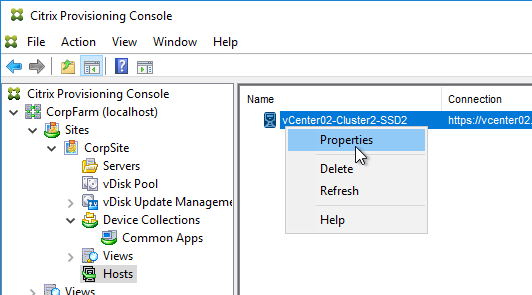
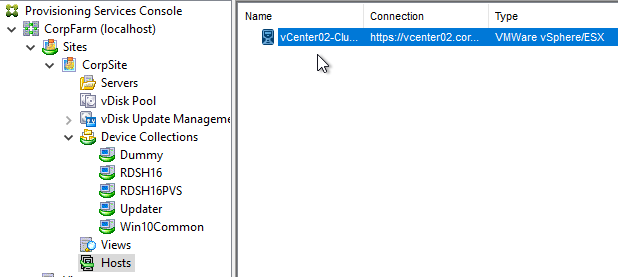
- In Citrix Provisioning Console, if you go to Farm > Sites > mySite > Hosts, you’ll see the Hosting Resource used by the Wizard. If you open the Properties of the Hosting Resource…
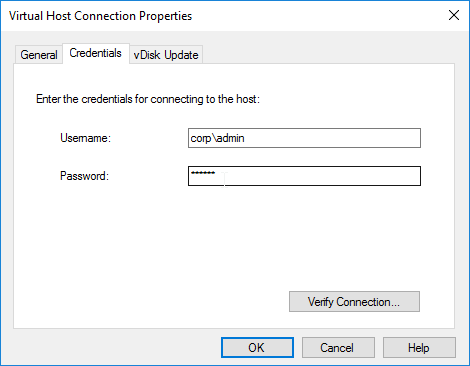
- On the Credentials tab, you can see the credentials you used when running the wizard. You will probably want to change these to a service account.
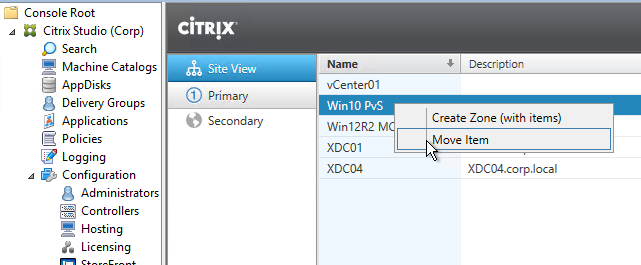
- In Citrix Studio, you’ll see a new machine catalog.

- The Citrix Provisioning Citrix Virtual Desktops Setup Wizard seems to ignore zones, so you’ll have to move it to the correct zone manually.
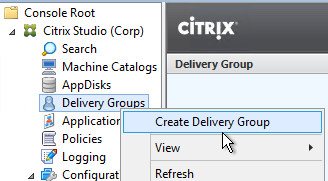
- Create a new Delivery Group or add the machines to an existing Delivery Group.
Target Device Power Operation
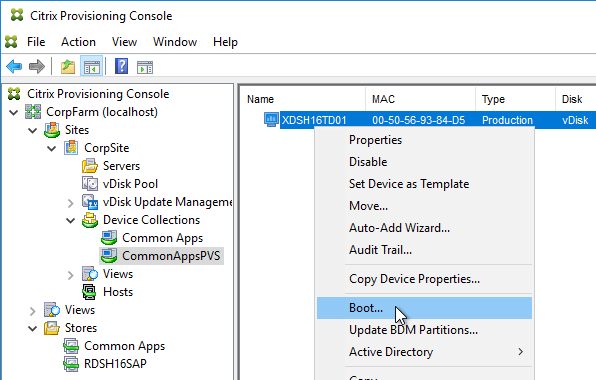
If you used the Citrix Virtual Desktops Setup Wizard to create Target Devices, then the Target Devices are linked to a hosting connection and can be powered on from the Citrix Provisioning Console by right clicking the device and clicking Boot.
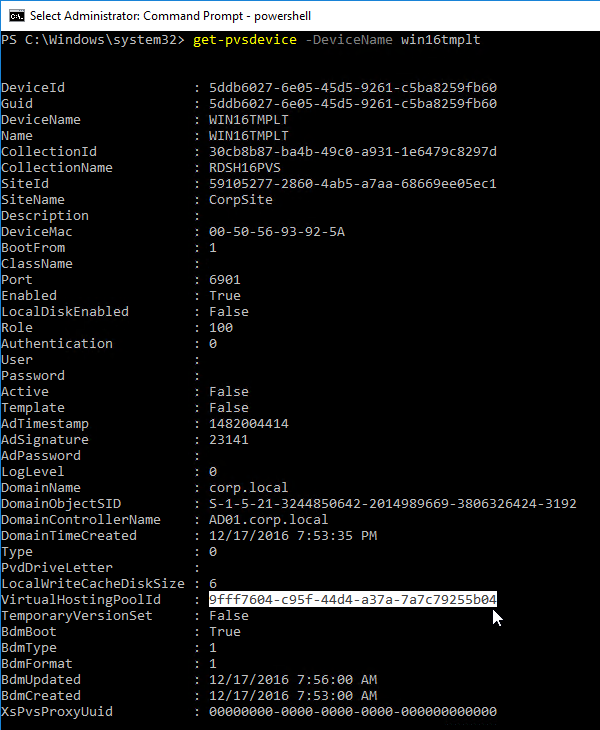
Target Devices created by the Citrix Virtual Desktops Setup Wizard have a VirtualHostingPoolId, which corresponds to the hosting connection listed under Sites > MySite > Hosts. When powering on the VM, Citrix Provisioning searches for a VM with the same name as the Target Device.
Boot Disk Manager (BDM) Partition Update
During Citrix Provisioning Citrix Virtual Desktops Setup Wizard, you can configure the Target Devices to use a BDM Partition to boot from Citrix Provisioning servers. This partition contains the IP addresses of the Citrix Provisioning servers. Prior to Citrix Provisioning 7.9, it was not possible to change the BDM Partition configuration.
In Citrix Provisioning 7.9 and newer, it is now possible to update the BDM Partition with the latest bootstrap info:
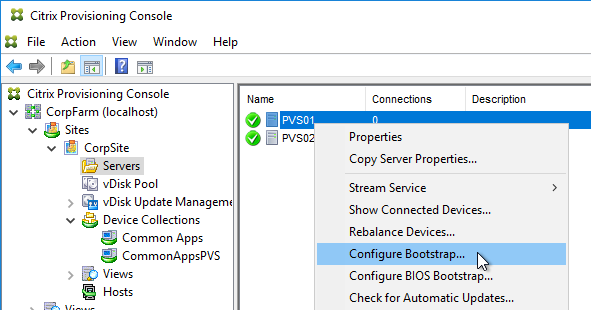
- In Citrix Provisioning Console, go to MyFarm > Sites > MySite > Servers, right-click each Citrix Provisioning server, and click Configure Bootstrap. Update the list of Citrix Provisioning servers.
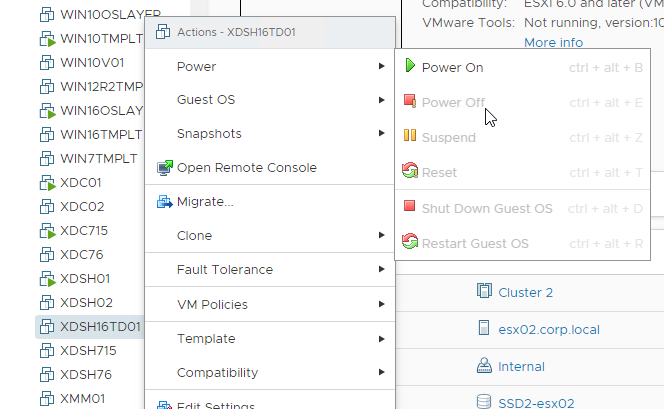
- Make sure the Target Devices are powered off.
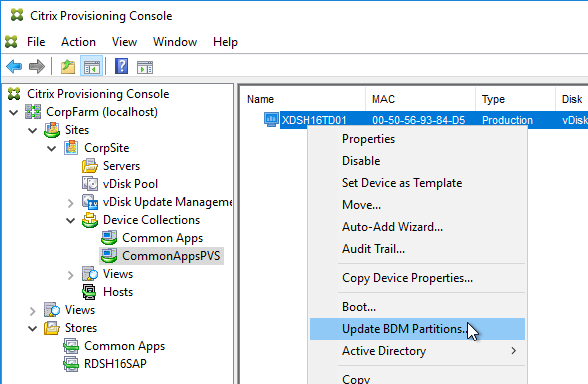
- Go to MyFarm > Sites > MySite > Device Collections, right-click a collection created by the Citrix Virtual Desktops Setup Wizard, expand Target Device, and click Update BDM Partitions.
- Citrix Provisioning 2311 and newer let you specify the Boot Servers.
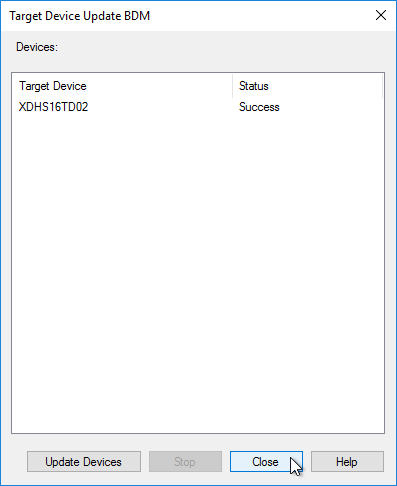
- Click Update Devices.

- Click Close when done.
Citrix Studio Catalog of Citrix Provisioning Machines
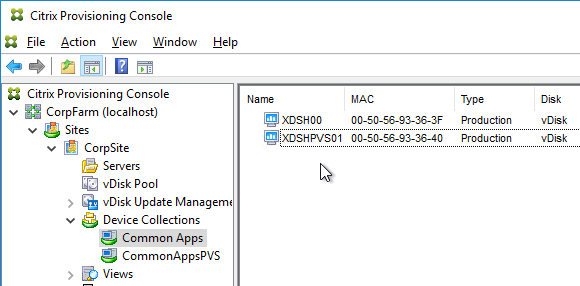
The easiest method to create Citrix Provisioning Target Device machines (i.e. VDAs) and add them to a Machine Catalog is to run the Citrix Virtual Desktops Setup Wizard.
If you’re not able to use the Citrix Virtual Desktops Setup Wizard for any reason, then you can manually create Citrix Provisioning Target Device machines or use the Streamed VM Setup Wizard. Once the machines are created in the Citrix Provisioning Console, you need to Export them to a Delivery Controller.
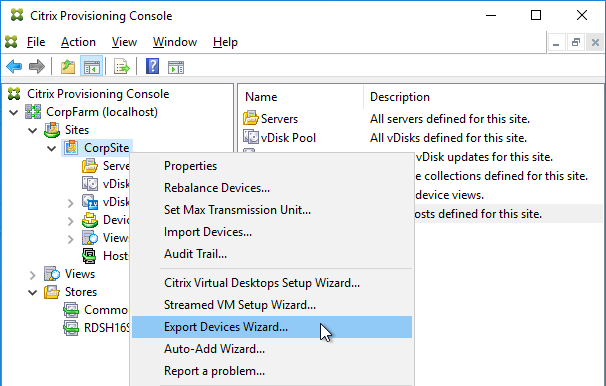
In Citrix Provisioning 1906 and newer, to add Target Devices to a Machine Catalog, Citrix recommends that you use the new Export Devices Wizard because it works with both on-premises CVAD and Citrix Cloud. Find the wizard by right-clicking the Site name. See Export Devices Wizard at Citrix Docs. The Export Wizard is very similar to the Citrix Virtual Desktops Setup Wizard.
For Citrix Provisioning 1903 and older, do the following:
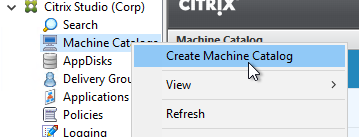
- In Citrix Studio, create a new Catalog.
- On the Introduction page, click Next.
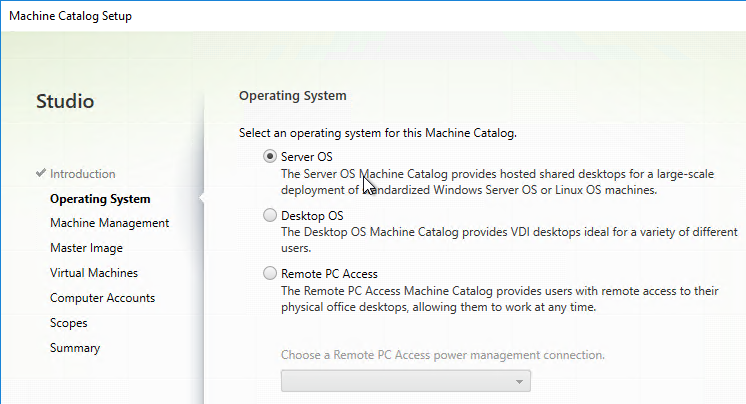
- In the Operating System page, make a selection that matches the vDisk, and click Next.
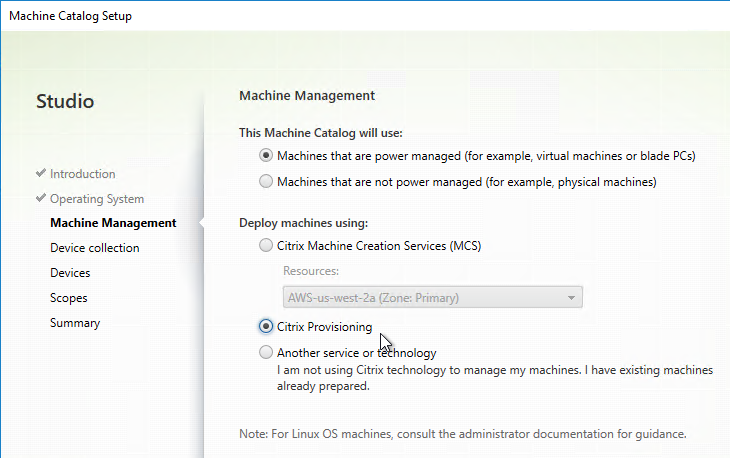
- In the Machine Management page, change the Deploy machines using selection to Citrix Provisioning, and click Next.
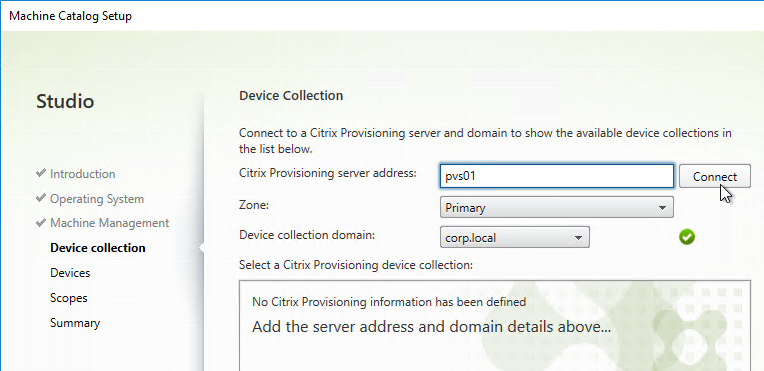
- In the Device Collection page, enter the Provisioning server name, and click Connect.
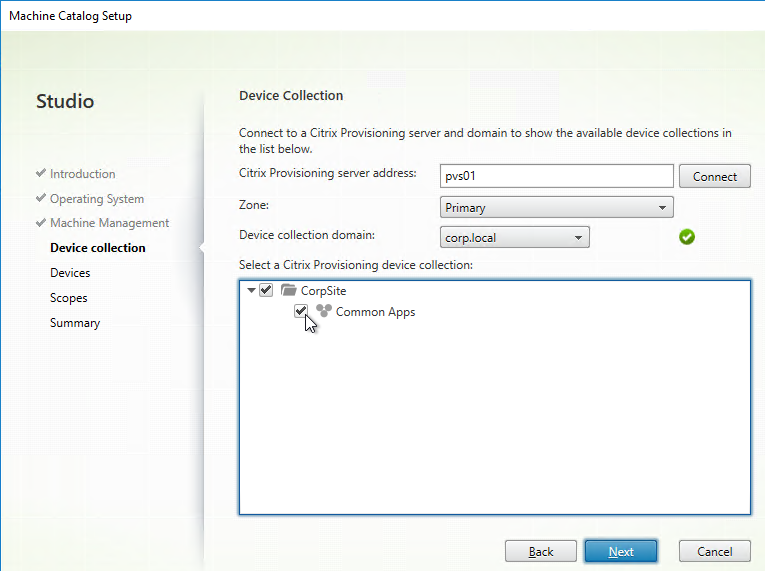
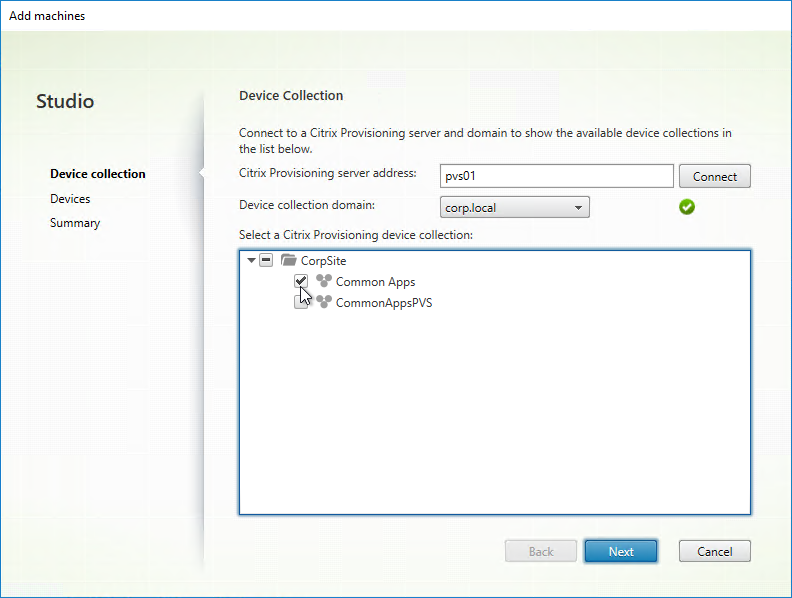
- Select the Citrix Provisioning Device Collection, and click Next.
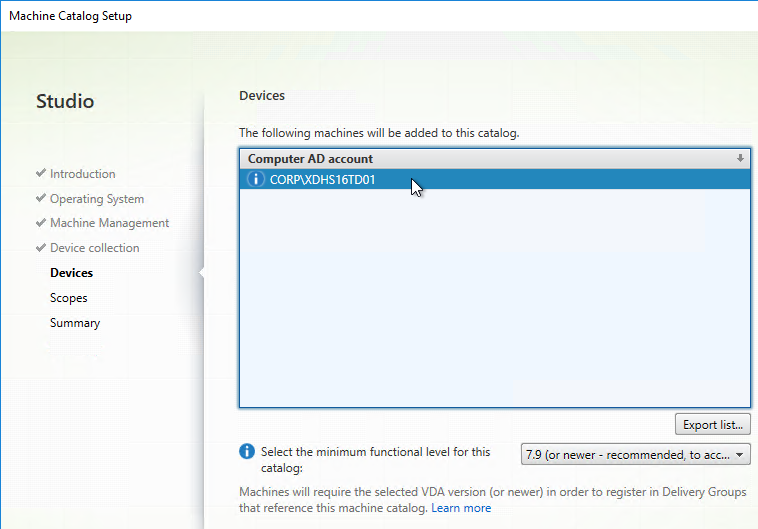
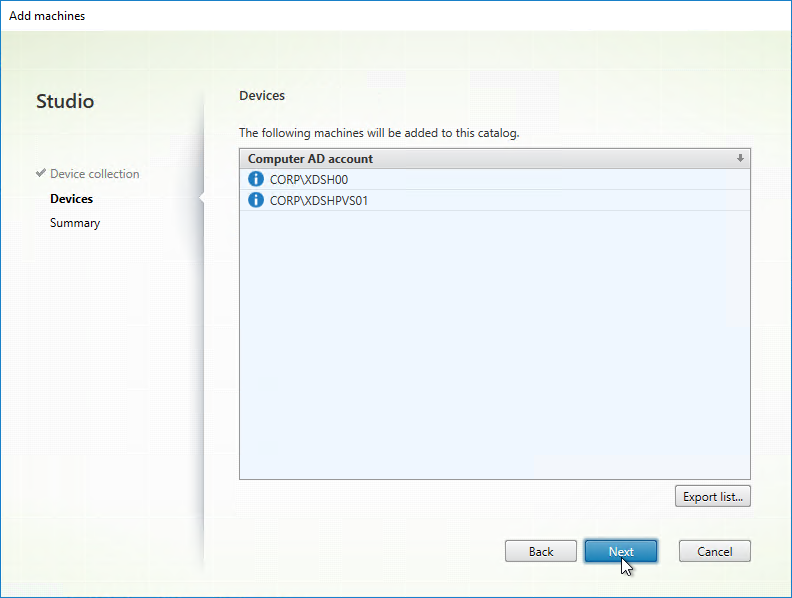
- In the Devices page, review the list of machines that will be added to the catalog, and click Next.
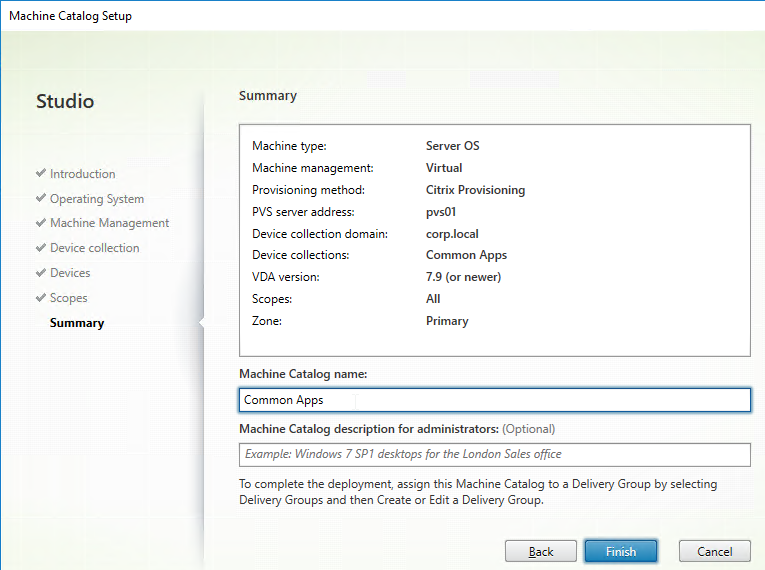
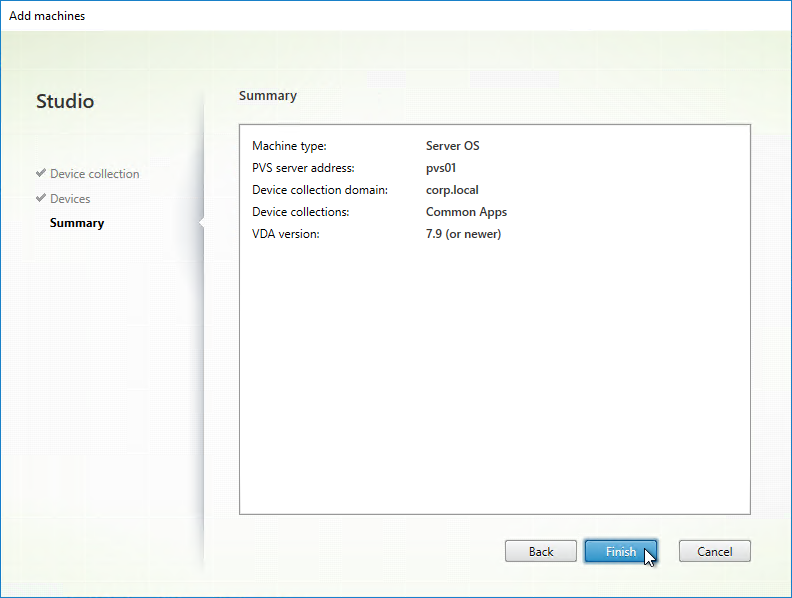
- In the Summary page, give the Catalog a name, and click Finish. You can now add these machines to a Delivery Group.
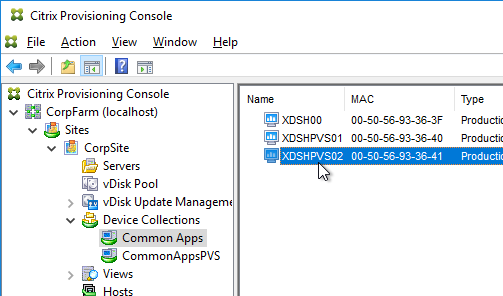
- You can later add more machines to the Device Collection in the Citrix Provisioning Console.
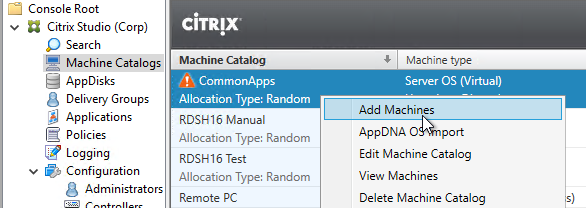
- To add the new machines to Citrix Studio, right-click the existing Catalog, and click Add Machines.
- In the Device Collection page, click Connect.
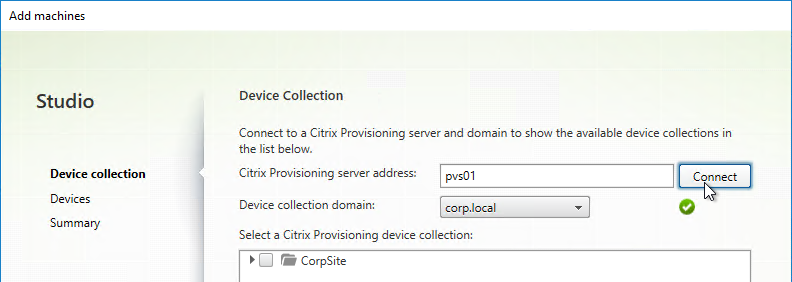
- Select the Device Collection containing new machines and click Next.
- In the Devices page, review the list of new machines, and click Next.
- In the Summary page, click Finish. You can now add these new machines to a Delivery Group.
Write Cache Disk
Write Cache Drive Letter
If the Write Cache disk is not mounting with the correct drive letter, see CTX133476 Explaining and Troubleshooting WriteCache Disk Drive Letter Assignment

Write Cache File Name
Citrix Provisioning has had three different cache names:
- .vdiskCache is Legacy Ardence format (5 .x and before not supported anymore, you can delete this if your target software is running latest, this cache was optimized for size)
- .vdiskdif.vhd is legacy hard drive cache (6.0 and above local hard drive cache, used standard 1mb sector size and is larger than the legacy cache but worked better with storage and was incrementally faster than Legacy Ardence format)
- vdiskdiff.vhdx is Ram cache with overflow (7.1.4 and above RAM cache with overflow, 2 mb sectors larger than vhd but much faster and more compatible with storage)
Write Cache Filling Up Cache Disk
The vdisk cache is basically a difference disk and only contains the blocks that are written to the system drive so you cannot mount it or read the file, it is just block data. Use a tool like Process Monitor from Microsoft (used to be sysinternals) and monitor the system drive. Any write to the system drive is redirected by the Citrix Provisioning software to the cache file. Make sure that any software that is installed on the target image does not have an auto update feature enabled, redirect all user data to a network share and educate your users to make sure they are not doing something that will fill up the cache like downloading a video to the local system drive.
Be aware that the RAM cache with overflow to hard drive can use more space on your local drive, it is important even in the older cache that you perform regular maintenance on your vdisks some recommendations:
- Merge to a new base disk when you have created 5 or more versions
- After every merge to the base disk, mount the new base disk and defrag the disk, this is important to reduce sectors used in the local cache, it is very important with the new RAM cache with overflow to local disk but it can have a very positive impact with the legacy local cache. Refer to http://blogs.citrix.com/2015/01/19/size-matters-pvs-ram-cache-overflow-sizing for more information.
Write Cache Size Monitoring
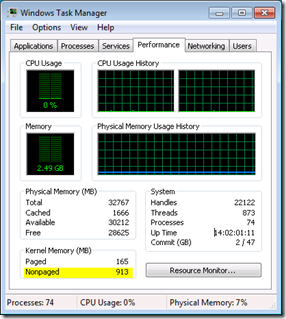
To view the size of Write Cache in RAM with overflow to disk, look in Task Manager for Nonpaged pool.
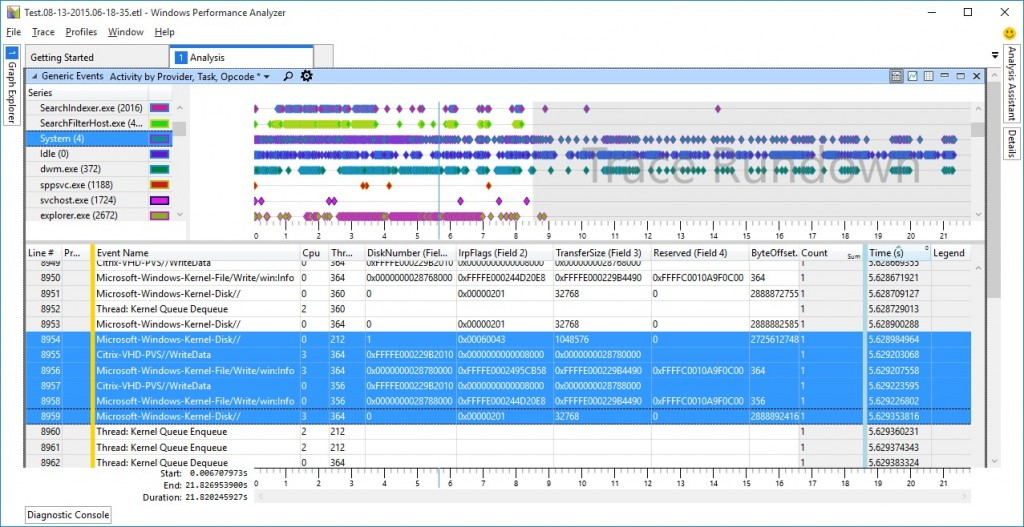
Citrix Blog Post Digging into PVS with PoolMon and WPA details how to use Windows Performance Analyzer to view Citrix Provisioning RAM cache and overflow.
Related Topics
- Update a vDisk
- Back to Citrix Provisioning
We somewhat recently upgraded from 7.15 LTSR CU3 to 1912 LTSR CU1, and I am noticing (weeks later) that when I launch the Virtual Desktops Setup Wizard it still limits highest available VDA version to 7.9 or newer. That leaves me unable to create new machines for my catalogs and delivery groups because they are all set to “1811 or newer”. For now I’ve worked around it by creating a 7.9 catalog and delivery group, dumping machines in there and then upgrading them in Studio to 1811 and then moving the upgraded machines to the right delivery groups. But that won’t scale well and is going to create some catalog sprawl.
Is there something we missed that would make the wizard see the latest available VDA version? I don’t recall having this issues when we upgraded from 7.6 to 7.15.
I think the 1811 and newer is only for Citrix Cloud.
hi Carl,
my PVS Device Collection is setup on auto-generated and when the machines boot from PXE on the AD they are added just fine in the PVS Device Collection.
Also PVS Device can add the Machines in AD (Create Machine account) just fine.
I can add them in Machine Catalog and Delivery Group just fine.
However they are all showing up as “unregistered”.
When investigating I’ve noticed that the booted VMs did not authenticate on the AD network. PVS managed to add successfully the machines in AD with Create Machine Account, however, the machines ( booted VMs ) they are in a state of AD network Unauthenticated.
If I go manually and Login on the machine and add a mall change just so I can rejoin the domain, then on the next reboot machine shows “registered”.
I will very much appreciate your thoughts on this.
Thank you
Edi
Maybe AD is still syncing? Are PVS and Target Devices in the same AD site?
Hello Carl,
First of all thanks for all your blogs and documentation on different Citrix Products. It really helps us a lot in implementation of Citrix Infrastructure.
We are currently running with PVS 7.15 CU2 LTSR and XenDesktop 7.15 CU 2LTSR using VMware vSphere 6.5 U3.
We currently have around 100 servers provisioned using XDSW in PVS console. We need to change the VLANs on all the servers we have created. The new VLAN is added to the hosts cluster and is available.
The existing hosting connection in studio does not contains the new VLAN and I need to update my connection to only utilize the new VLANs.
Is there any possible way to update the existing hosting connection to add the new VLAN so that it shows up while provisioning new VMs using XDSW.
As in the XDSW it utilizes studio hosting connection only to display the list of VLANs.
I also can create new hosting connection in studio using the new VLANs, but then I will have to create the new machine catalogs and machines with that new VLAN assigned to VMs, I do not want to go that route of provisioning all 100 VMs again so was looking for some quick alternative to add the new VLAN to existing hosting connection and then update the VLAN individually on those 100 machines to point to the new VLAN.
Appreciate your assistance and guidance in this regard.
Here’s PowerShell to change the network on the existing host connection – https://support.citrix.com/article/CTX139460
However, this won’t affect the existing VMs. One option is to write a PowerCLI script to change the network on the existing VMs. Maybe something like this – http://www.virtu-al.net/2009/10/19/powercli-mass-vm-portgroup-change/
Hello Carl, have you come across this error? The target provisioning fails when trying to create the vdisk:
Error (10608)
Cannot create or update a highly available virtual machine because Virtual Machine Manager could not locate or access AdminSharedCluster:D1.private:C$\ClusterStorage\storage-PROD-025.
Recommended Action
Ensure that the path exists and that the path is for a cluster disk in available storage, and then try the operation again.
Environment is PVS and Virtual Apps 7.15 with SCVMM and Hyper-V 2016.
From studio the storage above is the only one selected from the list.
Maybe this? https://discussions.citrix.com/topic/333236-unable-to-provision-a-virtual-machine-on-a-hyper-v-clustered-shared-volume/
Thanks Carl. The template is set to HA (just double checked). I’ve tested adding additional CSVs but still complains with the same error. One thing is, there is no admin share in the cluster as stated in the error, but sholdnt be using that as far as I understand:
Virtual Machine Manager could not locate or access AdminSharedCluster:server.private:C$\ClusterStorage\CSV-PROD-026
Hello Carl,
I’m trying to find a command for the PVS target Devices to output to which PVS-server they are connected. I want to do that from the client, not the PVS-server because we are gathering also other information from the target devices and want to create an output in one csv.
In the PVS-status tray you can see from the target device to which PVS-server it’s connected. I cannot find any command-line how to query this. Also there is no information to find in the registry.
Do you know of any command to query this or where this information is stored?
Here’s a similar thread, but I don’t think there’s a definitive answer – https://discussions.citrix.com/topic/386428-find-the-pvs-server-xendesktop-vdi/#entry1966784
Carl,
Just to be clear, with the write-cache disk, the XenDesktop Wizard method can add and format it when creating target devices, but if that method does not work, one can fall back to the Streamed VM Setup Wizard, but my question is if the stream Wizard method needs a VM Template with a formatted NTFS write cache added hard disk to complete adding a write cache disk to the target devices in this way?
In the beginning a 40GB disk was added disk and formatted with NTFS to test Cache in device Ram with overflow to disk. Is that necessary for the Streaming Wizard method? What if you do the XenDesktop Wizard method, would that have added another yet another eg 40GB disk for the write cache?
Thanks, and as always, great to read your blog!
Werner
By default, the XenDesktop wizard discards any disks attached to the template, but you can override that.
The Streamed VM wizard uses the disks attached to the template.
Hi Carl,
I have a customer who wants to create write cache disk with specific disk block size. Do you know if it is possible with the XenDesktop Wizard ? Is there a SDK to do this ?
Thanks for your answser.
Maybe this – https://support.citrix.com/article/CTX237313
I will test this ! Thanks for your answer, I made some research but I dit not found this knowledge base article.
Regards
Hi Carl, question regarding the adding my hyperv cluster with scvmm as resource.
How I can add my CSV storage as resource. When I try to add it, the csv is not shown.
Thanks and best regards
Hello Carl
i have deployed some target devices on PVS 7.18 and configured them to use vDisk in standard mode
I notice that on rebooting inside target device trigger all target devices to reboot also
Is this normal? Can you assist?
Thanks in advance
Hello Carl,
As always thanks for your blog.
I have a question regarding updating images. I’d like to maintaing 5 separate images (vdisks) my questions are :
Is it necessary for me to have a dev and test VM for each single image? Also is this the best practice?
If for example I want to maintain 10 vdisks, clearly I can’t spin up 20 machines. Will I have to move reassign the vdisks to different VMs in my collections everytime I test an image update. I guess what I’m asking is how do people streamline this in your experience?
Secondly, do I always need to capture my VM to create a new image? In other words once I have one vdisk can I make a clean copy of it rename the copy and tag that image as a different image (will PVS handle and sysprepy type of requirements?).
I’m new to PVS so please forgive me if these questions are very basic.
Thanks as always for your efforts and time.
Different teams do it different ways. With that many images, you usually want to automate the updates. You can write a script that creates an Updater machine, boots it, installs updates, shuts down the Updater, and then promotes the vDisk. Or you can leave a bunch of Updater machines running and let tools push updates to them. Periodically, run a script to shut them down and promote the images.
Thank you for your fast response.
Hi Carl,
First off – thanks for your site…my Citrix team uses your docs to install/upgrade almost every component in our environment.
The issue – After logging on to a non-persistent VDI in read only mode, created using XenDesktop Setup Wizard with a VMware Hypervisor back-end, we see the following behavior:
– Open CMD Prompt
– Create new folder in C:\Temp (already exists on the read-only image)
– Copy any number of files into this new folder (we named it Test and copied all the admx files from C:\Windows\Policydefinitions, just because it was an even 200)
– The copy is successful, 200 files copied
– We run the DIR command to find only the first 31 files show up
– Open File Explorer, All 200 files are there just as they should be, only viewing the files from DOS is the problem
If the image is in read/write, the problem doesn’t exist
We have tried multiple images/templates/builds, etc.
The way we stumbled upon this is that an older app installed on the image was reaching a limit of 28 pages when trying to print-to-PDF and part of its process was easily mimicked by our copy/DIR testing
We have the following infrastructure with 100s of target devices running from multiple images flawlessly aside from the above mentioned:
– 3 PVS Servers – 7.15 LTSR CU2
– VDA and PVS Target Software match PVS and DDC versions – 7.15 LTSR CU2
– vDisk is Win10 1703 with SEP 14, AppSense, and app layering (although we have removed these and had same results in testing)
– Machine Catalog is created during the Wizard process and is set to Random
– Delivery Group is nothing special, just presents users with a random VDI that’s in the pool
This is our first attempt at a non-persistent VDI solution, and currently have 800+ VDI using the image with various results (95% of users have the user during any given day, the other 5% work fine with the app that uses c:\temp).
I feel this surely has something to do with the cache/difference disk file, as it only happens on production/read-only.
Each target is set to: Cache in device RAM with overflow on hard disk, with 2048MB Max RAM size.
The differencing file has never grown past 4MB.
We have had MS Platform Engineers/Designers, Citrix high-level techs/designer, and some very intelligent people that work for my company – They are stumped
We have done the steps I consider to be obvious ones – New template, new DG/MC, new targets, different resource pools and datastore clusters on the VMware side.
Do you have any suggestion/questions/comments/complaints,recipes…anything at all that might point us in the right direction?
Thanks so much!
Ken
One of my peers just mentioned a fix for layering and missing files. But I think you said that you tried without layering.
Please share! We have a requirement to use elastic layering for our images, and taking that portion out of the final RO image seems to have eliminated that symptom. That said…we have to get elastic layering back into the mix, so I would love to get more input!
Private fix for Layering 4.12. Storage filter driver. Specifically for Office 365 layer.
Hi Carl,
For some reason I can create new devices using PVS but they’re unregistered. I checked if delivery agents is installed and for some reason it’s NOT installed for the new PVS created devices.
So, I manually created a device pointing to the original vDisk that was created from the original target device and have delivery agent installed.
I fired up both the original Target device VM and the manually created device booting to the same original vDisk.
only 1 VM can see the installed delivery agent and the other just has target device install.
Cheers
Hello Carl, is it possible to not update bdm disks for all Targets the same time i think about the followring
-Update Boostrap on PVS Server
-Shutdown One Target
-Update Strap
-Power On
Is this Possible or getting the other devices an error ?
Or even worse they cannot boot anymore?
Do you mean Boot ISO? Or do you mean Boot Partition?
What updates do you want to do to the PVS Bootstrap? I think the BDM uses its own bootstrap with its own list of servers and probably isn’t affected by the servers configured in the PVS Server’s Bootstrap.
Hi Carl,
I need to install and configure a new environment with Citrix Provisiong Services 7.15 where target devices will be using BDM. With other boot option it was recommended or was to have 2 NICs in PVS server and targets decices, Using BDM is the same? I mean,it is recommended to user two vNICs?
Two NICs on PVS Server? I think it’s more trouble than it’s worth.
Hi Carl,
After reboot my Target Devices are having blue screen and massage “A duplicate IP address as assigned to this machine while attempting to boot from the network.
rafiq, Did you ever get a solution to this issue?
Hi Carl,
On my target device, I have a 30GB (D:\) drive dedicated to Write Cache. I have C:\ set to None and have D:\ set to 8GB for paging file. I am in private image mode of course, however whenever I reboot my D:\ acts like it needs to be formatted again. It turns into a RAW, let alone at long in I get the notification that the OS is creating a local paging file. I have tried multiple times to reformat and reboot, etc. Can’t figure out for the life of me what is going on.
Any thoughts? Thanks!
That’s new to me. You might have open a support case.
Hello Carl,
i have a question about the streamed VM setup wizard. In the wizard i have to choose a template to create the machines. Will the wizard use storage-level fast disk clone (which is the default when you manually create a machine from a template on XenServer) or will it create a full copy of the template disk? I didn’t find an answer in the Citrix docs.
In vCenter, it’s definitely a thin provisioned full clone of the .vmdk file. XenServer should be the same.
Hi Carl, it is good article. I have question, can a diskless client(harddisk removed) boot from PXE and get apps from XenApp server? diskless client did not get a full desktop shared (XenDesktop) but some applications from XenApp server.
Hi Carl, how do you add more vCpu for PVS Target Devices. I have tried in xenserver 1 socket and 4 cores for a win7 vdi and it then says windows is not geneuine. These are non-persistent so it will keep asking. I don’t want to have a script just do rearm it each time. There must be a way?
Hi Carl, Any answers to this?
Are you using KMS licensing?
yes I am.
Hi Carl,
I’m troubleshooting the known issue with drive letters changing in target devices. I followed the CTX133476 article but it seems that solution would require me to run that change on every target device individually as well as any new target devices I ever create. Is that correct? I’d prefer to have the change made centrally on the golden image that the target devices would then adapt. It would be brutal to log into hundreds of images and manually run that command to update the drive letter. Is it possible to change it globally?
You mean the UniqueID?
Can you fix it on one of them, and then clone that target to additional targets?
Hi, is there a way to clone a personal vDisk to save time reinstalling apps for someone else.
I don’t think I’ve tried that.
I’ve got one for you.
We have PVS 7.9
I tried the wizard and use the network we need for streaming (just making sure you dont think that’s an issue) and it creates a VM where we cannot change the boot order. This for both the PXE and BDM option, which do not boot.
At first I thought it was the image being used but then used a full vm, created a device in PVS, used that mac address, created a BDM on an iso, attached that iso to the VM, and it booted with no problem.
What do you think the issue could be as I need to create quite a few and need to use the bdm partition option.
I don’t think I’ve tried the XenDestkop Setup Wizard with BDM boot and multiple NICs. Try posting your question to Citrix Discussions and a Product Manager might respond. I personally don’t see a need for multiple NICs.
You could try the Streamed VM Setup Wizard with a template that is configured to boot from an ISO.
Hello Carl,
I need to use PVS target devices in the context of an existing SCVMM 2012 R2 infrastructure which is making use of static IP pools for each newly created VM. I have no DHCP servers in this infrastructure, therefore I am using the BDM option in PVS 7.13. Is it possible to make this configuration work without the use of DHCP? Static IP addresses are allocated automatically by SCVMM for each new VM, so I cannot find a way to pass this information to the VM to be booted from a vDisk, at least not in the BDM .iso. Not sure if this could be done via Powershell. Any ideas/thoughts?
Hi Carl ,
Do you have the minimum Required privileges a PVS User need in order to control a HyperV Environment ?
I have the similar privileges for the vnware environment. Do you have any ?
Thanks
Christos
I think the account needs to be a VMM administrator. http://docs.citrix.com/en-us/xenapp-and-xendesktop/7-13/install-configure/install-prepare/msscvmm.html
Hey Carl
Thank you very much for your Blog, it helps so much understanding Citrix.
I have one question: We have an existing Farm with 15 Servers, PVS and Machine catalogue are already existing.
Now I want to add one more machine to the existing machine catalogue, but cannot find a way to do this. I think it should not be that difficult, could you maybe give me an advice?
Thank you very much
If you’re using the PvS XenDesktop Setup Wizard then it will add it automatically. If you’re not doing that, then in Studio, right-click the Catalog and Add Machines. There’s a wizard to connect to PvS and get the devices from the device collection.
Having problem with imaging wizard on target device with Windows Server 2016 on Windows Ser er 2016 Hypervisor. Gen 2 all the way with Standard Synthetic network adapter. The Wizard starts and creates the Machine object on PVS + initial Image file on PVS, but fails after the required reboot. Before reboot the VM is set to boot on network and Harddisk + Private on the PVS side.
Anyone tried provisioning a 2016 Server Gen 1, Synthetic network adapter?
How are you booting? Using Boot ISO?
Hey Carl !.
Got this solved by using DHCP options 11. This due to the UEFI boot
https://docs.citrix.com/en-us/provisioning/7-7/pvs-install/pvs-configure-UEFI.html
Hi Carl i need an information please. What is the correct dhcp options for a system that dont use the PXE?
66 and 67. However, 66 usually only accepts one TFTP address so HA of TFTP needs to be considered.
Carl,
“If you store the template in the library then you might see the issue described in CTX128750 Hyper-V Synthetic Network Interface Card Reinitializes on New Target Devices.”
due to this issue, I am unable to disable any offloading per best practice on my pvs targets as it “recreates the NIC”.. Have you ran into this and do you know of a good workaround?
Having challenges booting machines through with the created vDisk.
The conversion was successfully and vDisk reconfigured to “Standard Image…” for multi usage. Followed the steps successfully as to sealing the vDisk, but all I get is blue screen (stop error 0x0000007b) with additional devices created. I am only able to use the vDisk with the “Master Device”, every others fails.
I intentionally disable the AntiVirus both on Master Device and PVS-Server before the conversion, to eliminate any problem it could cause.
Please any tips where to look into?
We are using XenServer as Hypervisor.
Thanks
Did you clone the original machine to create more target devices? If you didn’t then the VM hardware might be different.
I actually duplicated the Master Device, convert the duplicated copy to template, then create the target devices from the template.
The duplication was tried both with “Fast clone” and “Full Copy”, but same effected.
I will try converting the Master Device directly to template, then create the target devices. Maybe something is going wrong somewher with the copy.
What would be the ideal Option in this case when duplicating, FastClone or FullCopy? Those are the two Options XenServer offers.
Thanks
Hi Carl
I had to set aside the citrix issue for awhile to resolve other more pertinent things, reason I am just coming back with new development.
Now I am back in PVS but still facing the same “Blue Screen”. This time I converted the “Master Device” itself to “Template” and later use in PVS to create target devices.
Can’t see what I could have done wrong in the process and I need to seal this functionality. We are trying to move away from MCS to PVS. The other thing is that the VMs are on XenServer.
Anywhere I should look again?
Thanks
After upgrading from PVS 7.8 to PVS 7.11 (together with upgrading from XD 7.8 to XD 7.11) the XenDesktop Setup Wizard is no longer working.
After launching the wizard and entering the XenDesktop Controller address, we receive the following error:
“Cannot connect to the delivery controller at address ; XenDesktop FullAdmin or MachineAdmin Permission Reqruied”
In Citrix Studio both the logged-in user account and the PVS service account are configured as “Full administrator”.
Any idea?
We had the same problem.
If you use Win2008R2 on PVS 7.11, try upgrade Powershell to 3.
https://www.microsoft.com/en-us/download/details.aspx?id=34595
Now XDSW should work !
hi carl with creating static windows 7 machines 1:1, does the pvs need to be fixed or dynamic?
Fixed or Dynamic refers to disk space allocation. I assume you’re doing non-persistent linked clone, which means only the cache disk grows.
If you’re doing persistent VMs, then I wonder why you’re using PvS? It would be easier to create full clones in your hypervisor, or use the new MCS Full Clone feature in 7.11. There’s almost no benefit to PvS for persistent VMs.
Hi,
The XenDesktop Wizard is not working as the devices failed. Any thing I can do to troubleshoot this? We use XenServer
Hi Carl,
Any ideas how to troubleshoot the xendesktop wizard failing to create device?
Hi Carl,
We have configured Citrix PVS 7.8 and created a Vdisk Image from UEFI Virtual Machine. In Dhcp 66 and 67 along with 11 options are configured. in option 67 i have mentioned the bootfile name i.e. pxxx64… which is compatable for the UEFI target machines to get the boot file from PVS.
I have some legacy bios Vdisk and I want to stream this vdisk for legacy bios VM’s and I am not able to understand where I need to mention this ardbp32.bin file in DHCP.
Can you please help me with this ?
Regards,
Chandra
One option is to boot the legacy machines from ISO. Another option is to create DHCP reservations for the legacy machines and adjust 67 for those reservations.
Hi Carl, great manual, thanks!
We experience the “Hyper-V Synthetic Network Interface Card Reinitializes on New Target Devices” issue.
Whenever a new machine is created from a template it generates a blue screen when it boots. This behavior does not occur when a clone is used in stead of a template, just as the article explains.
Is there any way we can still use the XenDesktop setup wizard to create VM’s? It only recognizes templates, not clones.
Or does this automatically mean we have to create all VM’s by hand using clones?
Did you create the template by cloning your original VM?
I created the template from a clone, yes.
I don’t have the possibility to use the actual clone in the XenDesktop setup wizard, it only recognizes templates.
Update: Got this working by starting over and doing the whole process again. Now my VM’s are all nicely booting from their BDE drive, even though they are GEN2. Just make sure secure boot is disabled.
Create a clone first, than create a template from that clone, and use it for the XenDesktop wizard.
It does seem to work that way. Just make sure there aren’t any ISO’s mounted on the original VM, Clone and template while going trough the process.
Hi Carl,
Hyper-V is hosting my infrastructure, so my target devices boot from a legacy NIC with a second synthetic NIC on the same VLAN as the legacy NIC and a third synthetic NIC for front end LAN communication, when the OS is loaded.
I’ve started seeing a very odd problem where the vDisk streams OK and the OS loads, but when the OS is loaded I have noticed that the synthetic NICs are not being assigned an IP from DHCP. If I put the vDisk back into Private mode and boot from the master image device, the NICs get an IP.
I’ve also tried an image with the 7.6 VDA that ships on the install media and the 7.6 FP3 version of the VDA, both with the same result.
Is this something you have come across in any Hyper-V implementation you have done? I tried researching the problem online, but I’m not finding any other cases that report the same symptoms.
Any help would be greatly appreciated.
Cheers
I very rarely do Hyper-V deployments. Try posting to http://discussions.citrix.com where others can view and respond.
Great Article and Site!
Was wondering if you had any thoughts on thin provisioning for the PVS Cache on disk on the Xendesktop. We have issues with the cache disk growing in size and never resetting even after reboots within Vmware. We found that putting the disk to Nonpersistent mode allows us to reclaim the used disk space after the machine is rebooted/shutdown. However we loose the option to v-motion the machines to different datastores if needed while the machine is on.
Thanks again!
Are your cache disks significantly larger than they need to be?
MCS wouldn’t have this problem.
Possibly.. The cache drive is 12gb. The machines have 4gb of RAM and a page file of 8gb. Our Citrix Platinum Solutions Advisor recommended and implemented this setup with PVS for best space savings/performance. Perhaps we need to look into MCS instead, since our 300 Xendesktop environment takes a lot of space on our SAN.
While you can certainly create the cache disks as non-persistent, I would size the LUN for full cache disk utilization.
The MCS comment was geared towards the disks shrinking after a reboot. I’m not certain that the peak MCS cache disk usage would be much smaller than the PvS cache disk.
Outlook isnt using “Cached Exchange Mode” . Normally users will open up outlook and allow it to run and sit in the background or on a second monitor. The document management apps are probably heavily used.
The only way to know capacity for sure is to do capacity testing. For simulated users, see LoginVSI. Or, get some users on the machine, watch performance, and ask users if performance is suffering. If not, add more users until performance declines.
Hey Carl, I have everything working pretty well. My cachedisk in on D: and RAM cache with overflow to disk is working. One thing I don’t understand is what is the point of the Default Write Cache locations under the store properties in PVS. I specified a CIFs location there, but it doesn’t use it because I have a cache disk, but every time I try to remove the cifs location in the store properties, it just tells me something had to be specified. Is there a reason I need something specified in the store properties?
If your Target Device cache disk is not setup correctly then PvS will fallback to putting the cache disk on the PvS server. Your write cache folder should always be empty.
Hi Carl,
Thanks a lot for your more than valuable articles !
I’ve got something weird about the write cache disk.
My master Vmware machine has 2 disks (1 for local boot, 1 for writecache independent/non persistent)
While being in private mode, I setup Windows 7 so that my write cache disk is formatted NTFS, volume D:, basic disk
and I instructed the OS to put the pagefile on this disk.
My template Vmware has 1 only disk (1 for writecache).
After putting the vdisk in standard mode, I used the Xendesktop streamed VM to create one validation machine.
The machine boots fine except that Windows do not know the partition for the write cache and therefore
it created a temporary page file on the C drive.
Where did I go wrong ?
Kind regards
e-Van
I usually don’t move the pagefile. Leave it on C: and PvS will move it automatically.
Also, make sure the maximum size of the pagefile is less than the size of the D: drive.
Allright, so instead of setting a fixed size on D:, I set it as “system managed size” on C: ? (and then as written in the CTX122141 article, the PVS TDS places the pagefile automatically on the next available volume like D, E, F ?). What about the fact that when I go in the Disk management console (while being in the target device started in standard mode), I got the popup asking me to define a newly discovered disk as an MBR disk and then I have to create the volume, format, etc .. ?
It’s just like the settings I made in master/private mode are not held, that puzzles me a bit.
Your template should definitely have a NTFS formatted cache disk.
Or the XenDesktop Setup Wizard will do it for you.
The pagefile should be set to a fixed size (not system managed) that is smaller than the cache disk.
Great article, worked fine.
Question: If we want to “persist” changes in some machines ONLY (e.g. registry keys and static IP) after reboot, any idea how we can go about it?
For registry keys, are they HKLM? Or HKCU? If HKLM, use a scheduled task to write the values to a network share. Then use a computer startup script to reapply the values. For HKCU, use roaming profiles.
For Static IP, you can use either DHCP reservations? Or you can build the Target Devices using Personal vDisk. PvD would also preserve HKLM registry keys.
Hi Carl,
thanks for providing such a great website !
currently using pvs 7.6
If i need target devices with different CPU allocation ( some pooled desktops with 2 vCPUs some with 4vCPUs ) would I need separate vdisks images for these , sealed with the appropriate resources allocated at the time ? I tried to just increase the CPUs in the xencenter console and the target device is now requesting a restart ( which seems pointless in read-only image )
Thanks,
Changing the hardware might require new drivers in the image. Usually you build the image with all needed drivers. Then you select the paticular hardware on each Target Device. If you use the XenDestkop Setup Wizard then the wizard will ask you for the specs of each VM.
in the case of my different CPU requirements , do you mean i should seal the image with the maximum number of CPUs I anticipate for some of our VDIs and then when it comes to the Xendesktop wizard build the target devices with a possible reduced number of CPUs ?
Carl, I see your answer to Ralf. This would be great to know as it is always something I wasn’t sure about. How do you break up different needs for RAM and CPU in the same pool of PVS machines? Is it as simple as making sure all different resource configurations of RAM and CPU have been attempted in the MTD, and then rebooted, before creating that vDisk? How can you change RAM for a user that really needs the excess while keeping that person on the same image and in the same pool of machines without it asking for a restart?
If CPU/Memory change requires a reboot, then look in the file C:\Windows\Inf\setupapi.dev.log to determine which driver requested the reboot.
Thanks Carl! After that, Is it as simple as updating that master image in maintenance mode with that driver or would I need to put it in private mode?
Hi Carl – have you tried to use VMware storage clusters with PVS & the streamed VM setup wizard? It won’t recognize the storage cluster and just ends up creating the VMs on the same data store where the template resides. Is there a better solution than creating a template on each data store to address this? Would love to get your thoughts!
Disregard my previous message – turns out that there are too many limitations with the streamed VM setup wizard such as the lack of support for storage clusters…so I am going to have to use the XenDesktop setup wizard and make sure that I have a host connection in XenDesktop that has the ability to access all of my storage datastores.
Hi Carl,
I created my news VMs inside PVS Console 7.6 and the respective catalog on Delivery Controller, following your explanation described above. I’m using XenDesktop 7.6 Environment on XenServer 6.5. The procedure worked fine, but I had a problem with the NICs on the VMs.
I got two NICs: one Physical NIC for my server’s environment communication and I created a Private Network (Virtual NIC) for PVS Services (this is a Demo Environment on the single XenServer). The template which I used to create the VM have the two NICs (I need the physical NIC to login on the VMs with an Active Directory user account) and the Resources I configured on Delivery Controller also. The XenDesktop Setup Wizard asked me the Network for PVS Services and I selected the dedicated network for it (the Virtual NIC). When the VMs turn on, they see the two NICs but like a same network, the physical NIC got the same IP address of the Virtual NIC and that is a problem for me, because I not able to login on the VM whit the Active Directory user account (the AD server reside into another network, to reach this network I use the physical NIC)…
Could you help me to understand this issue?
Thanks a lot in advance for your cooperation.
Regards,
Alexander
Are the virtual NICs connected to different XenServer networks? How else would both NICs get the same DHCP IP?
I personally never do two NICs in my PvS machines. I also almost never use XenServer. So you might want to post your question to http://discussions.citrix.com.
Yes, the virtual NICs are connected to different networks and each network has the own DHCP server (one DHCP for the domain and another for PVS Services). Furthermore, I set the binding only for the NIC dedicated to PVS on the DHCP which assign IP address to the VMs created with PVS Services (I made the same configuration for domain DHCP, associated only to the NIC dedicated to the domain).
If I use the “Streamed VM Setup Wizard” to create a new VMs, everything works properly and each virtual NICs get the right IP address of the networks which belong, but if I use “XenDesktop Setup Wizard”, I’ve always the same problem with the IP addresses of the NICs… This stuff is a mystery for me…
What do you think about this?
The XenDesktop Setup Wizard uses the Hosting Resources defined in Citrix Studio. I can’t recall if those Hosting Resources support multiple NICs per VM. MCS uses the same Hosting Resouces so you might be able to Google search for MCS and multiple NICs.
OK, thanks Carl, I’ll do the research and I’ll let you know! 🙂 Congratulation for this article, very useful and interesting like all your articles!
Have a good weekend and Merry Christmas!
Alexander
Hi Carl turned to be that the console hadn’t refreshed. Also, as I’m using (god damned!) Hyper-V, it puts the synthetic NIC first in the boot order when it creates the VM. I copied the MAC address from the synthetic, NIC into the properties of the legacy NIC and was able to boot successfully.
Do you know of a way around this? I’d like to specify that the VM is created with the legacy NIC taking priority.
Cheers.
PvS 7.7 supports UEFI and hopefully Hyper-V Gen 2 machines. That should fix the Legacy NIC problem.
Hi Carl, I’m using the XenDesktop Setup Wizard to deploy Windows 2012 R2 shared desktop services. Everything works perfectly until the the VM is created. The wizard completes successfully, the AD account and Machine Catalogue are created, but there is no device created in PVS. Consequently, the VM wont boot from PXE as there is no device in the DB.
I must’ve missed a vital step, but I’ve been through the above and cant seem to pin down what I’ve missed.
Any thoughts?
Here’s a similar thread – https://discussions.citrix.com/topic/361691-xendesktop-setup-wizard-does-not-create-all-devices/
Are you running PvS 7.6 Update 1?
Carl,
Thank you for all this great documentation. I’m having an issue with the Xendesktop Setup Wizard. I run through the wizard, select my template and go to create the VMs and it is creating them in the wrong cluster in vCenter. The template is saved on a host in my VDI cluster yet it starts creating them in a different cluster. The clusters share the same storage but I figured it would create the VMs where the template resides. Any help is appreciated.
-Andy
In Citrix Studio, go to Configuration > Hosting. Edit your Hosting Resources. Is the correct cluster selected?
Thanks…I had it set wrong in there.
In my current XD 7.5 environment with XenServer 6.2 hosts, running the wizard creates VMs pretty quick. My new XD 7.6 environment is on ESXi 5.5 U2 and it takes ~2 minutes to create 10 VMs with the wizard. Is this normal?
Depends on your hardware and the size of the disks attached to each VM.
Hi Carl, Thanks for the awesome documentation!
I’m a bit stuck at this point now – I’m trying to use XenDesktop Setup Wizard to deploy VMs using local host (ESXi 5.5) storage for the cache disks. I’ve got 2 templates, 1 copy on each of the local datastores. In Citrix Studio Hosting node I’ve got two resources configured, one for each host with only the local storage selected (and shared storage for PvD). The environment is XD 7.6 and PVS 7.6.
When I select the host specific resource, the correct template is presented. The problem is that no matter which of the resources I select the task always runs on the same node which obviously cannot access the template on the other datastore, so currently I can only deploy VMs from one template, on that one host. There doesn’t seem to be any way of my selecting which host to run the task on.
Do you know how I can get around this?
Thanks!
Are the hosts in separate clusters? Or are they in the same cluster?
The two hosts form one cluster
If they’re in one cluster, try breaking them out into separate clusters.
Thanks Carl, We will be using RAM cache with overflow to disk and the article talks about the benefits of RAM cache with reduced load to overflow disk.
So I presume standard Tier 2 ISCSI shared storage will be ok?
I meant the underlying storage to store write cache files. (Does it needs to be Tier 1 Flash and what type of storage NFS or ISCSI?
I usually give the storage team a guesstimate of the IOPS and disk space requirements and let them figure out a solution. As long as the shared storage meets the IOPS and disk space requirements then it should work. I recommend working with a Citrix Partner to assess the requirements and design a solution.
Hi Carl
What is the recommended storage to store PVS write cache in PVs 7.X?
When caching to RAM with overflow to disk, the storage location for write cache is not as critical as it used to be. Any shared storage should be fine assuming it can handle the IOPS. See http://blogs.citrix.com/2014/07/07/turbo-charging-your-iops-with-the-new-pvs-cache-in-ram-with-disk-overflow-feature-part-two/ for some IOPS estimates. I’m not a fan of local (non-shared) storage unless you’re comfortable with its reduced functionality.
Carl,
Question regarding VDA specs/sizing for Shared Desktops. Here’s a breakdown of what im currently spec’d at and what the desktops are mainly used for. Any suggestions/adjustments would be greatly appreciated.
Using PVS 7.7
Server 2008 R2
14gb RAM
4vCPUs
60gb C:
30gb Write Cache
Mainly the desktops are used for mostly Outlook, Word & Excel (with add-ins) and programs that are used for document management. So majority of the workload is going to be via those apps.
How does my sizing look?
Im hoping to get around 15-20 users per Shared Desktop. Is this reasonable?
4 vCPUs is typical for 2008 R2.
15-20 is not unreasonable. But it depends on the apps and how they are used.
Also using Cache to RAM with overflow to disk 2048MB.