Navigation
This article applies to all versions, including 7.18, and 7.15
- Change Log
- Planning
- Server Prerequisites
- Server Installation/Upgrade 💡
- SQL Database
- Configuration Wizard
- Launch and Login
- Welcome Wizard
- Customer Experience Improvement Program (CEIP)
- Users
- Direct Import
- Install Capture
- Self Provisioning
- Solutions
Change Log
- 2018 June 6 – updated Install/Upgrade for AppDNA 7.18
- 2017 Dec 15 – in Install Capture sections, added link to Citrix Blog Post Speed Up AppDNA Install Capture by Using a Pre-captured Before Snapshot
Planning
Your Citrix License Server must have XenApp or XenDesktop Platinum Edition licenses. If you don’t have Platinum Edition licenses, then work with a Citrix Partner to perform AppDNA analysis.
AppDNA server should have the following:
- 12 GB of RAM
- 80 GB free disk space for up to 200 applications. 150 GB if more applications.
- Cannot be installed on a Delivery Controller. Must be a separate machine.
SQL Server:
- SQL 2008 R2, 2012, 2014, or 2016. SQL Express is not supported.
- AppDNA generates load on SQL during install (duration = few hours) and during import and analysis.
- See Optimize AppDNA > Optimize SQL Server at Citrix Docs.
- Disk space could easily be 20+ GB.
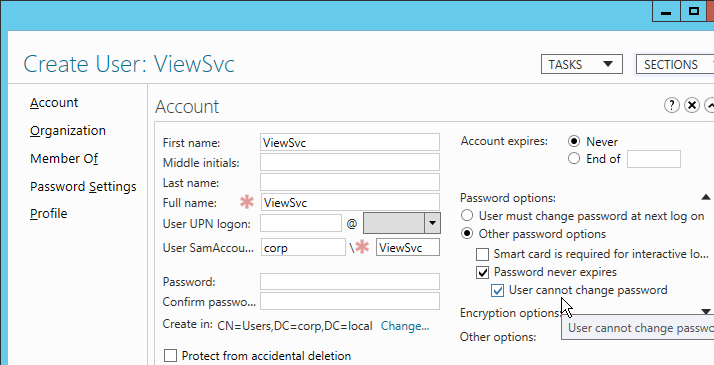
AppDNA can directly import and analyze .msi installers. For non-.msi installers, you’ll need a machine to capture the install process. The machine(s) should be the same operating system as what you are migrating from. The machine can either be directly accessible through a hypervisor, which means AppDNA can automate the capture process. Or it can be any machine where a user can perform Self Provisioning.
Server Prerequisites
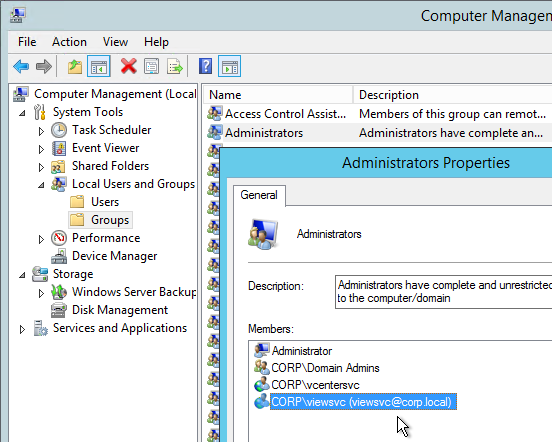
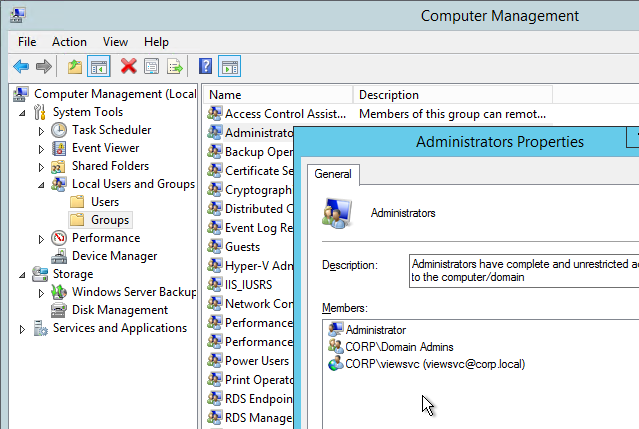
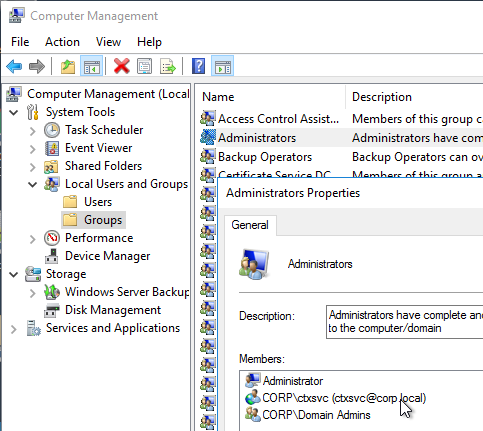
- On the AppDNA Server, open Computer Management. Edit the Administrators group, and add the service account.
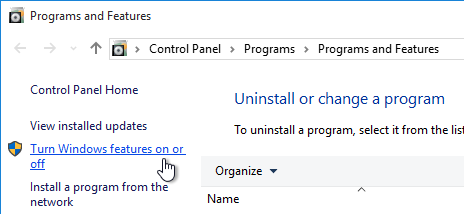
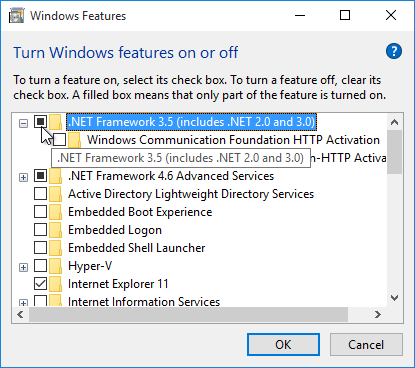
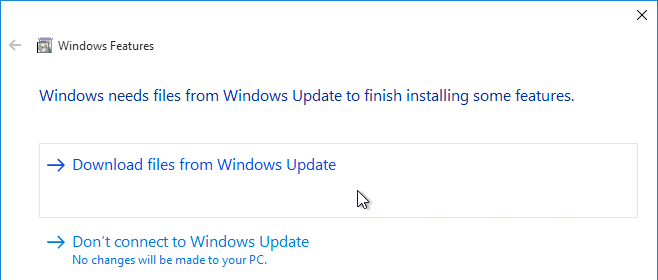
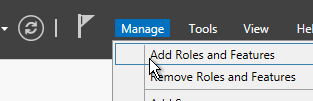
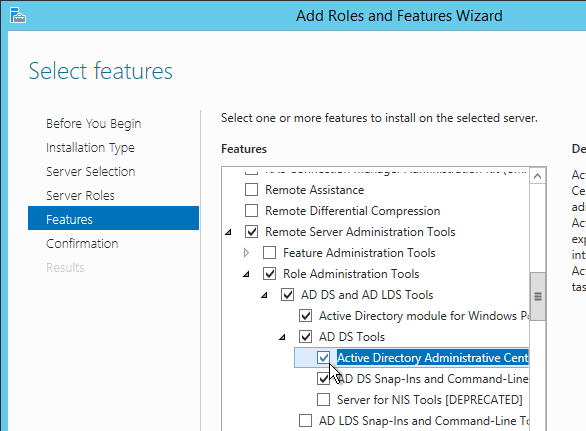
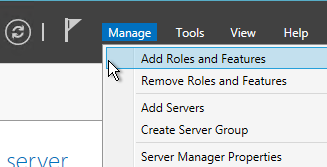
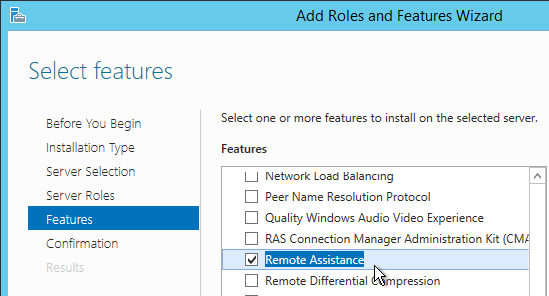
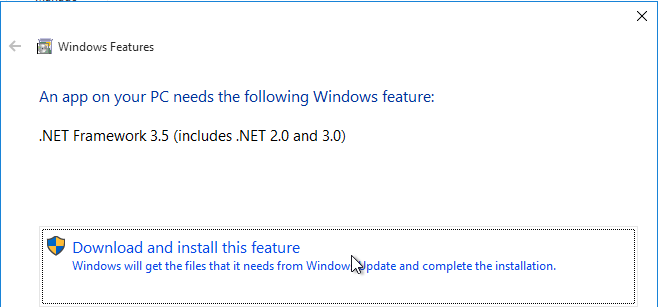
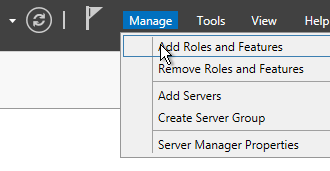
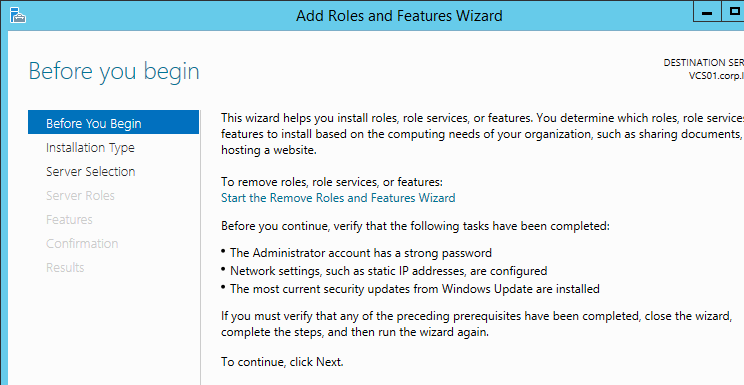
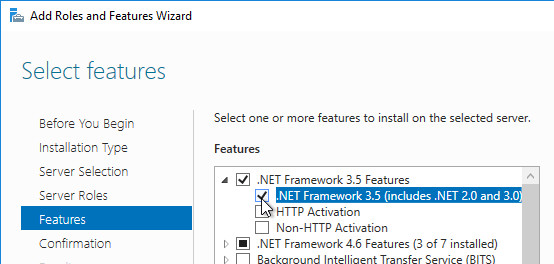
- In Server Manager, start the Add Roles and Features Wizard.
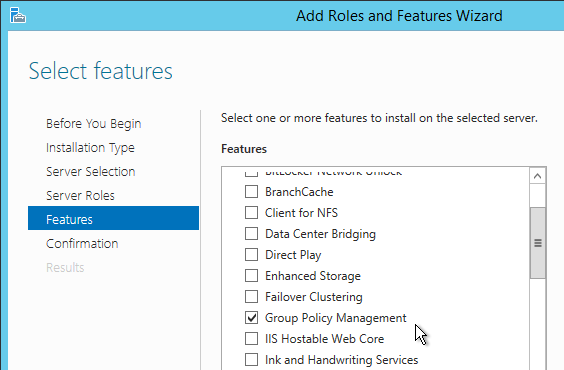
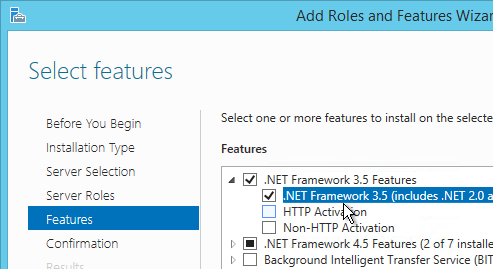
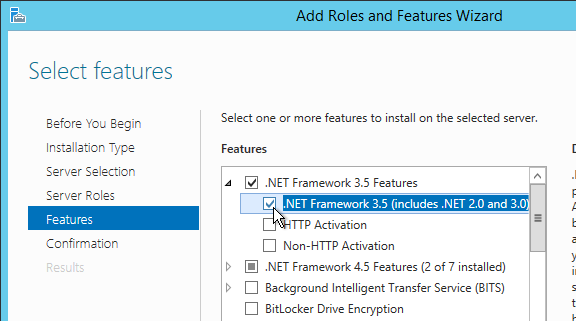
- In the Select features page, select .NET Framework 3.5. Click Next.
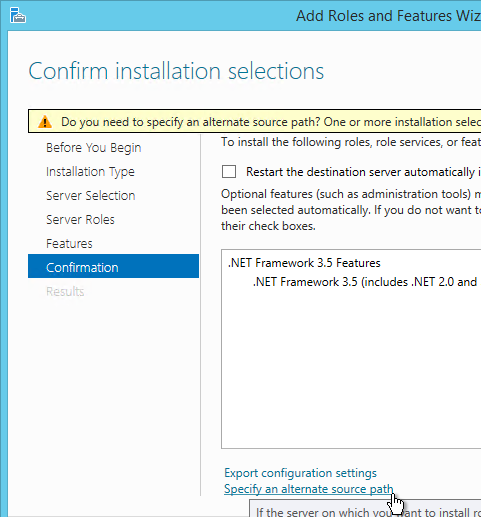
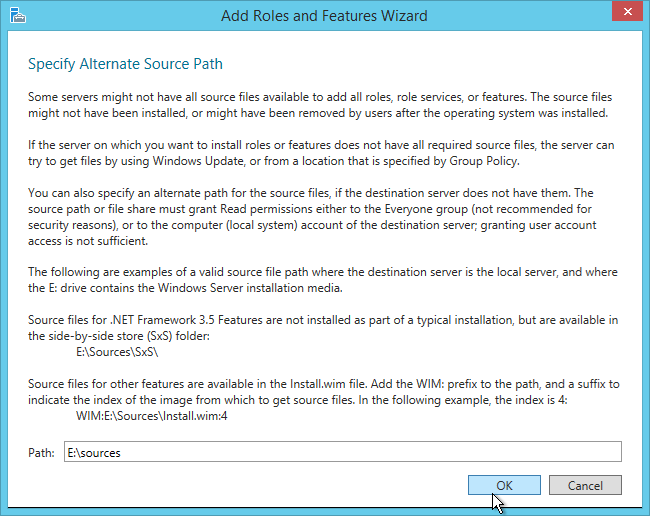
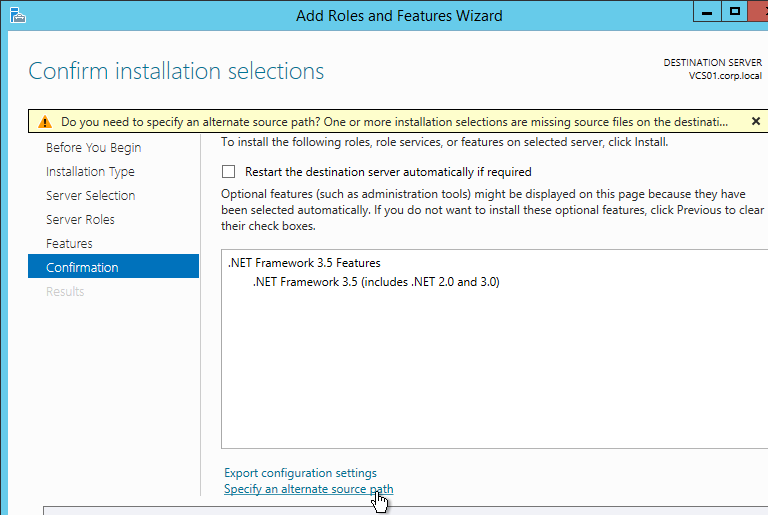
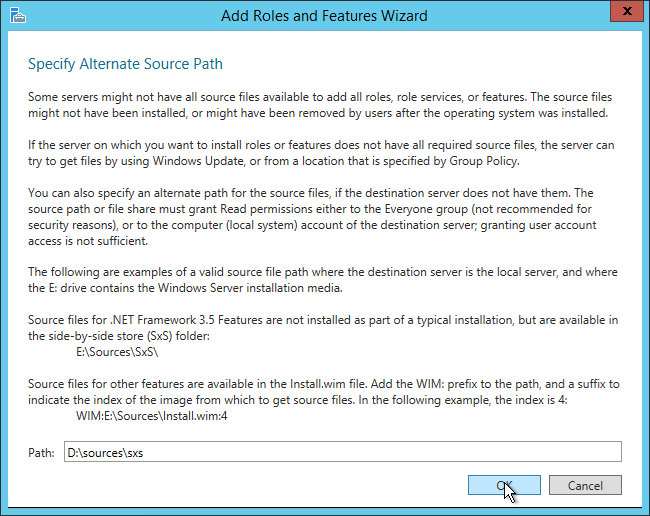
- In the Confirm installation selections page, click Specify an alternate source path.
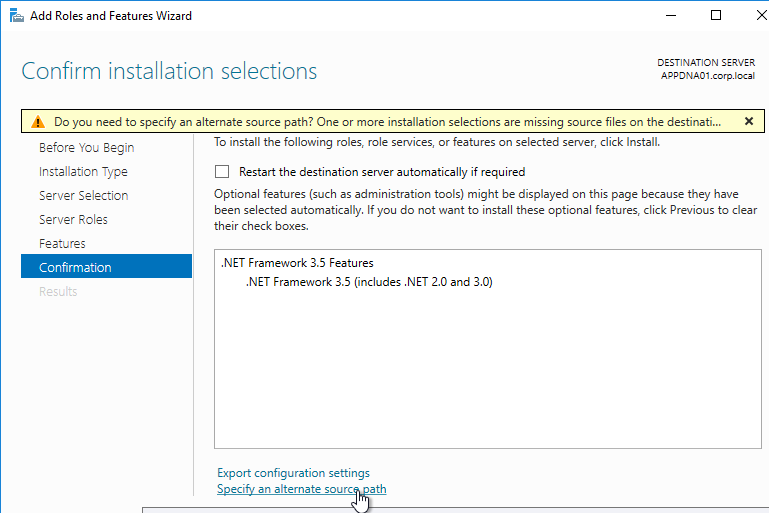
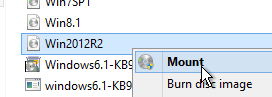
- Browse to the sources folder on the Windows Server 2012 R2 or newer DVD, and click OK.
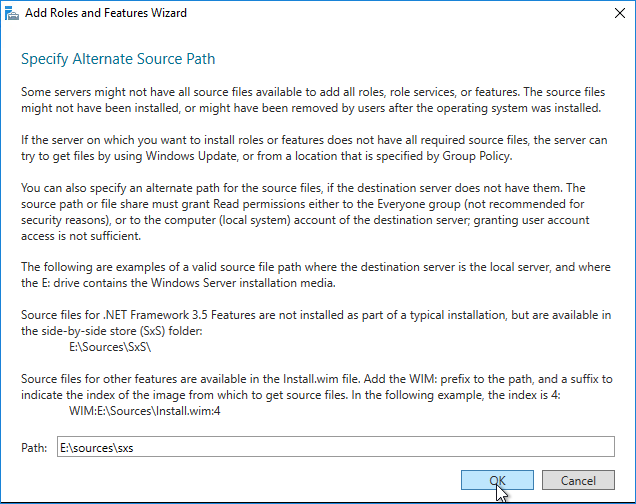
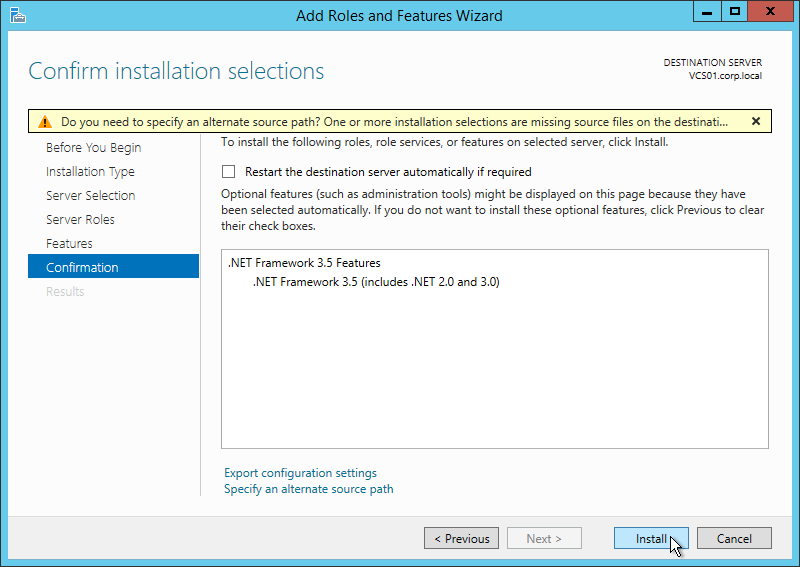
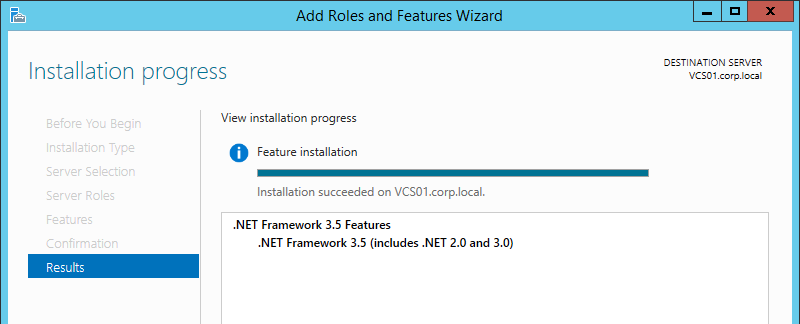
- Click Install.
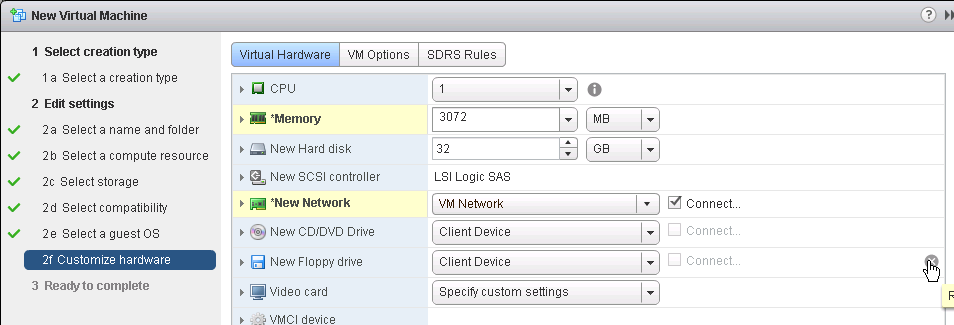
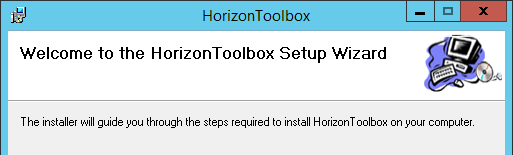
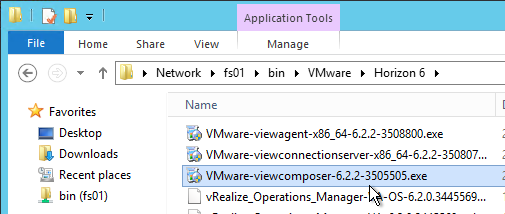
Server Installation/Upgrade
The same installation process is used for both new installs and upgrades.
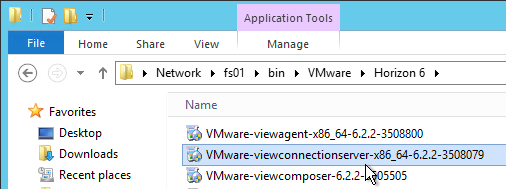
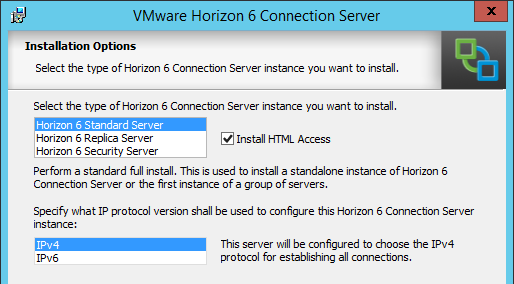
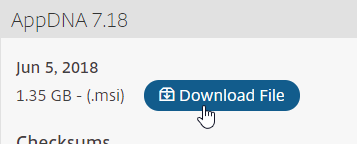
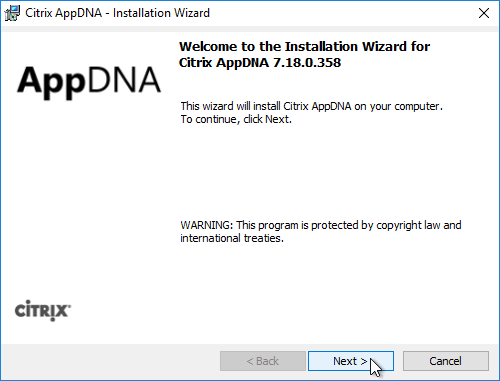
- On the AppDNA server, run the downloaded AppDNA 7.18 (Citrix-AppDNA.msi).
- It takes a few minutes to launch.
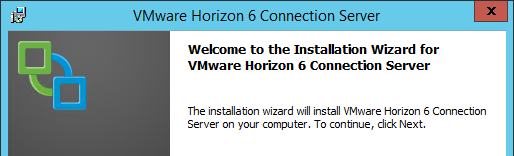
- In the Welcome to the Installation Wizard for Citrix AppDNA 7.18 page, click Next.
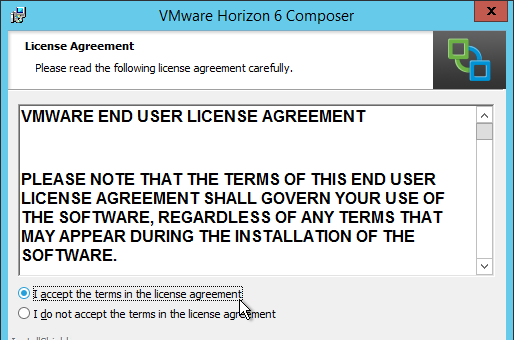
- In the License agreement page, select I accept the terms, and click Next.
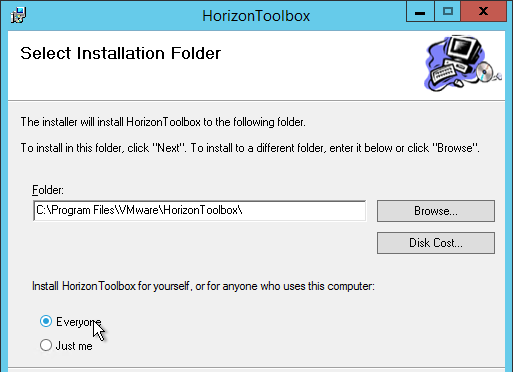
- In the Citrix AppDNA Installation Type page, select Complete, and click Next.

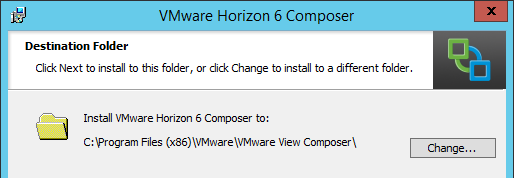
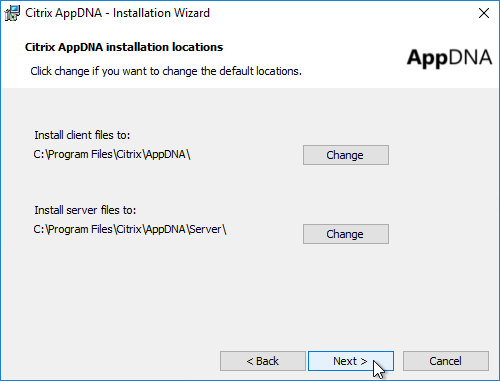
- In the Citrix AppDNA installation locations page, click Next.
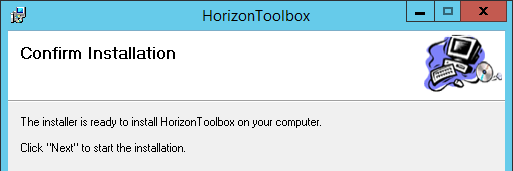
- In the Ready to install Citrix AppDNA page, click Install.
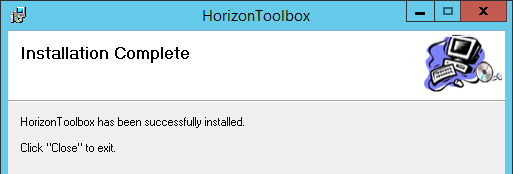
- In the Installation Wizard Completed page, click Finish.
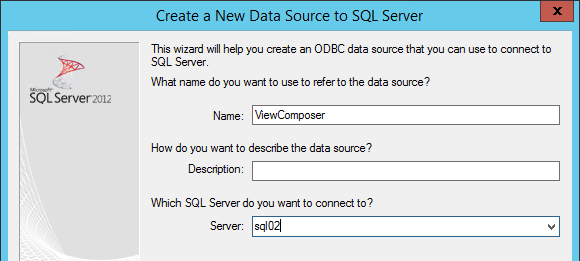
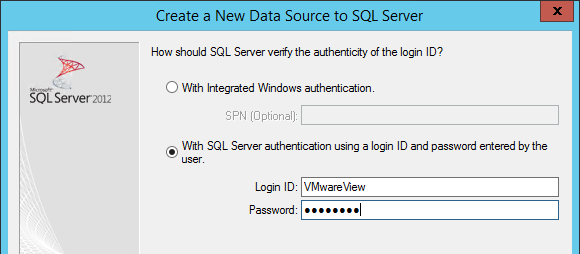
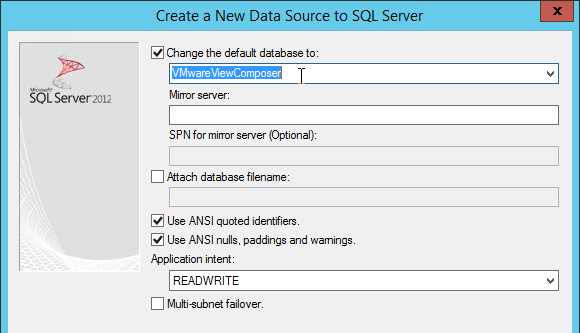
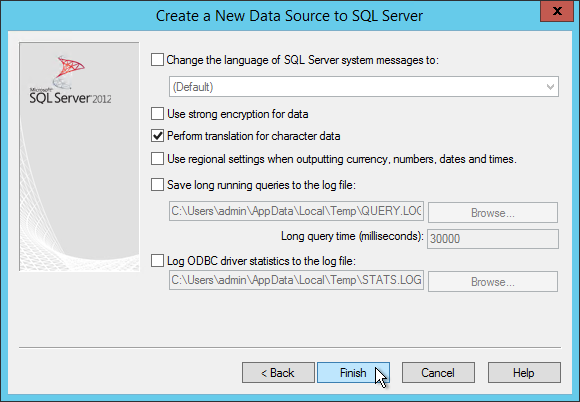
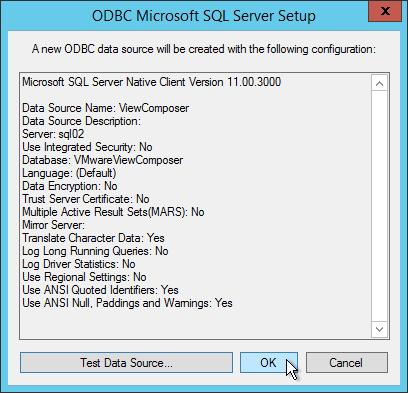
SQL Database
Instructions from CTP Eric Haavarstein Configure Citrix AppDNA 7.11 in Minutes instead of Hours:
- If you are upgrading an existing installation, then skip to the Configuration Wizard.
- If this is a new installation, on the AppDNA server, go to C:\Program Files (x86)\Citrix\AppDNA\Server\Bin, and extract the AppDNA.bz2 file.
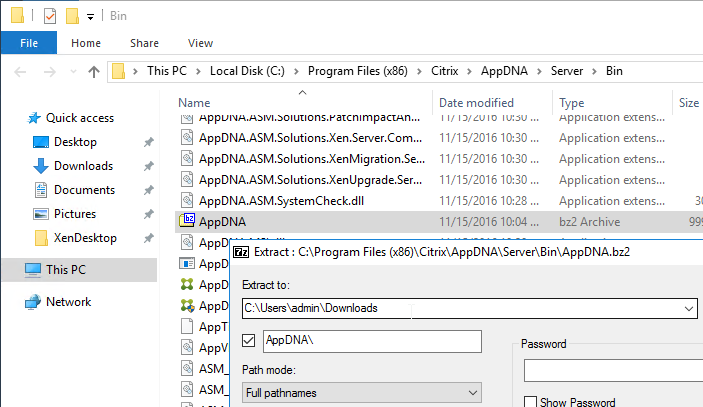
- Rename the extracted file with a .bak extension.
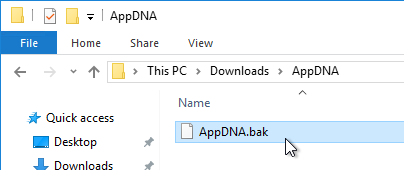
- Copy the file to the backup folder on the SQL server.
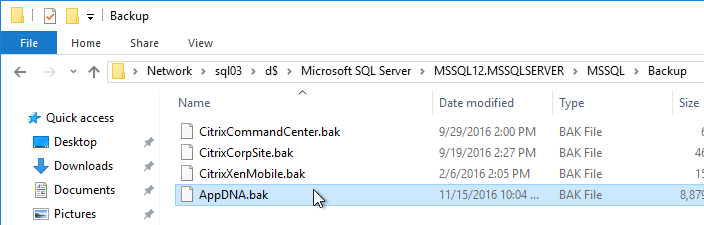
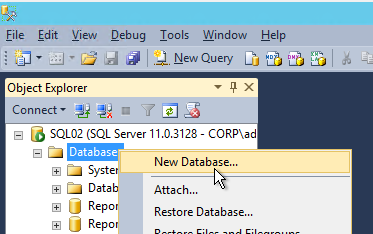
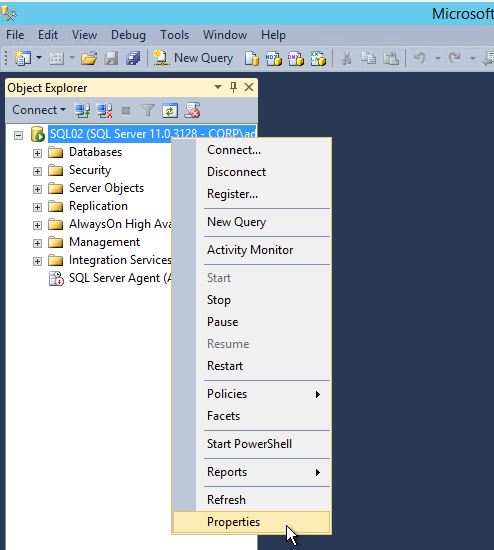
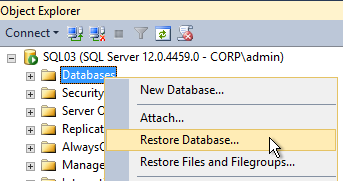
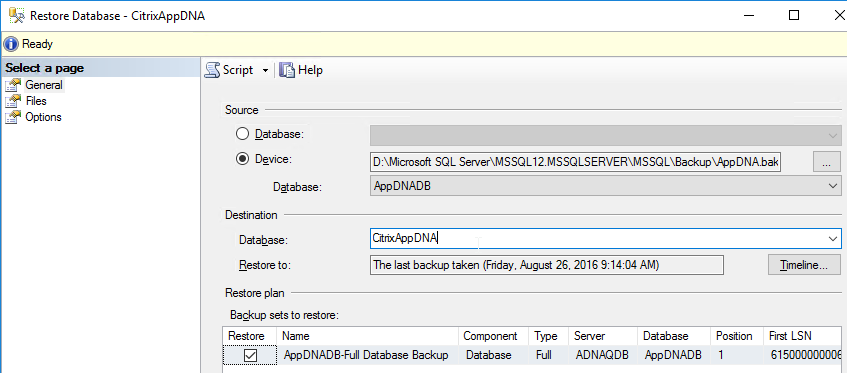
- In SQL Studio, right-click Databases, and click Restore Database.
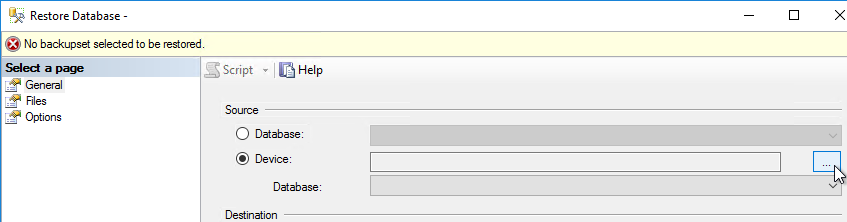
- Change the Source to Device, and click the ellipsis.
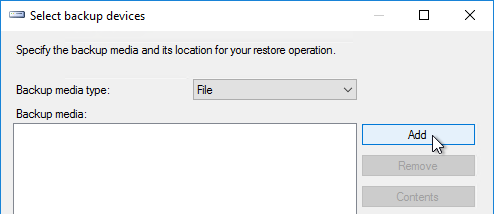
- Click Add.
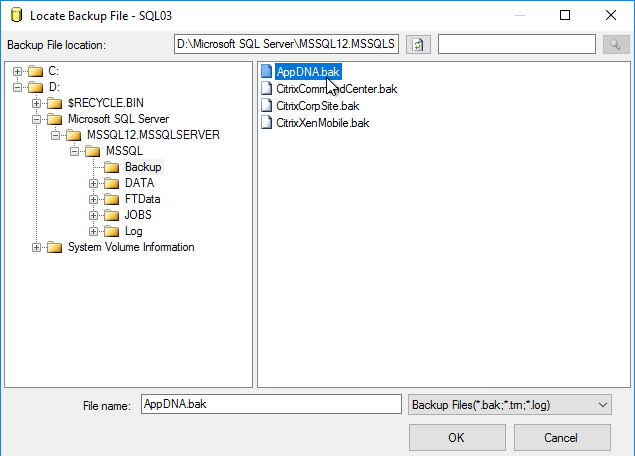
- Select the AppDNA.bak file, and click OK twice.
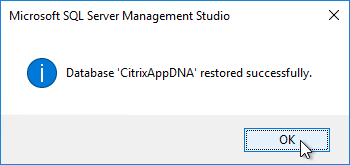
- Change the destination database name as desired, and click OK to begin the restore.
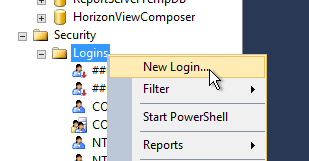
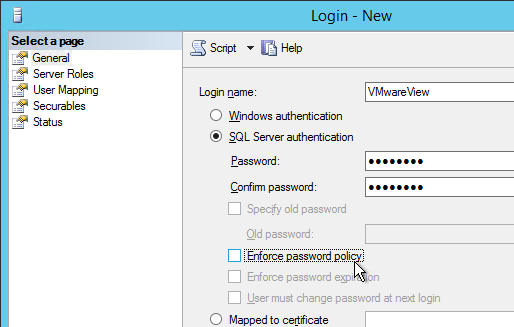
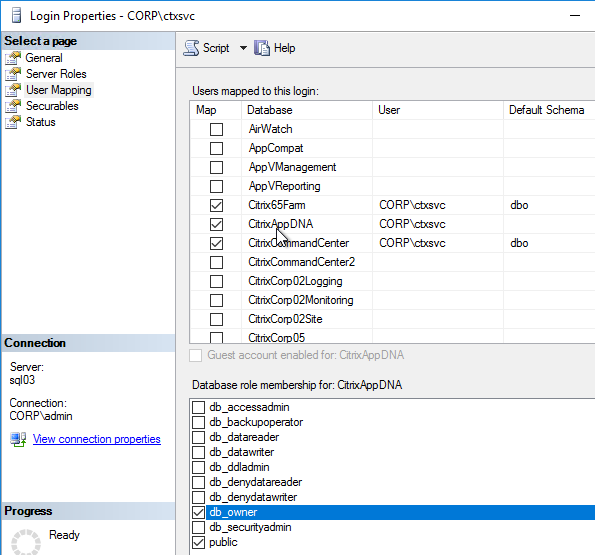
- Add a service account to SQL logins.
- On the Server Roles page, add the service account to the bulkadmin role.
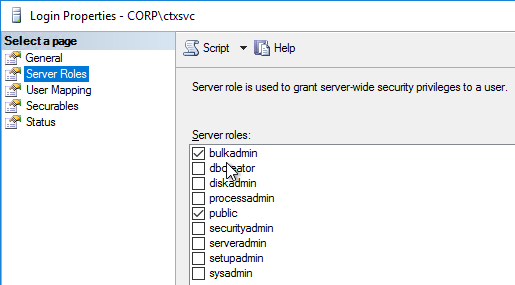
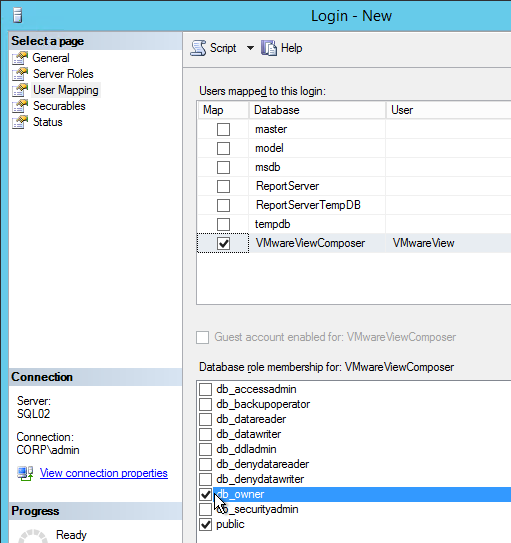
- Give the service account db_owner permission to the AppDNA database.
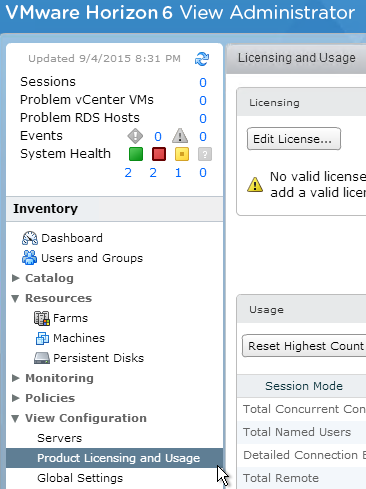
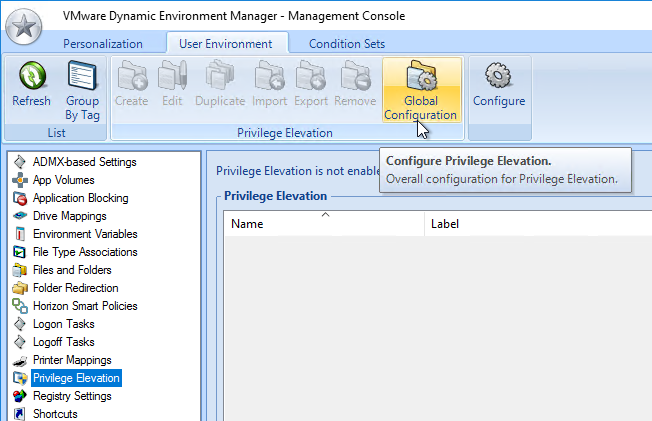
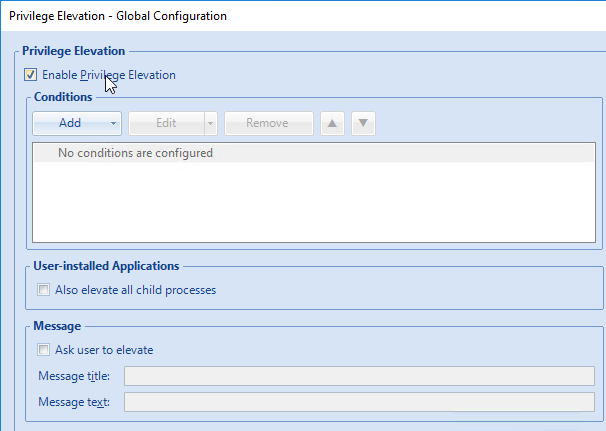
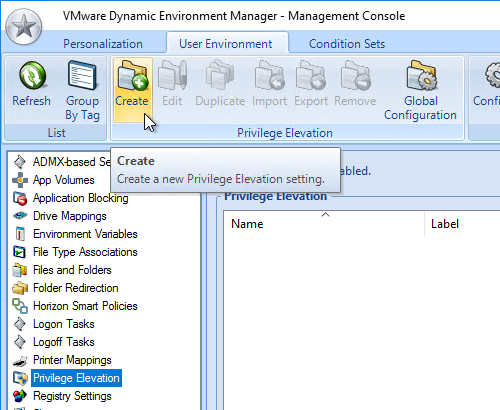
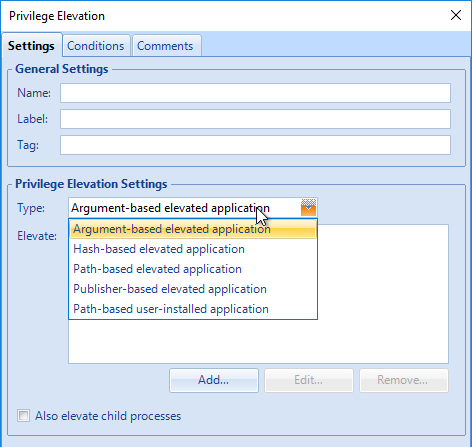
Configuration Wizard
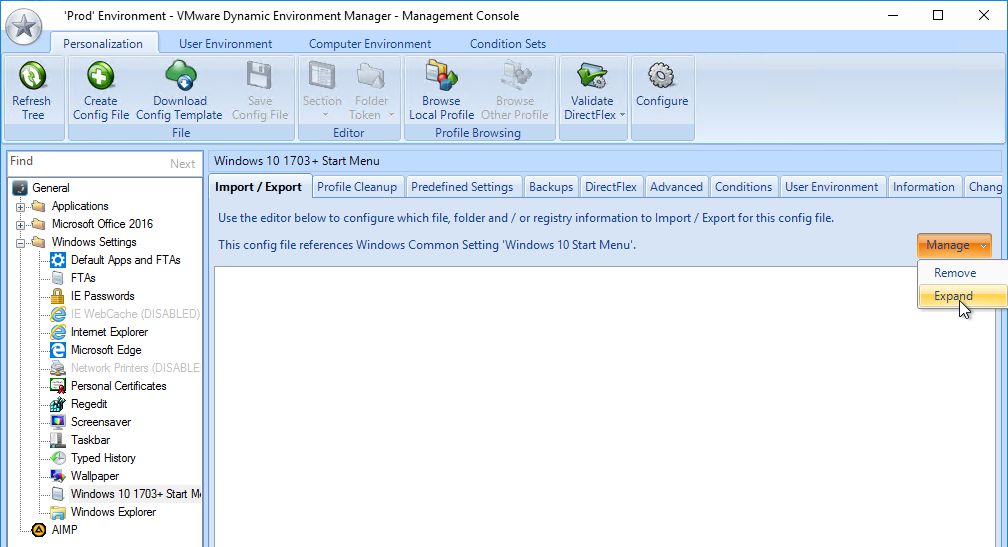
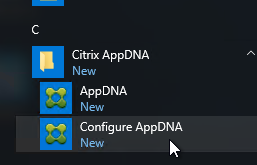
- The Configuration wizard launches. Or you can launch Configure AppDNA from the Start Menu.
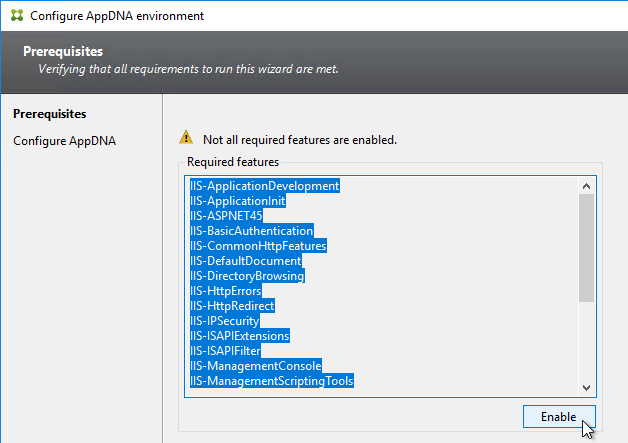
- In the Prerequisites page, click Enable.
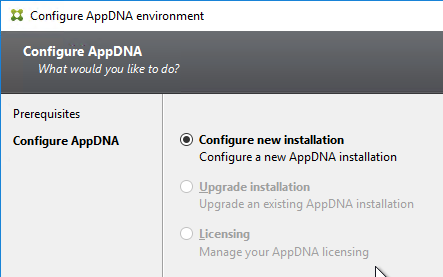
- In the Configure AppDNA page, if you are upgrading, select the Upgrade installation option, and click Next. The remaining wizard screens will be different but similar.

- Or leave it set to Configure new installation, and click Next.
- Or leave it set to Configure new installation, and click Next.
- If you are upgrading, on the Choose database page, after selecting your database and clicking Next, if you see a message about Subscription Advantage expiration, click OK, and go back a couple pages.
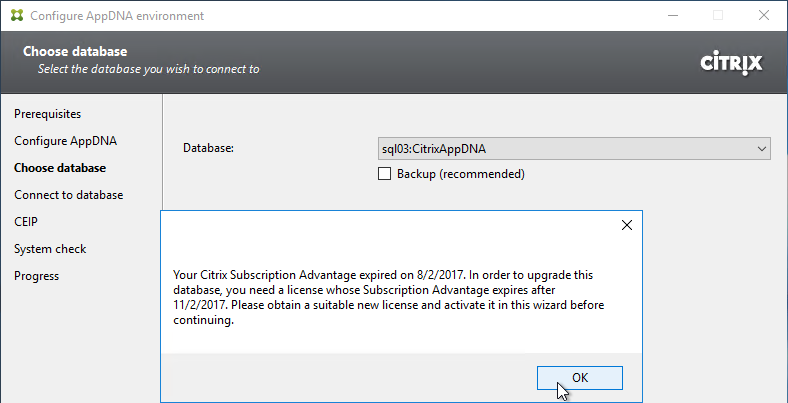
- Back on the Configure AppDNA page, change the selection to Licensing, and click Next.
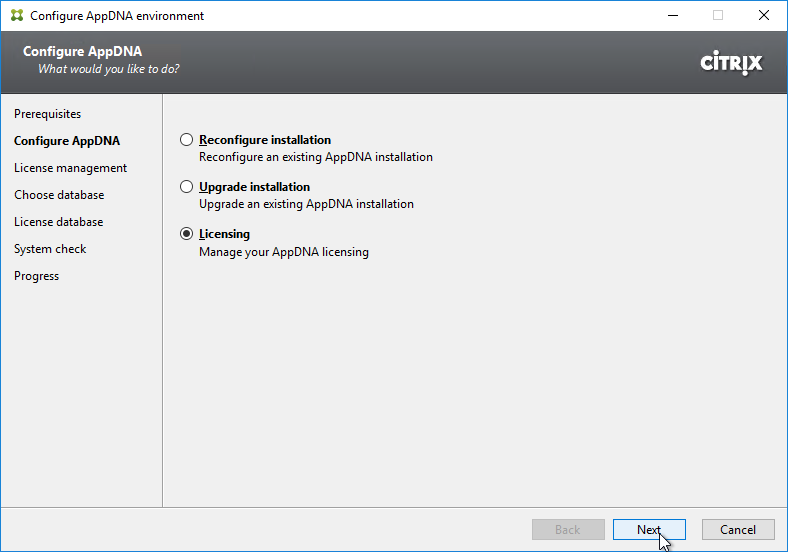
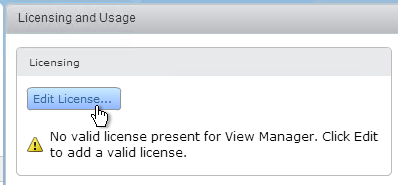
- In the License management page, leave the selection set to Activate, and click Next.
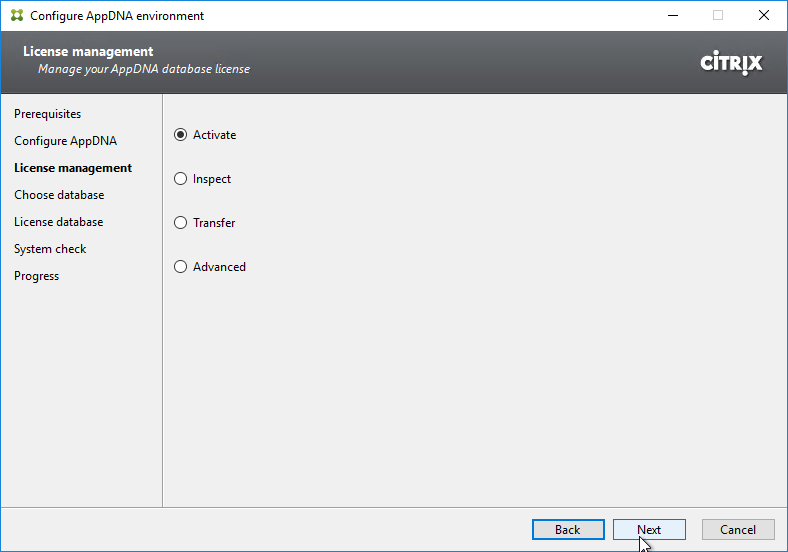
- In the Choose database page, click Next.
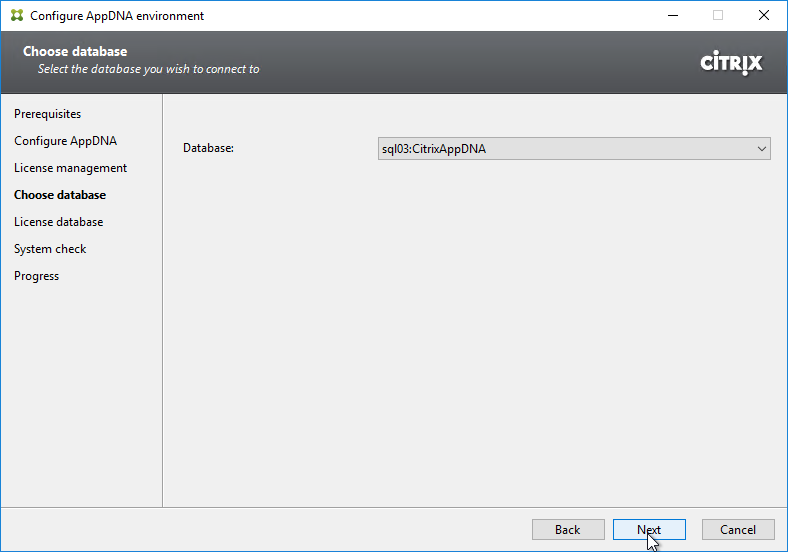
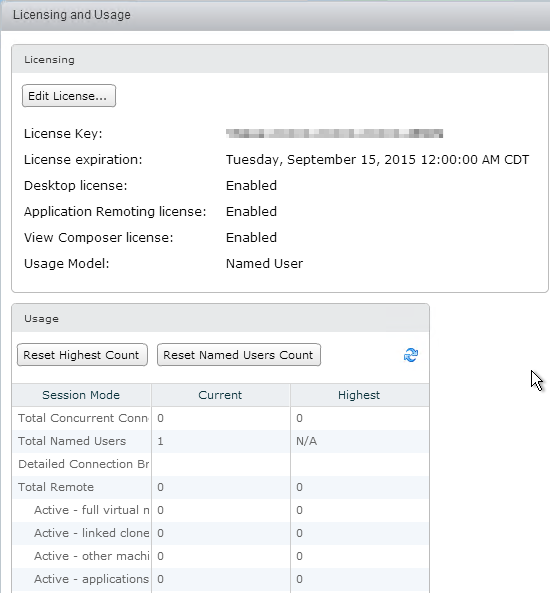
- In the License database page, enter your license server name, and click Next.
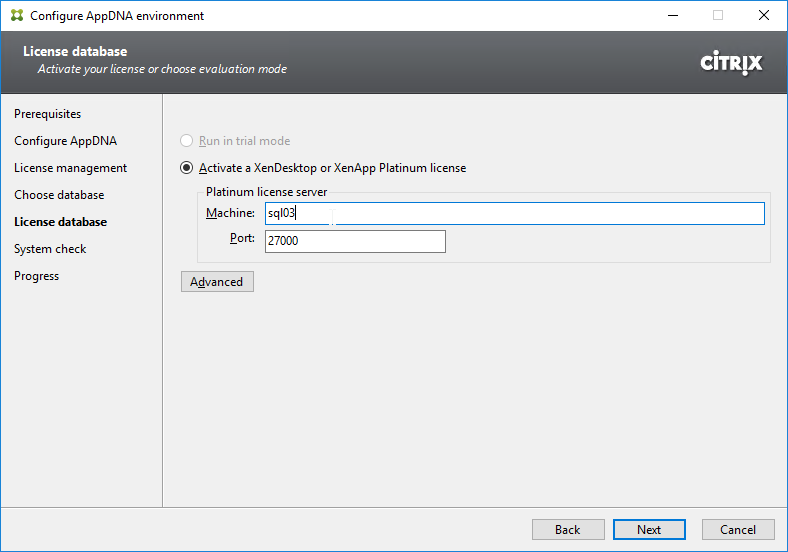
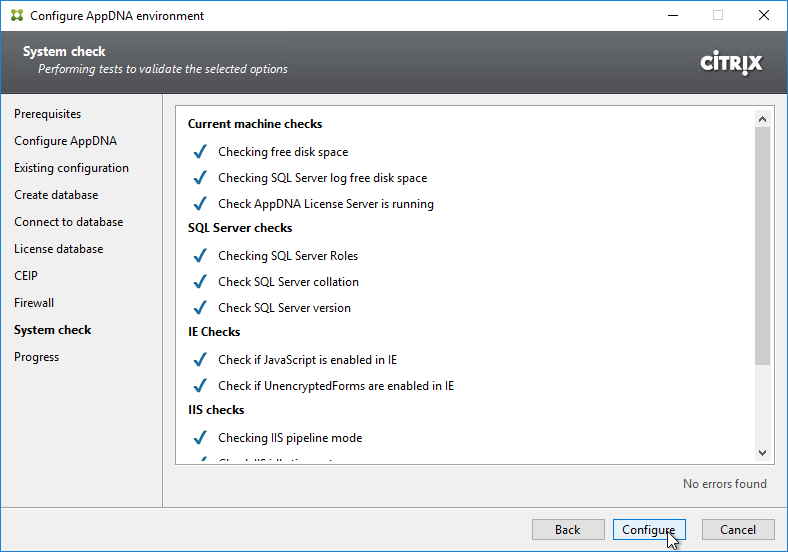
- In the System check page, click Activate.
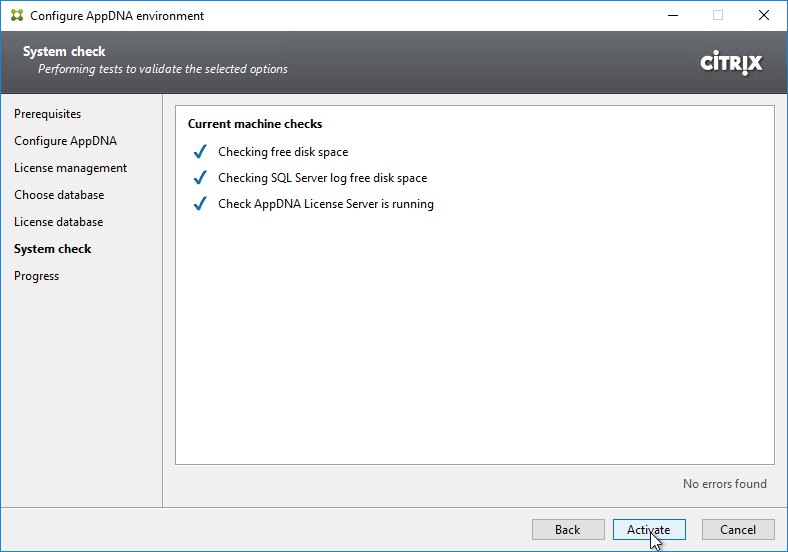
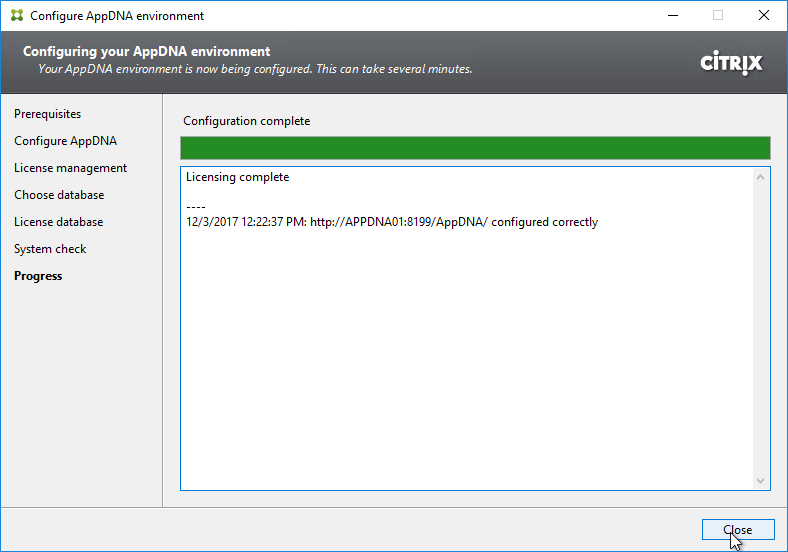
- In the Progress page, click Close, which closes the wizard.
- Relaunch the Configure AppDNA wizard and attempt the upgrade again.
- Back on the Configure AppDNA page, change the selection to Licensing, and click Next.
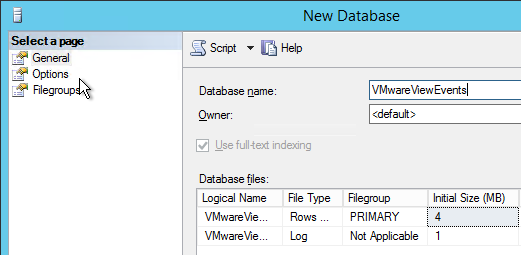
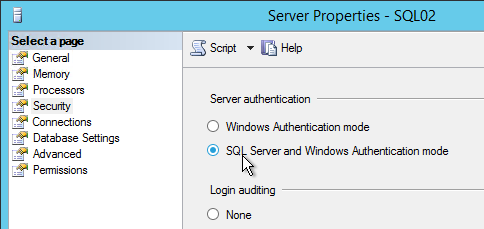
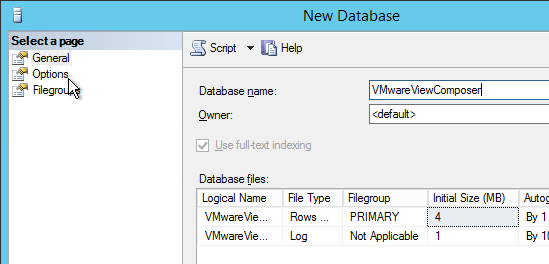
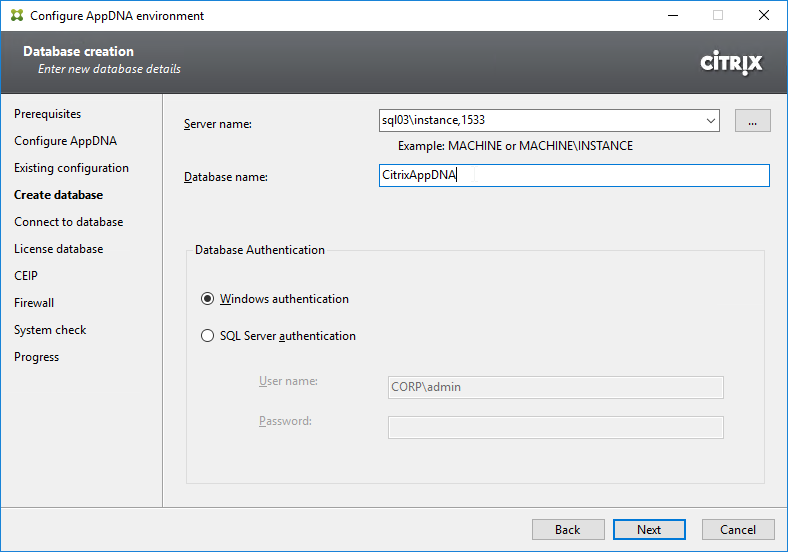
- If this is a new installation, in the Create database page, enter the SQL server name, enter the database name, and click Next. Note: in order for the Configure AppDNA wizard to create the database, the person running the wizard must have sysadmin permissions on the SQL Server.
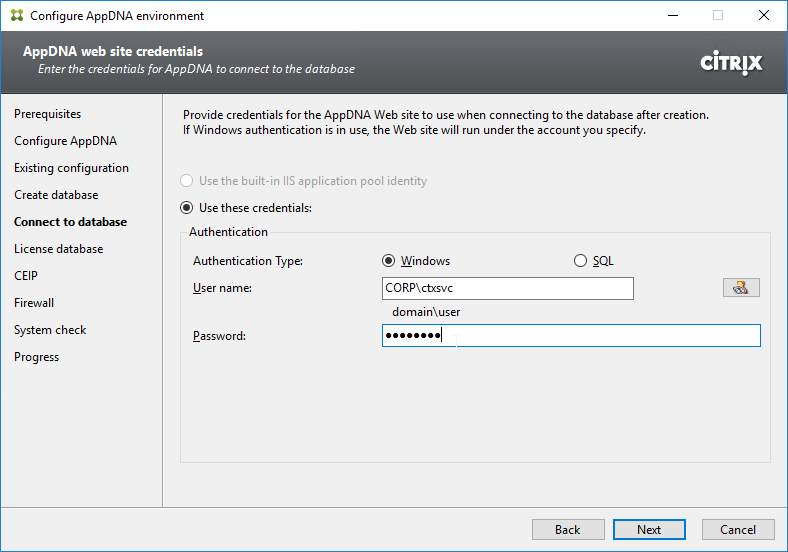
- In the Connect to database page, enter the credentials of your service account, and click Next. AppDNA will use this service account to connect to the database.
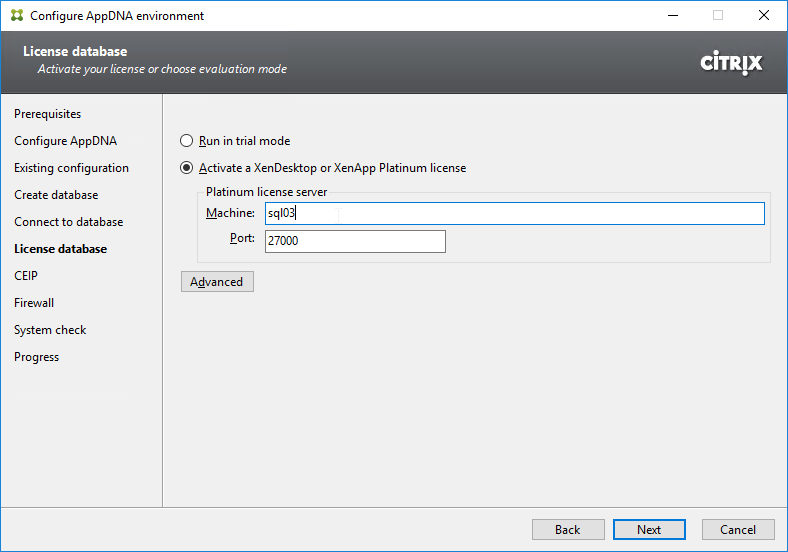
- If this is a new installation, in the License database page, enter the address of a Citrix License server that has XenApp/XenDesktop Platinum Licenses, and click Next.
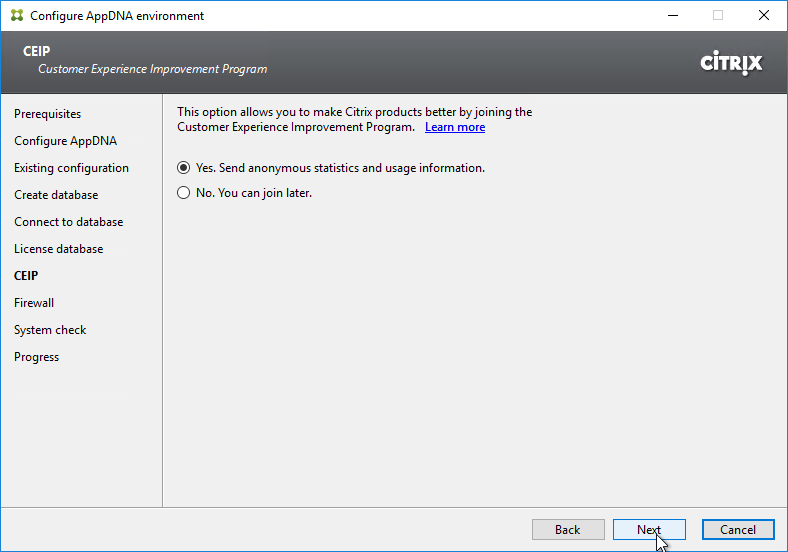
- In the CEIP page, make a selection, and click Next.
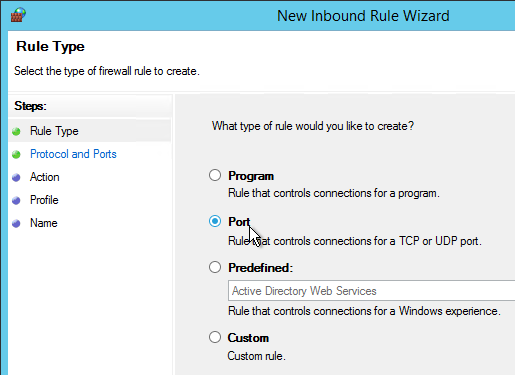
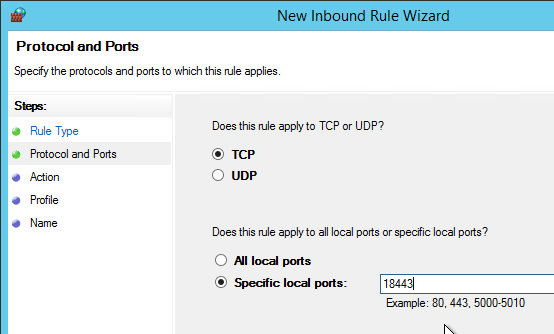
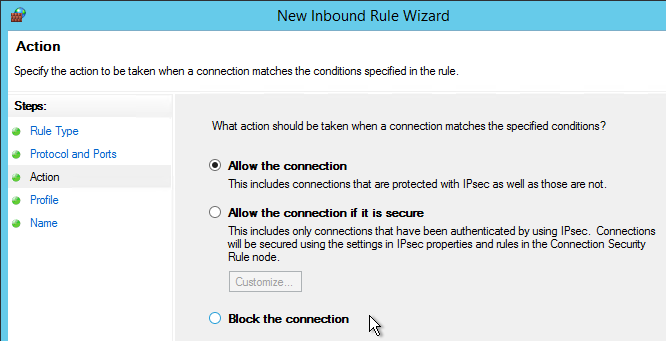
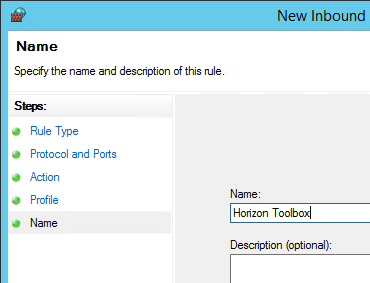
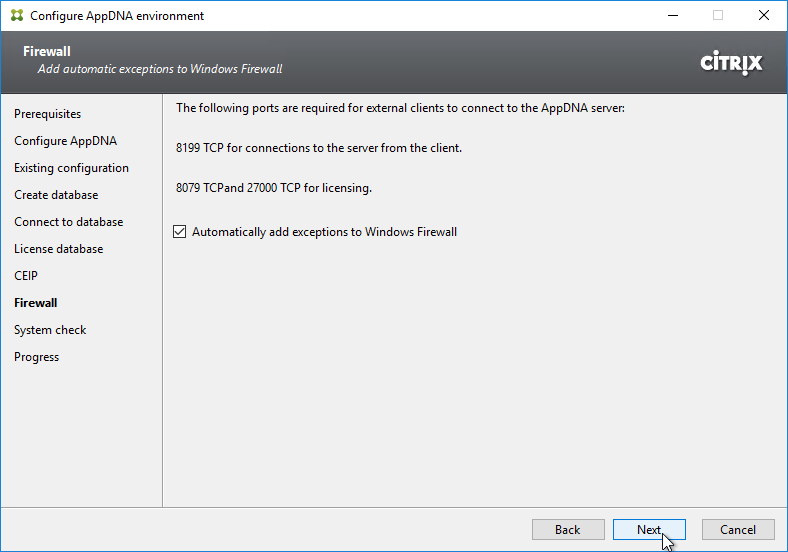
- In the Firewall page, click Next.
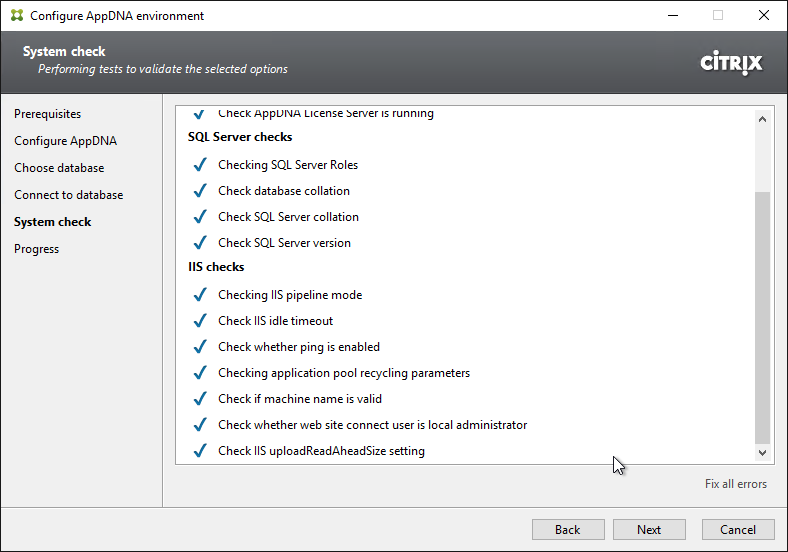
- In the System check page, click Fix next to any errors it finds. Then click Next, Configure, or Upgrade.
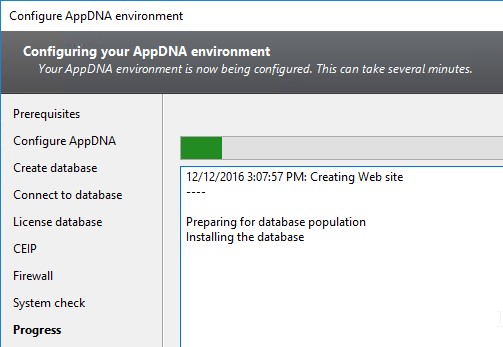
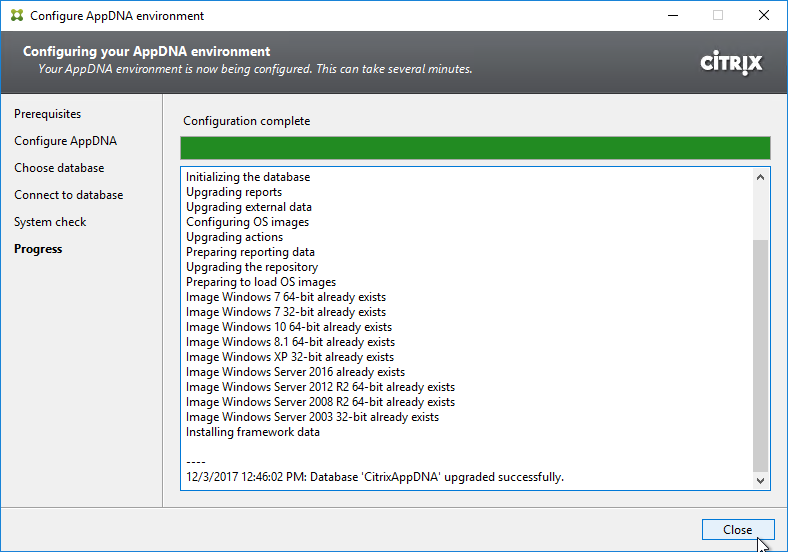
- It will take several minutes to update the database.
- Click Close when done.
- See Optimize AppDNA > Optimize IIS at Citrix Docs.
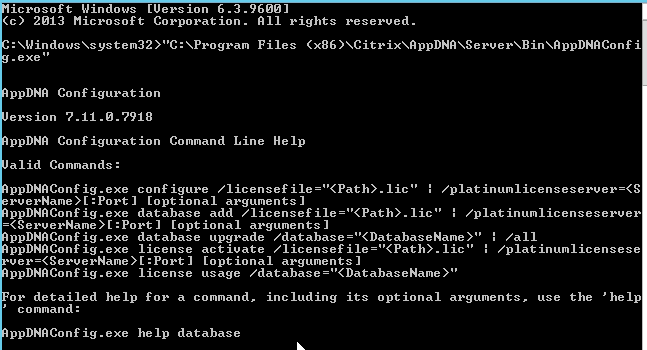
Note: Database and License Configuration can also be run from the command line: “C:\Program Files (x86)\Citrix\AppDNA\Server\Bin\AppDNAConfig.exe”
Logging
CTX219766 Understanding Logging in AppDNA explains how to enable the various logs, and where to find the logs.
- Verbose logs
- On the client
- On the server, including Configuration Wizard
- QueueProcessor Verbose logs
- Event logs
- Application Import logs
- Other miscellaneous logs
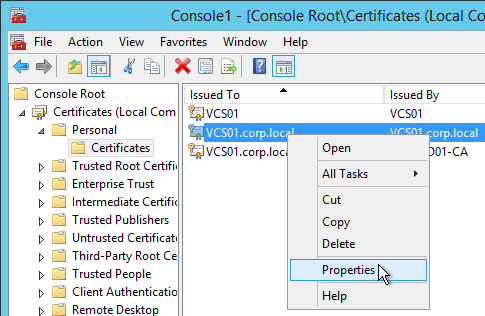
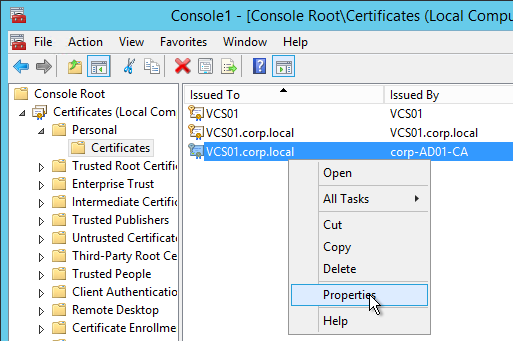
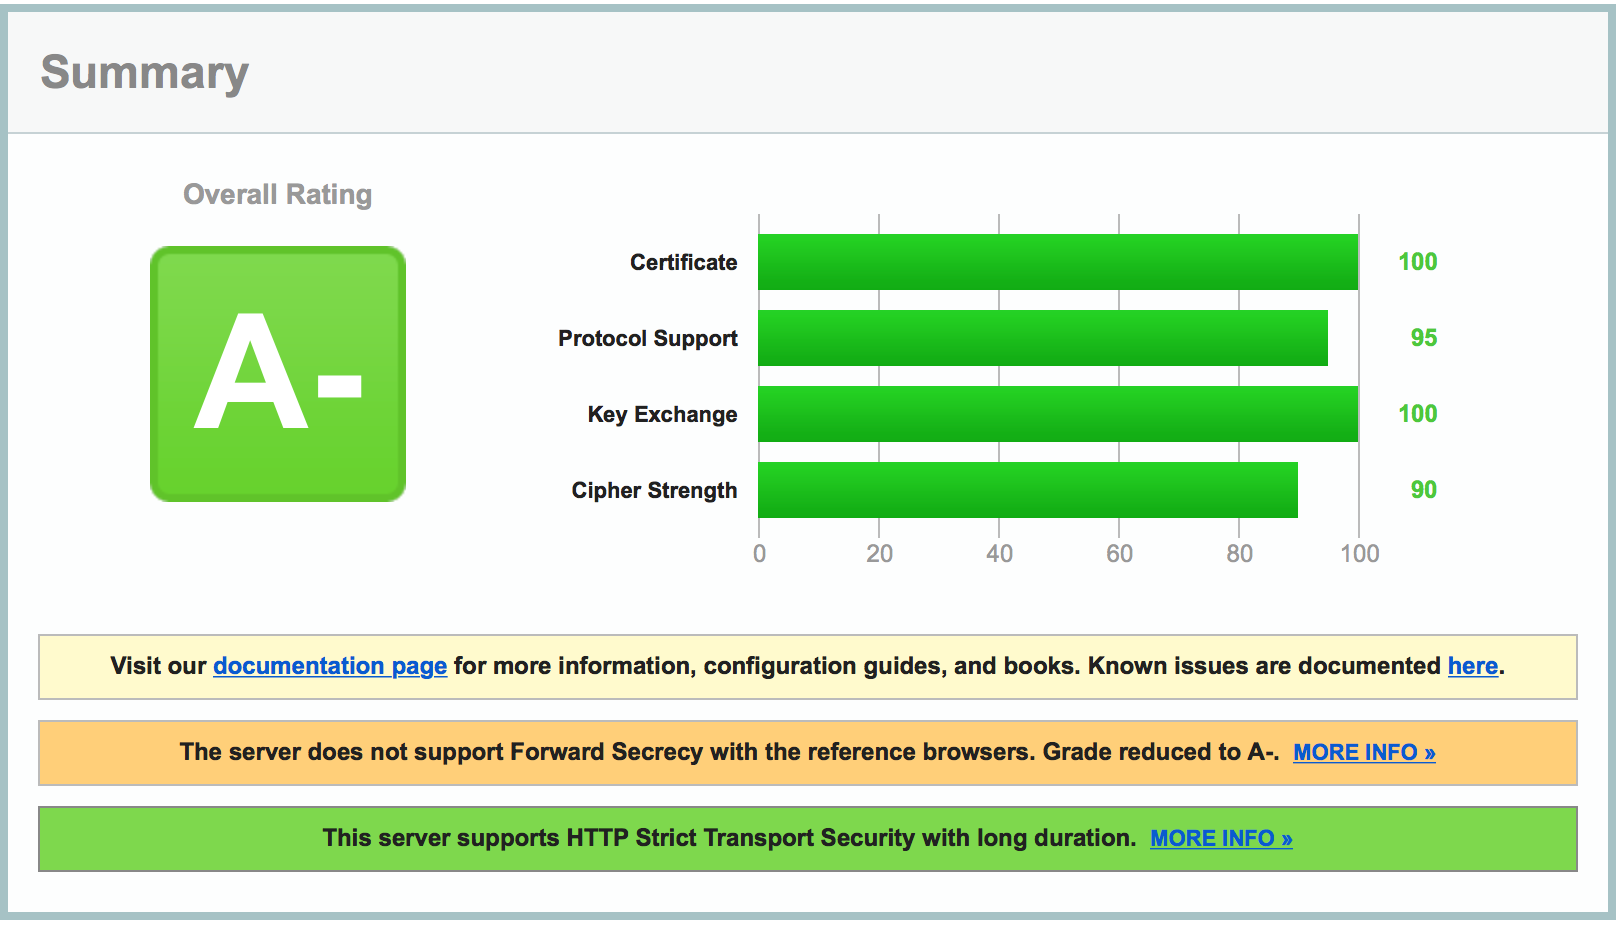
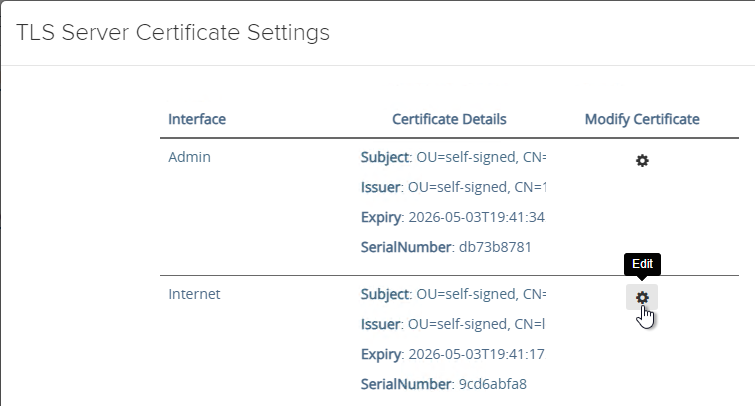
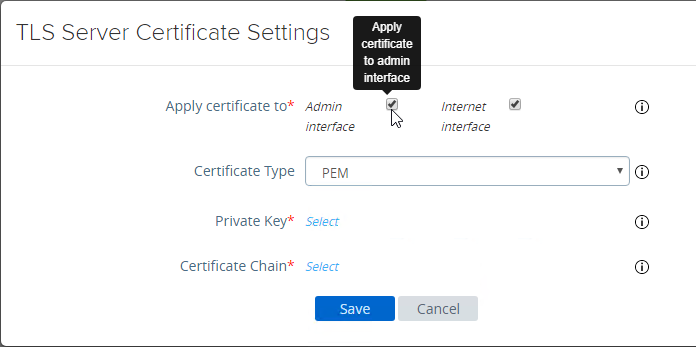
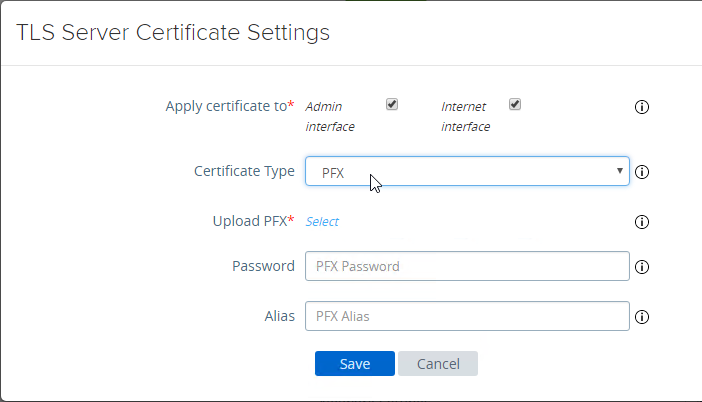
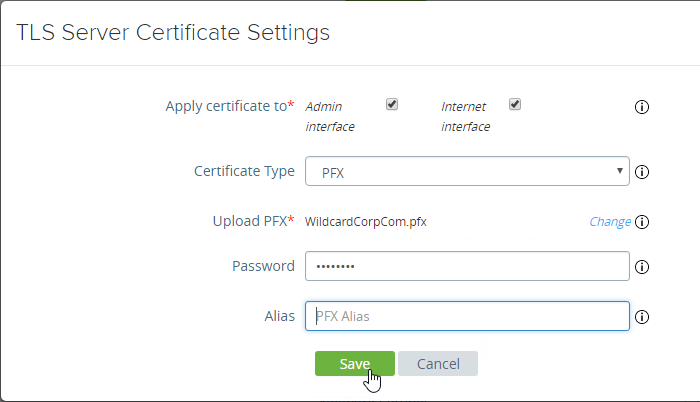
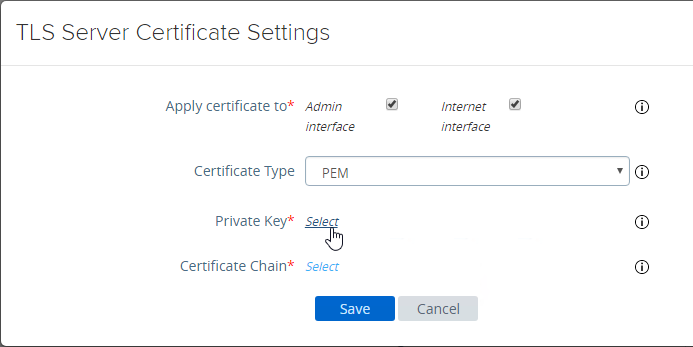
SSL/TLS
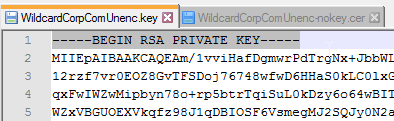
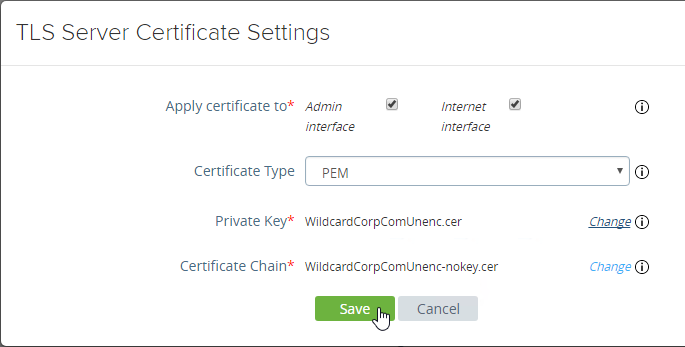
See Citrix CTX222781 Configuring AppDNA for SSL/TLS:
"%windir%\system32\inetsrv\appcmd.exe" set config -section:system.webServer/serverRuntime /uploadReadAheadSize:"104857600" /commit:apphost- Import a certificate, and in IIS, bind it to the Default Web Site.
- Edit the file C:\Program Files\Citrix\AppDNA\Server\web.config. Adjust ReportBaseUrl to https and port 443.
- Configure the AppDNA Client to connect using https.
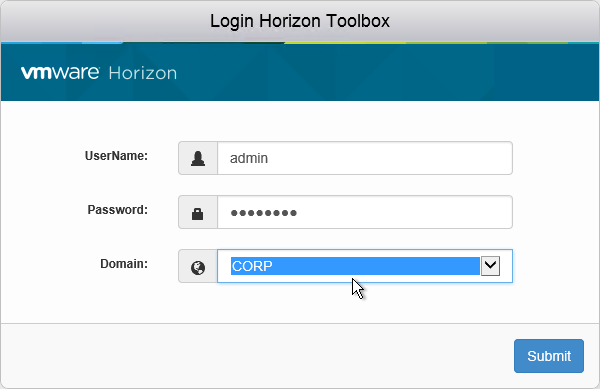
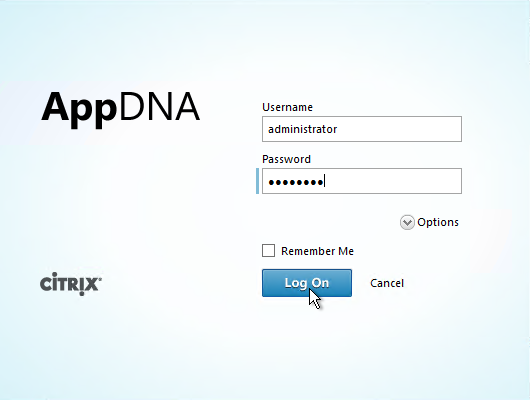
Launch and Login
- Launch AppDNA from the Start Menu.
- Login as administrator and apps3cur3.
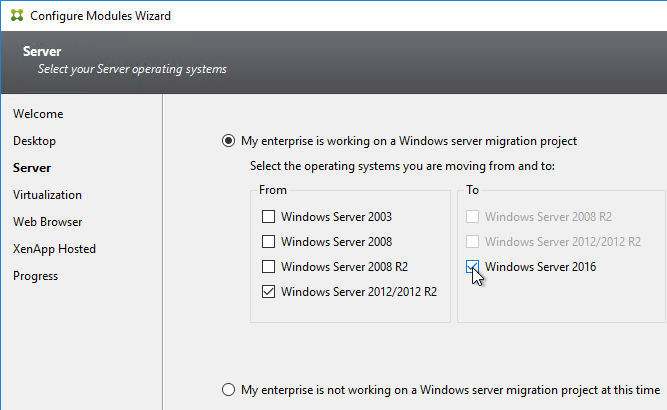
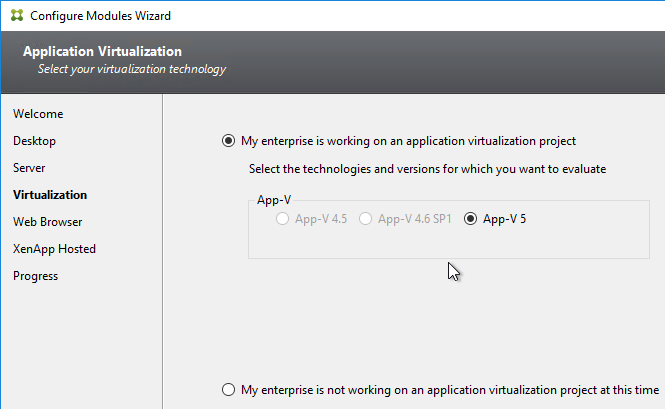
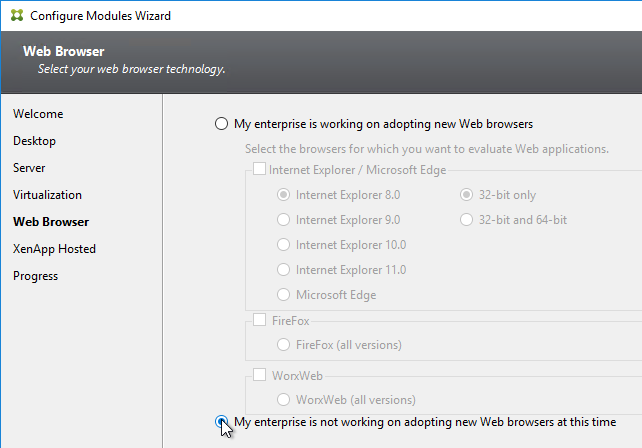
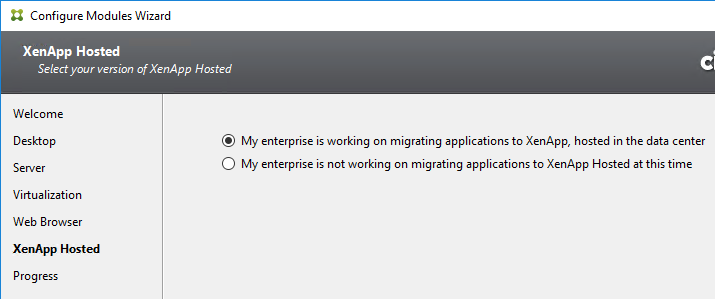
Configure Modules Wizard
- In the Welcome page, click Next.
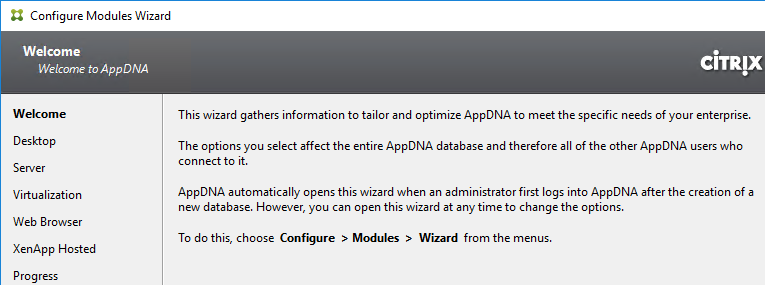
- This wizard lets you select which modules to enable. The more modules you enable, the longer it takes to analyze an application. Go through each page and make your selections.

- AppDNA 7.11 and newer support analysis of Windows Server 2016.
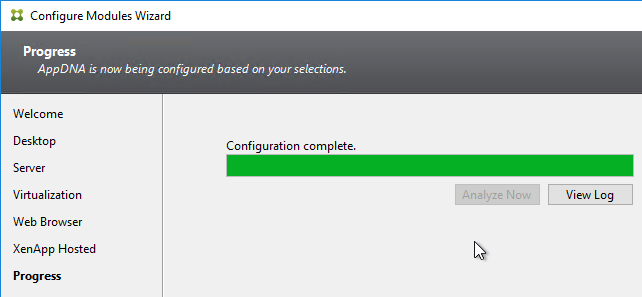
- Then click Configure.
- And click Close.
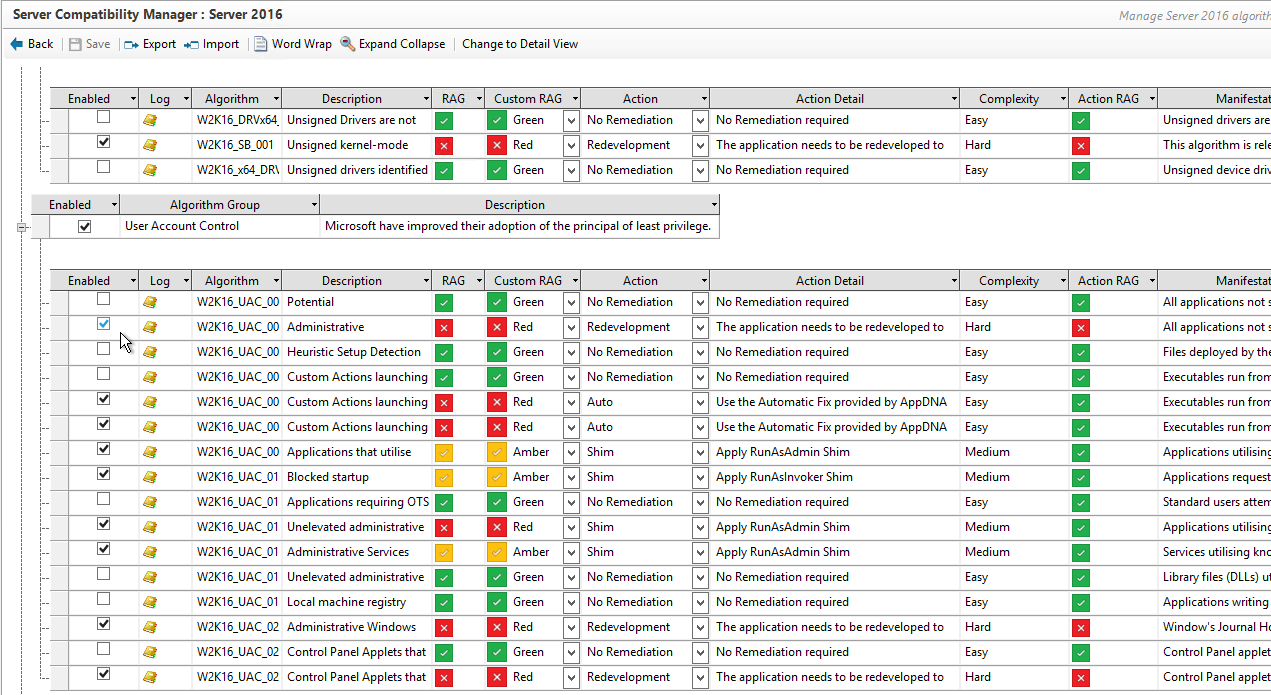
- AppDNA 7.9 adds a new Compliance Manager module. The module was enhanced in AppDNA 7.14 to check for FIPS compliance, NTLM, and Credential Guard.
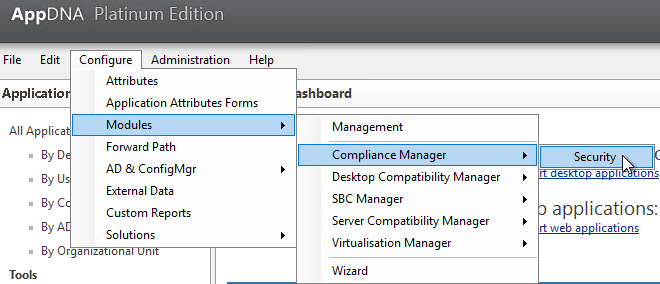
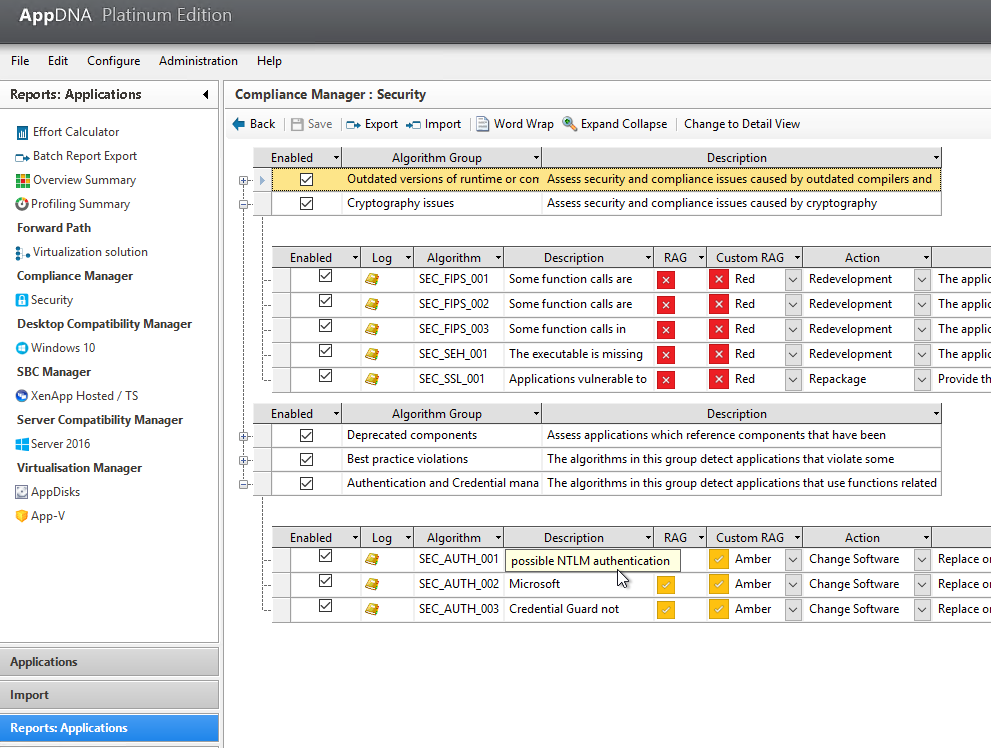
- You can use the Module Manager (Configure > Modules > Management) to see what each module is checking for.
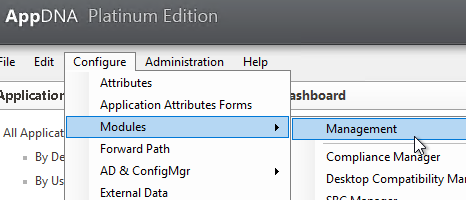
- Click Groups next to one of the modules.
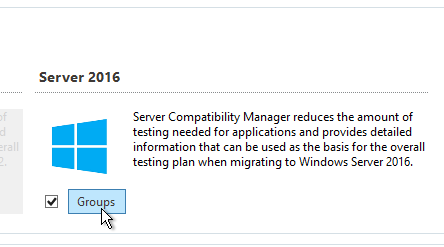
- Notice that not every analysis rule is enabled.
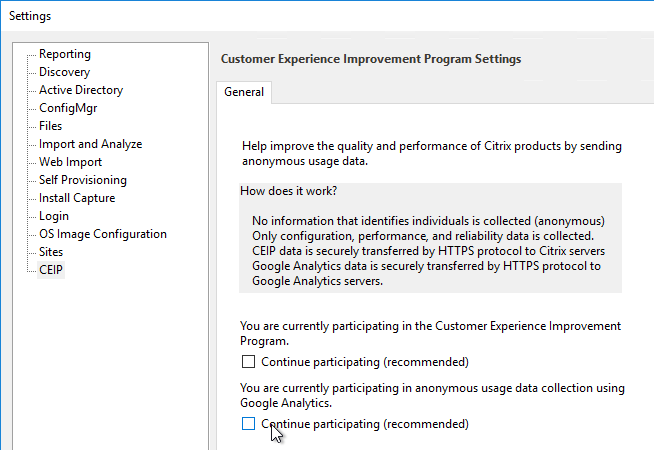
Customer Experience Improvement Program
Do the following to disable CEIP:
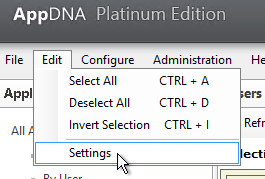
- Open the Edit menu, and click Settings.
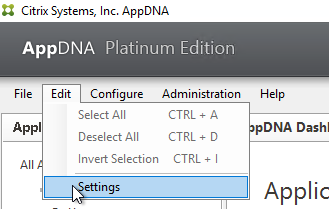
- On the CEIP page, uncheck both boxes next to Continue participating. Click Save. Google Analytics was added in AppDNA 7.16.
- See https://www.carlstalhood.com/delivery-controller-7-16-and-licensing/#ceip for additional places where CEIP is enabled.
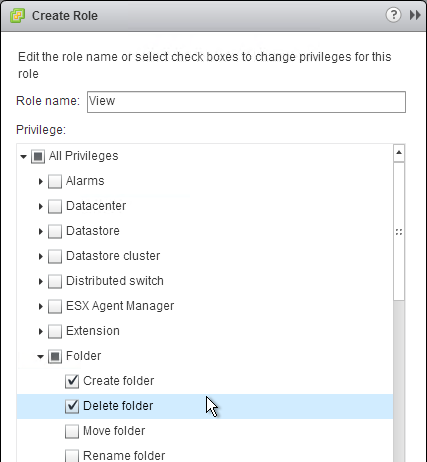
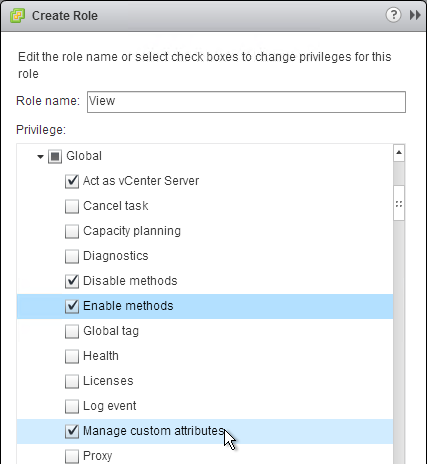
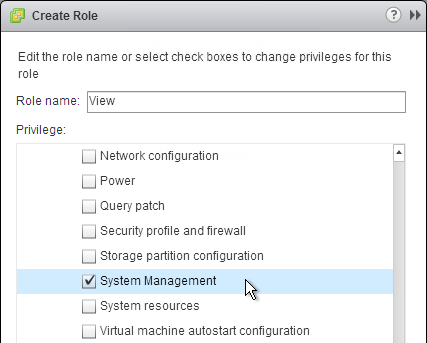
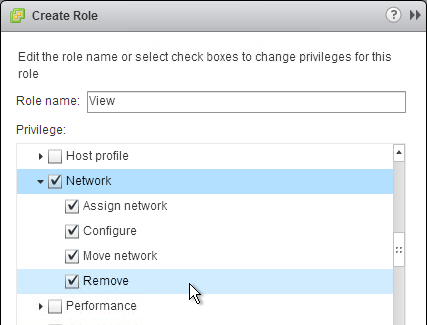
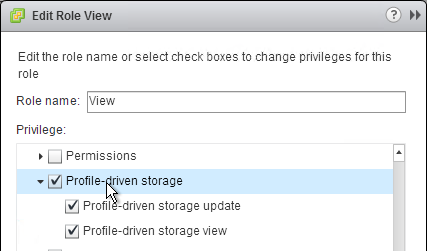
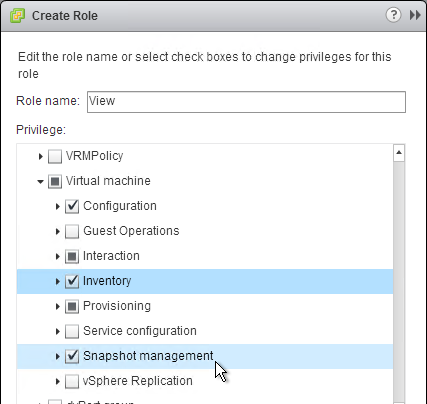
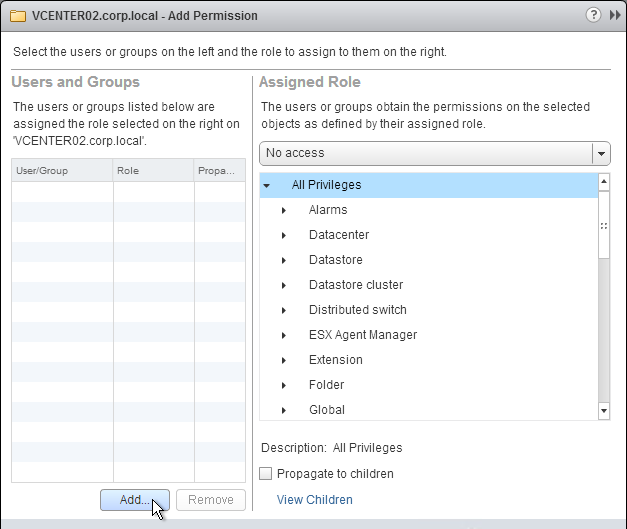
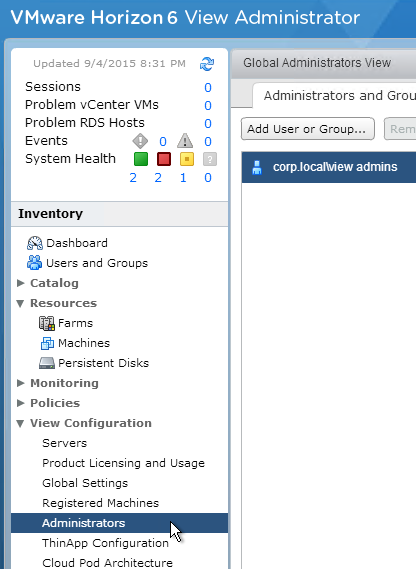
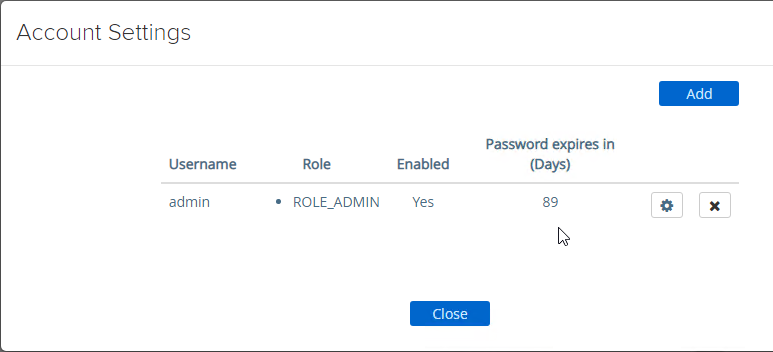
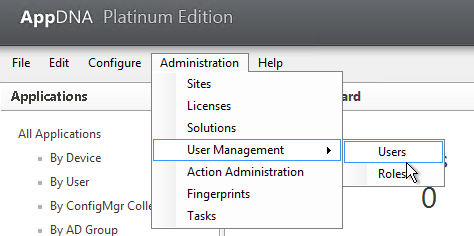
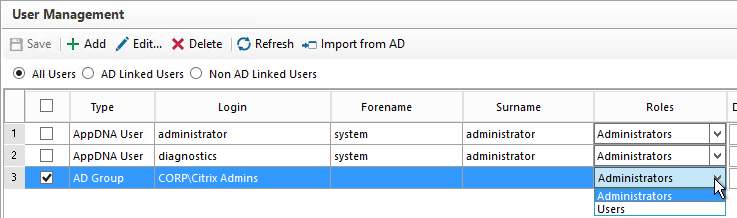
Users
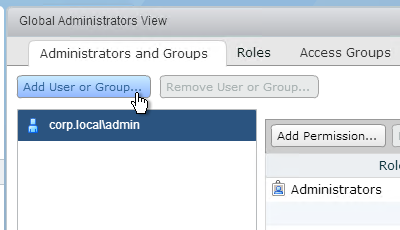
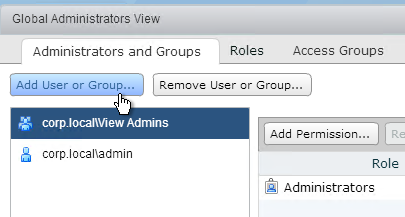
- Open the Administration menu, expand User Management, and click Users.
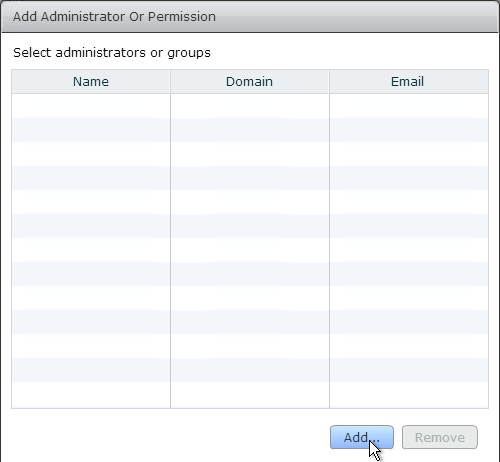
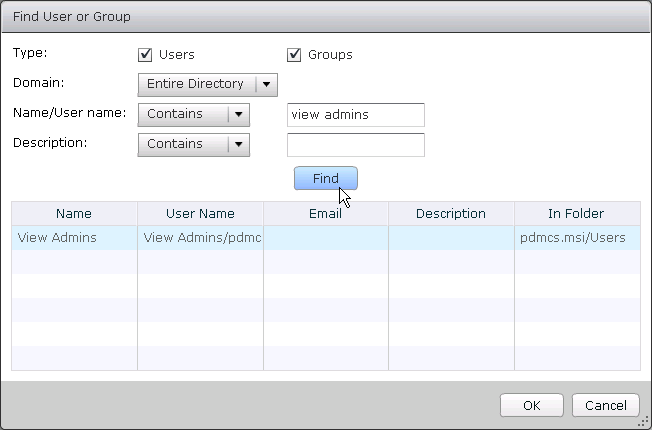
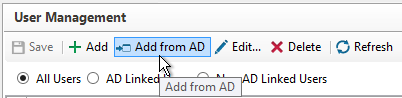
- In the toolbar, click Add from AD.
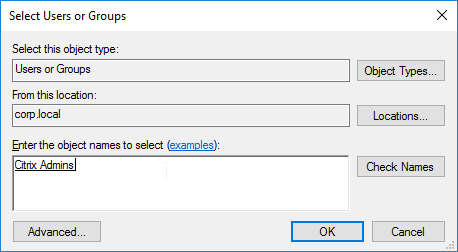
- Select your Citrix Admins group, and click OK.
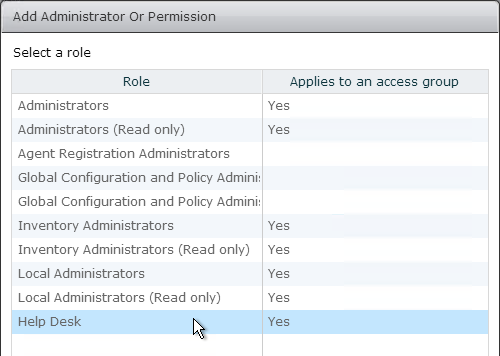
- On the right, notice that Administrators role is selected by default.
- Open the File menu and click Exit.
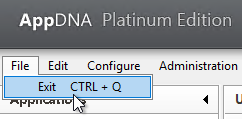
- Launch AppDNA again.
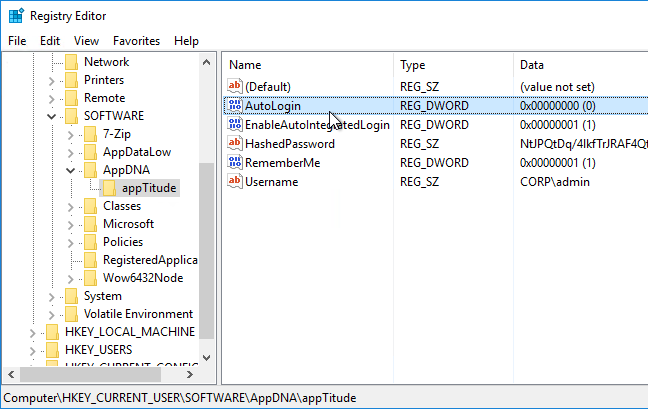
- On the login page, click Options.

- You can check the box next to Integrated Login and click Log On.

- Note: if you enable Auto Login and want to disable it, edit the registry.
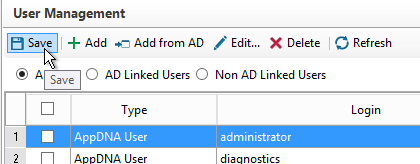
- Go back to Administration > User Management > Users.
- Edit the administrator account.

- And change its password.

- Then click Save.
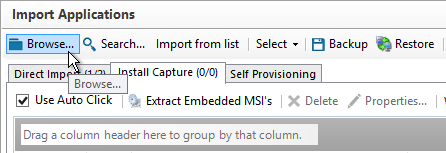
Direct Import
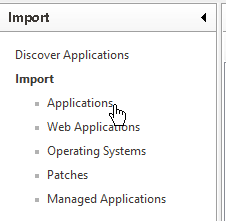
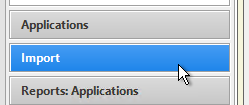
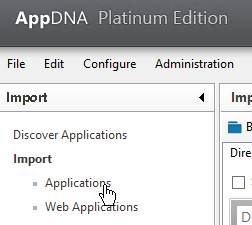
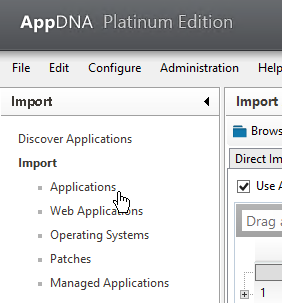
- Switch to the Import workspace.
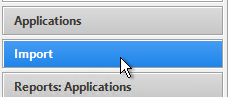
- On the left, under Import, click Applications.
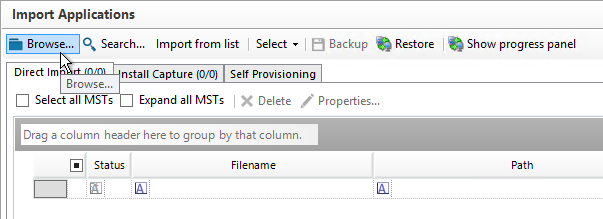
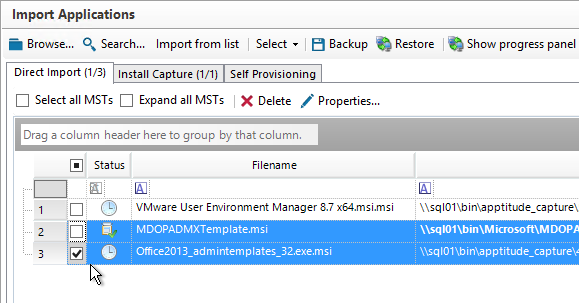
- On the right, switch to the Direct Import tab.
- Click Browse in the toolbar. Then browse to an .MSI file.
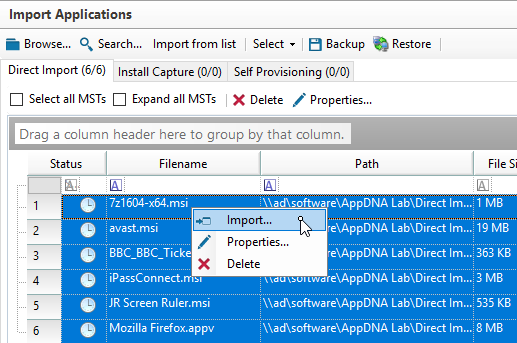
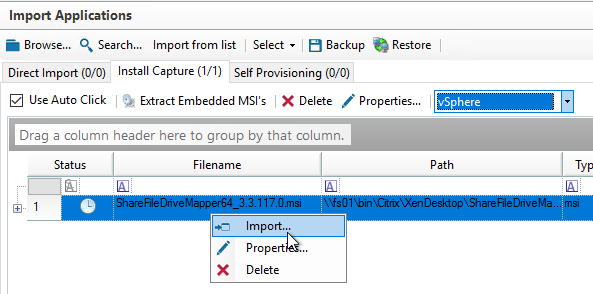
- The .msi files are shown in the list. Select one or more, right-click, and click Import to begin analysis.
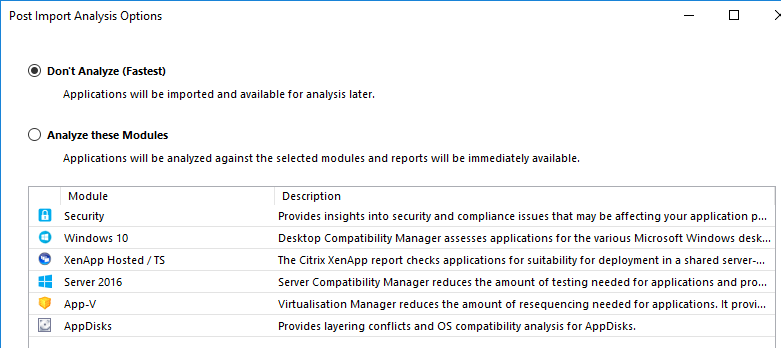
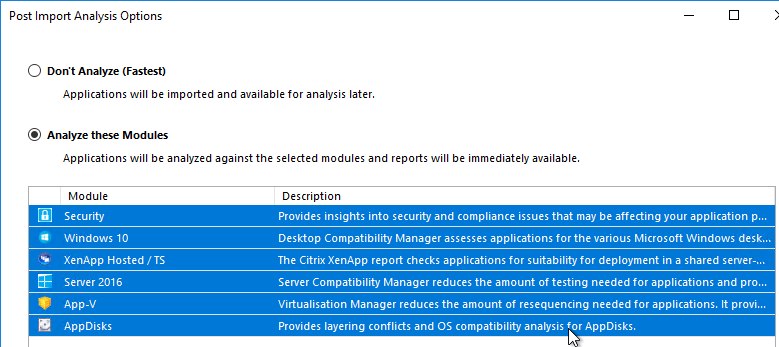
- You can select one or more modules for analysis. Note: it might take a few seconds for the list to appear. Click Import.
- The Server Queue is displayed. If needed, you can cancel a task in the Server Queue.
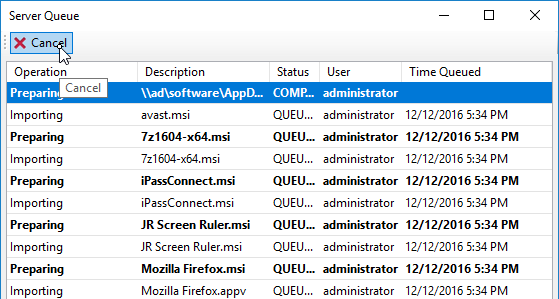
- If you close the Server Queue, you can reopen it by clicking the View Server Queue link on the bottom right.

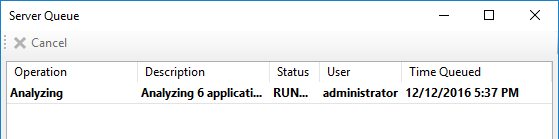
- Analysis is performed against the modules you selected.
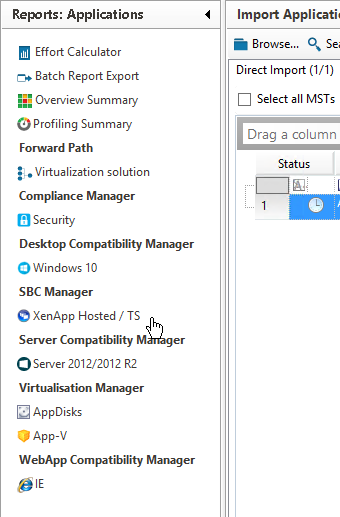
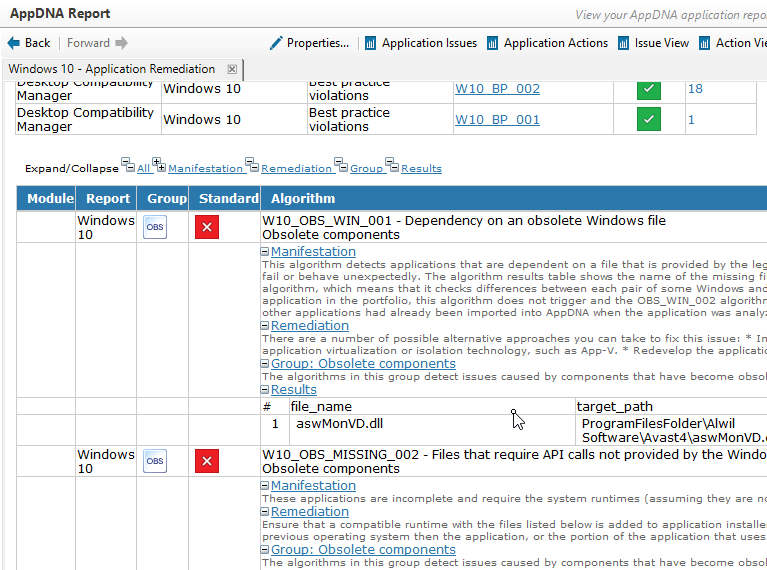
- After analysis is complete, switch to the Reports: Applications workspace.
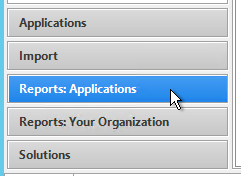
- On the left, select a report you want to view.
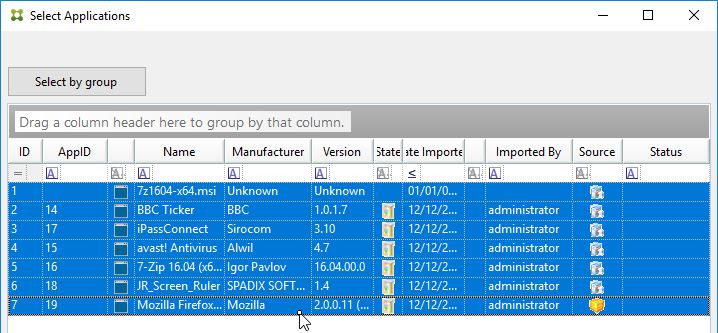
- You might be prompted to select applications. If you want to change this selection later, there’s a Change Selection button on the toolbar.
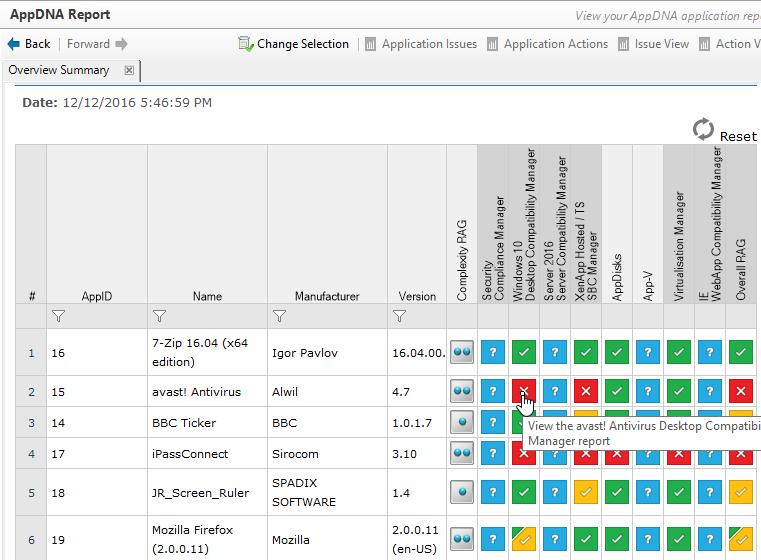
- The report displays a list of applications with color coding. Click the colored boxes to view more details.
Install Capture
Install Capture lets you import application installers that are not available as MSI files. AppDNA uses a hypervisor connection to automate the Install Capture process. Alternatively, you can do a manual capture using the Self Provisioning process.
Prepare Install Capture Machine
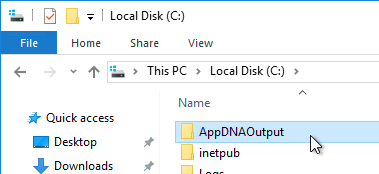
- Create a share on the AppDNA machine. The captured data is stored in this share.
- The operating system of the Install Capture machine should match the operating system version you are migrating from.
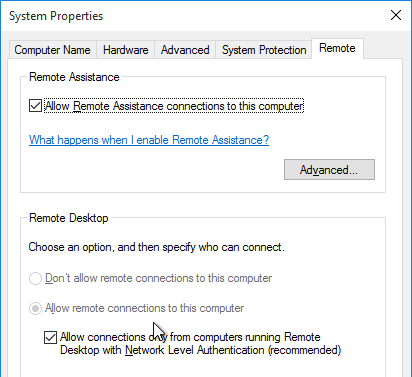
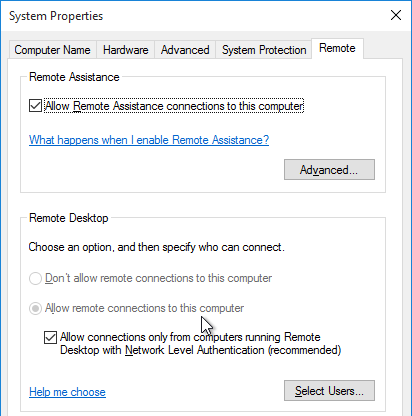
- On the Install Capture machine, make sure Remote Desktop is enabled.
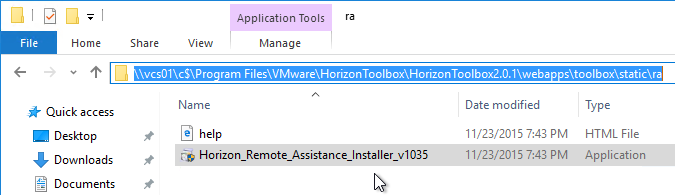
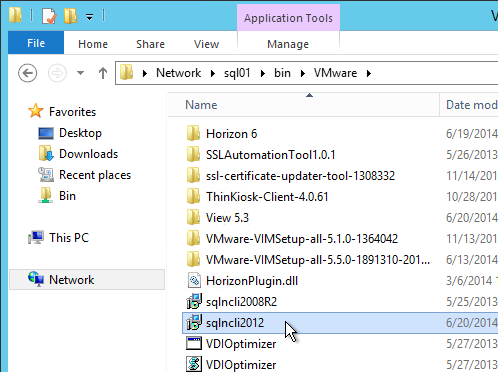
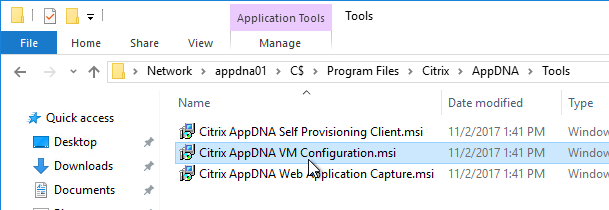
- On the Install Capture machine, browse to the AppDNA server in the \\AppDNAServer\C$\Program Files\Citrix\AppDNA\Tools folder, and run Citrix AppDNA VM Configuration.msi.
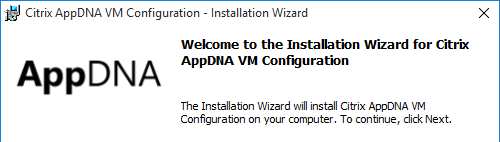
- In the Welcome to the Installation Wizard for Citrix AppDNA VM Configuration page, click Next.
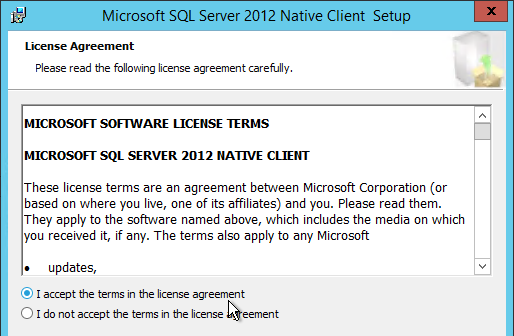
- In the License Agreement page, select I accept the terms and click Next.
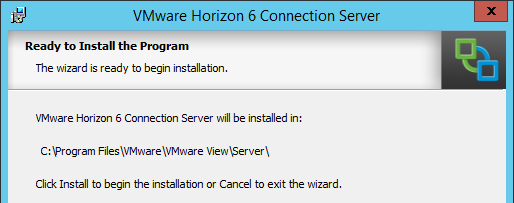
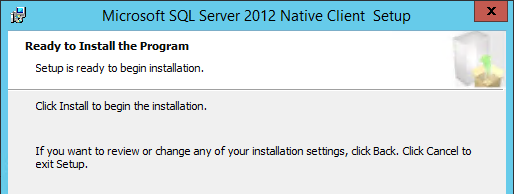
- In the Ready to Install the Program page, click Install.
- In the Installation Wizard Completed page, click Finish.
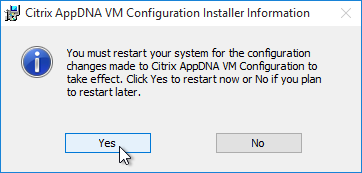
- Click Yes when prompted to reboot.
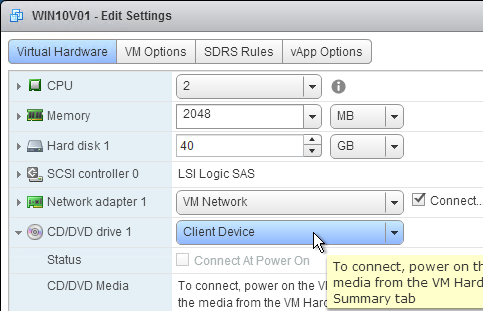
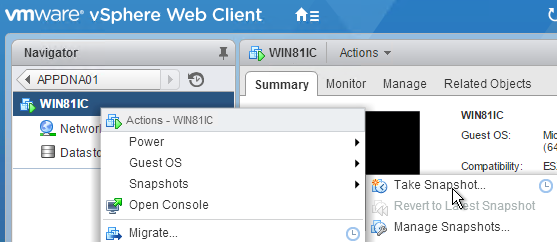
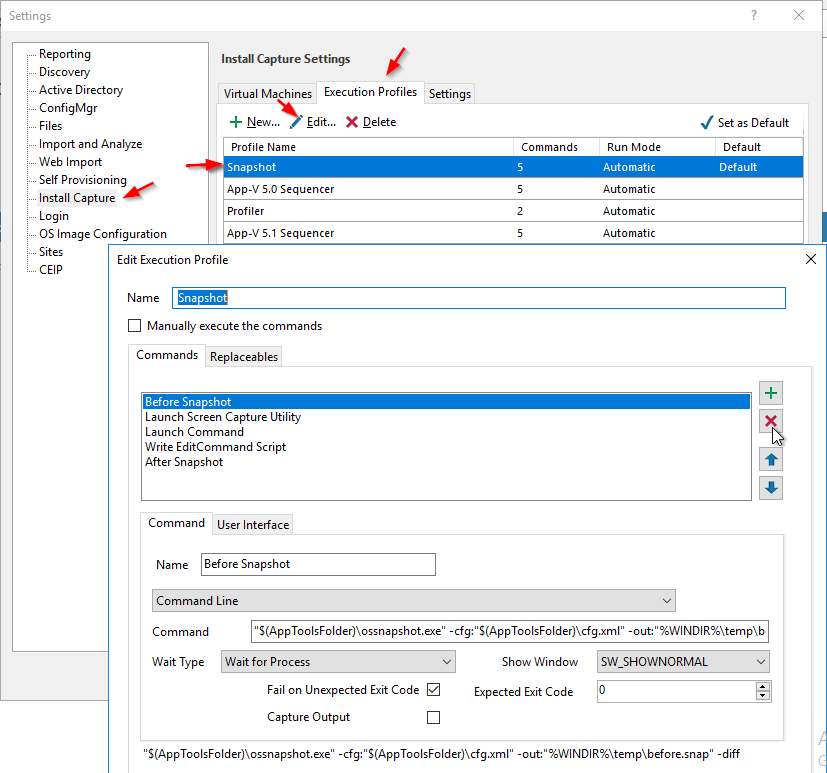
- Citrix Blog Post How to Speed Up AppDNA Install Capture by Using a Pre-captured Before Snapshot details how to take an Install Capture Snapshot manually, store it in the Install Capture machine, and then configure the Install Capture profile to skip taking an Install Capture snapshot. This Install Capture snapshot process is separate from hypervisor snapshot.
"C:\Program Files\Citrix\AppDNA\VM Configuration\ossnapshot.exe" -cfg:"C:\Program Files\Citrix\AppDNA\VM Configuration\cfg.xml" -out:"c:\windows\temp\before.snap" -diff
- You can either take a snapshot now, or AppDNA will do it for you.
Configure AppDNA for Install Capture
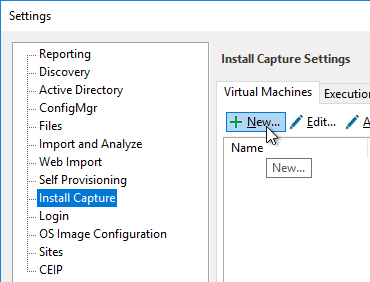
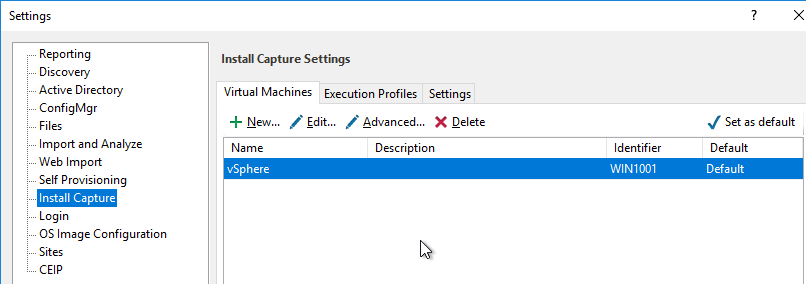
- In the AppDNA Console, open the Edit menu and click Settings.
- On the left, switch to the Install Capture page.
- On the right, click New.
- In the Virtual Machine Configuration Wizard page, click Next.
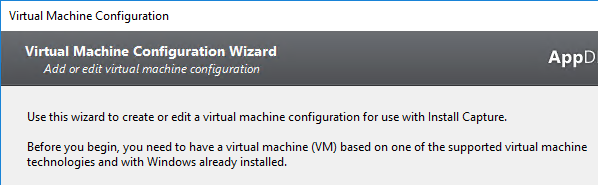
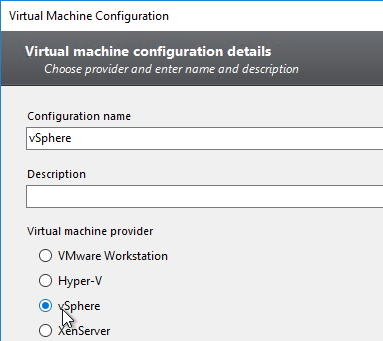
- In the Virtual machine details page, give the configuration a name.
- Select vSphere and click Next.
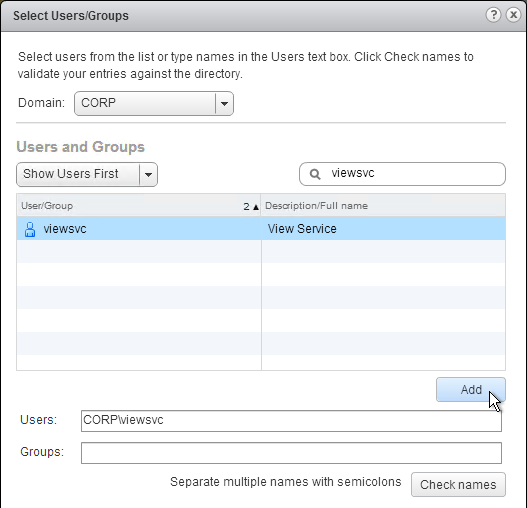
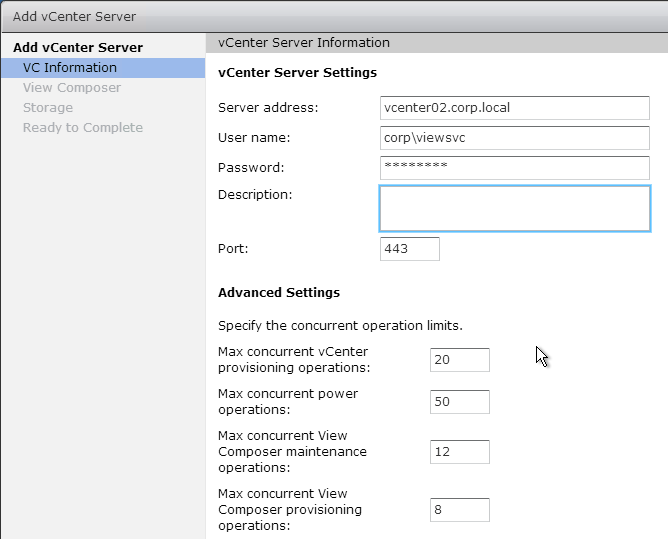
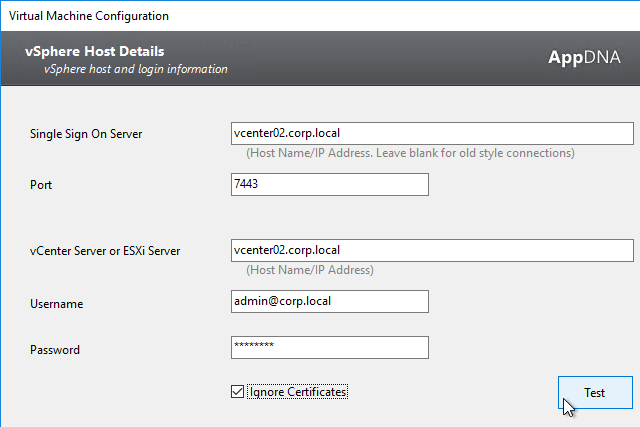
- In the vSphere Host Details page, in the Single Sign-on Server field, enter the Platform Services Controller hostname
- In the Port field, enter 7443.
- In the vCenter Server field, enter the hostname of the vCenter server.
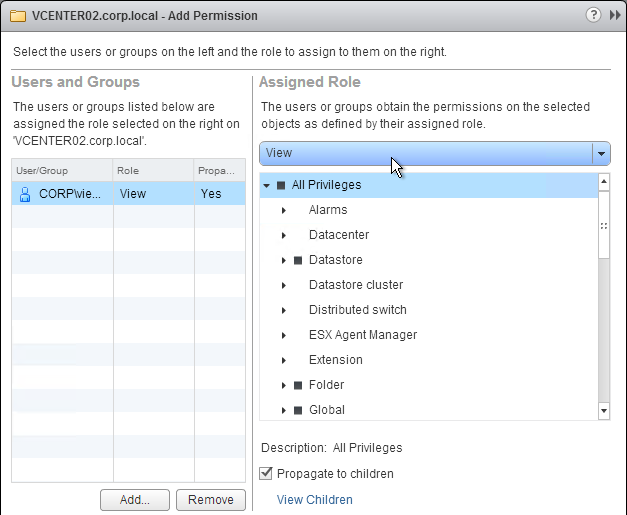
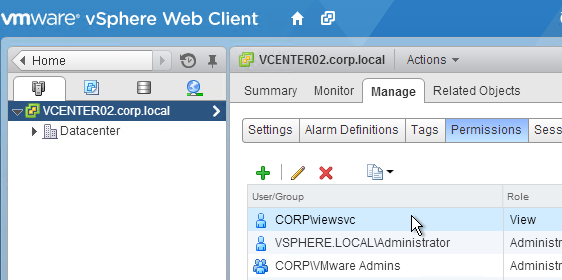
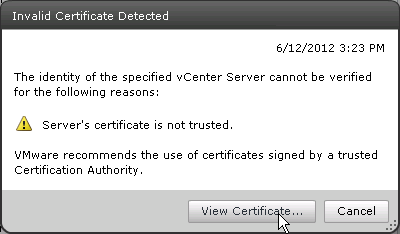
- Enter credentials that can snapshot and perform power operations on the Install Capture machine. Click Test and then click Next.
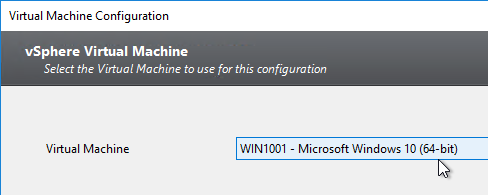
- In the vSphere Virtual Machine page, in the list of machines, select the Install Capture machine and click Next.
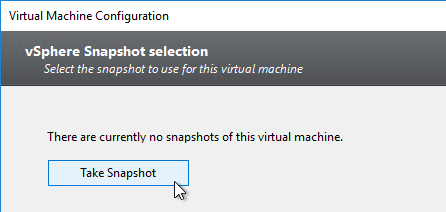
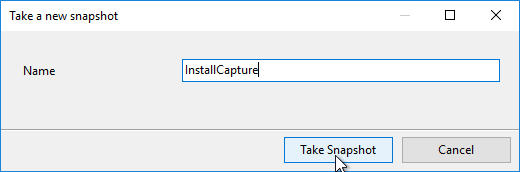
- In the vSphere Snapshot selection page, if there are no snapshots, click Take Snapshot.
- Click Test. At least confirm that the machine can be reverted to snapshot. Don’t worry if the console doesn’t open. Click Next.

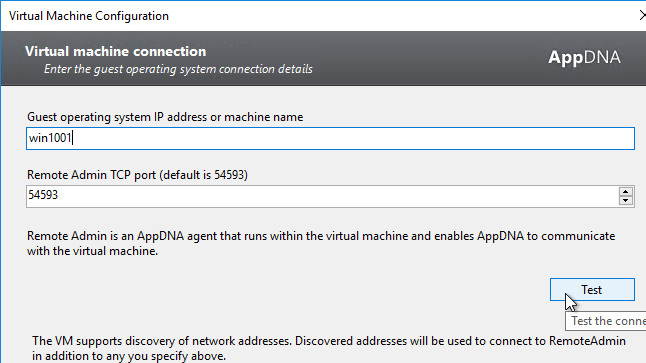
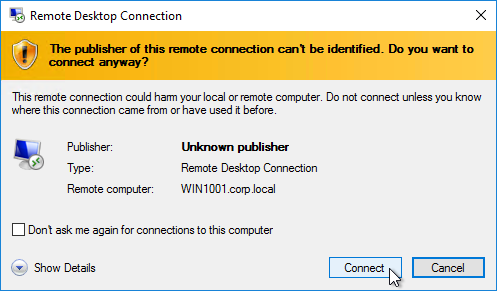
- In the Virtual machine connection page, enter the hostname of the Install Capture machine, and click Test. Note: the RemoteAdmin.exe process only runs while somebody is logged into the machine. Click Next.
- In the Capture output location page, enter the UNC path to the file share on the AppDNA server, and click Test. Then click Next.

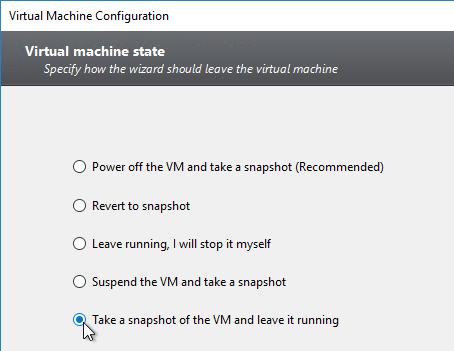
- In the Virtual machine state page, make a selection, and click Next.
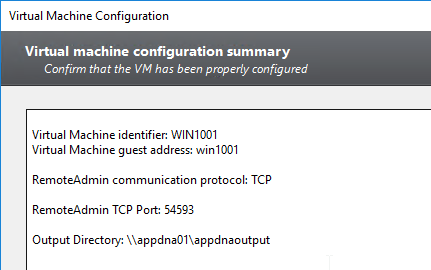
- In the Virtual machine configuration summary page, click Finish.
- Citrix Blog Post How to Speed Up AppDNA Install Capture by Using a Pre-captured Before Snapshot details how to take an Install Capture Snapshot manually, store it in the Install Capture machine, and then configure the Install Capture profile to skip taking an Install Capture snapshot. This Install Capture snapshot process is separate from hypervisor snapshot.
- Click Save to close the Settings window.
Perform Install Capture
- Switch to the Import workspace.
- On the left, under Import, click Applications.
- On the right, switch to the Install Capture tab. Click Browse and find an installer you want to import using Install Capture.
- If you have more than one Install Capture machine, use the drop-down to select the one you want to use.

- Select the apps. Then right-click, and click Import.
- Select the modules for analysis. Then click Import.
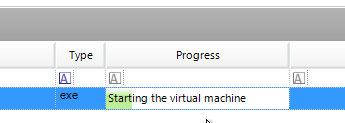
- The Install Capture VM will be started.
- Eventually you’ll be prompted to RDP to the Install Capture machine.
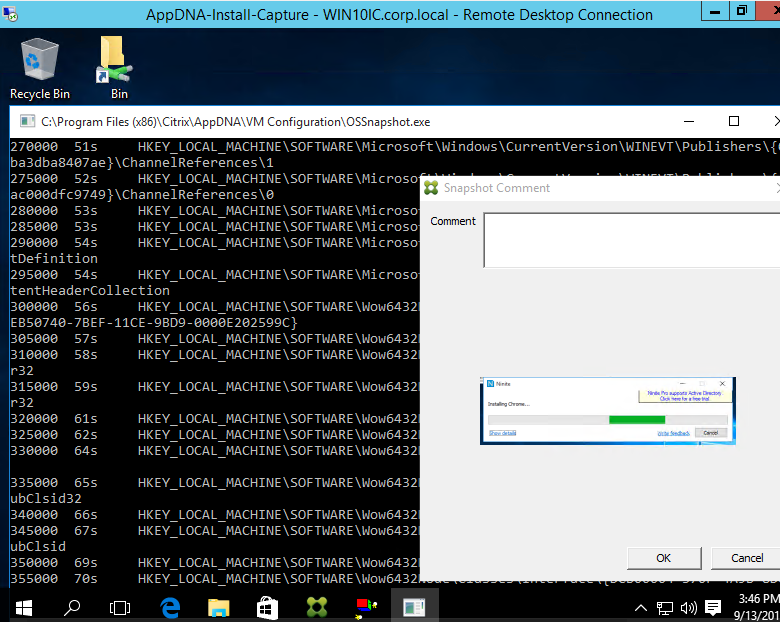
- The capture process begins with a snapshot of the Install Capture machine.

- Then the application is installed. This should happen automatically.
- Then a differencing snapshot is taken and uploaded to AppDNA Server.
- Analysis is performed against the modules you selected.
- After analysis is complete, switch to the Reports: Applications workspace.
- On the left, select a report you want to view.
Self Provisioning
Self Provisioning is very similar to Install Capture except there’s no need for direct connectivity between AppDNA server and the hypervisor that hosts the Self Provisioning machine. Once the process is started in the AppDNA console, a different user can complete the snapshot process on the Self Provisioning machine.
Prepare Self Provisioning Machine
- Make sure AppDNA VM Configuration is installed first.
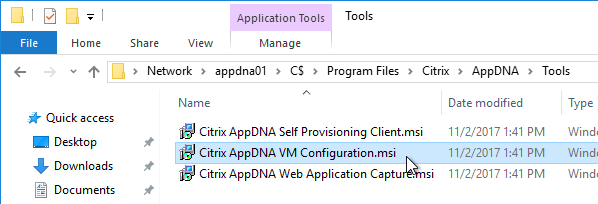
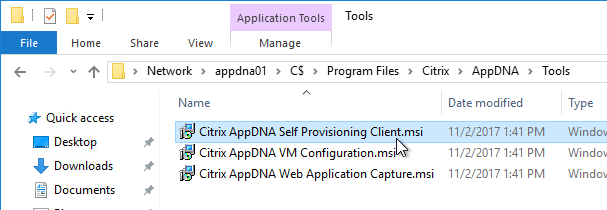
- On the Self Provisioning machine, browse to the AppDNA server in the C$\Program Files\Citrix\AppDNA\Tools folder, and run Citrix AppDNA Self Provisioning Client.msi.
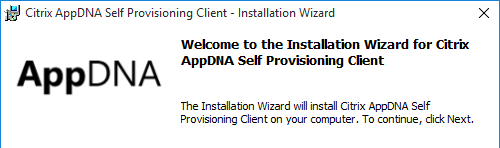
- In the Welcome to the Installation Wizard for Citrix AppDNA Self Provisioning Client page, click Next.
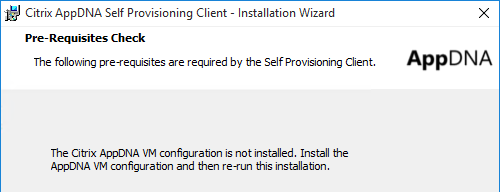
- If you see the Pre-Requisites Check page, stop the installer, install the AppDNA VM Configuration Client and then restart this installer.
- In the License Agreement page, select I accept the terms, and click Next.
- In the Destination Folder page, click Next.
- In the Ready to Install the Program page, click Install.
- In the Installation Wizard Completed page, click Finish.
- Take a snapshot of the Self Provisioning machine.
Perform Self Provisioning Capture
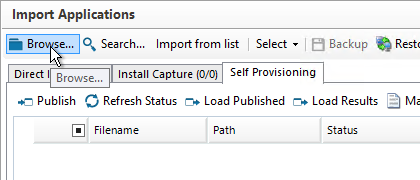
- In the AppDNA Console, switch to the Import workspace.
- On the left, click Applications.
- On the right switch to the Self Provisioning tab.
- Then click the Configuration icon in the toolbar.

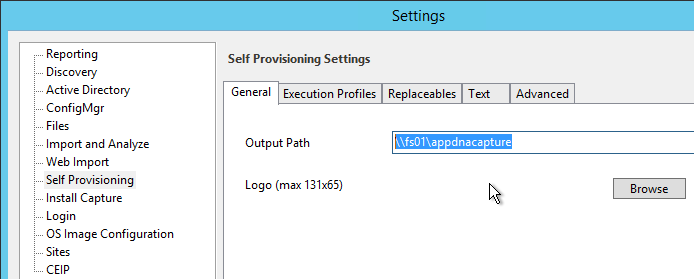
- In the Self Provisioning page, enter the UNC path to a share that both machines (AppDNA server and Self Provisioning machine) can access.
- In the toolbar click Browse and browse to the application installer.
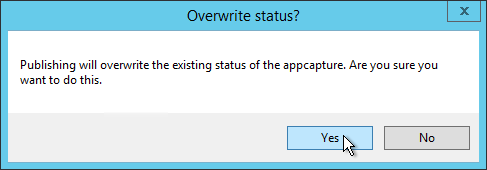
- Click Publish to push the files to the file share.
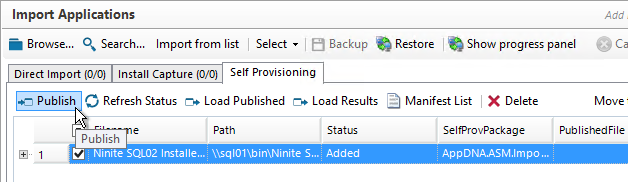
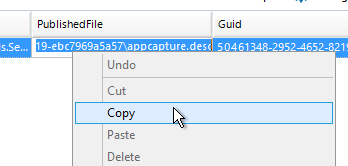
- Click in the PublishedFile column to access the full path and copy it to the clipboard.
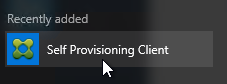
- On the Self Provisioning machine, run the Self Provisioning Client from the Start Menu.
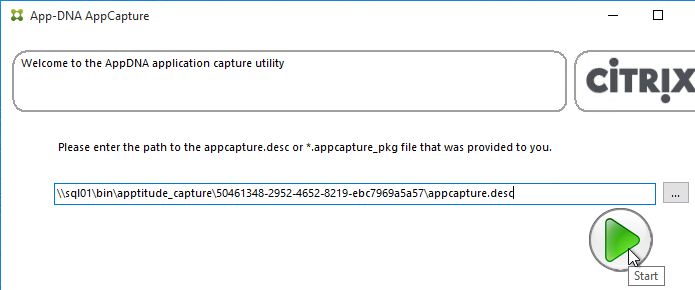
- Paste in the path and click Start.
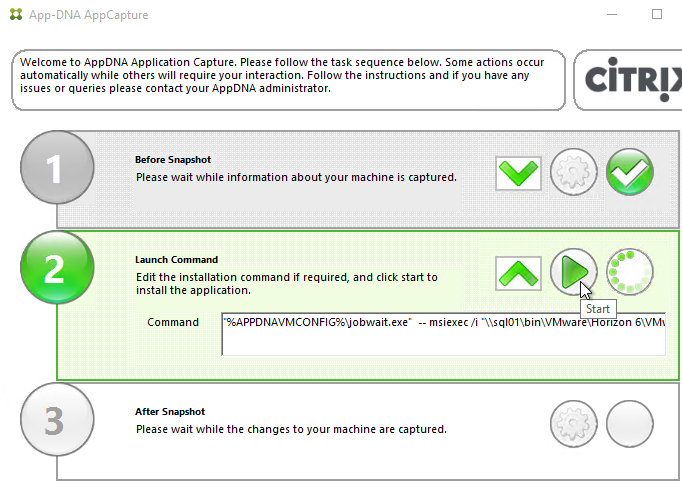
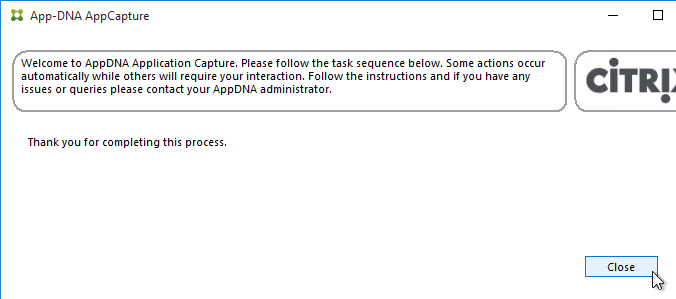
- After the snapshot is taken, click the Start button and install the application.
- Once the install is complete, another snapshot will be taken and the results will be uploaded to the share. Click Close.
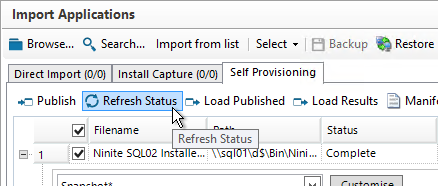
- Back in the AppDNA console, click Refresh Status and make sure the status changes to Complete.
- Make sure the application is selected and then on the right side of the toolbar click Move to Import.
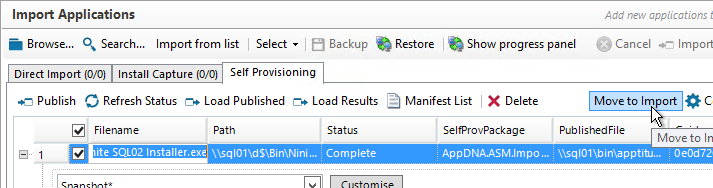
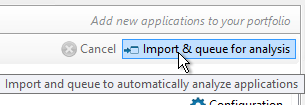
- This moves the application to the Direct Import tab where you can select the application and click Import & queue for analysis button to begin analysis.
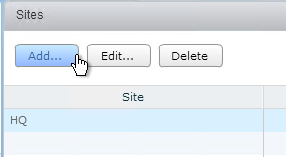
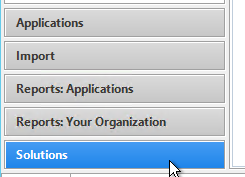
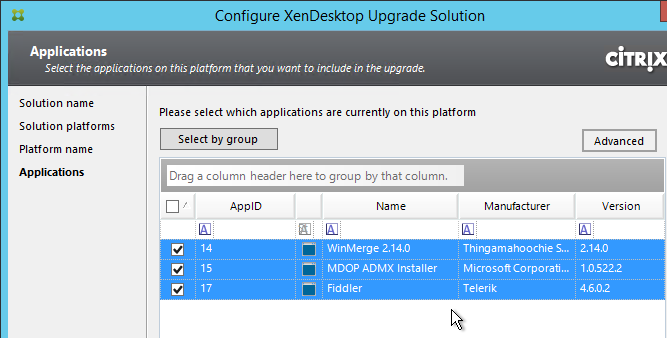
Solutions
CitrixTV XenApp Upgrades with AppDNA demonstrates the Solutions feature of AppDNA 7.6 including: XenApp upgrades, operating system image upgrades, and application interoperability.
Other links on Solutions:
- Configure solutions at Citrix Docs.
- Citrix Blog Post Taming Patch Tuesday with Citrix AppDNA details the new Patch Impact Analysis Solution in AppDNA 7.8.
Here are generic instructions for adding a Solution:
- For some of the solutions it is helpful to import operating system images of the machines you are moving from and the machines you are moving to..
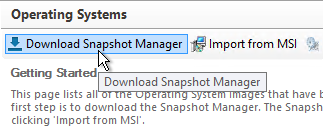
- In the Import workspace, on the left click Operating Systems.

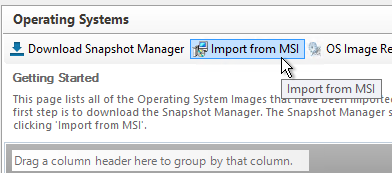
- On the right, click Download Snapshot Manager. Run this on a operating system image that you want to import.
- Then click Import from MSI to import the MSI file generated by the Snapshot Manager.
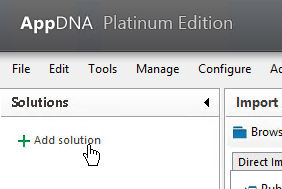
- Switch to the Solutions workspace.
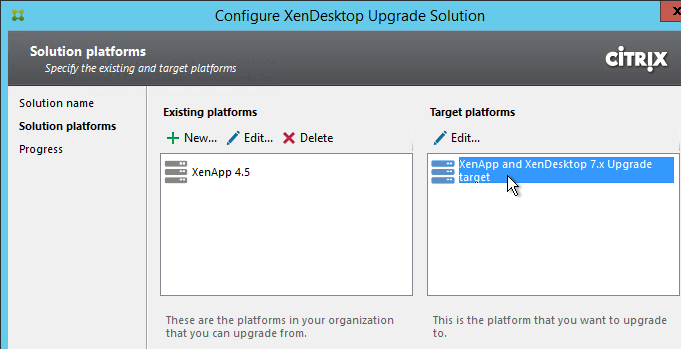
- On the top left click Add solution.
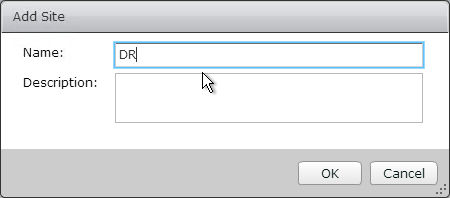
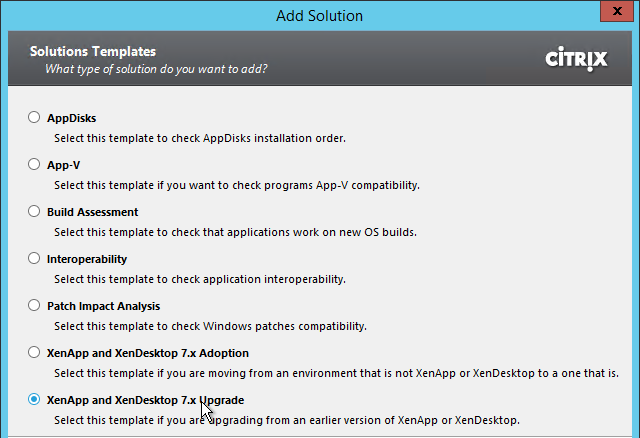
- In the Solutions Templates page, select a solution and click Next.
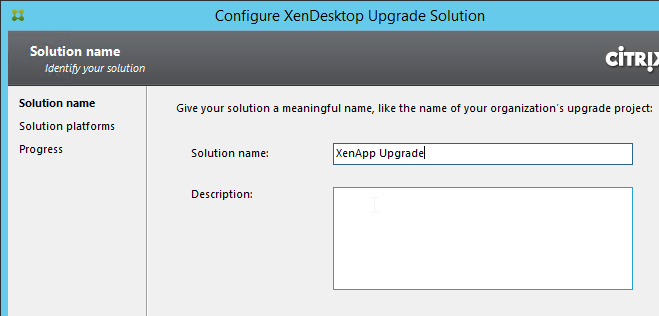
- In the Solution name page, give the solution a name and click Next.
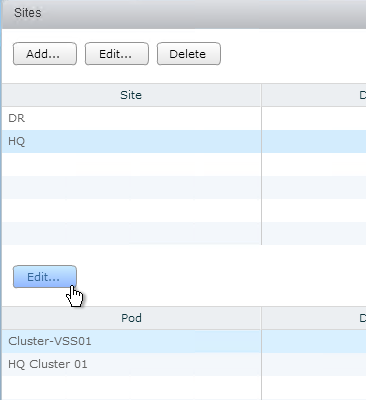
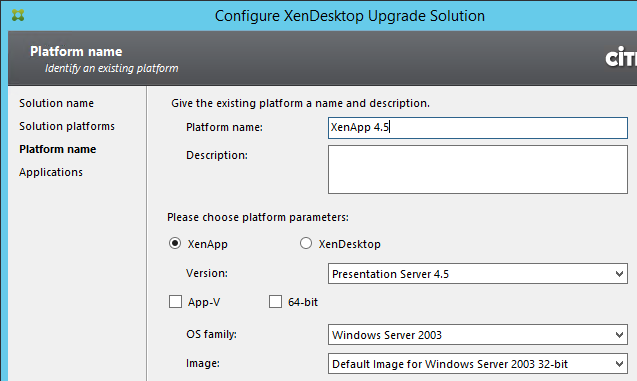
- In the Platform name page, choose the platform you are migrating from and click Next.
- In the Applications page, select the applications you want to analyze and click Next.
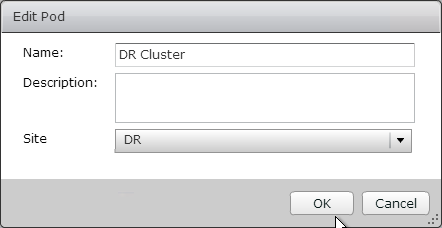
- In the Solution platforms page you can change the Target platforms or add more platforms.
- Click Build.