EUC Weekly Digest – August 10, 2019

Last Modified: Nov 7, 2020 @ 6:34 am

Interesting EUC items from last week:

Citrix Virtual Apps and Desktops

Citrix VDA

Citrix WEM and Profile Management

Citrix StoreFront

Citrix ADC

Citrix Content Collaboration

VMware

For more immediate updates, follow me at http://twitter.com/cstalhood.

For a list of updates at carlstalhood.com, see the Detailed Change Log.

EUC Weekly Digest – August 3, 2019

Last Modified: Nov 7, 2020 @ 6:34 am

Interesting EUC items from last week:

Citrix Virtual Apps and Desktops

Citrix App Layering

Citrix Cloud

VMware

Microsoft

For more immediate updates, follow me at http://twitter.com/cstalhood.

For a list of updates at carlstalhood.com, see the Detailed Change Log.

EUC Weekly Digest – July 27, 2019

Last Modified: Nov 7, 2020 @ 6:34 am

Interesting EUC items from last week:

Citrix VDA

Citrix Provisioning

Citrix ADC

Citrix Gateway

Citrix SD-WAN

Citrix Endpoint Management

Citrix Cloud

For more immediate updates, follow me at http://twitter.com/cstalhood.

For a list of updates at carlstalhood.com, see the Detailed Change Log.

EUC Weekly Digest – July 20, 2019

Last Modified: Nov 7, 2020 @ 6:34 am

Interesting EUC items from last week:

Citrix App Layering

Citrix WEM and Profile Management

Citrix StoreFront

Citrix Workspace app

Citrix ADC

Citrix ADM

Citrix Cloud

VMware

For more immediate updates, follow me at http://twitter.com/cstalhood.

For a list of updates at carlstalhood.com, see the Detailed Change Log.

EUC Weekly Digest – July 13, 2019

Last Modified: Nov 7, 2020 @ 6:34 am

Interesting EUC items from last week:

Citrix VDA

Citrix Workspace app

Citrix StoreFront

Citrix App Layering

Citrix ADC

Citrix Gateway

Citrix Cloud

Microsoft

VMware

For more immediate updates, follow me at http://twitter.com/cstalhood.

For a list of updates at carlstalhood.com, see the Detailed Change Log.

EUC Weekly Digest – July 6, 2019

Last Modified: Nov 7, 2020 @ 6:34 am

Interesting EUC items from last week:

Citrix Virtual Apps and Desktops

Citrix Director / Monitoring

Citrix StoreFront

Citrix Workspace app

Citrix ADC

Citrix ADM

VMware

Microsoft

Other

For more immediate updates, follow me at http://twitter.com/cstalhood.

For a list of updates at carlstalhood.com, see the Detailed Change Log.

EUC Weekly Digest – June 22, 2019

Last Modified: Nov 7, 2020 @ 6:34 am

Interesting EUC items from last week:

Citrix Virtual Apps and Desktops

Citrix VDA

  • Session Recording 1906 – RBAC policies to place granular rules who can view recorded sessions; tag browser URLs

Citrix WEM and Profile Management

Citrix Provisioning

Citrix StoreFront

Citrix Workspace app

Citrix ADC

Citrix Cloud

VMware

Microsoft

Other

For more immediate updates, follow me at http://twitter.com/cstalhood.

For a list of updates at carlstalhood.com, see the Detailed Change Log.

EUC Weekly Digest – June 15, 2019

Last Modified: Nov 7, 2020 @ 6:34 am

Interesting EUC items from last week:

Citrix StoreFront

Citrix ADC

Citrix ADM

Citrix Gateway

Other

For more immediate updates, follow me at http://twitter.com/cstalhood.

For a list of updates at carlstalhood.com, see the Detailed Change Log.

SSL Virtual Servers – Citrix ADC 13

Last Modified: Apr 26, 2024 @ 7:34 am

Navigation

This page contains generic SSL instructions for all SSL-based Virtual Servers, including: Load Balancing, Citrix Gateway, Content Switching, and AAA.

💡 = Recently Updated

Change Log

Custom Cipher Group

References:

To get an A+ at SSL Labs, create a custom secure cipher group:

  1. Enable SSL Secure Renegotiation:
    1. In the left menu, expand Traffic Management, and then click SSL.
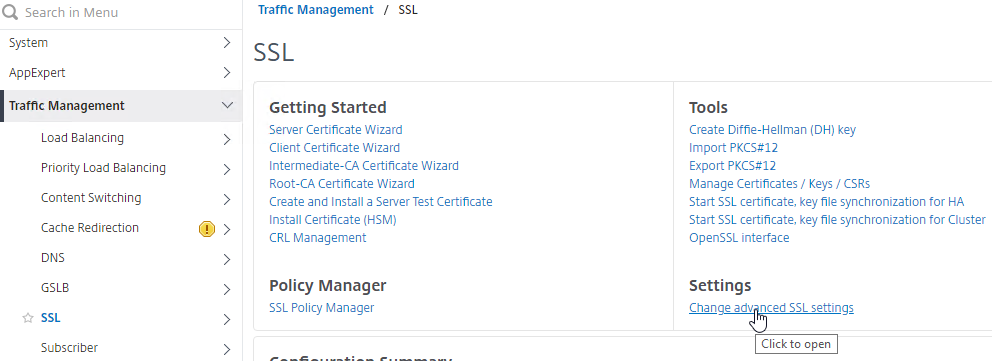
    2. On the right, in the right column, click Change advanced SSL settings.
    3. Find Deny SSL Renegotiation, and set the drop-down to NONSECURE.
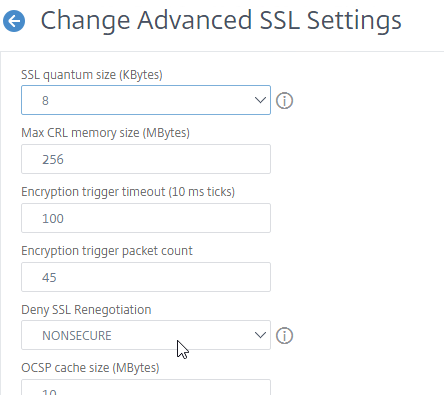
    4. Scroll down and click OK.

      set ssl parameter -denySSLReneg NONSECURE
  2. The easiest way to create a cipher group is from the CLI. See Citrix Blogs Scoring an A+ at SSLlabs.com with Citrix NetScaler – Q2 2018 update for cipher group CLI commands. Putty (SSH) to the Citrix ADC and paste the following commands.
    Note: The TLS 1.3 ciphers are not in the Citrix Blog Post. You can add TLS 1.3 ciphers to the cipher group. Make sure the TLS 1.3 ciphers are listed first (top of the list).
    add ssl cipher ssllabs-smw-q2-2018
    bind ssl cipher ssllabs-smw-q2-2018 -cipherName TLS1.3-AES256-GCM-SHA384 -cipherPriority 1
    bind ssl cipher ssllabs-smw-q2-2018 -cipherName TLS1.3-CHACHA20-POLY1305-SHA256 -cipherPriority 2
    bind ssl cipher ssllabs-smw-q2-2018 -cipherName TLS1.3-AES128-GCM-SHA256 -cipherPriority 3
    bind ssl cipher ssllabs-smw-q2-2018 -cipherName TLS1.2-ECDHE-ECDSA-AES128-GCM-SHA256
    bind ssl cipher ssllabs-smw-q2-2018 -cipherName TLS1.2-ECDHE-ECDSA-AES256-GCM-SHA384
    bind ssl cipher ssllabs-smw-q2-2018 -cipherName TLS1.2-ECDHE-ECDSA-AES128-SHA256
    bind ssl cipher ssllabs-smw-q2-2018 -cipherName TLS1.2-ECDHE-ECDSA-AES256-SHA384
    bind ssl cipher ssllabs-smw-q2-2018 -cipherName TLS1-ECDHE-ECDSA-AES128-SHA
    bind ssl cipher ssllabs-smw-q2-2018 -cipherName TLS1-ECDHE-ECDSA-AES256-SHA
    bind ssl cipher ssllabs-smw-q2-2018 -cipherName TLS1.2-ECDHE-RSA-AES128-GCM-SHA256
    bind ssl cipher ssllabs-smw-q2-2018 -cipherName TLS1.2-ECDHE-RSA-AES256-GCM-SHA384
    bind ssl cipher ssllabs-smw-q2-2018 -cipherName TLS1.2-ECDHE-RSA-AES-128-SHA256
    bind ssl cipher ssllabs-smw-q2-2018 -cipherName TLS1.2-ECDHE-RSA-AES-256-SHA384
    bind ssl cipher ssllabs-smw-q2-2018 -cipherName TLS1-ECDHE-RSA-AES128-SHA
    bind ssl cipher ssllabs-smw-q2-2018 -cipherName TLS1-ECDHE-RSA-AES256-SHA
    bind ssl cipher ssllabs-smw-q2-2018 -cipherName TLS1.2-DHE-RSA-AES128-GCM-SHA256
    bind ssl cipher ssllabs-smw-q2-2018 -cipherName TLS1.2-DHE-RSA-AES256-GCM-SHA384
    bind ssl cipher ssllabs-smw-q2-2018 -cipherName TLS1-DHE-RSA-AES-128-CBC-SHA
    bind ssl cipher ssllabs-smw-q2-2018 -cipherName TLS1-DHE-RSA-AES-256-CBC-SHA
    bind ssl cipher ssllabs-smw-q2-2018 -cipherName TLS1-AES-128-CBC-SHA
    bind ssl cipher ssllabs-smw-q2-2018 -cipherName TLS1-AES-256-CBC-SHA
  3. Or you can create the cipher group using the GUI.
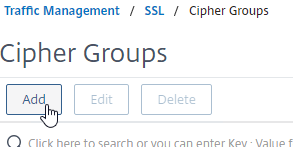
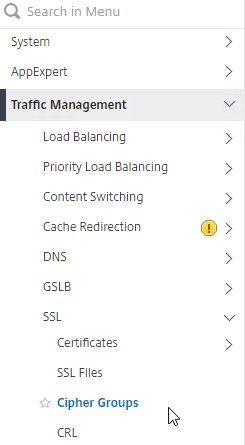
    1. Go to Traffic Management > SSL > Cipher Groups.
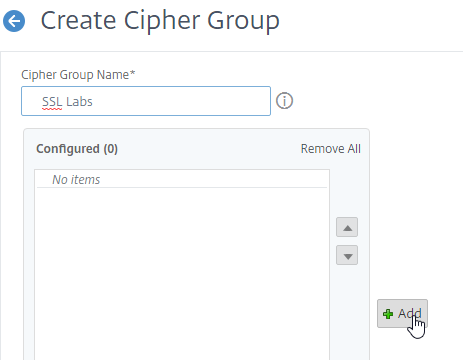
    2. On the right, click Add.
    3. Name it SSL Labs or similar.
    4. In the middle, click the button named Add.
    5. Use the search box to find a particular cipher.
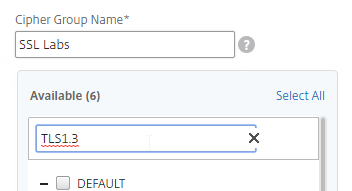
    6. Check the box next to one of the results, and click the arrow to move it to the right.
    7. For TLS 1.3 support, add the TLS 1.3 ciphers first.
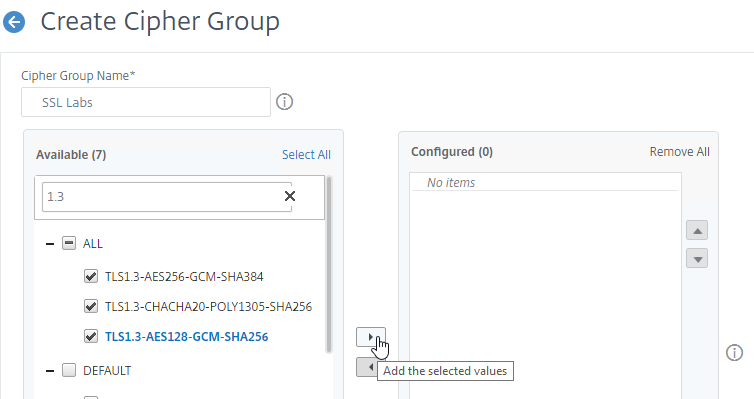
    8. Then add the ciphers from Citrix Blog Post Scoring an A+ at SSLlabs.com with Citrix NetScaler – Q2 2018 update.
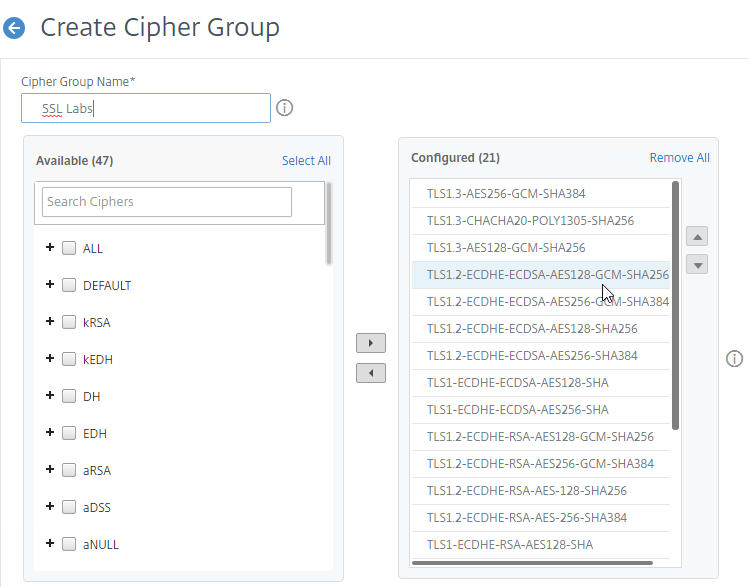
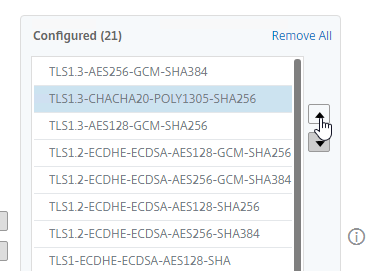
    9. Use the up and down arrows to order the ciphers. Citrix ADC prefers the ciphers on top of the list, so the ciphers at the top of the list should be the most secure ciphers (TLS 1.3).
    10. Click Create when done.

Strict Transport Security – Rewrite Policy Method

To get an A+ at SSLLabs.com, you need to insert the Strict-Transport-Security HTTP header in the responses. Citrix ADC Rewrite Policy is one method of doing this. Another method is to enable HSTS in an SSL Profile, or enable it in SSL Parameters on a SSL vServer.

To create a Rewrite Policy that inserts the Strict-Transport-Security HTTP header:

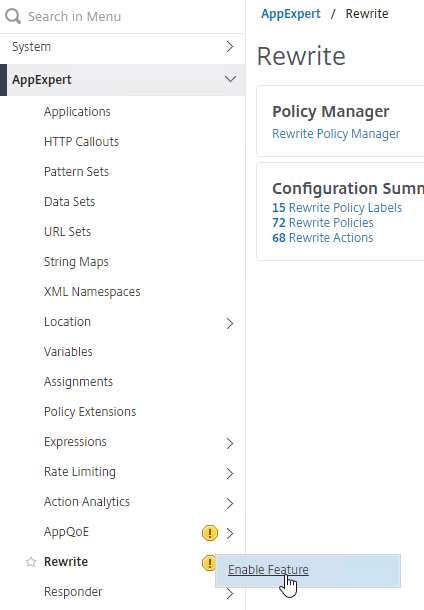
  1. In the left menu, expand AppExpert, right-click Rewrite, and click Enable Feature.
  2. Create the Rewrite Action:
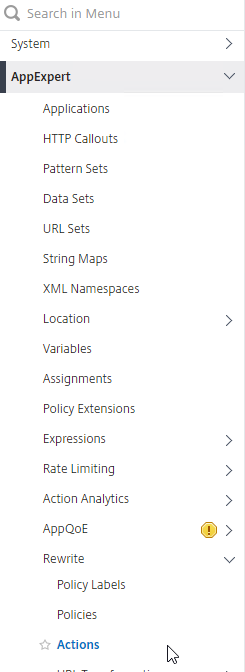
    1. Go to AppExpert > Rewrite > Actions.
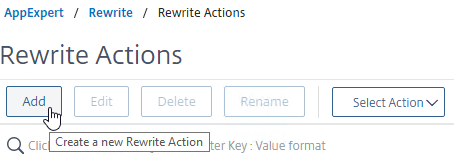
    2. On the right, click Add.
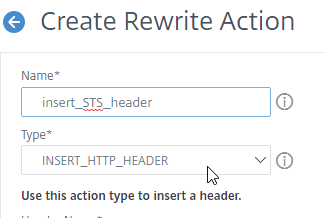
    3. Name the action insert_STS_header or similar.
    4. The Type should be INSERT_HTTP_HEADER.
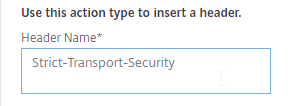
    5. In the Header Name field, enter Strict-Transport-Security.
    6. In the Expression field, enter the following:
      "max-age=157680000"
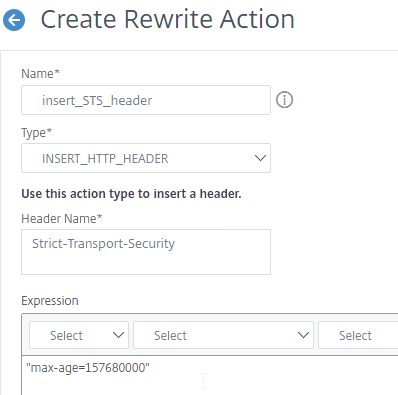
    7. Click Create.
  3. Create the Rewrite Policy:
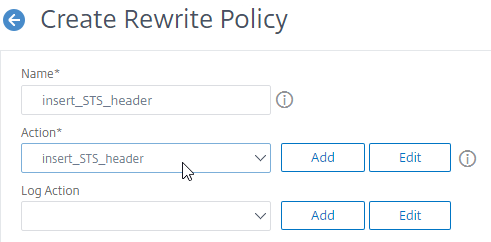
    1. On the left, go to AppExpert > Rewrite > Policies.
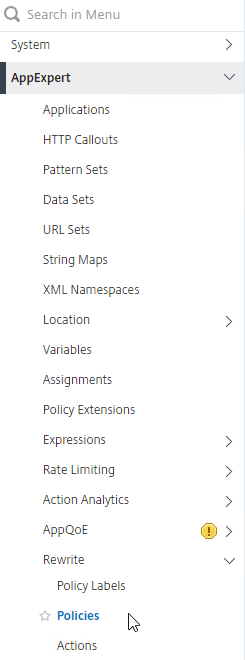
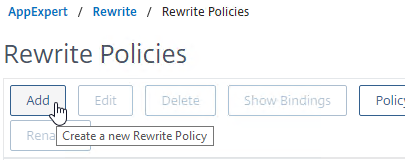
    2. On the right, click Add.
    3. Name it insert_STS_header or similar.
    4. Select the previously created Action.
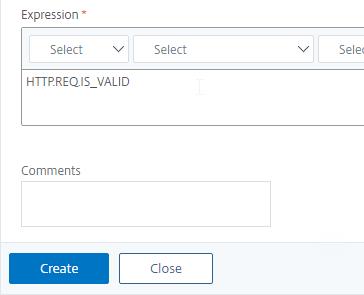
    5. In the Expression box, enter HTTP.REQ.IS_VALID.
    6. Click Create.
  4. Now you can bind this Rewrite Response policy to SSL-based SSL vServers.
    1. Edit an SSL vServer (Gateway vServer, Load Balancing vServer, etc.).
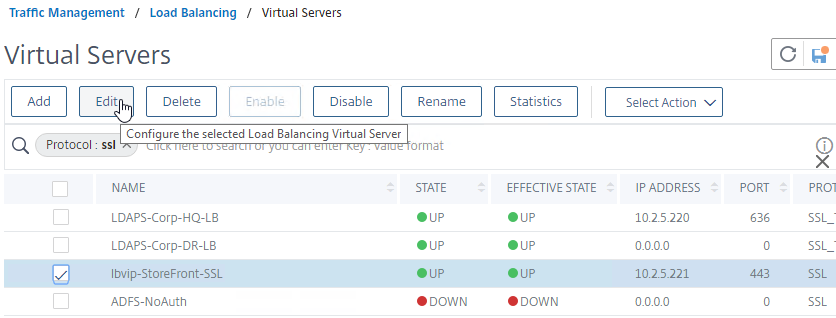
    2. if the Policies section doesn’t exist on the left, then add it from the Advanced Settings column on the right.
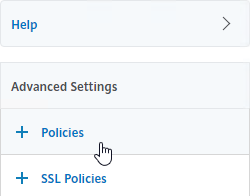
    3. On the left, in the Policies section, click the plus icon.
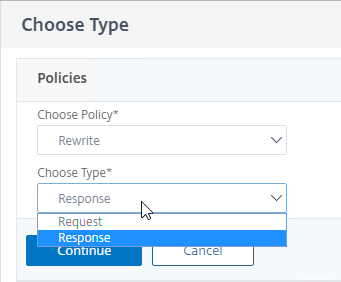
    4. Change the Choose Policy drop-down to Rewrite.
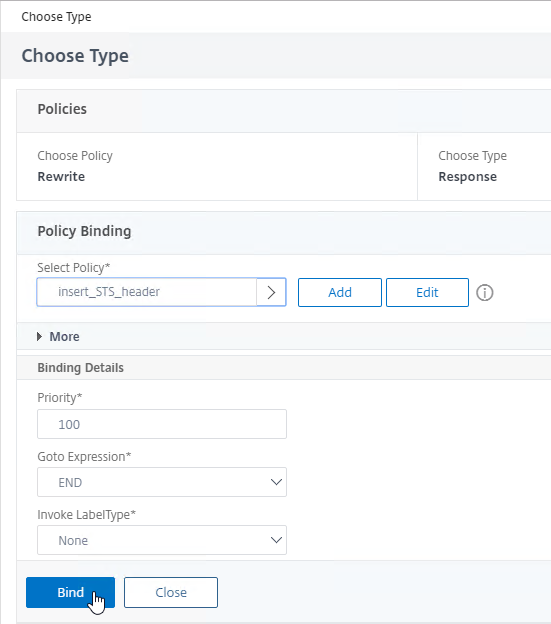
    5. Change the Choose Type drop-down to Response, and click Continue.
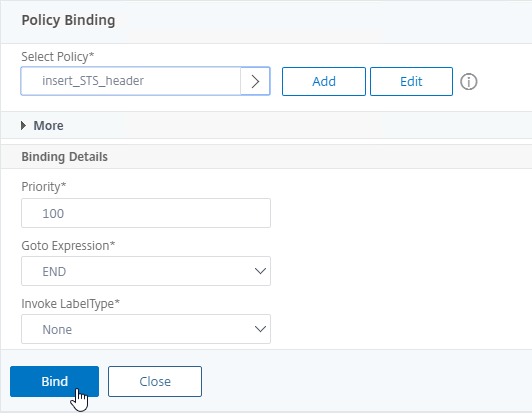
    6. In the Select Policy field, click where it says Click to select.
    7. Click the small circle next to insert_STS_header, and then click the blue Select button at the top of the page.
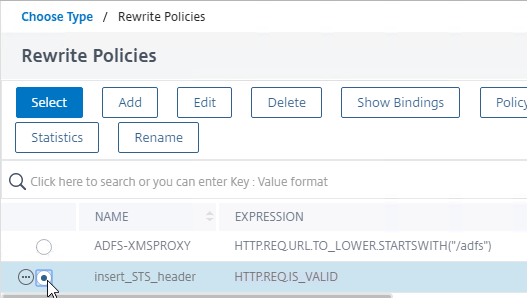
    8. Click Bind.
enable ns feature rewrite

add rewrite action insert_STS_header insert_http_header Strict-Transport-Security "\"max-age=157680000\""

add rewrite policy insert_STS_header true insert_STS_header

bind lb vserver MyvServer -policyName insert_STS_header -priority 100 -gotoPriorityExpression END -type RESPONSE

SSL Profiles – Default and Custom

You can use SSL Profiles to package several SSL settings together and apply the settings package (Profile) to SSL-based Virtual Servers and SSL-based Services. These SSL settings include:

  • Disable SSLv3, TLSv1, TLSv11
  • Bind secure ciphers
  • Bind ECC curves
  • Enable Extended Master Secret (EMS)
  • Enable HSTS (Strict Transport Security), etc.

There are default SSL Profiles, and there are custom SSL Profiles. The default SSL Profiles are disabled by default because they would impact every SSL-based Virtual Server and Service on the appliance. Once default SSL Profiles are enabled, you cannot disable the default SSL Profiles.

  • Some features of custom SSL Profiles require default SSL Profiles to be enabled. For example, you cannot configure ciphers in a custom SSL Profile unless the default SSL Profiles are enabled.

Default SSL Profiles are intended to provide a baseline SSL configuration for all newly created SSL Virtual Servers and SSL Services. You can still create Custom SSL Profiles to override the Default SSL Profiles.

Enabling the default SSL profile will wipe out any SSL configuration on SSL entities (e.g. SSL Virtual Servers) that do not have a custom SSL profile bound. Citrix offers a script that can read your existing SSL entity SSL configuration and convert them to custom SSL Profiles. See Enabling the Default Profiles at Citrix Docs. The default_profile_script can be downloaded from Github. The commands output by the script won’t work until the default SSL Profile is enabled.

To enable Default SSL profiles

Enabling Default SSL Profiles is irreversible.

  1. Make sure you are connected to the appliance NSIP using http, and not https.
  2. In the left menu, go to Traffic Management > SSL.
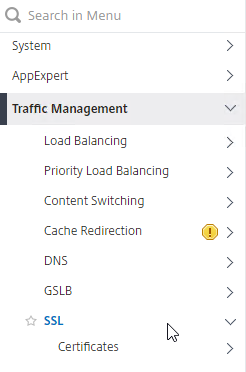
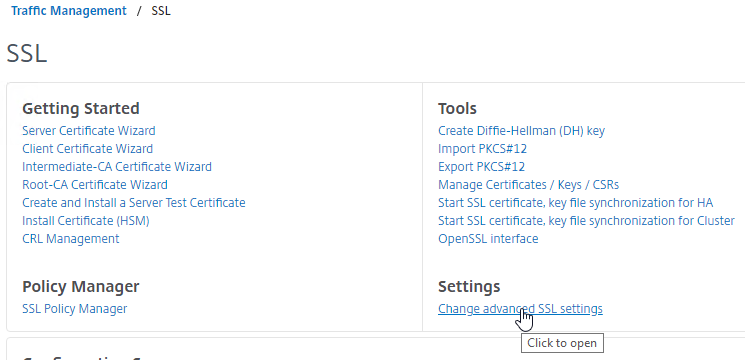
  3. On the right, in the right column, click Change advanced SSL settings.
  4. Near the bottom, check the box next to Enable Default Profile. Note: this will change SSL settings on all SSL Virtual Servers to match the default SSL profile. You might want to do this during a maintenance window.
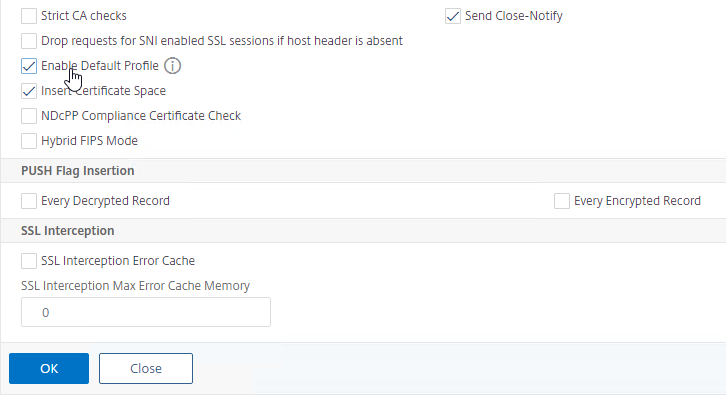
  5. Click OK at the bottom of the page.
  6. Click Yes to confirm that you are enabling the Default profile.
  7. If you go back into Change Advanced SSL Settings, notice that the Default Profile is enabled, and there’s no way to disable it.

Edit Default SSL Profile with Recommended SSL Profile Settings

The Default SSL Profile applies to all newly created SSL vServers and all newly created SSL Services.

The Default SSL Profile also applies to the management GUI unless you change the SSL Profile assigned to the management Internal Services.

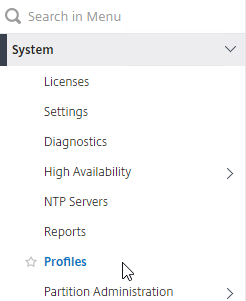
  1. In the left menu, expand System, and click Profiles.
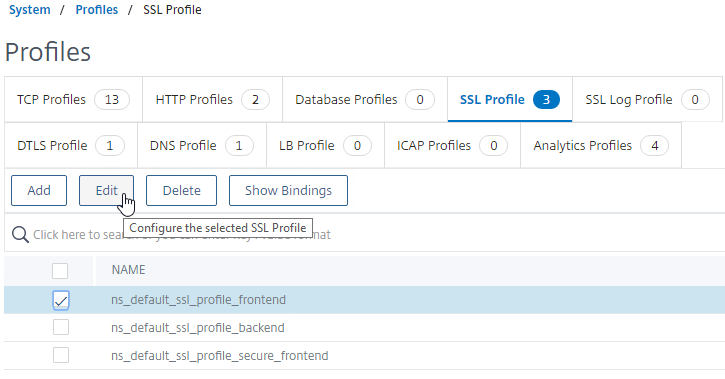
  2. On the right, switch to the SSL Profile tab.
  3. Edit the default frontend or backend profile.
    • Frontend = client-side connections to SSL Virtual Servers.
    • Backend = server-side connections (SSL Services and Service Groups).
    • ns_default_ssl_profile_frontend is automatically applied to all newly created SSL vServers.
    • ns_default_ssl_profile_backend is automatically applied to all newly created SSL Services.
  4. This section focuses on FrontEnd profiles so edit ns_default_ssl_profile_frontend.
  5. Click the pencil icon in the Basic Settings section.

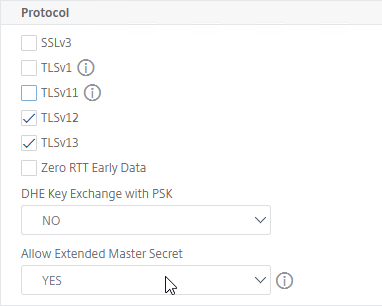
    1. Scroll all the way down to the Protocol section.
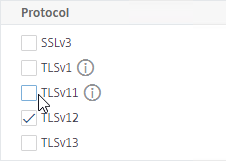
    2. Notice that SSLv3 is already unchecked.
    3. It’s recommended that you uncheck TLSv1 and TLSv11 in the Default FrontEnd SSL profile.
      • If you have a website that requires TLSv1, then you can create another Custom FrontEnd SSL Profile that has TLSv1 enabled and manually bind the new Custom SSL Profile to the SSL vServers that need it.
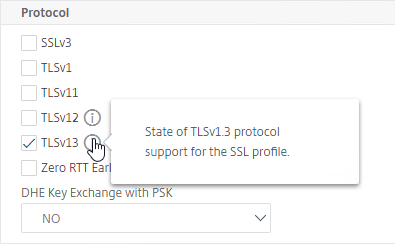
    4. TLSv13 is an option.

      • You can either enable TLSv13 in this Default SSL Profile, or you can create new Custom SSL Profiles that have TLSv13 enabled.
      • If you enable TLSv13, then make sure your cipher group includes TLS 1.3 ciphers.
      • To log SSL Protocol usage, see NetScaler SSL Protocol’s Used (SSLv3, TLS1.0, etc) at Citrix Discussions.
    5. In ADC 13.0 build 61 and newer, just below the protocols. there is an option to enable Allow Extended Master Secret. Windows machines enforce EMS for resumption. 💡
    6. Find Deny SSL Renegotiation and set it to NONSECURE. To find the setting, press Ctrl+F in your browser and search for it.
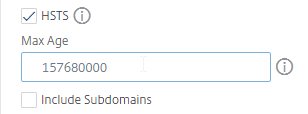
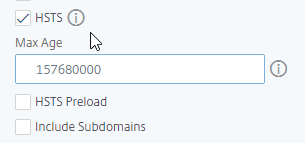
    7. To enable Strict Transport Security (HSTS), scroll up a little, and check the box next to HSTS.
    8. Enter 157680000 in the Max Age box.

      • You can either enable HSTS in an SSL Profile, or you can enable HSTS by binding a Rewrite policy to your SSL vServer. Do not use both methods at the same time or else you will end up with two Strict-Transport-Security headers in your responses.
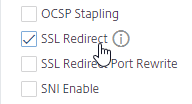
    9. If you do any SSL Offload (SSL on the client side, HTTP on the server side), then you’ll need to enable SSL Redirect. It’s above HSTS. With this option enabled, any 301/302 redirects from the server with HTTP Location headers are rewritten to HTTPS Location headers. You might need this option for StoreFront load balancing if doing SSL Offload (port 80 to the StoreFront servers).
      • This setting might be more appropriate in a Custom SSL Profile instead of the Default SSL Profile.
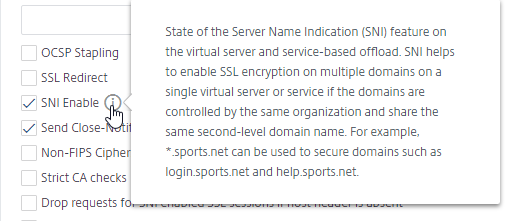
    10. For SSL vServers that need multiple SSL certificates, you can enable the SNI Enable checkbox.

      • This setting might be more appropriate in a Custom SSL Profile instead of the Default SSL Profile.
    11. Click OK when done modifying the Basic Settings section.
  6. Scroll down to the SSL Ciphers section, and click the pencil icon.

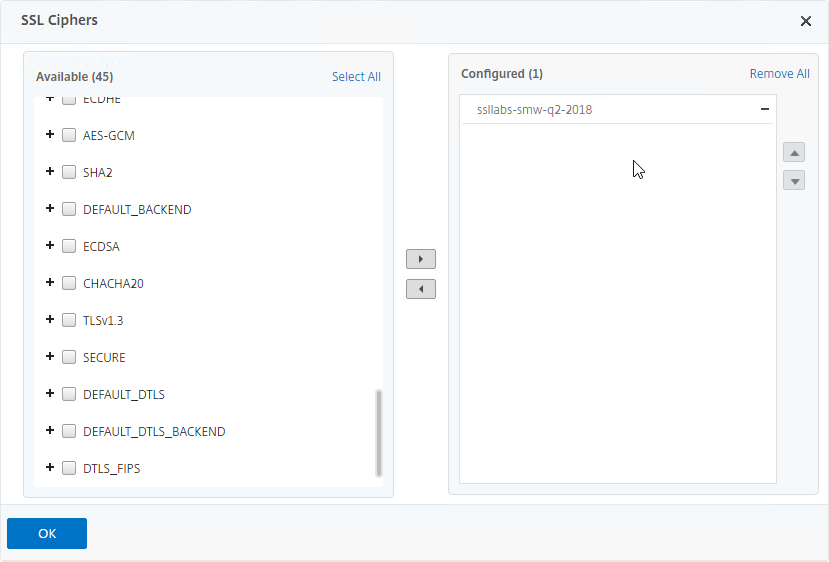
    1. Scroll down, and select your custom cipher group (e.g. SSL Labs). Click the arrow to move it to the right.
      If you enabled TLS 1.3, then make sure your cipher group includes TLS 1.3 ciphers.
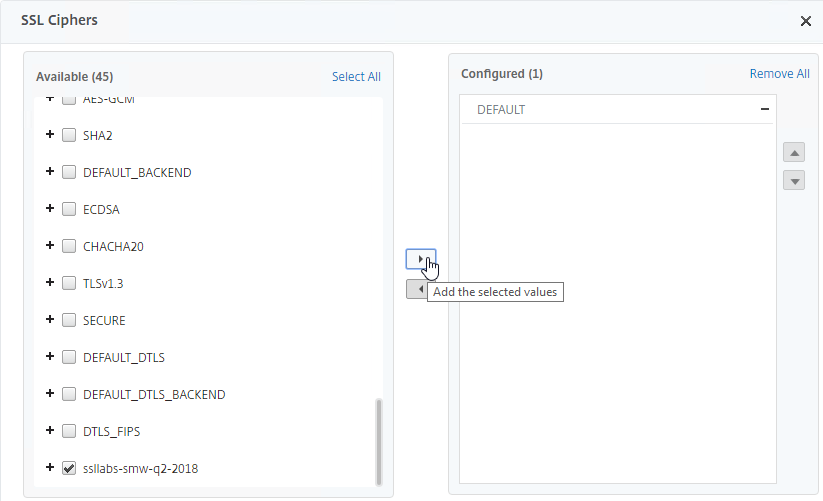
    2. In the Configured list on the right, click the minus sign next to the DEFAULT cipher group to remove it from the Configured list.
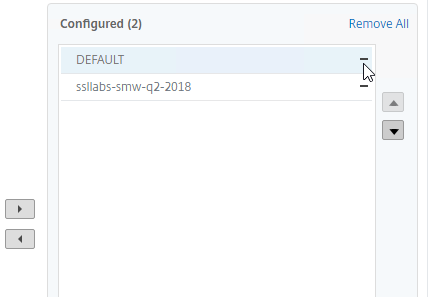
    3. Click OK to close the SSL Ciphers section.
    4. If you make changes to the Custom Cipher Group, then you might have to edit the SSL Profile, remove the Custom Cipher Group, and rebind it.

Create a custom SSL Profile

You can create Custom SSL Profiles to override the Default SSL Profile.

  1. In the left menu, expand System, and click Profiles.
  2. On the right, switch to the tab named SSL Profile.
  3. To copy the existing settings from the Default SSL Profile, check the box next to ns_default_ssl_profile_frontend and then click the button named Add.
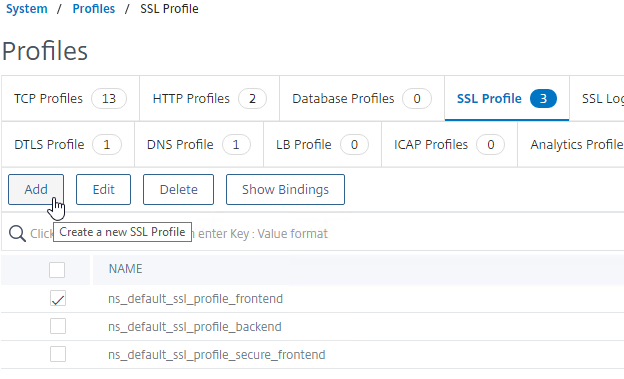
    1. Enter a name.
    2. Change the SSL Profile Type to FrontEnd or BackEnd.
    3. Configure SSL Profile settings as desired (see above for some recommendations).
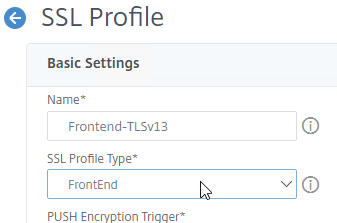
    4. For example, your Custom SSL Profile can enable TLSv13 protocol and include TLSv13 ciphers.
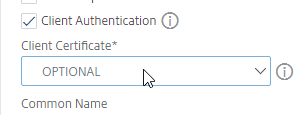
    5. For example, your Custom SSL Profile can enable Client Authentication (client certificates).
    6. Another example, your Custom SSL Profile can enable SNI.
    7. When done, click OK at the bottom of the page.
  4. When you clone an SSL Profile, the Ciphers are not cloned so you’ll have to rebind the ciphers to the Custom SSL Profile.
  5. After the SSL Profile is created, edit any SSL-based Virtual Server.
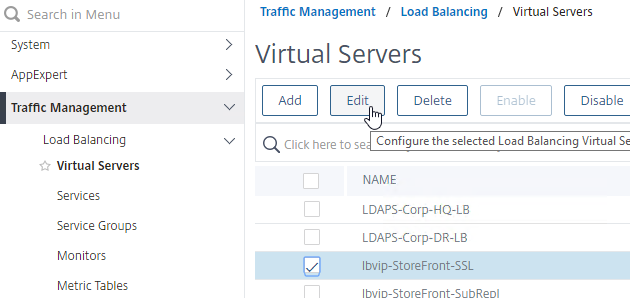
    1. If you don’t see the SSL Profile section on the left, then on the right, in the Advanced Settings column, click SSL Profile to add the section to the left.
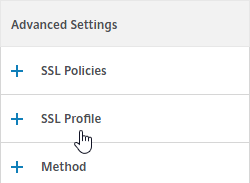
    2. On the left, scroll down to the SSL Profile section and click the pencil icon.
    3. Select an SSL Profile.
    4. Click OK to close the SSL Profile section.
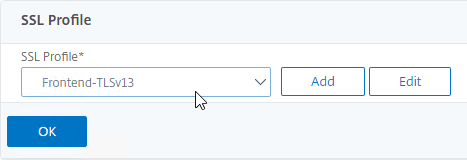
SSL vServers – Bind Certificate, Bind Cipher Group, Disable SSLv3, Enable STS

If you enabled the Default SSL Profiles feature, you can either leave the vServer configured with the Default SSL Profile; or you can change the vServer to use a Custom SSL Profile.

If you don’t use the Default SSL Profiles feature, then you’ll need to manually configure ciphers and SSL settings on every SSL vServer.

Do the following on every SSL vServer:

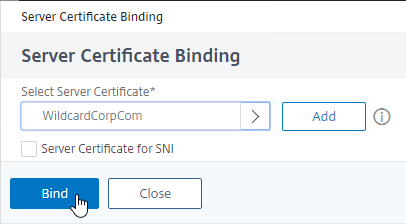
  1. When creating an SSL Virtual Server (e.g. SSL Load Balancing vServer), on the left, in the Certificates section, click where it says No Server Certificate.
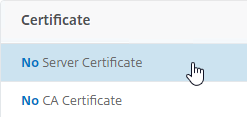
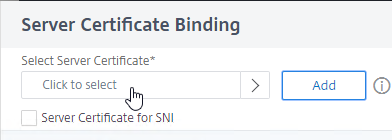
    1. In the Select Server Certificate field, click where it says Click to select.
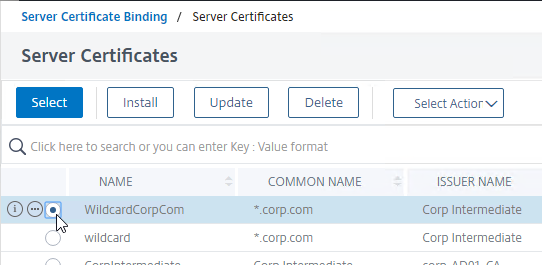
    2. Click the small circle next to a certificate, and then click the blue Select button at the top of the page.
    3. Click Bind.

      bind ssl vserver MyvServer -certkeyName MyCert
  2. You can bind a Custom SSL Profile:
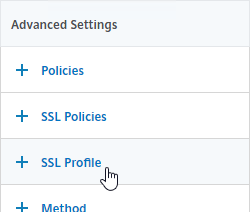
    1. Find the SSL Profile section on the left, and click the pencil icon.

      • If you don’t see the SSL Profile section on the left, then add the SSL Profile section from the Advanced Settings column on the right.
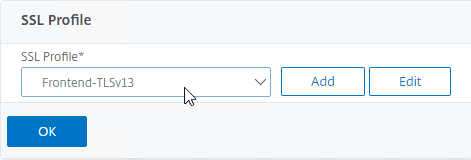
    2. Select a Custom SSL Profile, and click OK.
  3. If default SSL Profiles are not enabled:
    1. On the left, in the SSL Parameters section, click the pencil icon. You won’t see this section if Default SSL Profiles are enabled.
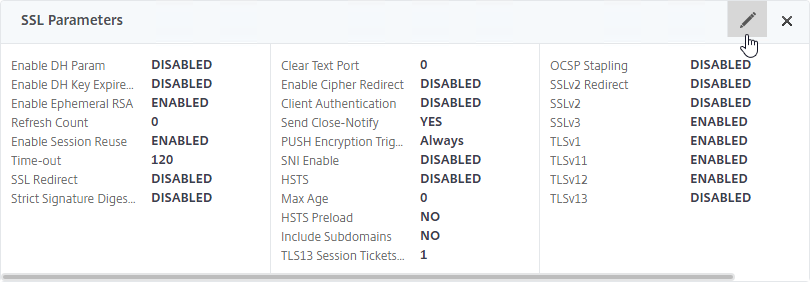
    2. Uncheck the box next to SSLv3.
    3. Optionally uncheck the boxes next to TLSv1 and TLSv11.
    4. Make sure TLSv12 is checked.
    5. TLSv13 is an option. If you enable this, then make sure your cipher group includes TLS 1.3 ciphers.
    6. Click OK.

      set ssl vserver MyvServer -ssl3 DISABLED -tls12 ENABLED
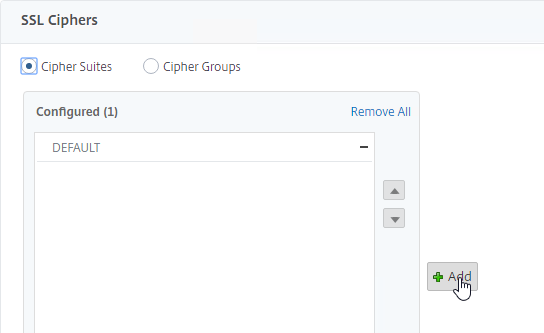
    7. Scroll to the SSL Ciphers section, and click the pencil icon.
    8. In the middle, click Add.
    9. Select your custom cipher group. It’s probably at the bottom of the list. If you enabled TLS 1.3, then make sure your cipher group includes TLS 1.3 ciphers. Move the cipher group to the right.
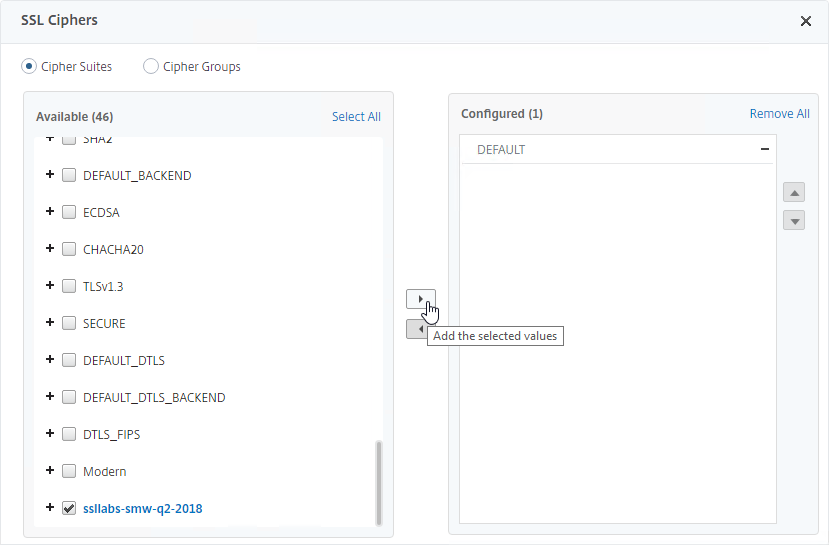
    10. Remove the DEFAULT cipher group from the Configured list
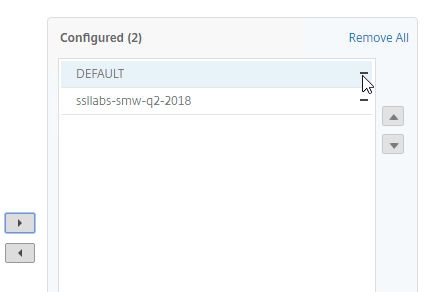
      unbind ssl vserver MyvServer -cipherName ALL
      bind ssl vserver MyvServer -cipherName ssllabs-smw-q2-2018
    11. Then click OK to close the SSL Ciphers section.
  4. SSL Virtual Servers created on newer versions of Citrix ADC will automatically have ECC Curves bound to them. However, if this appliance was upgraded from an older version, then the ECC Curves might not be bound. If you are not using SSL Profile, then on the right, in the Advanced Settings column, click ECC Curve.
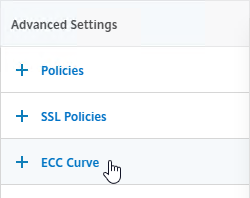
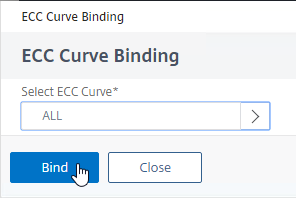
    1. On the left, in the ECC Curve section, click where it says No ECC Curve.
    2. In the ECC Curve Binding field, click where it says Click to select.
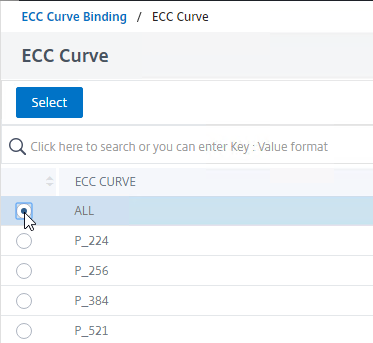
    3. Click the small circle next to ALL, and then click the blue Select button at the top of the page.
    4. Click Bind.

      bind ssl vserver MyvServer -eccCurveName ALL
  5. If HSTS is not enabled in a bound SSL Profile, you can enable it in SSL Parameters, or you can enable it by binding a Rewrite policy.
  6. To enable HSTS by configuring SSL Parameters:
    1. On the left, find the SSL Parameters section, and click the pencil icon. This section is only present if Default SSL Profiles are not enabled.
    2. In the right column, check the box next to HSTS.
    3. Enter 157680000 in the Max Age box.
    4. Click OK to close SSL Parameters.
  7. If enabling HSTS in an SSL Profile or SSL Parameters causes technical issues, then bind a Rewrite policy instead. Don’t do both methods.
    1. If the Policies section doesn’t exist on the left, then add it from the Advanced Settings column on the right.
    2. On the left, find the Policies section, and click the plus icon.
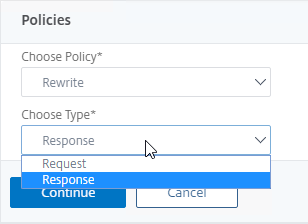
    3. Change the Choose Policy drop-down to Rewrite.
    4. Change the Choose Type drop-down to Response, and click Continue.
    5. In the Select Policy field, click where it says Click to select.
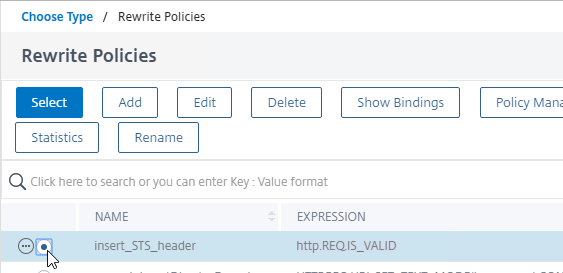
    6. Click the small circle next to the insert_STS_header policy, and then click the blue Select button at the top of the page.
    7. Click Bind.

      bind lb vserver MyvServer -policyName insert_STS_header -priority 100 -gotoPriorityExpression END -type RESPONSE

If you experience SSL performance problems on a Citrix ADC MPX, Citrix CTX207005 Performance Issues with NetScaler MPX SSL recommends creating and binding the following TCP Profile:

add ns tcpProfile tcp_test -WS ENABLED -SACK ENABLED -maxBurst 20 -initialCwnd 8 -bufferSize 4096000 -flavor BIC -dynamicReceiveBuffering DISABLED -sendBuffsize 4096000

SSL Tests

After you’ve created an SSL Virtual Server and configured SSL settings, run the following test:

SSL Redirect – Methods

There are typically three methods of performing SSL Redirect (http to https) in Citrix ADC:

  • Load Balancing Virtual Server Method – enable SSL Redirect directly on the Load Balancing Virtual Server. This is the easiest method.
    • This option is not available for Gateway Virtual Servers and Content Switching Virtual Servers.
    • There’s nothing in the GUI to indicate that the SSL Virtual Server is also listening on port 80.
  • Down vServer Method – create a new Load Balancing Virtual Server on Port 80, and configure the Redirect URL for when it is down.
    • The Virtual Server must be DOWN for the Redirect to occur. These Virtual Servers are shown as Red instead of Green.
  • Responder Method – create a new Load Balancing Virtual Server on Port 80, and bind a Responder policy that redirects to https.
    • The Responder policy only works if the Virtual Server is UP, which means it is shown as Green.
    • Some setup tasks are required – create the AlwaysUP service, and create the Responder Policy. But once setup is complete, it only requires slightly more steps than the Down vServer method.

SSL Redirect – SSL Load Balancing vServer Method

You can configure SSL Redirect directly in an SSL Load Balancing vServer (port 443) instead of creating a separate HTTP (port 80) Load Balancing vServer.

Limitations:

  • This is only an option for SSL Load Balancing vServers; it’s not configurable in Gateway vServers or Content Switching vServers.
  • Only one Redirect URL can be specified. Alternatively, the Responder method can handle multiple FQDNs to one VIP (e.g. wildcard certificate) and/or IP address URLs.

To configure an SSL Load Balancing vServer to redirect from HTTP to HTTPS:

  1. Edit the SSL Load Balancing vServer (port 443).
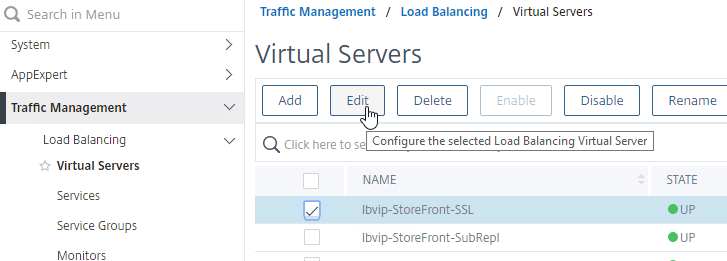
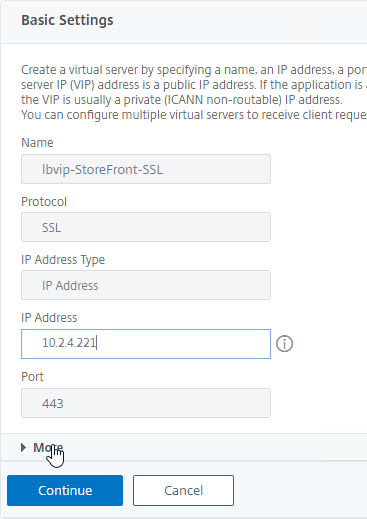
  2. In the Basic Settings section, click the pencil icon.
  3. Click More.
  4. In the Redirect from Port field, enter 80.
  5. In the HTTPS Redirect URL field, enter https://MyFQDN.
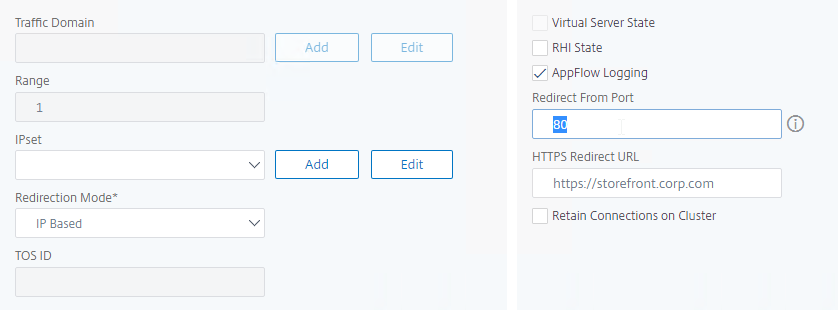
  6. Click Continue twice.
  7. When you view the list of Load Balancing Virtual Servers, there’s no indication that it’s listening on port 80.

SSL Redirect – Down vServer Method

If you created an SSL Virtual Server that only listens on SSL 443, then users must enter https:// when navigating to the website. To make it easier for the users, create another load balancing Virtual Server on the same VIP, but listens on HTTP 80, and then redirects the user’s browser to reconnect on SSL 443.

The Down Virtual Server Method is easy, but the Redirect Virtual Server must be down in order for the redirect to take effect. Another option is to use Responder policies to perform the redirect.

To create the down Redirect Virtual Server:

  1. On the left, under Traffic Management > Load Balancing, click Virtual Servers.
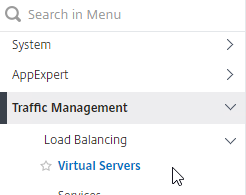
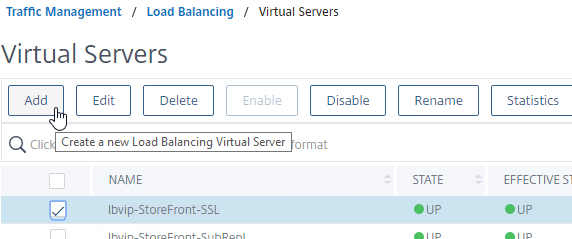
  2. On the right, right-click an SSL Virtual Server you’ve already created, and click Add. Doing it this way copies some of the data from the already created Virtual Server.
  3. Or, if you are redirecting Citrix Gateway, create a new Load Balancing vServer with the same VIP as the Gateway.
  4. Change the name of the Virtual Server to indicate that this new Virtual Server is an SSL Redirect.
  5. Change the Protocol to HTTP on Port 80.
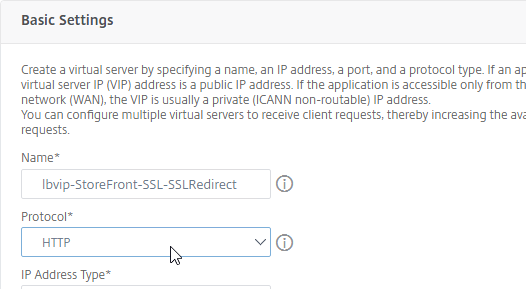
  6. The IP Address should already be filled in. It must match the original SSL Virtual Server (or Gateway vServer). Click OK.
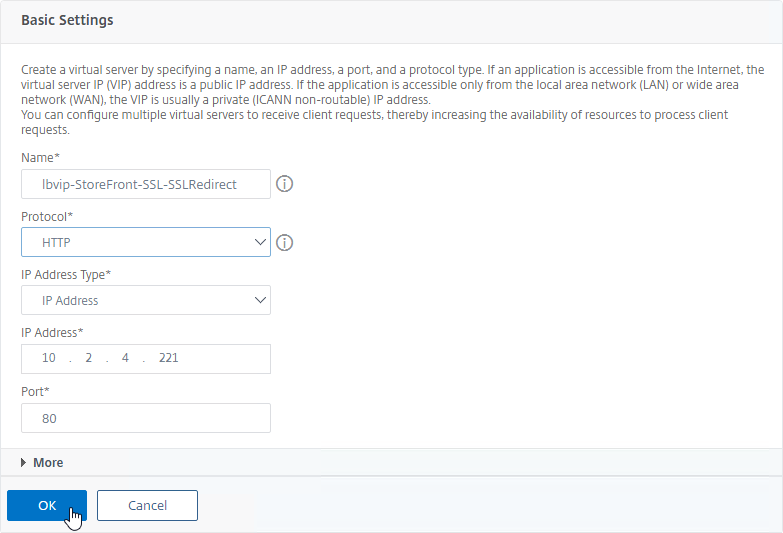
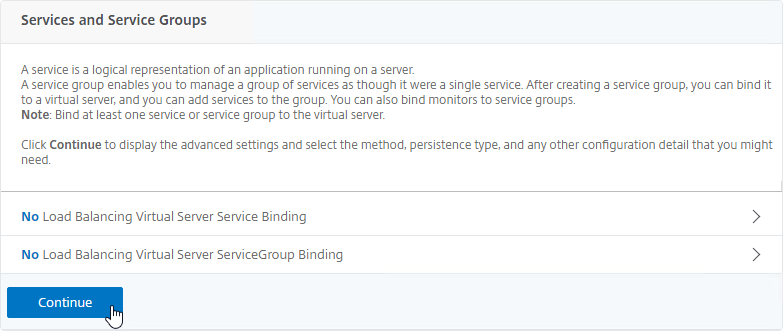
  7. Don’t bind any services. This vServer must intentionally be marked down so the redirect will take effect. Click Continue.
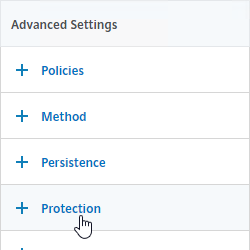
  8. On the right, in the Advanced Settings column, click Protection.
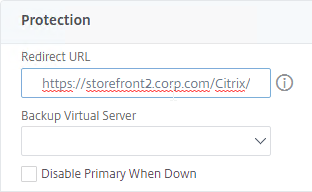
  9. On the left, in the Protection section, in the Redirect URL field, enter the full URL including https://. For example: https://storefront.corp.com/Citrix/StoreWeb.
  10. Click OK to close the Protection section.
  11. Click Done.
  12. When you view the SSL redirect Virtual Server in the list, it will have a state of DOWN. That’s expected. The Port 80 Virtual Server must be DOWN for this redirect method to work.

SSL Redirect – Responder Method

The Down Virtual Server Method is easy, but the Redirect Virtual Server must be down in order for the redirect to take effect. Another option is to use Responder policies to perform the redirect. The Responder method requires the Redirect Virtual Server to be UP.

Responder Method Setup Tasks

The following setup tasks are performed once no matter how many redirects you want to configure.

Create a dummy Load Balancing service. This dummy service can be bound to multiple Redirect Virtual Servers.

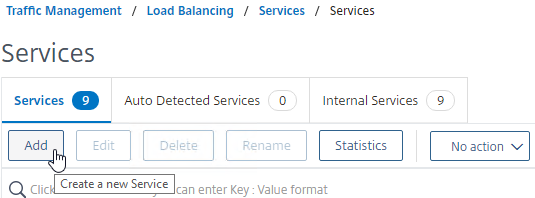
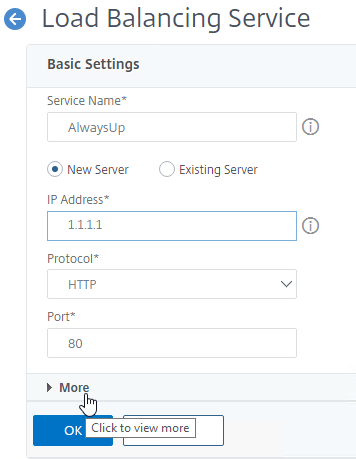
  1. Go to Traffic Management > Load Balancing > Services.
  2. On the right, click Add.
  3. Name the service AlwaysUp or similar.
  4. Enter a fake IP address. Try not to use any IP address owned by the Citrix ADC to avoid being able to access the ADC management web page.
  5. Click the More link.
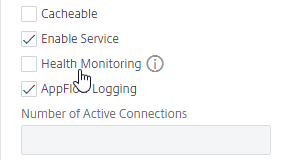
  6. This dummy service must always be UP, so uncheck the box next to Health Monitoring.
  7. Click OK, and then click Done to close the Load Balancing Service.

    add server 1.1.1.1 1.1.1.1
    add service AlwaysUp 1.1.1.1 HTTP 80 -healthMonitor NO

Create the Responder Action:

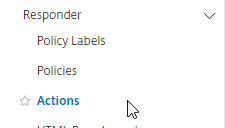
  1. On the left, expand AppExpert, and click Responder.
  2. If Responder feature is not enabled, right-click Responder, and click Enable Feature.
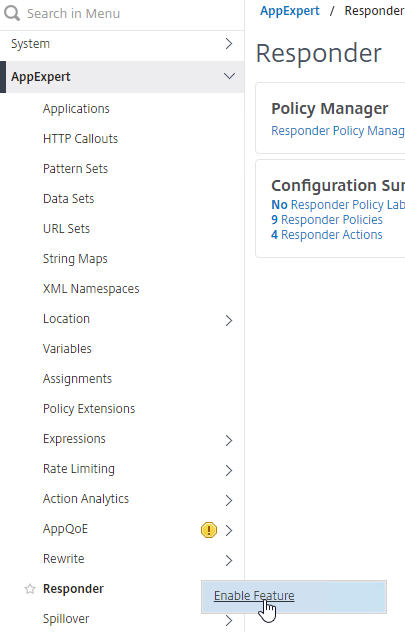
    enable ns feature RESPONDER
  3. Under Responder, click Actions.
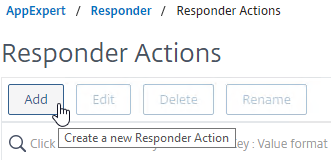
  4. On the right, click Add.
  5. Give the action a name.
  6. Change the Type to Redirect. If you leave this set to Respond With then it won’t work.
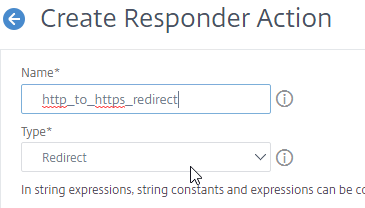
  7. Enter an expression. The following expression redirects to https on the same URL the user entered in the browser. Or you can create a Responder Action with a more specific Target.
    "https://" + HTTP.REQ.HOSTNAME.HTTP_URL_SAFE + HTTP.REQ.URL.PATH_AND_QUERY.HTTP_URL_SAFE
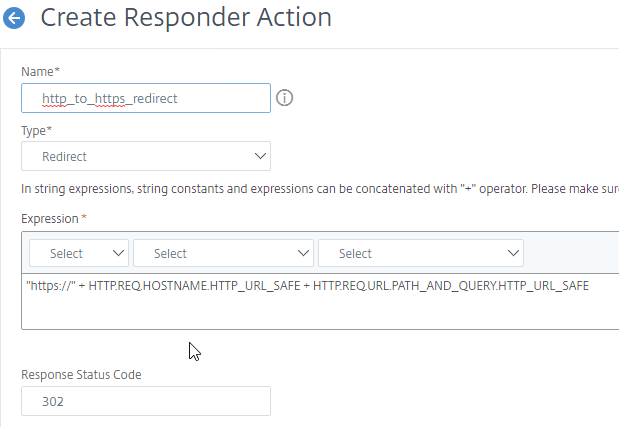
    add responder action http_to_ssl_redirect_responderact redirect "\"https://\" + HTTP.REQ.HOSTNAME.HTTP_URL_SAFE + HTTP.REQ.URL.PATH_AND_QUERY.HTTP_URL_SAFE" -responseStatusCode 302
  8. Click Create.

Create the Responder Policy:

  1. On the left, under Responder, click Policies.
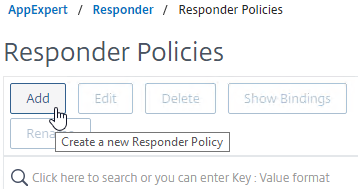
  2. On the right, click Add.
  3. Give the policy a name.
  4. Select the previously created Responder action.
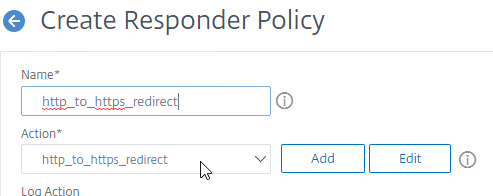
  5. For the expression, enter the following.
    HTTP.REQ.IS_VALID
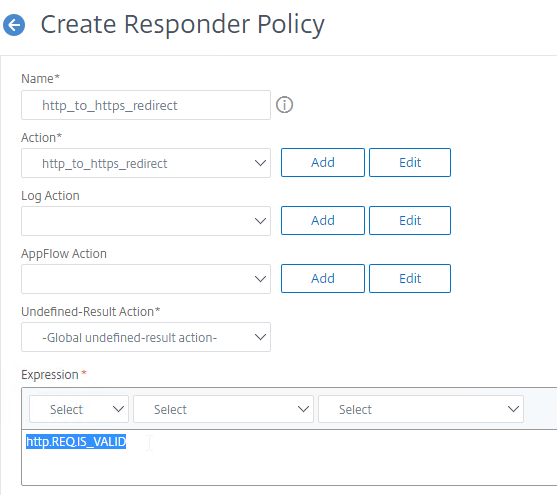
    add responder policy http_to_ssl_redirect_responderpol HTTP.REQ.IS_VALID http_to_ssl_redirect_responderact
  6. Then click Create.

Enable Redirect using Responder Policy

Repeat this section for each HTTP to HTTPS redirect that you want to configure:

  1. Create a Load Balancing Virtual Server with Protocol HTTP, and Port 80.
  2. The vServer’s VIP should match an existing SSL Virtual Server or existing Citrix Gateway Virtual Server.
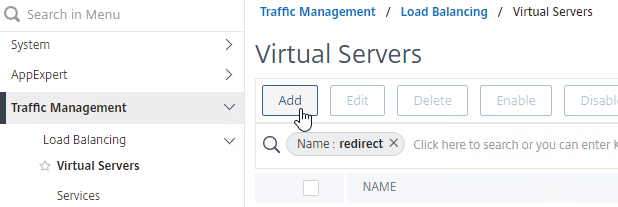
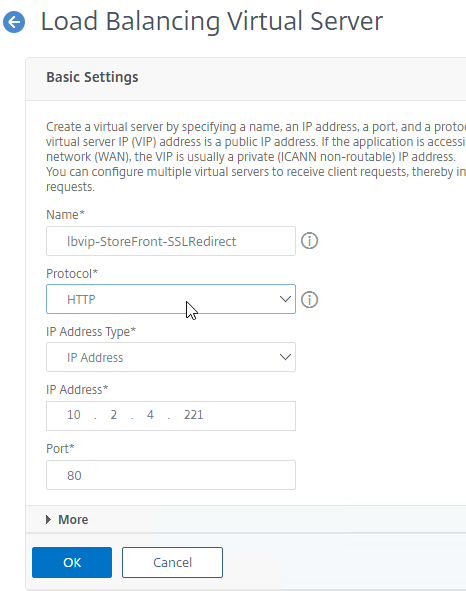
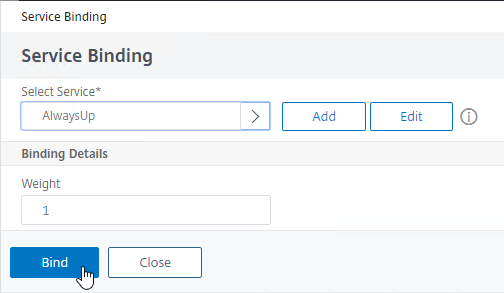
  3. Bind the AlwaysUp service.
    1. In the Services and Service Groups section, click where it says No Load Balancing Virtual Server Service Binding.
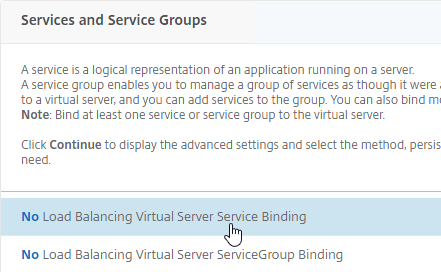
    2. In the Select Service field, click where it says Click to select.
    3. Check the box next to AlwaysUp, and then click the blue Select button at the top of the page.
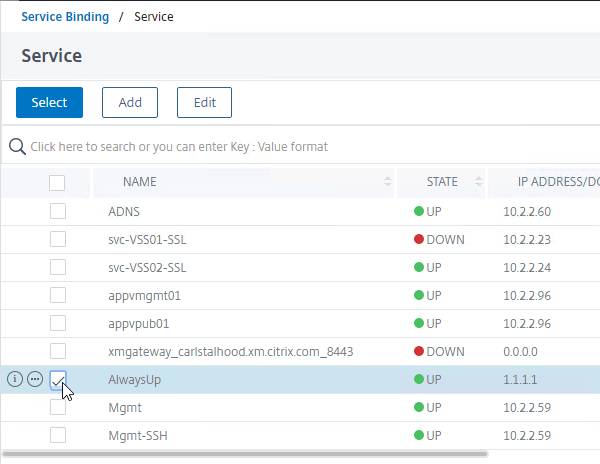
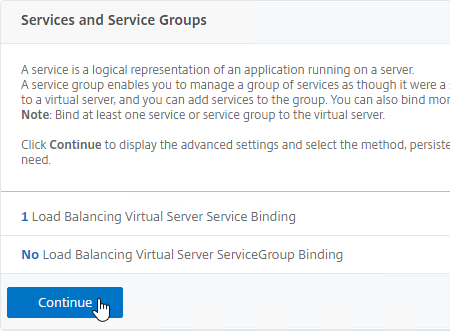
    4. Click Bind.
    5. Click Continue to close Services and Service Groups.
  4. Bind the Responder Policy:
    1. On the right, in the Advanced Settings column, click Policies.
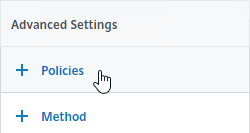
    2. On the left, scroll down to the Policies section, and click the plus icon in the top right of the Policies box.
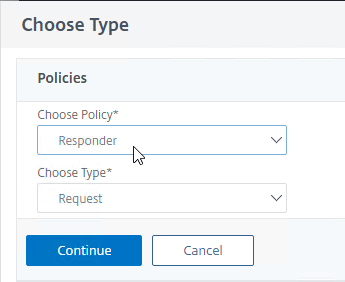
    3. Change the Choose Policy drop-down to Responder. Click Continue.
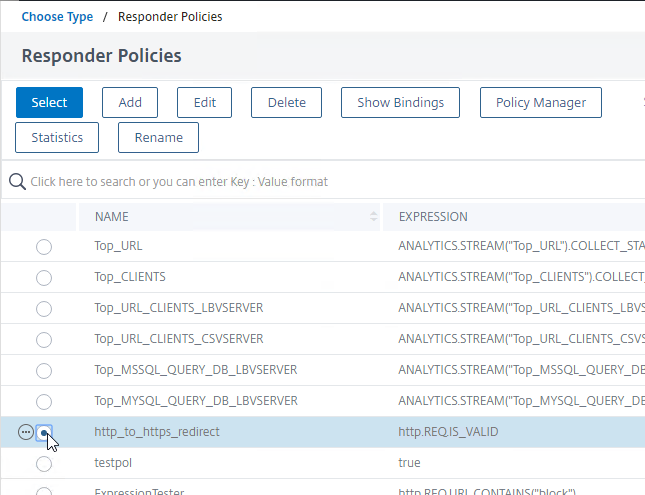
    4. In the Select Policy field, click where it says Click to select.
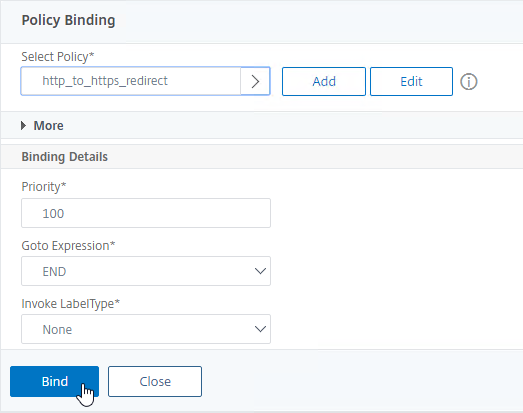
    5. Click the small circle next to the redirect Responder policy, and then click the blue Select button at the top of the page.
    6. Click Bind.
    7. Then click Done to close the Load Balancing Virtual Server.

      add lb vserver MyvServer-HTTP-SSLRedirect HTTP 10.2.2.201 80
      
      bind lb vserver storefront.corp.com-HTTP-SSLRedirect AlwaysUp
      
      bind lb vserver storefront.corp.com-HTTP-SSLRedirect -policyName http_to_ssl_redirect_responderpol -priority 100 -gotoPriorityExpression END -type REQUEST
  5. The primary advantage of this method is that the Redirect Virtual Server is UP.

Related Pages

Certificates – Citrix ADC 13

Last Modified: Dec 6, 2020 @ 8:27 am

Navigation

💡 = Recently Updated

Change Log

  • 2020 Dec 6 – 13.0 build 71 and newer shows SANs (Subject Alternative Names) in Certificate Details
  • Updated screenshots and procedures for ADC 13

Convert .PFX Certificate to PEM Format

You can export a certificate (with private key) from Windows, and import it to Citrix ADC.

To export a Windows certificate in .pfx format

  1. If Windows Server 2012 or newer, on the Windows server that has the certificate, you can run certlm.msc to open the Certificates console pointing at Local Computer.
    1. Or, run mmc.exe, manually add the Certificates snap-in, and point it to Local Computer.
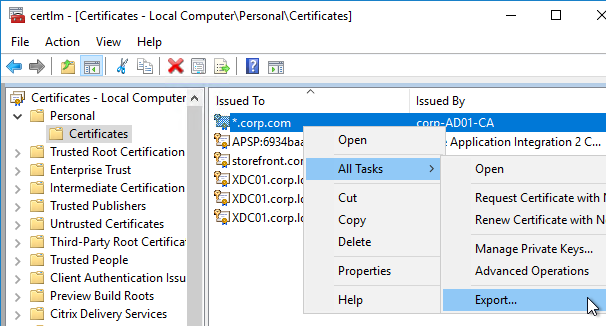
  2. Go to Personal > Certificates.
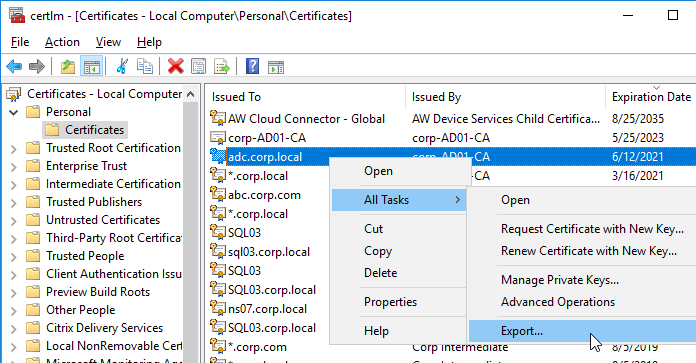
  3. Right-click the certificate, expand All Tasks, and click Export.
  4. On the Welcome to the Certificate Export Wizard page, click Next.
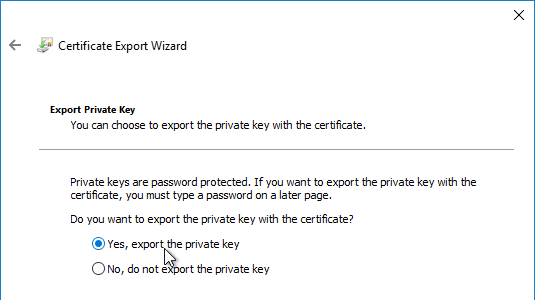
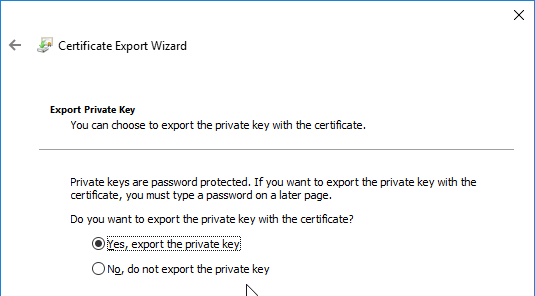
  5. On the Export Private Key page, select Yes, export the private key, and click Next.
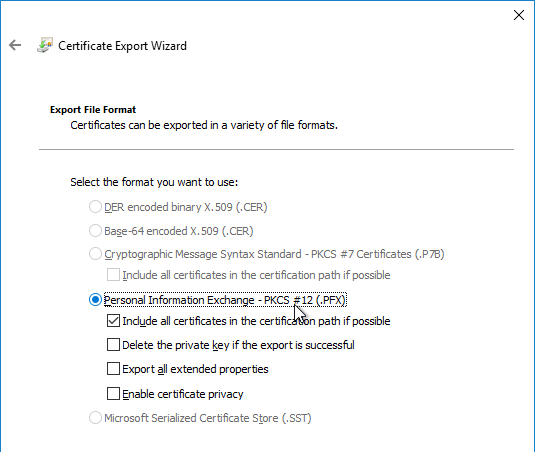
  6. On the Export File Format page, click Next.
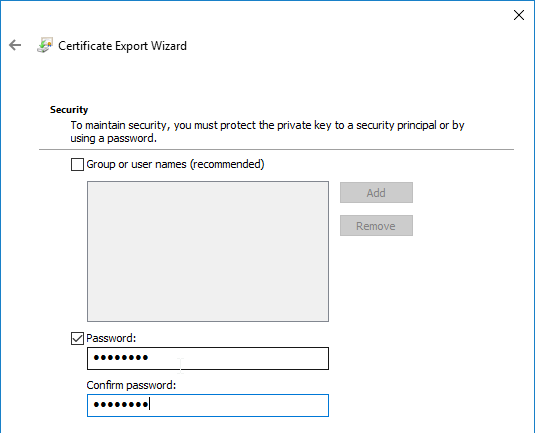
  7. On the Security page, check the box next to Password, and enter a new temporary password. Click Next.
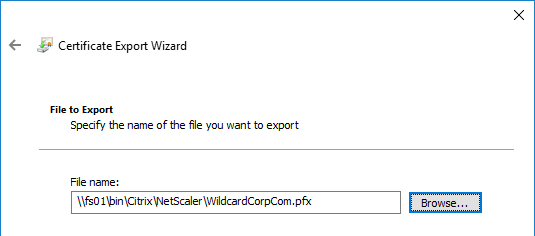
  8. On the File to Export page, specify a save location and name the .pfx file. Don’t put any spaces in the filename. Click Next.
  9. In the Completing the Certificate Export Wizard page, click Finish.
  10. Click OK when prompted that the export was successful.

Import a .pfx file to Citrix ADC

Citrix ADC 13 imports .pfx files and uses them in their native encrypted format.

To import the .pfx file:

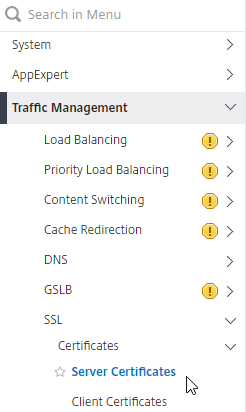
  1. On the Citrix ADC, expand Traffic Management, and click SSL.
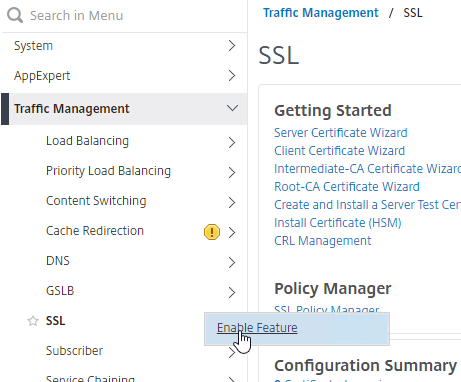
  2. If the SSL feature is disabled, right-click the SSL node, and click Enable Feature.
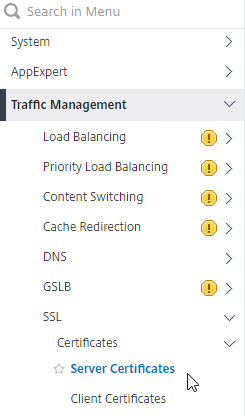
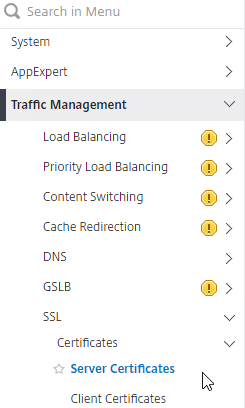
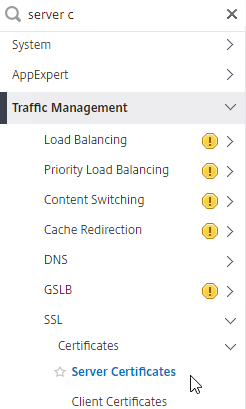
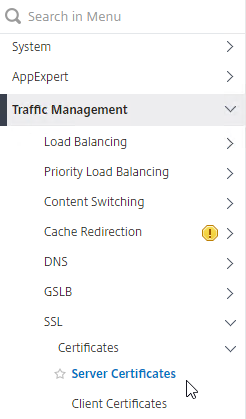
  3. Go to Traffic Management > SSL > Certificates > Server Certificates.
  4. There are four different certificate nodes:
    1. Server Certificates have private keys. These certificates are intended to be bound to SSL vServers.
    2. Client Certificates also have private keys, but they are intended to be bound to Services so Citrix ADC can perform client-certificate authentication against back-end web servers.
    3. CA Certificates don’t have private keys. The CA certificates node contains intermediate certificates that are linked to Server Certificates. CA certificates can also be used for SAML authentication, and to verify client certificates.
    4. Unknown Certificates list the certificates that don’t fall under the other categories. Some SAML certificates (e.g. Azure) show up here.
  5. On the left, click the Server Certificates node.
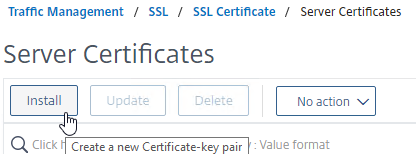
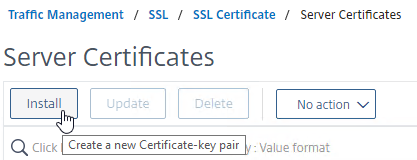
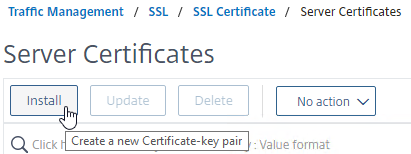
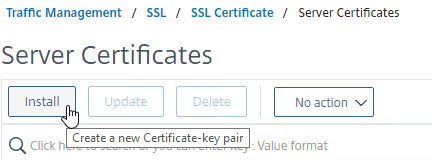
  6. On the right, click Install.
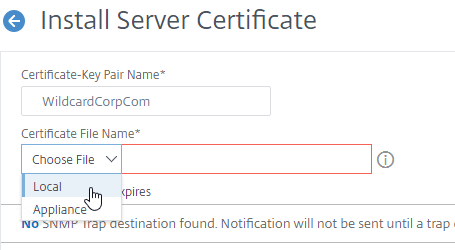
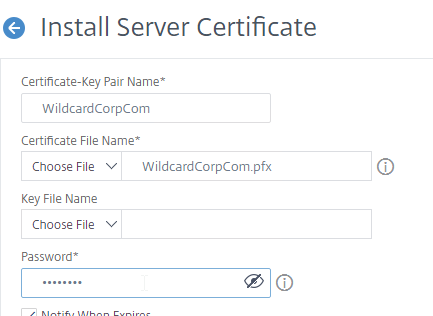
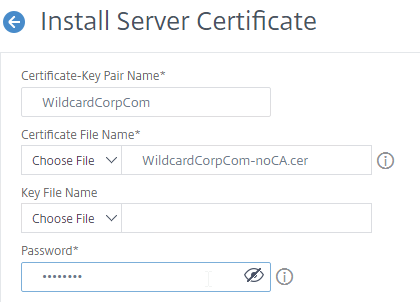
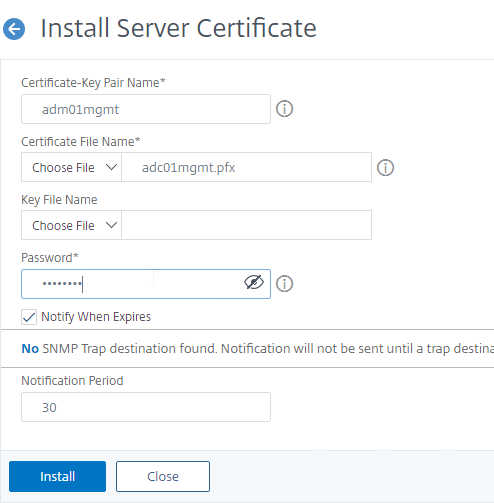
  7. Give the certificate (Certificate-Key Pair) a name.
  8. Click the drop-down next to Choose File, select Local, and browse to the .pfx file that you exported earlier.
  9. After browsing to the .pfx file, Citrix ADC will prompt you to enter the Password for the .pfx file. Ignore the Key File Name field.
  10. Then click Install.
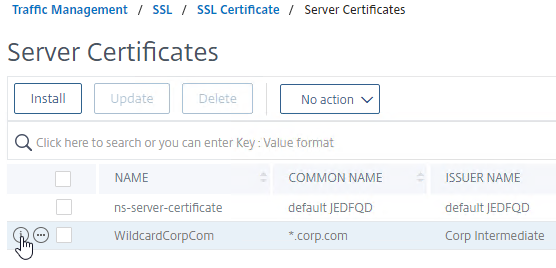
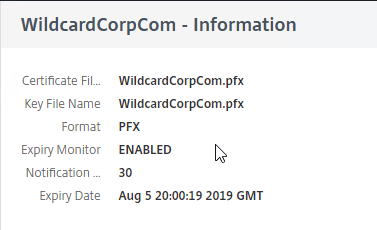
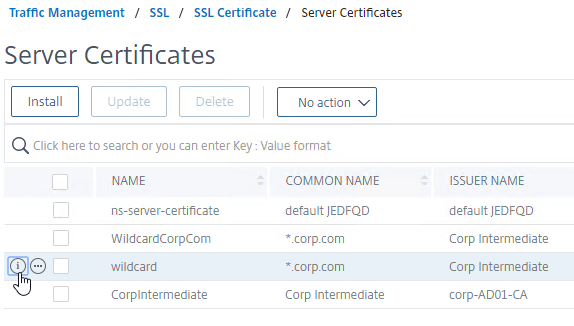
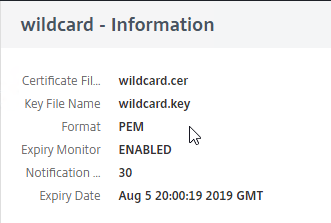
  11. If you click the information icon next to the new certificate…
  12. You’ll see that Citrix ADC uses the file in native .pfx format. No PEM conversion.
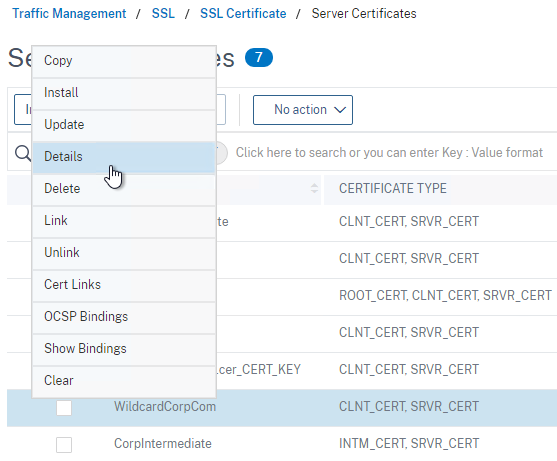
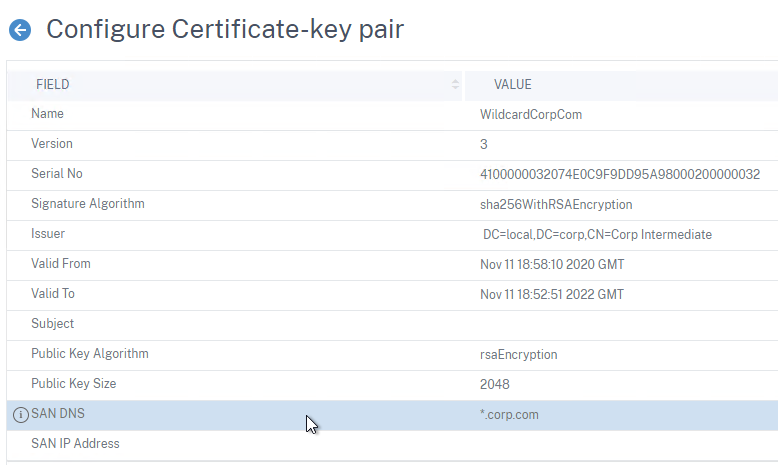
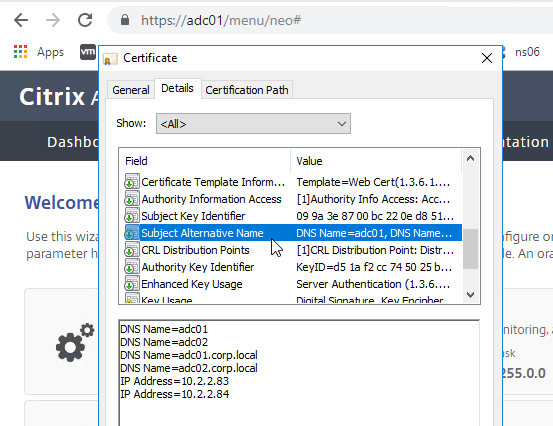
  13. In 13.0 build 71 and newer, if you right-click the certificate and click Details, you can see the SANs (Subject Alternative Names) in the certificate.

  14. You can now link an intermediate certificate to this SSL certificate, and then bind this SSL certificate to SSL and/or Citrix Gateway Virtual Servers.
  15. To automatically backup SSL certificates and receive notification when the certificates are about the expire, deploy Citrix Application Delivery Management (ADM). Also see Citrix CTX213342 How to handle certificate expiry on NetScaler.

To convert PFX to PEM (with Private Key encryption)

If you followed the previous section to import a .pfx in native format, then you can skip this section.

Sometimes you need to convert a .pfx file to PEM format so you can use the PEM certificate on other systems. To use Citrix ADC to convert PFX to PEM, do the following:

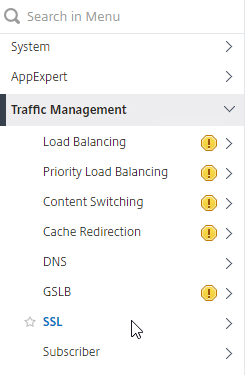
  1. In the Citrix ADC Configuration GUI, on the left, expand Traffic Management, and click SSL.
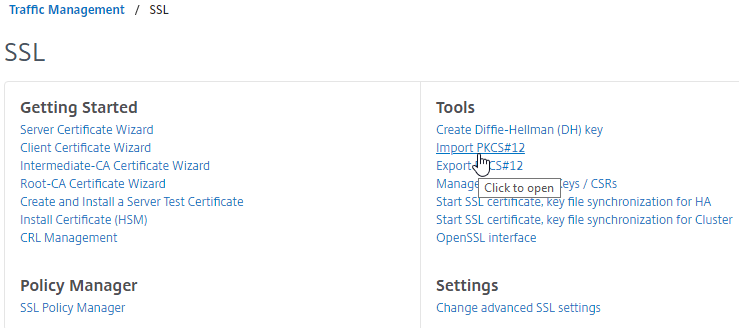
  2. In the right column of the right pane, in the Tools section, click Import PKCS#12.
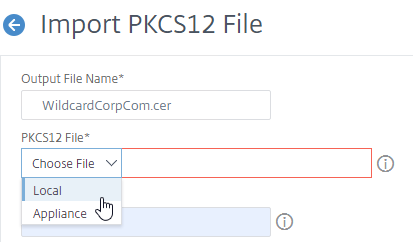
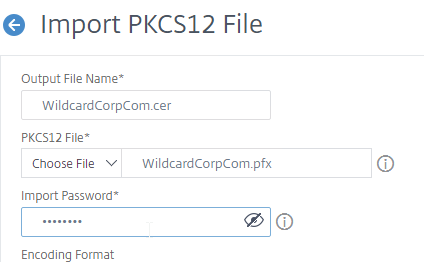
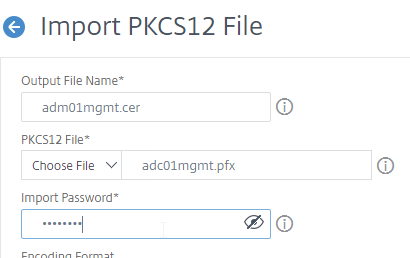
  3. In the Import PKCS12 File dialog box:
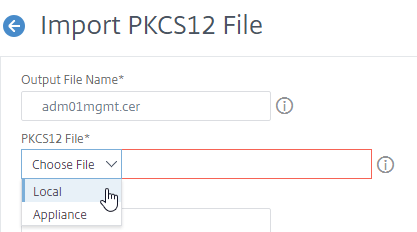
    1. In the Output File Name field, enter a name for a new file where the converted PEM certificate and private key will be placed. This new file is created under /nsconfig/ssl on the Citrix ADC appliance.
    2. In the PKCS12 File field, click Choose File, and browse to the .pfx file.
    3. In the Import Password field, enter the password you specified when you previously exported the .pfx file.
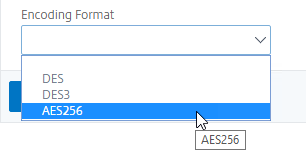
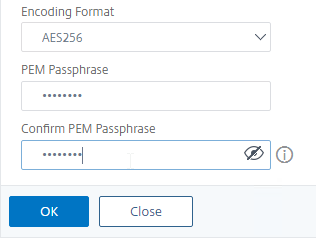
    4. By default, the private key in the new PEM file is unencrypted. To encrypt the private key, change the Encoding Format selection to AES256 or DES3. This causes the new PEM file to be password protected, and encrypted.
    5. Enter a permanent password for the new PEM file, and click OK.
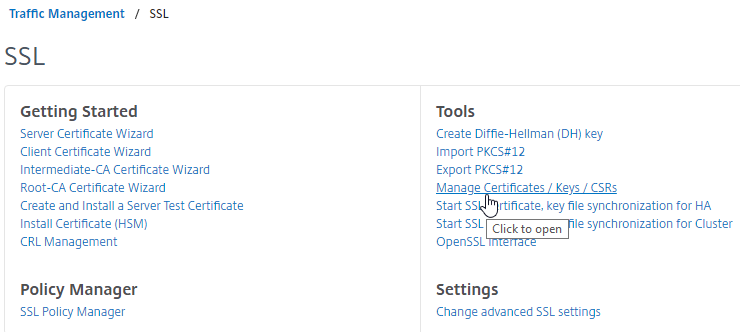
  4. You can use the Manage Certificates / Keys / CSRs link to view the new PEM file.

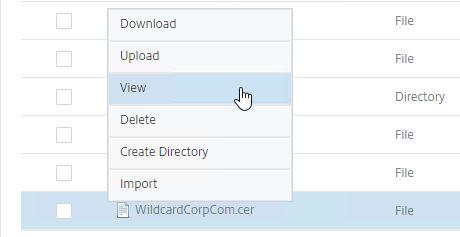
    1. The new file is usually at the bottom of the page.
    2. Right-click the new file, and click View.
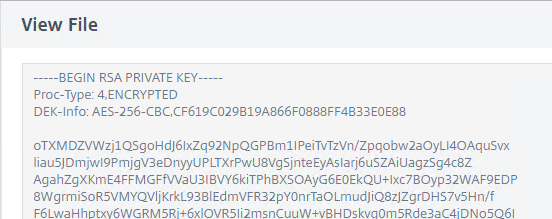
    3. Notice that the Private Key is encrypted.
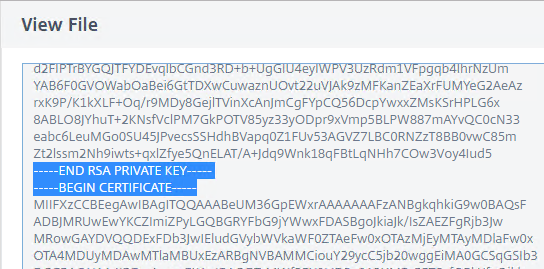
    4. If you scroll down, notice that the file contains both the certificate, and the RSA Private key.
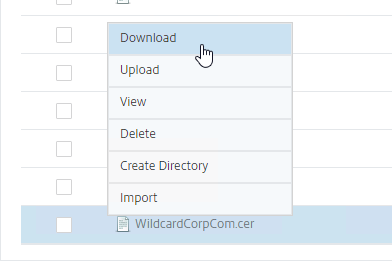
  5. If you want to use this PEM certificate on a different system, then you can right-click the file and Download it.

Install PEM Certificate on Citrix ADC

If you want to bind the PEM certificate to ADC SSL Virtual Servers, then you must first install the PEM certificate. Or you can import a .pfx file in native format as described earlier.

  1. ADC probably won’t import the PEM certificate file if it contains CA certificates. Download the PEM file.

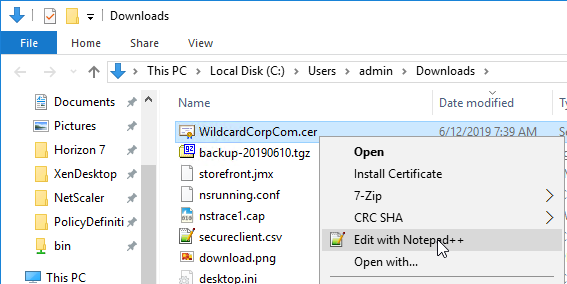
    1. Edit the downloaded file.
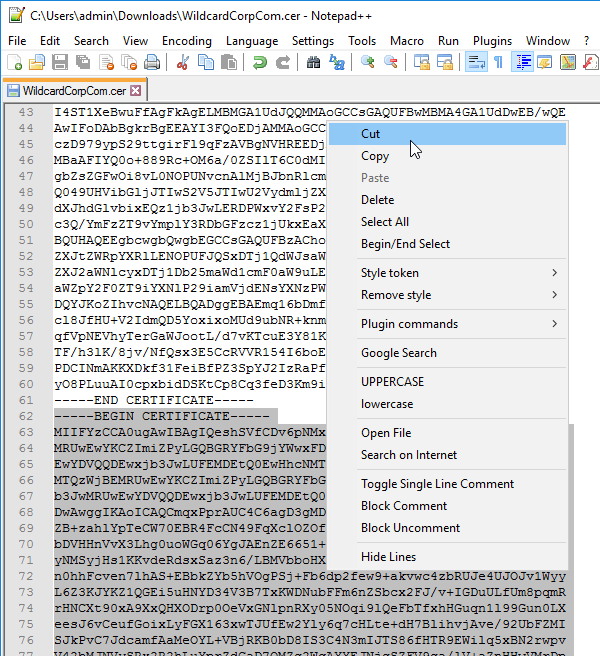
    2. Scroll down. Skip the first certificate. Then delete the rest of the certificates in the file. When done, you should have a Private Key and one Certificate (the first one in the file).
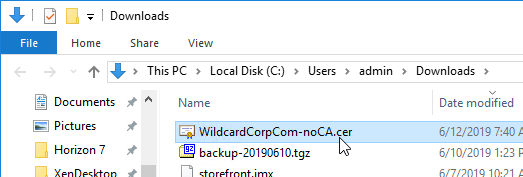
    3. Save the file with a new name. You can upload the file, or browse to it later when installing the certificate.
  2. On the left side of the Citrix ADC Configuration GUI, go to Traffic Management > SSLCertificates > Server Certificates.
  3. On the right, click Install.
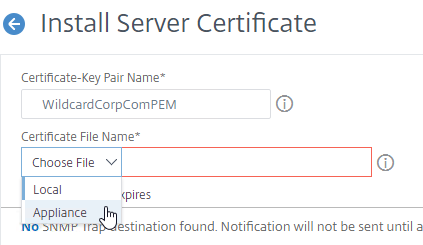
  4. In the Certificate-Key Pair Name field, enter a friendly name for this certificate.
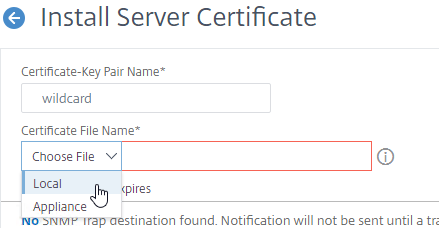
  5. In the Certificate File Name field, click the drop-down next to Choose File, and select Local.
  6. Browse to the PEM file that you downloaded and edited to remove the CA certificates.
  7. Citrix ADC will ask you to enter the Password for the encrypted private key.
  8. Ignore the Key File Name since the converted PEM file contains both the certificate and the key.
  9. Click Install.
  10. In 13.0 build 71 and newer, if you right-click the certificate and click Details, you can see the SANs (Subject Alternative Names) in the certificate.

  11. You can now link an intermediate certificate to this SSL certificate, and then bind this SSL certificate to SSL and/or Citrix Gateway Virtual Servers.
  12. To automatically backup SSL certificates and receive notification when the certificates are about the expire, deploy Citrix Application Delivery Management (ADM). Also see Citrix CTX213342 How to handle certificate expiry on NetScaler.
  13. You can also export the certificate files and use them on a different Citrix ADC.

Create Key and Certificate Request

If you want to create free Let’s Encrypt certificates, see John Billekens’ PowerShell script detailed at Let’s Encrypt Certificates on a NetScaler.

You can create a key pair and Certificate Signing Request (CSR) directly on the Citrix ADC appliance. The CSR can then be signed by an internal, or public, Certificate Authority.

Most Certificate Authorities let you add Subject Alternative Names when creating (or purchasing) a signed certificate, and thus there’s no reason to include Subject Alternative Names in the CSR created on Citrix ADC. You typically create a CSR with a single DNS name. Then when submitting the CSR to the Certificate Authority, you type in additional DNS names.

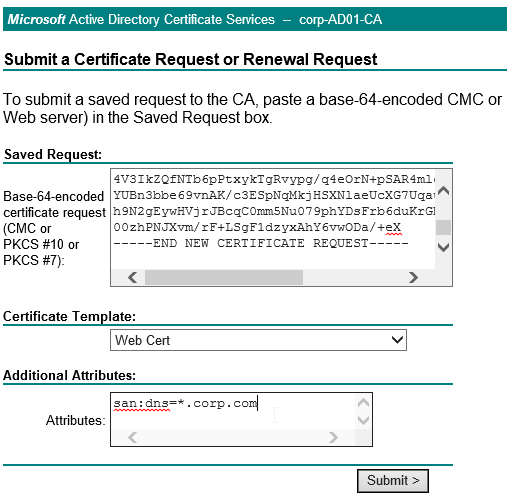
  • For a Microsoft Certificate Authority, you can enter Subject Alternative Names in the Attributes box of the Web Enrollment wizard.
  • For public Certificate Authorities, you purchase a UCC certificate or purchase a certificate option that lets you type in additional names.

To create a key pair on Citrix ADC

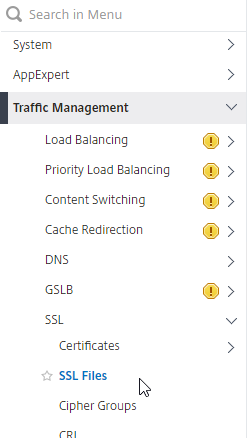
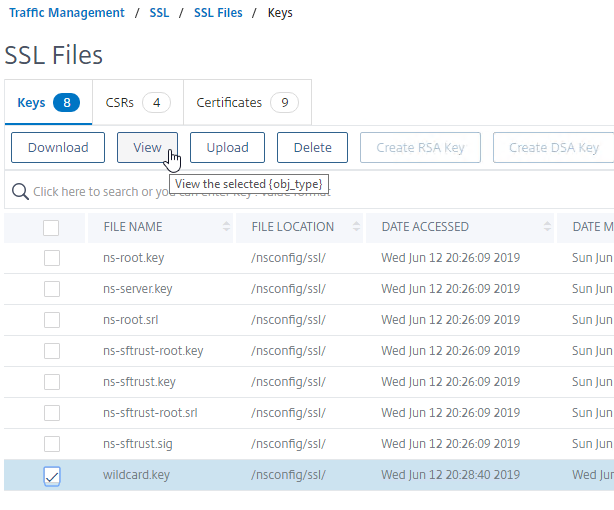
  1. On the left, expand Traffic Management, expand SSL, and click SSL Files.
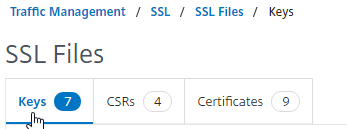
  2. On the right, switch to the tab named Keys.
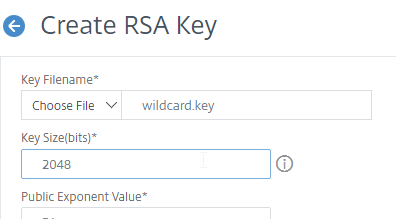
  3. Click the button named Create RSA Key.
  4. In the Key Filename box, enter a new filename (e.g. wildcard.key). Key pair files typically have a .key extension.
  5. In the Key Size field, enter 2048 bits.
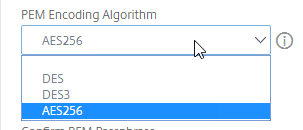
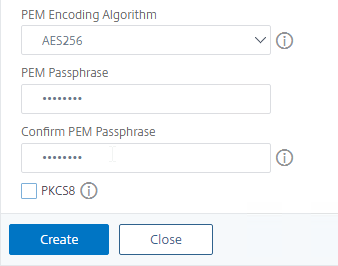
  6. By default, the private key is unencrypted. To encrypt it, set the PEM Encoding Algorithm drop-down to AES256 or DES3.
  7. Enter a password to encrypt the private key.
  8. Click Create.
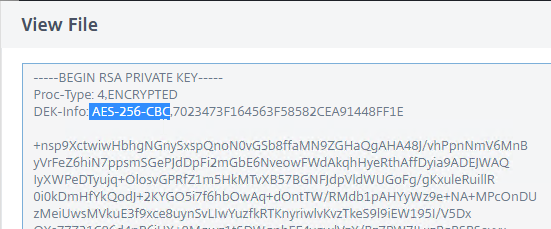
  9. The new file is probably at the bottom of the list. Select it and click the button named View.
  10. The Private Key should be encrypted with your chosen encoding algorithm.

To create CSR file

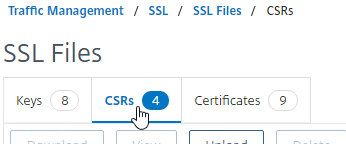
  1. Back in the SSL Files page, on the right, switch to the tab named CSRs.
  2. Click the button named Create Certificate Signing Request (CSR).
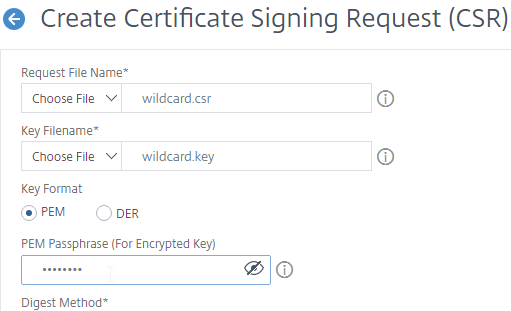
  3. In the Request File Name field, enter the name of a new CSR file. CSR files typically have .csr or .txt extension.
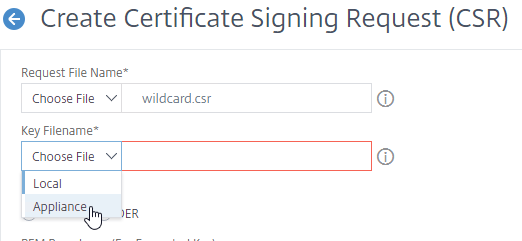
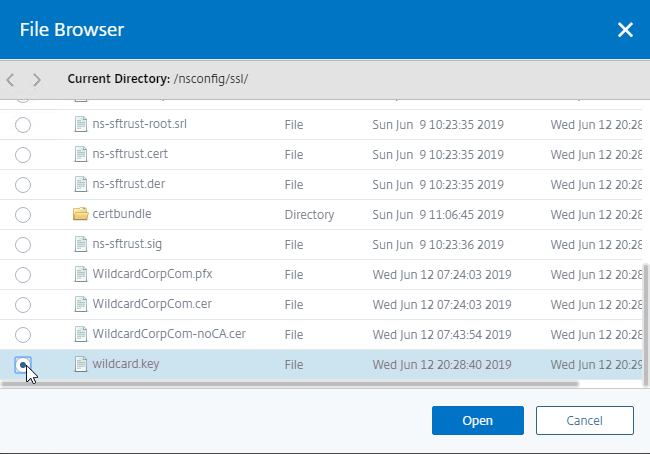
  4. In the Key Filename field, click Choose File (Appliance) and select the previously created .key file. It’s probably at the bottom of the list.

  5. If the key file is encrypted, enter the password.
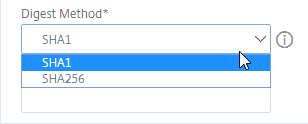
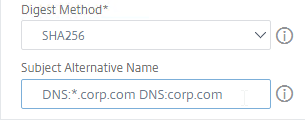
  6. You can optionally change the CSR Digest Method to SHA256. This only applies to the CSR and does not affect the CA-signed certificate.
  7. Citrix ADC 13 lets you specify up to three Subject Alternative Names in the CSR. Some Certificate Authorities ignore this field and instead require you to specify the Subject Alternative Names when purchasing the signed certificate. See CTX232305 How to create a SAN CSR in NetScaler 12.0 57.19.
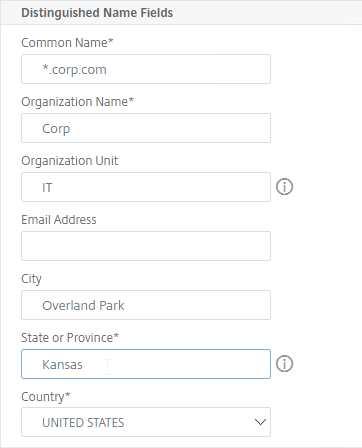
  8. In the Common Name field, enter the FQDN of the SSL enabled-website. If this is a wildcard certificate, enter * for the left part of the FQDN. This is the field that normally must match what users enter into their browser address bars.
  9. In the Organization Name field, enter your official Organization Name.
  10. Enter IT, or similar, as the Organization Unit.
  11. Enter the City name.
  12. In the State field, enter your state name without abbreviating.
  13. Scroll down and click Create.
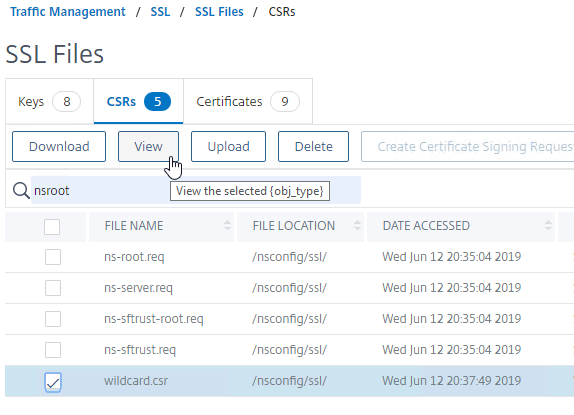
  14. The new CSR file is at the bottom of the list. You can select the new .csr file, and click the buttons named View or Download.

Get CSR signed by CA, and then install certificate on Citrix ADC

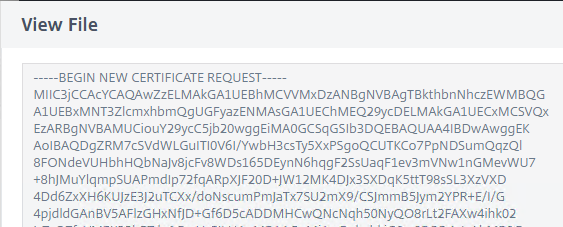
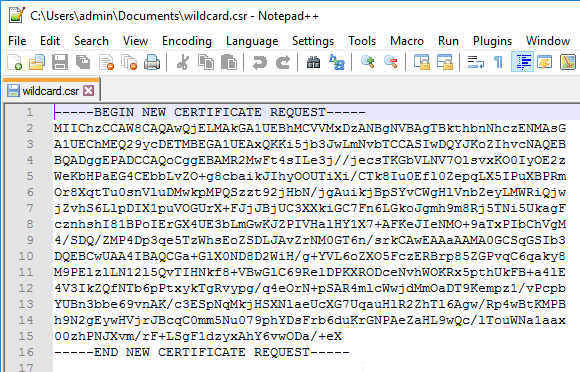
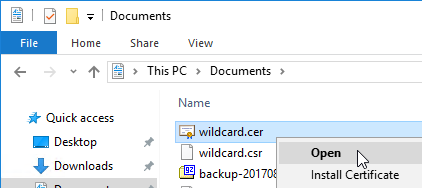
  1. View the CSR file or open the downloaded .csr file with Notepad, and send the contents to your Certificate Authority.

    1. Chrome requires every certificate to have at least one Subject Alternative Name that matches the FQDN entered in Chrome’s address bar. Public CAs will handle this automatically. But for Internal CAs, you typically must specify the Subject Alternative Names manually when signing the certificate.

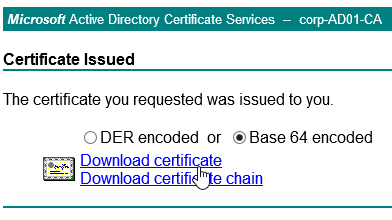
    2. If the CA asks you for the type of web server, select Apache, or save the CA response as a Base 64 file.
  2. After you get the signed certificate, on the left side of the Citrix ADC Configuration GUI, expand Traffic Management > SSL > Certificates, and click Server Certificates.
  3. On the right, click Install.
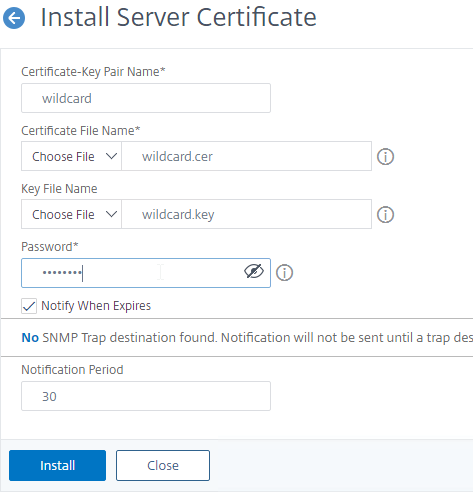
  4. In the Certificate-Key Pair Name field, enter a friendly name for this certificate.
  5. In the Certificate File Name field, click the drop-down next to Choose File, and select Local.
  6. Browse to the Base64 (Apache) .cer file you received from the Certificate Authority.
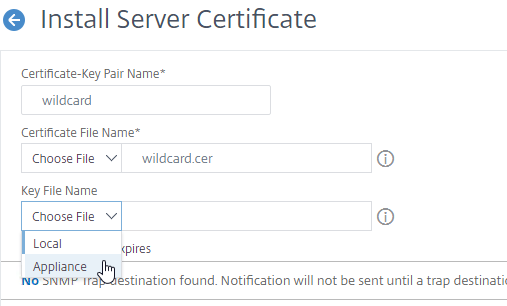
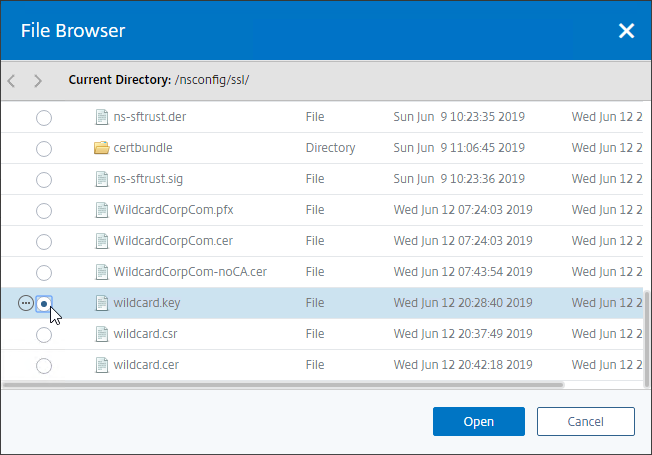
  7. In the Key File Name field, click the drop-down next to Choose File, and select Appliance.
  8. Select the key file you created earlier, and click Open. It’s probably at the bottom of the list.
  9. If the key file is encrypted, enter the password.
  10. Click Install.
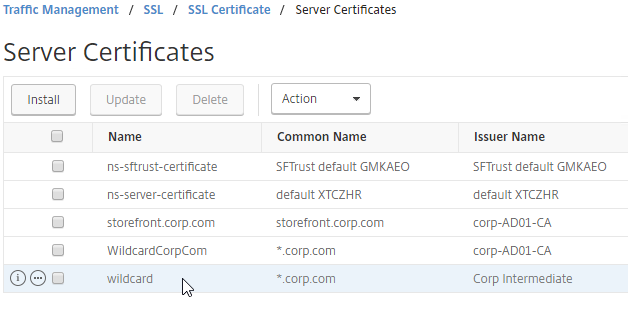
  11. The certificate is now added to the list.
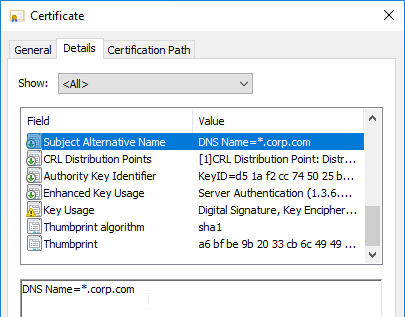
  12. In 13.0 build 71 and newer, if you right-click the certificate and click Details, you can see the SANs (Subject Alternative Names) in the certificate.

  13. You can now link an intermediate certificate to this SSL certificate, and then bind this SSL certificate to SSL and/or Citrix Gateway Virtual Servers.
  14. To automatically backup SSL certificates and receive notification when the certificates are about the expire, deploy Citrix Application Delivery Management (ADM). Also see Citrix CTX213342 How to handle certificate expiry on NetScaler.
  15. You can also export the certificate files and use them on a different Citrix ADC.

Intermediate Certificate

If your Server Certificate is signed by an intermediate Certificate Authority, then you must install the intermediate Certificate Authority’s certificate on the Citrix ADC. This Intermediate Certificate then must be linked to the Server Certificate.

Get the correct intermediate certificate

  1. Log into Windows, and double-click the signed certificate file.
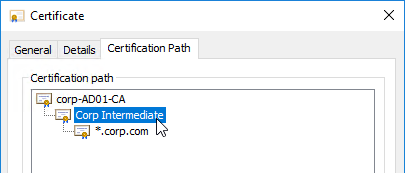
  2. On the Certification Path tab, double-click the intermediate certificate (e.g. Go Daddy Secure Certificate Authority. It’s the one in the middle).
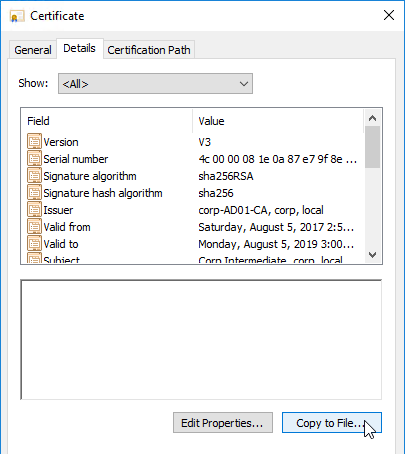
  3. On the Details tab, click Copy to File.
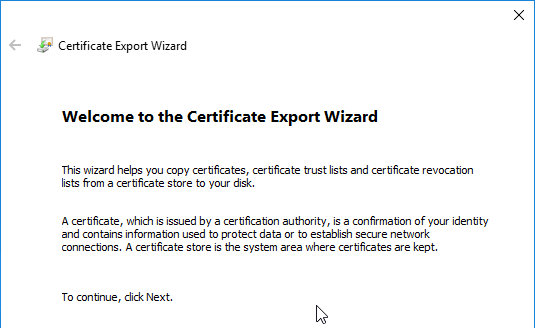
  4. In the Welcome to the Certificate Export Wizard page, click Next.
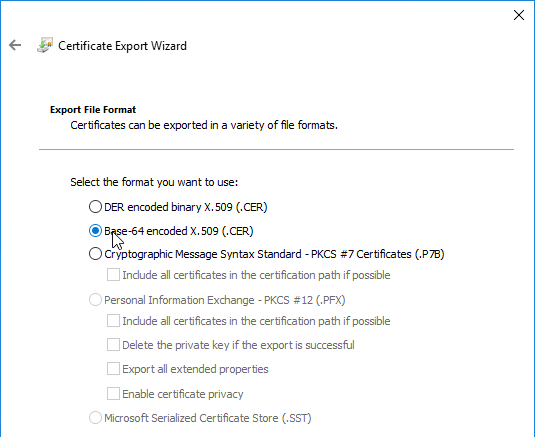
  5. In the Export File Format page, select Base-64 encoded, and click Next.
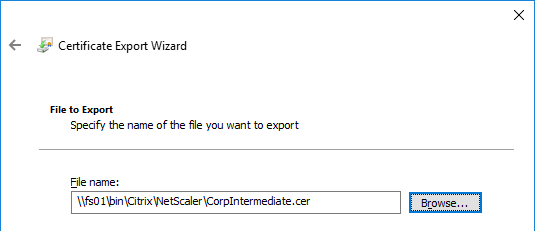
  6. Give it a file name, and click Next.
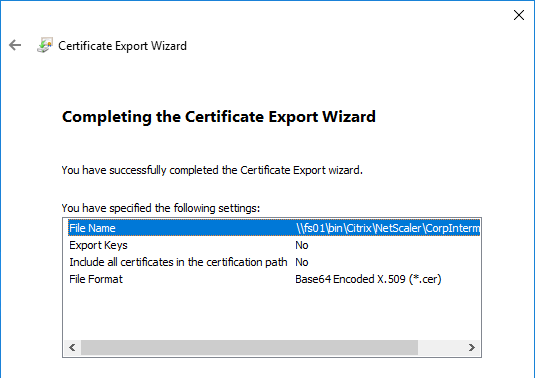
  7. In the Completing the Certificate Export Wizard page, click Finish.

To import the intermediate certificate

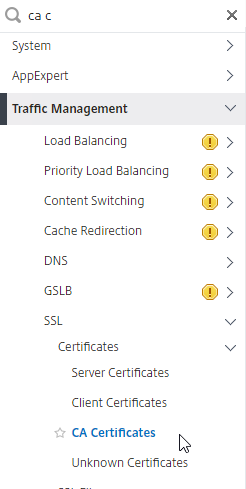
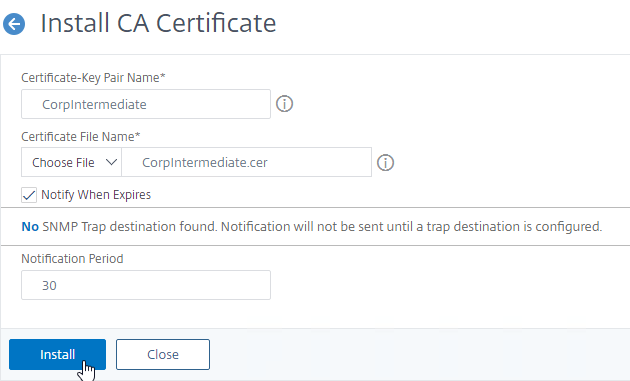
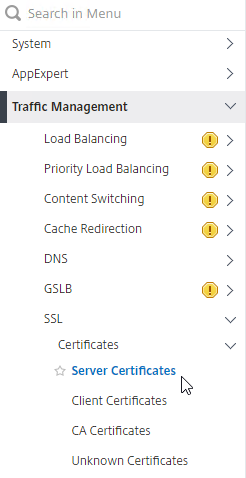
  1. In the Citrix ADC configuration GUI, expand Traffic Management, expand SSL, expand Certificates, and click CA Certificates.
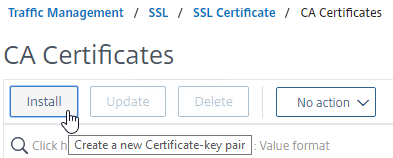
  2. On the right, click Install.
  3. Name it Intermediate or similar.
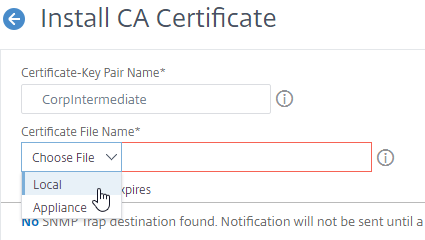
  4. Click the arrow next to Choose File, select Local, and browse to the Intermediate certificate file and open it.
  5. Click Install.

Link Intermediate Certificate to Server Certificate

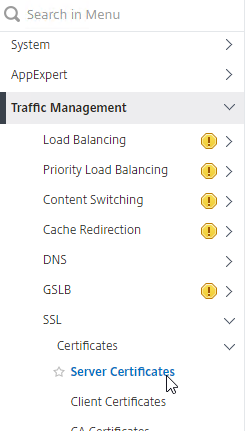
  1. Go back to Traffic Management > SSL > Certificates >Server Certificates.
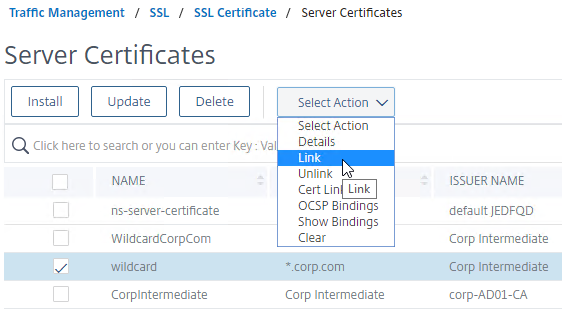
  2. On the right, right-click the server certificate, and click Link.
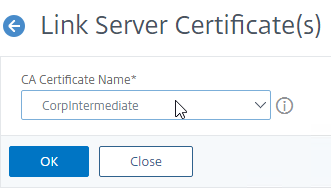
  3. The previously imported Intermediate certificate should already be selected. Click OK.
  4. You might be tempted to link the Intermediate certificate to a Root certificate. Don’t do this. Root certificates are installed on client machines, not on Citrix ADC. Citrix ADC must never send the root certificate to the client device. If you run ssllabs.com against your website, SSL Labs might show Contains anchor. If so, then you linked your intermediate to your root when you shouldn’t have.

Export Certificate Files from Citrix ADC

You can easily export certificate files from the Citrix ADC, and import them to a different Citrix ADC.

  1. In the menu, expand Traffic Management, expand SSL, expand Certificates, and click one of the certificate types.
  2. Move your mouse over the certificate you want to export, and then click the information icon on the far left.
  3. Note the file names. There could be one file name or two file names.
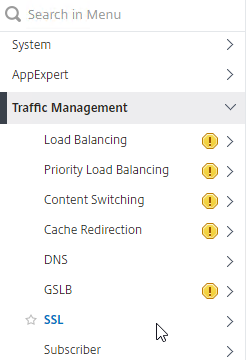
  4. On the left, go to Traffic Management > SSL.
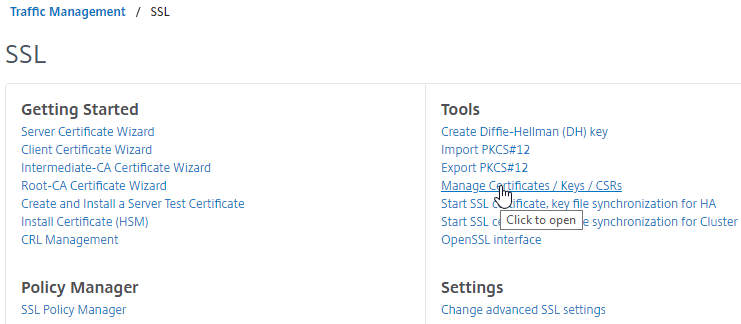
  5. On the right, in the right column, click Manage Certificates / Keys / CSRs.
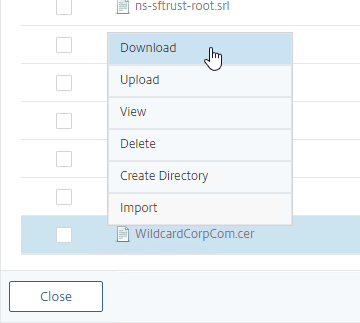
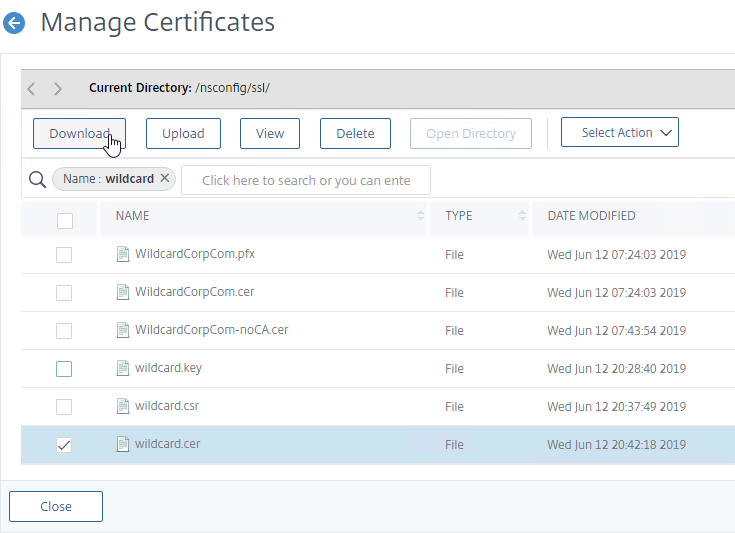
  6. Find the file(s) in the list, right-click the file, and click Download.
    1. You can only download one file at a time.
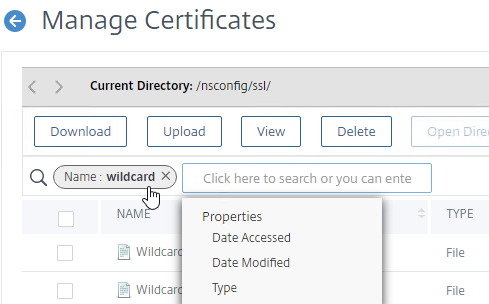
    2. In the search area, you can enter “Name:myfilename” to filter the list.
    3. You might have to increase the number of files shown per page, or go to a different page.
  7. Also download the files for any linked intermediate certificate.
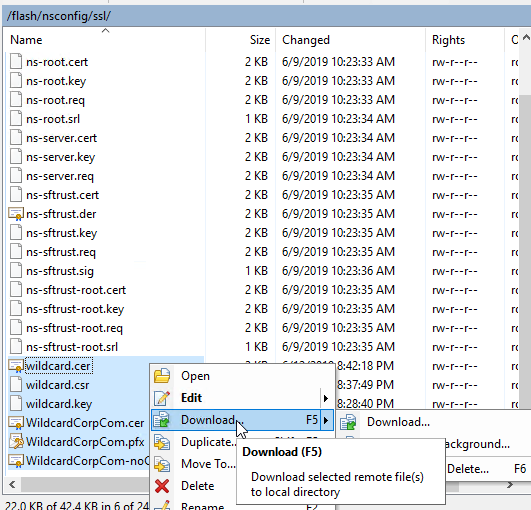
  8. You can also use WinSCP to download the SSL certificate files from /nsconfig/ssl.
  9. You can now use the downloaded files to install certificates on a different Citrix ADC.

Replace Management Certificate

You can replace the default management certificate with a new trusted management certificate.

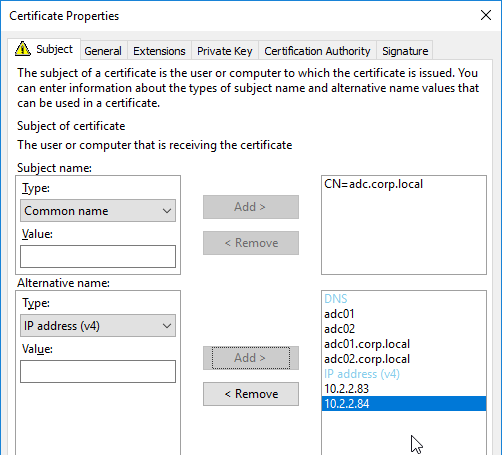
High Availability – When a management certificate is installed on one node of a High Availability pair, the management certificate is synchronized to the other node and used for the other node’s NSIP too. So make sure the management certificate matches the DNS names of both nodes. This is easily doable using a Subject Alternative Name certificate. Here are some SAN names the management certificate should match (note: a wildcard certificate won’t match all of these names):

  • The FQDN for each node’s NSIP. Example: adc01.corp.local and adc02.corp.local
  • The shortnames (left label) for each node’s NSIP. Example: adc01 and adc02
  • The NSIP IP address of each node. Example: 192.168.123.14 and 192.168.123.29
  • If you enabled management access on your SNIPs, add names for the SNIPs:
    • FQDN for the SNIP. Example: adc.corp.local
    • Shortname for the SNIP. Example: adc
    • SNIP IP address. Example: 192.168.123.30

If you prefer to create a separate management certificate for each HA node, then see CTP George Spiers How to secure management access to NetScaler and create unique certificates in a highly available setup.

Request Management Certificate

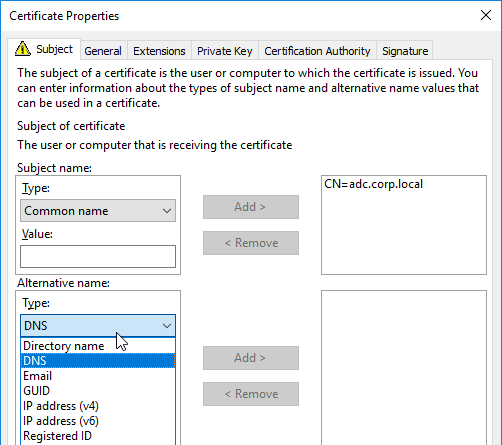
If you are creating a Subject Alternative Name certificate, it’s probably easiest to request a SAN certificate from an internal CA using the MMC Certificates snap-in on a Windows box.:

  1. Open the MMC certificates snap-in by running certlm.msc on a Windows 2012 or newer machine.
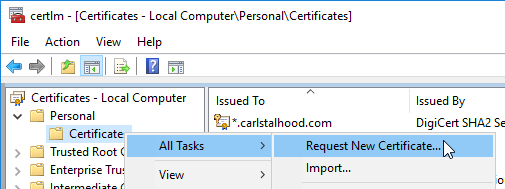
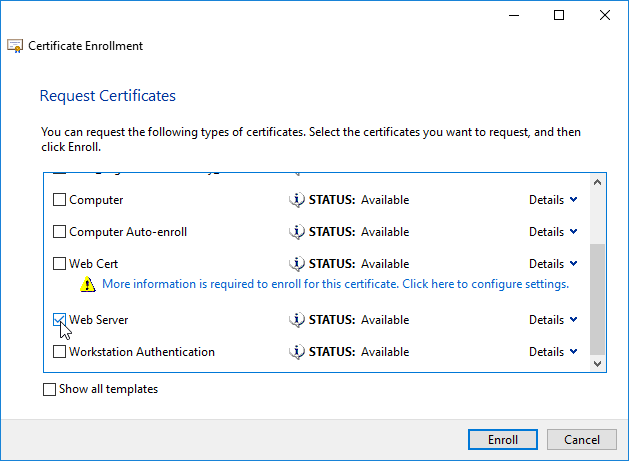
  2. Go to Personal, right-click Certificate, expand All Tasks, and click Request New Certificate.
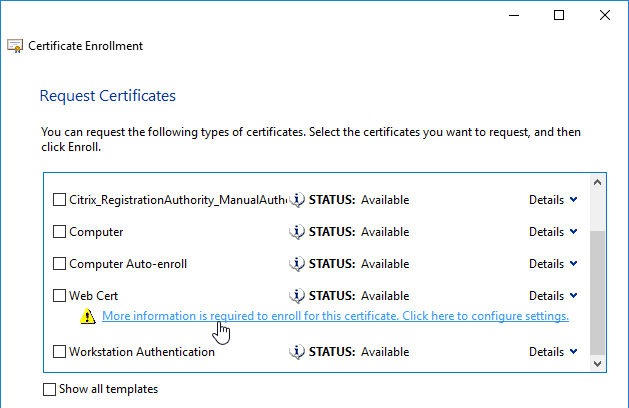
  3. A web server certificate template should let you specify subject information.
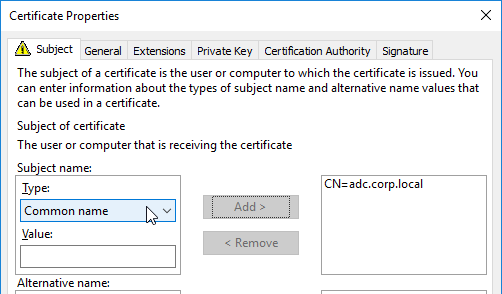
  4. In the top half, change the Subject name > Type drop-down to Common Name. Enter a DNS name, and click Add to move it to the right.
  5. In the bottom half, change the Alternative Name > Type drop-down to either DNS or IP address (v4).
  6. Type in different names or IPs as detailed earlier, and click Add to move them to the right.
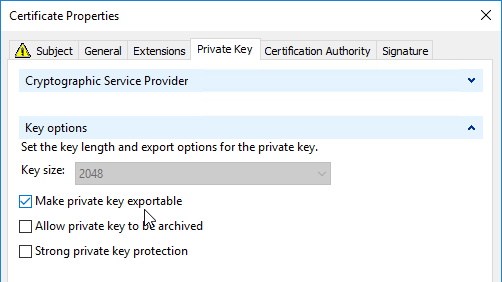
  7. Switch to the tab named Private Key.
  8. Expand Key Options, and make sure Mark private key as exportable is checked.
  9. Click OK. Then finish Enrolling the certificate.
  10. Export the certificate and Private Key to a .pfx file.

  11. Then follow one of the procedures below to replace the ADC’s management certificate.

Methods of replacing the Management Certificate

There are two methods of replacing the management certificate:

  • In the Citrix ADC GUI, right-click ns-server-certificate, and click Update. This automatically updates all of the Internal Services bindings too. This method is intended for dedicated management certificates, not wildcard certificates. Notes:
    • You cannot rename the ns-server-certificate in the Citrix ADC GUI. It remains as ns-server-certificate.
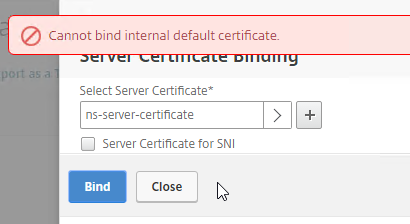
    • ns-server-certificate cannot be bound to Virtual Servers, so make sure you are replacing it with a dedicated management certificate.
  • Or manually Bind a new management certificate to each of the Internal Services.

Update Certificate Method

The Update Certificate button method is detailed below:

  1. The Update method doesn’t work with .pfx files so you’ll first have to convert your .pfx to PEM.
    1. In the Citrix ADC Configuration GUI, on the left, expand Traffic Management, and click SSL.
    2. In the right column of the right pane, in the Tools section, click Import PKCS#12.
    3. In the Output File Name field, enter a name for a new file where the converted PEM certificate and private key will be placed. This new file is created under /nsconfig/ssl on the Citrix ADC appliance.
    4. In the PKCS12 File field, click Choose File, and browse to the .pfx file.
    5. In the Import Password field, enter the password you specified when you previously exported the .pfx file.
    6. By default, the private key in the new PEM file is unencrypted. To encrypt the private key, change the Encoding Format selection to AES256 or DES3. This causes the new PEM file to be password protected, and encrypted.
    7. Enter a permanent password for the new PEM file, and click OK.
  2. You can’t update the certificate while connected to the Citrix ADC using https, so make sure you connect using http.
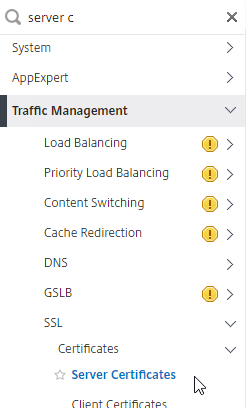
  3. On the left, expand Traffic Management, expand SSL, expand Certificates, and click Server Certificates.
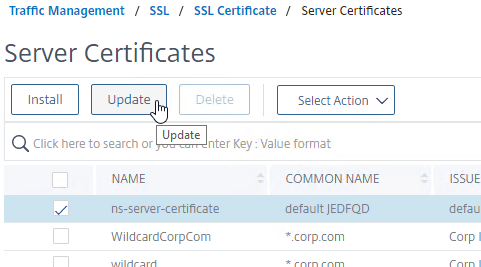
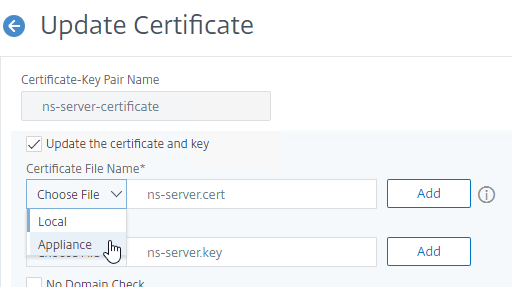
  4. On the right, right-click ns-server-certificate, and click Update.
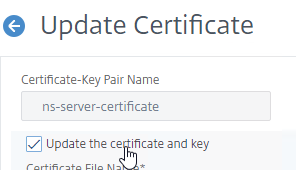
  5. Check the box next to Click to update the certificate and key.
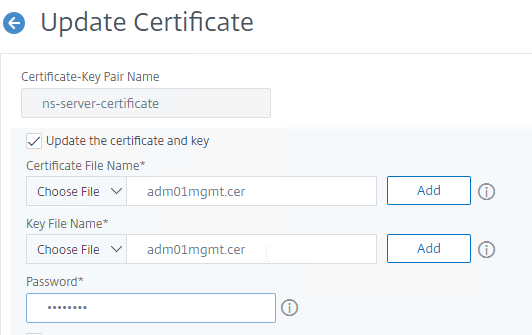
  6. Click Choose File, and browse to the new PEM (not PFX) management certificate. It could be on the appliance, or it could be on your local machine.
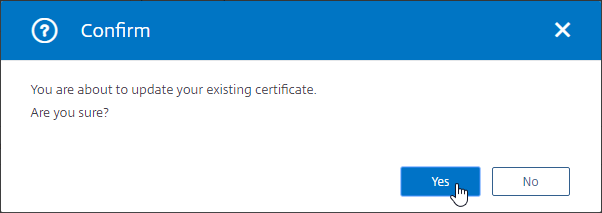
  7. Click Yes to update the certificate.
  8. For the Key File Name, browse to the same PEM certificate file.
  9. If the PEM private key is encrypted, enter the password.
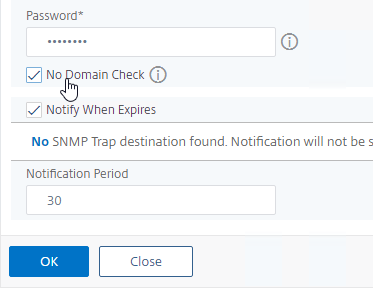
  10. Check the box next to No Domain Check. Click OK.
  11. You can now connect to the Citrix ADC using https protocol. The certificate should be valid (no certificate errors).

Manual Binding Method

The manual Binding to Internal Services method is detailed below:

  1. You can’t update the certificate while connected to the Citrix ADC using https, so make sure you connect using http.
  2. On the left, expand Traffic Management, expand SSL, expand Certificates, and click Server Certificates.
  3. On the right, use the Install button to install the new management certificate, which can be .pfx format, or PEM format.

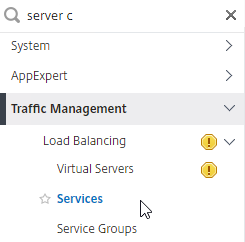
  4. In the menu, expand Traffic Management, expand Load Balancing, and click Services.
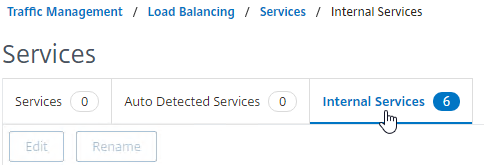
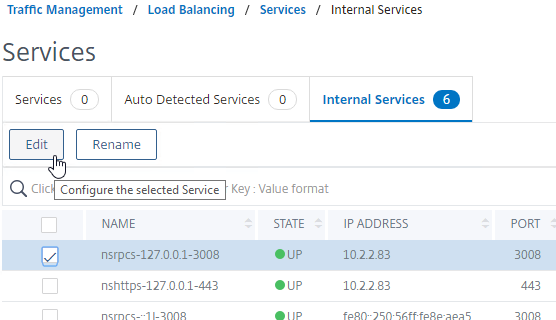
  5. On the right, switch to the tab named Internal Services.
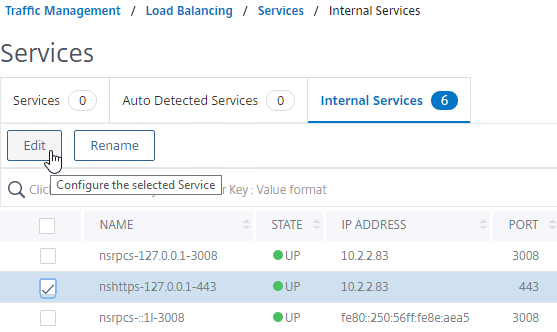
  6. Right-click one of the services, and click Edit.
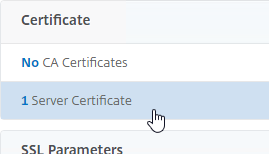
  7. Scroll down to the Certificate section and click where it says 1 Server Certificate.
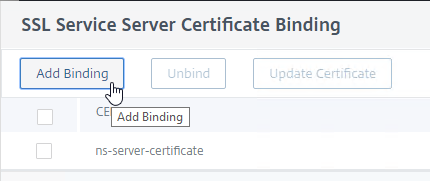
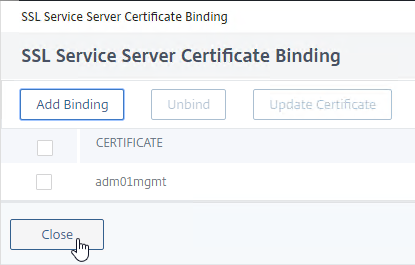
  8. Click the button named Add Binding.
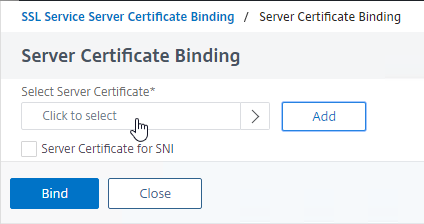
  9. In the Select Server Certificate field, click where it says Click to select.
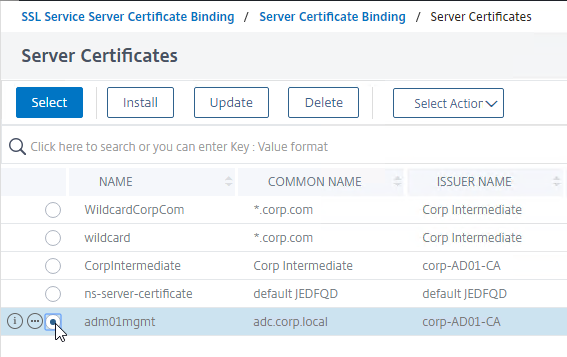
  10. Click the small circle next to the new management certificate and then click the blue Select button at the top of the page.
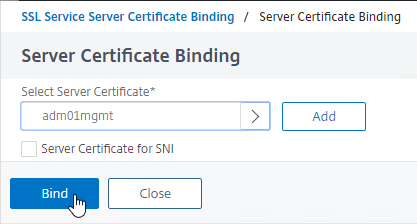
  11. Click Bind.
  12. Click Close.
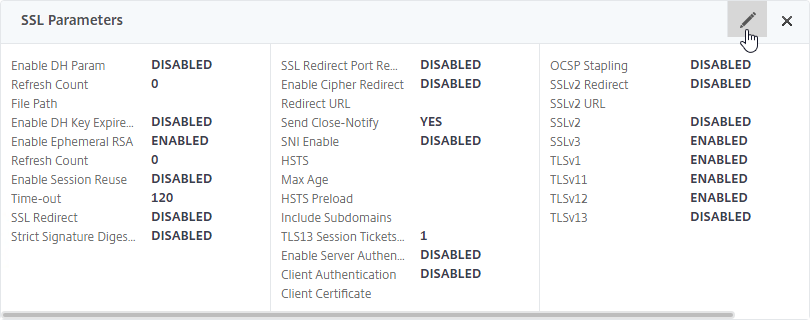
  13. If Default SSL Profile is not enabled, then you can modify the SSL Parameters and/or Ciphers on each of these Internal Services to disable SSLv3 and bind stronger ciphers.

  14. Repeat for each of the rest of the internal services. There should be at least 6 services. Additional Internal Services are created for SNIPs that have management access enabled.

Force Management SSL

By default, administrators can connect to the NSIP using HTTP or SSL. This section details how to disable HTTP.

  1. Connect to the NSIP using https.
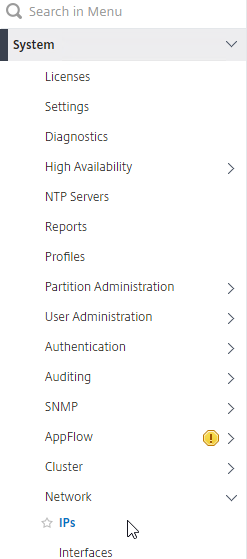
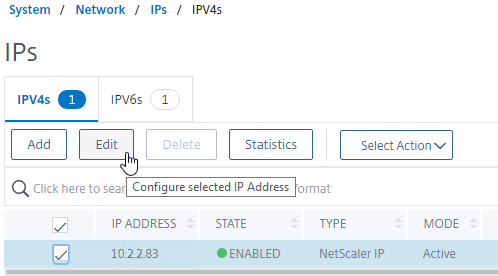
  2. On the left, expand System, expand Network, and click IPs.
  3. On the right, right-click your NetScaler IP, and click Edit.
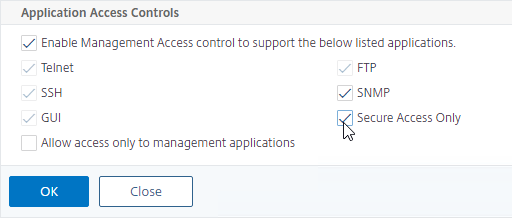
  4. Near the bottom, check the box next to Secure access only, and then click OK.

    set ns ip 10.2.2.126 -gui SECUREONLY
  5. Repeat this procedure on the secondary appliance.
  6. Repeat for any SNIPs that have management access enabled.

Also see:

SSL Certificate – Update

There are two options for updating a certificate:

  • Create or Import a new certificate to Citrix ADC > Traffic Management > SSL > Certificates > Server Certificates. Then find all of the places the original certificate is bound, and manually replace the original certificate binding with the new certificate. This method is obviously prone to errors.
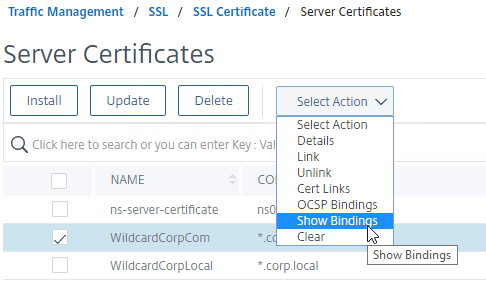
    • You can right-click a certificate and click Show Bindings to see where the certificate is being used.
  • On Citrix ADC, simply right-click the existing certificate, and click Update. This automatically updates all of the bindings. Much faster and easier.

To update a certificate using the Update method:

  1. Create an updated certificate, and export it as .pfx file (with private key). Don’t install the certificate onto Citrix ADC yet, but instead, simply have access to the .pfx file.
  2. In Citrix ADC, navigate to Traffic Management > SSL > Certificates > Server Certificates.
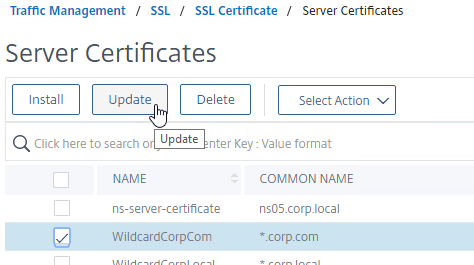
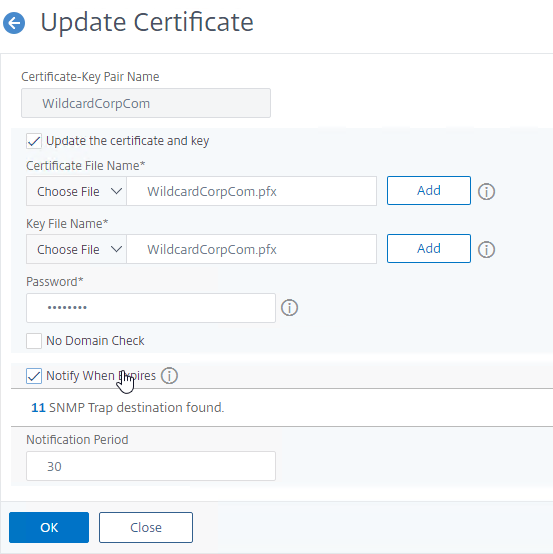
  3. On the right, right-click the certificate you intend to update, and click Update.
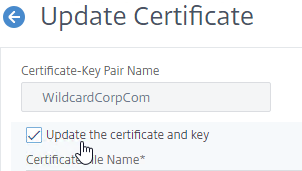
  4. Check the box next to Update the certificate and key.
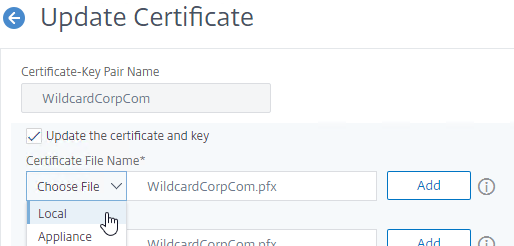
  5. Click Choose File > Local, and browse to the updated .pfx file.
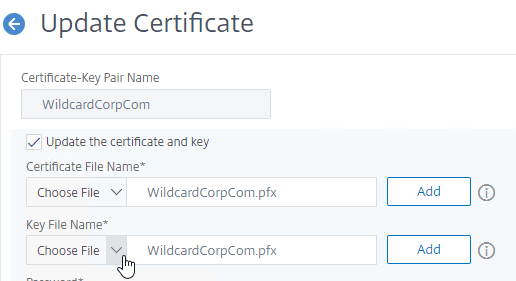
  6. For Key File Name, browse to the same .pfx file.
  7. Enter the .pfx file password.
  8. Click OK. This will automatically update every Virtual Server on which this certificate is bound.
  9. Click OK when told that cert links were broken.
  10. Intermediate certificate – After replacing the certificate, you might have to update the cert link to a new Intermediate certificate.
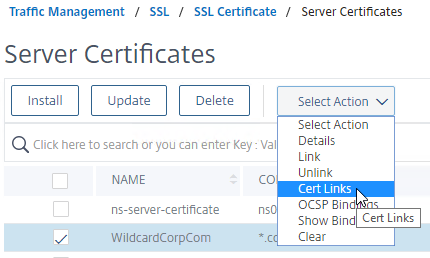
    1. Right-click the updated certificate, and click Cert Links, to see if it is currently linked to an intermediate certificate.
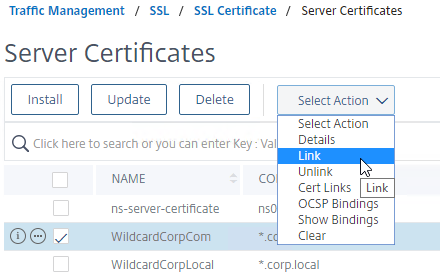
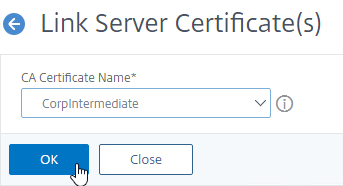
    2. If not, right-click the updated certificate, and click Link, to link it to an intermediate certificate. If it doesn’t give you an option to link it to, then you’ll first have to install the new intermediate certificate on the Citrix ADC.

Certificates can also be updated in Citrix Application Delivery Management (ADM).

Certificates can be updated from the CLI by running update ssl certKey MyCert. However, the certificate files must be stored somewhere on the appliance, and already be in PEM format.

Next Steps