Navigation
- Change Log
- Overview
- OTP Encryption
- AAA vServer
- Push Service
- LDAP Policies/Actions
- nFactor Visualizer
- Number of Registered OTP Devices
- Traffic Policy for Single Sign-on
- Citrix Gateway and Authentication Profile
- Update Content Switching Expression for Unified Gateway
- Manageotp User Experience
- OTP Authentication User Experience
- CLI Commands
Change Log
- 2023 Mar 17 – added link to CTP Julian Jakob Citrix NetScaler – OTP Encryption Tool.
- 2021 Feb 1 – First factor – added info from Samuel LEGRAND Native OTP issues on Citrix ADC 13
- 2020 Apr 12 – Overview – added link to Andreas Nick OTPEdit: tool to register OTP devices without using manageotp
- 2019 Sep 27 – OTP Encryption – new in ADC 13.0 build 41
- New OTP features in ADC 13:
Overview
Citrix ADC 13 Native OTP lets you enable two-factor authentication without purchasing any other authentication product. A typical configuration uses Citrix SSO app (mobile VPN Client) to receive push notifications, or Google Authenticator to generate Passcodes. See the following for an overview:
- Citrix Blog Post NetScaler Unified Gateway Provides One Time Password (OTP), Natively
- Citrix CTX228454 NetScaler One Time Password (OTP) Guide for Dual Authentication or Registration
Here are some notes and requirements for Native OTP:
- Licensing – Citrix ADC Native OTP is part of nFactor, and thus requires Citrix ADC Advanced Edition or Citrix ADC Premium Edition licensing. Citrix ADC Standard Edition licensing is not sufficient.
- OTP Push Notifications require ADC Premium Edition
- Workspace app 1809 and newer with Citrix Gateway 12.1 build 49 and newer support nFactor authentication. Older Receivers and older NetScalers don’t support nFactor with Receiver, so you’ll instead have to use a web browser.
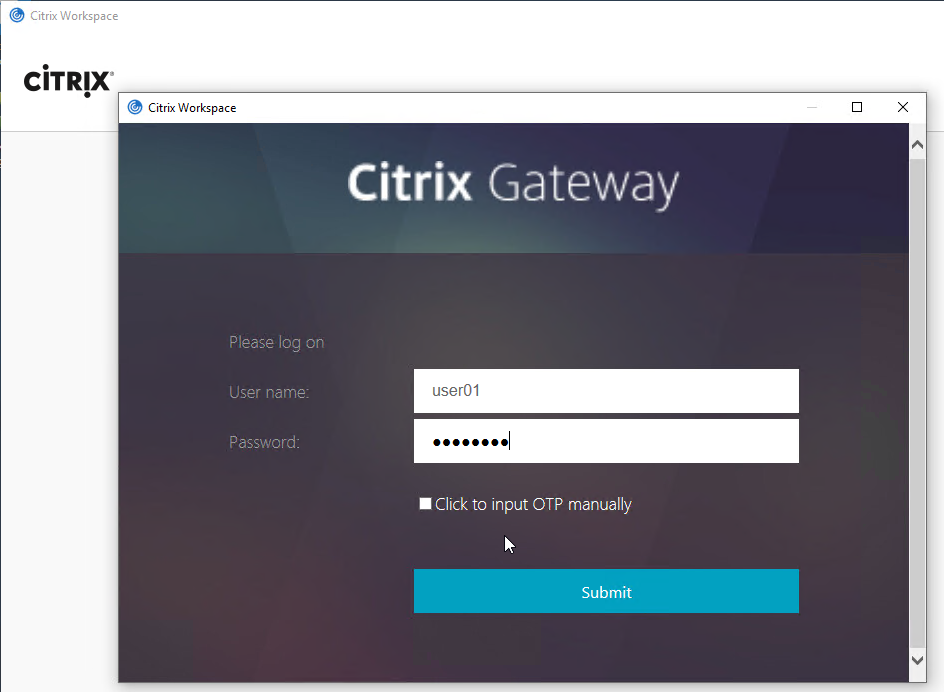
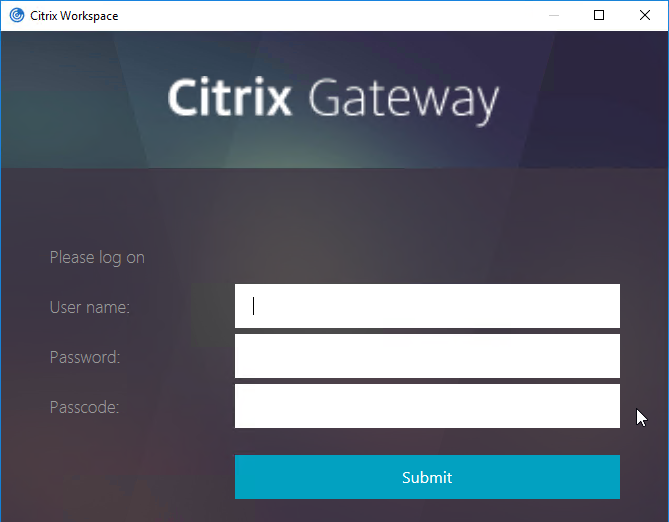
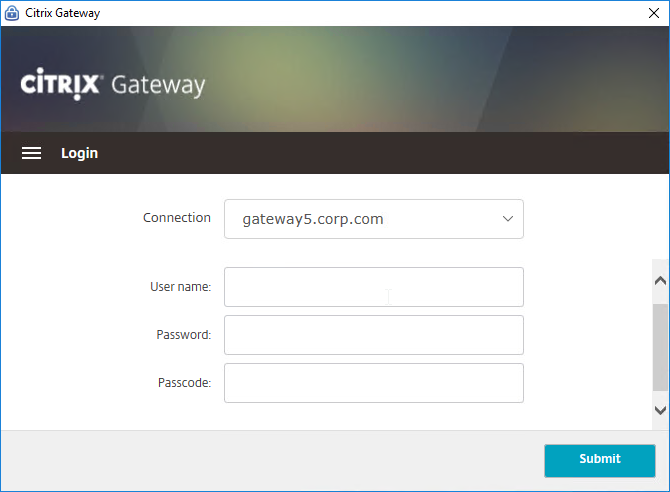
- Citrix Gateway VPN Plug-in 12.1 build 49 and later support nFactor when authenticating from the VPN Plug-in.

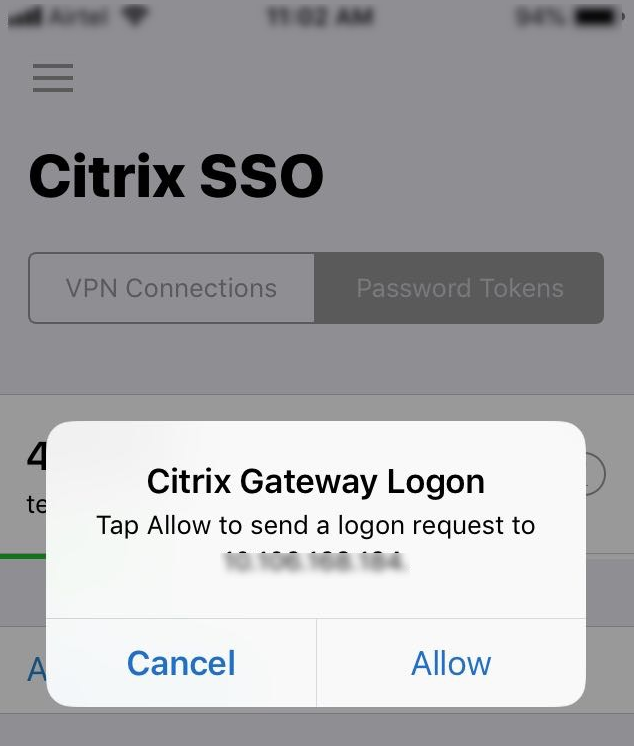
- Push notifications – Citrix ADC 13 and newer supports OTP push notifications of logon request to the mobile (iOS, Android) Citrix SSO app. Other authenticator apps are not supported for OTP Push, but they can be used with OTP Passcode.
- Authenticator – If not using Citrix SSO app, then Google Authenticator can generate passcodes. Christian in the comments indicated that Microsoft Authenticator also works. Click on plus sign -> other (Google,…).
- Internet for Push – Push notifications requires the Citrix ADC appliance to be able to send API calls across the Internet to Citrix Cloud.
- Active Directory attribute – Citrix ADC stores OTP device enrollment secrets in an string-based Active Directory attribute. Citrix’s documentation uses the userParameters Active Directory attribute.
- The LDAP bind account must have permission to modify this attribute on every user.
- The userParameters attribute must not be populated. Active Directory Users & Computers might set the userParameters attribute if you modify any of the RDS property pages.
- Enroll multiple devices – Citrix ADC 13 and newer lets you control the number of devices that a user can enroll.
- Manageotp is difficult to secure – The manageotp website is usually only protected by single factor authentication so external access must be blocked.
- Andreas Nick OTPEdit is an out-of-band tool to register OTP devices without using manageotp.
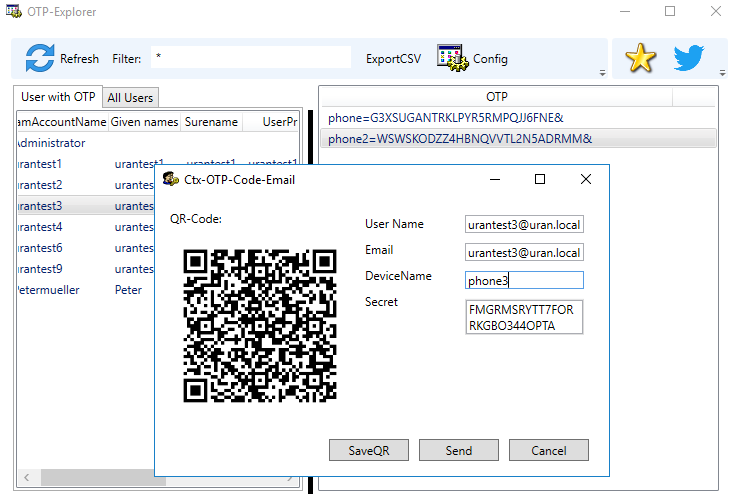
- Andreas Nick OTPEdit is an out-of-band tool to register OTP devices without using manageotp.
Notes on Citrix ADC Configuration Objects for OTP
Here are some notes on the Citrix ADC OTP configuration objects. Detailed instructions are provided later.
- Make sure NTP is configured on the Citrix ADC. Accurate time is required.
- AAA vServer – nFactor requires a AAA vServer, which can be non-addressable. You don’t need any additional public IP for OTP.
- An Authentication Profile links the AAA vServer to the Citrix Gateway vServer.
- Citrix Cloud – For Push notifications, create a Citrix Cloud account. No Citrix Cloud licensing needed. Citrix ADC uses Cloud API credentials to authenticate with Citrix Cloud.
- NSC_TASS cookie – To access the manageotp web page, users add /manageotp to the end of the Gateway URL. Citrix ADC puts this URL path into a cookie called NSC_TASS. You can use this cookie and its value in policy expressions for determining which Login Schema is shown to the user.
- Login Schema for manageotp – The built-in Login Schema file named SingleAuthManageOTP.xml has hidden fields that enable the manageotp web page. If the Login Schema Policy expression permits the SingleAuthManageOTP.xml Login Schema to be shown to the user, then after authentication the user will be taken to the manageotp web page.
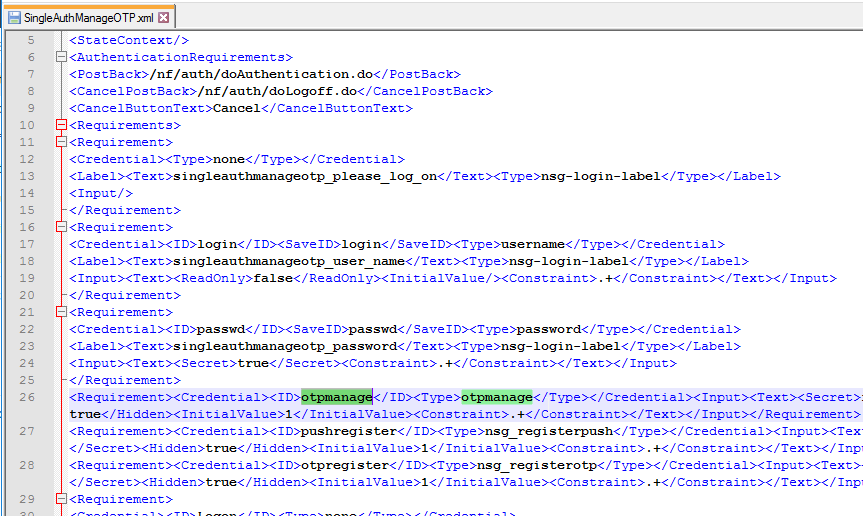
- LDAP authentication is expected to be bound to the same factor as this SingleAuthManageOTP login schema.
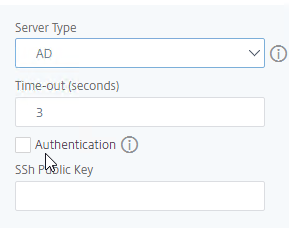
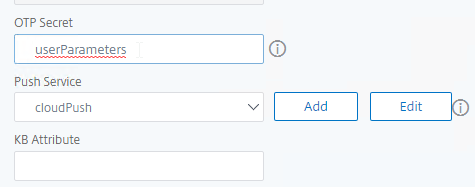
- The next factor is a LDAP Policy/Server with authentication disabled (unchecked) but with arguments specifying the Active Directory attribute for the OTP Secret and Push Service configuration.
- Login Schema for OTP authentication – The built-in Login Schema file named DualAuthPushOrOTP.xml performs the two-factor authentication utilizing the push service. There’s a checkbox that lets users choose Passcode instead of Push. This login schema has a Credential called otppush.
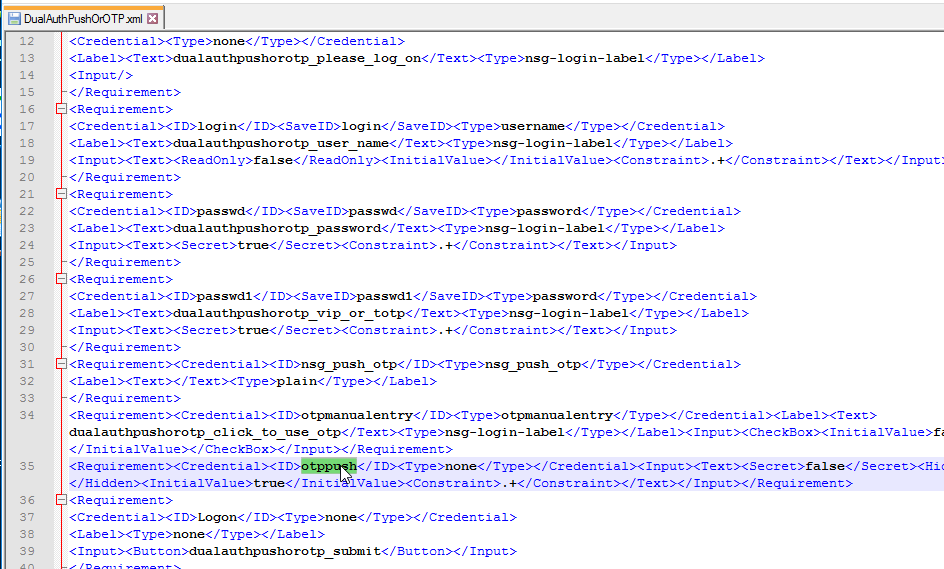

- If you prefer to not use Push, then you can use a normal DualAuth.xml Login Schema file since for passcode authentication there are no special Login Schema requirements other than collecting two password fields.
- Both methods expect an authenticating LDAP Policy/Server to be bound to the same Factor as the Login Schema.
- The next factor should be a non-authenticating LDAP Policy/Server that optionally has the the Push Service defined and must have the OTP Secret attribute defined.
- Single Sign-on to StoreFront – The OTP dual authentication Login Schema essentially collects two passwords (AD password plus push, or AD password plus passcode). Later, Citrix Gateway needs to use the AD password to perform Single Sign-on to StoreFront. To ensure the AD password is used instead of the OTP passcode, configure the OTP dual authentication Login Schema to store the AD password in a AAA attribute and then use a Citrix Gateway Traffic Policy/Profile to utilize the AAA attribute during Single Sign-on to StoreFront.
- nFactor Visualizer – Citrix ADC 13 has a nFactor Visualizer to simplify the OTP configuration. Or you can manually create the LDAP Policies/Actions, the Login Schema Policies/Profiles, the PolicyLabels, and then bind them to a AAA vServer.
OTP Encryption
ADC 13.0 build 41 and newer let you encrypt the OTP secrets stored in Active Directory.
ADC uses a certificate to encrypt the contents of the Attribute. It currently is not possible to configure the certificate from the GUI, so you’ll need to SSH to the ADC and run the following command:
bind vpn global -userDataEncryptionKey MyCertificate
![]()
To enable OTP attribute encryption:
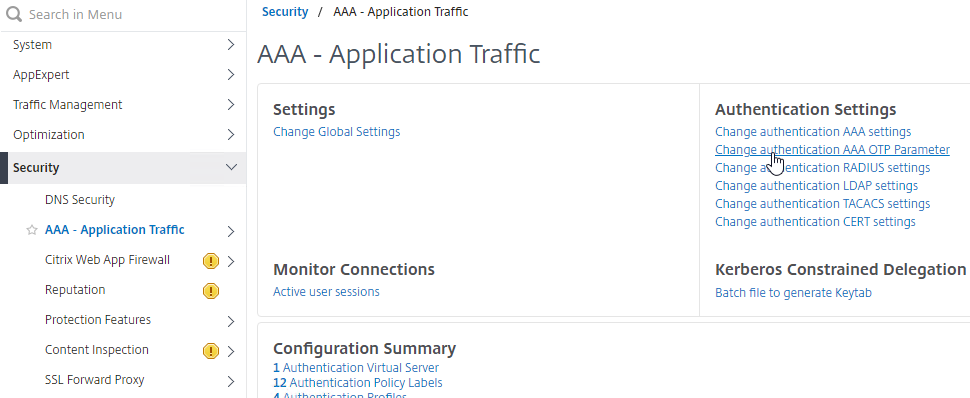
- In the ADC menu, go to Security > AAA – Application Traffic.
- On the right, click Change authentication AAA OTP Parameter.
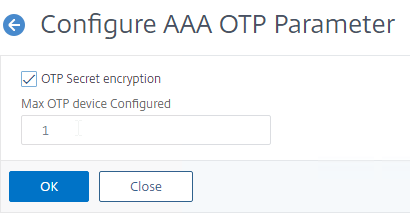
- Check the box for OTP Secret encryption and then click OK.
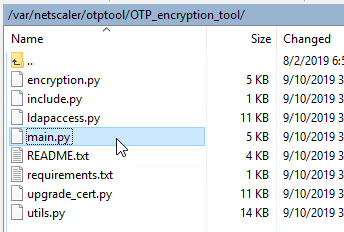
- If you have a previous implementation of ADC OTP that stored unencrypted OTP secrets, then use the Python OTP encryption tool at
/var/netscaler/otptool/OTP_encryption_toolto encrypt the AD attribute using the userDataEncryptionKey certificate. The same tool can be used to change the encryption certificate. More details at OTP encryption tool at Citrix Docs. Also see CTP Julian Jakob Citrix NetScaler – OTP Encryption Tool.
AAA Virtual Server
Create a AAA vServer that is the anchor point for our OTP nFactor configuration.
- Make sure the time is correct on the NetScaler. Click the Configuration tab to see the current System Time. Make sure NTP is configured at System > NTP Servers.

- Go to Security > AAA – Application Traffic.
- If the AAA feature is not enabled, then right-click the AAA node, and click Enable Feature.
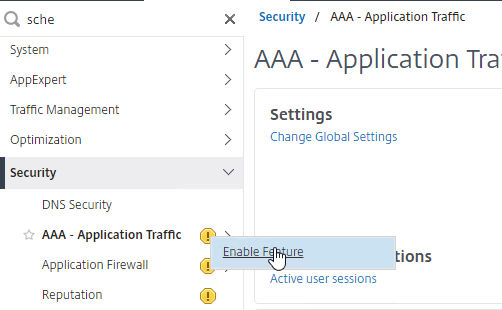
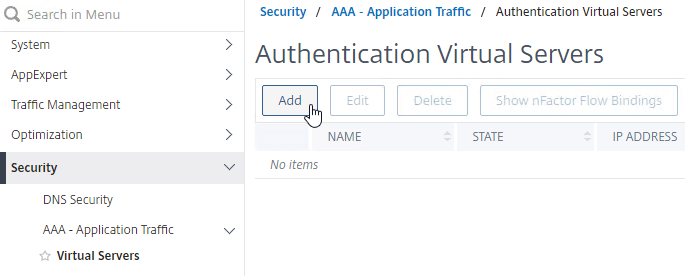
- Go to Security > AAA – Application Traffic > Virtual Servers.
- On the right, click Add.
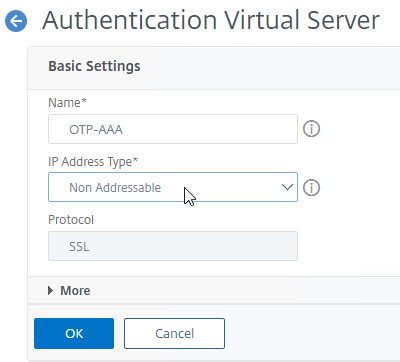
- This AAA vServer is for OTP so name it accordingly.
- Change the IP Address Type to Non Addressable. You don’t need to specify any additional IP address.
- Click the blue OK button.
- Click where it says No Server Certificate.
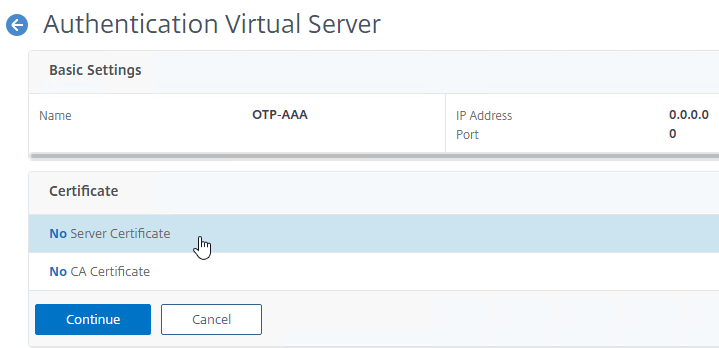
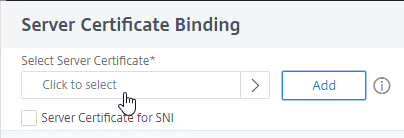
- In the Server Certificate Binding section, click Click to select.
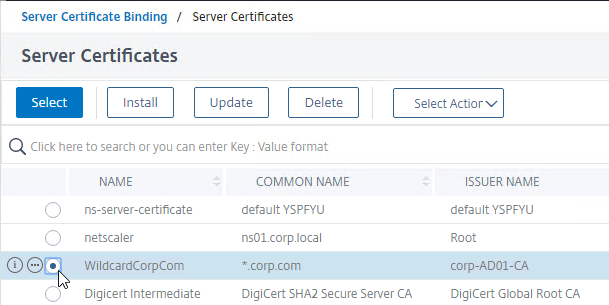
- Click the radio button next to a certificate, and then click the blue Select button at the top of the page. You can select the same certificate as the Citrix Gateway Virtual Server.
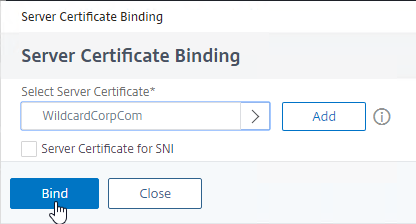
- Click Bind.
- In the Server Certificate Binding section, click Click to select.
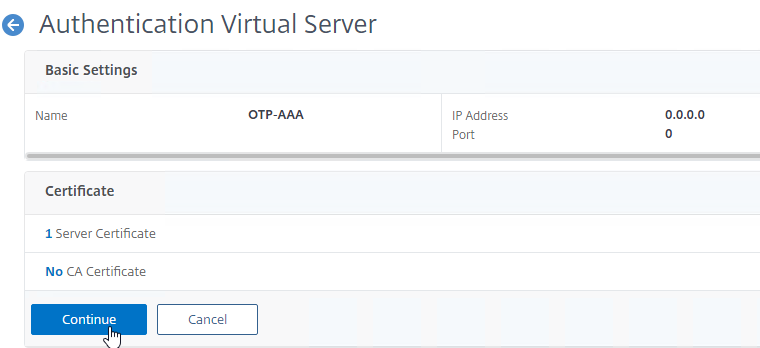
- Click Continue to close the Certificate section.
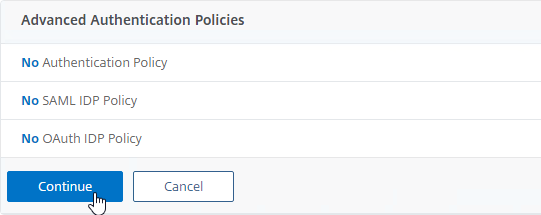
- In the Advanced Authentication Policies section, don’t bind anything and just click Continue. We’ll bind a nFactor Flow later.
- You can optionally improve the SSL ciphers on this AAA Virtual Server but it’s probably not necessary since this AAA vServer is not directly addressable.
- Nothing else is needed at this time so click the blue back arrow on the top left.
Push Service
If your Citrix ADC has Internet access, then you can enable OTP Push Authentication. The ADC must be able to reach the following FQDNs:
- mfa.cloud.com
- trust.citrixworkspacesapi.net
Create an API Client at citrix.cloud.com:
- Go to https://citrix.cloud.com and login. Your cloud account does not need any licensed services.
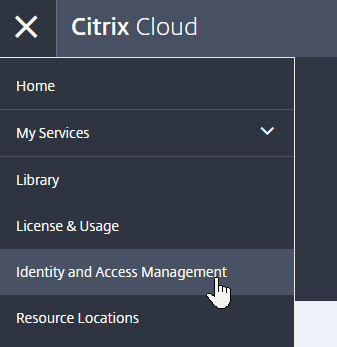
- On the top left, click the hamburger (menu) icon, and then click Identity and Access Management.
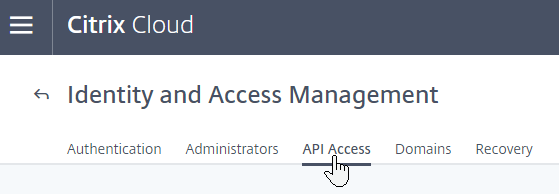
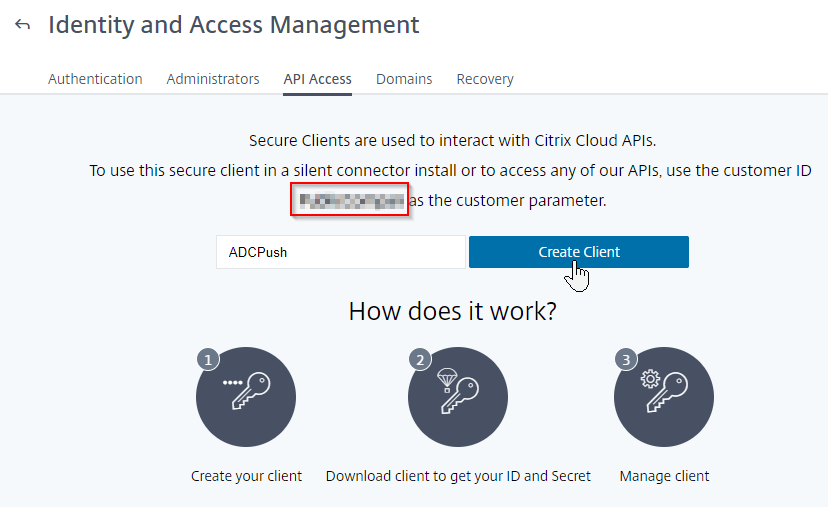
- Switch to the tab named API Access.
- On this page, notice the Customer ID. You’ll need this value later.
- Enter a name for a new API client and then click Create Client
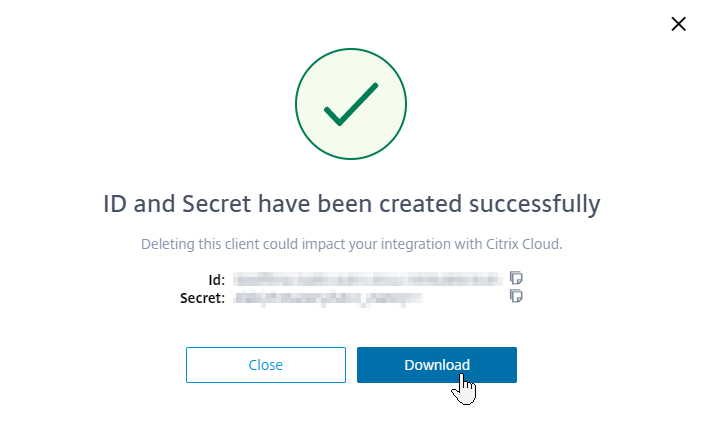
- Click Download to download the client credentials.
On ADC 13, create the Push Service:
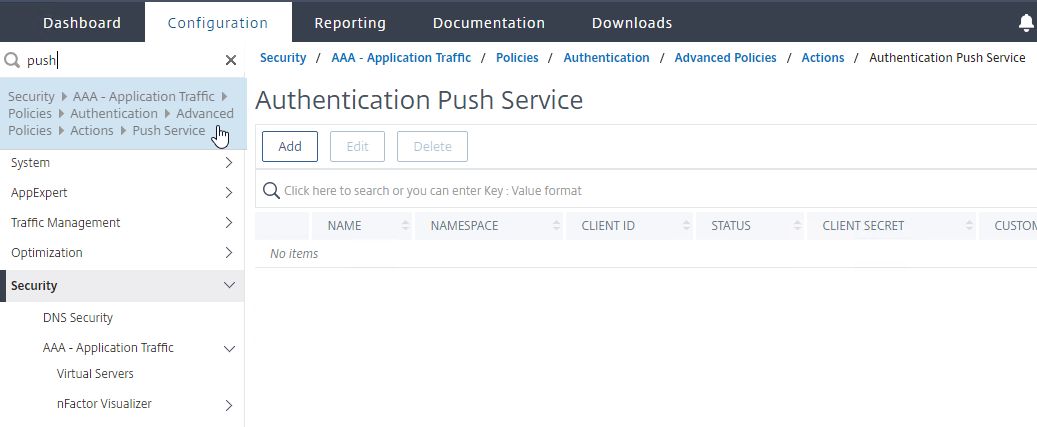
- In Citrix ADC 13 management GUI, navigate to the Push Service node. The easiest way to find it is to enter Push in the search box on the top left.
- On the right, click Add.
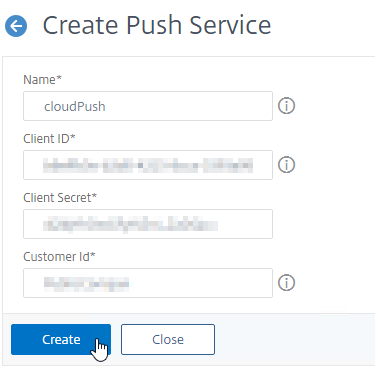
- In the Create Push Service page, do the following:
- Enter a name for the Push Service.
- Enter the Client ID and Client Secret that you downloaded when creating your API Client.
- Enter the Customer ID shown on the Create Client web page at cloud.com. Make sure there are no hidden characters or whitespace around the Customer ID.
- Click Create.
- On the top right, click the refresh icon until the Status changes to COMPLETE. If it won’t go past CCTOKEN, then make sure you entered the API Client info correctly, especially the Customer ID, which might have hidden characters around it.

LDAP Actions/Servers
Create three LDAP Actions (aka LDAP Servers):
- One LDAP Action for normal LDAP authentication against Active Directory
- One LDAP Action to set the OTP Active Directory attribute and register with push
- One LDAP Action to perform push authentication (in a dual-authentication flow)
Create normal LDAP Action
- Go to Security > AAA – Application Traffic > Policies > Authentication > Advanced Policies > Actions > LDAP.
- On the right, click Add.

- Create a normal LDAP Server if you don’t have one already. This one has Authentication enabled. There are no special instructions for this LDAP Server.
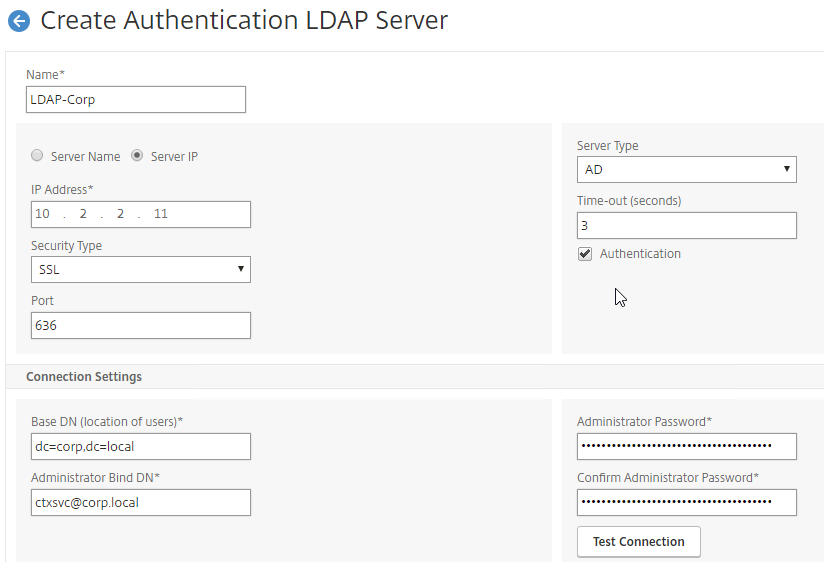
Create LDAP Action for OTP Device Registration
Create the LDAP Action for OTP device registration that sets the OTP Active Directory attribute and registers with push:
- Create another LDAP Action.

- Name it according to this goal: used by the manageotp web site to set the OTP authenticator in Active Directory.
- On the right, uncheck the box next to Authentication.
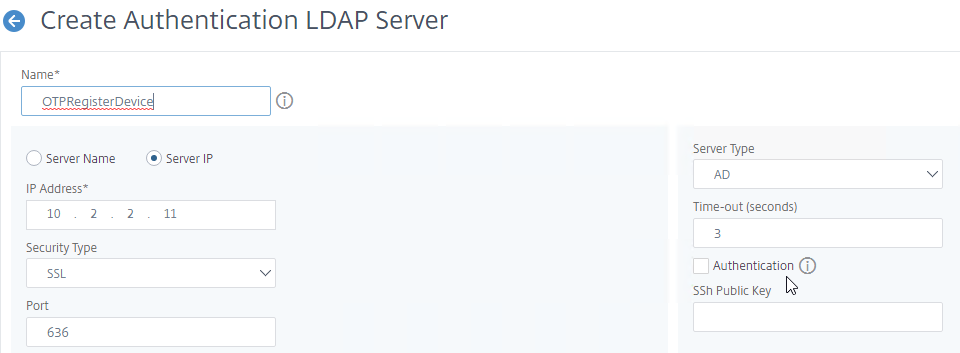
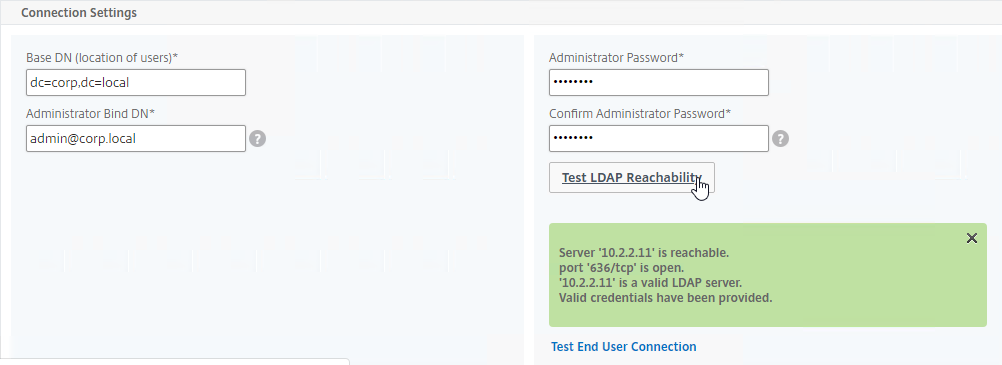
- Make sure the Administrator Bind DN has permissions to modify the OTP Secret Active Directory attribute for all users. A regular non-admin LDAP Bind account won’t work.
- If you cloned an existing LDAP Server, then make sure you re-enter the Administrator Password or the new LDAP Action won’t work.
- Click Test LDAP Reachability.
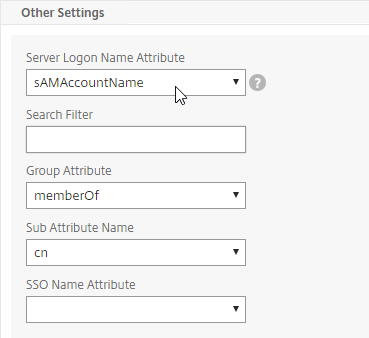
- Configure the Server Logon Name Attribute to match the one you configured in the normal authentication LDAP Server.
- In the Other Settings section, on the bottom right, find the OTP Secret field. Enter the name of the Active Directory attribute where Citrix ADC will store the user’s OTP secret. You can use the userParameters attribute if that attribute isn’t being used for anything else.
- userParameters is populated by Active Directory Users & Computers if you set anything on the RDS tabs (e.g. RDS Roaming Profile).
- Select the Push Service that you created earlier.
- Click Create when done.
Create LDAP Action for OTP Authentication
Create a LDAP Action that performs OTP push authentication or verifies the OTP Passcode. The only difference from the prior LDAP Action is the addition of an LDAP Search Filter.
- Create another LDAP Action.
- Give the LDAP Action a name.
- On the right, uncheck the box next to Authentication.
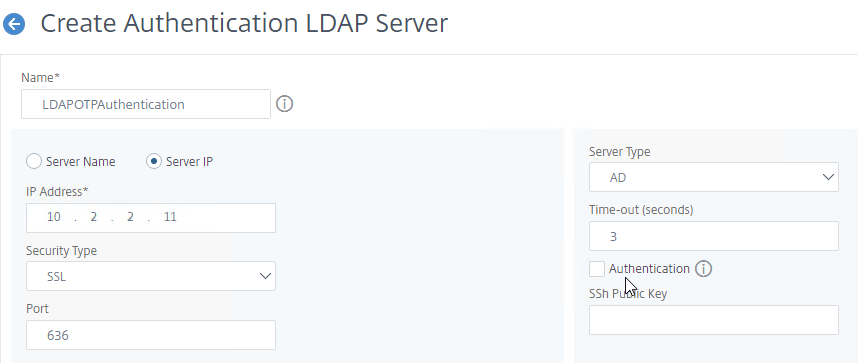
- Make sure the Administrator Bind DN has permissions to read the OTP Secret Active Directory attribute.
- If you cloned an existing LDAP Server, then make sure you re-enter the Administrator Password or the new LDAP Action won’t work.
- Click Test LDAP Reachability.
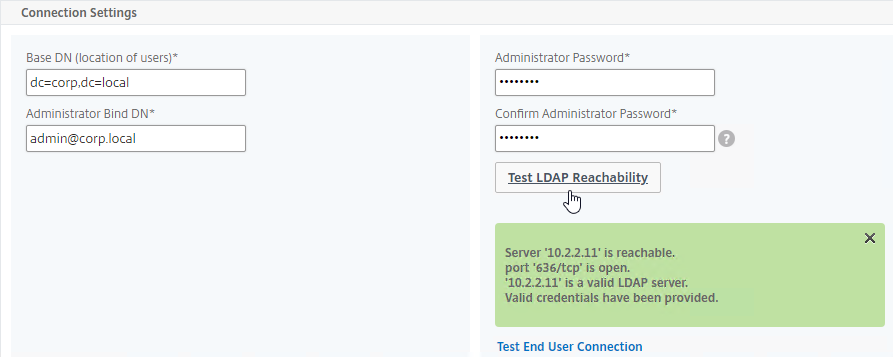
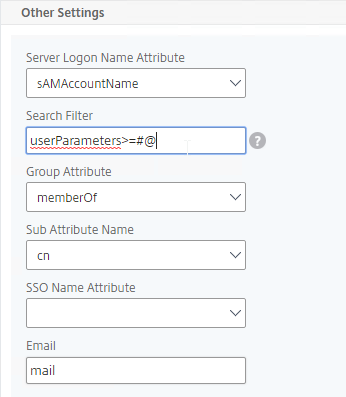
- In the Other Settings section, configure the Server Logon Name Attribute to match the one you configured in the normal authentication LDAP Server.
- In the Search Filter field, enter the text userParameters>=#@. This syntax ensures that only users with enrolled authenticators can login. See George Spiers NetScaler native OTP for more info.
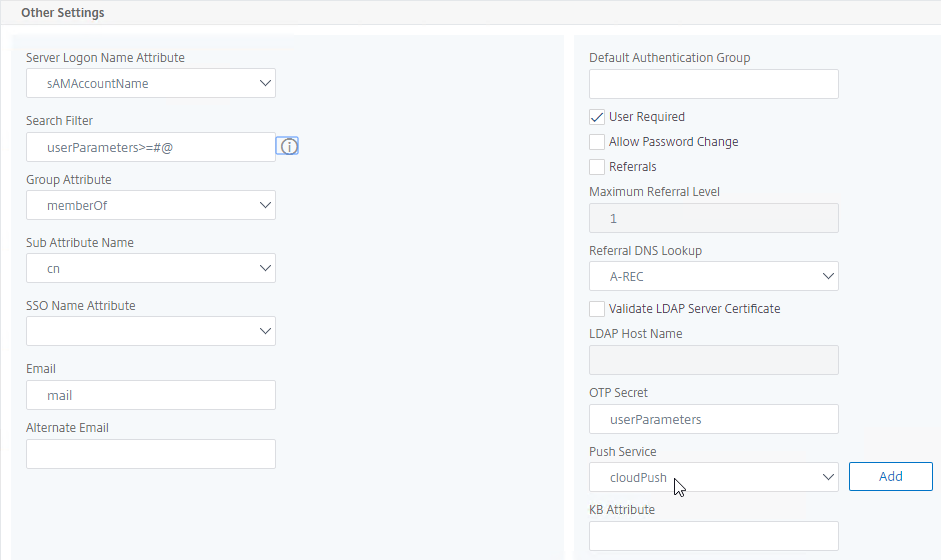
- In the Other Settings section, on the bottom right, find the OTP Secret field. Enter the name of the Active Directory attribute containing the user’s OTP secret.
- In the Push Service drop-down, select the Push Service that you already created.
- Click Create when done.
nFactor Visualizer
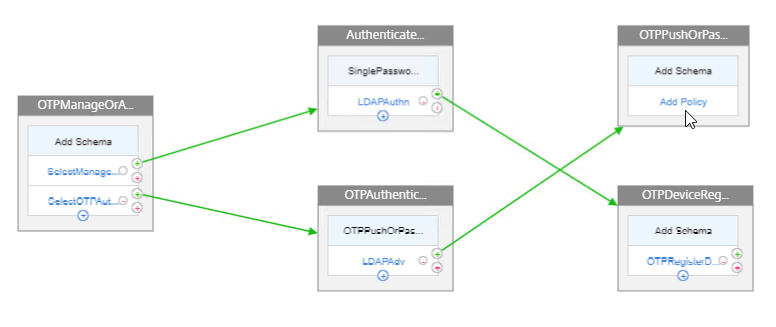
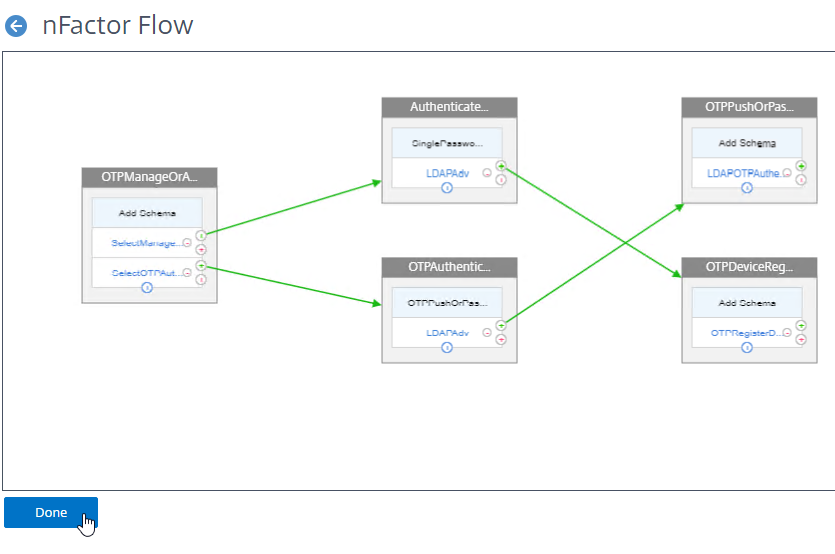
We will build a nFactor Flow that looks something like this:
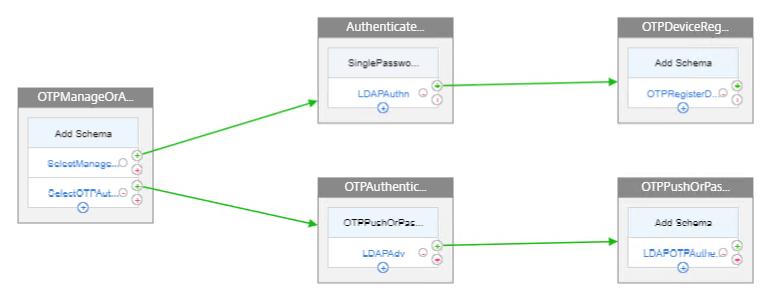
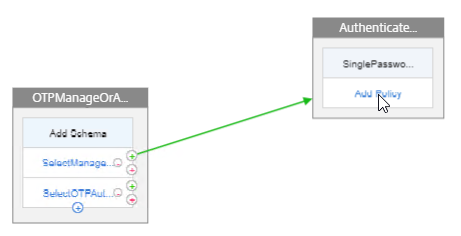
- First factor on the left chooses either OTP Device Registration or OTP Authentication. If user enters /manageotp, then nFactor Flow takes the top path. Otherwise, nFactor flow takes the bottom path.
- Login Schema is not needed for the first factor.
- Second factor for Manage OTP = Login Schema with Manage OTP flag and normal LDAP authentication before allowing users to add devices.
- Third factor is just an LDAP Policy configured with the OTP Active Directory attribute and Push Service. No Login Schema needed.
- Second factor for OTP Authentication = Login Schema with OTP Push (or OTP Passcode) and normal LDAP authentication.
- Third factor is just an LDAP Policy with the OTP Active Directory attribute and Push Service. No Login Schema needed.
nFactor Visualizer notes:
- nFactor Visualizer is not required. You can instead follow the older manual ADC 12.1 instructions.
- It doesn’t seem to be possible to rename any part of the flow once it’s created. To rename, you basically remove the entire flow and rebuild it.
- nFactor Visualizer does not support policy expressions for Login Schemas so the older ADC 12.1 instructions must be modified to support two different branches.
Create Flow and first factor that selects Manage or selects Authenticate
- In ADC 13, go to Security > AAA – Application Traffic > nFactor Visualizer > nFactor Flows. Or search the menu for nFactor.
- On the right, click Add.
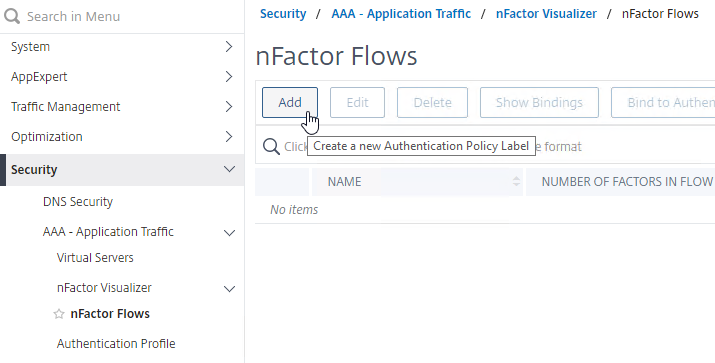
- Click the blue plus icon to create a factor.
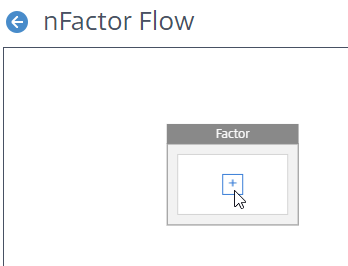
- Name the factor based on this goal: choose manageotp or authenticate based on whether the user entered /manageotp or not. The name of the first factor is also the name of the nFactor Flow.
- Click the blue Create button.
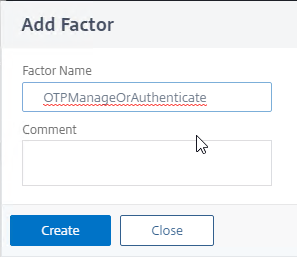
- The first factor does not need a Schema.
- In the first factor, click where it says Add Policy.
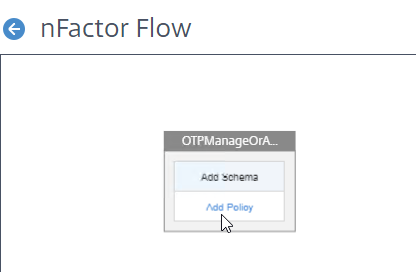
- In the Choose Policy to Add page, click Add to create an authentication policy.

- Name this policy according to this goal: if this policy’s expression is true, then select the manageotp branch (instead of OTP authentication).
- For the Action Type drop-down, select NO_AUTHN. This policy is merely a decision point for the next factor so no actual authentication will occur at this time. The next factor is configured later.
- In the Expression box, enter something similar to the following. The IP subnet expression restricts the manageotp web page to only internal users.
http.req.cookie.value("NSC_TASS").eq("manageotp") && client.IP.SRC.IN_SUBNET(10.2.0.0/16) - In newer ADC 13, you might have to change the expression to eq /manageotp, or change it to contains manageotp. (source = Samuel LEGRAND Native OTP issues on Citrix ADC 13) 💡
http.req.cookie.value("NSC_TASS").eq("/manageotp") && client.IP.SRC.IN_SUBNET(10.2.0.0/16) http.req.cookie.value("NSC_TASS").contains("manageotp") && client.IP.SRC.IN_SUBNET(10.2.0.0/16) - Then click the blue Create button.
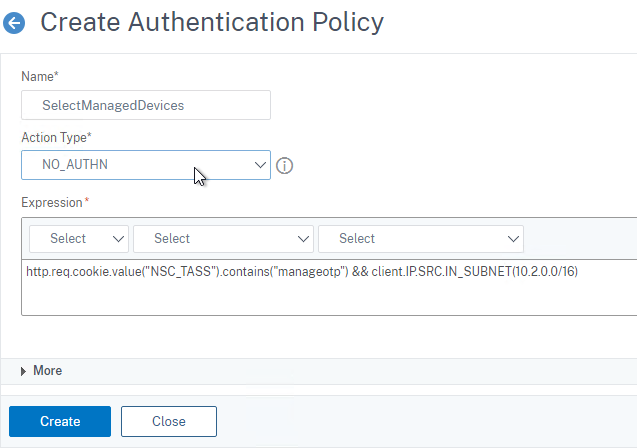
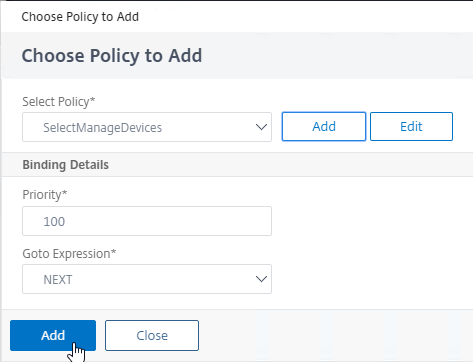
- Click the blue Add button to bind this policy to the factor.
- In the first factor, below the policy you just added, click the blue plus arrow to create another policy.
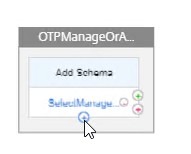
- In the Choose Policy to Add page, click Add to create another policy.

- Name the policy according to this goal: select the dual factor OTP authentication branch.
- For the Action Type drop-down, select NO_AUTHN. This is a decision point policy without authentication that leads to the next factor that does the actual authentication.
- In the Expression box, enter true to capture all OTP users that did not match the prior manageotp policy.
- Click the blue Create button.
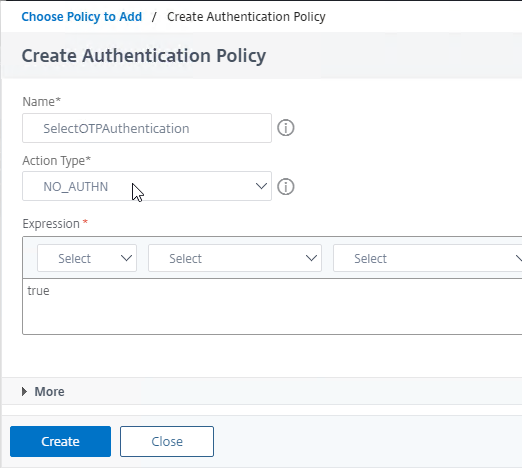
- Click Add to bind this policy to the first factor but after (higher priority number) than the manageotp policy.
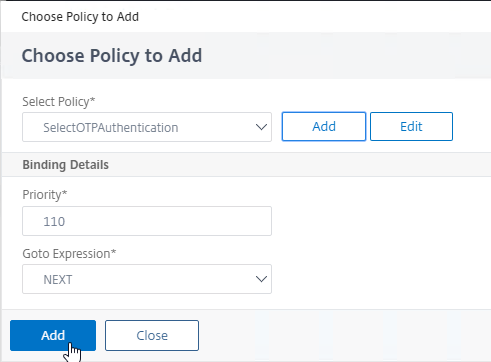
Create second factor for manageotp
- In the first factor, click the green plus icon to the right of the “SelectManageOTP” policy. If the “SelectManageOTP” policy is true, then this new factor will be evaluated.
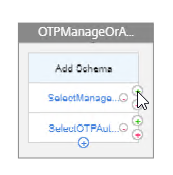
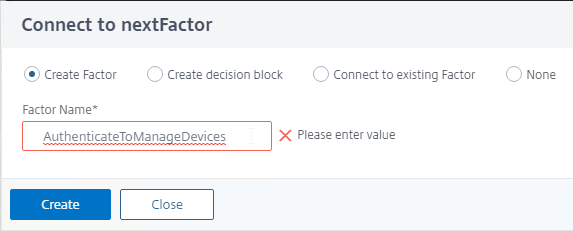
- Name this factor according to this goal: perform single-factor LDAP authentication before allowing access to the manageotp web page.
- Then click the blue Create button.
- In the second factor, click where it says Add Schema.
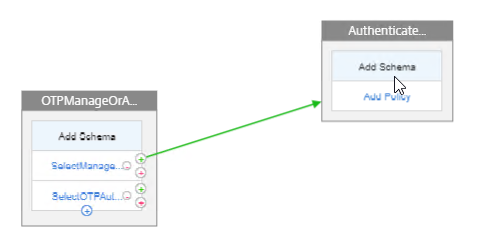
- In the Choose Schema page, click Add to create a Login Schema.
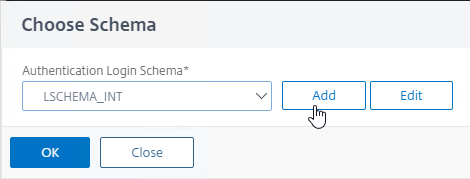
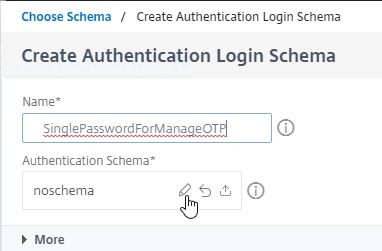
- Name the Login Schema according to this goal: ask user for one password that will be verified with LDAP (Active Directory) before showing the manageotp web page.
- In the Authentication Schema field, click the pencil icon.
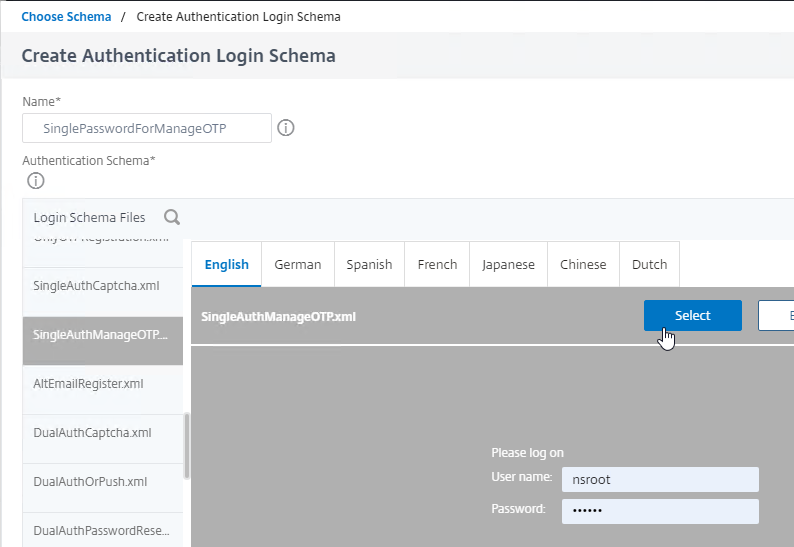
- The existing window expands to show the Login Schema Files. On the left, click the LoginSchema folder to see the files in that folder.
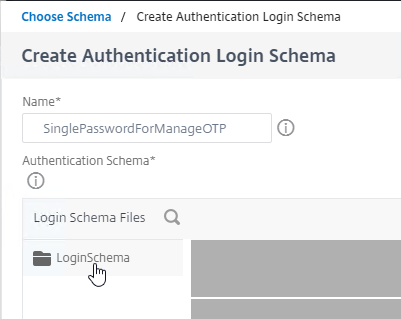
- In the list of files, click SingleAuthManageOTP.xml. This login schema asks for one password and has the special hidden credential to enable the manageotp web page.
- To actually select this file, on the top right, click the blue Select button. The Login Schema window will then collapse so that Login Schema Files are no longer shown.
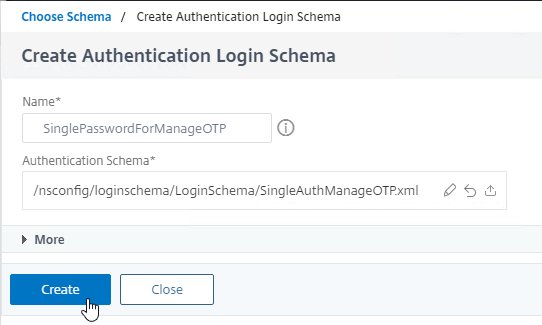
- Make sure the Authentication Schema field shows the Login Schema file that you selected.
- Then click the blue Create button.
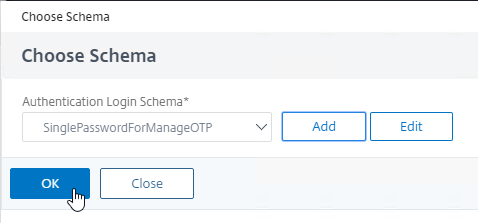
- Click OK to bind the Schema to the factor.
- In the second factor, below the Schema, click Add Policy.
- In the Choose Policy to Add page, if you already have a normal Advanced Expression LDAP policy, then select it.
- Otherwise, click Add to create one.
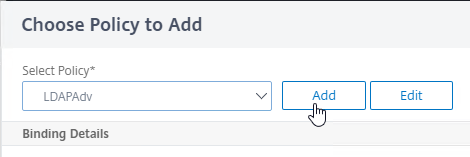
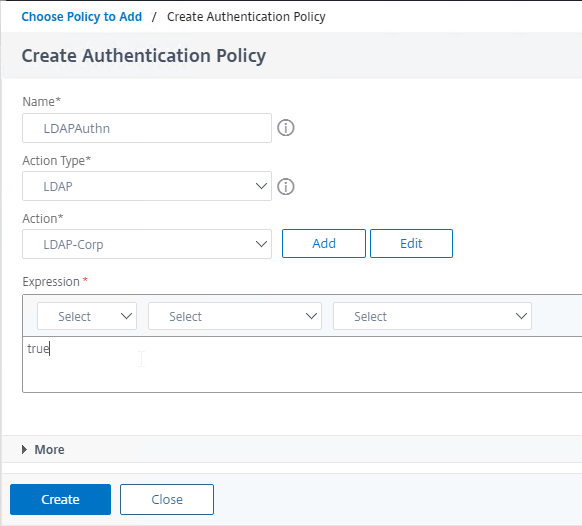
- Name this policy according to this goal: perform normal LDAP authentication against an Active Directory domain.
- In the Action Type drop-down, select LDAP.
- In the Action drop-down, select the LDAP Action/Server you created earlier that performs normal authentication.
- In the Expression box, enter true, which is an Advanced Expression.
- Click the blue Create button.
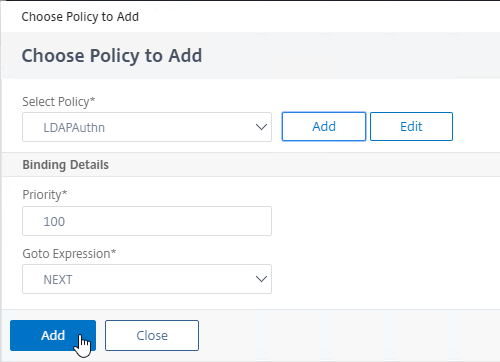
- Click Add to bind this LDAP Policy to the factor.
Create third factor that registers an OTP device with Active Directory and Push
- In the second factor, click the green plus icon to create another factor. This new factor is only evaluated if the LDAP Policy is successful.
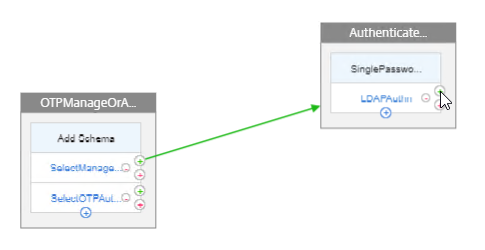
- Name the factor according to this goal: register the device with Active Directory and optionally Push.
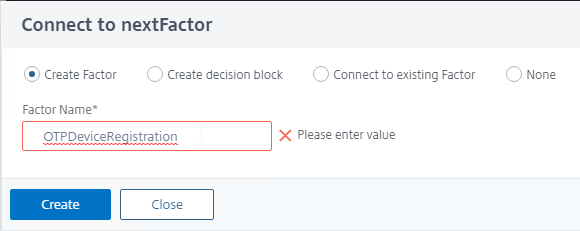
- This factor does not need any Schema.
- In the third factor, click Add Policy

- In the Choose Policy to Add page, click Add to create a policy.

- Name the policy according to this goal: Register OTP devices using LDAP Action without authentication that has the OTP Secret Attribute specified.
- In the Action Type drop-down, select LDAP.
- In the Action drop-down, select the LDAP Action you created earlier that registers new devices. Make sure authentication is disabled in the LDAP Action, and make sure it has OTP Secret and optionally OTP Push configured.
- In the Expression field, enter true.
- Click the blue Create button.
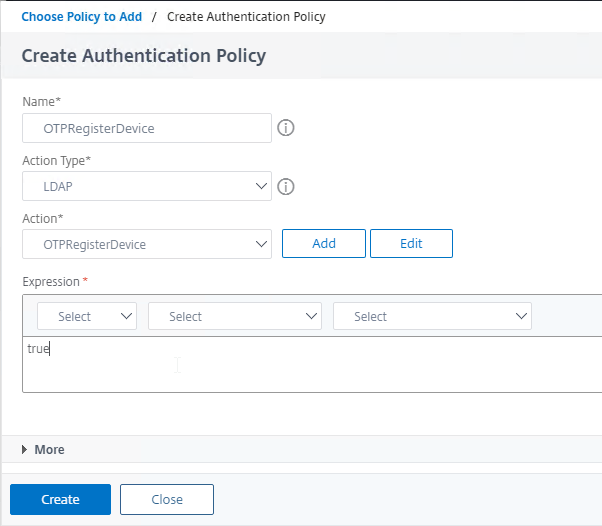
- Click the blue Add button to bind this policy to the factor.
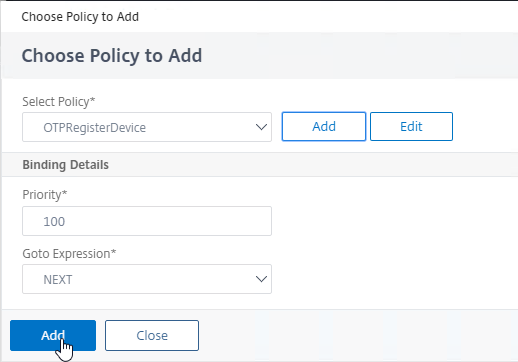
The Factors for manageotp are complete. Now we build the factors for authenticating using OTP.
Create a second factor for LDAP Authentication
- Go back to the first factor and click the green plus icon next to the OTP Authentication policy.

- Name the factor according to this goal: ask user for one password + push, or two passwords, and then perform LDAP authentication. OTP authentication is performed in the next factor (see below).
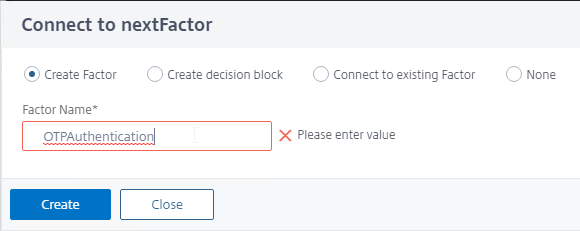
- In the second factor, click where it says Add Schema.
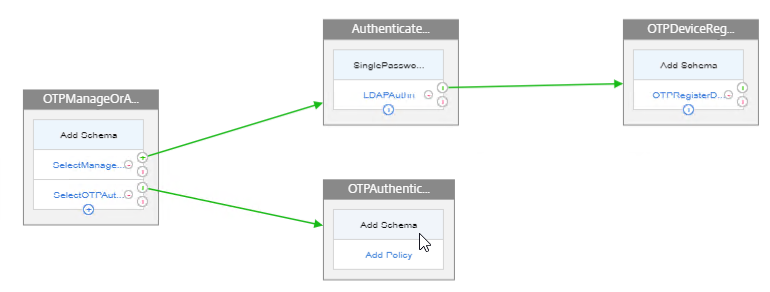
- In the Choose Schema window, click Add.
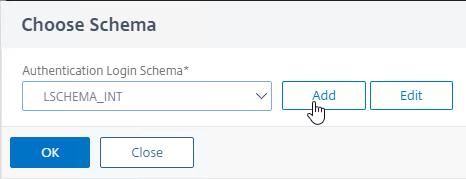
- Name the Login Schema according to this goal: ask for one password + OTP push, or ask for two passwords.
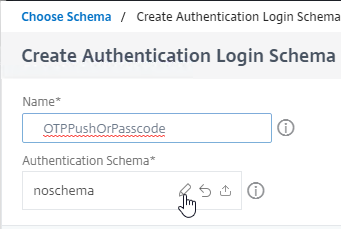
- In the Authentication Schema field, click the pencil icon.
- The window expands to show Login Schema Files. On the left, click the LoginSchema folder to see the files under it.
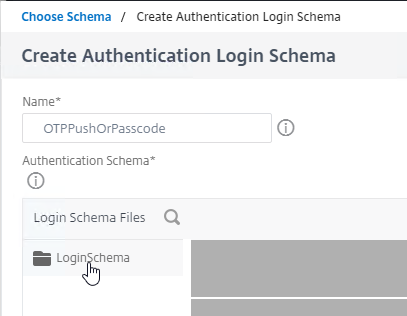
- On the left, click the DualAuthPushOrOTP.xml file.
- Or if you don’t want push, then click a normal two password schema like DualAuth.xml. You can modify the DualAuth.xml file to indicate to the user that the OTP Passcode is expected in the second field.
- Then on the top right click the blue Select button. This causes the Login Schema window to collapse and no longer show the Login Schema Files.
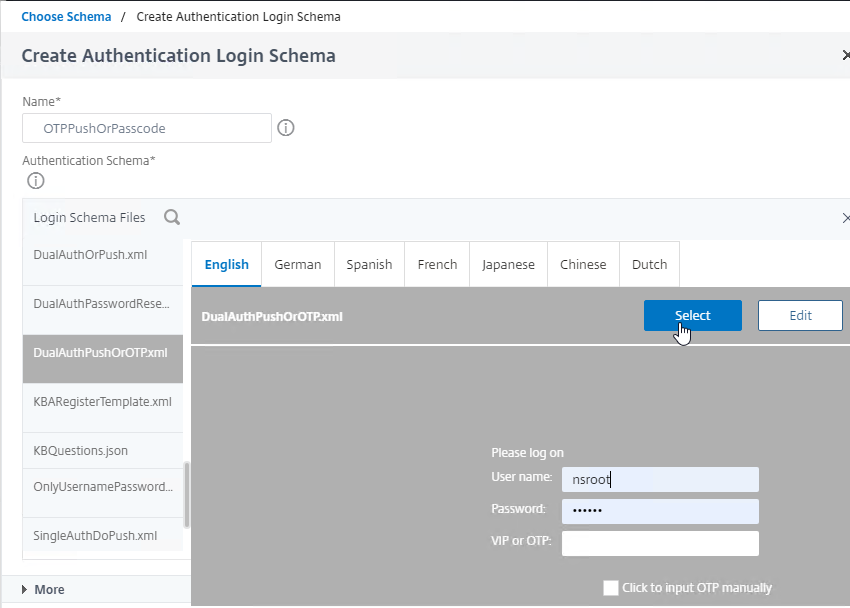
- In the Authentication Schema field, makes sure the correct file name is selected.
- Click More.
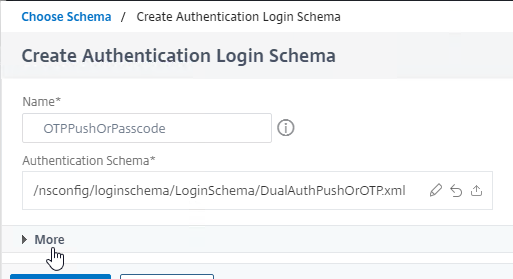
- At the bottom, in the Password Credential Index field, enter a 1 to save the first password into AAA Attribute 1, which we’ll use later in a Traffic Policy that performs Single Sign-on to StoreFront.
- Then click the blue Create button.
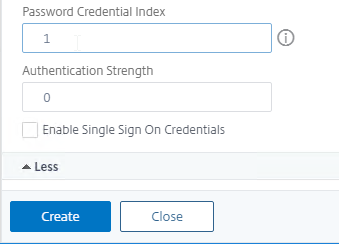
- Click OK to bind the Schema to the factor.
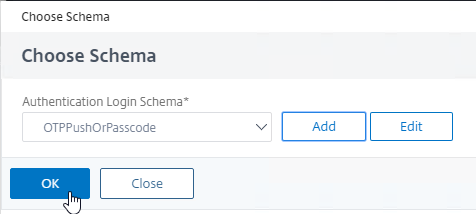
- In the second factor, below the schema, click where it says Add Policy.
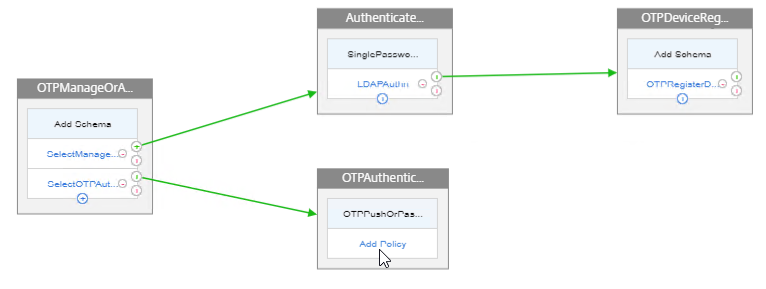
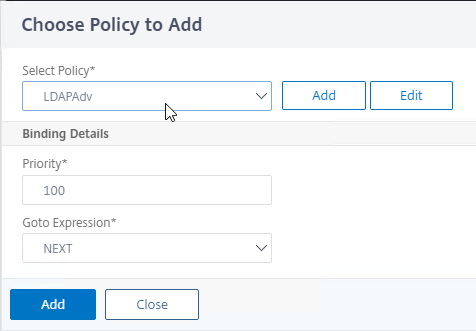
- In the Select Policy drop-down, select your normal LDAP Active Directory authentication policy. This is the same one you used for the second factor in the manageotp branch.
- Click the blue Add button to bind this LDAP policy to the second factor.
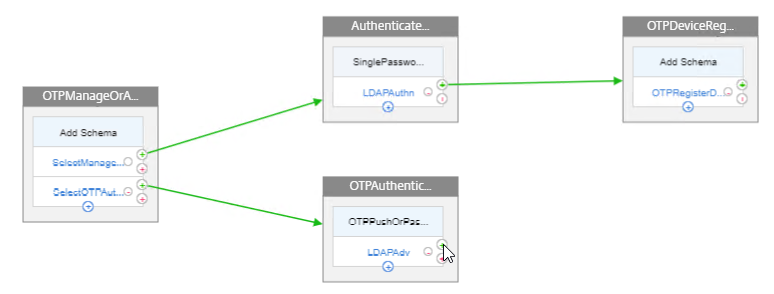
Create third factor to perform OTP authentication (Push or Passcode)
- In the second factor, click the green plus icon next to the LDAP Policy to create another factor.
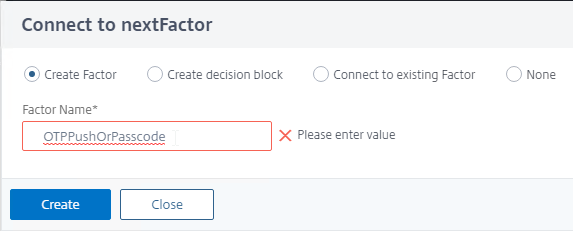
- Name the factor according to this goal: perform OTP Push or Passcode authentication.
- Be aware that the nFactor Visualizer might swap your third factors.
- This third factor does not need a Login Schema.
- In the new third factor (probably the top one, follow the arrows), click where it says Add Policy.
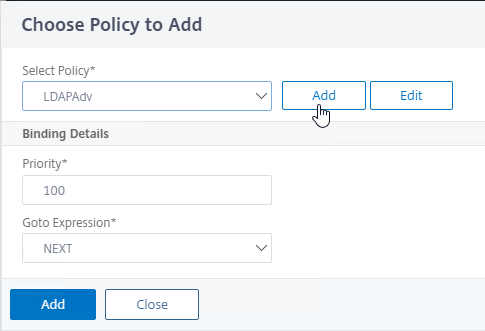
- In the Choose Policy to Add page, click Add to create a policy.
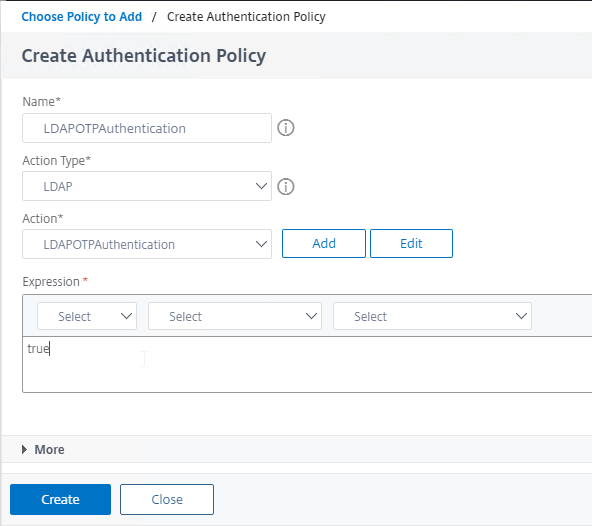
- Name this policy according to this goal: perform OTP Push or OTP Passcode authentication.
- In the Action Type drop-down, select LDAP.
- In the Action drop-down, select the LDAP action you created earlier that verifies the OTP push or passcode. This is the Action that has the LDAP Filter configured.
- In the Expression box, enter true.
- Click the blue Create button.
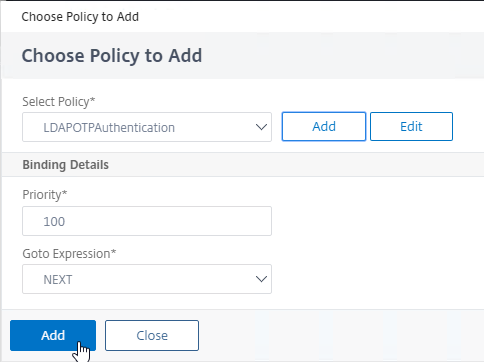
- Click the blue Add button to bind this policy to the third factor.
- Click the blue Done button to close the Flow.
Bind nFactor Flow to AAA Virtual Server
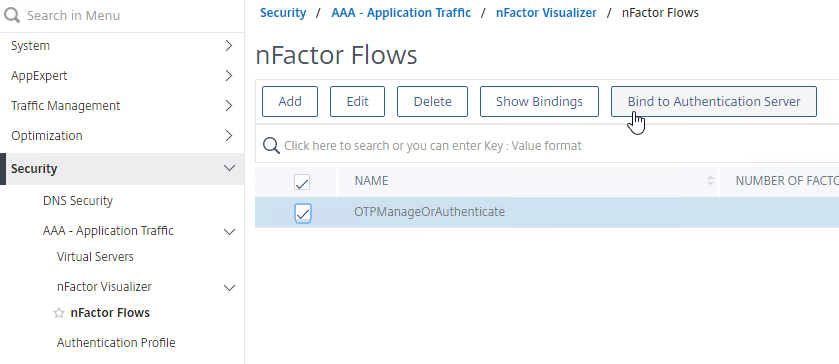
- In the nFactor Flows menu node, highlight the nFactor Flow and click the button labelled Bind to Authentication Server.
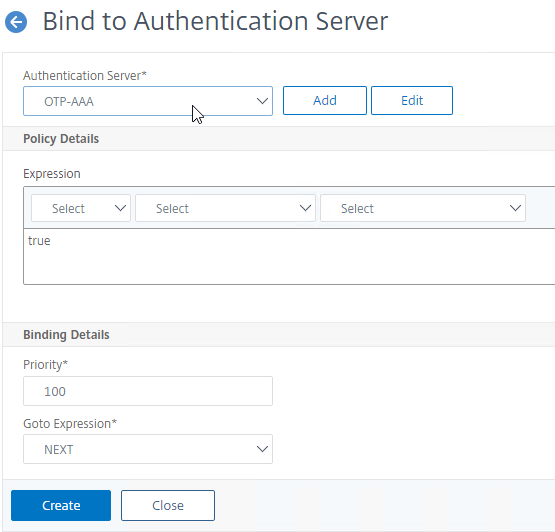
- In the Authentication Server drop-down, select the AAA vServer you created earlier.
- Everything else should already be filled in so just click the blue Create button.
Maximum Number of Registered OTP Devices
ADC 13 lets you restrict the number of OTP devices each user can register:
- In the ADC menu, go to Security > AAA – Application Traffic.
- On the right, click Change authentication AAA OTP Parameter.

- Enter the number of devices each user can register and then click OK.

- When the user attempts to register more than the max number of devices, the error message is not user friendly.
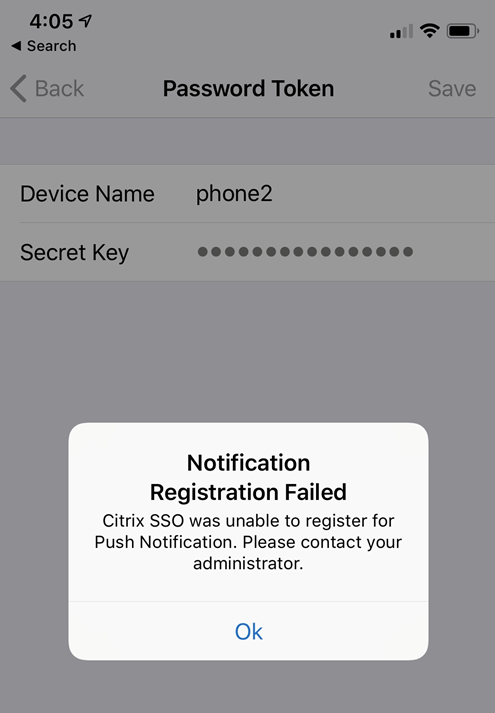
- But you can see the actual error by grepping /var/log/ns.log for otp. which might show <Max permitted otp devices reached>.

Traffic Policy for Single Sign-on to StoreFront
Create Traffic Profile
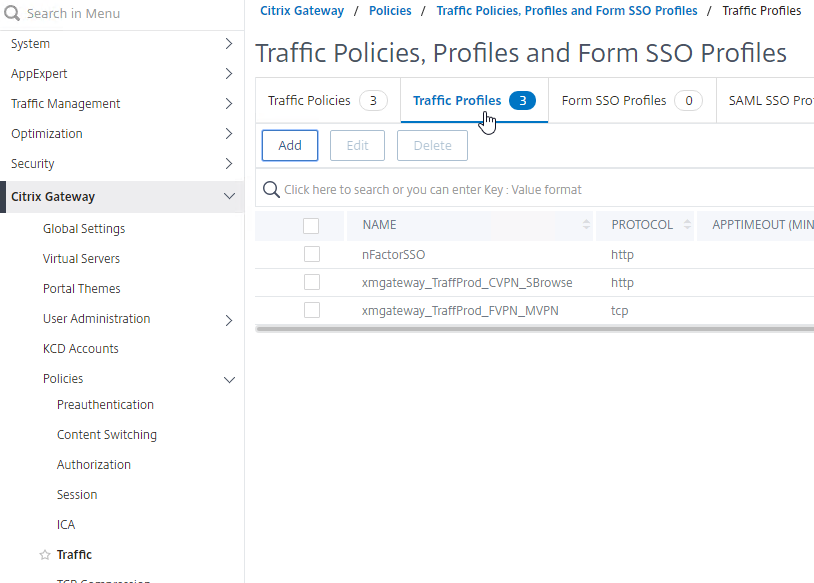
- On the left, go to Citrix Gateway > Policies > Traffic.
- On the right, switch to the tab named Traffic Profiles, and click Add.
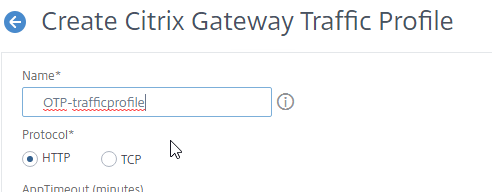
- Name the Traffic Profile according to this goal: use the AAA attribute 1 as password when doing Single Sign-on to StoreFront.
- Scroll down.
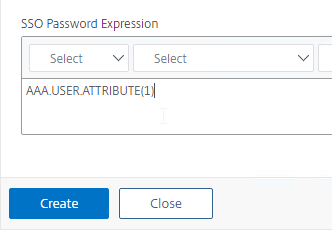
- In the SSO Password Expression box, enter the following which uses the Login Schema Password Attribute specified earlier.
AAA.USER.ATTRIBUTE(1)
- Click the blue Create button.
Create Traffic Policy
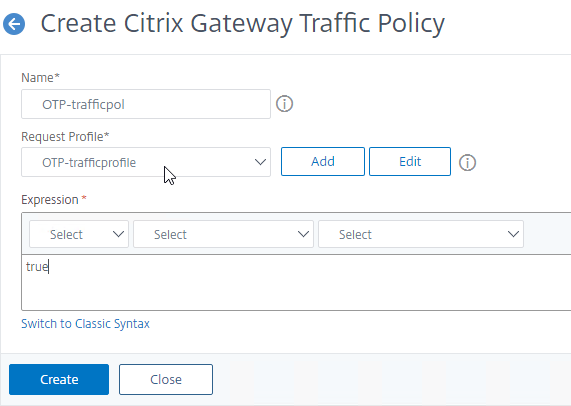
- On the right, switch to the tab named Traffic Policies, and click Add.

- In the Request Profile field, select the Traffic Profile you just created.
- Name the Traffic Policy.
- In the Expression box, enter true (Advanced Syntax).
- If your Citrix Gateway Virtual Server allows full VPN, change the expression to the following. Source = Julien Mooren at NetScaler – Native OTP is breaking SSL VPN.
http.req.method.eq(post)||http.req.method.eq(get) && false
- If your Citrix Gateway Virtual Server allows full VPN, change the expression to the following. Source = Julien Mooren at NetScaler – Native OTP is breaking SSL VPN.
- Click the blue Create button.
Citrix Gateway, Traffic Policy, and Authentication Profile
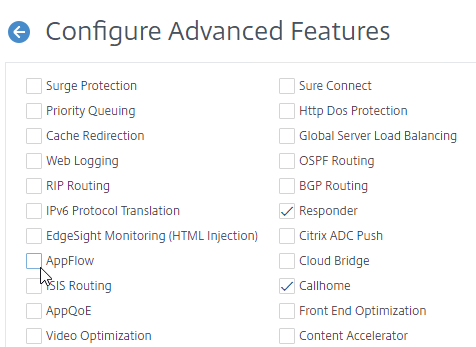
Edit an existing Citrix Gateway Virtual Server
- Go to Citrix Gateway > Virtual Servers.
- Edit an existing Gateway vServer. If you don’t have one, see the other Citrix Gateway topics on this site.
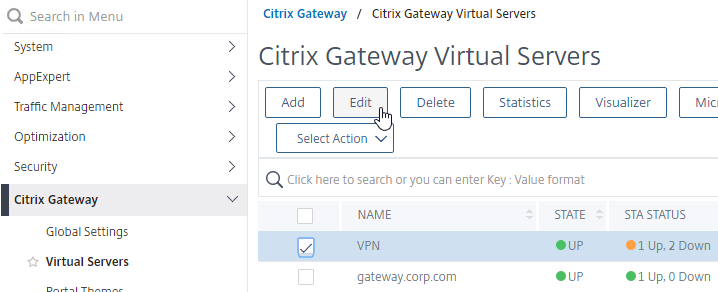
Bind the Traffic Policy
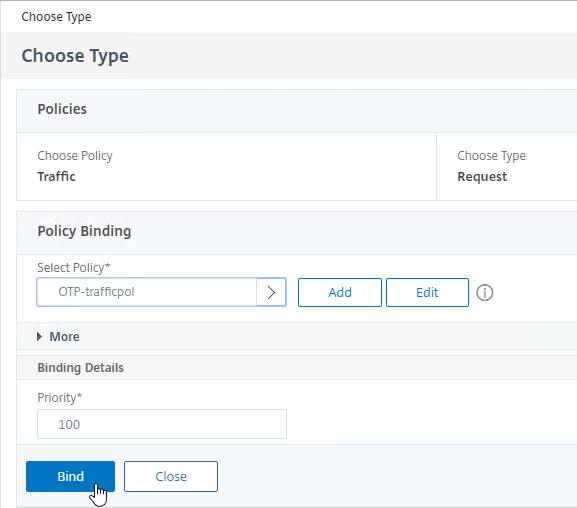
- While editing a Gateway Virtual Server, scroll down to the Policies section, and click the plus icon.

- Change the Choose Policy drop-down to Traffic, and then click the blue Continue button.
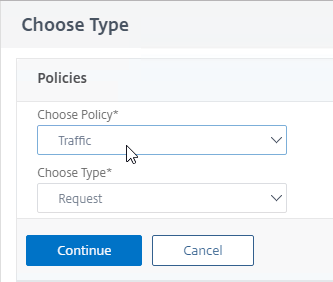
- In the Policy Binding section, click Click to select.

- Click the radio button next to the Traffic Policy you created earlier, and then click the blue Select button at the top of the page.
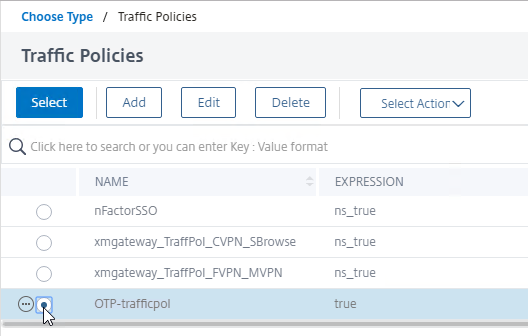
- Click the blue Bind button.
Create Authentication Profile
Create and bind an Authentication Profile to link the Gateway Virtual Server to the AAA Virtual Server:
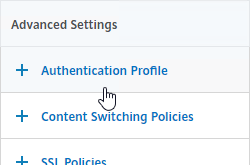
- While editing a Gateway Virtual Server, on the right, in the Advanced Settings column, click Authentication Profile.
- On the left, scroll down to the Authentication Profile section.
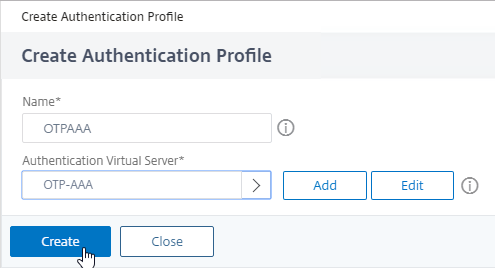
- Click Add to create one.
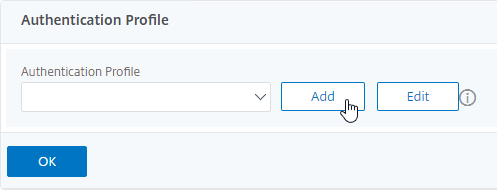
- Authentication Profile links the Citrix Gateway vServer with the OTP AAA vServer, so name it accordingly.
- In the Authentication Virtual Server section, click Click to select.
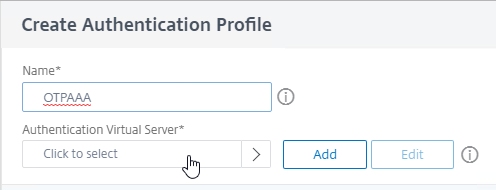
- Click the radio button next to the OTP AAA vServer, and then click the blue Select button at the top of the page.
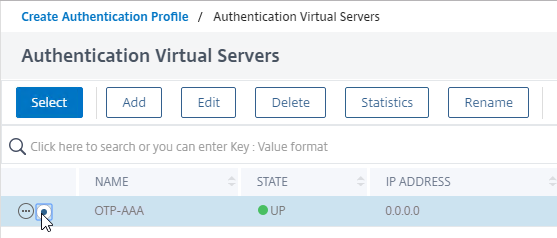
- Click the blue Create button.
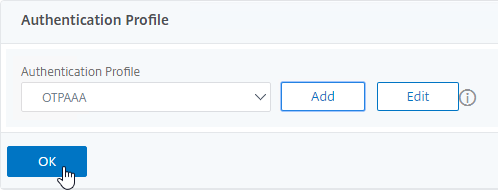
- Scroll down again to the Authentication Profile section, and click the blue OK button. Your selection isn’t saved until you click OK.
- The Portal Theme bound to the Gateway Virtual Server should be X1, RfWebUI, or a derivative.

Update Content Switching Expression for Unified Gateway
If your Citrix Gateway Virtual Server is behind a Unified Gateway (Content Switching Virtual Server), then you must update the Content Switching Expression to include the manageotp paths.
- In the Citrix ADC GUI, navigate to Configuration> Traffic Management > Content Switching > Policies.
- On the right, select the Unified Gateway Content Switching Policy, and then click Edit.
- Append the following expression under the Expression area, and then click OK.
|| HTTP.REQ.URL.CONTAINS("/manageotp")
Manageotp User Experience
To access the manageotp web page:
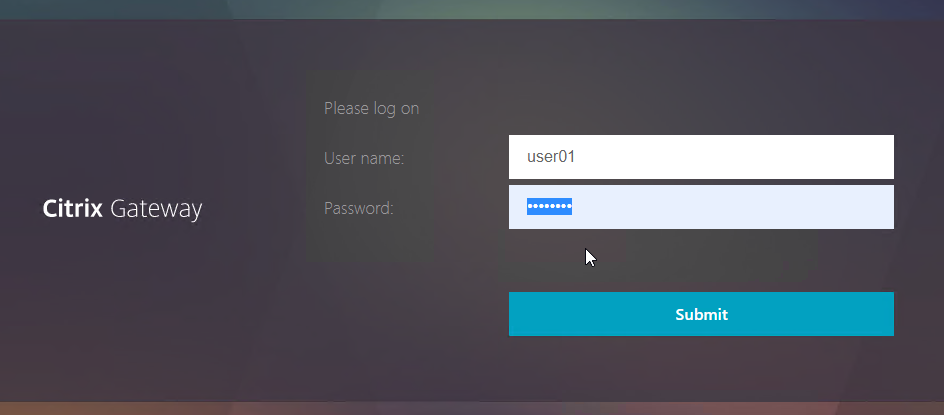
- Point your browser to https://mygateway.corp.com/manageotp or similar. Add /manageotp to the end of your Gateway URL.

- Notice it’s only single-factor authentication. Login using normal LDAP credentials.
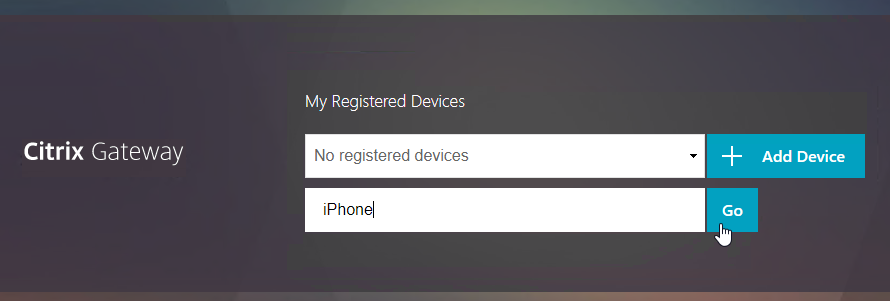
- Click Add Device.

- Enter a device name, and click Go.
- For OTP Push, on your phone, install the Citrix SSO app if it’s not already installed. Then launch it.
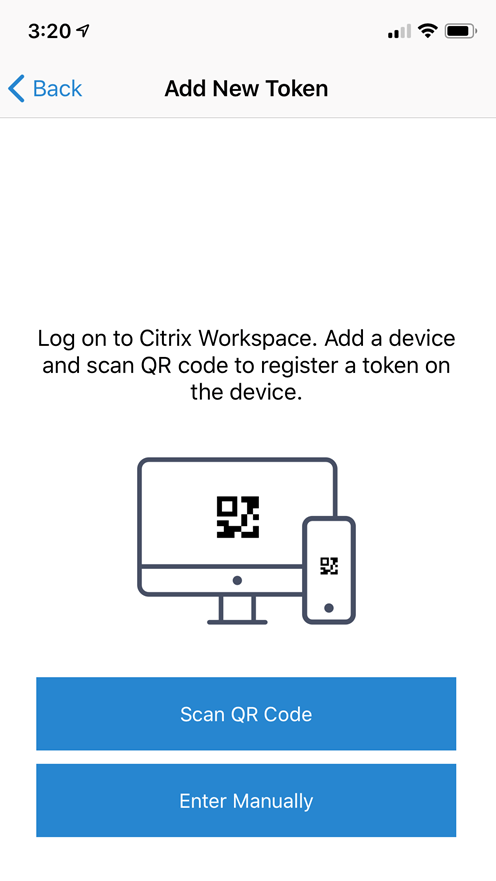
- Switch to the Password Tokens tab and tap Add New Token.

- Tap Scan QR Code.
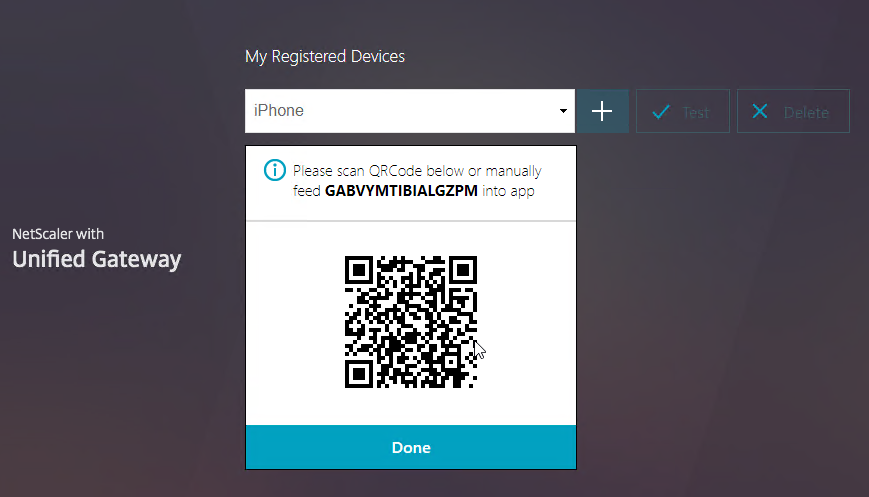
- Then scan the QRCode shown in your browser.
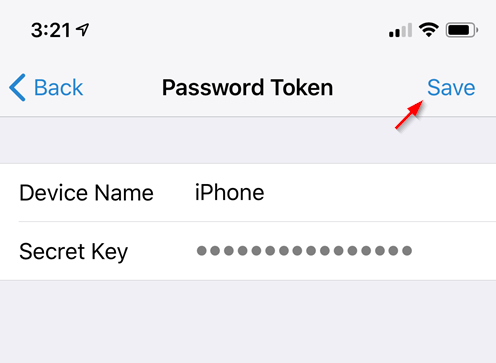
- You should see the Device Name. Tap Save.
- Switch to the Password Tokens tab and tap Add New Token.
- If OTP Passcode, launch the Google Authenticator application on your phone. Click the plus icon in Google Authenticator, and scan the QRCode that is shown on the screen.
- Citrix SSO app also supports passcode.
- Christian in the comments indicated that Microsoft Authenticator also works. Click on plus sign -> other (Google,…).
- If you configured OTP Push, then you won’t see a Test button. To display the Test button, simply refresh your browser page.

- Click Test.

- Enter the passcode shown in your Authenticator, and click Go.
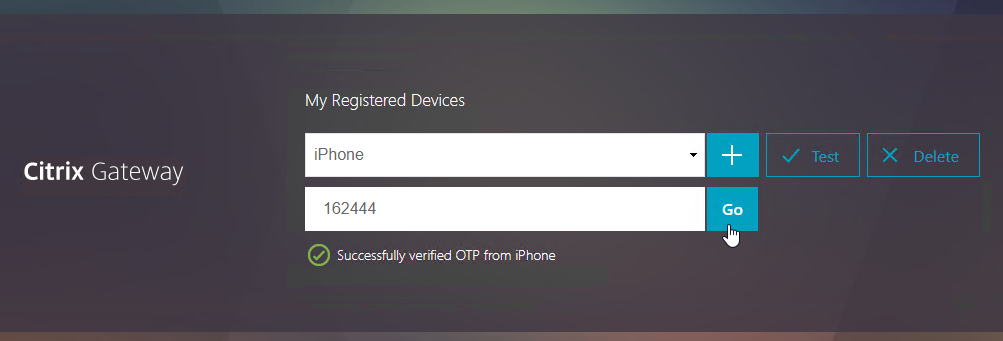
- Citrix SSO app shows the passcode on the main Password Tokens view.
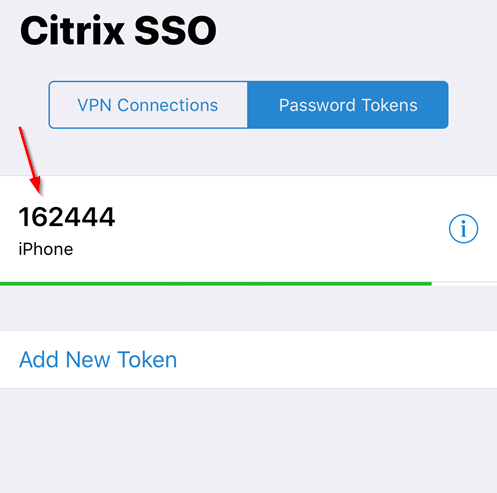
- Citrix SSO app shows the passcode on the main Password Tokens view.
- When done, on the top right, click your name and Log Off.
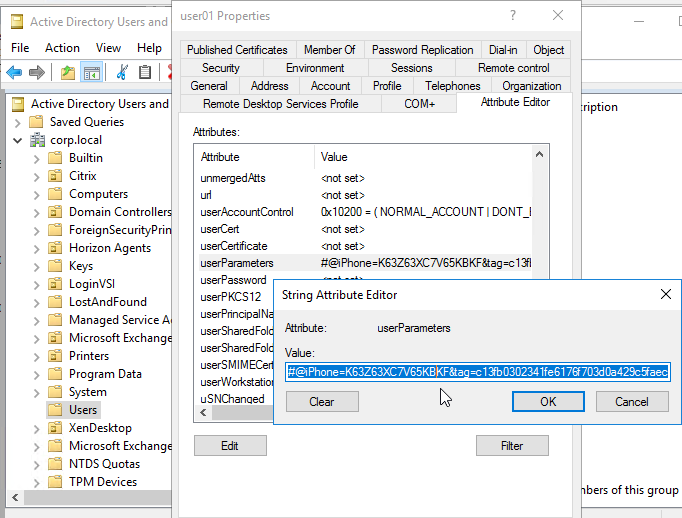
- The OTP registration info is stored in the Active Directory attribute. If users need to re-register, then help desk might need permission to clear this Active Directory attribute.
Perform OTP Authentication
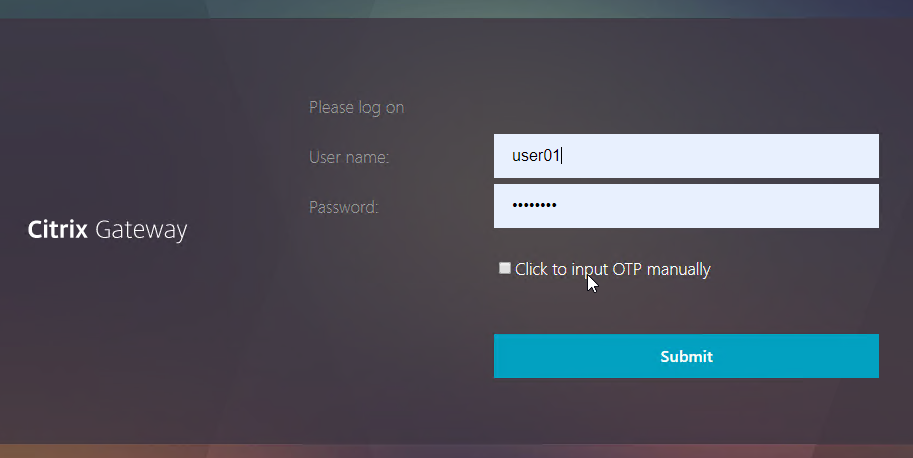
- If you access your Gateway URL normally, you’ll be prompted for either one password or two passwords. If one password, then enter your normal LDAP credentials and Citrix Gateway will send a push notification to your phone. If two passwords, then enter the OTP passcode in the second field.
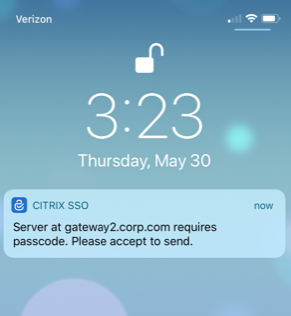
- The push notification is shown on the phone’s lock screen. Tap it to open the Citrix SSO app.
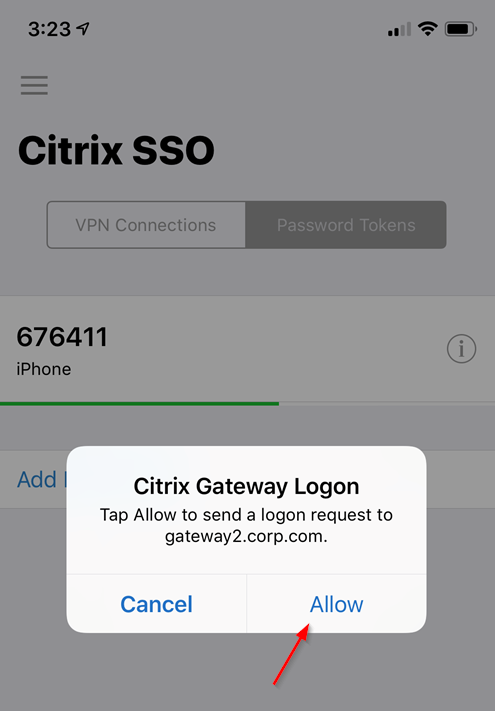
- Tap Allow to allow the authentication request.
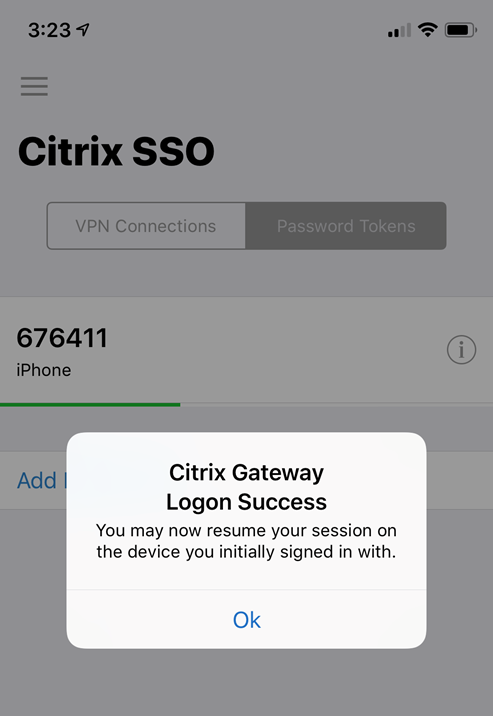
- Tap OK when prompted with Logon Success.
- After Gateway authentication, Gateway should Single Sign-on into StoreFront with no additional password prompts.
CLI Commands
Here’s a complete OTP nFactor Flow (Visualizer) CLI configuration (except encrypted passwords):
# AAA Global Settings
# -------------------
enable ns feature AAA
set aaa otpparameter -maxOTPDevices 1


# Push Service
# ------------

add authentication pushService cloudPush -namespace "https://mfa.cloud.com/" -clientID b6effb5e-b2d3125 -clientSecret 152c84647b -encrypted -encryptmethod ENCMTHD_3 -CustomerID MyCompan -trustService "https://trust.citrixworkspacesapi.net/"

# LDAP Actions
# ------------
add authentication ldapAction LDAP-Corp -serverIP 10.2.2.11 -serverPort 636 -ldapBase "dc=corp,dc=local" -ldapBindDn ctxsvc@corp.local -ldapBindDnPassword a368c -encrypted -encryptmethod ENCMTHD_3 -ldapLoginName sAMAccountName -groupAttrName memberOf -subAttributeName cn -secType SSL -passwdChange ENABLED -nestedGroupExtraction ON -groupNameIdentifier sAMAccountName -groupSearchAttribute memberOf -groupSearchSubAttribute CN

add authentication ldapAction OTPRegisterDevice -serverIP 10.2.2.11 -serverPort 636 -ldapBase "dc=corp,dc=local" -ldapBindDn admin@corp.local -ldapBindDnPassword 1f952a81 -encrypted -encryptmethod ENCMTHD_3 -ldapLoginName sAMAccountName -groupAttrName memberOf -subAttributeName cn -secType SSL -authentication DISABLED -pushService cloudPush -OTPSecret userParameters

add authentication ldapAction LDAPOTPAuthentication -serverIP 10.2.2.11 -serverPort 636 -ldapBase "dc=corp,dc=local" -ldapBindDn admin@corp.local -ldapBindDnPassword 4319b4d7 -encrypted -encryptmethod ENCMTHD_3 -ldapLoginName sAMAccountName -searchFilter "userParameters>=#@" -groupAttrName memberOf -subAttributeName cn -secType SSL -authentication DISABLED -pushService cloudPush -OTPSecret userParameters


# Advanced Authentication Policies
# --------------------------------
add authentication Policy _OTP-AAA_OTPManageOrAuthenticate__root_0 -rule true -action NO_AUTHN

add authentication Policy SelectManageDevices -rule "http.req.cookie.value(\"NSC_TASS\").contains(\"manageotp\") && client.IP.SRC.IN_SUBNET(10.2.0.0/16)" -action NO_AUTHN

add authentication Policy SelectOTPAuthentication -rule true -action NO_AUTHN

add authentication Policy LDAPAdv -rule true -action LDAP-Corp

add authentication Policy OTPRegisterDevice -rule true -action OTPRegisterDevice

add authentication Policy LDAPOTPAuthentication -rule true -action LDAPOTPAuthentication


# Login Schemas
# -------------
add authentication loginSchema SinglePasswordForManageOTP -authenticationSchema "/nsconfig/loginschema/LoginSchema/SingleAuthManageOTP.xml"

add authentication loginSchema OTPPushOrPasscode -authenticationSchema "/nsconfig/loginschema/LoginSchema/DualAuthPushOrOTP.xml" -passwordCredentialIndex 1


# Authentication Policy Labels
# ----------------------------
add authentication policylabel OTPManageOrAuthenticate__root -loginSchema LSCHEMA_INT
bind authentication policylabel OTPManageOrAuthenticate__root -policyName SelectManageDevices -priority 100 -gotoPriorityExpression NEXT -nextFactor AuthenticateToManageDevices__OTPManageOrAuthenticate
bind authentication policylabel OTPManageOrAuthenticate__root -policyName SelectOTPAuthentication -priority 110 -gotoPriorityExpression NEXT -nextFactor OTPAuthentication__OTPManageOrAuthenticate

add authentication policylabel AuthenticateToManageDevices__OTPManageOrAuthenticate -loginSchema SinglePasswordForManageOTP
bind authentication policylabel AuthenticateToManageDevices__OTPManageOrAuthenticate -policyName LDAPAdv -priority 100 -gotoPriorityExpression NEXT -nextFactor OTPDeviceRegistration__OTPManageOrAuthenticate

add authentication policylabel OTPAuthentication__OTPManageOrAuthenticate -loginSchema OTPPushOrPasscode
bind authentication policylabel OTPAuthentication__OTPManageOrAuthenticate -policyName LDAPAdv -priority 100 -gotoPriorityExpression NEXT -nextFactor OTPPushOrPasscode__OTPManageOrAuthenticate

add authentication policylabel OTPDeviceRegistration__OTPManageOrAuthenticate -loginSchema LSCHEMA_INT
bind authentication policylabel OTPDeviceRegistration__OTPManageOrAuthenticate -policyName OTPRegisterDevice -priority 100 -gotoPriorityExpression NEXT

add authentication policylabel OTPPushOrPasscode__OTPManageOrAuthenticate -loginSchema LSCHEMA_INT
bind authentication policylabel OTPPushOrPasscode__OTPManageOrAuthenticate -policyName LDAPOTPAuthentication -priority 100 -gotoPriorityExpression NEXT


# Authentication Virtual Servers
# ------------------------------
add authentication vserver OTP-AAA SSL 0.0.0.0
bind authentication vserver OTP-AAA -policy _OTP-AAA_OTPManageOrAuthenticate__root_0 -priority 100 -nextFactor OTPManageOrAuthenticate__root -gotoPriorityExpression NEXT


# Authentication Profiles
# -----------------------
add authentication authnProfile OTP-AAA -authnVsName OTP-AAA


# NetScaler Gateway Session Profiles
# ----------------------------------
add vpn sessionAction AC_OS_10.2.4.120 -transparentInterception OFF -defaultAuthorizationAction ALLOW -SSO ON -icaProxy ON -wihome "https://xdc01.corp.local/Citrix/StoreWeb" -ClientChoices OFF -ntDomain corp.local -clientlessVpnMode OFF -storefronturl "https://xdc01.corp.local"

add vpn sessionAction AC_WB_10.2.4.120 -transparentInterception OFF -defaultAuthorizationAction ALLOW -SSO ON -icaProxy ON -wihome "https://xdc01.corp.local/Citrix/StoreWeb" -ClientChoices OFF -ntDomain corp.local -clientlessVpnMode OFF


# NetScaler Gateway Session Policies
# ----------------------------------
add vpn sessionPolicy PL_OS_10.2.4.120 "REQ.HTTP.HEADER User-Agent CONTAINS CitrixReceiver" AC_OS_10.2.4.120

add vpn sessionPolicy PL_WB_10.2.4.120 "REQ.HTTP.HEADER User-Agent NOTCONTAINS CitrixReceiver && REQ.HTTP.HEADER Referer EXISTS" AC_WB_10.2.4.120


# NetScaler Gateway Global Settings
# ---------------------------------
enable ns feature SSLVPN


# NetScaler Gateway Virtual Servers
# ---------------------------------
add vpn vserver gateway2 SSL 10.2.4.220 443 -Listenpolicy NONE -tcpProfileName nstcp_default_XA_XD_profile -deploymentType ICA_STOREFRONT -authnProfile OTP-AAA -vserverFqdn gateway3.corp.com
bind vpn vserver gateway2 -portaltheme RfWebUI
bind vpn vserver gateway2 -policy LDAP-Corp -priority 100
bind vpn vserver gateway2 -policy PL_OS_10.2.4.120 -priority 100
bind vpn vserver gateway2 -policy PL_WB_10.2.4.120 -priority 100


# SSL Virtual Servers
# -------------------
bind ssl vserver gateway2 -certkeyName WildcardCorpCom.cer_CERT_KEY
bind ssl vserver gateway2 -eccCurveName P_256
bind ssl vserver gateway2 -eccCurveName P_384
bind ssl vserver gateway2 -eccCurveName P_224
bind ssl vserver gateway2 -eccCurveName P_521

bind ssl vserver OTP-AAA -certkeyName WildcardCorpCom.cer_CERT_KEY
bind ssl vserver OTP-AAA -eccCurveName P_256
bind ssl vserver OTP-AAA -eccCurveName P_384
bind ssl vserver OTP-AAA -eccCurveName P_224
bind ssl vserver OTP-AAA -eccCurveName P_521
Hi Carl and thank you so much for this guide. It worked very well, except one issue. In your CLI commands you suggest ” && HTTP.REQ.HEADER(\”Referer\”).EXISTS” which you don’t do in your more recent guides (https://www.carlstalhood.com/citrix-gateway-ica-proxy/#sessionprofiles)
With this enabled, I was unable to login: Cannot complete your request.
After I modified the command, everything started working.
add vpn sessionPolicy “sessionPolicy-OTP-Web” “HTTP.REQ.HEADER(\”User-Agent\”).CONTAINS(\”CitrixReceiver\”).NOT” “sessionAction-OTP-Web”
Maybe you change that example?
Hello Carl,
thank you for the detailed documentation. It works very good for us on the browser Login. We just have an issue with the login in the workspace app (2409 or 2402 LTSR).
When we connect to the workspace app, we get redirected to the login page for 2FA and can log in there. But then it loads for 2 seconds and we have to enter the Username an password again before we get logged in and can start the Applications.
Also when we then restart the Workspace App and try to start an Application, we have to enter only the username and password and not the OTP Token again.
Did you experience this before an maby have an idea regarding this?
I did set up the Traffic Profile with the SSO Password Expression “AAA.USER.ATTRIBUTE(1)”
Thank you very much in Advance!
Luis Roters
In the CLI commands section is the following correct ? and for what purpose
bind vpn vserver gateway2 -policy LDAP-Corp -priority 100
That’s the older classic authentication policy. nFactor is recommended instead.
I have configured everything that way you have documented 14.1 34.42. When the user gets to the initial gateway login screen, they get the proper prompts but when inputting the username and password I get the following error: “Try again after some time or contact your help desk.” Like the username and password are incorrect.
When going to the manageotp page I can log in and manage a device but the username in the upper right corner says anonymous. I have added a device but when going back to manage it, it goes back to anonymous and no devices.
I am using a password manager plugin so I know that credentials are accurate.
Have you good permission to write otp registration on the AD attribute from user Account in the ldap policie?
Hello Carl,
I am trying to enable native OTP with nFactor for a traffic management virtual server instead of Citrix Gateway. Does a similar setup work for an ordinary virtual server as well?
I created an Authentication Profile configured with a non-addressable authentication virtual server that binds to an nFactor flow. When I tried to bind this profile to the virtual server, I couldn’t find the Authentication Profile under Advanced Settings on the right (as it appears for Citrix Gateway). Instead, I saw it under FBA/401 in Authentication. I checked on FBA and selected the Authentication Profile I created and clicked OK, but it prompted for a missing Authentication FQDN. I am confused about what to put for the FQDN if the authentication server is non-addressable. Can you help clarify this and advise if anything I should take note of in my case?
Thanks.
For Traffic Management, the Authentication vServer should have its own FQDN/IP, or see https://support.citrix.com/s/article/CTX201949-one-public-ip-for-aaatm-deployments-on-netscaler?language=en_US
Many thanks, Carl! This information saved me hours of trial and error. Following this KB, I created a content switching VS to redirect authentication traffic to the non-addressable authentication server. Now, only one IP address is required for AAA-TM.
Hello! What is going wrong with my Netscaler 13.1 setup if I cannot store encrypted OTP-Token to userParameters?
It runs fine without OTP-Encryption.
What are the requirements for user encryption key certificates?
thanks!
regards, Stefan
The OTP registration key for each device needs to be stored somewhere in LDAP. Encryption of the values is optional.
Wow, thanks for that quick reply ! ! ! 😀
I was able to encrypt the values at other netscaler setups, so I decided to keep it as standard. Funny though it das not work in my current project.
Will there be any crucial risk without encrypting the tokens`
depends on the Active Directory Security, every user can read out the property of all other users, means they could steal the second factor secret if not blocked by ACLs. If you are not able to modify the security or it is to complex, then encrypting the keys is the way to go or to have it as a double layer security
Hello Mauricio,
Thanks for your post. I’ll check how to implement ACLs for security.
Strange though I cannot find any instructions how to properly create an encryption certificate for OTP device registration and userParameters encryption.
I’ve tried a few different kinds of certificates on this NS-Deployment but without success so far.
Is there anyone who can provide a link to instructions for this case?
Thanks a lot
I think it just needs to be a regular Server Cert with a Private Key.
Are you running this command from CLI?
bind vpn global -userDataEncryptionKey MyCertificate
Well, perhaps it‘s the private Key what‘s missing 😐
Yes, I used CLI
I‘ll try again.
Thanks
Hi Carl,
is possible configure native otp (Push notification + Otp Code)? in my company we need configure push notification but if notificacion not recibe, the users can put otp code. Software in device is Citrix Secure Access.
btw: what characters are allowed for names of devices to be registered?
I experienced that it works fine with only numbers and letters!
Even with encryption
Hi Carl,
I have configure SAML as idp for IBM and RSA , then as soon a reach Store detect receiver get “can not complete request”. How we can achieve this.
Did you follow this? https://www.carlstalhood.com/citrix-federated-authentication-service-saml/#storefrontsamlgateway
Hello,
quick question: Do I need an AD for OTP or can I use the users on the ADC?
AD is required since that’s where the OTP secrets are stored.
Should the netscaler with native OTP be able to lock AD accounts when an invalid password and invalid OTP ist provided? I just noticed this was possible and i think this might be a configuration issue.
I was struggling with the policy filter if there are more than one allowed sourcenetworks.
Finally i went for this, but this is not very fancy especially if 3,4 or 5 networks has to be included: (http.req.cookie.value(“NSC_TASS”).contains(“manageotp”)&&(client.IP.SRC.IN_SUBNET(192.168.0.0/16)))||(http.req.cookie.value(“NSC_TASS”).contains(“manageotp”)&&(client.IP.SRC.IN_SUBNET(172.16.110.0/24)))
I tried first with this, but i get syntax errors:
http.req.cookie.value(“NSC_TASS”).contains(“manageotp”) && client.IP.SRC.IN_SUBNET(192.168.0.0/16 || 172.16.110.0/24)
Is there a better approach than putting the complete term many times in it?
You can configure a ipv4 dataset to include multiple subnets. https://docs.netscaler.com/en-us/citrix-adc/current-release/appexpert/pattern-sets-data-seta/configuring-data-sets.html
Hi Carl,
Yesterday I upgraded netscaler one for our customers with the last upgraded 13.0-92.21 This customer had Push enabled with Citrix SSO following your articles.
After this update, the client stopped working with push. We reviewed the configuration and we did not see the Push Service menu there. It seems that with the Advanced version this option is not visible.
any suggestion
Hello,
today we upgrade our netscaler to 13.0.-92-21. In my appliance we have PushService active.
Later upgrade, the option “pushservice” is not visible and my customers haven’t access with MFA.
This option no appear in appliance. My licency is Enterprise and we check the option “Citrix ADC Push” but in option “Security-AAA-Application Traffic-Policies-Autentitcation-Advanced Policies-Action” this option “Push Service” don’t appear.
someone else with the same problem?
can you help me?
Hello Carl
Thank you very much for this great article and your tireless efforts around Citrix. I am very grateful for your site, it has helped me many times when I had a problem.
Now I have a question about the “Authentication LDAP Server”. For one of them you have to set the search filter “userParameters>=#@”. When I look at the AD userParameters attribute field, the entry starts with “{“otpdata”:{“devices”:……” if you have set the option “OTP Secret encryption”. Does the search filter still work? Many thanks for your support.
Greetings
Oliver
Hey Carl,
awesome written document.
I’ve got a short question, after do the configuration in our environment all works fine for iOS devices. Android devices can’t register, after scanning the QR code the registration’s timeed out on any Android device.
Have you got any idea what happens here?
kind regards
Michael
Hey Carl,
thanks for that awesome documentation.
I’ve got one problem with android phones (Samsung) that they can’t register.
Apple devices works fine.
Have you a hint where I can finde out what that problem is?
greetings from Germany
Michael
Hi Carl,
We have an issue with the Push Service. If I add the Push Service on the LDAP Action that register the OTP on Active Directory attribute, the device is not register.
The AD Attribute stay empty.
If I remove the Push Service from the LDAP Action, I can register device without issue.
Any idea ?
It seems that the push ack by NetScaler doesn’t work if http/2 is enabled. Without http/2 or manually entering the otp works fine. anybody knows something about it?
Following is the output of the Citrix SSO App.
[May 9, 2023 at 1:12:13 PM GMT+2] : Able to connect successfully. Proceeding with HTTP request [HTTP REQUEST
POST /nf/auth/doPush.do HTTP/1.1
Host: my-prestage.myhiddendomain.com
User-Agent: CitrixReceiver/NSGiOSplugin-23.04.1 (714) iPhone-iOS 16.4.1 VpnCapable AuthV3Capable NAC/1.0
Content-Length: 45
otp=f643fe703d9e59b2&context=f643fe703d9e59b2
END HTTP]
[May 9, 2023 at 1:12:13 PM GMT+2] : Inside completion handler of makeNewHTTPRequest. Status – 403, Response – [HTTP RESPONSE
HTTP/1.1 403 Forbidden
Pragma: no-cache
Content-Type: text/html
Connection: close
Content-Length: 29
Cache-Control: no-cache,no-store
Error: Not a privileged User.
END HTTP]
Getting error at if user sellect “Click to input OTP manualy”
The OTP are sucsessful but at the Storefront we are getting Cannot request your request.
(works if push are beeing used)
At the storefront we are getting following event logs:
Event id 7 Citrix Authentication Service
CitrixAGBasic single sign-on failed because the credentials failed verification with reason: Failed.
The credentials supplied were;
user: geir@xxxx.no
domain:
And:
Event id 10 Citrix Receiver for web
A CitrixAGBasic Login request has failed.
Citrix.DeliveryServicesClients.Authentication.AG.AGAuthenticatorException, Citrix.DeliveryServicesClients.Authentication, Version=3.23.0.0, Culture=neutral, PublicKeyToken=null
Authenticate encountered an exception.
at Citrix.DeliveryServicesClients.Authentication.AG.AGAuthenticator.Authenticate(HttpRequestBase clientRequest, Boolean& passwordSupplied)
at Citrix.Web.AuthControllers.Controllers.GatewayAuthController.Login()
System.Net.WebException, System, Version=4.0.0.0, Culture=neutral, PublicKeyToken=b77a5c561934e089
The remote server returned an error: (403) Forbidden.
Url: https://127.0.0.1/Citrix/Authentication/CitrixAGBasic/Authenticate
ExceptionStatus: ProtocolError
ResponseStatus: Forbidden
at System.Net.HttpWebRequest.GetResponse()
at Citrix.DeliveryServicesClients.Utilities.HttpHelpers.ReceiveResponse(HttpWebRequest req)
at Citrix.DeliveryServicesClients.Authentication.TokenIssuingClient.RequestToken(String url, RequestToken requestToken, String primaryToken, String languages, CookieContainer cookieContainer, IEnumerable`1 acceptedResponseTypes, IDictionary`2 additionalHeaders)
at Citrix.DeliveryServicesClients.Authentication.AG.AGAuthenticator.Authenticate(HttpRequestBase clientRequest, Boolean& passwordSupplied)
Is nFactor configured to send the correct password to StoreFront? The Login Schema should have SSO Credentials checked. Or put the AD password in a AAA attribute and the configure a Traffic Policy to send the AAA Attribute to StoreFront as the user’s password.
Thanks, the Login Schema did not have SSO Credentials checked.
https://www.youtube.com/watch?v=IL_ocv6w8nM
Native OTP YouTube link provided is not working, showing the video is private
Thanks for pointing that out. I just removed the link.