Navigation
This article applies to all versions of Horizon Client for Windows.
- Change Log
- Horizon Client Versions
- Windows 10 / Windows 11 Support
- Install – Horizon Client Manual
- Launch Horizon Client
- Certificate Validation
- Client Device Redirection
- Session Collaboration
- Performance Tracker
- HTML Blast
- Thin Clients
- Repurposed PCs
- Horizon Client GPO – Security Settings
💡 = Recently Updated
Change Log
- 2025 April 18 – Install Horizon Client – updated for Horizon Client 2503
- 2024 Aug 6 – Folders in Horizon Client 2406
- 2023 Oct 28 – Keylogger Blocking
- 2023 July 8 – Certificate Validation – Horizon 2306 (8.10) and newer with Horizon Client 2306 (8.10) and newer can enforce certificate checking on the client.
- 2023 Apr 1 – Install Horizon Client – updated for Horizon Client 2303 – see Horizon Group Policy for new features
Horizon Client Versions
Starting August 2020, the client versioning changed to a YYMM format. Horizon Client 2503 is the latest release.
- Horizon 8.x no longer supports Horizon Client 5.x and older.
- Features, like ThinPrint, were removed from Horizon Client 2006 and newer, so don’t use the 2xxx (8.x) clients with Horizon 7.13 and older.
- Microsoft Teams optimization features depend on Horizon Client version and Horizon Agent version. See Omnissa Knowledgebase Article 86475 MS Teams Optimization Feature Compatibility Matrix for Horizon 7 and Horizon 8 Recent Releases.
- Windows 21H2 and Windows 11 are supported with Horizon Client 2111 and newer.
- Horizon Client 2006 and newer no longer support Windows 7, Windows 8.1, or Windows 10 1809.
Connection Server can be configured to prevent older clients from connecting. Find it in the Global Settings node in Horizon Console.
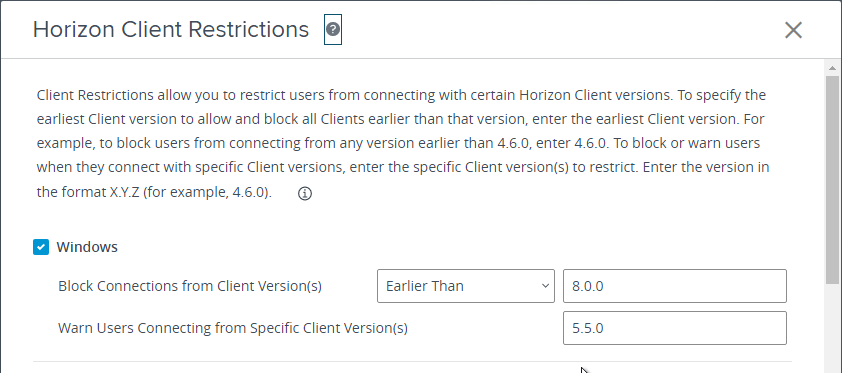
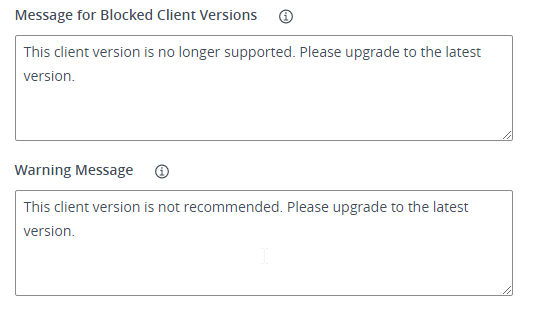
Windows 10 / Windows 11 Support
- Windows 11 24H2 is supported with Horizon Client 2412 (8.14) and newer.
- Windows 10 22H2 and Windows 11 22H2 are supported with Horizon Client 2209 (8.7) and newer.
- Windows 10 21H2 and Windows 11 are supported with Horizon Client 2111 (8.4) and newer.
- Windows 10 21H1 is supported with Horizon Client 2103 (8.2) and newer.
- Windows 10 20H2 is supported with Horizon Client 2012 (8.1) and newer.
- Windows 10 2004 is supported with Horizon Client 2006 (8.0) and newer
- Windows 10 1909 is supported with Horizon Client 5.3 and newer
- Windows 10 1803 is supported with Horizon Client 4.8 and newer
Manual Installation of Horizon Client
The Horizon Clients can be downloaded from https://customerconnect.omnissa.com/downloads/info/slug/desktop_end_user_computing/vmware_horizon_clients/horizon_8.
- Logon to the client machine as an administrator. Administrative rights are required for the Horizon Client installation. You can also push the client silently as described in the next section.
- Open a browser and enter the name of your Horizon Connection Server in the address bar (e.g. https://view.corp.local). Use https://.
- Click the Install VMware Horizon Client link. If the Horizon Clients are installed on the Connection Server, the client will download immediately. Or you’ll be taken to omnissa.com to download the client.
- If you are redirected to the Clients download page (https://customerconnect.omnissa.com/downloads/info/slug/desktop_end_user_computing/vmware_horizon_clients/horizon_8), then find the VMware Horizon Client for Windows, and click Go to Downloads.
- Then click Download Now.
- On the client machine, run the downloaded VMware-Horizon-Client-2503-8.15.exe.
- If you want to use the URL Content Redirection feature in Horizon 7 and newer, run the installer with the following switch:
/v URL_FILTERING_ENABLED=1. - If you want the UNC Path Redirection feature in 2209 (8.7) and newer, then you run the Client installer with the following switches:
/v ENABLE_UNC_REDIRECTION=1. You can combine the two switches.
- If you want to use the URL Content Redirection feature in Horizon 7 and newer, run the installer with the following switch:
- Click Agree & Install. Or you can click Customize Installation. Horizon Client 2203 and newer has an option to Enable Keylogger Blocking, but only in Custom installation. Or Horizon Client 2309 and later let you enable Keylogger Blocking in the Settings interface.
- If you selected Customize Installation, you can enter a Default connection server, install USB Redirection, etc.
- Horizon Client 2203 and newer has an option to Enable Keylogger Blocking.
- Click Agree & Install when done.
- In the Success page, click Finish.
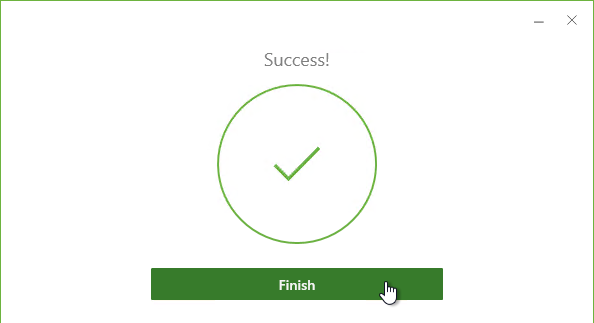
- Click Restart Now when prompted to restart.
- Note: Horizon Client 2412 and newer have Omnissa branding.
Verify URL Redirection
- In 2412 and newer, verify the presence of the file C:\Program Files\Omnissa\Omnissa Horizon Client\omnissa-url-protocol-launch-helper.exe.
- In older than 2412, to verify that URL Content Redirection is installed, verify the presence of the file C:\Program Files\VMware\VMware Horizon View Client\vmware-url-protocol-launch-helper.exe.
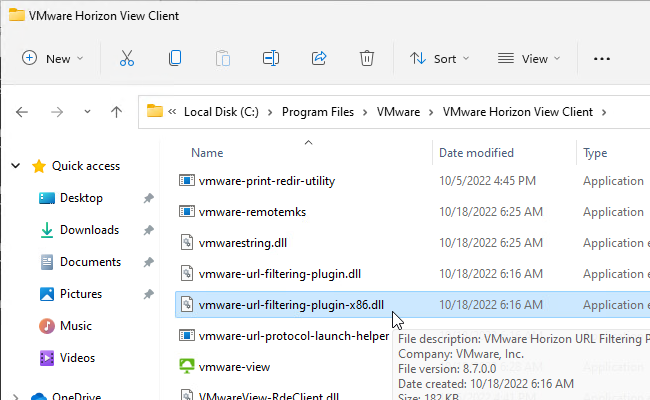
- In older than 2412, to verify that URL Content Redirection is installed, verify the presence of the file C:\Program Files\VMware\VMware Horizon View Client\vmware-url-protocol-launch-helper.exe.
- There’s also an IE add-on.
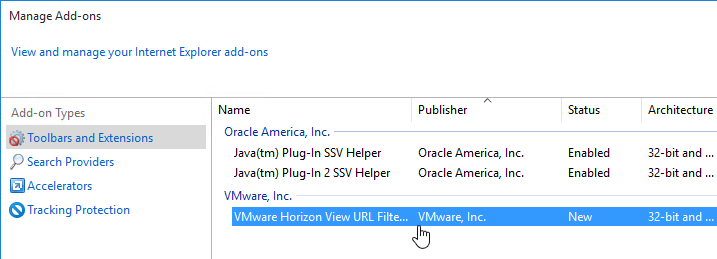
- URL Content Redirection is configured using group policy.
Software Updates
- In the Horizon Client, click the hamburger icon on the top right, and click Software Updates. It will be green if there is an update available. Note: Horizon Client 5.5 will not offer an upgrade to Horizon Client 2006 or newer.
- There is an option to Show pop-up message when there is an update.
- The Horizon GPO Templates for Horizon Client have GPO settings to control the pop-up message. The settings are Update message pop-up and Allow user to skip Horizon Client update.
Install – Horizon Client Silent
Installing Horizon Client From the Command Line at Omnissa Docs has instructions on how to install the Horizon Client silently. Common methods for installing the client silently include: SCCM and Active Directory Group Policy Computer Startup Script.
Keylogger Blocking
Horizon Client 2309 and newer let you enable Keylogger Blocking if you did not select it during installation.
- In Horizon Client, before you open a server, click the Settings button.
- On the Security page, set Keylogger Blocking to On. Then restart the Horizon Client.
Launch Horizon Client
To launch a View Desktop or application manually:
- From the Start Menu run VMware Horizon Client.
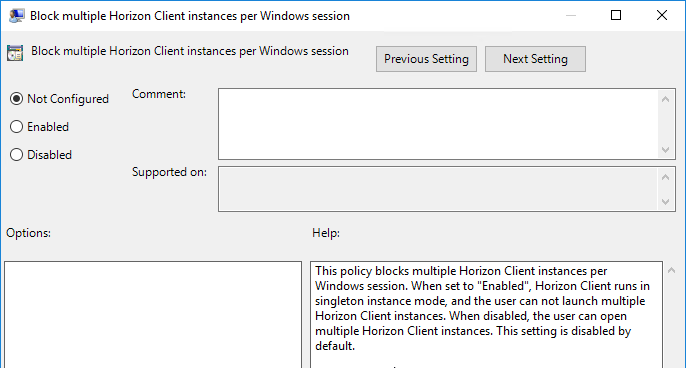
- Horizon Client 4.7 and newer has a GPO setting to prevent the Client from being launched multiple times.
- Install the Horizon GPO templates if you haven’t already.
- Create or edit a GPO that is linked to an OU containing the Horizon Client machines. These are the end-user PCs, not the virtual desktops.
- The Block multiple Horizon Client instances per Windows session setting is at Computer Configuration | Policies | Administrative Templates | Omnissa Horizon Client Configuration.
- To change SSL certificate verification:
- In Horizon Clients version 2106 and newer, click the Settings button on the top right. Switch to the Security page. Then make a selection. This is also configurable using Group Policy as detailed at Certificate Validation below.
- In Horizon Clients version 2106 and newer, click the Settings button on the top right. Switch to the Security page. Then make a selection. This is also configurable using Group Policy as detailed at Certificate Validation below.
- If there is no server in the list, then use the New Server button on the top left or click Add Server on the top right.
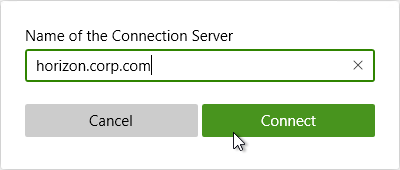
- Enter the load balanced FQDN for the Connection Server and click Connect.
- You can click the Options menu to Hide the selector after launching an item.
- If you want to perform pass-through authentication, click the hamburger icon, and select Log in as current user. This option is only available if selected during installation, the client machine was rebooted and is not prohibited using group policy. Also, the Connection Server must allow Log on as current user.
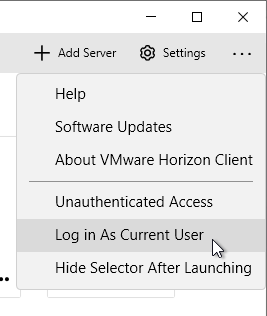
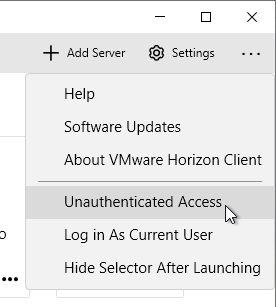
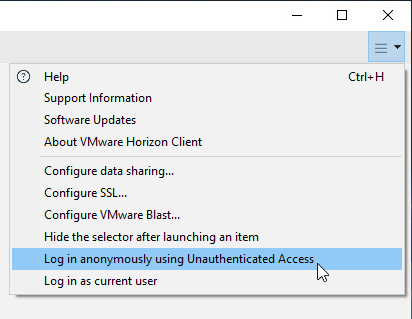
Horizon 7.2 and newer have Recursive Unlock, which is enabled by default. See Using the Log In as Current User Feature Available with Windows-Based Horizon Client at Omnissa Docs. - If you have apps published to an Unauthenticated User, click the hamburger icon, and select Unauthenticated access or Log in anonymously using Unauthenticated Access.
- Before connecting to the server, click Settings and then switch to the Horizon Blast page.
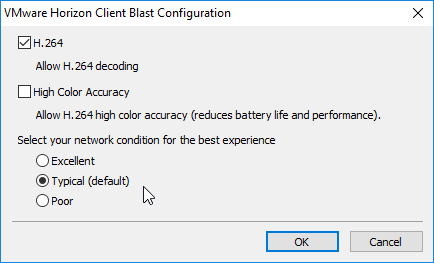
- In Horizon Client 4.8 and newer, network condition is determined automatically and no longer configurable in the client.
- If your Horizon Client is older than 4.8, then adjust the network condition and click OK. This affects TCP vs UDP for Blast connectivity. Excellent = TCP only. Typical = UDP if the ports are open. Poor = UDP plus packet duplication, which is best for 20% packet loss networks. More info in Omnissa Tech Zone VMware Blast Extreme Display Protocol in Horizon.
- If your Horizon Client is older than 4.8, then adjust the network condition and click OK. This affects TCP vs UDP for Blast connectivity. Excellent = TCP only. Typical = UDP if the ports are open. Poor = UDP plus packet duplication, which is best for 20% packet loss networks. More info in Omnissa Tech Zone VMware Blast Extreme Display Protocol in Horizon.
- You can optionally enable Allow High Color Accuracy.
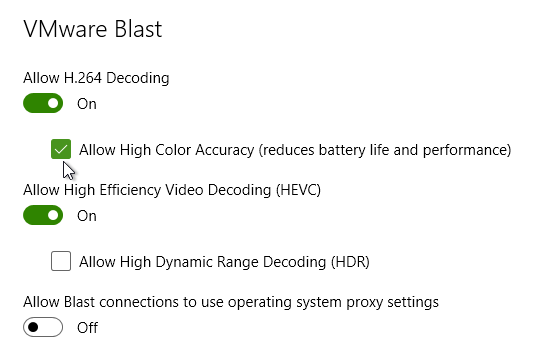
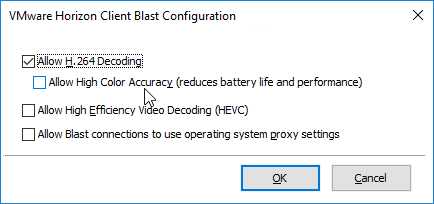
- In Horizon Client 2106 and Horizon Agent 2106 and newer, High Efficiency Video Decoding (HEVC) is enabled by default.
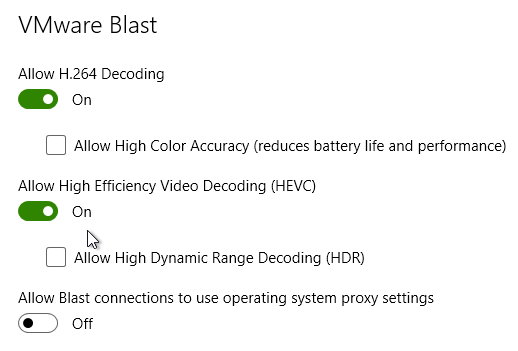
- Horizon Client 5.2 and newer have an option to Allow Blast connections to use operating system proxy settings, which is deselected by default. You can configure a client-side group policy to enable proxy. Or users can manually enable it.
- Double-click the server.
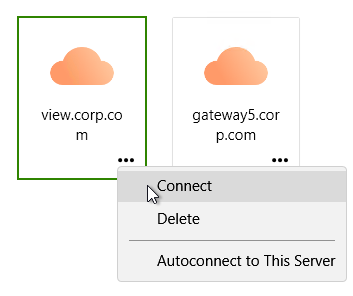
- If the certificate is not trusted, click Show Certificate, and then click Continue. To disable this prompt, see Certificate Validation below.

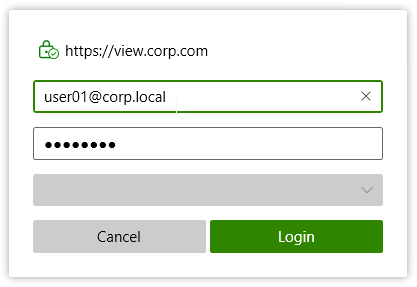
- Enter your username and password, and then click Login.
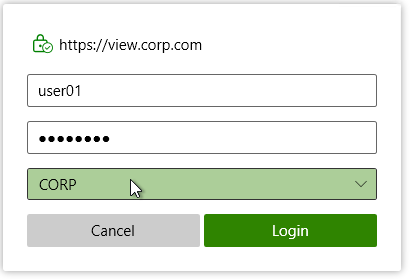
- Horizon 7.8 and newer no longer send the domain list by default but you can enable it in Horizon Console. Or instruct users to login using their userPrincipalNames.
- Horizon 7.8 and newer no longer send the domain list by default but you can enable it in Horizon Console. Or instruct users to login using their userPrincipalNames.
- If you see too many domains in the Domain list:
- You can filter them by running the
vdmadmin -Ncommand. See Configuring Domain Filters Using the ‑N Option at Omnissa Docs. - Horizon 7.1 and newer have an option to Hide domain list in client user interface. If you enable this in Global Settings, then users must enter UPN, or Domain\Username. This is the same place you can configure Horizon to send the Domain List to the client.
- You can filter them by running the
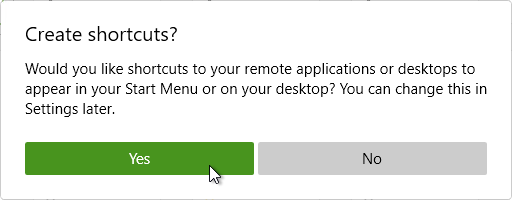
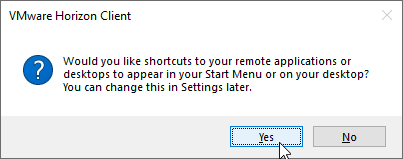
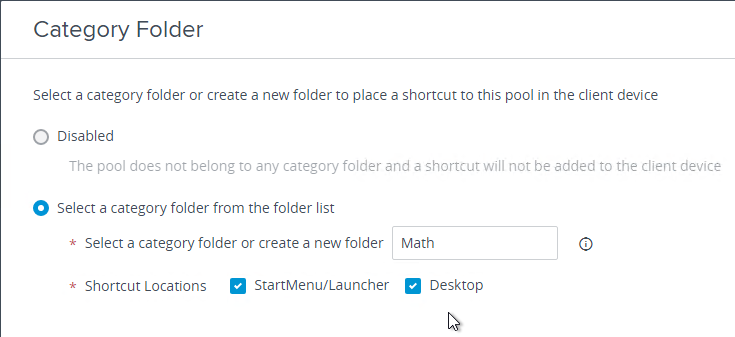
- If any of your published applications or desktops are configured with a Category Folder, click Yes when asked for shortcuts to appear in your Start Menu or desktop.
- Horizon Client 5.1 and newer have an interesting command line switch -installShortcutsThenQuit that connects to a Connection Server, creates the shortcuts on Start Menu and Desktop, and then quits. Here is sample syntax:
vmware-view.exe -serverURL serverurl -loginAsCurrentUser true -installShortcutsThenQuit
- Horizon Client 5.1 and newer have an interesting command line switch -installShortcutsThenQuit that connects to a Connection Server, creates the shortcuts on Start Menu and Desktop, and then quits. Here is sample syntax:
- If any of your published application icons have Pre-launch enabled, then a session will be started on one of the Horizon Agents that hosts the icon. All it does is create a session; the icon that Pre-launch was enabled on is not launched until the user double-clicks the icon. When the user launches any icon published from the Horizon Agent, it will launch quickly.
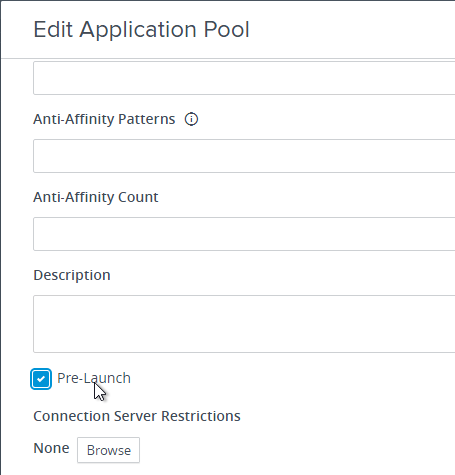
- After the user closes the Horizon Client, the Pre-launch session remains disconnected for the duration specified in the RDS Farm.
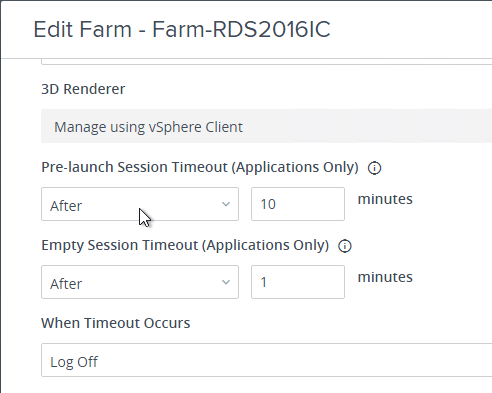
- After the user closes the Horizon Client, the Pre-launch session remains disconnected for the duration specified in the RDS Farm.
- Horizon Client 2406 and newer let users organize icons into folders.

- The Folders feature can be in disabled in Horizon Console 2406 and newer at Settings > Global Settings. It’s enabled by default.
- The Folders feature can be in disabled in Horizon Console 2406 and newer at Settings > Global Settings. It’s enabled by default.
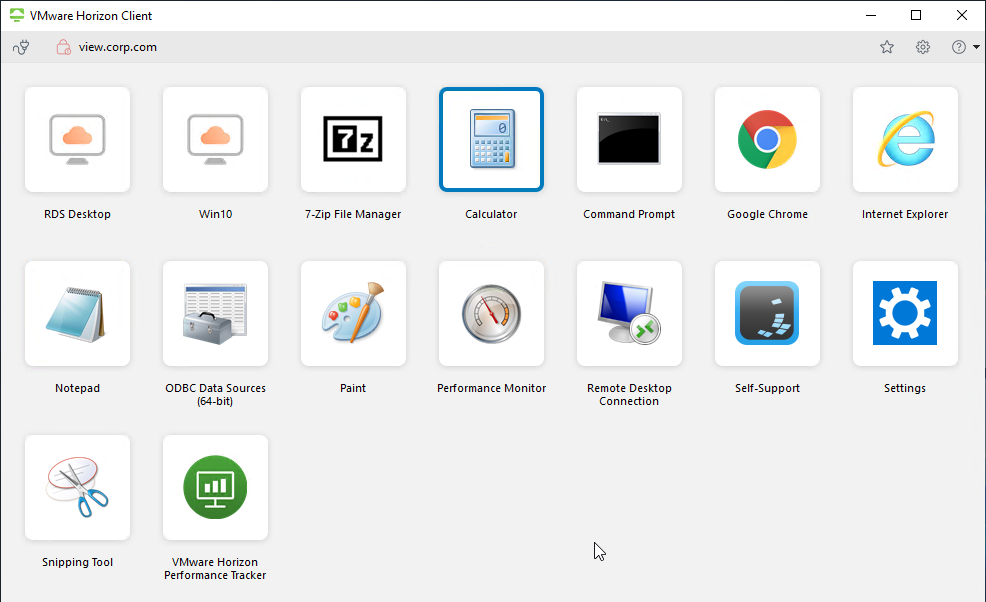
- If you have a bunch of icons, click one of the icons and then start typing in the name of the icon and it will highlight.
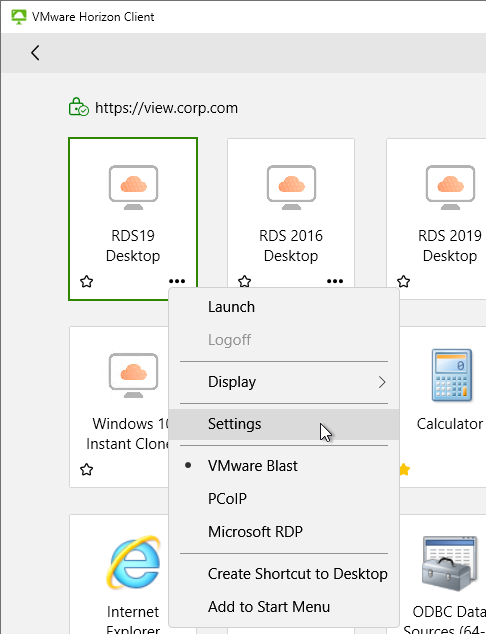
- If the pool settings allow it, you can right-click an icon and then select a protocol. VMware Blast is the recommended protocol.
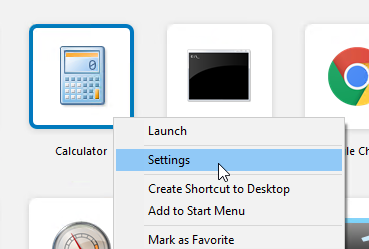
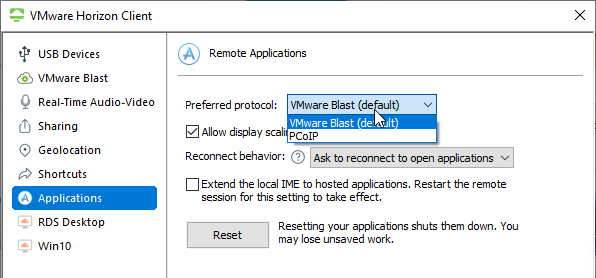
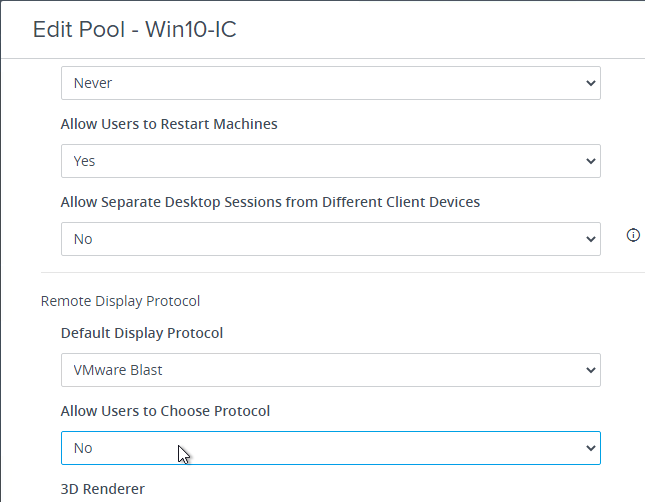
- When editing a pool, you can force users to use a particular protocol by setting Allow Users to Choose Protocol = No.
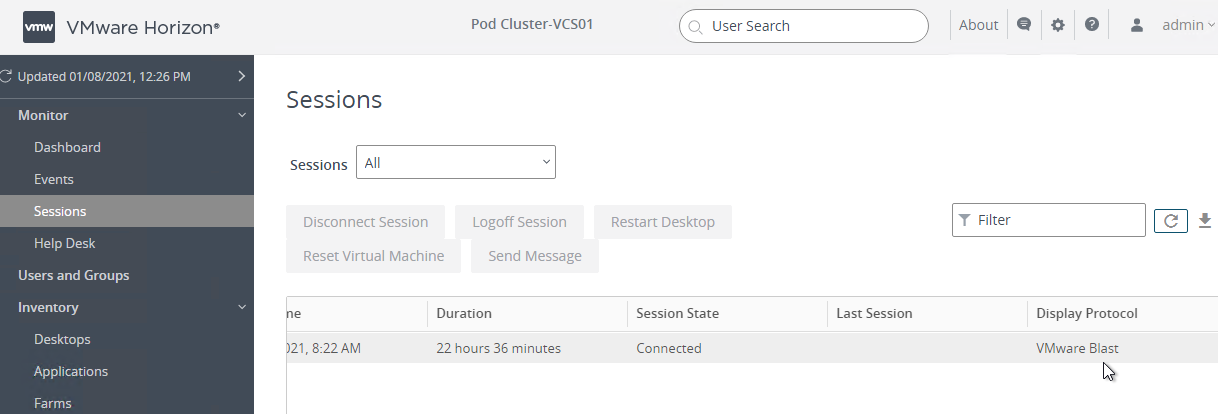
- In Horizon Console, at Monitor > Sessions, if you scroll to the right, you can see which Protocol the clients are using.
- When editing a pool, you can force users to use a particular protocol by setting Allow Users to Choose Protocol = No.
- You can synchronize num lock and cap lock status.
- Right-click a desktop icon and click Settings.
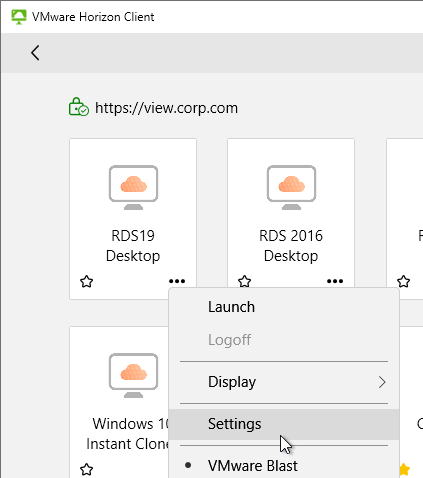
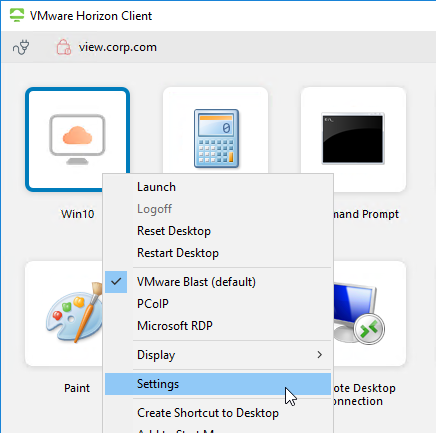
- The left side of the screen shows all published desktops. On the right, enable the option to Automatically synchronize the keypad, scroll, and cap lock keys.
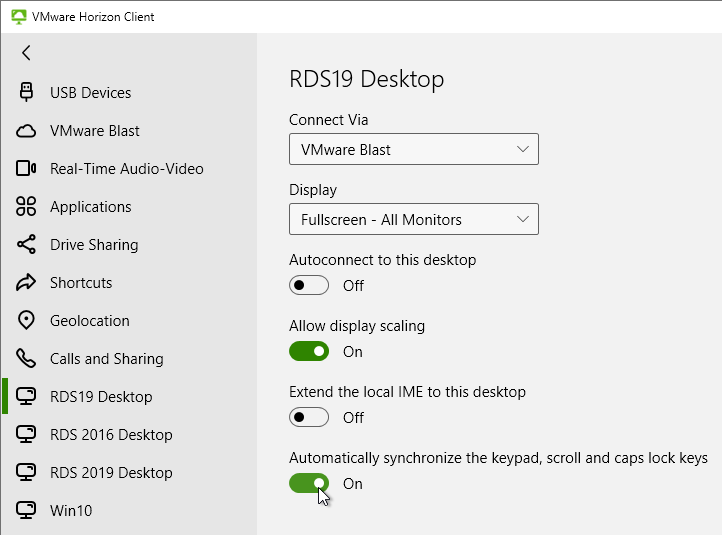
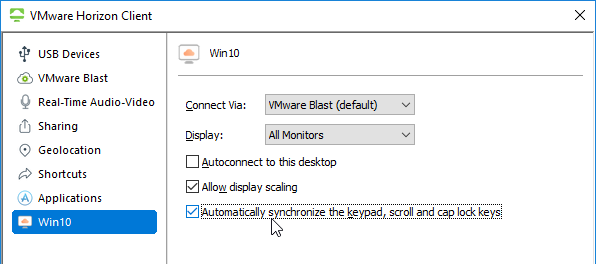
- You can also automatically enable this setting by configuring a client-side group policy setting.
- Right-click a desktop icon and click Settings.
- Either double-click an icon, or right-click an icon, and click Launch.
- When connecting, you might be prompted to access your local files.
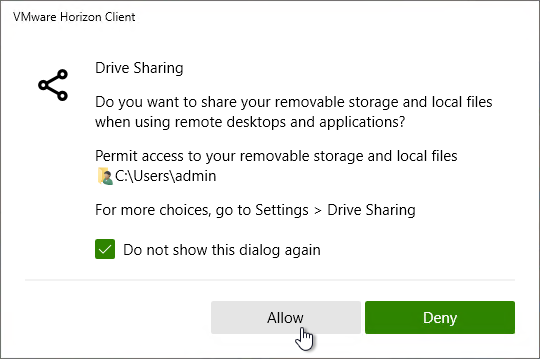
- You can change your file sharing options by clicking the Settings button and switching to the Data and Folder Sharing page.
- You can change your file sharing options by clicking the Settings button and switching to the Data and Folder Sharing page.
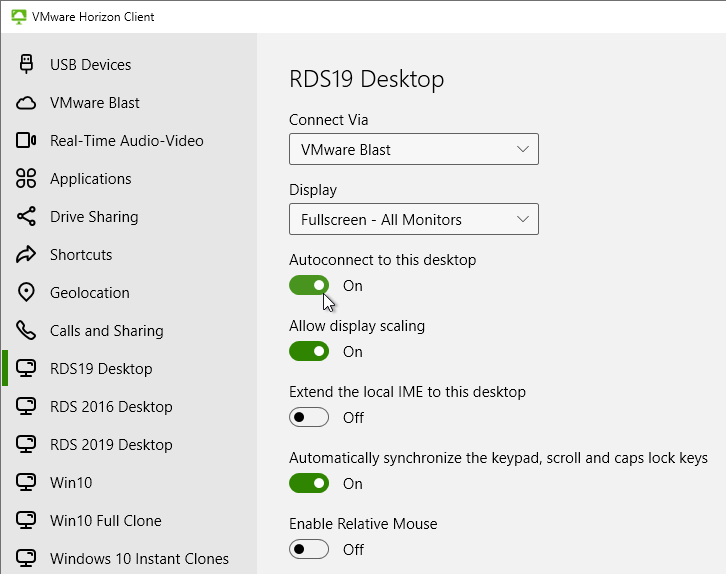
- If you are connected to a remote desktop, you can use the menu at the top of the screen, click the three dots, and then click Settings.. An interesting option is Autoconnect to this Desktop. This setting is stored on the Horizon Connection Server in LDAP and there doesn’t appear to be any way to automate enabling it.

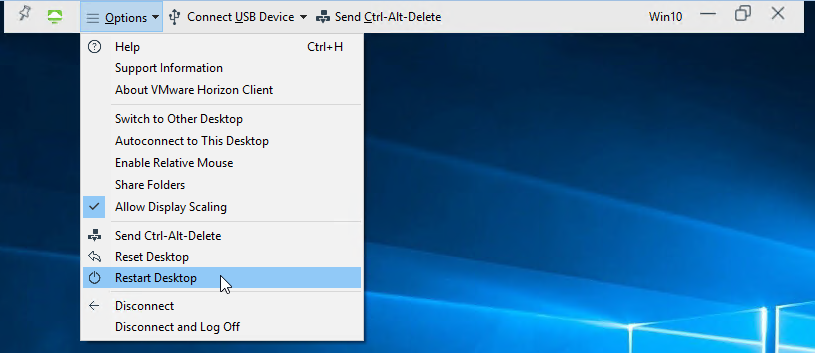
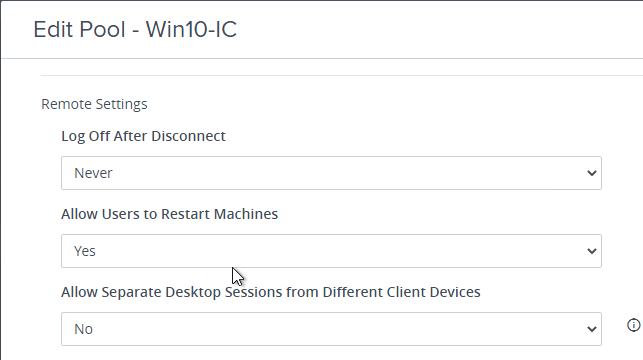
- In Horizon Client 4.4 and newer, administrators can enable a Desktop Pool Setting that allows users to Restart the remote desktop gracefully.
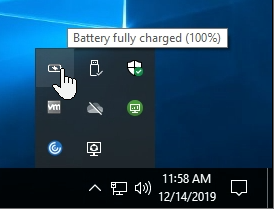
- Horizon can show the client’s battery status in the remote desktop. The user will have to click the up arrow in the system tray to see the battery icon. The battery icon is shown in both single-user Virtual Desktops and multi-user RDS Desktops.
- There are client-side group policy settings to define a hotkey combination for grabbing and releasing input focus.
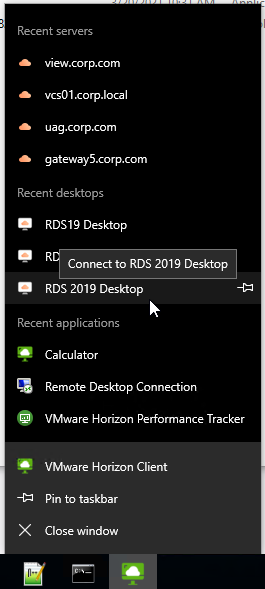
- The Horizon Client also has a taskbar jump list showing recently launched applications and desktops.
- Some of the menu items in Horizon Client can be hidden by configuring Group Policy using the Horizon GPO Templates.
Shortcuts and Favorites
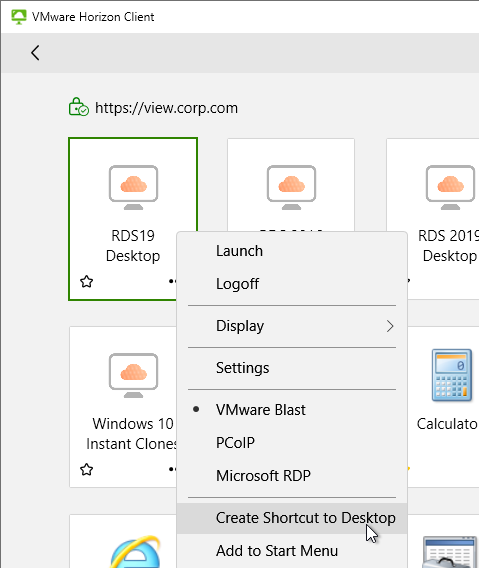
In the Horizon Client, once you are connected to a server, you can right-click an icon and click Create Shortcut to Desktop or Add to Start Menu.
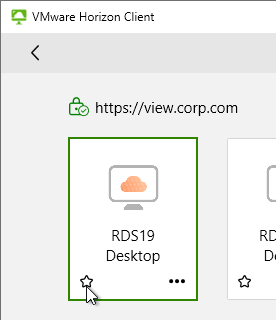
In the Horizon Client, each desktop/app icon has a star icon you can click, or right-click an icon and Mark as Favorite. Favorites are stored in the LDAP database on the Horizon Connection Server.
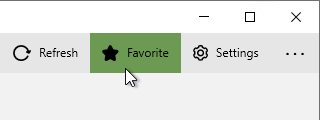
- On the top right of the Horizon Client, you can switch to the Favorite view so that only icons selected as Favorites are displayed.
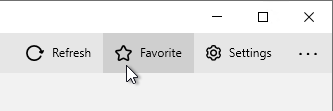
- Or switch back to the All View by deselecting the Favorite button.
Support information
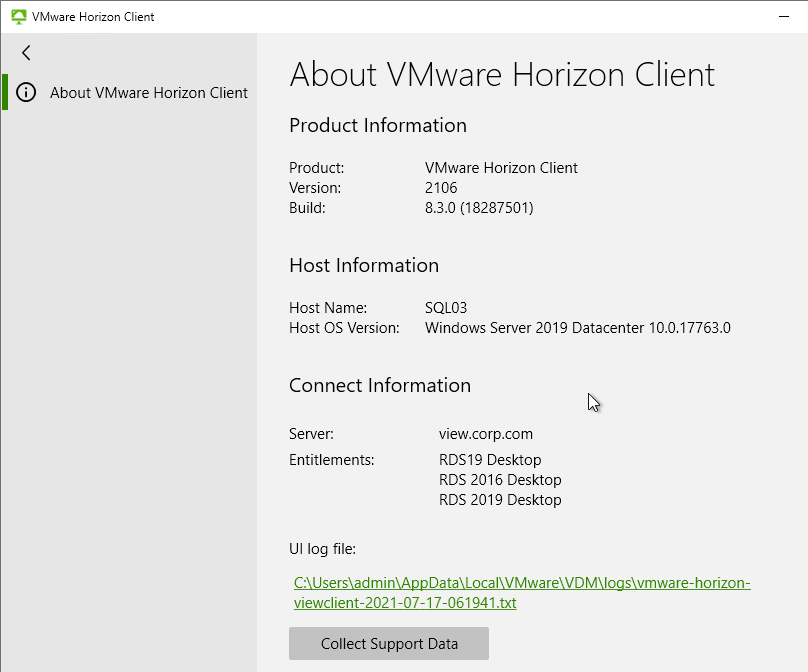
- In Horizon Client 2106 and newer, in the menu is About VMware Horizon Client.
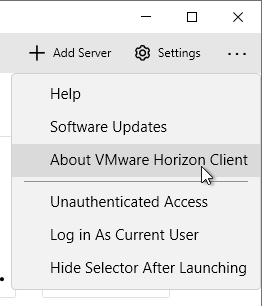
- Users can click this to find the client name, client operating system, Horizon Client version, the Horizon Connection Server name, and entitled desktops.
Certificate Validation
When you connect to a Horizon Connection Server, and if the certificate is not trusted or valid, then the user is prompted to accept the certificate. You can disable this prompt for any client machine that can be controlled using group policy.

- Copy the Horizon .admx files to PolicyDefinitions if you haven’t already.
- Create a GPO that is linked to an OU containing the Horizon Client machines. These are the end-user PCs, not the virtual desktops.
- Edit the GPO.
- Go to Computer Configuration | Policies | Administrative Templates | Omnissa Horizon Client Configuration | Scripting Definitions.
- On the right, double-click Server URL.
- Set the URL to your Horizon View URL and click OK.
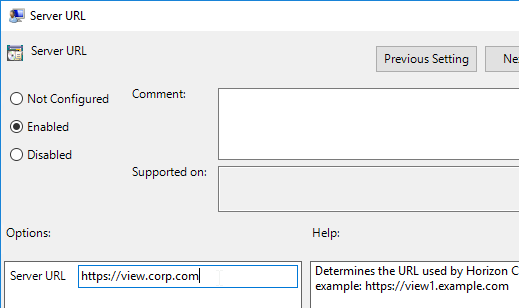
- On the left, click Security Settings. On the right, open the setting Certificate verification mode.
- Enable the setting and make your choice. No Security will disable the certificate prompt. Then click OK.
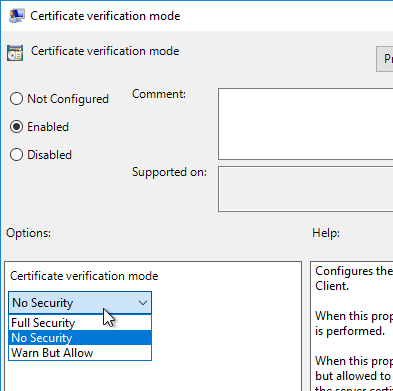
Horizon 2306 (8.10) and newer with Horizon Client 2306 (8.10) and newer can enforce certificate checking on the client.
- Go to Settings > Global Settings > Client Desired Configuration and click Edit.
- Make your choices and click OK.
Device Redirection
Client Drive Redirection
- When you connect to a Horizon Agent that has Client Drive Redirection enabled, you are prompted to allow file redirection.
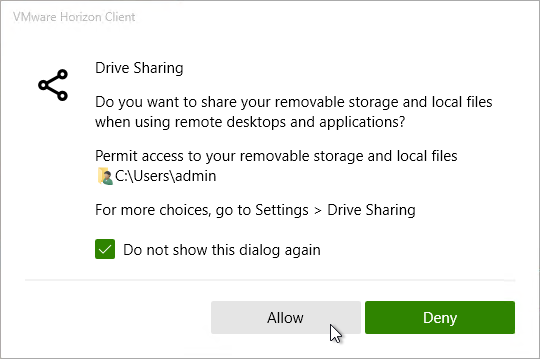
- By default, only the user’s local profile is redirected.
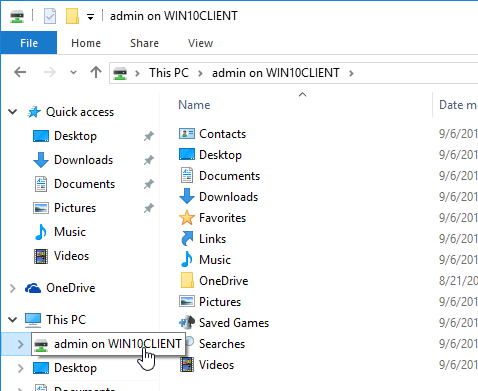
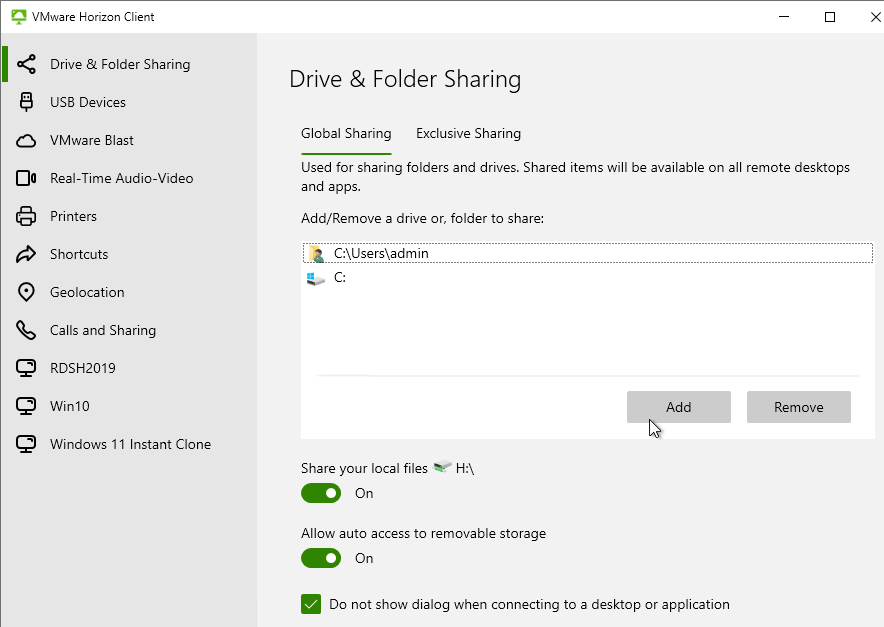
- You can redirect more folders or drives by opening Settings, or click the Options menu, and click Share Folders.

- In the Drive & Folder Sharing tab (or Sharing tab), on the Global Sharing sub-tab, add drives or folders.
- Horizon Client 2206 and newer with Horizon Agent 2206 and newer have an Exclusive Sharing tab that lets you share a client drive exclusively with the remote desktop for faster file transfer performance. The Storage Drive Redirection feature is installed by default on Horizon Agent 2206 and newer.
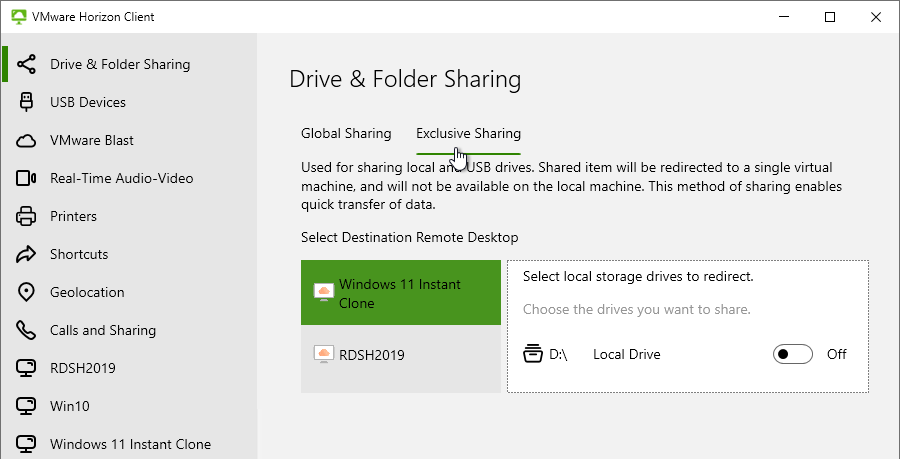
- Horizon Client 2206 and newer with Horizon Agent 2206 and newer have an Exclusive Sharing tab that lets you share a client drive exclusively with the remote desktop for faster file transfer performance. The Storage Drive Redirection feature is installed by default on Horizon Agent 2206 and newer.
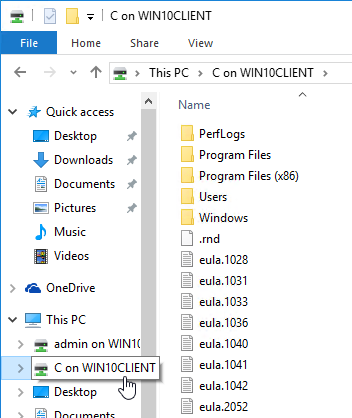
- The folders or drives you added are now visible within Explorer in the Horizon Desktop.
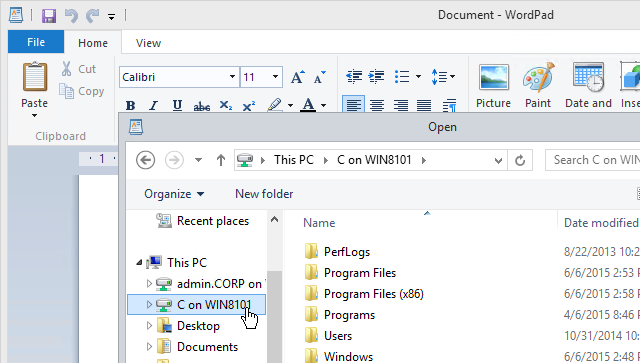
- Client Drive Redirection also works in published applications.
- Horizon Agent 7.7 and newer with Horizon Client 4.10 and newer let you drag files from the local machine into the remote machine. This is drag only. You can’t copy/paste. If you drag the file onto a remote application, then then application opens the file.
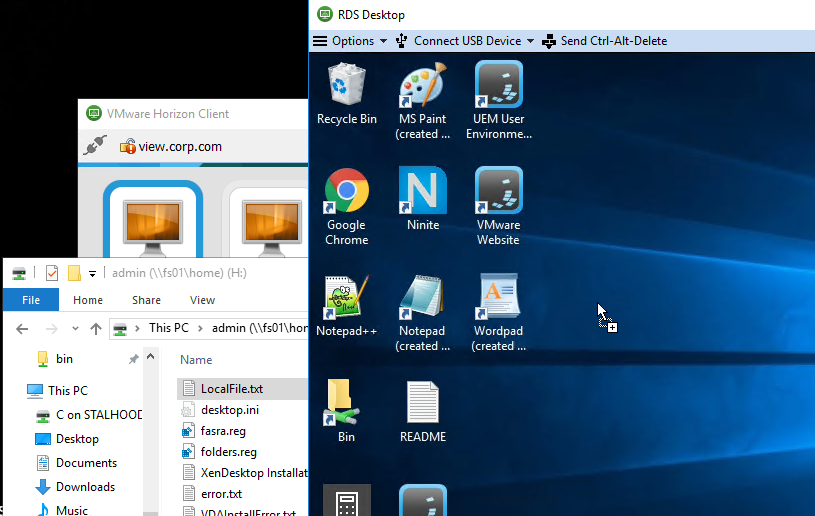
- This feature can be disabled and/or controlled in a GPO that applies to the Horizon Agent. Make sure the Horizon 7.7 or newer GPO templates are installed. In the Computer half of the GPO, go to Administrative Templates > Omnissa Horizon Agent Configuration > Drag and Drop and edit the setting Configure drag and drop direction.
- This feature can be disabled and/or controlled in a GPO that applies to the Horizon Agent. Make sure the Horizon 7.7 or newer GPO templates are installed. In the Computer half of the GPO, go to Administrative Templates > Omnissa Horizon Agent Configuration > Drag and Drop and edit the setting Configure drag and drop direction.
- The client drive redirection prompt configuration is stored in %appdata%\VMware\VMware Horizon View Client\prefs.txt. You can edit this file to disable the prompt.
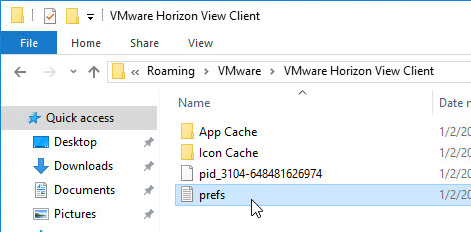
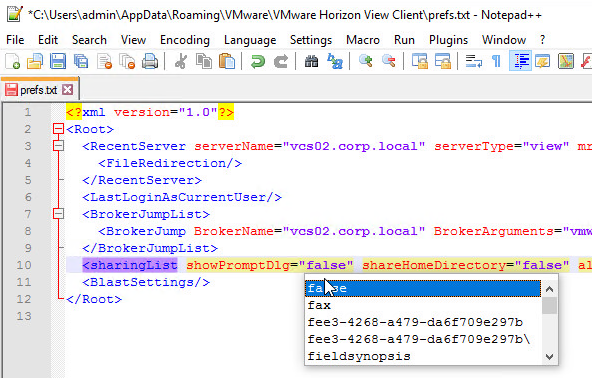
- Horizon has some GPO settings for Client Drive Redirection that let you control drive letters for client drives in the remote session. Install the Horizon GPO Templates if you haven’t already. Edit a GPO that applies to the Horizon Agents. Then find the settings under Omnissa Horizon Agent Configuration > Horizon Client Drive Redirection.
Serial Port Redirection
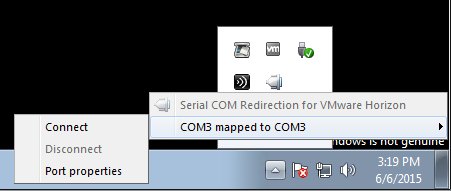
- If you connect to a Horizon Agent that has Serial Port Redirection enabled, then a new icon will appear in the system tray.

- Right-click the icon to map the remote COM port to the local COM port.
Scanner Redirection
From VMware Blogs Scanner Redirection in Horizon with View: we have added scanner redirection to Horizon with View for use with both VDI desktops and Remote Desktop Session Host (RDSH) applications and desktops. The new scanner redirection functionality in View works by capturing the entire image at the client with the scanning device, compressing the image, and sending that compressed image to the guest in the data center, where the image is presented by a “virtual scanner device” to the application that requested the image capture. The scanner redirection functionality supports both TWAIN and WIA scanning modes and allows images to be captured from both scanners and other imaging devices (such as webcams).
The scanner redirection functionality requires the Horizon Agent version 6.0.2 or later, and the Windows Horizon Client 3.2 or later.
When you install the Horizon Agent component, be sure to select the scanner redirection feature if you want to use it; it is disabled by default. If you are installing the feature onto a server-based OS (Windows Server 2008 R2 or Windows Server 2012 R2) for either VDI desktops or RDSH desktops or applications, then be sure that the Desktop Experience feature (a Microsoft operating system feature) is installed on the server OS first. (This is a prerequisite for installing scanners in a server-based OS.)
After a user makes a connection from a compatible Windows Horizon Client to the new Horizon Agent, a new tool-tray application icon appears. The user clicks the icon to reveal the compatible image acquisition devices available for scanning.
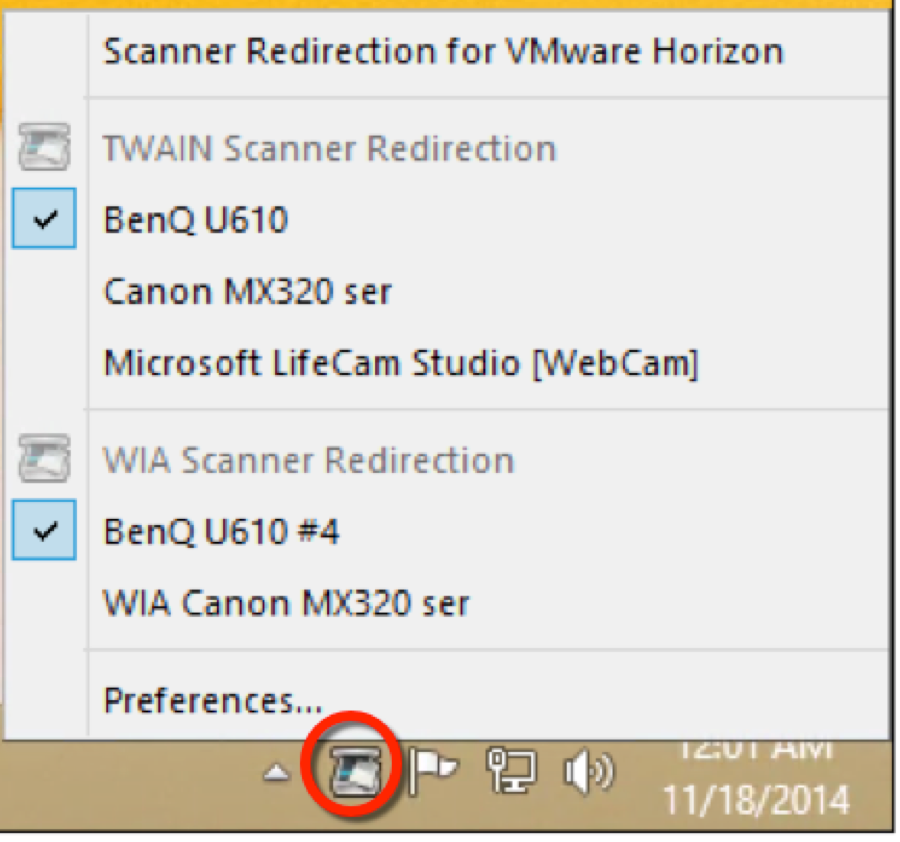
The default mode of operation is, however, that “it should just work,” and the seamless hosted application should be able to acquire an image without needing manual intervention. The user may need to adjust the preferences if more than one imaging device is connected to the client machine, and the user wants to select a specific scanner, or if the user wants to adjust the scan resolution, and so on.
Scanner Redirection Preferences, available by clicking Preferences from the tool-tray icon, allows further configuration of the scanning process, for example, adjusting the default compression applied to the scanning. This can greatly reduce the bandwidth needed to transmit the image (the compression is applied on the client side before the image is transmitted to the guest), but, of course, the more an image is compressed, the lower the image quality. In addition, in the Scanner Redirection Preferences, options are available to adjust the default image capture device (for example, automatic mode, last-used, or an absolute specified device).
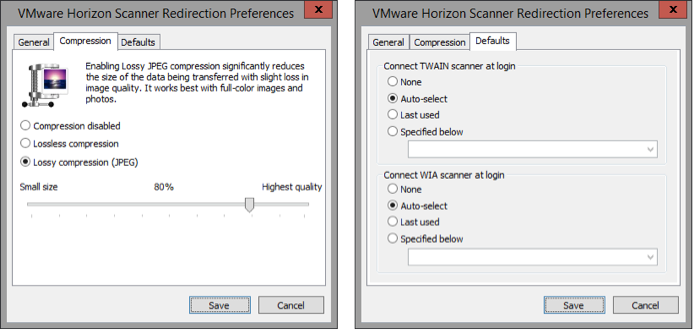
These preferences can also be adjusted by way of Group Policy options in the guest OS. A new GPO file (available in the Horizon GPO Bundle) allows this configuration. See Configuring Scanner Redirection in Setting Up Desktop and Application Pools in View for more information
Scanner Redirection Caveats
From VMware Communities:
- Scanner redirection does not create a device on your virtual desktop that matches the name of the actual scanner. It creates a generic scanner in Device Manager called VMWare Virtual WIA Scanner (or VMWare Virtual TWAIN Scanner I am assuming). For us this stinks because the image capture software our client uses (Vertex by Jack Henry), has a prepopulated list of scanners you can select. So if we plug in a Canon-CR50 and select Canon CR50/80 in the application, it does not recognize that this scanner is attached to the virtual desktop.
- There is a tick box option in the scanner preferences dialog box titled “Use vendor defined names for TWAIN scanners”. This should solve the issue you mention, and we added it specifically to cover the problematic use case you mention.
- This only applies to TWAIN scans, WIA can’t use the vendor name.
- You must install a TWAIN or WIA driver on your thin client. If you can’t find a TWAIN or WIA driver, you are out of luck. For teller check image scanners, we have found no TWAIN or WIA drivers for the TellerScan TS-230, TS-240, or the Canon CR-55. We have found a TWAIN driver for the Canon CR-50 (from the Canon Europe site no less), but issue #1 above means we are out of luck.
Client Printers
Horizon 7.7 and newer with Horizon Client 4.10 and newer have a new VMware Integrated Printing (aka VMware Advanced Printing) feature that replaces the older ThinPrint technology. ThinPrint is no longer available in Horizon Agent 2006 and newer.
When printing from an application, if you highlight a printer and click Preferences, the VMware Horizon icon on the Layout tab shows you that this printer is using VMware Integrated Printing.
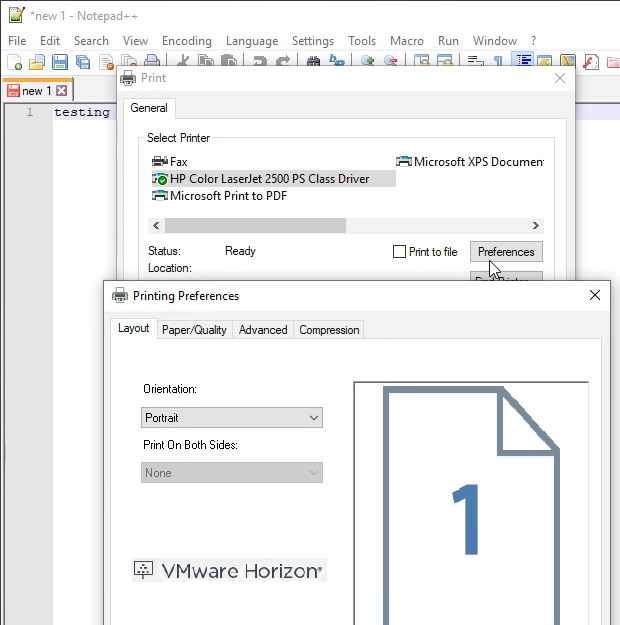
If you open the client printer Properties as an administrator, on the Advanced tab, you will see the VMware Universal EMF Driver.
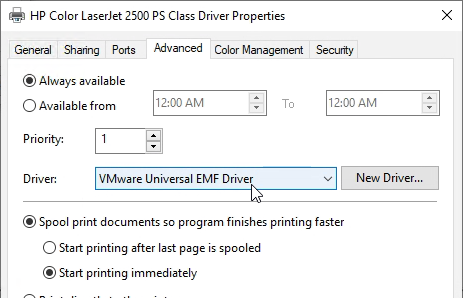
If older ThinPrint:
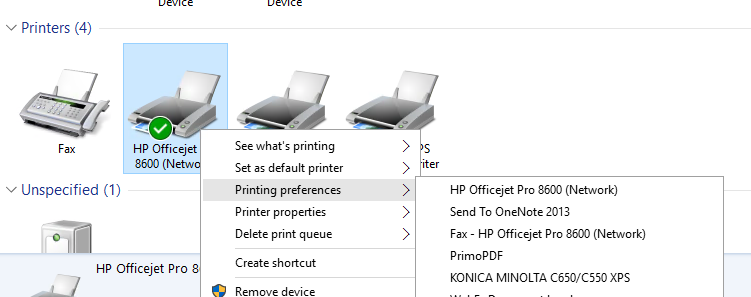
- Inside the virtual desktop, if you go to Devices and Printers, it will look a little weird. To see all of the client printers, right-click on a TP printer and use the expandable menus.
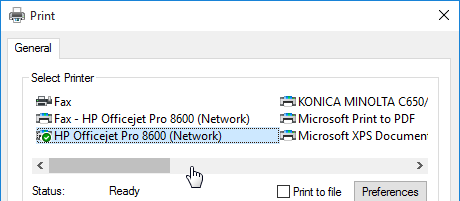
- But when you print from an application, all printers appear normally.
File Type Association
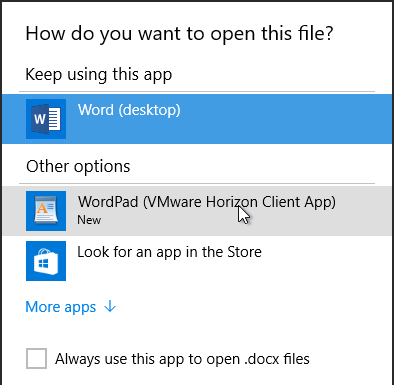
Some published applications might have file types associated with them. When you double-click a file with the configured extension, you might be prompted to open the file using the remote application.
In Horizon Client, if you right-click an icon and click Settings:
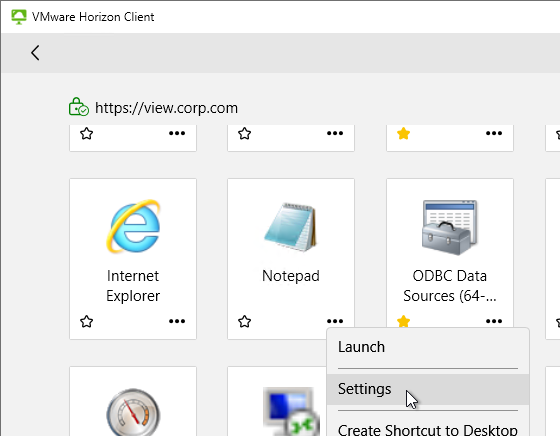
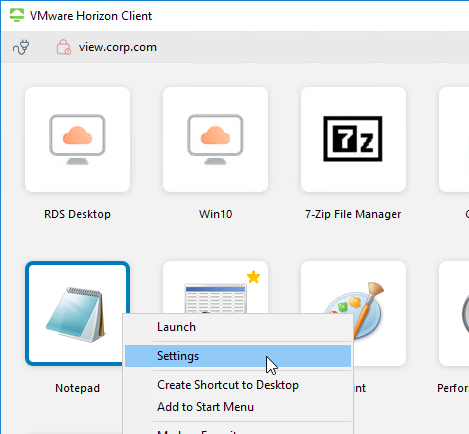
- On the Applications page (or Sharing page), you can disable this functionality.
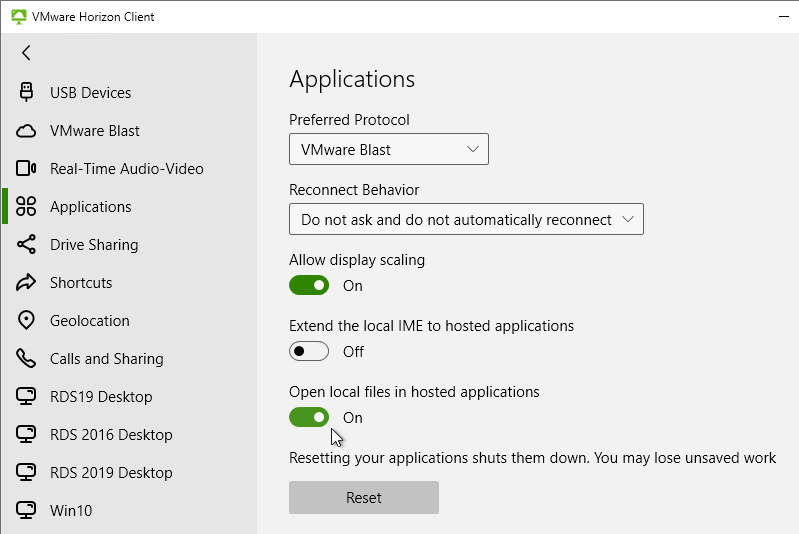
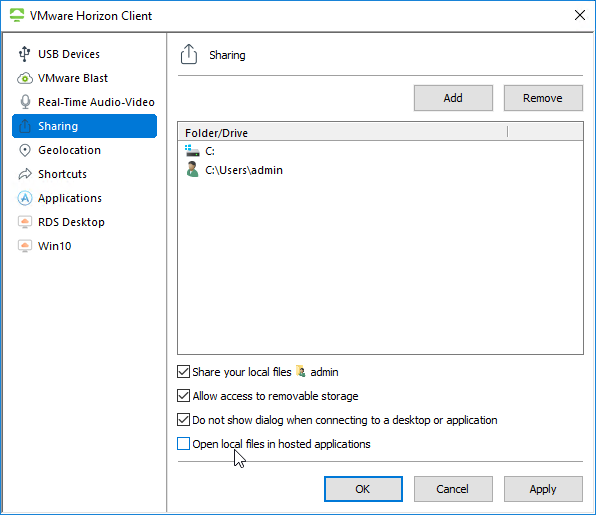
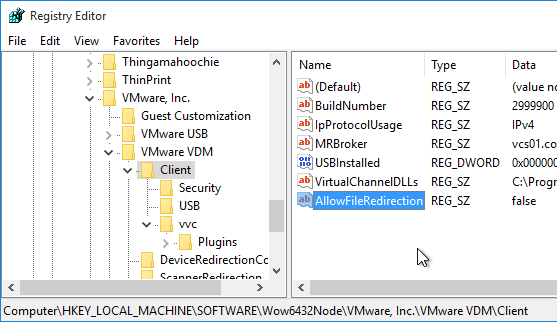
It’s also configurable in the client-side registry at HKEY_LOCAL_MACHINE\SOFTWARE\Wow6432Node\VMware, Inc.\VMware VDM\Client by creating a String value at named AllowFileRedirection and setting it to false. See VMware Communities for more information.
Session Collaboration
Horizon 7.4 and newer have an Allow Session Collaboration checkbox in Pool Settings and RDS Farm Settings.

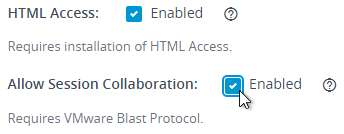
This setting enables a VMware Horizon Collaboration icon in the system tray of the remote desktop, which lets you invite users to collaborate.

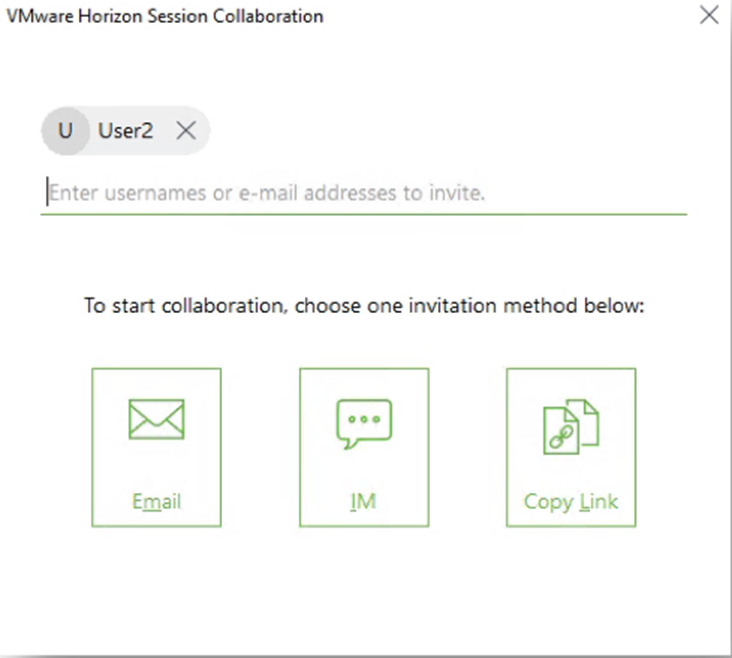
The invite is a URL that you can run (or click) on the collaborator’s machine that has Horizon Client 4.7 or newer installed.

To give control to the collaborator, double-click the green icon to open the Session Collaboration window. Or open the icon in the system tray.


Performance Tracker
Horizon Agent 7.5 and newer have an optional component called Performance Tracker.
When installing Horizon Agent, the last option is Horizon Performance Tracker. It is deselected by default.

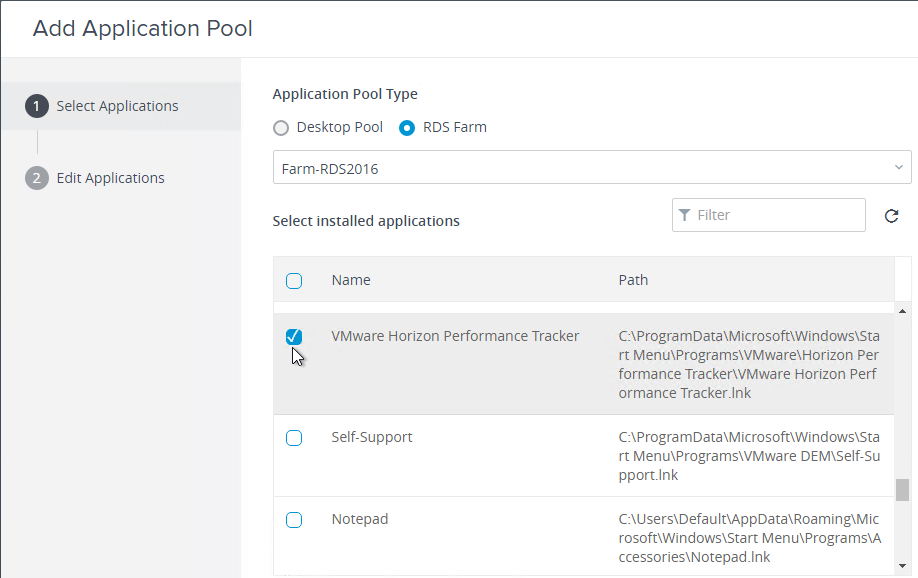
After it’s installed in an RDS farm, you can publish the Performance Tracker as an Application Pool
Or connect to a Desktop and launch it from the Desktop icon.
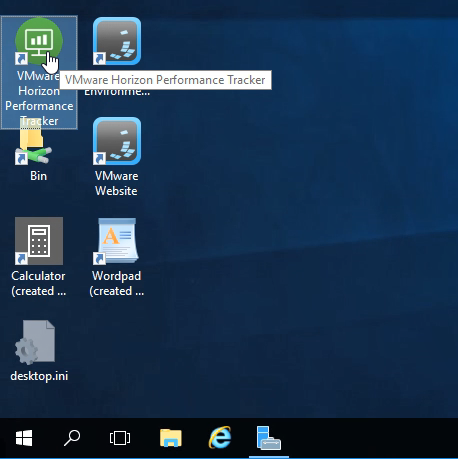
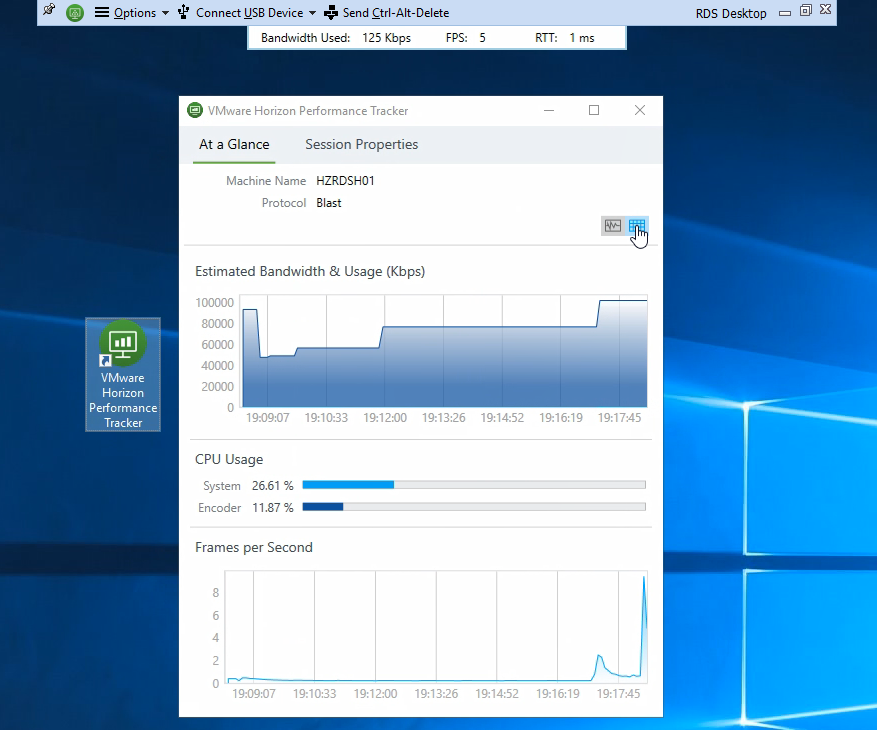
It can display protocol performance information in graphical or tabular form. The overview UI also shows the name of the Horizon Agent machine.
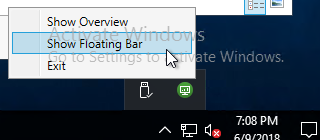
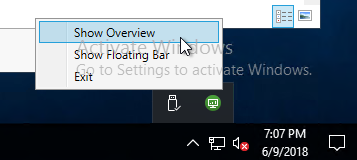
There’s also a Floating Bar option.

Performance Tracker can be configured to launch automatically:
- Install the Horizon GPO templates if you haven’t already.
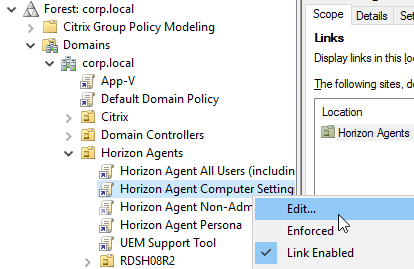
- Edit a GPO that applies to the Horizon Agents. These are Computer settings.
- Go to Computer Configuration | Policies | Administrative Templates | VMware Horizon Performance Tracker.
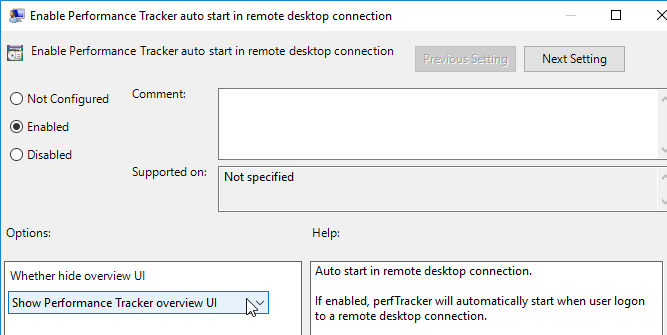
- On the right, you’ll see two options for auto starting the Performance Tracker.
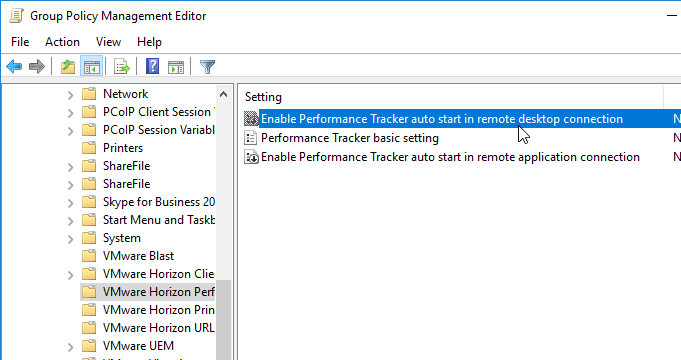
- Both settings let you Show or Hide the overview UI.
- If Hide is selected, then users can open the Tracker from the systray icon.
HTML Blast
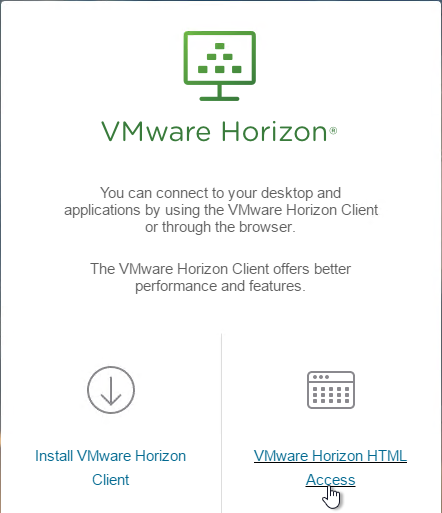
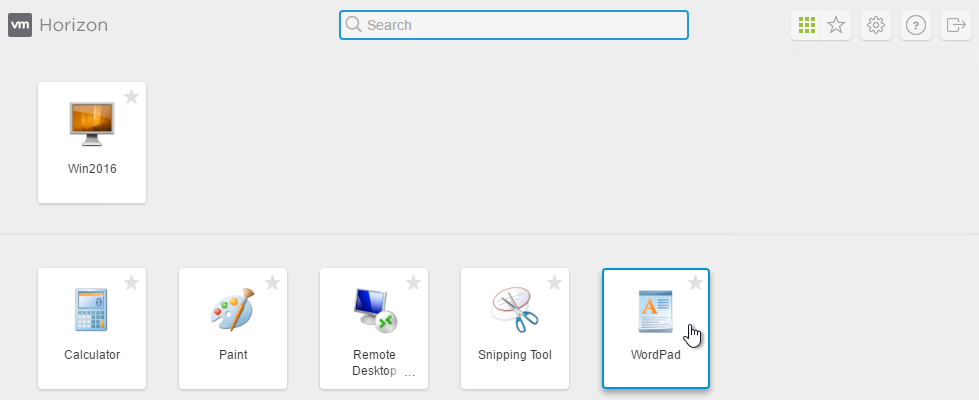
From the Horizon Connection Server webpage, you can click the VMware Horizon View HTML Access link to launch a desktop or application inside your browser. While Internet Explorer 9 is supported, some functionality, like clipboard and audio, is only available in Internet Explorer 10 and newer, Chrome and Firefox.
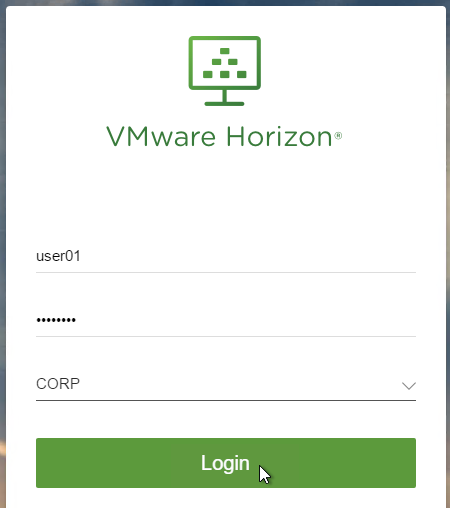
In Horizon 6.2 and later, you can launch applications as well as desktops from HTML Blast.
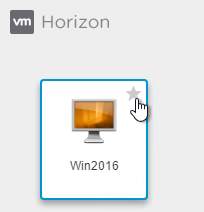
If you click the star icon then you can Mark the icon as a Favorite. Favorites are stored in the LDAP database on the Horizon Connection Server.
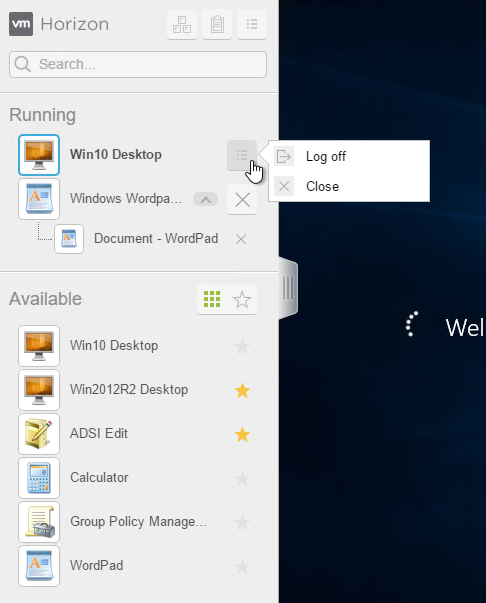
Applications and desktops are launched within the browser window. You can click the vertical lines on the left to switch to a different application or desktop.
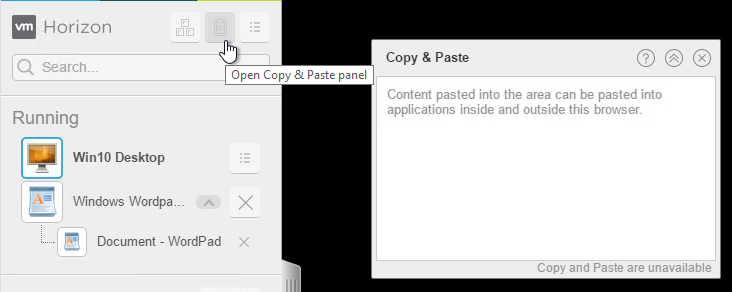
You can open the Copy & Paste panel to copy between the local machine and the remote machine.
Thin Clients
Omnissa EUC Technology Partner Hub – Thin Client Device and Model Information. It shows thin client models and the version of Horizon that is supported with the model.

Repurposed PCs
From Chris Halstead VMware Horizon View AutoConnection Utility: I decided to write an app in .NET that is essentially a wrapper for the View Client. It creates the command line variables based on what the user configures in the GUI and automatically connects to the specified desktop or application pool. All of the user configured information is stored in the registry under the current user hive.
The application silently and automatically connects into either a desktop or application pool each time a user logs in by placing it in the startup folder.
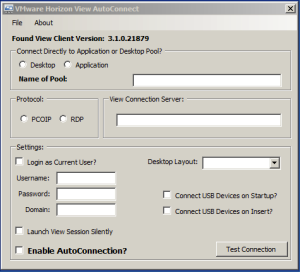
Once you have tested your connection, you are ready to enable AutoConnection. You enable AutoConnection by checking the “Enable AutoConnection” box. A common use case would be to place the .exe in the Windows startup folder so that every time a user logs in it will automatically connect to the Virtual Desktop.

This will run the application with the GUI hidden and will automatically connect to the specified pool. The application will minimize to the system tray and a balloon will indicate the connection process is occurring.

Horizon Client Group Policy – Security Settings
The Horizon GPO Bundle includes policy templates for the Horizon Client. See https://www.carlstalhood.com/horizon-group-policy-and-profiles/#viewtemplates to install the ADMX files.
Here are some security GPO settings recommended (VMware Horizon with View Security Hardening Overview) by VMware:
| GPO Setting |
|
Computer Config | Policies | Administrative Templates | Omnissa Horizon Client Configuration | Scripting definitions Disable 3rd-party Terminal Server plugins = enabled |
|
Computer Config | Policies | Administrative Templates | Omnissa Horizon Client Configuration | Security Settings Allow command line credentials = disabled Certificate verification mode = enabled, Full Security Default value of the ‘Log in as current user’ checkbox = disabled Display option to Log in as current user = disabled Servers Trusted for Delegation = enabled |
I am having nothing but issues just installing the Hortizon client. This version and 2506. Trying to install on a RDS Farm on Windows 2025, though i had the issue on 2022 as well. We’re using User Profile Disks. I get an error of “Found Link Directory C:\Users\username”, “Please delete the junction directory and try again”. The log file says found a security issue. I have tried the fix with the Hosts file. tried installing as a local admin, no change. I’ve tried installers back to 23xxx, all with the same error. This is a new server with Datto AV/EDR installed, no errors from those tools that i have found. Any ideas?
Many thank.
Hi,
i m trying to find out, how can i customize the webclient. For example to hide the three dots in the vm’s icon-button. Or the bar at the left side, when you connected with the vm.
all this for all web access users
thnks.
Hi Carl,
Thanks, if you could help with adding an example for “URL for horizon client online update”. I tried to use the GPO and added https://mydomain.com/downloads with includes the client exe but not working. I think that there is some missing files ex. xml file with the client exe.
Thank you
Any Help ?
I have not found any documentation on the proper configuration of the update server.
Thanks for your reply. Do you have any idea to update all the clients at once with silent update ?
https://community.omnissa.com/forums/topic/69112-url-for-horizon-client-online-update/?&_rid=19488#findComment-300473
I can confirm the problem is now solved.