Navigation
- RDS Farms Overview
- RDS Farms – Linked Clones
- RDS Farms – Manual
- Published Desktop
- Published Applications
Overview
Before following this procedure, build a master RDS Session Host.
This post details VMware Horizon configuration for Remote Desktop Session Host Horizon View Agents. Virtual Desktops are detailed elsewhere.
Before you can publish applications or desktops, you must create an RDS Farm. An RDS Farm is a collection of identical (cloned) Remote Desktop Session Hosts. Applications must be installed identically on every machine in the farm. If you have different applications on different Remote Desktop Session Hosts then these are different RDS Farms.
Horizon 6 supports up to 200 RDS farms, each with up to 200 RDS hosts.
Once the RDS Farms are created, you publish resources from them by either creating a Desktop Pool or an Application Pool or both. When creating a Desktop Pool or Application Pool, all members of the RDS Farm are selected. It is not possible to select a subset of Farm members.
RDS Farms – Linked Clones
You can use View Composer to create RDS linked clones. Here are some missing features and other notes:
- No QuickPrep. Uses SysPrep with Customization Specifications instead. SysPrep is slower than QuickPrep. SysPrep is also performed during Recompose operations.
- No View Storage Accelerator.
- No Rebalance.
- No Refresh. The machines are persistent until you Recompose the farm.
- The delta disks continue to grow until you Recompose the farm.
- You can enable Space Reclamation to shrink the delta disks as files are deleted.
- DHCP is required.
Customization Specification
If you want to use View Composer then SysPrep requires a Customization Specification in vCenter. QuickPrep is not supported with RDS farms.
- In vCenter, from the Home page, click Customization Specification Manager.
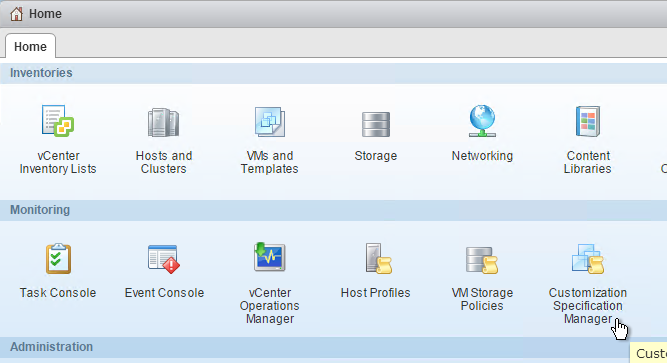
- Click the icon to create a new Customization Specification.

- In the Specify Properties page, give the spec a name and click Next.
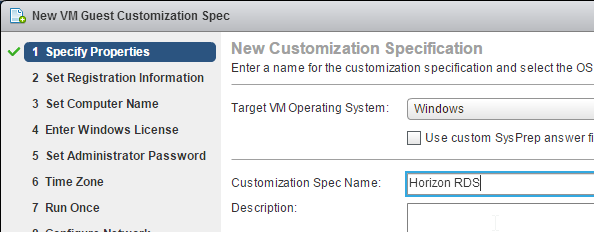
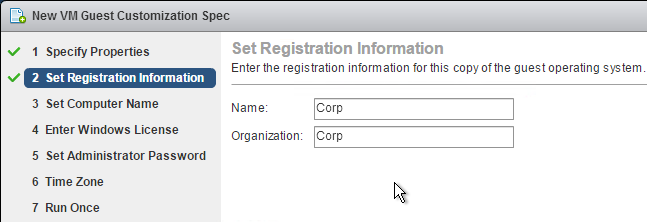
- In the Set Registration Information page, enter your normal settings and click Next.
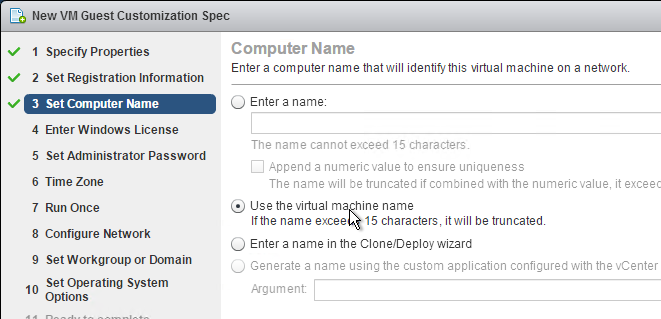
- In the Set Computer Name page, select Use the virtual machine name and click Next.
- In the Enter Windows License page, select Per seat and click Next.
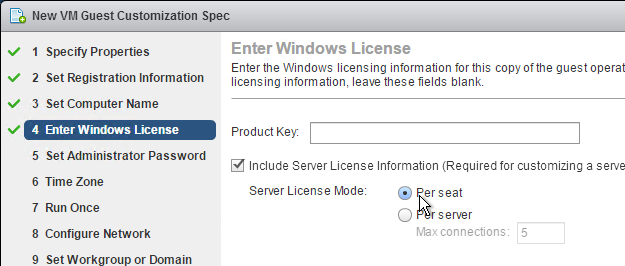
- In the Set Administrator Password page, enter the local administrator password and click Next.
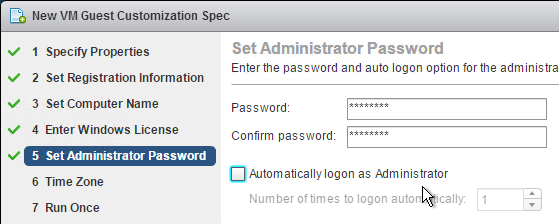
- In the Time Zone page, select the time zone and click Next.
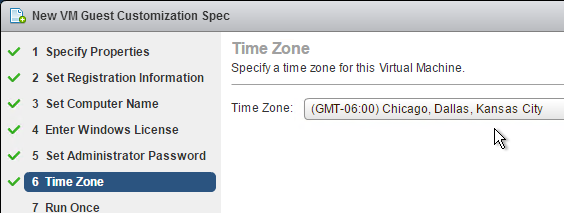
- In the Run Once page, click Next.
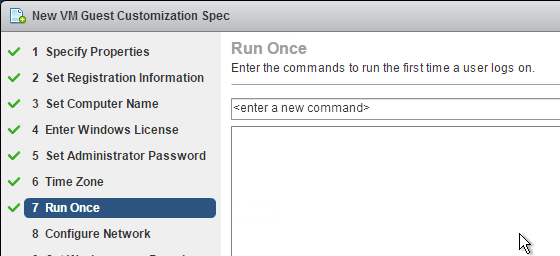
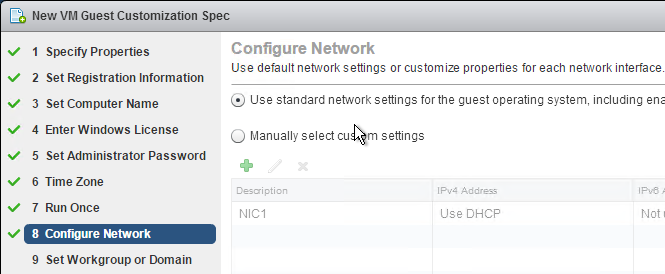
- In the Configure Network page, leave it set to Use standard network settings. Horizon 6 requires the VMs to be configured for DHCP. Click Next.
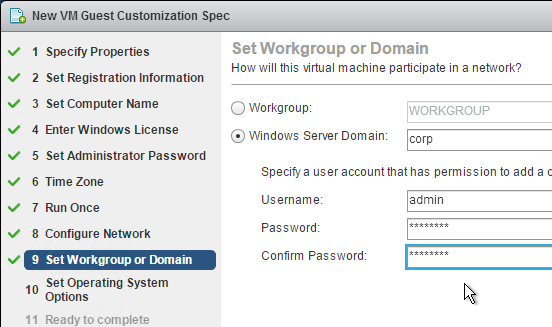
- In the Set Workgroup or Domain page, enter credentials that can join the machines to the domain and click Next.
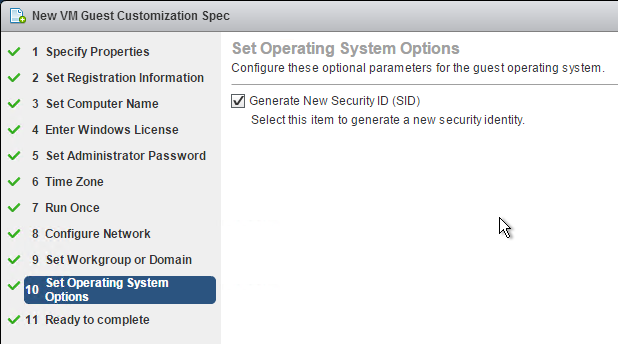
- In the Set Operating System Options page, leave the box checked and click Next.
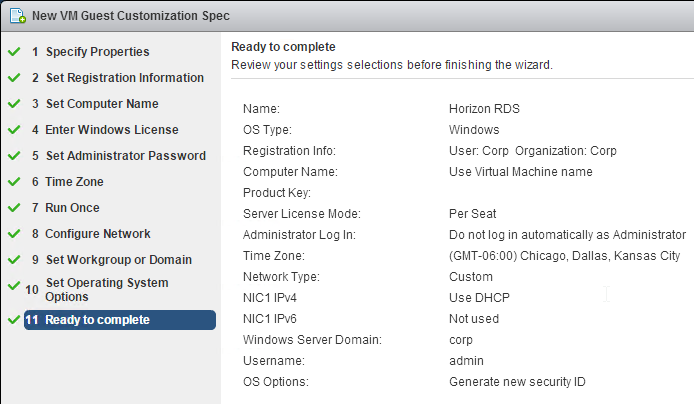
- In the Ready to complete page, click Finish.
Create an Automatic Farm
To create a farm of linked clones, do the following:
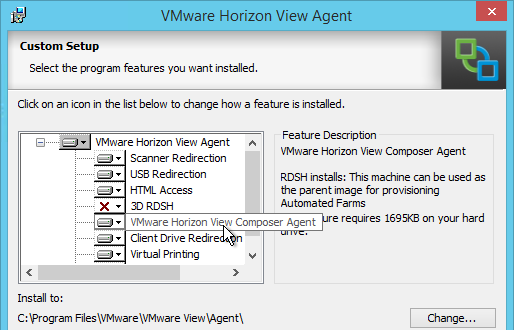
- Make sure your RDS View Agents have the VMware Horizon View Composer Agent feature installed.
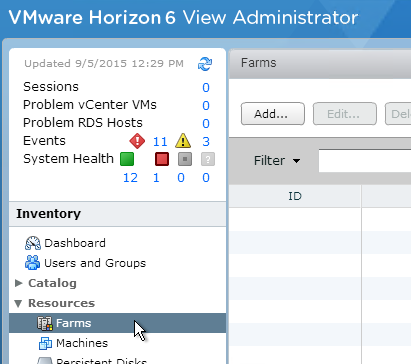
- In View Administrator, on the left, expand Resources and click Farms.
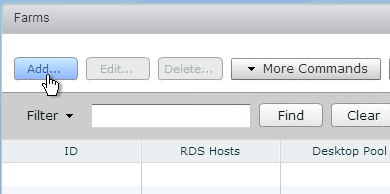
- On the right, click Add.
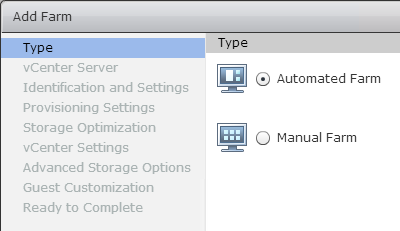
- In the Type page, select Automated Farm and click Next.
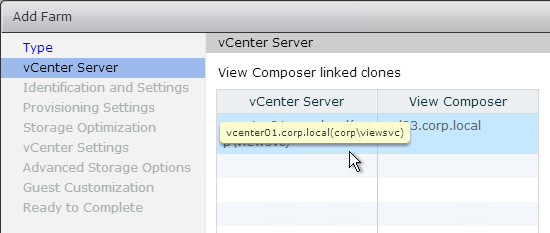
- In the vCenter Server page, select the vCenter Server and View Composer and click Next.
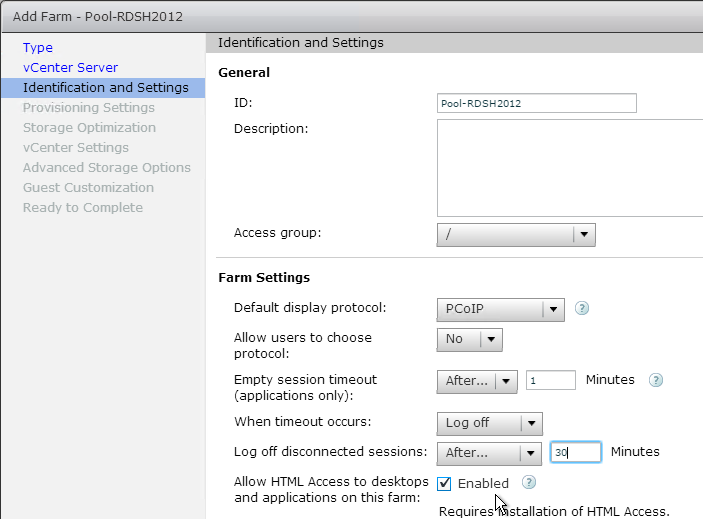
- In the Identification and Settings page, enter a name for the Farm. A folder with the same name will be created in vCenter.
- Allow users to choose protocol should be set to No.
- For Empty session timeout, set it to 1 minute. For When timeout occurs, set it to Log off. You usually want the session to end when users close all of their applications.
- For Log off disconnected sessions, specify a disconnect timer. This is in addition to the idle timer configured in View Configuration > Global Settings.
- Check the box next to Allow HTML Access and click Next.
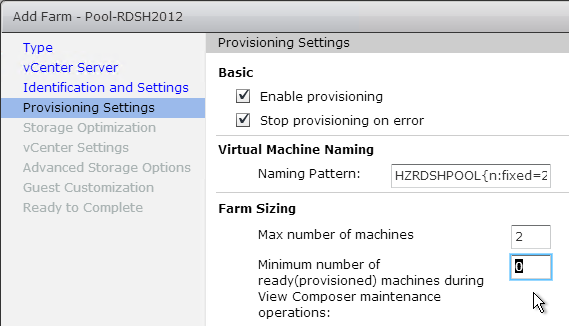
- In the Provisioning Settings page, enter a naming pattern. Make sure the name includes {n:fixed=3} or something like that.
- Enter the number of machines to create and click Next.
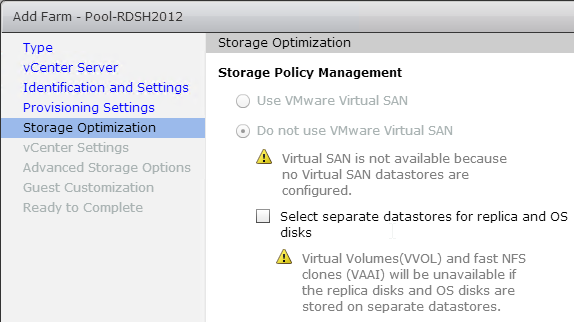
- In the Storage Optimization page, click Next.
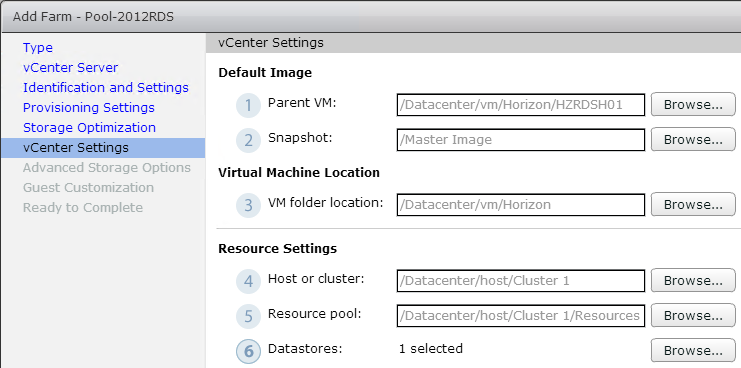
- In the vCenter Settings page, click Browse next to each option and make a selection.
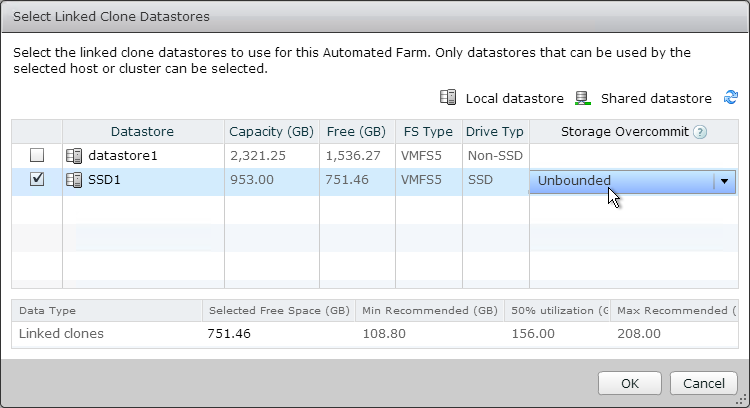
- When selecting a datastore, set the Storage Overcommit to Unbounded. Click OK and then click Next.
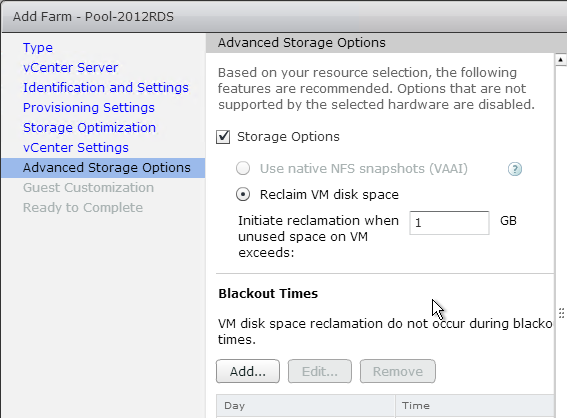
- In the Advanced Storage Options page, decide if you want space reclamation or not. Space reclamation does reduce disk space but increases IOPS while the operation is occurring. If space reclamation is enabled, also configure a Blackout window so the increased IOPS does not affect production usage. Scroll down.
- If you scroll down you’ll see an option for Transparent Page Sharing. By default it is disabled. You can enable it by setting it to Global. This should reduce some memory consumption. Click Next.

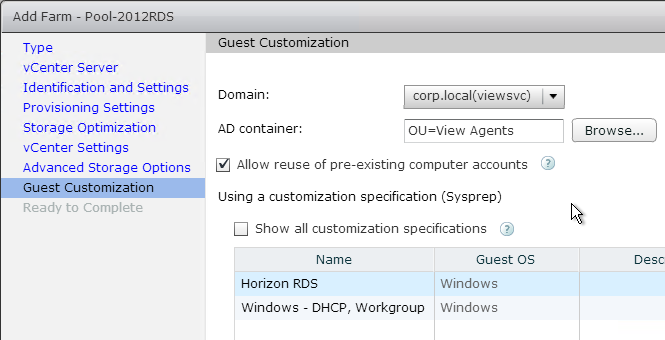
- In the Guest Customization page, select an OU.
- Select a customization specification and click Next.
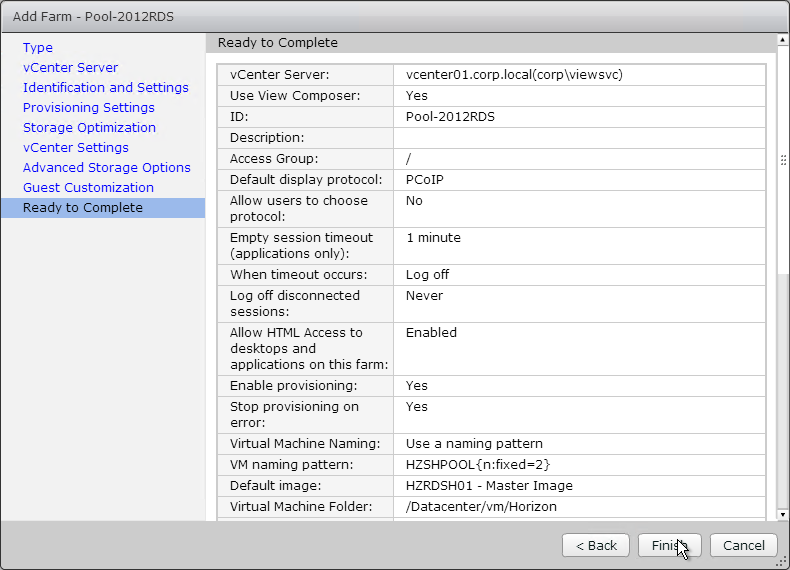
- In the Ready to Complete page, click Finish.
- On the RDS Hosts tab you can see the progress of the farm creation operation.

- Since RDS Farms use SysPrep, it will take some time before they become available.

- Once the RDS Hosts are created, you publish resources from them by either creating a Desktop Pool or an Application Pool or both.
Add RDS Host to Automatic Farm
- On the left, expand Resources and click Farms.
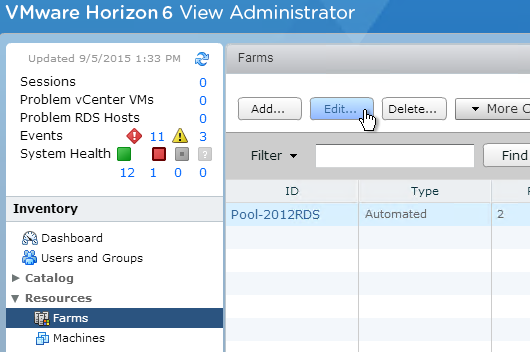
- On the right, highlight an existing Farm and click Edit.
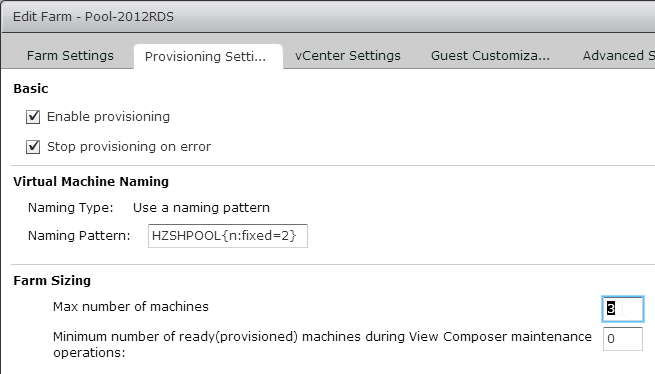
- Switch to the Provisioning Settings tab and change the Max number of machines. Then click OK.
- Since this is based on SysPrep, it will take a while to add the virtual machine. The new VMs reboot several times during the provisioning and customization process.
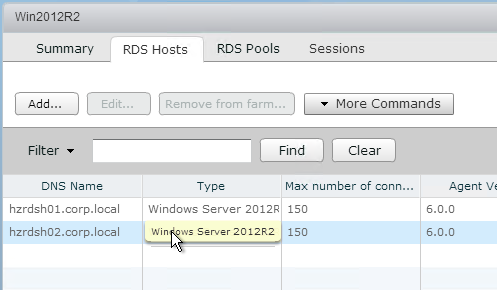
- The farm now has new RDS host(s).
Update an Automatic Farm
- Power on the master session host.

- After making your changes, shut down the master session host.

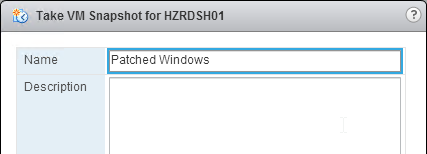
- Right-click the virtual machine and take snapshot. You must create a new snapshot.

- Name the snapshot and click OK.
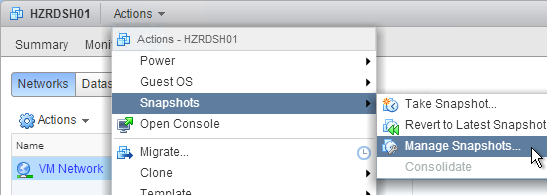
- You’ll need to periodically delete the older snapshots. Right-click the master VM and click Manage Snapshots.
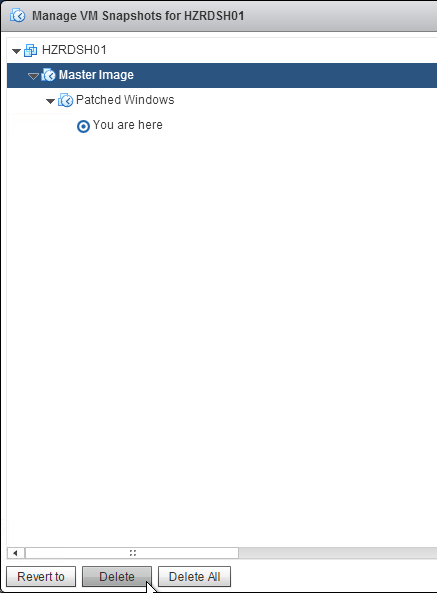
- Delete one or more of the snapshots.
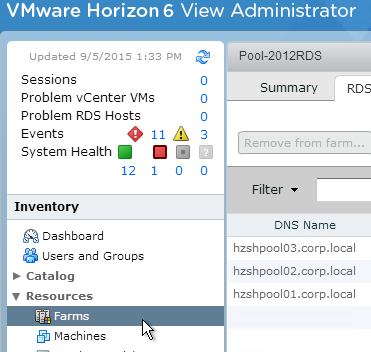
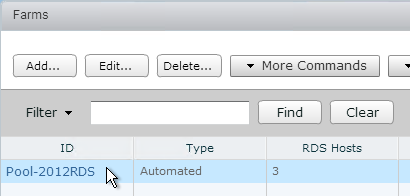
- In View Administrator, go to Resources > Farms.
- Double-click a farm name.
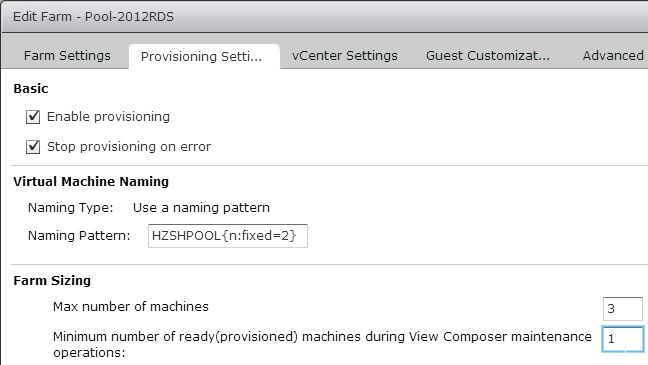
- Before beginning the Recompose operation, edit the Farm and on the Provisioning Settings tab consider specifying a minimum number of ready machines during View Composer maintenance operations. If you leave this set to 0 then all machines will be in maintenance mode and nobody can connect until Recompose is complete.
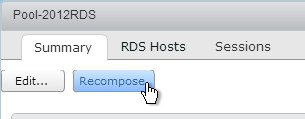
- On the Summary tab, click Recompose.
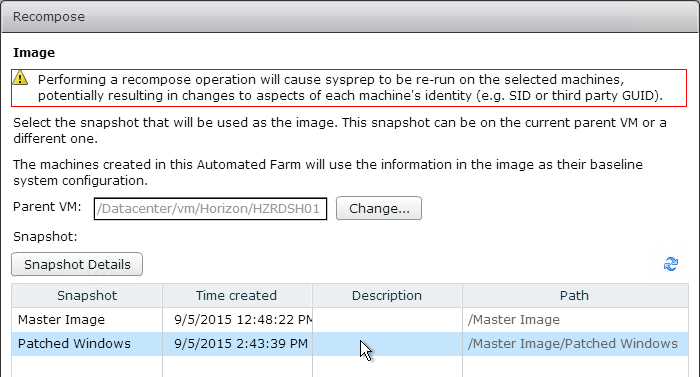
- In the Image page, select the new snapshot and click Next.
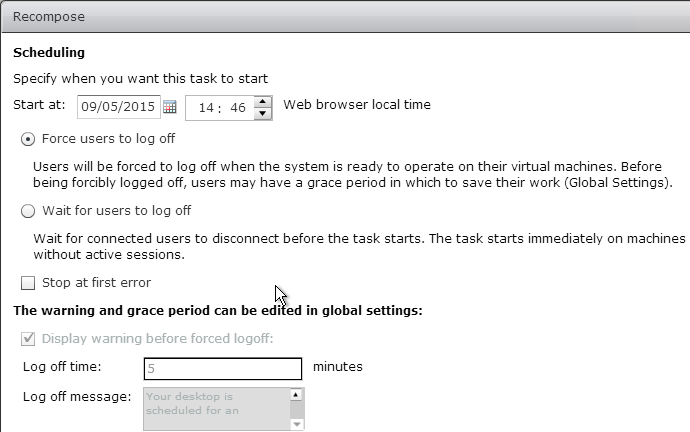
- In the Scheduling page, decide when to apply this new image and then click Next.
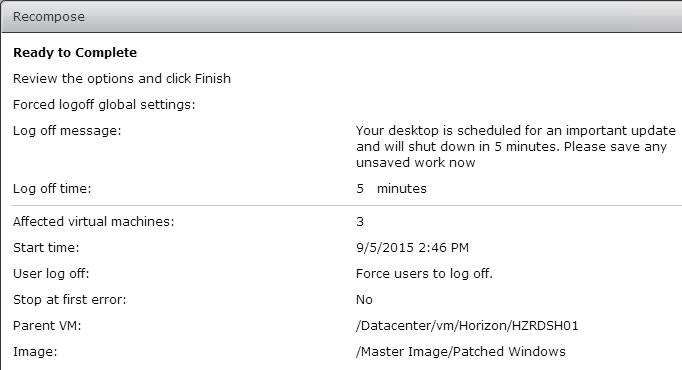
- In the Ready to Complete page, click Finish.
- On the RDS Hosts tab, you can check on the status of the recompose task. Since RDS Farms use SysPrep, this will take a while.

RDS Farms – Manual
To create a manual RDS Farm, do the following:
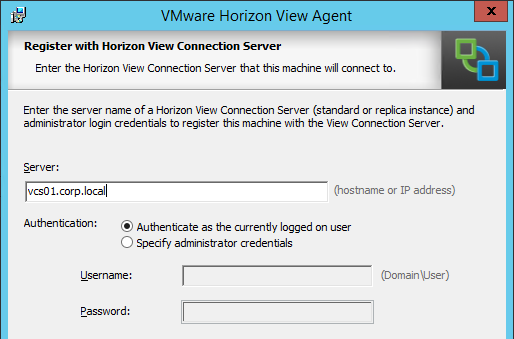
- Make sure the View Composer Agent is not installed on your RDS servers and make sure you saw the screen to register the Agent with a Horizon 6 Connection Server.
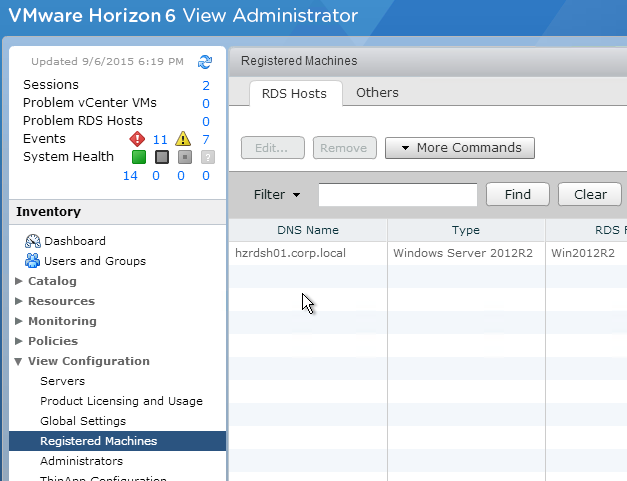
- In View Administrator, expand View Configuration and click Registered Machines. Make sure your manually built RDS Host is registered and listed on the RDS Hosts tab.
- In View Administrator, on the left, expand Resources and click Farms.
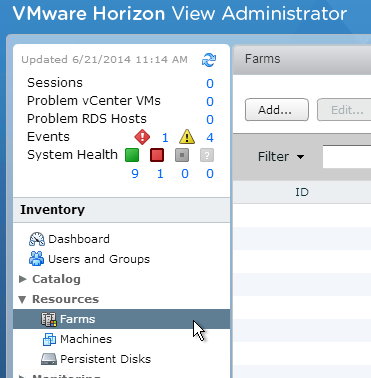
- On the right, click Add.

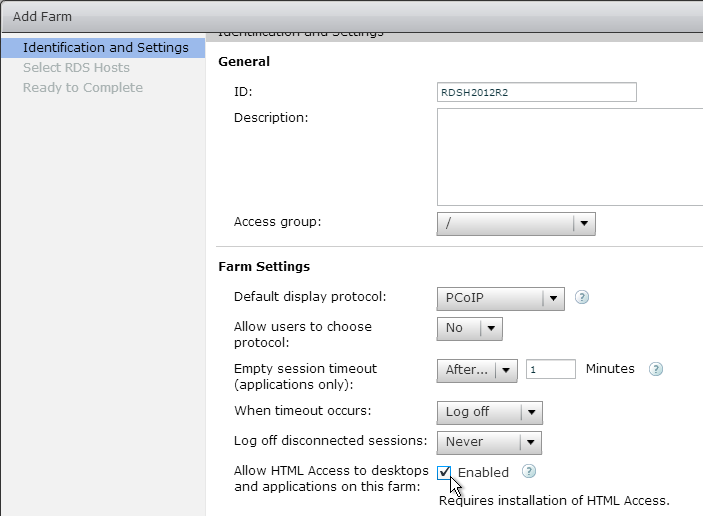
- In the Identification and Settings page, enter a name for the Farm.
- For Empty session timeout, set it to 1 minute. For When timeout occurs, set it to Log off. You usually want the session to end when users close all of their applications.
- For Log off disconnect sessions, specify a disconnect timer. This is in addition to the idle timer configured in View Configuration > Global Settings.
- Check the box next to Allow HTML Access and click Next.
- In the Select RDS Hosts, select one or more identical Remote Desktop Session Hosts. Click Next.

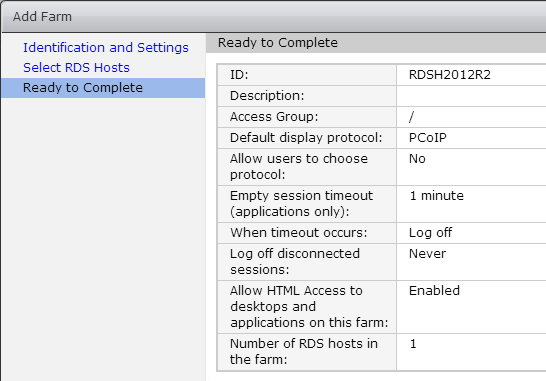
- In the Ready to Complete page, click Finish.
Add RDS Host to Manual Farm
- On the left, expand Resources and click Farms.
- On the right, double-click an existing Farm.
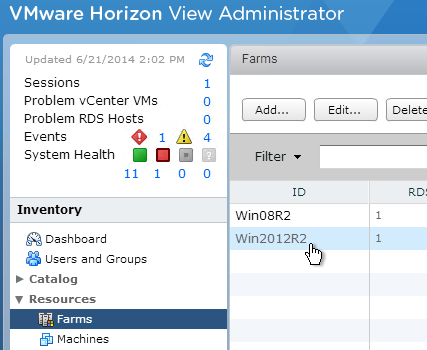
- On the right, switch to the RDS Hosts tab and click Add.
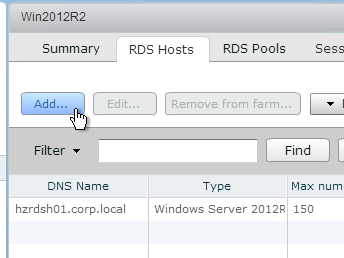
- Select the new RDS host and click OK.

- The farm now has a new RDS host.

Published Desktop
To publish a desktop from an RDS farm, do the following:
- In View Administrator, on the left, expand Catalog and click Desktop Pools.
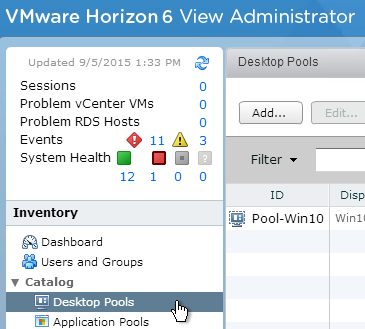
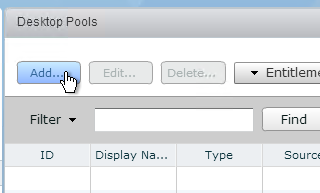
- On the right, click Add.
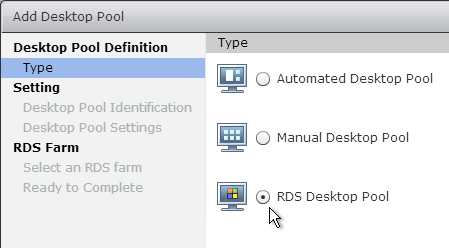
- In the Type page, select RDS Desktop Pool and click Next.
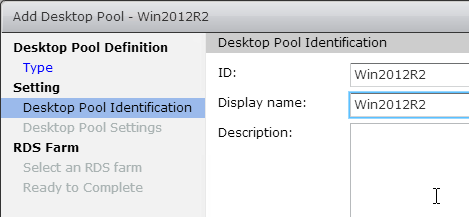
- In the Desktop Pool Identification page, enter an ID and name. They can be different. Click Next.
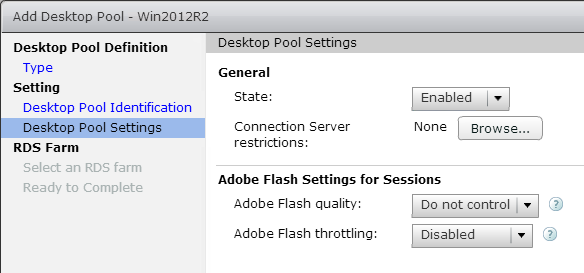
- In the Desktop Pool Settings page, click Next.
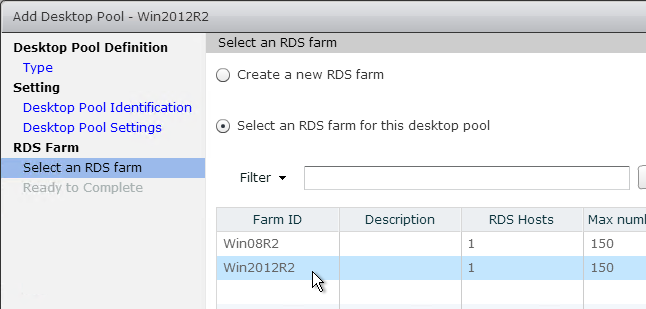
- In the Select an RDS farm page, select a farm and click Next.
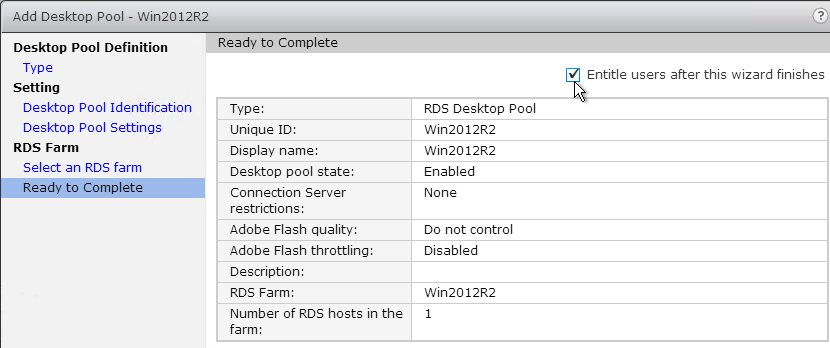
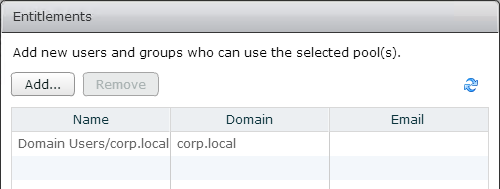
- In the Ready to Complete page, check the box next to Entitle users after this wizard finishes and click Finish.
- In the Entitlements window, click Add.

- Browse to an Active Directory group and click OK.
- Then click Close.
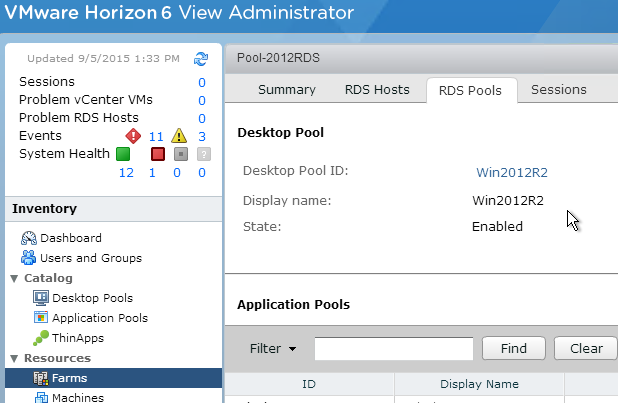
- If you go to Resources > Farms, double-click your farm and switch to the RDS Pools tab, you can see which Desktop Pool is associated with this farm.
Published Applications
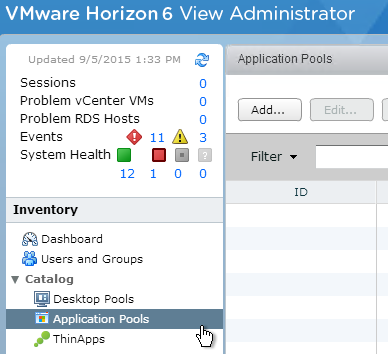
- In View Administrator, on the left, expand Catalog and click Application Pools.
- On the right, click Add.
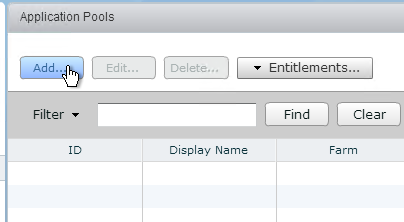
- The purpose of this wizard is to publish applications from an RDS Farm and entitle them. The entitlements will apply to all of the applications you select on this page. If you want different entitlements for different applications, run this wizard multiple times and select different applications. Once the applications are published, you can change their entitlements individually. Click Next after selecting one or more applications.
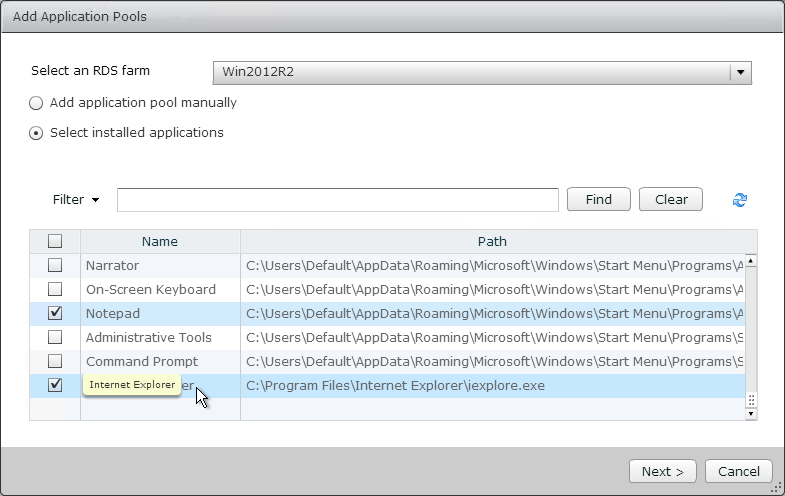
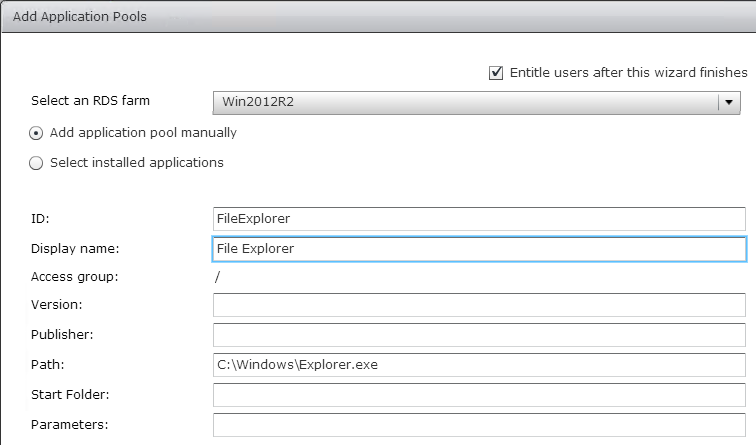
- Or you can add an application manually by changing the radio button to Add application pool manually. Notice that Explorer is not one of the listed applications so that one will need to be done manually.
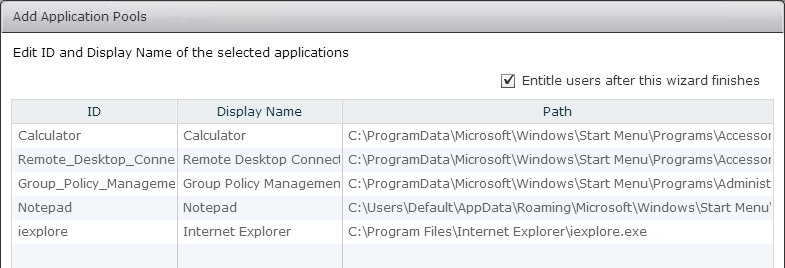
- Notice the Entitle users box is checked by default. All of the applications in this list will receive the same entitlements. Click Finish.
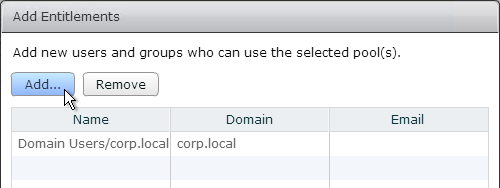
- Then click Add to select a group that can see these icons. Click OK when done.
- You can run the wizard again to publish more applications with different entitlements.
- If you double-click one of the application pools, on the Entitlements page you can change the entitlements.
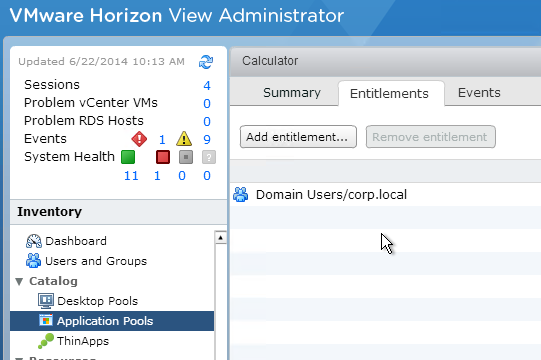
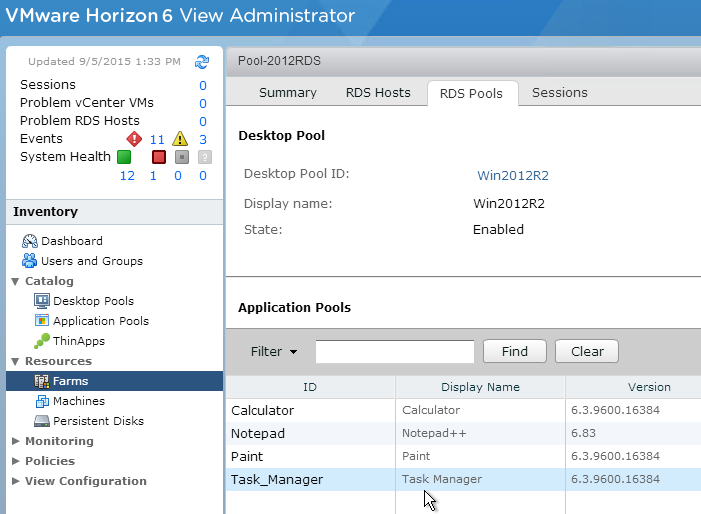
- If you go to Resources > Farms, double-click your farm, and switch to the RDS Pools tab, you can see which Application Pools (published applications) are associated with this farm. Notice you can’t really do anything from here.
Anti-affinity
You can configure Horizon to restrict the number of instances of an application running on a particular RDS host. Here are some limitations:
- If the user already has a session then anti-affinity is ignored.
- If the application is launched from within an RDS Desktop then anti-affinity is ignored.
- Not recommended for Horizon Mobile clients.
See Configure an Anti-Affinity Rule for an Application Pool at pubs.vmware.com.
Do the following to configure Anti-Affinity:
- On the left, expand Catalog and click Application Pools.
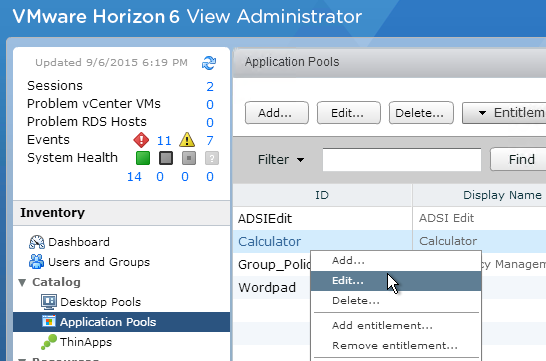
- On the right, edit an existing app/pool.
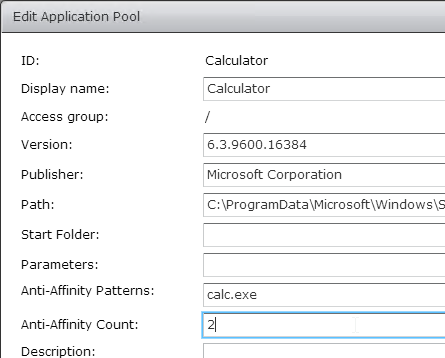
- In the Anti-Affinity Patterns field, enter process names to match. Wildcards are supported. Each match is counted.
- In the Anti-Affinity Count field, enter the maximum number of matches that can run on a single RDS Host.
Hello there,
I am use to horizon view 5.3 and there are no Farms
Have upgraded to Horizon 7.4 and don’t really understand the difference in Farms and regular pools
I read doc’s but still not clear on this
I do understand published apps and how clients and connect to server and use the app and not have to have the app installed on the client
RDS Farms are collections of RDSH machines.
Pools are how you publish icons from RDS Farms.
With virtual desktops, the only kind of icon you can publish is a desktop icon, so they merged the machine creation and desktop publishing (desktop entitlement) into the same wizard.
With RDS, you can publish multiple app icons and/or desktop icon from the RDS servers so they needed two separate objects to facilitate this. First define the machines in the farm. Then create pools to publish the icons (and entitle them).
So we still have running horizon 5.4 and have installed a new horizon 7.4, (actually someone else did this) however I do the client end and work with horizon, such as the pools
since this was technically not an upgrade but a new install (because we have both systems running) will I have to recreate my pools again on the newer horizon?
and since we didn’t use farms or applications publishing before, In order to this get the clients running on the new horizon I would be under the pools section, correct?
I beleive I will need to upgrade my view agents though
You can create destkop pools just like you always did.
Farms are only for RDS machines.
Do we split RDSH sessions between multiple RDS desktop pools? Is there any possibility? For instance we have one win 2012 RDSH host with 100 sessions limit and now we want to split it into multiple RDS desktop pools each as 20 session limit.
Different machines in different pools but you want one icon? You can use Cloud Pod Architecture to merge pools into a single entitlement.
Not single icon… For example I have created 4 rds desktop pool in view and I want to tag one RDSH host to all 4 different rds pool, each pool has 25 session limit with 4 icons on horizon view client
Much respect Carl. Question….how can I put a timeout on an idle hosted RDSH desktop in View? There doesn’t seem to be an option in the pool setting.
That would be a GPO setting under admin templates > windows components > Remote Desktop services > RDSH > Session Time Limits. https://www.carlstalhood.com/group-policy-objects-vda-computer-settings/#computer
Carl,
We followed your guides and we are up and running great! However, when a user finally hits the threshold to logoff the server hosting the RDS application, all of their screens turn blue with the Windows Server logoff screen. Is there a way to disable this or hack it so it does it minimized? It’s very confusing for our users when it suddenly appears and pauses what you were doing.
In the Citrix world you configure group policy logoff script to run tsdiscon. Not sure if this works with Horizon. http://support.citrix.com/article/CTX122145
Thanks Carl! Definitely helped. It also had us looking into the Connection server settings for disconnect or logoff action. We didn’t realize the disconnect first would prevent this screen from popping up.
Great article Carl.
Interested to see that there is now a solution for cloning in a RDS environment.
I have been a Citrix user for many years and have been keeping an eye on VMware these last few months as they do appear to be a very close rival.
I would be very interested in your opinion in terms of ease of management etc between Horizon Advanced (as a minimum) v XenApp 7.6 Enterprise?
For example, in the area of patch management and first release on updates, have they proven to be any easier and more reliable?
More reliable yes.
As VMware adds more features, the upgrades get more complicated.
For Horizon View, the updates are generally full installs/upgrades.
When VMware adds a feature, the initial implementation is usually not what I expect. It takes more effort to manage than I would like. For example, the Access Point doesn’t have a management UI. They do fix some of the mgmt issues in later releases but still not as flexible as Citrix.