Navigation
This article applies to Federated Authentication Service (FAS) versions 2411, 2402 LTSR, 2203 LTSR, 1912 LTSR, and all other versions 7.9 and newer.
- Change Log
- Overview
- Install/Upgrade FAS Service
- FAS Group Policy
- FAS Configuration
- StoreFront Configuration
- SAML Configuration:
- Active Directory Shadow Accounts
- Verify FAS
Change Log
- 2025 Jan 9 – updated Versions section for version 2203 CU6
- 2024 Dec 4 – updated Versions and Install sections for version 2411
- 2024 April 2 – added Force Authentication in NetScaler SAML Action
- 2024 March 6 – added Standard Edition instructions
- 2024 April 30 – updated Versions section for version 1912 LTSR CU9
- 2023 Aug 11 – added link to Deployment Guide: Multi-Domain FAS Architecture at Citrix Tech Zone.
- 2023 May 17 – added info from Can I enable other credential providers after installing Duo Authentication for Windows Logon? (h/t Barry Barclay)
Overview
Citrix Federated Authentication Service (FAS) enables users to log in to Citrix Gateway and Citrix StoreFront using SAML authentication.
With SAML, Citrix Gateway and StoreFront do not have access to the user’s password and thus cannot perform single sign-on to the VDA. FAS works around this limitation by using issuing certificates that can be used to logon to the VDA.
- StoreFront asks Citrix Federated Authentication Service (FAS) to use a Microsoft Certificate Authority to issue Smart Card certificates on behalf of users.
- The certificates are stored on the FAS server.
- The VDA requests the user’s certificate from FAS so it can complete the VDA Windows logon process.
FAS can be used for any authentication scenario where the user’s password is not provided.
Requirements:
- Microsoft Certification Authority (CA) in Enterprise mode.
- When configuring FAS, you tell it what CA server to use.
- You can build a new CA server just for FAS.
- You can install CA on the FAS server.
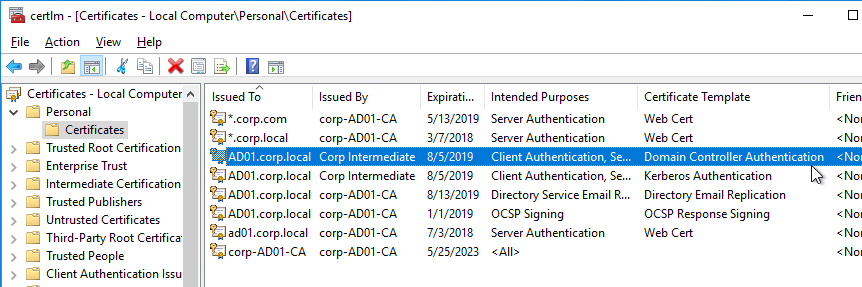
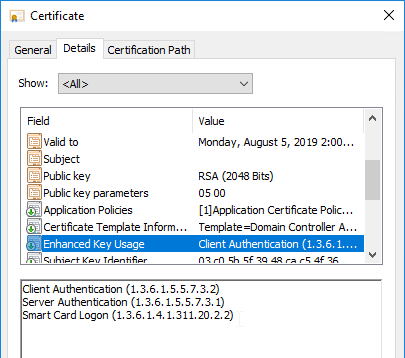
- Domain Controllers must have Domain Controller certificates. See CTX218941 FAS – Request not supported.
- The certificates on the Domain Controllers must support smart card authentication. Certificates created using the Microsoft CA certificate template named Domain Controller Authentication supports smart cards. Manually created Domain Controller certificates might not work. See CTX270737 for the Domain Controller certificate requirements.
- The certificates on the Domain Controllers must support smart card authentication. Certificates created using the Microsoft CA certificate template named Domain Controller Authentication supports smart cards. Manually created Domain Controller certificates might not work. See CTX270737 for the Domain Controller certificate requirements.
- Citrix Virtual Apps and Desktops or XenApp/XenDesktop 7.9 or newer
- StoreFront 3.6 or newer
- Citrix Gateway.
- StoreFront 3.9 and newer also support SAML authentication natively without Citrix ADC.
- SAML in an nFactor (Authentication Virtual Server) configuration works in both browsers and Workspace app.
- For multiple domains, see Deployment Guide: Multi-Domain FAS Architecture at Citrix Tech Zone.
Configuration overview:
- Build one or more FAS servers.
- For security reasons, FAS should be its own server and not installed on a Delivery Controller.
- Upload Certificate Templates to Active Directory and configure a CA server to issue certificates using the new templates.
- Enterprise Admin permissions are needed to upload the Certificate Templates.
- One of the Certificate Templates is for Smart Card logon to Citrix VDA.
- The other two Certificate Templates are to authorize FAS as a certificate registration authority.
- The registration authority certificate does not renew automatically so be prepared to renew it manually every two years. See Renew registration authority certificates at Citrix Docs.
- Install the Citrix FAS group policy .admx template into PolicyDefinitions.
- Create a group policy object (GPO) and configure the GPO with the addresses of the FAS servers.
- The GPO must apply to FAS servers, StoreFront servers, and every VDA. It does not need to apply to Delivery Controllers, but there’s no harm in applying it to the Delivery Controllers.
- Authorize FAS to request certificates from a Microsoft CA server.
- Configure FAS Rules to permit StoreFront servers to request FAS to generate certificates for users and permit VDA machines to retrieve the certificates from FAS.
- Configure StoreFront to use FAS for VDA single sign-on.
Links:
- CTA Julian Mooren Citrix FAS – Notes from the Field
- CTP Wilco van Bragt Citrix Federated Authentication Service (FAS) Tips and Tricks
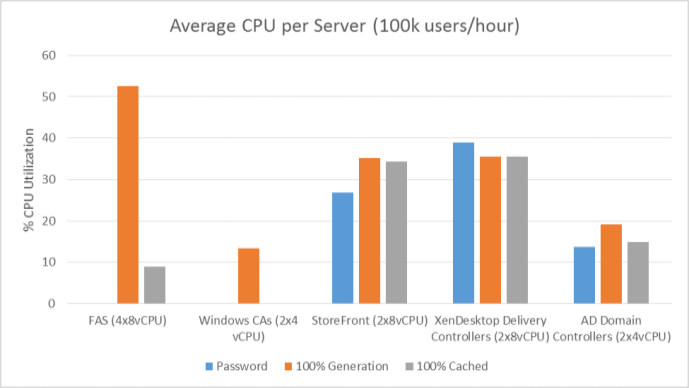
From Citrix CTX225721 Federated Authentication Service High Availability and Scalability: you can build multiple FAS servers. Enter all FAS server FQDNs in the Group Policy. StoreFront will then use a hashing algorithm on the username to select a FAS server.
- If you have less than 10K users, one FAS server with 4 vCPUs (2.5Ghz) should be sufficient.
- You will require a minimum of one FAS server (with 8 vCPUs) per 25,000 users if all users expect to be able to logon under cold start conditions (no keys or certificates cached) within 60-90 minutes.
- A single FAS server can handle greater than 50K users under warm start conditions (keys and certificates pre-cached)
- One reserve FAS server for every four FAS servers for “Day 1” cold start (Users get new keys/certificates) & disaster recovery scenarios
- Split the FAS Certificate Authority from Certificate Authority that performs other tasks for both security and scalability purposes.
Michael Shuster explains the Group Policy configuration for FAS in multiple datacenters at HowTo: Active-Active Multi-Datacenter Citrix FAS.

Also see the Citrix Federated Authentication Service Scalability whitepaper.
Federated Authentication Service Versions
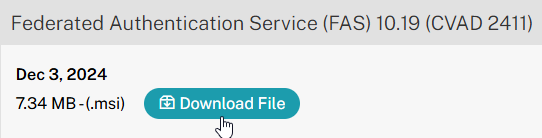
The most recent Federated Authentication Service Current Release is version 2411.
- Download FAS 2411.
For LTSR versions of Citrix Virtual Apps and Desktops (CVAD) and StoreFront, install the version of FAS that comes with the CVAD LTSR version.
- FAS LTSR version 2402 CU2 is included in the Citrix Virtual Apps and Desktops 2402 LTSR CU2 ISO.

- FAS LTSR version 2203 CU6 is included in the Citrix Virtual Apps and Desktops 7 2203 LTSR CU6 ISO.

- FAS LTSR version 1912 CU9 is included in the Citrix Virtual Apps and Desktops 7 1912 LTSR CU9 ISO.
Install/Upgrade Federated Authentication Service
The service should be installed on a secure, standalone server that does not have any other Citrix components installed. The FAS server stores user authentication keys, and thus security is paramount.
- On the Federated Authentication Service server, go to the Citrix Virtual Apps and Desktops, or XenDesktop 7.9, or newer ISO, and run AutoSelect.exe. Or you can download the standalone installer and run that.

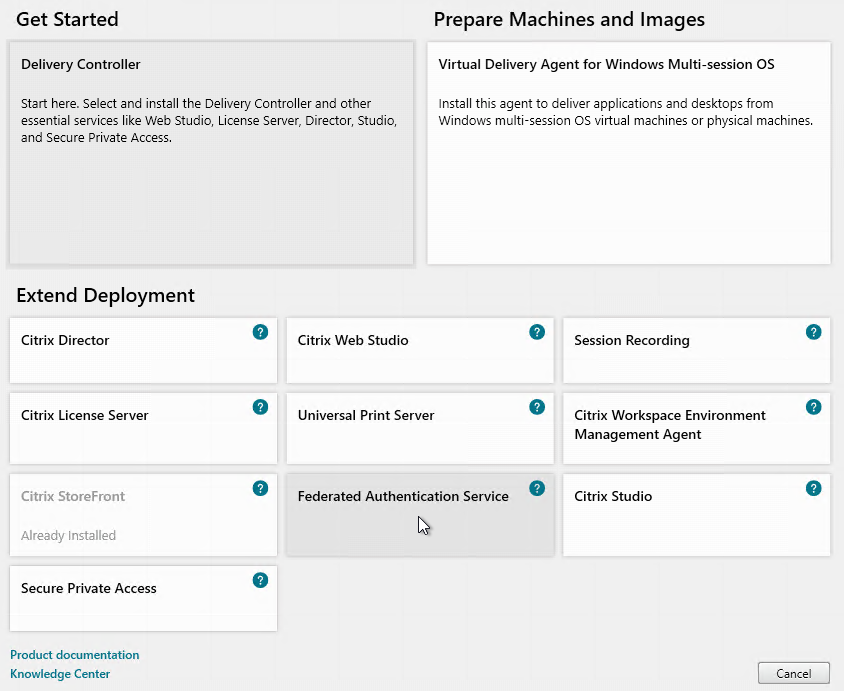
- In the lower half of the window, click Federated Authentication Service.
- In the Licensing Agreement page, select I have read, understand, and accept the terms of the license agreement, and click Next.

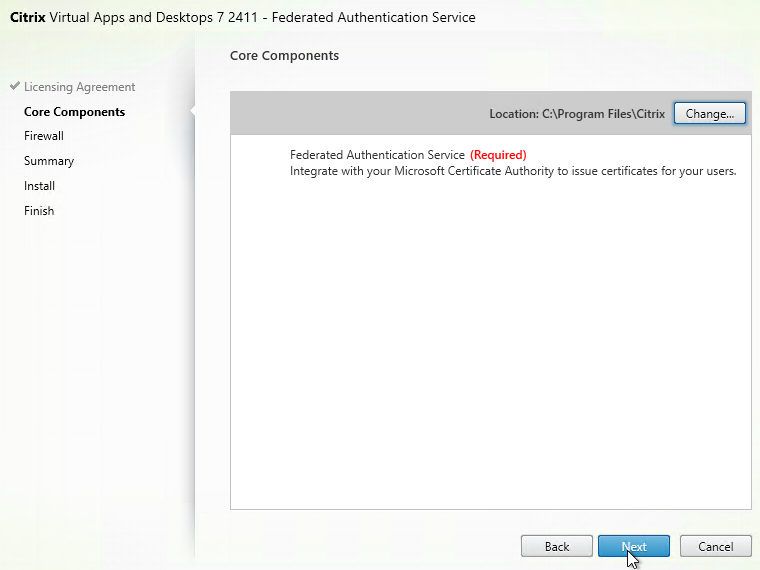
- In the Core Components page, click Next.
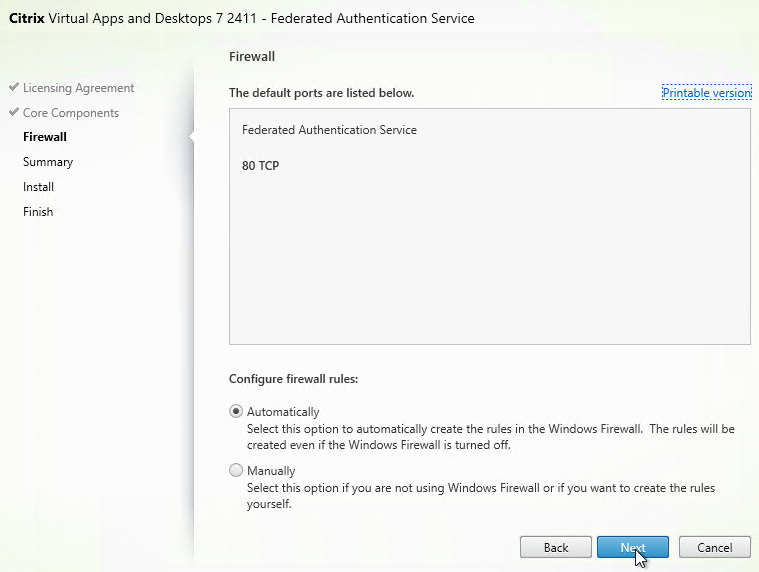
- In the Firewall page, click Next.
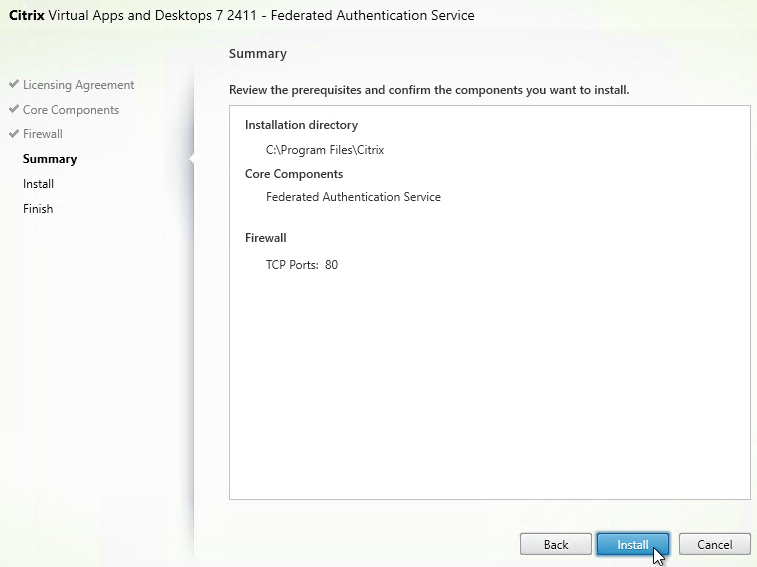
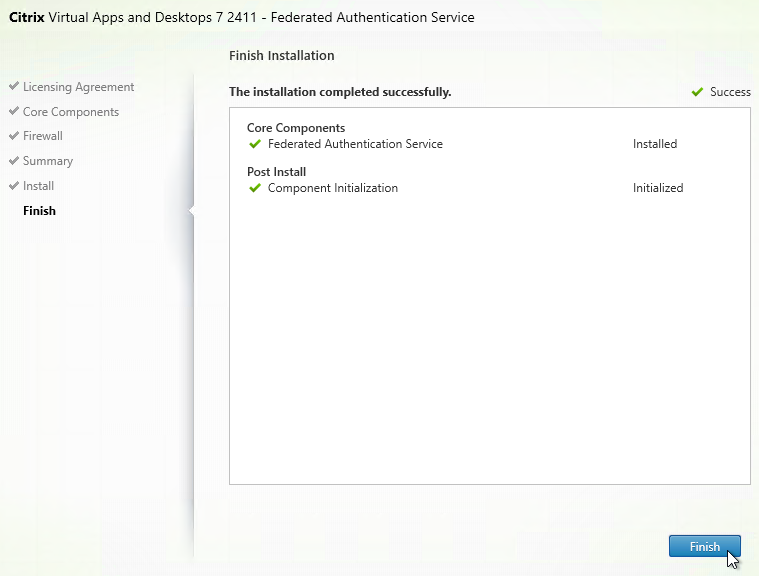
- In the Summary page, click Install.
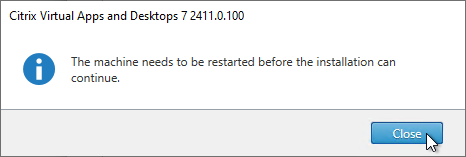
- The installer will probably ask for a restart.
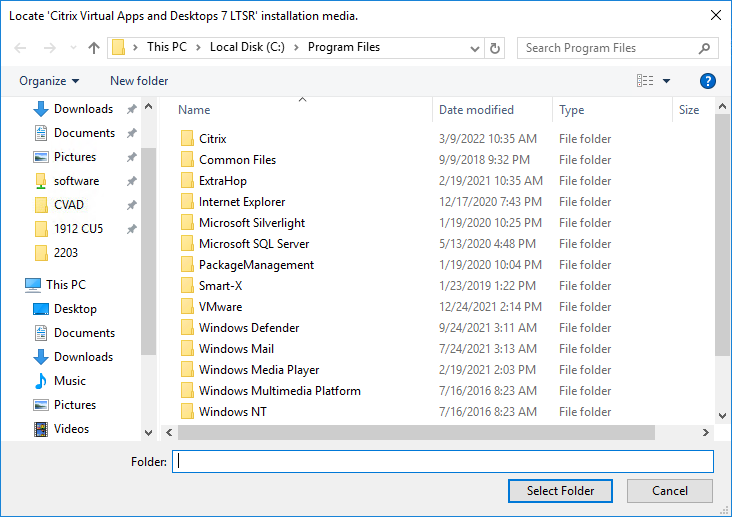
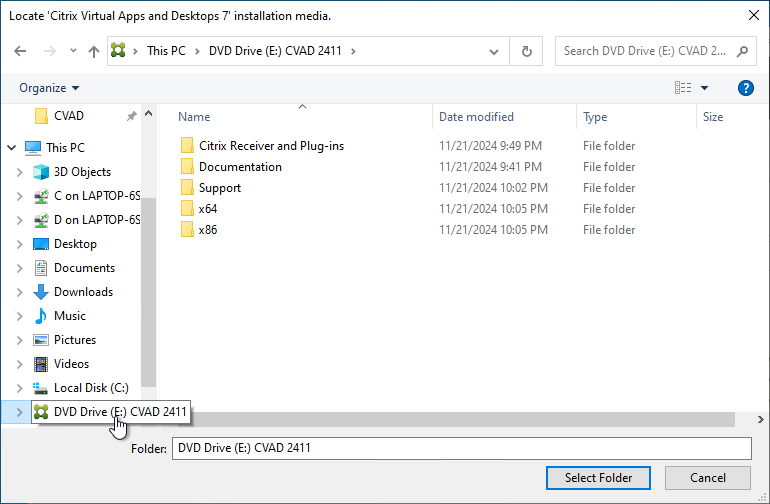
- After the reboot, and after logging in again, you might see a Locate ‘Citrix Virtual Apps and Desktops 7’ installation media window. Don’t click anything yet.
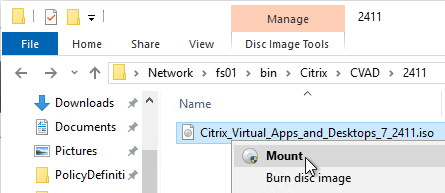
- Go to the Citrix_Virtual_Apps_and_Desktops_7_2411.iso file and mount it.
- Go back to the Locate ‘Citrix Virtual Apps and Desktops 7’ installation media window.
- On the left, expand This PC, and click the DVD Drive.
- Click Select Folder.
- After the reboot, and after logging in again, you might see a Locate ‘Citrix Virtual Apps and Desktops 7’ installation media window. Don’t click anything yet.
- Click Finish.
FAS Group Policy
Configure a Group Policy that instructs StoreFront servers and VDAs on how to locate the FAS servers.
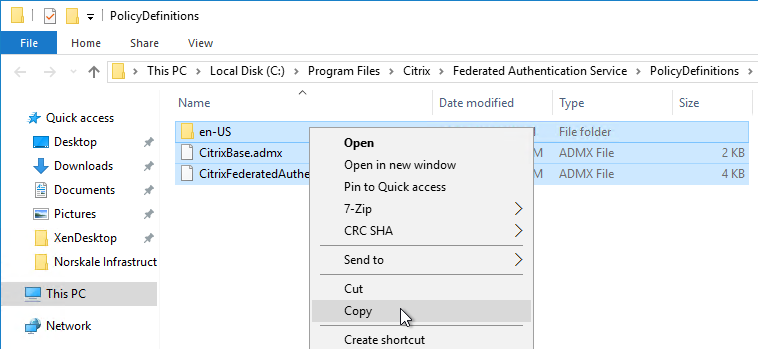
- On the Federated Authentication Service server, browse to C:\Program Files\Citrix\Federated Authentication Service\PolicyDefinitions. Copy the files and folder.
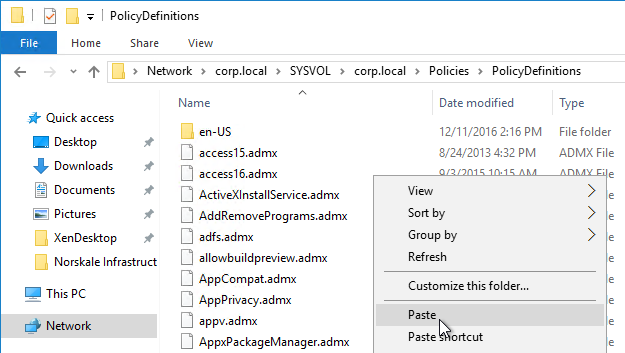
- Go to \\domain.com\SYSVOL\domain.com\Policies\PolicyDefinitions and paste the files and folder. If PolicyDefinitions doesn’t exist in SYSVOL, then copy them to C:\Windows\PolicyDefinitions instead.
- Edit a GPO that applies to all StoreFront servers, all Federated Authentication Service servers, and all VDAs.
- Navigate to Computer Configuration > Policies > Administrative Templates > Citrix Components > Authentication.
- Edit the setting Federated Authentication Service.
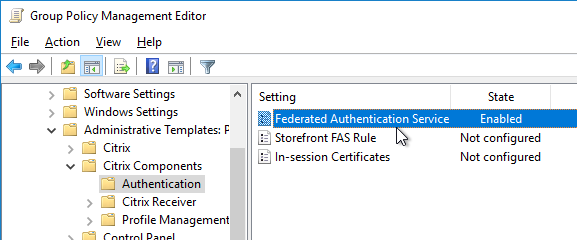
- Enable the setting and click Show.
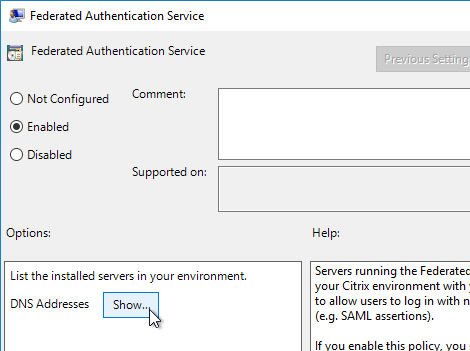
- Enter the FQDN of the Federated Authentication Service server. You can add more than one Federated Authentication Service server.
- Michael Shuster explains the Group Policy configuration for FAS in multiple datacenters at HowTo: Active-Active Multi-Datacenter Citrix FAS.

- Michael Shuster explains the Group Policy configuration for FAS in multiple datacenters at HowTo: Active-Active Multi-Datacenter Citrix FAS.
- Click OK twice.

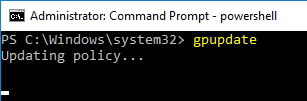
- On the Federated Authentication Service server, and VDAs, run gpupdate.
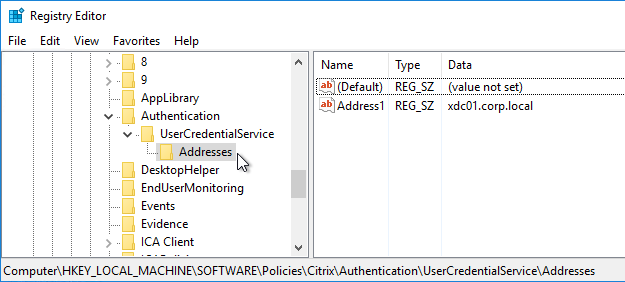
- On the FAS server, and on VDAs, look in the registry at HKLM\Software\Policies\Citrix\Authentication\UserCredentialService\Addresses. Make sure this key and value exists. The number one cause why FAS doesn’t work is because this key is missing from VDAs. The FAS Address GPO must apply to VDAs too.
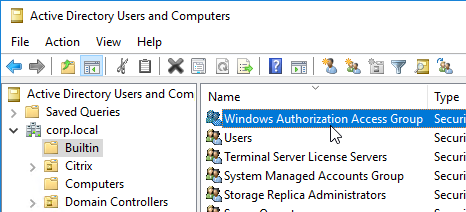
- If the VDAs and Users are in different domains, see CTX220497 Users from one AD Domain not able to get FAS user certificates from another trusted domain: add the Citrix StoreFront Servers, FAS server and VDA servers to the Windows Authorization Access Group in the users’ domain. Also see Deployment Guide: Multi-Domain FAS Architecture at Citrix Tech Zone.
-
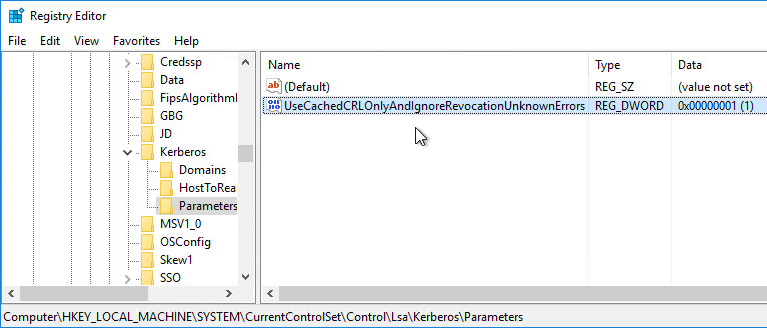
- By default, the VDAs will verify the certificates aren’t revoked by downloading the Certificate Revocation List. You can disable CRL checking by configuring HKEY_Local_Machine\System\CurrentControlSet\Control\LSA\Kerberos\Parameters\UseCachedCRLOnlyAndIgnoreRevocationUnknownErrors (DWORD) = 1 as detailed at CTX217150 Unable to login using the FAS Authentication – Getting Stuck on Please wait for local session manager.
- If your VDAs have third party credential providers (e.g., Duo), then it might interfere with FAS Single Sign-on.
- For Duo, see Can I enable other credential providers after installing Duo Authentication for Windows Logon? to whitelist the FAS credential provider, which is {81C8E4DC-B376-4D88-BCCD-BD0DD65BEE2B} CitrixMirrorCredentialProvider.
FAS 1909+ Configuration
If you prefer to script the FAS configuration, then see Citrix Blog Post Automating the Citrix Federated Authentication Service with PowerShell.
FAS 1909 and newer have a different configuration GUI than FAS 1906 and older.
Here are 1909 and newer GUI configuration instructions:
- Log into the FAS server as an Enterprise Administrator that can upload certificate templates to Active Directory.
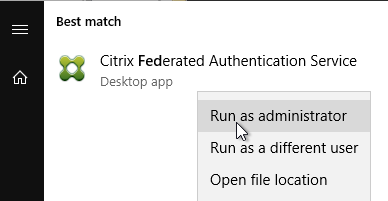
- On the FAS server, from the Start Menu, run Citrix Federated Authentication Service as administrator. Make sure you run it elevated.
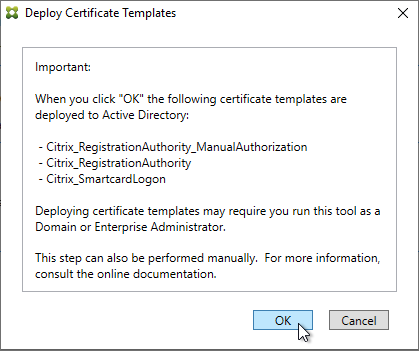
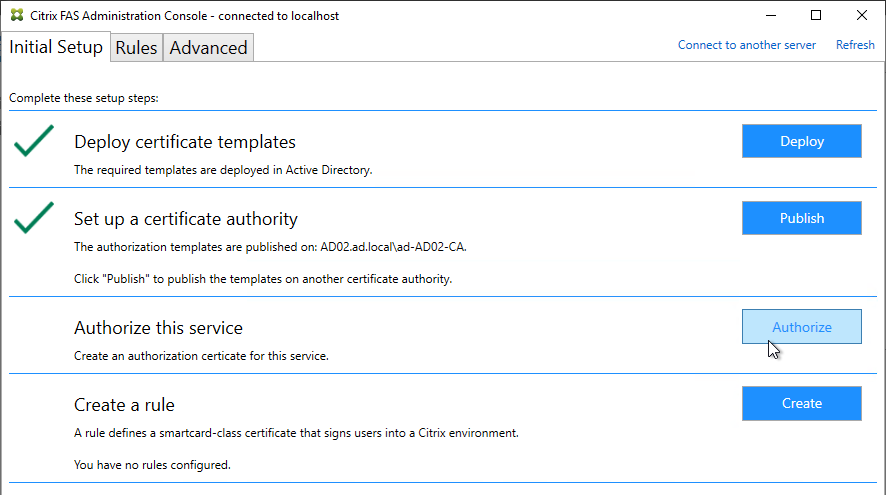
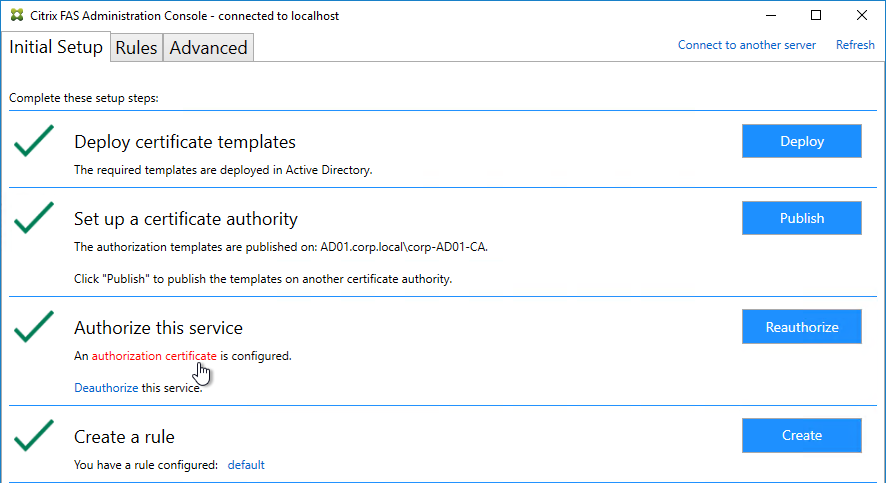
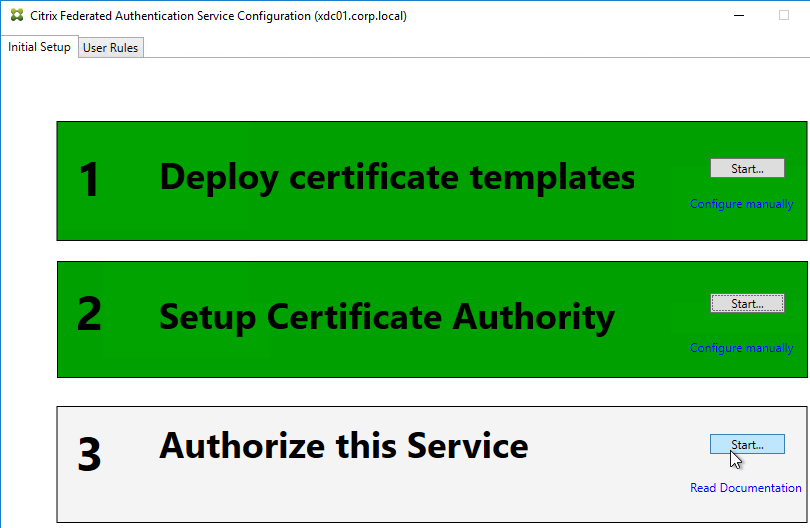
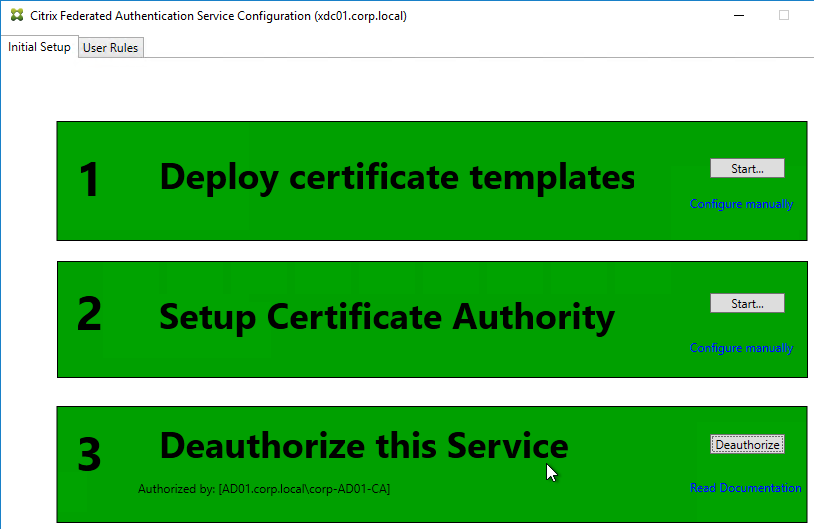
- In the tab named Initial Setup, in the row named Deploy certificate templates, click Deploy.
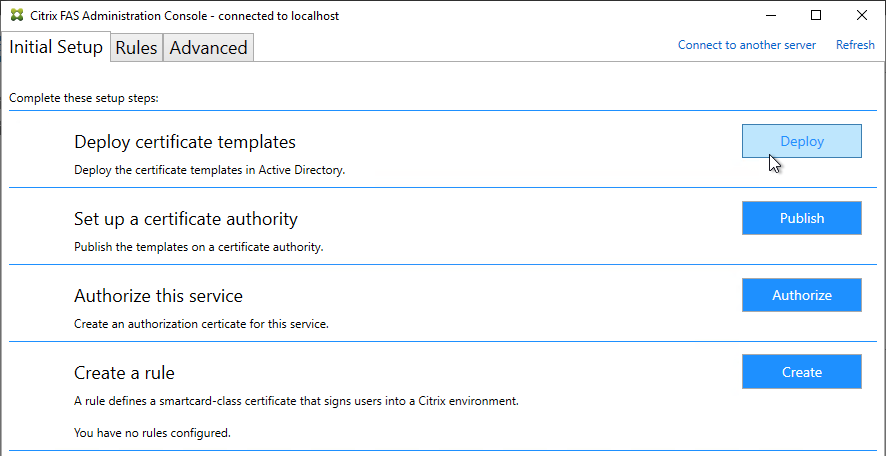
- Click OK to deploy the templates to Active Directory.
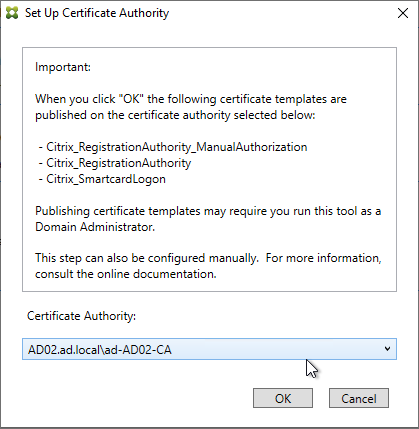
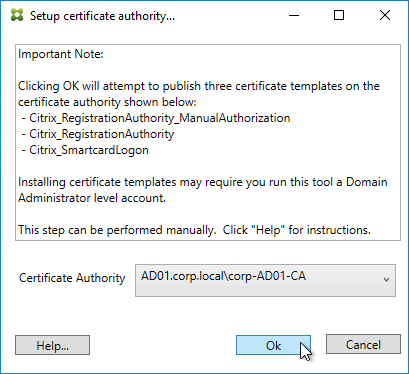
- In the row named Set up a certificate authority, click Publish.

- Select an Enterprise Certificate Authority that will be issue the FAS certificates and click OK.
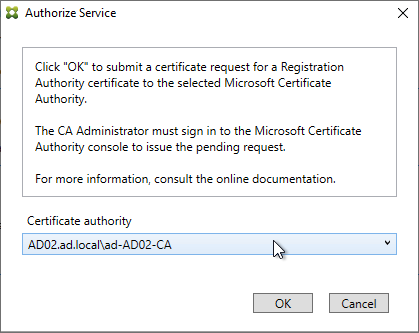
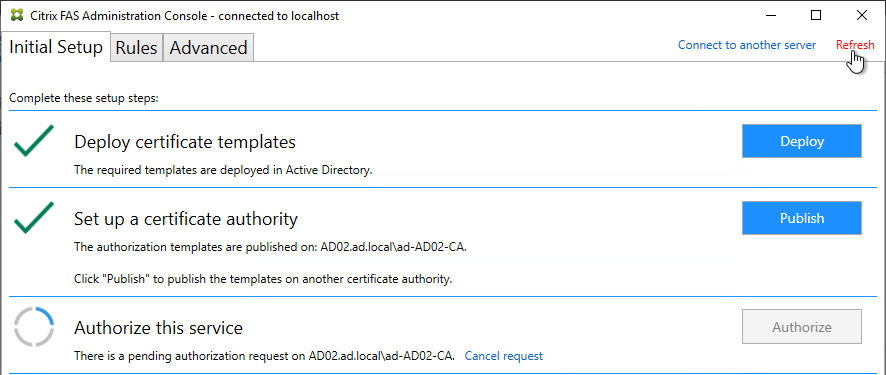
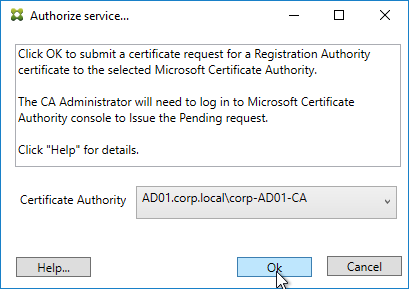
- In the row named Authorize this service, click Authorize.
- Select a CA that will issue this FAS server a Registration Authority certificate. Later, you will need to open the Certificate Authority console on the chosen server. Click OK.
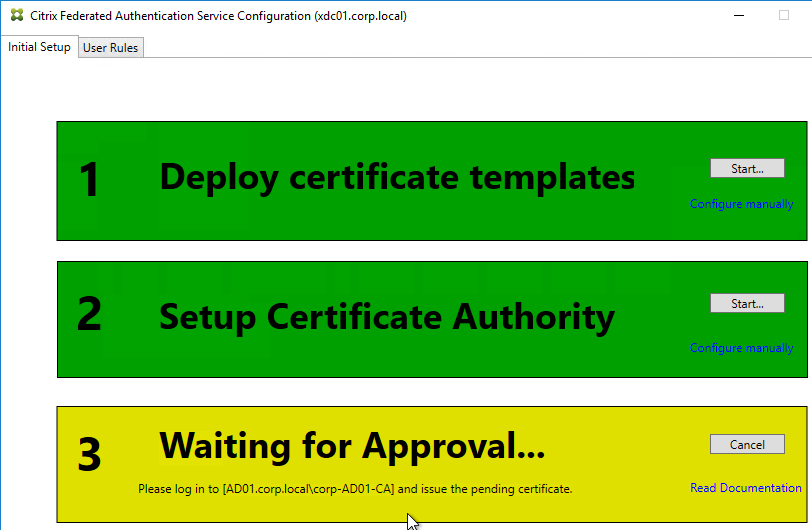
- The row named Authorize this service has a new icon indicating it is waiting on the registration authority certificate to be approved.

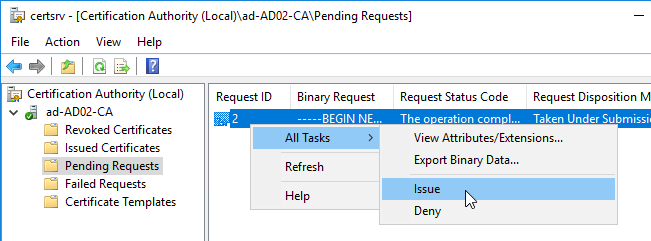
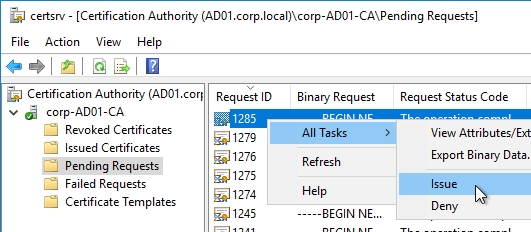
- Open the Certification Authority console and point it to the CA server. In the Pending Requests node, find the certificate request for the FAS server and Issue it.
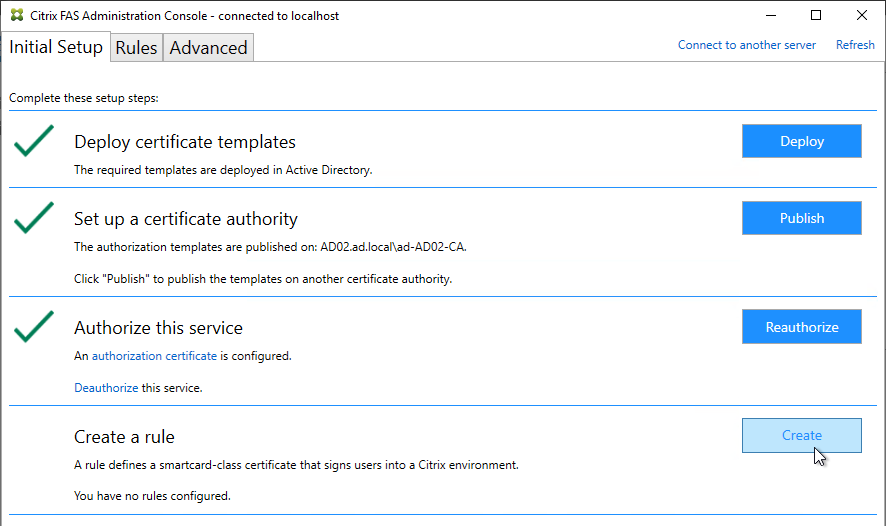
- Back in the FAS Administration Console, on the top right, click Refresh.
- The row named Authorize this service should now have a green check mark.
- In the row named Create a rule, click Create.
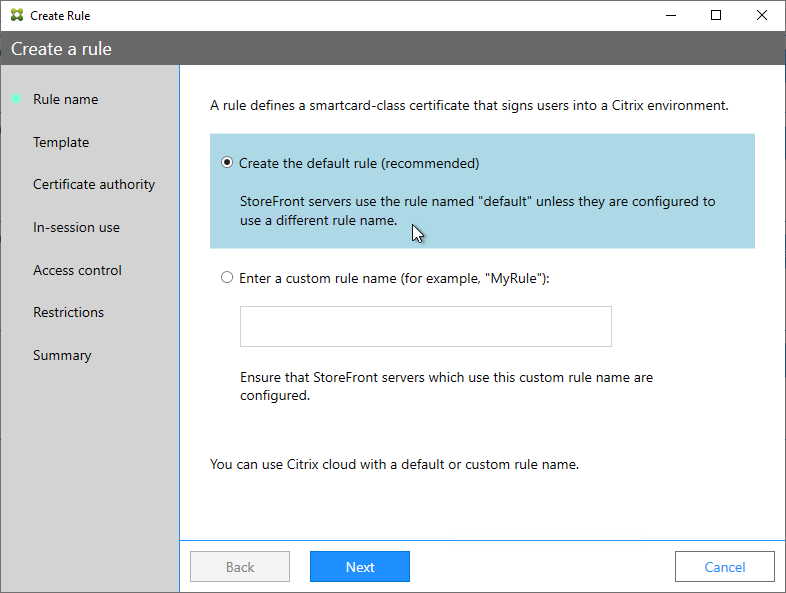
- In the Rule name page, leave it set to Create the default rule and click Next.
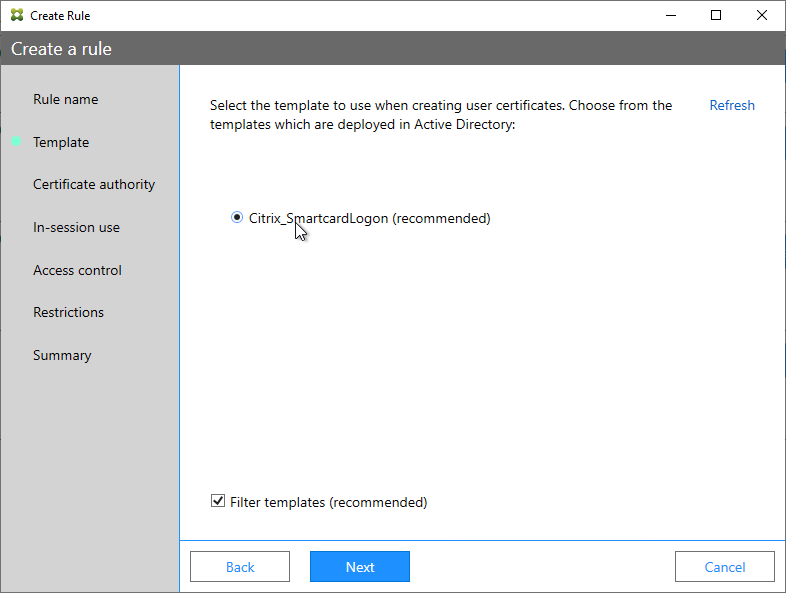
- In the Template page, click Next.
- In the Certificate authority page, select the CA that has the issuing templates configured and click Next. You can select more than one CA server.

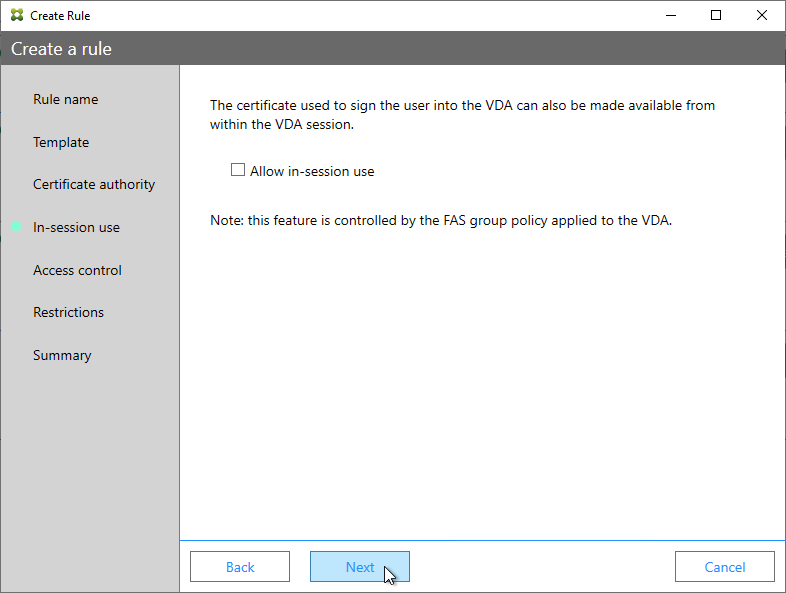
- In the In-session use page, click Next.
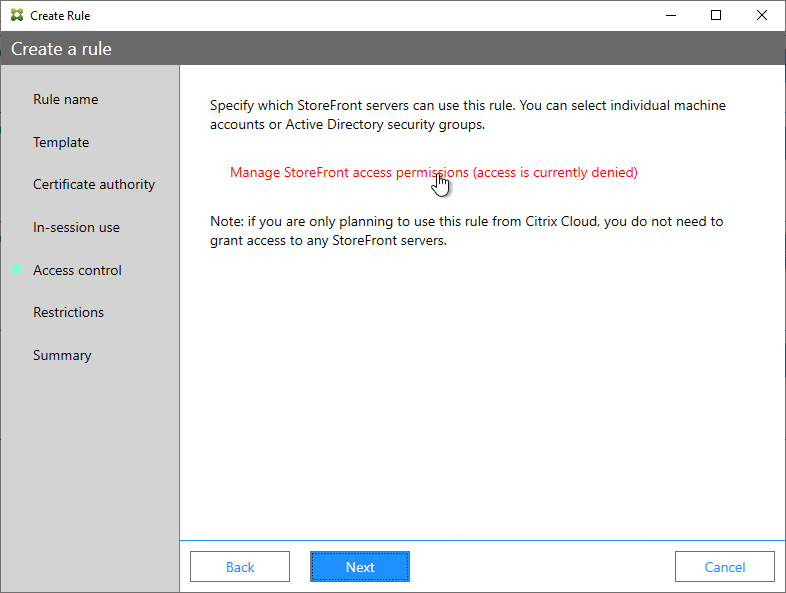
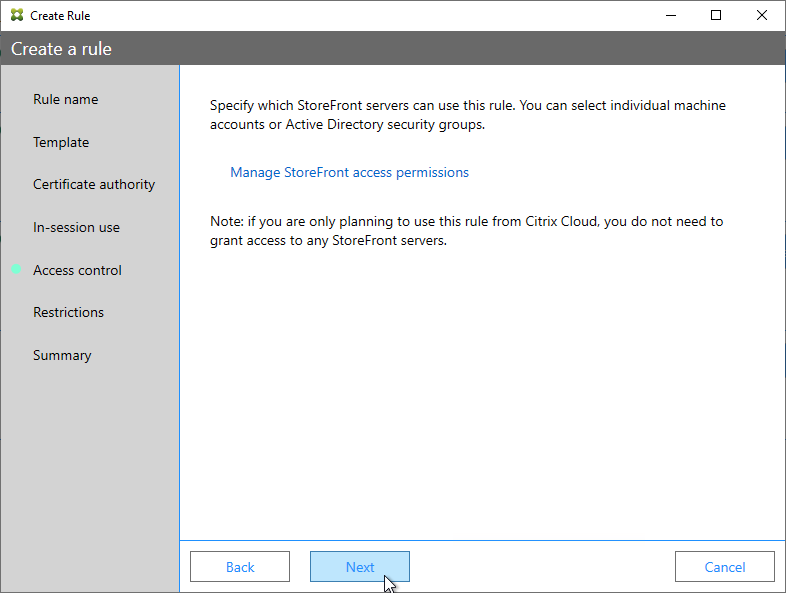
- In the Access control page, click the link to Manage StoreFront access permissions.
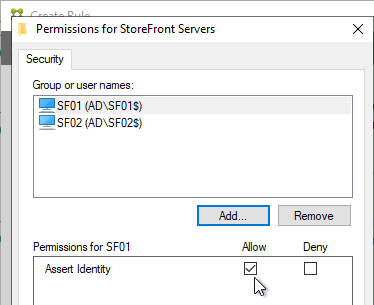
- In the Permission for StoreFront Servers page, add your StoreFront servers and give them the permission Assert Identity. Click OK.
- Back in the Create Rule wizard, click Next.
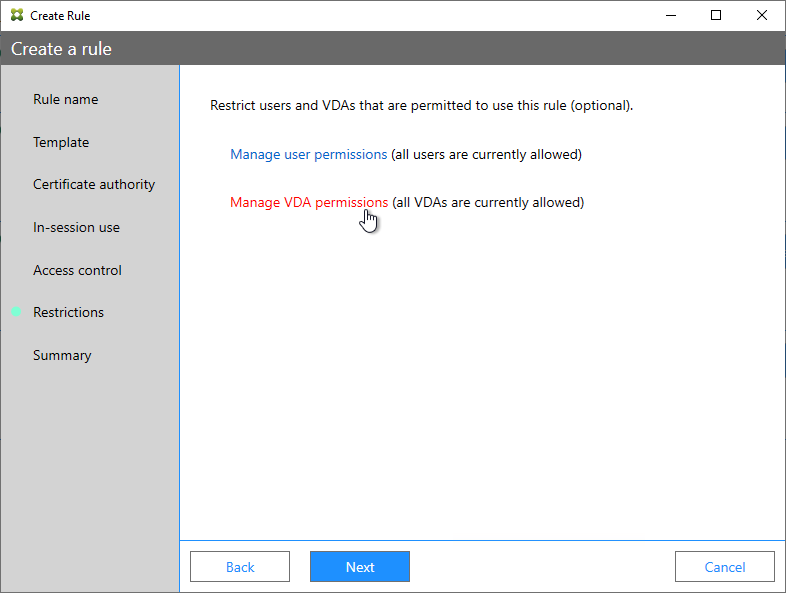
- In the Restrictions page, you can optionally reduce the VDAs that are authorized to use FAS. Click Next.
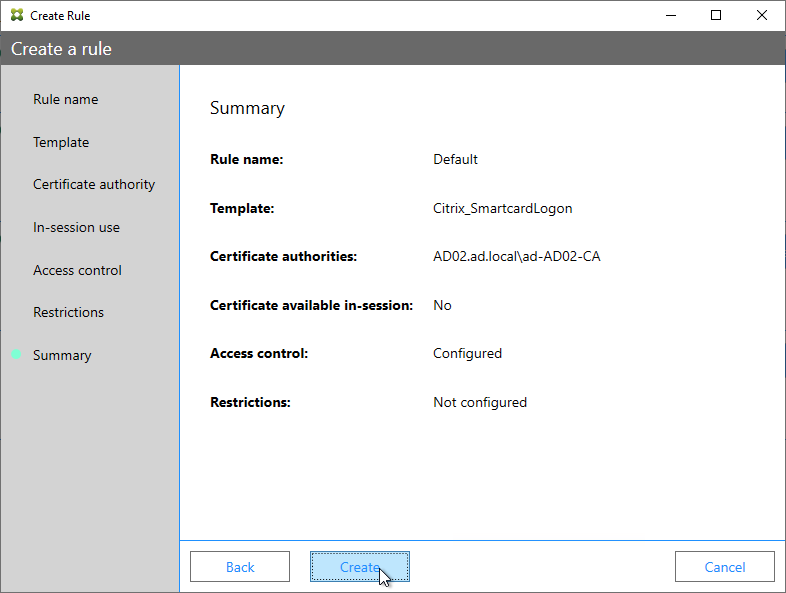
- In the Summary page, click Create.
- The FAS Registration Authority certificate expires in two years. You’ll need to manually renew the FAS Registration Authority certificate before it expires. Put a notification on your calendar. For details, see Renew registration authority certificates at Citrix Docs.
- In the row named Authorize this service, you can click the link for authorization certificate to see when it expires. Before expiration, use the Reauthorize button on the right of the same row.
- In the row named Authorize this service, you can click the link for authorization certificate to see when it expires. Before expiration, use the Reauthorize button on the right of the same row.
- Jump ahead to Certificate Templates.
FAS 1906 and older Configuration
If you prefer to script the FAS configuration, then see Citrix Blog Post Automating the Citrix Federated Authentication Service with PowerShell.
Here are GUI configuration instructions for FAS 1906 and older:
- Log into the FAS server as a Domain Administrator or Enterprise Administrator that can upload certificate templates to Active Directory.
- On the FAS server, from the Start Menu, run Citrix Federated Authentication Service as administrator. Make sure you run it elevated.
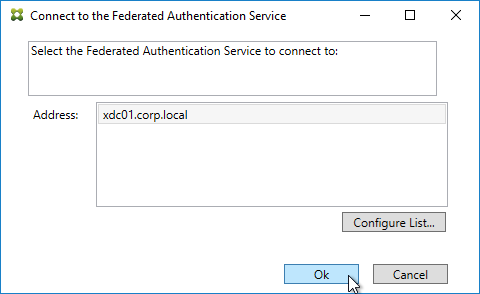
- The Federated Authentication Service FQDN should already be in the list (from group policy). Click OK.
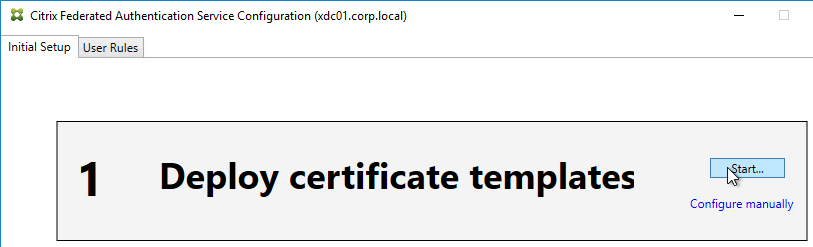
- In Step 1: Deploy certificate templates, click Start.
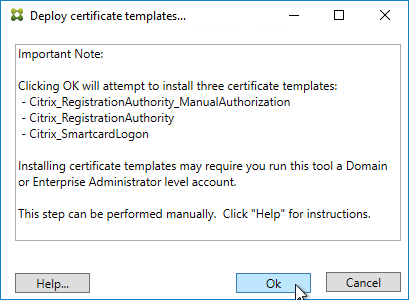
- Click OK to add certificate templates to Active Directory. Sufficient permission is required.
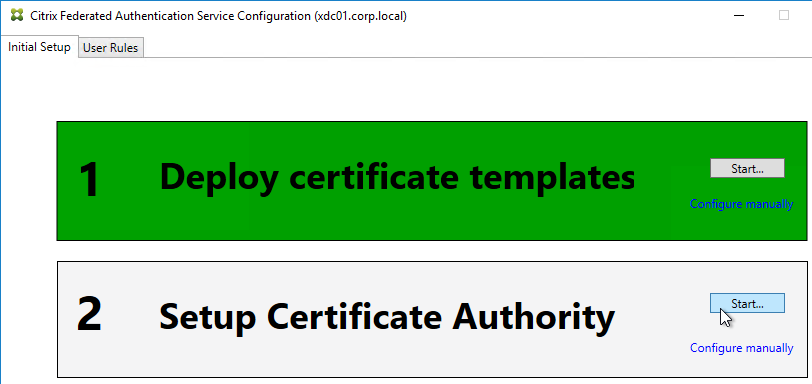
- In Step 2: Setup Certificate Authority, click Start.
- Select a Certificate Authority to issue the certificates, and click Ok.
- In Step 3: Authorize this Service, click Start.
- Step 3 automatically submits an online request for the Registration Authority certificate to the CA and stores the non-exportable private key in the standard Microsoft Enhanced RSA and AES Cryptographic Provider.
- Alternatively, you can submit the certificate request manually, and store the private key in TPM or HSM as detailed at Federated Authentication Service private key protection at Citrix Docs. When running New-FasAuthorizationCertificateRequest, the -UseTPM switch is optional.
- Select the issuing Certificate Authority, and click OK.
- Authorize this Service only lets you select one Certificate Authority. If you want to load balance certificate requests against multiple Certificate Authorities, then see Set up multiple CA servers for use in FAS at Citrix Docs.
Set-FasCertificateDefinition -Name default_Definition -CertificateAuthorities @("ca1.corp.local\CA1.corp.local", "ca2.corp.local\ca2.corp.local")
- Authorize this Service only lets you select one Certificate Authority. If you want to load balance certificate requests against multiple Certificate Authorities, then see Set up multiple CA servers for use in FAS at Citrix Docs.
- Step 3 is now yellow.
- On the Microsoft CA server, go to the Certification Authority Console > Pending Requests. Find the pending request, and Issue it.
- In a minute or two, Federated Authentication Service will recognize the issued certificate and Step 3 will turn green.
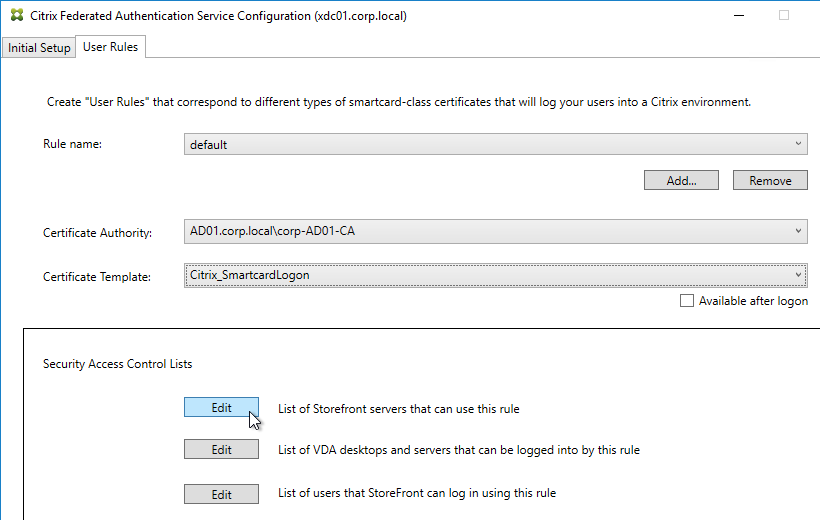
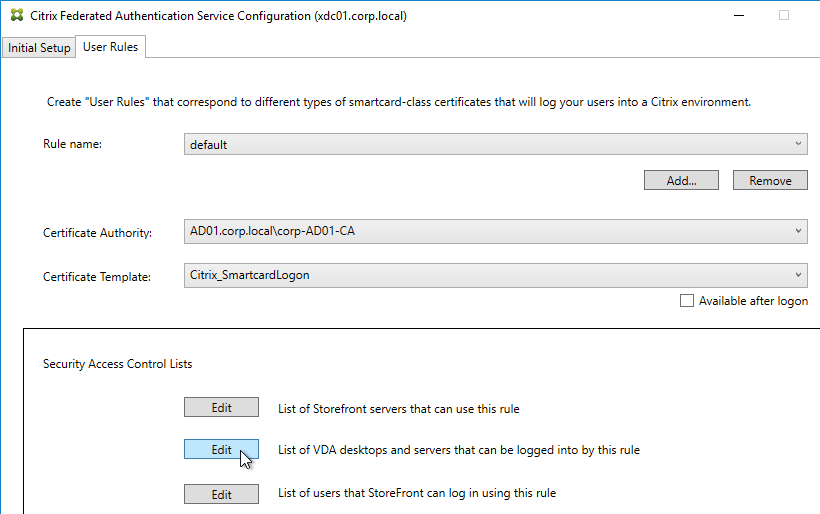
- After FAS authorization with the CA, in the FAS Configuration tool, switch to the User Rules tab.
- Use the Certificate Authority drop-down to select the issuing Certificate Authority.
- Use the Certificate Template drop-down to select the Citrix_SmartcardLogon template.
- Click Edit next to List of StoreFront servers that can use this rule.
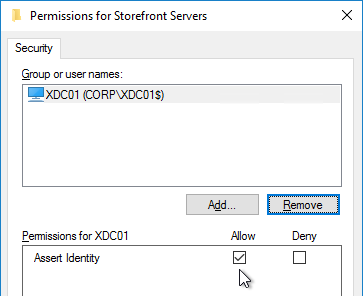
- Remove Domain Computers from the top half, and instead add your StoreFront servers. You could add an Active Directory security group instead of individual StoreFront servers.
- On the bottom half, make sure Assert Identity is Allowed. Click OK.
- By default, all users and all VDAs are allowed. You can click the other two Edit boxes to change this.
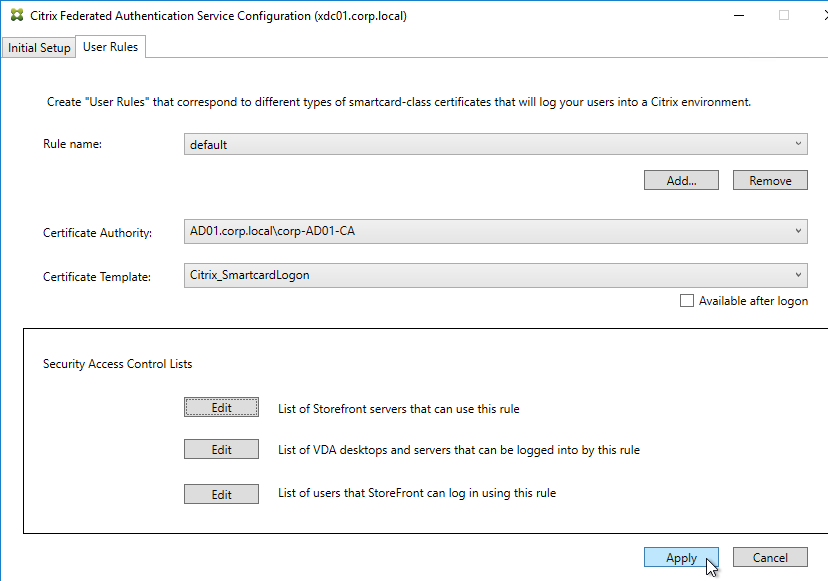
- When done, click Apply.
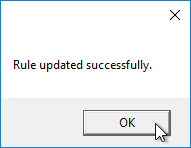
- Click OK when you see Rule updated successfully.
- The FAS Registration Authority certificate expires in two years. You’ll need to manually renew the FAS Registration Authority certificate before it expires. Put a notification on your calendar. For details, see Renew registration authority certificates at Citrix Docs.
- To see the expiration date of the authorization certificate, run the following PowerShell command after running
add-pssnapin Citrix.Authentication.FederatedAuthenticationService.V1:Get-FasAuthorizationCertificate -FullCertInfo -address myFASServer
- To see the expiration date of the authorization certificate, run the following PowerShell command after running
Certificate Templates
The deployed FAS Certificate Templates from older versions of FAS have Autoenroll enabled. Newer versions of FAS (e.g., 2203) no longer have Autoenroll enabled.
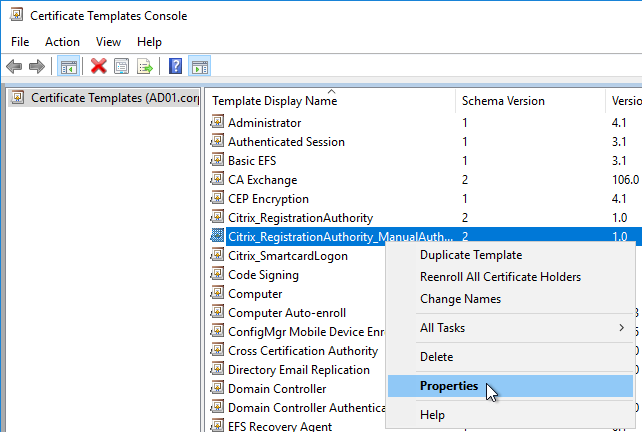
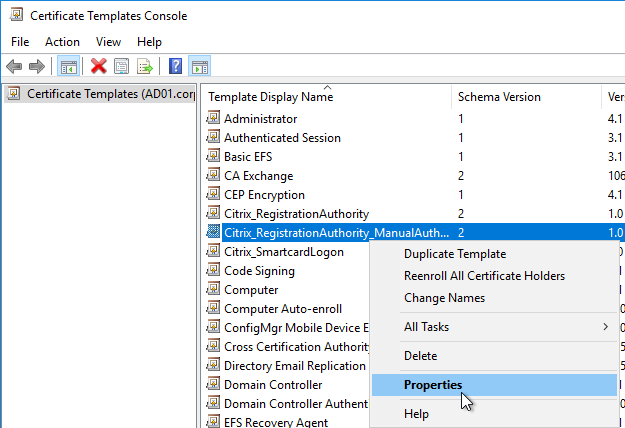
- Open the Certificate Templates console. One option is to open the Certification Authority console, right-click Certificate Templates, and then click Manage.

- There should be three templates with names starting with Citrix_. Open the properties on each one.
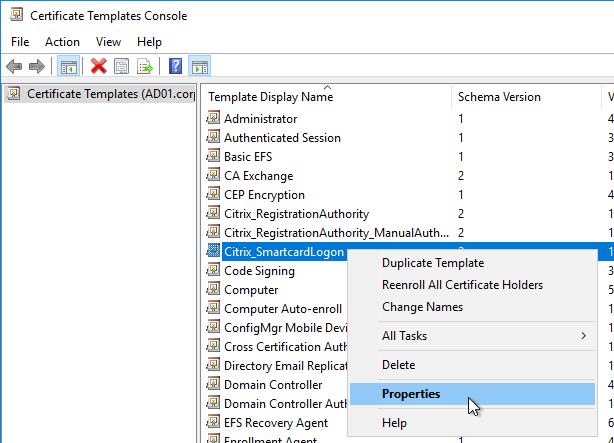
- On the Security tab, highlight each group assigned to the template.
- On the bottom half, uncheck the box in the Autoenroll row but leave Enroll checked. Perform this step for every group assigned to this template. Then click OK.
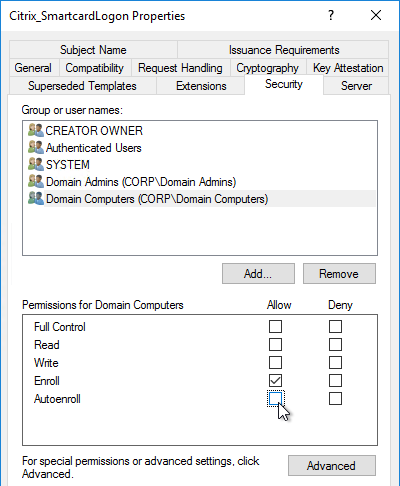
- Repeat disabling autoenroll for the other two templates.
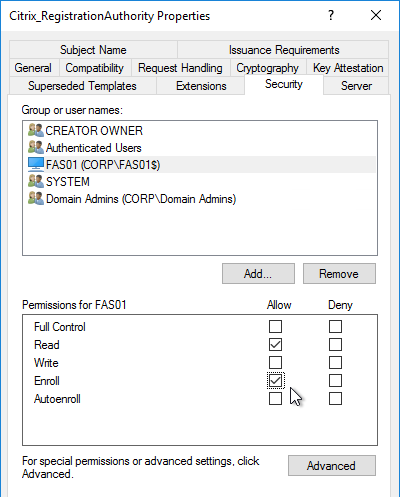
The Registration Authority certificate templates are permitted to all Domain Computers. You might want to change that.
- Open the Properties of one of the Citrix_RegistrationAuthority certificate templates.
- On the Security tab, remove Domain Computers.
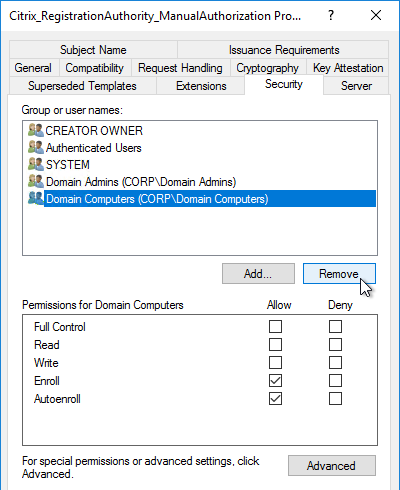
- Add your FAS servers and enable the Enroll permission.
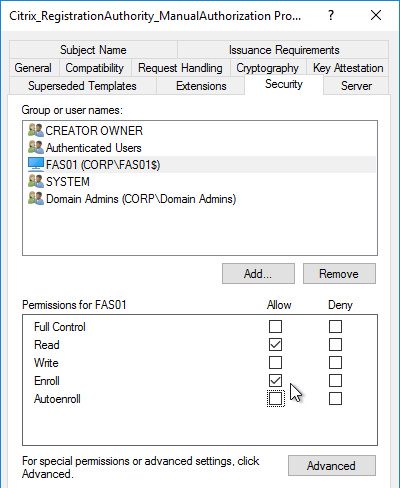
- Repeat for the other Registration Authority certificate.
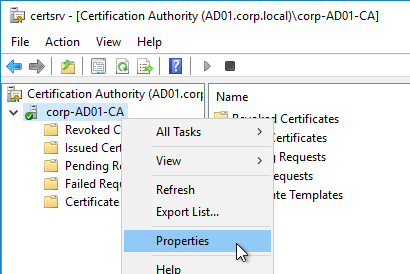
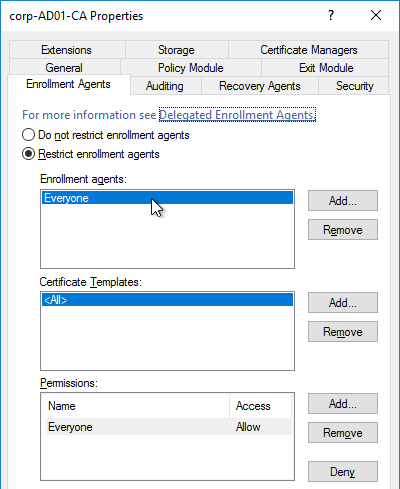
To further restrict who can be issued certificates, go to your Certificate Authority’s Properties and use the Enrollment Agents tab to restrict enrollment agents.
StoreFront Configuration
Once FAS is enabled on a StoreFront store, it applies to all connections through that store, including password-based authentications. One option is to create a new store just for FAS users.
- Check the registry at at HKLM\Software\Policies\Citrix\Authentication\UserCredentialService\Addresses to confirm that the group policy with FAS addresses has been applied to the StoreFront servers.
- On the StoreFront 3.6 or newer server, run the following elevated PowerShell command:
& "$Env:PROGRAMFILES\Citrix\Receiver StoreFront\Scripts\ImportModules.ps1"
- Run the following commands. Adjust the store name as required.
$StoreVirtualPath = "/Citrix/Store"
$store = Get-STFStoreService -VirtualPath $StoreVirtualPath
$auth = Get-STFAuthenticationService -StoreService $store
Set-STFClaimsFactoryNames -AuthenticationService $auth -ClaimsFactoryName "FASClaimsFactory"
Set-STFStoreLaunchOptions -StoreService $store -VdaLogonDataProvider "FASLogonDataProvider"
- If you have multiple StoreFront servers, Propagate Changes.
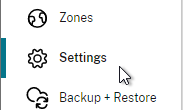
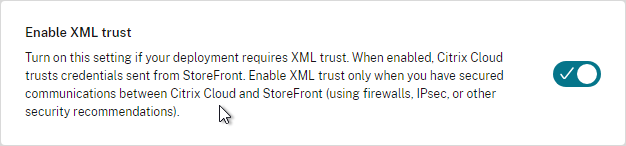
- In Web Studio (CVAD 2212 and newer), go to Settings and Enable XML Trust.
- Or on a Citrix Delivery Controller, run the following PowerShell command:
Set-BrokerSite -TrustRequestsSentToTheXmlServicePort $true
- Or on a Citrix Delivery Controller, run the following PowerShell command:
If you ever need to disable FAS on StoreFront, run the following commands. Adjust the store name as required.
$StoreVirtualPath = "/Citrix/Store"
$store = Get-STFStoreService -VirtualPath $StoreVirtualPath
$auth = Get-STFAuthenticationService -StoreService $store
Set-STFClaimsFactoryNames -AuthenticationService $auth -ClaimsFactoryName "standardClaimsFactory"
Set-STFStoreLaunchOptions -StoreService $store -VdaLogonDataProvider ""
SAML Configuration
SAML Flow
SAML flows like this:
- (Optional) User goes to the web application aka Service Provider (e.g. Citrix Gateway).
- The Service Provider (SP) redirects the user’s browser to the Identity Provider’s (IdP) SAML Single Sign-on (SSO) URL and includes an authentication request in the Redirect. The IdP SSO URL might be different for each Service Provider.
- The Authentication Request from the Service Provider includes a Service Provider Entity ID. The IdP matches the SP Entity ID with an entry in its database so it knows which SP is making the authentication request. The Entity ID must match on both the SP and the IdP.
- If the Authentication Request is signed by the Service Provider’s certificate private key, then the IdP will verify the signature using the Service Provider’s certificate public key. In this scenario, the Service Provider’s certificate (without private key) must be loaded into the IdP.
- The user authenticates to the IdP, typically using Multi-factor Authentication.
- If the user was redirected from the SP, then the IdP already knows which SP to authenticate with.
- If the user went directly to the IdP, then the user typically needs to click an icon representing the web application (Service Provider).
- IdP generates a SAML Assertion containing the user’s userPrincipalName or email address.
- Configure the IdP to include the user’s UPN or email address in the NameID field of the assertion. SAMAccountName won’t work with Citrix FAS.
- The SAML Assertion also includes the Service Provider’s Entity ID. The ID in the Assertion must match the ID configured on the SP.
- IdP signs the SAML Assertion using an IdP certificate private key.
- IdP has a configuration for the SP that includes a SAML Assertion Consumer Service (ACS) URL. IdP redirects the user’s browser to the SP’s ACS URL and POST’s the SAML Assertion.
- The ACS URL on Citrix Gateway ends in /cgi/samlauth
- SP uses the IdP certificate’s public key to verify the signature on the SAML Assertion.
- The IdP’s certificate (without private key) is installed on the Citrix ADC so it can verify the Assertion’s signature.
- SP extracts the user’s userPrincipalName from the Assertion and uses the UPN for Single Sign-on to StoreFront and the rest of the Citrix components.
- Note that the SP does not have access to the user’s password and thus that’s why we need Citrix FAS to generate certificates for each user.
Configure the SAML IdP
You typically start the configuration on the Identity Provider (IdP). Every IdP has unique instructions. Search Google for your IdP and Citrix ADC and you might find a IdP-specific guide. After IdP configuration, you download the IdP’s certificate and copy the IdP’s SSO URL so you can configure them on Citrix ADC.
- Azure Active Directory IdP – See the next section. Also see:
- Marius Sandbu Setting up Citrix SSO with Windows 10 and Azure AD Join
- ADFS IdP – jump to the ADFS as IdP section. Also see:
- George Spiers ADFS authentication to StoreFront using NetScaler, SAML and Citrix Federated Authentication Service
- Dennis Radstake SAML authentication for Citrix XenDesktop and XenApp.
- Citrix Blog Post ADFS v3 on Windows Server 2012 R2 with NetScaler.
Azure AD as SAML IdP
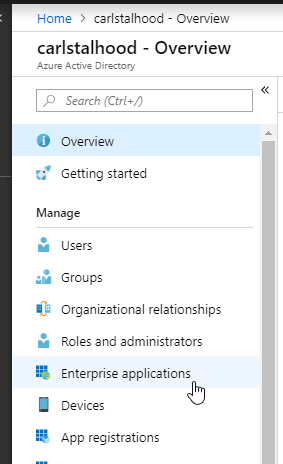
- In Azure Portal, go to Azure Active Directory.
- On the left, click Enterprise applications.
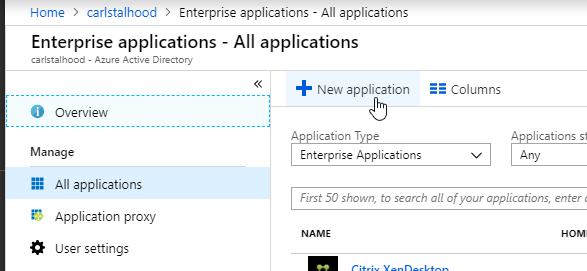
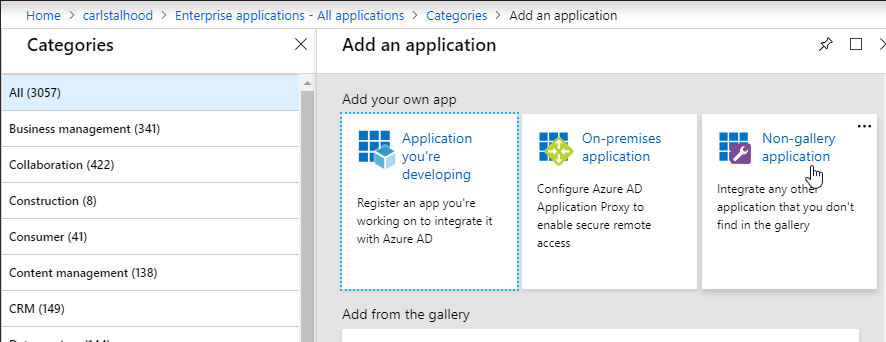
- In the new blade that appears, on the All applications page, on the right, click New application.
- In the All Categories view of the gallery, on the top right, click Non-gallery application.
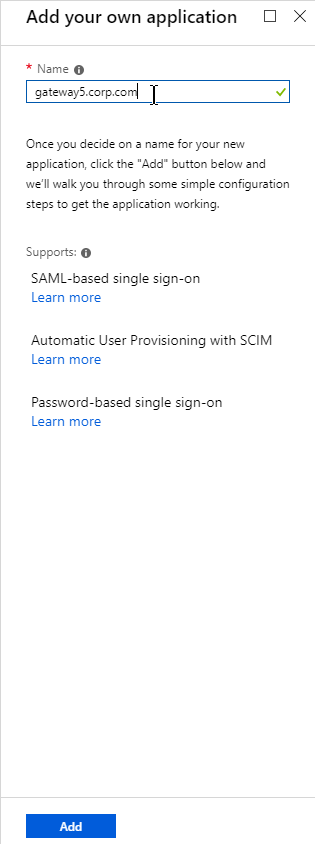
- Give the application a descriptive name. Azure AD shows this name in the myapps portal. Click Add.
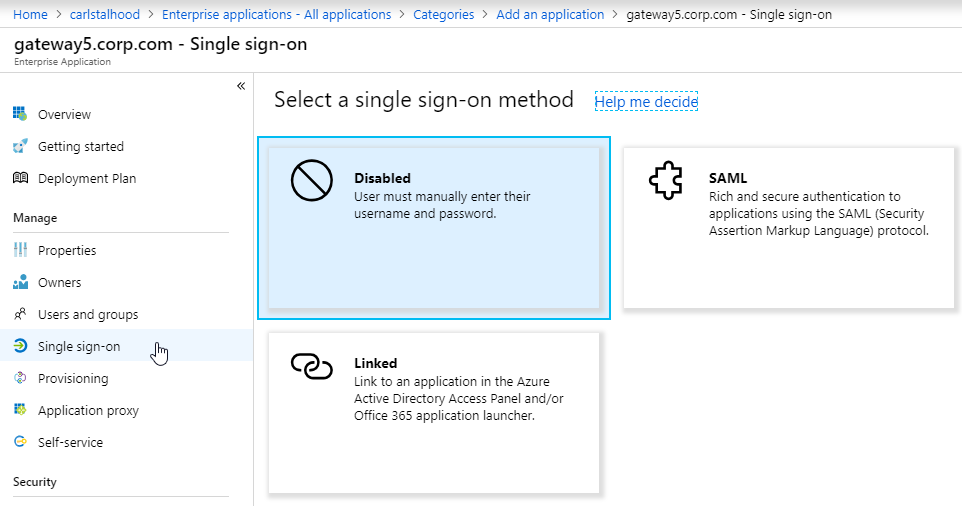
- After the application is created, on the left, in the Manage section, click Single sign-on.
- On the right, click the big button for SAML.
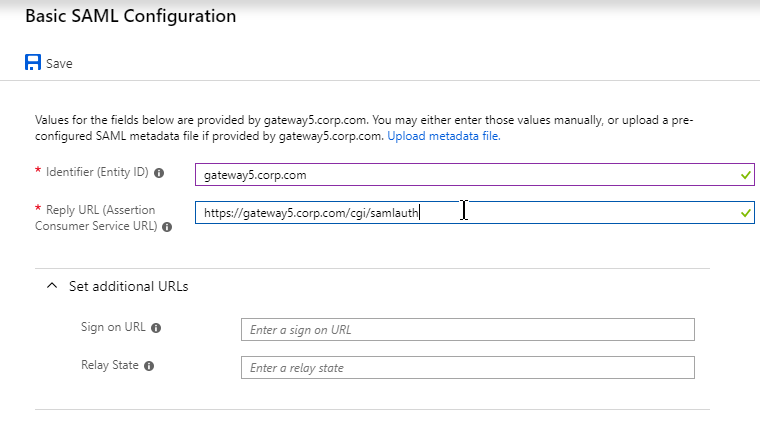
- In section 1 labelled Basic SAML Configuration, click the pencil icon.
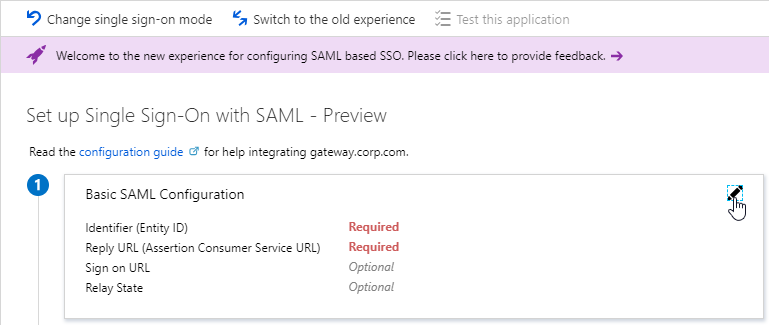
- In the Identifier (Entity ID) field, enter an identifier in URI format. Usually it matches the FQDN of the Citrix Gateway and can be entered in https://gateway.corp.com format. You’ll later need to specify the exact same Identifier on the Citrix ADC.
- In the Reply URL (Assertion Consumer Service URL) field, enter a URL similar to https://mygateway.company.com/cgi/samlauth. The path must be /cgi/samlauth. The scheme should be https. And the FQDN is your Citrix Gateway’s FQDN.
- Click Save. Then you might have to click the x on the top right to make it go away.
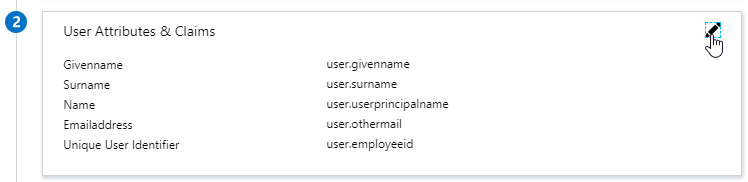
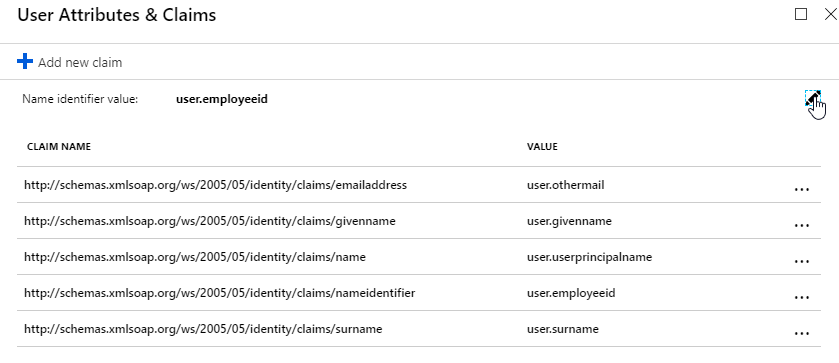
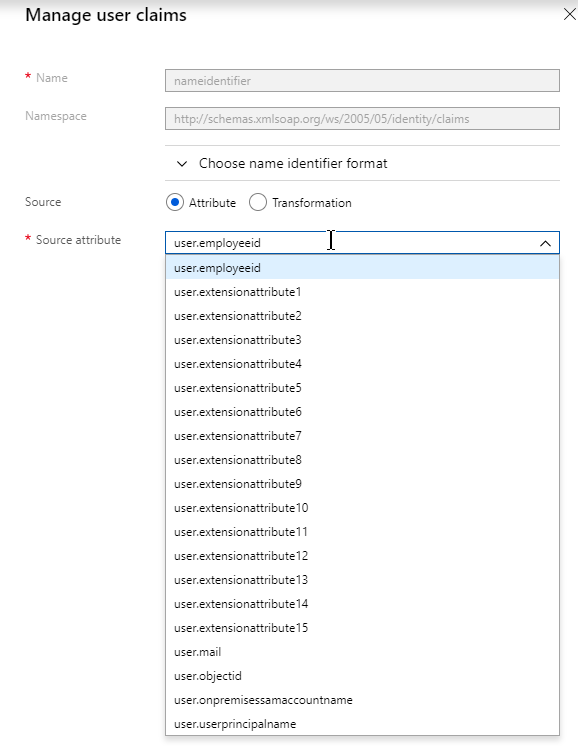
- In section 2 labelled User Attributes & Claims, notice that it defaults to sending the userprincipalname. You can click the pencil to change the attribute used for the Name identifier value. Whatever value you send will need to match the userPrincipalNames of local Active Directory accounts (aka shadow accounts).
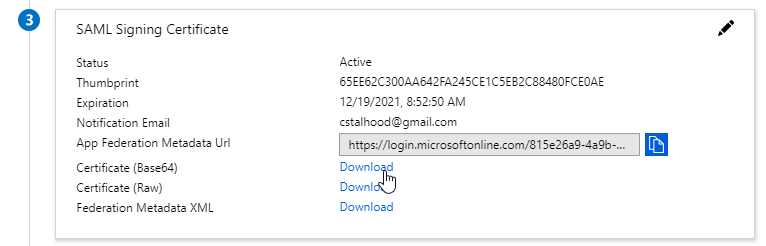
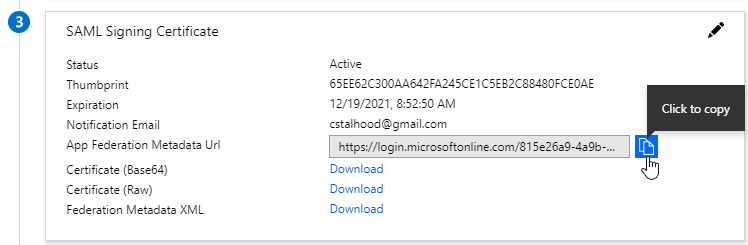
- In section 3 labelled SAML Signing Certificate, click the Download link in the Certificate (Base64) line.
- Citrix ADC 12.1 and newer support SAML metadata so feel free to copy the App Federation Metadata Url field.
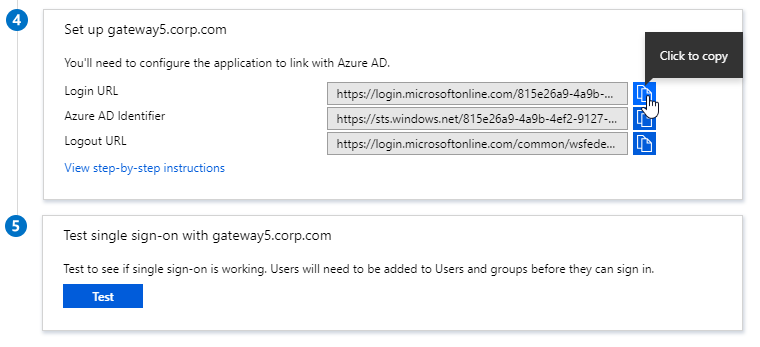
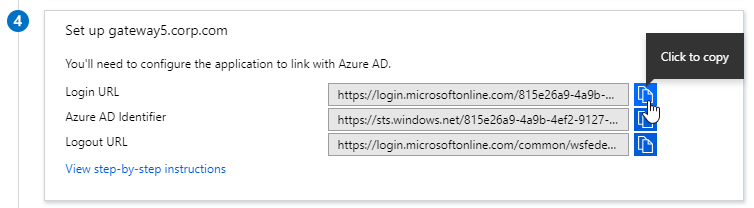
- If you are running NetScaler 12.0 or older, then you will need to copy the Login URL field from section 4 labelled Set up gateway5.corp.com
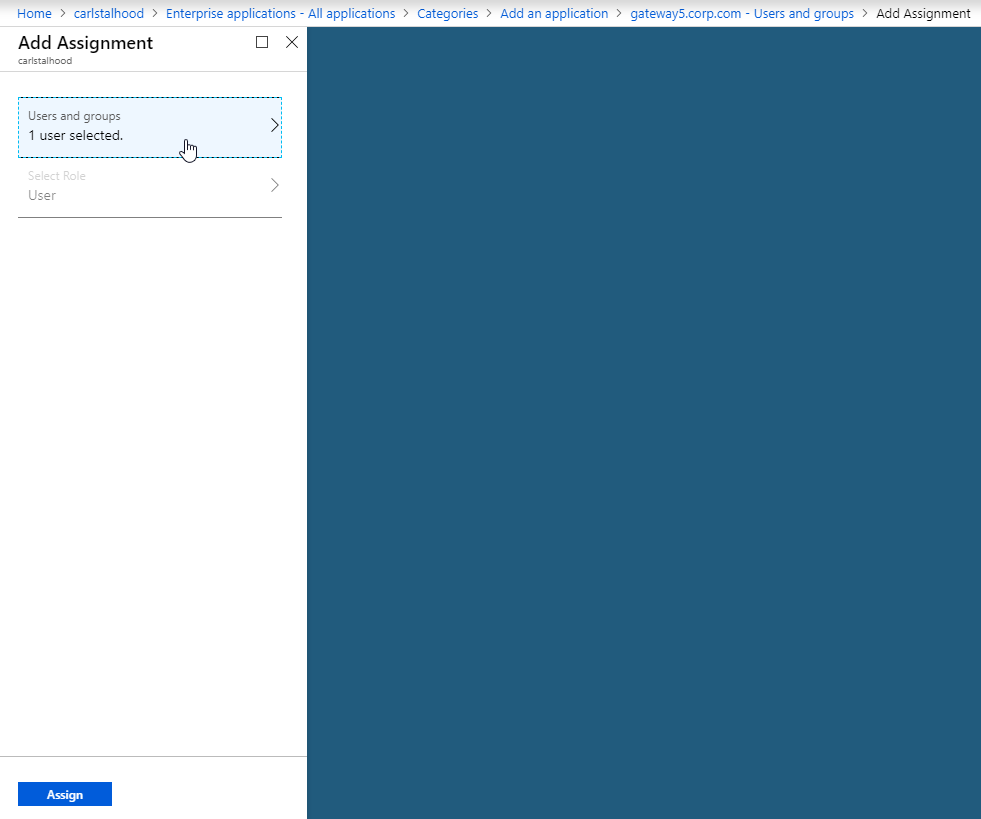
- On the left, under Manage, click Users and groups.
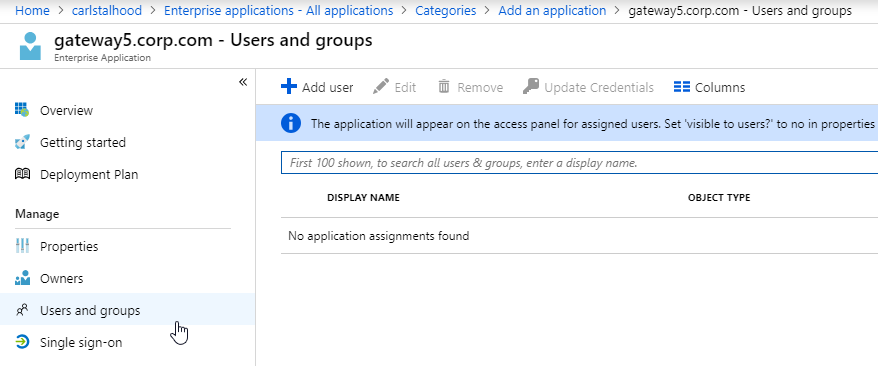
- Use the normal process to assign Azure AD users and groups to this application. Click Assign.
- Jump to the section named Citrix ADC SAML Configuration.
ADFS as SAML IdP
The screenshots in this section use ADFS as an example IdP. Your IdP will be different.
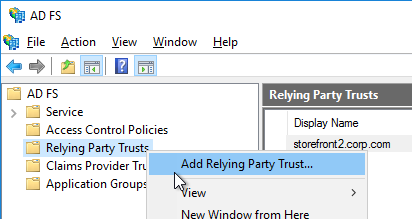
- In your SAML IdP, create a Relying Party Trust (aka service provider trust) or new Application.
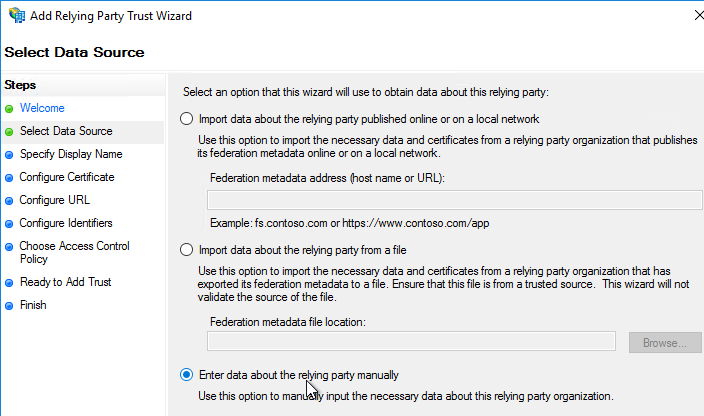
- Since we’re configuring the IdP before we configure Citrix ADC and thus don’t have access to the SP metadata, select the option to Enter data about the relying party manually.
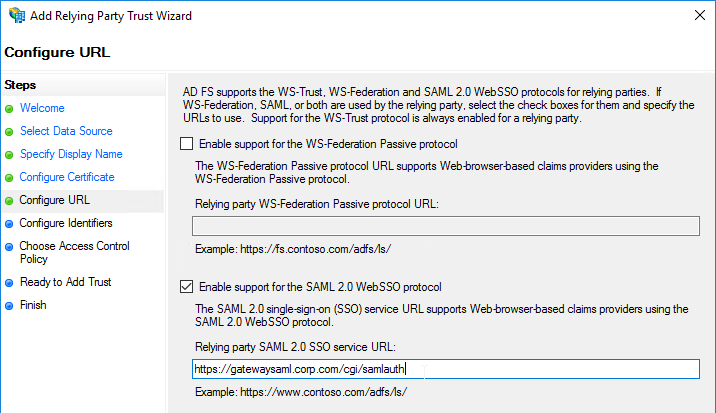
- For the Assertion Consumer Service URL (aka relying party service URL), enter the URL to your Citrix Gateway with /cgi/samlauth appended to the end (e.g. https://gateway.corp.com/cgi/samlauth)
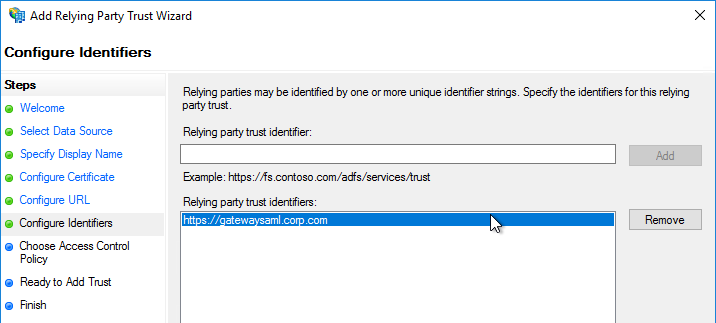
- Enter a Relying party trust identifier in URI format. You must specify the same identifier (Issuer Name) on the Citrix ADC as detailed in the next section.
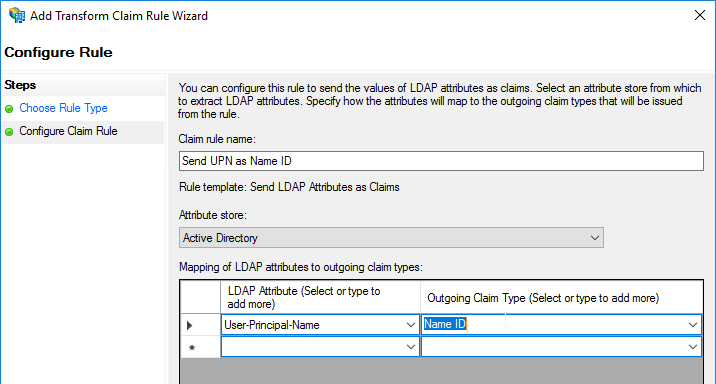
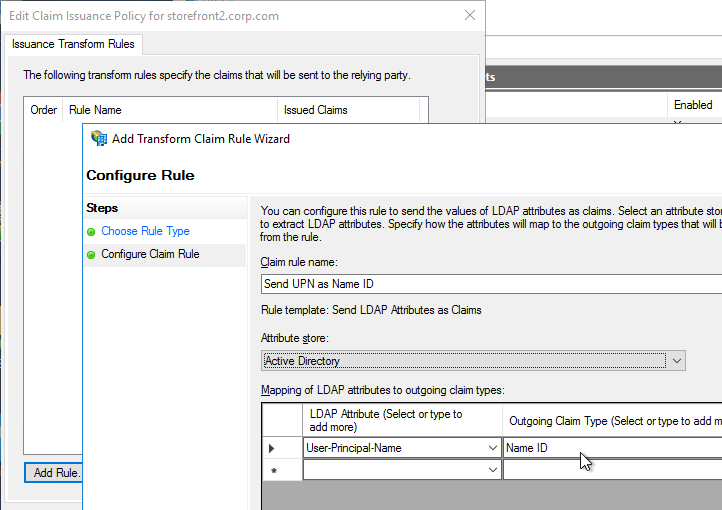
- Configure the SAML IdP to send email address or User-Principal-name as Name ID. Citrix ADC receives the Name ID and sends it to StoreFront. StoreFront will look in Active Directory for an account with userPrincipalName that matches the Name ID.
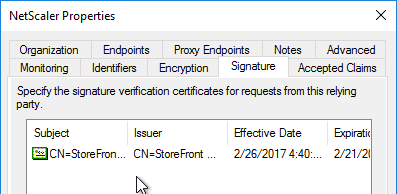
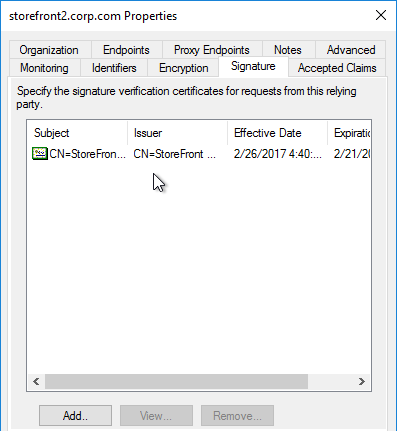
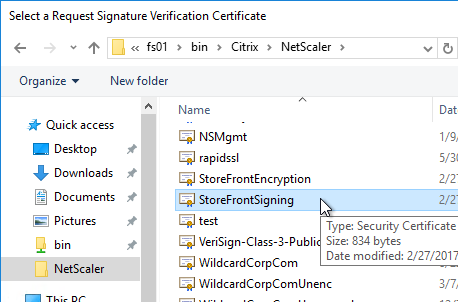
- Citrix ADC will sign the authentication requests it sends to the IdP. On the Citrix ADC, you will soon configure the Citrix ADC SAML SP signing certificate with private key that signs the authentication requests that are sent to the IdP. In your SAML IdP, import the same Citrix ADC SAML SP signing certificate but without the private key.
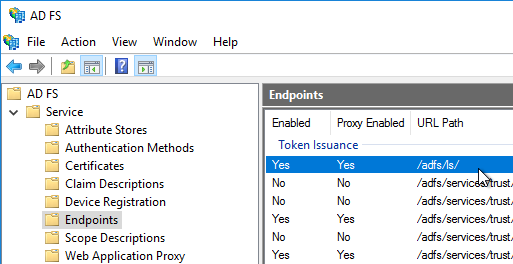
- Copy the SAML authentication URL (aka Token Issuance URL) from your SAML IdP. You’ll need to enter this same URL on your Citrix ADC later.
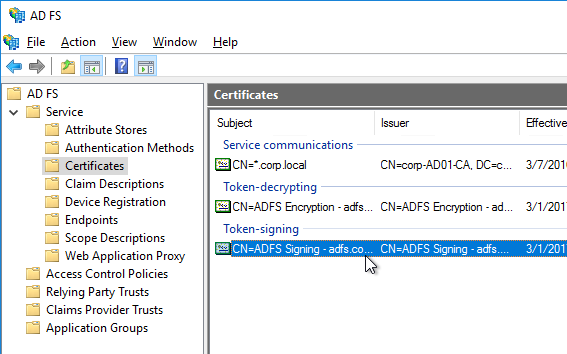
- Export the IdP Token-signing certificate from your SAML IdP. The IdP could be ADFS, Okta, Ping, etc.

Citrix ADC SAML Configuration
SAML Server/Action
- Instructions for Citrix ADC 13.0, Citrix ADC 12.1, NetScaler 12.0, and NetScaler 11.1 are essentially the same.
- Citrix ADC 12.1 and newer support SAML Metadata while older versions of NetScaler do not support SAML Metadata.
- NetScaler 11 is very similar, except Certificates are in a different place in the NetScaler menu tree.
- Workspace app support – If you bind a SAML Authentication Policy directly to the Gateway Virtual Server (no nFactor/AAA), then Workspace app and Gateway VPN plug-in won’t work. To support SAML with Workspace app and Gateway VPN plug-in, configure nFactor (Authentication Virtual Server with Authentication Profile) instead of directly on the Gateway Virtual Server.
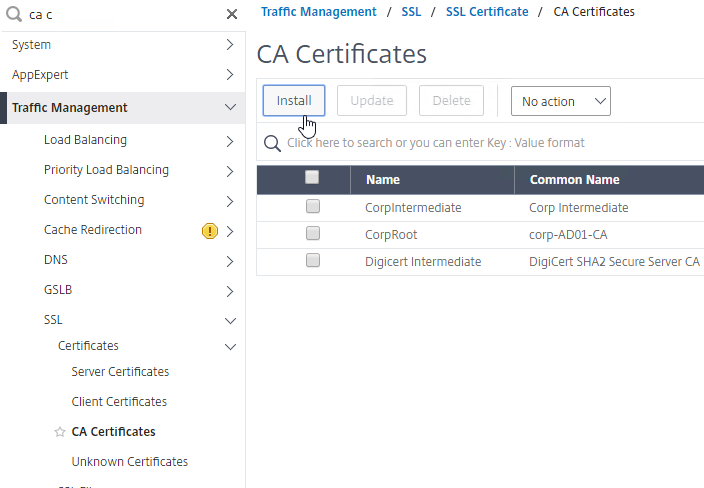
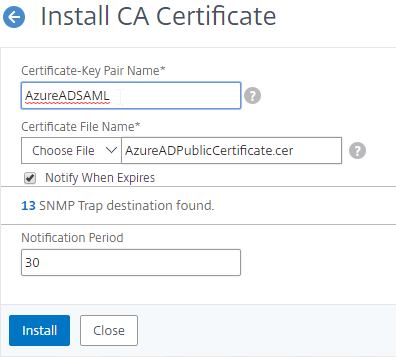
- IdP Signing Certificate – On Citrix ADC, if you are not importing IdP metadata, then manually import the IdP SAML token-signing certificate (without private key) under Traffic Management > SSL > Certificates > CA Certificates. Citrix ADC uses this certificate to verify the signature of the SAML assertion from the IdP.
Note: when you later create the SAML Action on Citrix ADC, there’s a place to add a SAML certificate. Unfortunately, the SAML Action is trying to import the wrong type of certificate since it wants the private key, which you don’t have access to. If you import the certificate here under CA Certificates, then there’s no prompt for private key.
- SAML IdP certificates are shown in the Unknown Certificates node.
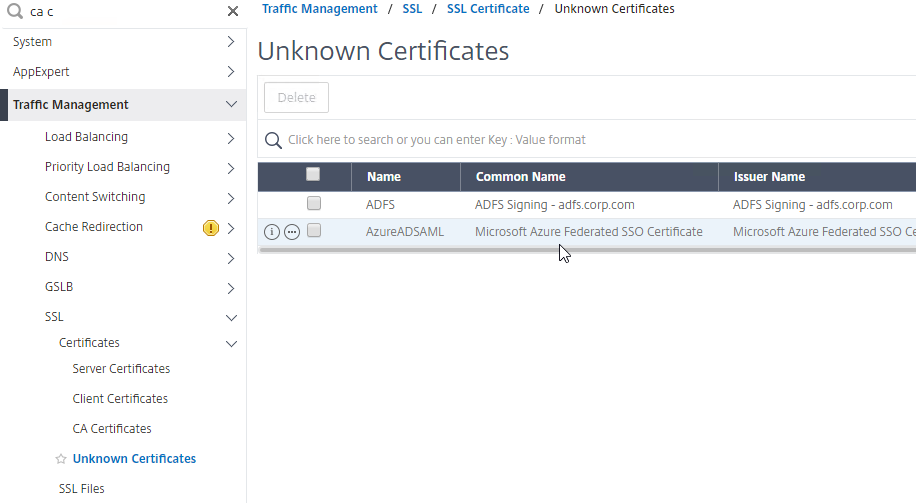
- SAML IdP certificates are shown in the Unknown Certificates node.
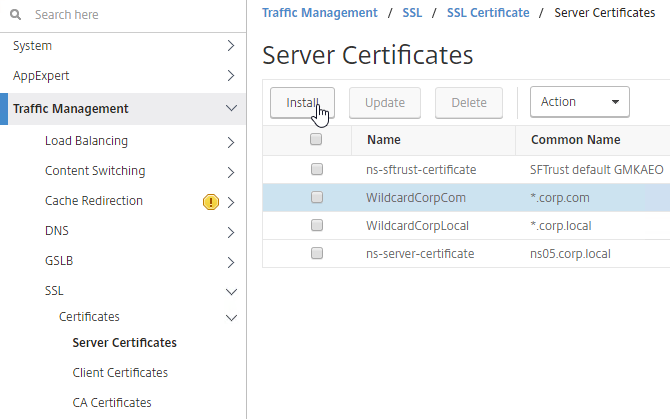
- If you want ADC to sign the authentication requests it sends to the IdP, then do the following:
- Move up two nodes to Server Certificates and Import or create a SP SAML signing certificate with private key. This can be the same certificate used on Citrix Gateway. Or a more common practice is to create a self-signed certificate.
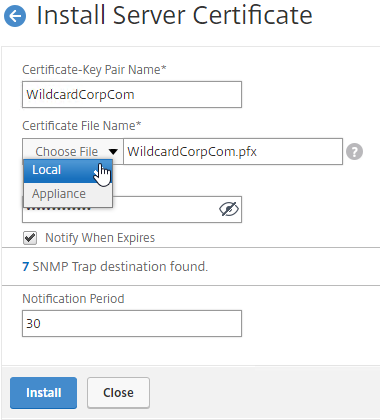
- You’ll also need to import this SAML SP signing certificate (without private key) to your SAML IdP so it can verify the SAML authentication request signature from the Citrix ADC.
- Move up two nodes to Server Certificates and Import or create a SP SAML signing certificate with private key. This can be the same certificate used on Citrix Gateway. Or a more common practice is to create a self-signed certificate.
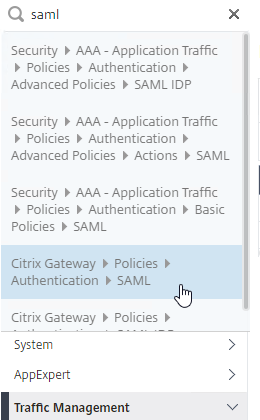
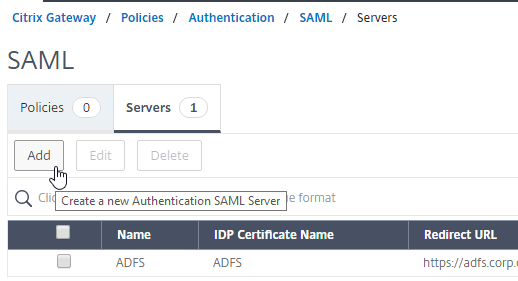
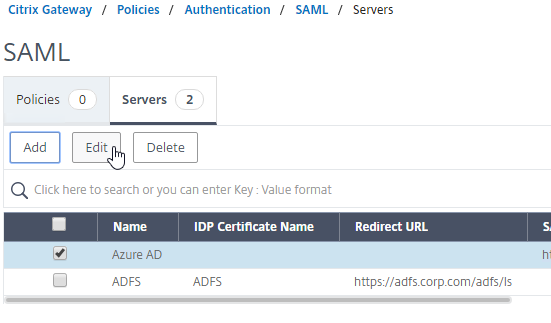
- Go to Citrix Gateway > Policies > Authentication > SAML. The quickest way to get here is to enter SAML in the search box on top of the menu.
- On the right, switch to the tab labelled Servers, and click Add.
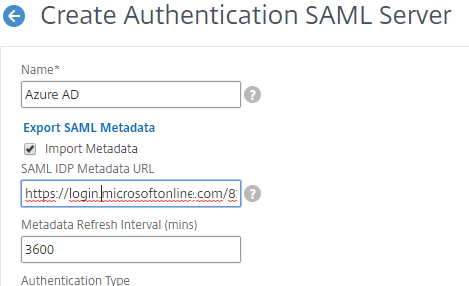
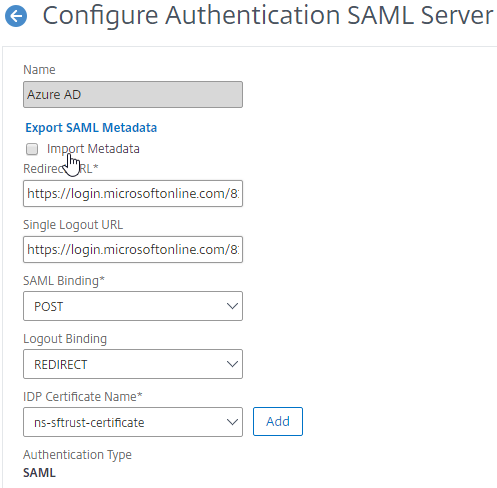
- In the Name field, give the SAML Action a name that indicates the IdP’s name.
- If your Citrix ADC is 12.1 or newer, then get the SAML Metadata URL (or file) from the IdP.
- In the SAML Server on Citrix ADC, in the SAML IDP Metadata URL field, paste in the URL. ADC should be able to extract the IdP’s certificate from the Metadata URL.
- In the Issuer Name field, enter the ID that the SAML IdP is expecting for the Relying Party. This Issuer Name must match the name you configured on the IdP’s Relying Party (Service Provider) Trust. Azure AD calls this the Identifier or Entity ID.

- Near the bottom, configure a Relay State Rule to prevent session hijack. It should check the Relay State field to make sure it matches the URL that users using to reach the Gateway Virtual Server. Make sure you include the forward slash at the end of the URL. Sample expression below. Pattern set is also possible. See CTX316577 for details. To avoid relay state “does not match” error, make sure users enter the Gateway URL instead of using a bookmark. 💡
AAA.LOGIN.RELAYSTATE.EQ("https://gateway5.corp.com/")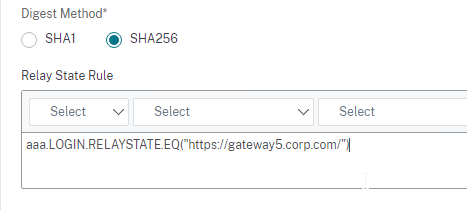
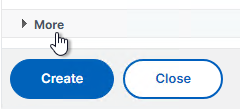
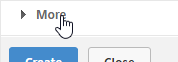
- Scroll down and click More.
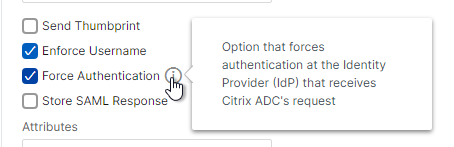
- You can optionally check Force Authentication to prevent users from doing SAML authentication using cached credentials. This prompts for MFA every time the user accesses Citrix Gateway.
- Scroll down and click Create.

- Edit the SAML Server again.
- If you uncheck the box next to Import Metadata, you can see the fields that it filled in for you. Unfortunately, other fields must be configured manually as detailed soon.
- In the SAML Server on Citrix ADC, in the SAML IDP Metadata URL field, paste in the URL. ADC should be able to extract the IdP’s certificate from the Metadata URL.
- Configure the SAML Server based on the data provided by your IdP. If you imported Metadata, then some of the fields might already be populated.
- For IDP Certificate Name, select the SAML IdP’s certificate that was exported from the SAML IdP and imported to Citrix ADC. Citrix ADC will use this IdP certificate to verify SAML assertions from the IdP.
Note: the Add button here does not work correctly. Instead, if you need to import the SAML IDP certificate, then do it at the CA Certificates node as detailed earlier in this section.
- For Redirect URL, enter the URL to the SAML IdP’s authentication page. Citrix Gateway will redirect users to this URL. For ADFS, enter your ADFS URL appended with /adfs/ls (e.g. https://adfs.corp.com/adfs/ls). For other IdP’s, get the URL from your IdP.
- For User Field, enter the name of the SAML Claim from the IdP that contains the value that matches the userPrincipalName of your local Active Directory users (aka shadow accounts). This defaults to the NameID field, but you might have to use a different claim, like emailaddress.
- In the Issuer Name field, enter the ID that the SAML IdP is expecting for the Relying Party. This Issuer Name must match the name you configured on the IdP’s Relying Party (Service Provider) Trust. Azure AD calls this the Identifier or Entity ID.
- Near the bottom, configure a Relay State Rule to prevent session hijack. It should check the Relay State field to make sure it matches the URL that users using to reach the Gateway Virtual Server. Make sure you include the forward slash at the end of the URL. Sample expression below. Pattern set is also possible. See CTX316577 for details. 💡
- Optionally, for Signing Certificate Name, select the SAML SP certificate (with private key) that Citrix ADC will use to sign authentication requests to the IdP. This same certificate (without private key) must be imported to the IdP, so the IdP can verify the authentication request signature. This field usually isn’t needed by most IdPs.
- Scroll down and click More.
- Citrix ADC defaults to SHA1. You might have to change the Signature Algorithm and Digest Method to SHA256.
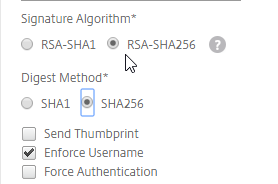
- Review the other settings as needed by your IdP. Click Create when done.
- For IDP Certificate Name, select the SAML IdP’s certificate that was exported from the SAML IdP and imported to Citrix ADC. Citrix ADC will use this IdP certificate to verify SAML assertions from the IdP.
SAML Policy – Advanced (nFactor) Method
Workspace app and Gateway Plugin (i.e. VPN plugin) require nFactor (Advanced Authentication Policies) to support SAML authentication.
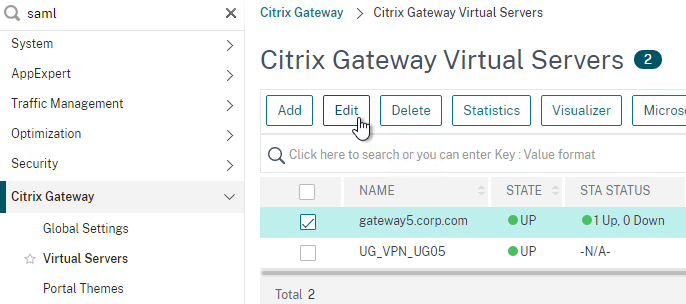
Licensing – nFactor requires NetScaler ADC Advanced Edition or NetScaler ADC Premium Edition. The newest builds of NetScaler ADC 13 have added nFactor support for NetScaler ADC Standard Edition, but the configuration of an Authentication Virtual Server is not directly accessible from the main menu. If you only have Standard Edition, then do the following to get to the Authentication Virtual Server:
- Go to Citrix Gateway > Virtual Servers and edit one.
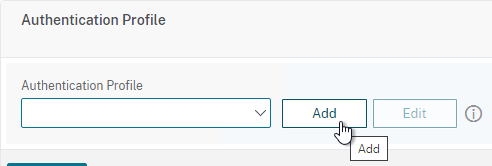
- On the right, add the Authentication Profile section.
- On the left, in the Authentication Profile section, click Add to create an Authentication Profile.
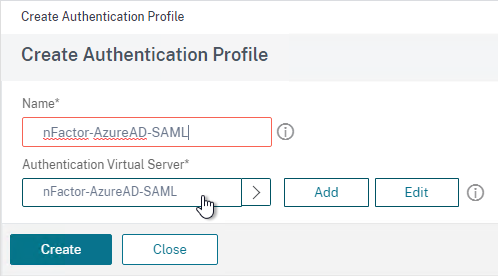
- In the Authentication Virtual Server row, click Add to create an Authentication Virtual Server.
- The rest of the nFactor configuration is similar to what’s detailed below.
If you prefer to configure the older Classic Method, which doesn’t work with Workspace app, then skip to the Classic Method.
Do the following to create an Advanced Authentication Policy, an Authentication Virtual Server, and bind it to the Gateway Virtual Server:
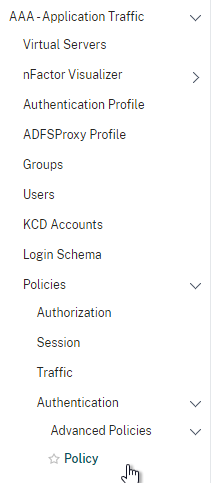
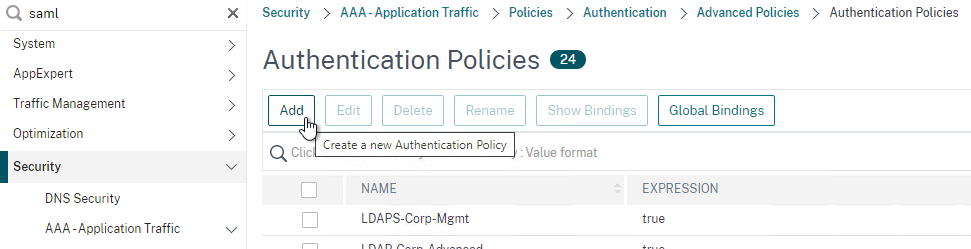
- In the left menu, expand Security, expand AAA – Application Traffic, expand Policies, expand Authentication, expand Advanced Policies, and then click Policy.
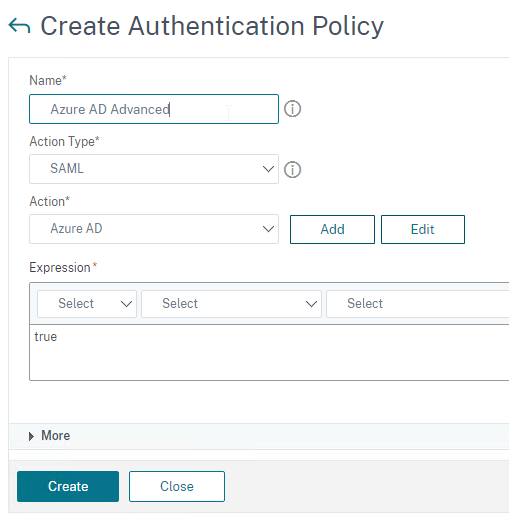
- On the right, click the button labelled Add.
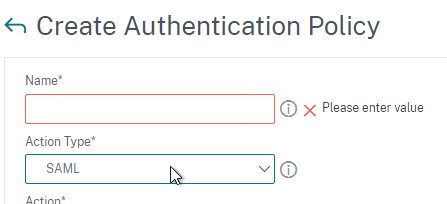
- Change the drop-down for Action Type to SAML.
- Change the drop-down for Action to the SAML Action you created earlier.
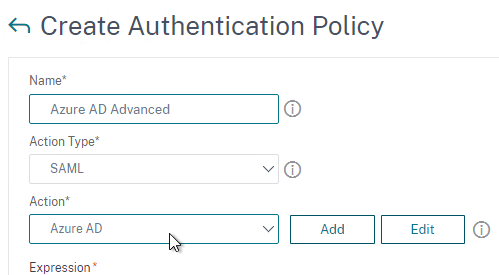
- In the box labelled Expression, enter true.
- Give the policy a name and click Create.
- Change the drop-down for Action Type to SAML.
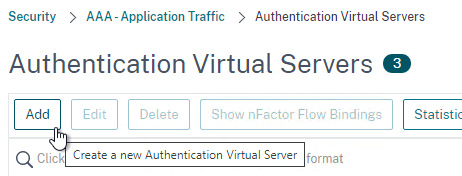
- In the left menu, expand Security, expand AAA – Application Traffic and then click Virtual Servers.
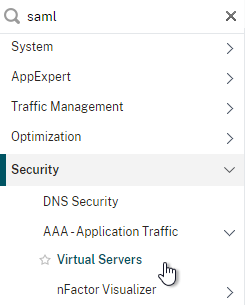
- On the right, click the button labelled Add.
- Change the drop-down named IP Address Type to Non Addressable and then click OK.
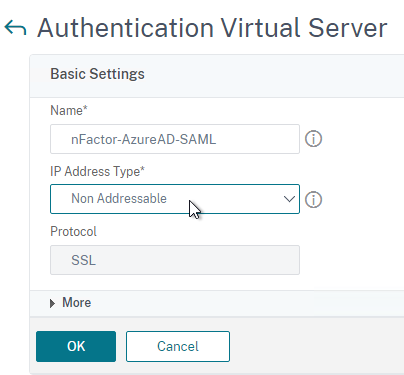
- Change the drop-down named IP Address Type to Non Addressable and then click OK.
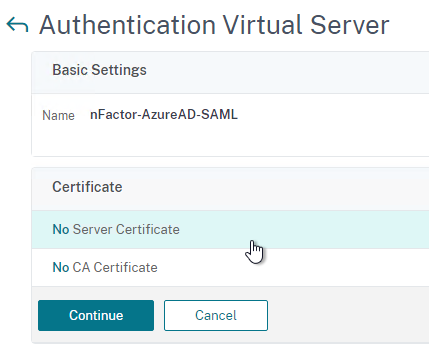
- You can optionally bind a Server Certificate. If you don’t bind a certificate, then the AAA vServer will be down but it will still work. It doesn’t matter what certificate you choose. Click Continue when done.
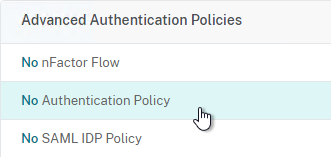
- On the left, in the section named Advanced Authentication Policies, click the row that says No Authentication Policy.
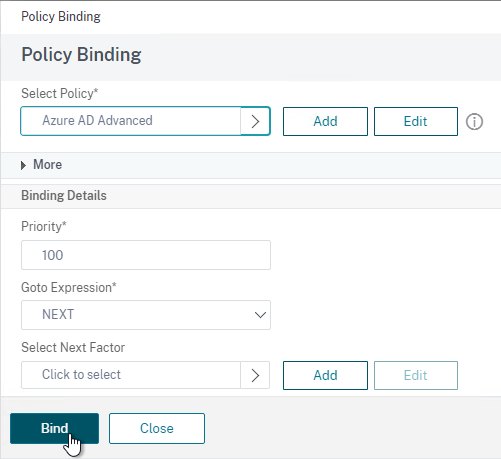
- Click where it says Click to select.
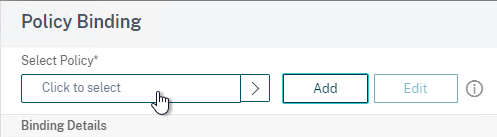
- Click the small circle to the left of the SAML Policy that you created earlier. Then click the blue button labelled Select at the top of the screen.

- There’s no need to configure Select Next Factor unless you want to bind an LDAP Policy with Authentication Disabled so you can extract groups from Active Directory and use those groups for Gateway authorization. This configuration procedure is detailed in the next section.
- Click the blue button labelled Bind at the bottom of the window.
- Click where it says Click to select.
- Click Continue,
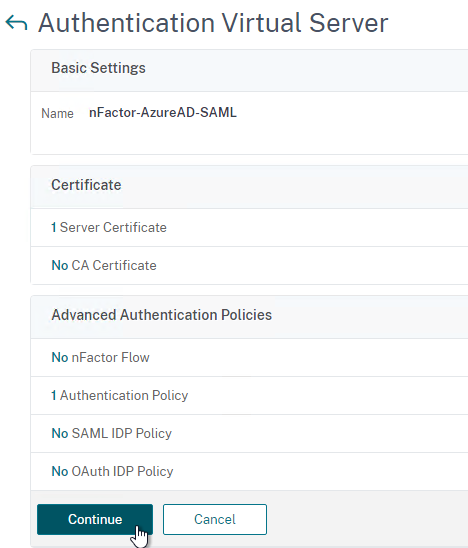
- At the bottom of the page, click Done to finish creating the AAA vServer.

- In the left menu, expand Citrix Gateway and click Virtual Servers.
- On the right, edit your existing Gateway Virtual Server.
- On the right side of the screen, in the Advanced Settings column, click Authentication Profile.
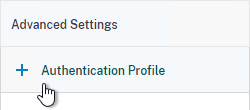
- On the left side of the screen, find the Authentication Profile section and then click the button labelled Add.
- Click where it says Click to Select and then select your AAA vServer.
- Give the Authentication Profile a name and then click the blue button named Create.
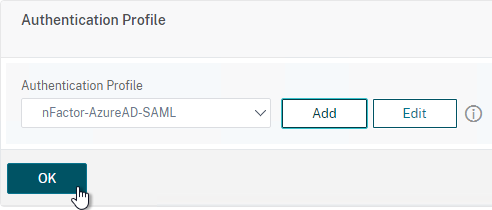
- Make sure you click the blue OK button before you click Done. If you don’t click OK then your changes won’t be saved.
Here are some sample CLI commands for this nFactor SAML configuration.
# SAML Actions
# ------------
add authentication samlAction "Azure AD" -samlIdPCertName AzureADSAML -samlSigningCertName WildcardCorpCom -samlRedirectUrl "https://login.microsoftonline.com/815e26a9-4a9b/saml2" -samlIssuerName gateway5.corp.com -Attribute1 emailaddress -logoutURL "https://login.microsoftonline.com/815e26a9/saml2" -logoutBinding REDIRECT -relaystateRule "aaa.LOGIN.RELAYSTATE.EQ(\"https://gateway5.corp.com/\")"

# SAML Authentication Policies
# ----------------------------
add authentication samlPolicy "Azure AD" ns_true "Azure AD"

# Advanced Authentication Policies
# --------------------------------
add authentication Policy "Azure AD Advanced" -rule true -action "Azure AD"

# Authentication Virtual Servers
# ------------------------------
add authentication vserver nFactor-AzureAD-SAML SSL 0.0.0.0
bind authentication vserver nFactor-AzureAD-SAML -policy "Azure AD Advanced" -priority 100 -gotoPriorityExpression NEXT

# Authentication Profiles
# -----------------------
add authentication authnProfile nFactor-AzureAD-SAML -authnVsName nFactor-AzureAD-SAML

# Citrix Gateway Virtual Servers
# ------------------------------
set vpn vserver gateway5.corp.com -authnProfile nFactor-AzureAD-SAML
SAML nFactor LDAP Group Extraction
If you use AAA Groups with Citrix Gateway, then be aware that SAML usually does not provide the user’s group membership. Instead, configure a LDAP Policy to get the user’s groups from Active Directory so the groups can be later used by Citrix Gateway.
If you don’t need LDAP Group Extraction, then skip ahead to the StoreFront section.
Do the following to configure LDAP Group Extraction.
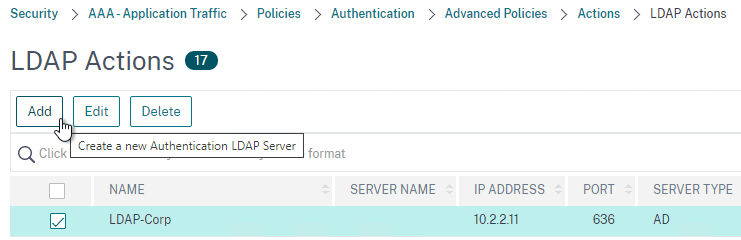
- Create a new LDAP Action.
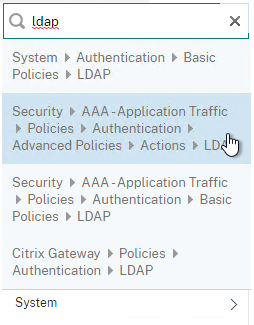
- Use the Search in Menu to find LDAP then pick any of the results.
- Check the box next to an existing LDAP policy and click Add to copy its configuration. Or create a new one.
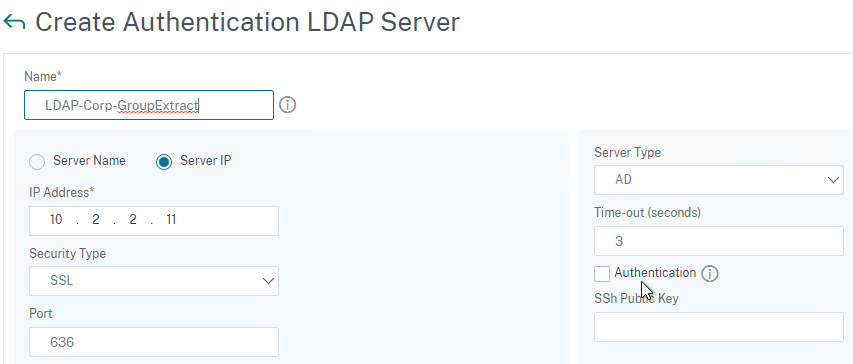
- Change the name of the LDAP Action.
- On the top right, uncheck the box next to Authentication.
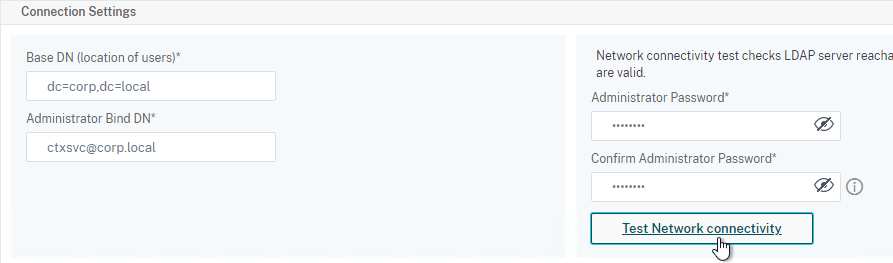
- Scroll down a bit and in the right side re-enter the Administrator Password. Copying an existing LDAP Action does not copy the Bind password.
- Scroll down to the Other Settings section.
- On the left, change Server Logon Name Attribute to –<< New >>–.
- Enter userPrincipalName. The UPN is extracted from the SAML Assertion.
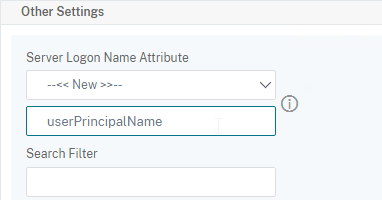
- Scroll down and click Create.
- Use the Search in Menu to find LDAP then pick any of the results.
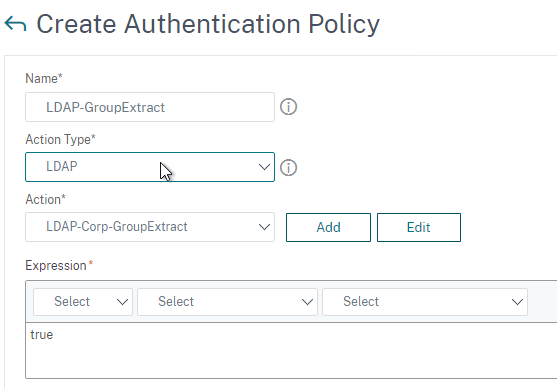
- On the left, go to Security > AAA – Application Traffic > Policies > Authentication > Advanced Policies > Policy and click Add to create a new Policy.
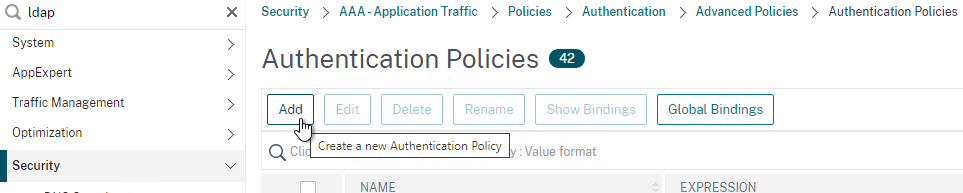
- Change Action Type to LDAP.
- Expression = true.
- Click Create.
- On the left, go to Security > AAA – Application Traffic > Policies > Authentication > Advanced Policies > Policy Label. On the right, click Add.
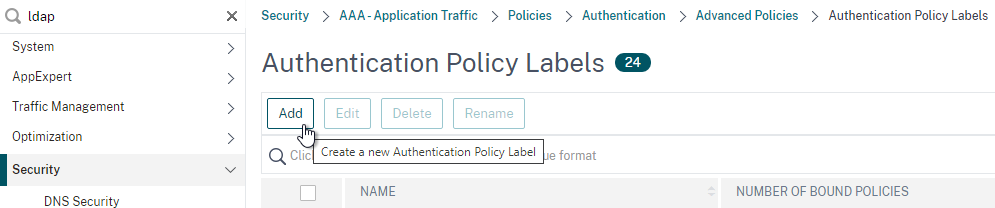
- Give the Policy Label a name and click Continue. The Login Schema should be LSCHEMA_INT.
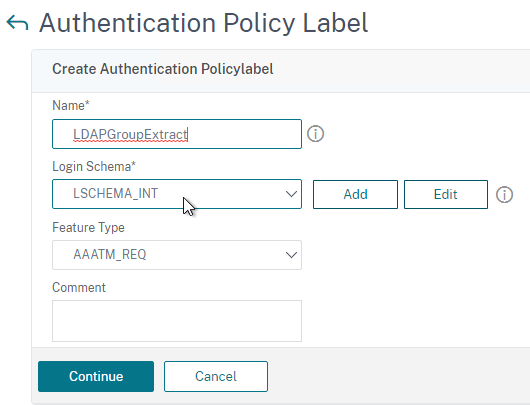
- Select your LDAP Group Extract policy and then on the bottom click Bind.
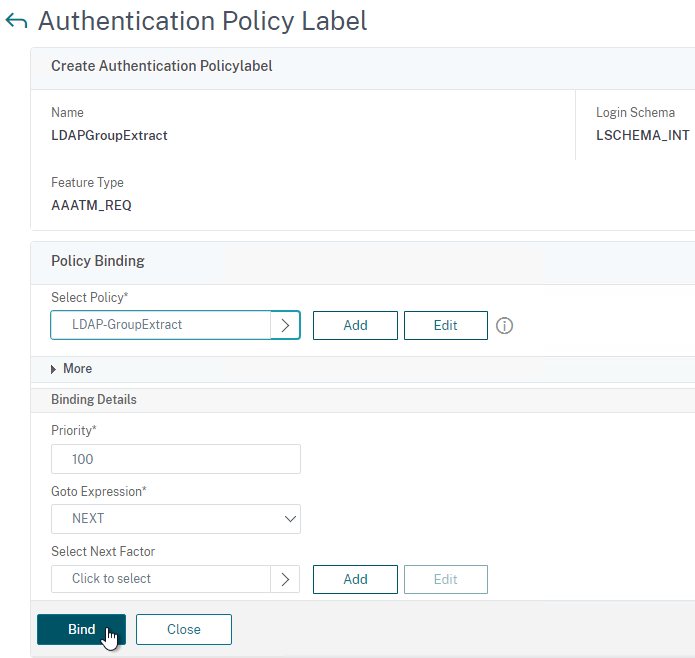
- Click Done to close the Policy Label.
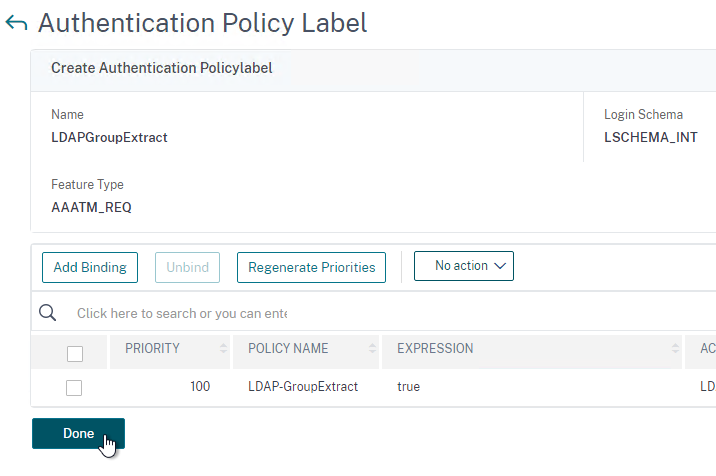
- Give the Policy Label a name and click Continue. The Login Schema should be LSCHEMA_INT.
- On the left, go to Security > AAA – Application Traffic > Virtual Servers. On the right, edit your SAML AAA vServer.
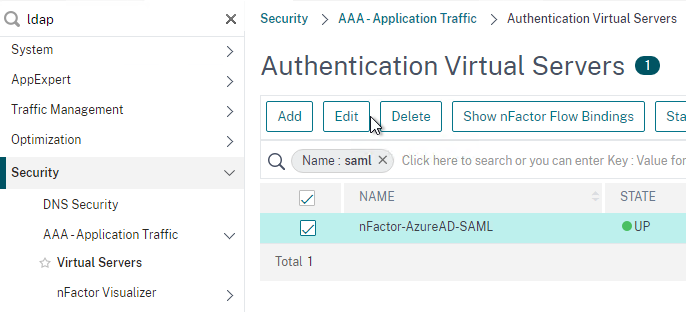
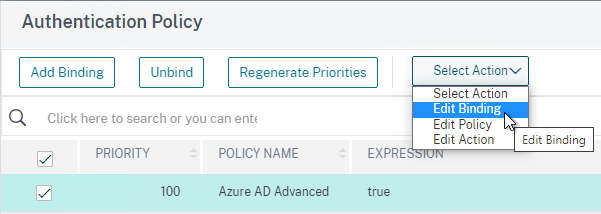
- Click where it says 1 Authentication Policy.
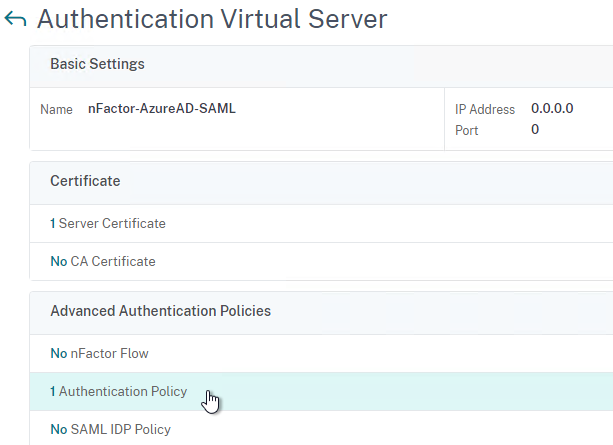
- Right-click the Authentication Policy and then click Edit Binding.
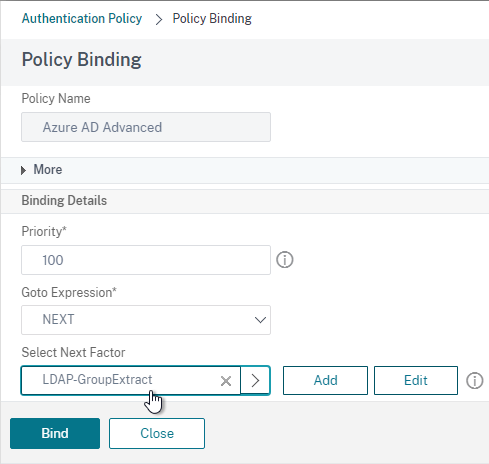
- In the Select Next Factor field, click where it says Click to select.

- Select your LDAP Group Extract Policy Label and then click Bind.
- Click where it says 1 Authentication Policy.
- Skip ahead to the StoreFront section.
Here are some sample CLI commands for this nFactor SAML LDAP Group Extract configuration.
# LDAP Actions
# ------------
add authentication ldapAction LDAP-GroupExtract -serverIP 10.2.2.11 -serverPort 636 -ldapBase "dc=corp,dc=local" -ldapBindDn ctxsvc@corp.local -ldapBindDnPassword ****** -ldapLoginName userPrincipalName -groupAttrName memberOf -subAttributeName cn -secType SSL -authentication DISABLED

# LDAP Policies
# -------------
add authentication ldapPolicy LDAP-Corp ns_true LDAP-Corp

# Authentication Policy Labels
# ----------------------------
add authentication policylabel LDAP-GroupExtract -loginSchema LSCHEMA_INT
bind authentication policylabel LDAP-GroupExtract -policyName LDAP-GroupExtract -priority 100 -gotoPriorityExpression NEXT

# Authentication Virtual Servers
# ------------------------------
bind authentication vserver nFactor-AzureAD-SAML -policy "Azure AD Advanced" -priority 100 -nextFactor LDAP-GroupExtract -gotoPriorityExpression NEXT
Configure StoreFront for SAML Citrix Gateway
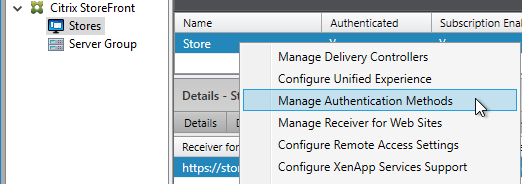
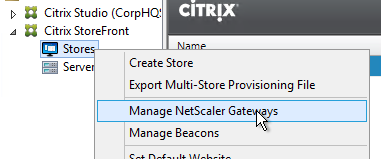
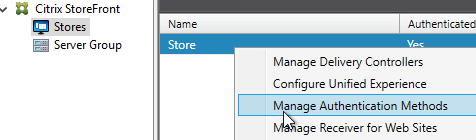
- In StoreFront 3.6 or newer, in the StoreFront Console, go to Stores, right-click the store, and click Manage Authentication Methods.
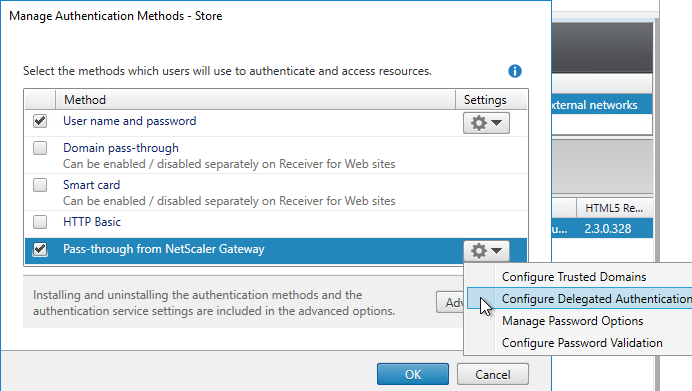
- Make sure Pass-through from Citrix Gateway is selected.
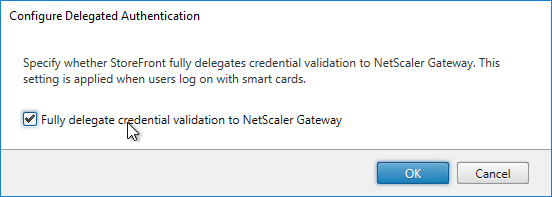
- Click the bottom gear icon on the right, and click Configure Delegated Authentication.
- Check the box next to Fully delegate credential validation to Citrix Gateway and click OK twice.
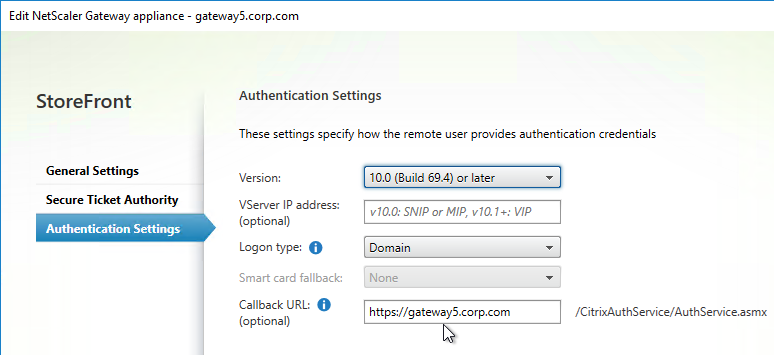
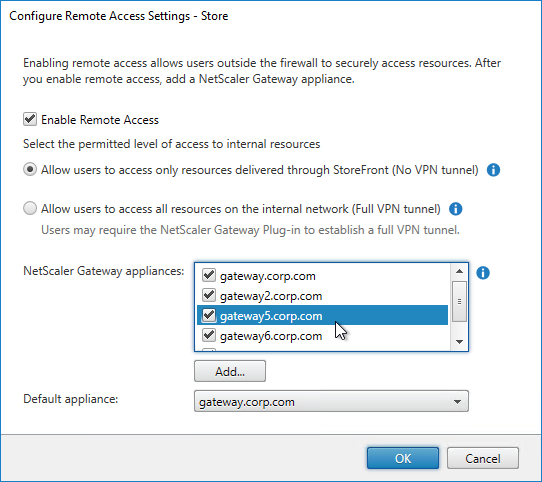
- In StoreFront, add a Citrix Gateway object that matches the FQDN of the Citrix Gateway Virtual Server that has SAML enabled.
- On the Authentication Settings page, make sure you configure a Callback URL. It won’t work without it.
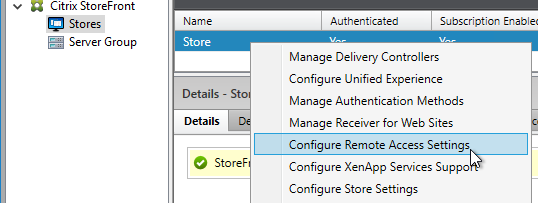
- Then assign (Configure Remote Access Settings) the Gateway to your Store.
- Next step: create Active Directory Shadow Accounts
Native SAML on StoreFront without Citrix ADC
StoreFront 3.9 and newer have native support for SAML Authentication without Citrix ADC. Notes:
- SAML overrides Explicit and Pass-through authentication.
- SAML in StoreFront without Citrix ADC seems to work in Workspace app and Receiver Self-Service for Windows.
For an example configuration using StoreFront PowerShell commands and SAML metadata, see CTX232042 Configure StoreFront with OKTA.
To configure native SAML in StoreFront 3.9 or newer:
- Export the signing certificate from your SAML IdP. The IdP could be ADFS, Okta, Ping Identity, etc.
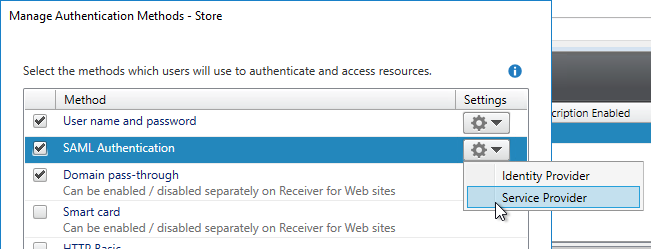
- In StoreFront 3.9 or newer console, right-click a Store, and click Manage Authentication Methods.
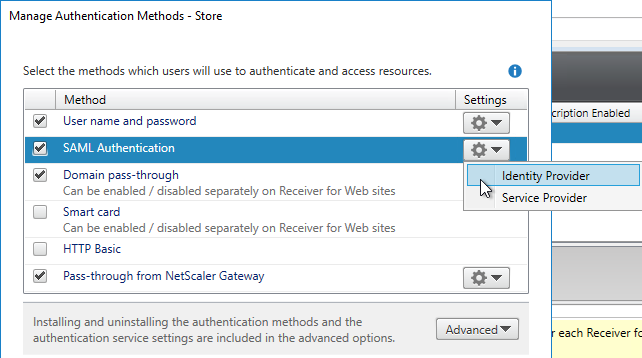
- Check the box next to SAML Authentication. If you don’t see this option (because you upgraded from an older version), click the Advanced button on the bottom of the window, and install the authentication method.
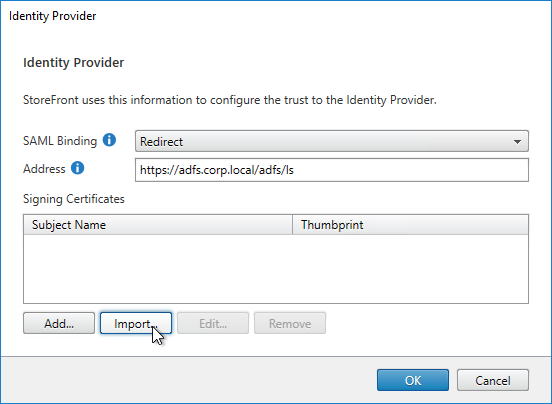
- On the right, click the gear icon for SAML, and click Identity Provider.
- Change the SAML Binding to the method your IdP expects.
- Enter the IdP token issuance endpoint URL. For example, in ADFS, the path is /adfs/ls.
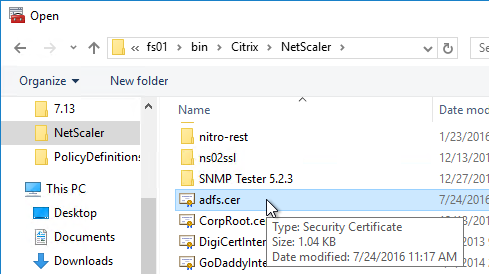
- Click Import.
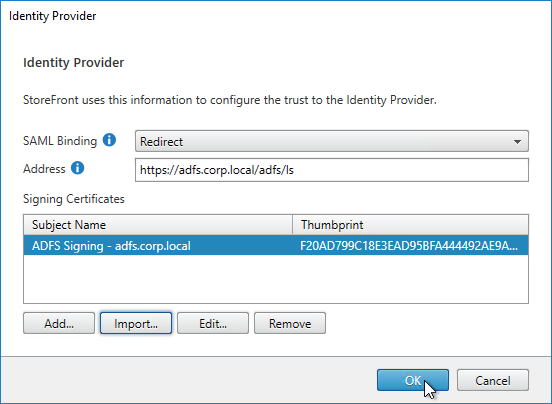
- Browse to the signing certificate exported from your IdP, and click Open.
- Then click OK to close the Identity Provider window.
- On the right, in the SAML Authentication row, click the gear icon, and then click Service Provider.
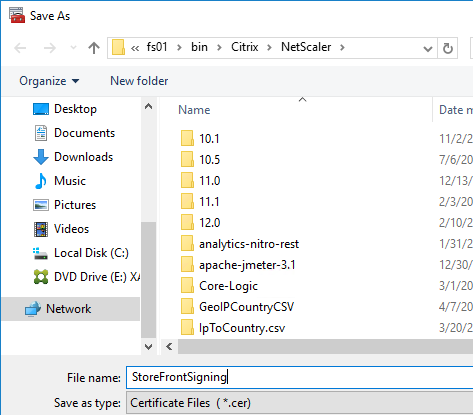
- Click the first Browse button.
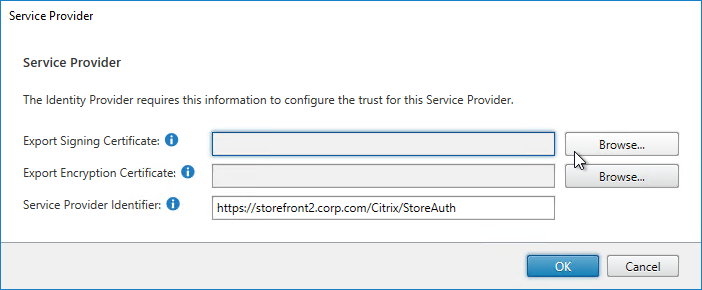
- Give the Signing certificate a name, and save it somewhere.
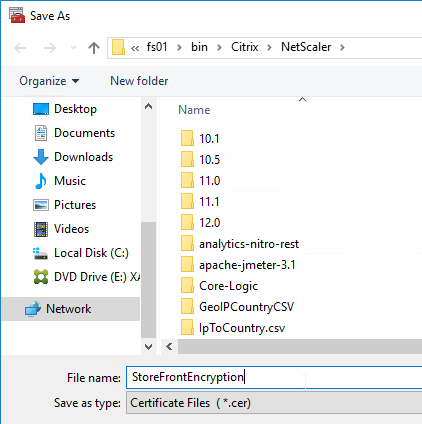
- Click the second Browse button.

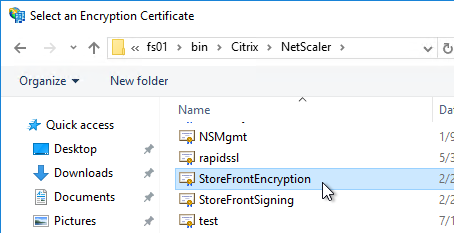
- Give the Encryption certificate a name, and save it somewhere.
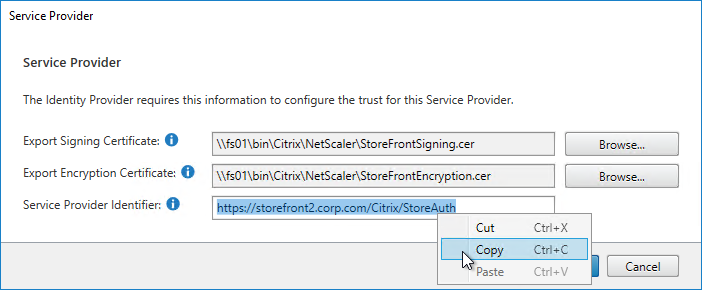
- Copy the Service Provider Identifier. Or you can change it to your desired value. Then click OK.
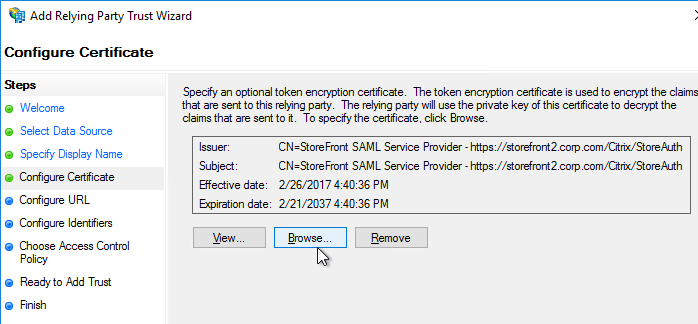
- In your IdP (e.g. ADFS), create a Relying Party Trust.
- Import the Encryption certificate that you exported from StoreFront.
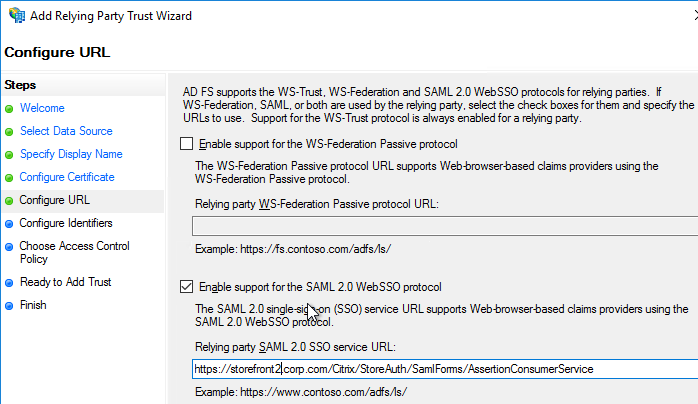
- Enable SAML 2.0.
- For the Assertion Consumer Service (ACS) path, enter something similar to https://storefront.corp.com/Citrix/StoreAuth/SamlForms/AssertionConsumerService. The hostname portion of the URL is equivalent to your StoreFront Base URL. /Citrix/StoreAuth matches your Store name with Auth on the end. The rest of the path must be /SamlForms/AssertionConsumerService. You can get this ACS value by looking in the SAML metadata at the bottom of https://<storefront host>/Citrix/StoreAuth/SamlForms/ServiceProvider/Metadata.

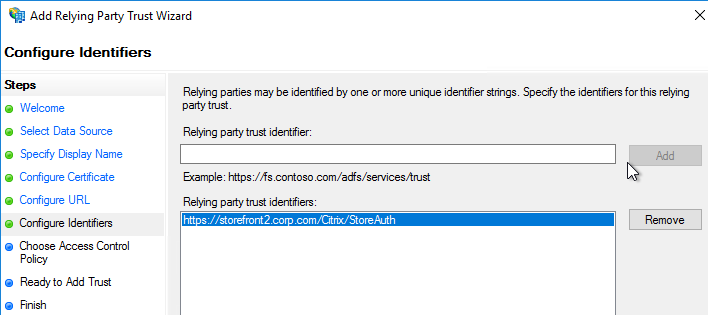
- For the Relying party trust identifier, enter the identifier you copied from the Service Provider window in StoreFront.
- Configure the Claim Rules to send the user’s email address or userPrincipalName as Name ID.
- Edit the Relying Party Trust. Import the Signing certificate that you exported from StoreFront.
- Create Active Directory Shadow Accounts. Federated users must be userPrincipalName mapped to local Active Directory accounts.
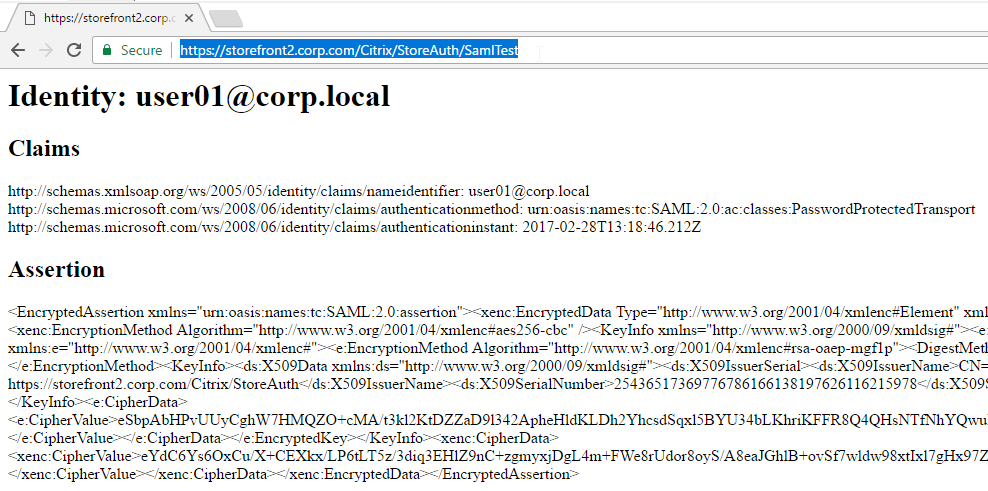
- If you point your browser to https://<storefront-host>/Citrix/<storename>Auth/SamlTest, it should perform a SAML Login, and then show you the assertion that was returned from the IdP. See Citrix CTX220639 How to configure SAML Authentication-Test Configuration.
- See Citrix CTX220682 Storefront SAML Troubleshooting Guide for event logs, SAML Metadata, Active Directory account mapping, Trust XML, etc.
- When you go to your Receiver for Web page, it should automatically redirect you to your IdP. After authentication, it should redirect you back to StoreFront and show you your icons.
- ADFS also works in Receiver 4.6 and newer, and Workspace app.
- When you logoff, it won’t let you log on again unless you close your browser and reopen it.
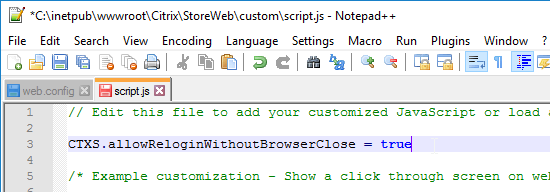
- To fix this problem, see CTP Sacha Thomet StoreFront – Allow relogin without browser close. Edit the file C:\inetpub\wwwroot\Citrix\StoreWeb\custom\script.js, and add the following line:
CTXS.allowReloginWithoutBrowserClose = true
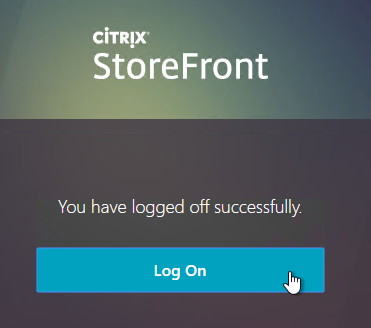
- Now when you logoff, you’re given an option to log on again.
Active Directory Shadow Accounts
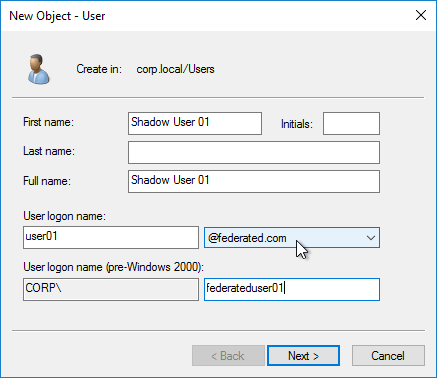
To login to Windows (Citrix VDA), every user must have an Active Directory account in a domain trusted by the VDA. For Federated Users, you typically need to create shadow accounts for each Federated user in your local Active Directory. These Shadow accounts need a userPrincipalName that matches the SAML attribute (usually email address) provided by the SAML IdP.
If the email address provided by the SAML IdP does not match the UPN suffix for your domain, then do the following:
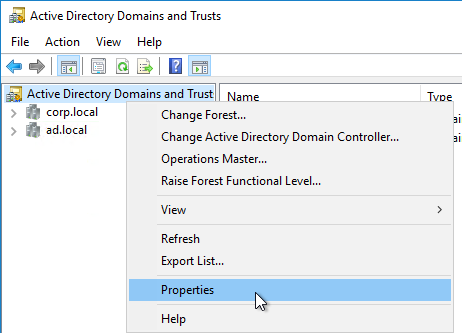
- Open Active Directory Domains and Trust.
- Right-click the top left node (not a domain node), and click Properties.
- In the UPN Suffixes tab, add a UPN suffix that matches the email suffix provided by the SAML IdP.
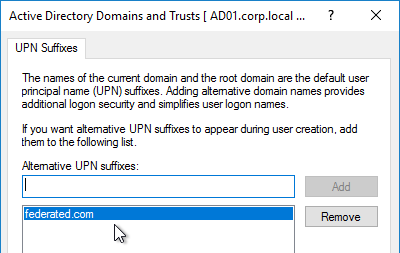
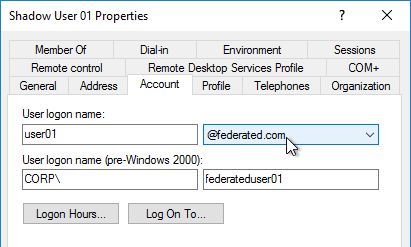
- When creating a shadow account in your Active Directory, the new UPN suffix is available in the drop-down list. Note that the pre-Windows 2000 logon name can’t conflict with any other user in the domain.
- The password for these Shadow accounts can be any random complex password since the Federated users never need the Shadow account’s password.
- If the shadow account is already created, edit the account, and on the Account tab, use the drop-down to select the new UPN suffix.
- Create a shadow account for every federated user. There are third party Identity Management tools that can automate this. Or get an export from the IdP and use PowerShell scripting to create the acccounts.
Verify FAS
When FAS is enabled on StoreFront, every user that logs into StoreFront (local or remote) causes a user certificate to be created on the FAS server. You can see these user certificates by running the following PowerShell commands:
Add-PSSnapin Citrix.Authentication.FederatedAuthenticationService.V1
Get-FasUserCertificate -address fas01.corp.local
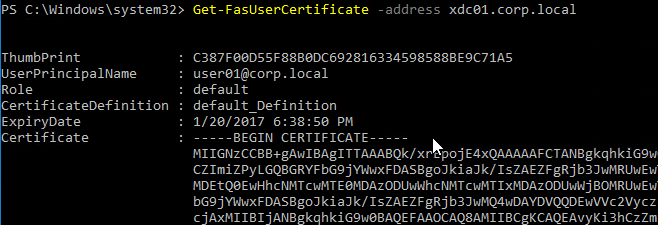
Citrix uses these certificates to logon to the VDA as the user. No password needed.
Are we able to point Citrix FAS to use already published Templates? For example, I already have a Smart Card Logon Template/Client and Server Authentication. Is there a way to tell Citrix FAS to use those or am I required to use the Default Citrix ones?
In the FAS console you edit the User Rule and there’s a drop-down to select the certificate template. Compare your template with the Citrix template to make sure they are the same.
Hi Carl,
I’ve installed FAS Server with Azure as IDP in a 1912 CU3 environment.
User can login with Azure MFA, view the application, but when he launch an application receive an error “Cannot Start App”
No error in FAS Server
In storefront I see warning event ID 28 from Citrix Store Service
Could not contact any Federated Authentication Servers
Ping from storefront to FAS server works as expected.
Any suggestion?
Regards
Did you check the registry on the StoreFront server to make sure the GPO applied?
I think FAS requires port 80 to be open.
Yes,
in storefront the HKLM\sofware\policies\Citrix\Authentication\UserCredentialService\Addresses
is correctly populated.
No firewall between storefront and FAS
Yes,
registry is populated correctly in storefront.
No firewall between FAS and storefront server
can i use one FAS server which is in my Azure resource location 1 for all the VDA in 2 different locations (one resource location would be Azure and second one would be on-primes) for SSO.
In Citrix Cloud, you can edit a FAS server and enable it for multiple resource locations.
Hi Carl,
Sorry if you have answered this previously but if we wanted to configure SAML for both internal & external connections through Azure IdP to enforce MFA through out, would we be best to configure SAML on the ADC and Storefront or would you point the internal connections to the ADC VIP?
Cheers
Citrix Gateway can do SAML authentication. On StoreFront, disable all authentication methods except Citrix Gateway.
Hi Carl, In this scenario, how would internal users hitting StoreFront directly get redirected to authenticate on the NetScaler Gateway to provide the SAML authentication?
Cheers
In StoreFront Console, click your Store and then click Manage Authentication Methods. Uncheck User name and Password. This will force users to use Citrix Gateway for authentication.
If both StoreFront and Citrix Gateway have the same FQDN, then configure internal DNS to resolve the FQDN to the Gateway instead of to StoreFront.
When configuring the store to only use “Passthrough from Citrix Gateway” as authentication method, i receive the message “no logon methods are available on this platform” when hitting the Receiver for web url of the particular store. It seems it doesn’t redirect me. I also have checked the option “Fully delegate credential validation to Citrix Gateway”.
In StoreFront Console, click Manage Beacons. Change the Internal Beacon to a fake address.
For browser users, the user must navigate to a Citrix Gateway FQDN instead of StoreFront FQDN.
Another option is to configure SAML natively in StoreFront.
Hi Carl, thank you very much for your help.
I guess i need to follow the path by enabling native SAML authentication on this StoreFront store as it seems that beacons can only be configured on StoreFront server group level and not on individual store level.
Hi Carl,
Can we configure SAML authentication at Citrix gateway in such a way that we continue to utilize SSO experience to Citrix resources without FAS ?
We are implementing SAML authentication method getting away from LDAP and using Citrix gateway, do we really need FAS configured or is there an alternative method of achieving SSO to Citrix resources with only SAML and Citrix gateway (no FAS) ?
FAS eliminates the second logon. Without FAS, users logon again at the VDA.
Hi Carl,
I have two separate sites in same domain and have to implement FAS on this sites, FAS is implemented and working on Site-A.
How to configure FAS for Site-B with different SF serves.
The FAS GPO defines which FAS servers are used by StoreFront and the VDAs.
I have single FAS server and i created a single GPO and applied it to both sites. I have Duplicated original template and renamed as “SiteB-Temlatenames” and created new Rule(SiteB) in FAS and when try to launch VDI getting “Cannot Start Desktop”.
What do you see in StoreFront Server > Event Viewer > Applications and Services > Citrix Delivery Services? Also check event viewer on the FAS server.
i found events FAS server:
[S101] Server [servername$] is not authorized to assert identities in role [Default]. [correlation: d5a80f47-a238-48f8-b1de-ebeb079d1f1e]
and did not find any events on SF server.
i have two rules in FAS,
1.Default rule which used for SiteA
2.SiteB rule created but the SF(SiteB) is connecting to Default rule.
Hello Carl, Need help with.
I have two forest. Forest A (users, AD) Forest B (AD, ADCS, FAS, VDA, DDC, StoreFront) NetScaler IDP and Storefront is SP. We have configured SAML for seamless users experience. There is one way trust between Forest A and Forest B. We can see application but while launching getting message “Cannot start app”
Any suggestion?
Regards,
Have you reviewed https://www.citrix.com/blogs/2019/11/20/your-guide-to-citrix-fas-multi-forest-selective-authentication/ ?
Good article as always.
I’m trying to set up FAS in our environment. Have set up the server and enabled the default role, GPO applying to all the relevant servers/VDA and SAML (Azure AD) is set up on Storefront.
When connecting to StoreFront Direct (no Citrix ADC) I can start a session but it just gets stuck trying to log in (Previously the Windows Login page displayed but I fixed a policy that caused that).
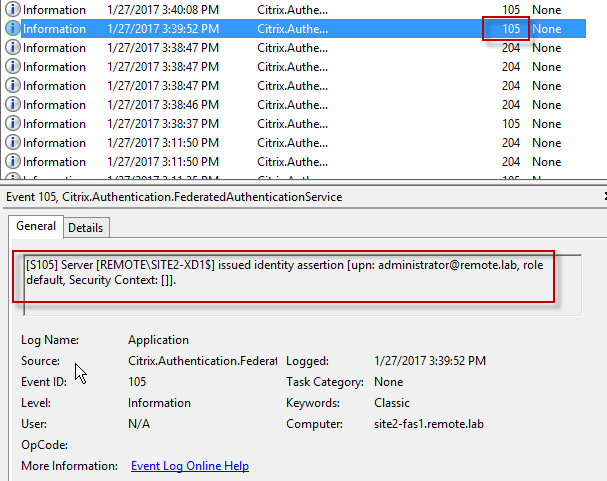
Ive checked on the FAS server and can see event ID 105 where the server has issued identity assertion and no errors on SF or FAS but still does not sign in fully.
Anything I am missing? I suspect it may be one of the CIS benchmark GPOs applying to the VDA but not really sure where to look
It could mean that the Domain Controllers don’t have certs or doesn’t trust have the CA that issued the FAS certs in PKI Enterprise Trust. Enable Kerberos logging and it might give you the answer.
Do you have a legal message shown on the logon screen? Maybe it’s interfering. Do you have any other logon credential providers installed, like Imprivata?
What events on the VDA machine?
Ive resolved the issue. It was due to port 80 being blocked between the VDA and FAS Server
Hi Carl, I was searching Citrix FAS and imprivata and found this.
I recently setup 2402 LTSR CU1 with FAS .. working well thanks to your docs.
Now I need to integrate imprivata.
Any suggestions?
Hey Carl,
Any idea about “None of the Citrix XML Services configured for farm Controller are in the list of active services, so none were contacted.” error?
can you please tell me how you fix this “Previously the Windows Login page displayed but I fixed a policy that caused that”
https://www.tenable.com/audits/items/MSCT_Windows_11_v1.0.0.audit:ec0834226162a8def7b81ee008d55a9d
It was this
I’ve got a conundrum I’m hoping you can shed some light on. We are planning a migration to DaaS and have configured SAML via PingFed for Workspace auth and have also configured FAS, all of which is working without issue.
My problem is around Microsoft Teams auth when launching the Teams app in a VDI session. For users brokering to VDAs that don’t yet utilize SAML and FAS, Teams opens and authenticates (Azure AD auth) but for those with sessions brokered using SAML at the gateway (DaaS) and FAS for auth at the VDA, Teams is unable to complete SSO with Azure AD. If I disable FAS, Teams auth is successful, so I’m assuming Azure AD can’t utilize the cert used for auth to the VDA.
Do you know if there is a method to Azure AD auth work within a session while using FAS?
I’m guessing AzurePRT is missing. Try Cert Based Authentication. https://learn.microsoft.com/en-us/azure/active-directory/authentication/concept-certificate-based-authentication
Carl –
Great article – we’ve gone thru the implementation of this and have been successful with Receiver for Web. The full workspace client, however, is not working. When trying to add the store via Workspace we receive the error : “Your Account Cannot Be added using this server address. Make sure you entered it correctly”. This error happens after MFA succeeds. Workspace + store does function correctly when using basic authentication policies (LDAP+RADIUS) but when switched to advanced SAML / authentication profile it does not. With Receiver for web we see client certs being processed on the storefront / FAS server. With Workspace we see nothing in the storefront / fas logs – no errors. Any ideas on where to look next?
Is nFactor (Authentication Virtual Server) configured on the Citrix Gateway?
Is your theme RfWebUI?
– The gateway is using an authentication profile tied to an authentication virtual server.
– The gateway is using RFWebUI as a theme.
(thank you for your reply!)
One further bit of information. Using Workspace on IOS I AM able to connect to the gateway add the store, complete MFA and start launching a desktop. The launch eventually times out with
“Permanent Error…. (The operation couldn’t be completed (HdxSdkErrorDomain_Session error 8)
Director shows a “Connection Timeout” error.
I can see the user authentication attempt succeed on the delivery controller.
The VDA I attempted to connect to has no errors present in the event logs and is showing some authentication success as well as key operations.
Event log entries from VDA
Cryptographic operation.
Subject:
Security ID: LOCAL SERVICE
Account Name: LOCAL SERVICE
Account Domain: NT AUTHORITY
Logon ID: 0x3E5
Cryptographic Parameters:
Provider Name: Microsoft Software Key Storage Provider
Algorithm Name: ECDSA_P256
Key Name: myuser@my.domain
Key Type: User key.
Cryptographic Operation:
Operation: Open Key.
Return Code: 0x0
Cryptographic Parameters:
Provider Name: Microsoft Software Key Storage Provider
Algorithm Name: UNKNOWN
Key Name: myuser@my.domain
Key Type: User key.
Key File Operation Information:
File Path: C:\Windows\ServiceProfiles\LocalService\AppData\Roaming\Microsoft\Crypto\Keys\6a7d0348cbf9d83dc4b54f9181065b38_ba31097a-199b-4772-a96d-7605a2e81c25
Operation: Read persisted key from file.
Return Code: 0x0
Hello, we recently followed you guide and are using ADC 13.0 Build 89.7.nc + Storefront 2203 + FAS 10.12.0.6 + Azure
Our public Gateway URL is https://citrix.ourdomain.com, our internal Store URL is https://storefront.ourdomain.com/Citrix/STORENAME
Things are working great from outside of our internal network: people log into https://ourdomain.com using their Microsoft credentials, are shown the applications, and can launch them without further prompt for credentials. External Workspace users have the same experience – works great.
Internally, web login and using via the web works just fine as well, however Receiver is struggling. We reset Receiver to start with (for testing), then enter citrix.ourdomain.com as the Store URL, Azure authentication happens, but then we’re prompted to log into the Storefront server via the old LDAP AD Auth we used to use.
In summary, everything is working great externally and from the web. Internally, Workspace is struggling to accept the SAML Auth passed to it by the Gateway, it appears. Can you give us any pointers?
During our initial testing, at first anyway, we also saw an error in Workspace: “Your changes could not be saved due to an invalid configuration of the account DummyAutoD”. We thought this might be because we had Workspace set up with SSON On. We uninstalled and reinstalled w/o that enabled and we don’t get that error anymore, but we do still get the separate login prompt as described above.
Thanks for the help!
Is your client machine able to reach the Internal Beacon? If so, then your client is trying to login directly to StoreFront and bypassing the Gateway.
Thanks for your reply, Carl! Yes, it’s able to reach the internal beacon (which is set to the Service URL). It still initially authenticates to the Gateway (citrix.ourdomain.com: internal IP: the Netscaler load-balanced VIP [I think that’s what it’s called]) but then is handed off to the StoreFront [storefront.ourdomain.com] and tries User/Password auth — probably because it can reach the beacon, I take it.
What do you think a good fix would be? Set the internal beacon to something non-existent, to force it through the Gateway?
If not, how do we get the system to honor the Gateway auth that does happen first? Our StoreFront auth settings are User/Password + Pass-through from the gateway as shown in your steps here: https://www.carlstalhood.com/citrix-federated-authentication-service-saml/#storefrontsamlgateway
I’m open to any/all ideas. Again, thank you so much for your response!
A fake internal beacon would force internal clients to use the Gateway. I’ve done that at several places.
Thank you! We did that and also had to reinstall Citrix Workspace without the SSON option and old store URL option and changed our install string to:
CitrixWorkspaceApp.exe /silent /AutoUpdateCheck=disabled /ALLOWADDSTORE=S STARTMENUDIR=\Citrix-Apps Store0=”storefront;https://citrix.ourdomain.com#COACITRIX;On”
This works!
I also followed CTZ227673 (https://support.citrix.com/article/CTX227673/please-close-your-browser-to-protect-your-account) to stop people from needing to completely close their browser and relaunch when they were idle too long and single-sign-out was occurring. With that fix in place, people can re-sign-in from the existing browser session.
Thanks a lot for the help!
Hi Carl, thank you so much for this detailed information. I started by installing and configuring adfs, adding the relying party trust and then configured the saml server, advanced policy, aaa vserver and auth profile. I binded that auth profile to the gateway, but when I enter the gateway URL in the browser to test from external, I get an error ERR_NAME_NOT_RESOLVED. I have an internal DNS created for the adfs server, is there anything else I may be missing?
Great guide as always, Carl!
I do have a question about child domains and FAS.
Our users are located in accep.loc domain. So are the FAS and Storefront server. Only the VDA’s are located in a child domain: test.accep.loc
I already tried adding all the VDA’s to the Windows Authorization Access Group of accep.loc, but FAS doesn’t work. Do I have to build FAS servers for every child domain or am I doing something wrong?
What exactly is the symptom? What error are you seeing in event logs on StoreFront, FAS, and VDA?
User gets a logon screen without credentials. After filling in the username and password, user can logon.
The event log of the FAS is saying:
[S205] Relying party access denied – the calling account [TEST4\TA4W10Desk003$] is not a permitted relying party of the rule [Default]
In FAS console, edit the user rule. Make sure the other domain’s VDA machines are in the rule.
Thanks Carl, the 205 event is gone. FAS says [S105] Server [CC:m9gs9rklg6bq] issued identity assertion [upn: username, rule Default, Security Context: []]
But unfortunately, still no SSO. I still have to manually enter my credentials when launching the VDA. On the VDA is see this in application log:
[S102] Identity Assertion Logon failed. Could not lookup SID for USERNAME [Exception: Username of Password is incorrect.
by System.Security.Principal.WindowsIdentity.KerbS4ULogon(String upn, SafeAccessTokenHandle& safeTokenHandle)
bij System.Security.Principal.WindowsIdentity..ctor(String sUserPrincipalName, String type)
bij System.Security.Principal.WindowsIdentity..ctor(String sUserPrincipalName)
bij Citrix.Authentication.IdentityAssertion.HdxCredentialSelector.c__DisplayClass24_0.b__0()]
Hey Carl. Good stuff, thanks for posting. I can get this working without a signing certificate on the auth saml server on the NS. You mention that you had to also add it (without private key) to the enterprise app in Azure. Do you know if that’s done in the certificate section of the single sign-on config in Azure? If so, the options of Sign SAML assertion, Sign SAML response or Sign SAML response and Assertion don’t seem to make much sense…. that is, if it’s presence is just needed to decrypt the authn request sent from the NS. There’s also a token encryption section as well. Where did you add the NS cert in Azure? Thanks!!
This looks like it – https://learn.microsoft.com/en-us/azure/active-directory/manage-apps/howto-enforce-signed-saml-authentication
Hi Car, very good article and helped me in setting up SAML in my environment.
I’m just running into some trouble that when the Active Directory password for the user is expired, the vdi showing just showing that password is expired and not letting login, unless user changes the password by entering the correct password. Now this defies the purpose of the SAML.. is there any way around this instead of not toggling password never expires setting in Active directory?
Thanks,
Ashish
Password is not used by SAML or FAS so it shouldn’t matter. I’d have to test this scenario.
Please let me know if you find something.. I’m stuck at this last stage before moving SML to our production setup.
This is very strange though, password shouldn’t been SAML.
Thanks
Ashish
Hi Carl, by any chance you got this tested in your setup? Not sure why anyone else not having this issue. 🙂
Ashish
Hi Carl, any luck yet to test this in your scenario? I did opened a case with Citrix but to avail no help as they mentioned it’s expected behaviour, so ridiculously making entire hassle of keeping this FAS and SAML practically useless as users will still have to remember their AD password. Due to coporate govern policies (and also as.sometimr user will use in office domain joined workstation to login) we can not set password expiry – to never.
Your help is much appreciated.
I have configured nFactor Advanced policy and imported the metadata from the azure URL. All works great from the gateway web site however with ios workspace I am being prompted to import an SSL cert after successfully logging into SAML. If I click ignore 50% of the time my apps / desktops appear, the other 50% it sits and says fetching data… If I then close the app and relaunch it and re-add the site it works most times without even having to re-authenticate.
Since I am importing the metadata there is no need to import the IDP cert. I am also not adding the SP cert but I have tried both ways. Same result.
Any ideas?
Do you have multiple Gateways that are GSLB load balanced? Do any of them have client certificate authentication enabled?
No. This is actually my test environment that has a single ADC and a single SF server. No cert policy applied.
It comes up right after I complete the SAML password prompt but before Azure prompts for MFA.
I just received this error too. Certificate not trusted. aacdcdn.msauth.net may not be secure.
No just a single SF server and lone ADC for testing. I’m also receiving this occasionally. Certificate not Trusted. This server might not be secure “ aadcdn.msauth.net”
Is the intermediate cert linked to the server cert?
Any SSL inspection devices, like firewalls?
Hi Carl,
thank you for the great detailed descriptions.
I implemented FAS today and found that the authentication (internal to the storefront) does not work. After enabling the Kerberos event logs on the VDA I get the following error: 0x7 KDC_ERR_S_PRINCIPAL_UNKNOWN
In the details I see ServerRealm DE.DOMAIN.COM / ServerName krbtgt/ NT Authority / TargetName krbtgt/NT Authority@DE.DOMAIN.COM.
Any ideas?
Are you doing SAML from Citrix Gateway? If so, does the SAML Assertion include the user’s userPrincipalName and does it match an Active Directory account?
Not yet, that would have been my next step. I wanted to test first whether FAS + Storefront generally already works
I’m doing SAML from Storefront, no Citrix gateway in this disployment
Inside the certificate are fields for CRL and AIA. Can your VDAs access the URLs in those fields? I think you can run Get-FasUserCertificate to see one of the User certificates.
Thanks it’s working now, issue was CRL, users from the same domain as the citrix environment are now receiving citrix_smartcardlogon certs and can launch applications but users in a different domain cannot start citrix apps, they can logon to storefront and see all apps but cannot launch error message “cannot launch app
See https://support.citrix.com/article/CTX220497/users-from-one-ad-domain-not-able-to-get-fas-user-certificates-from-another-trusted-domain
Hi, I followed Carl procedure integrating ADFS and FAS to publish applications in citrix via storefront only in my case. Here goes, I launch storefront storefront which redirects me to ADFS sign-on page, I then enter username (UPN format) and password, this opens my citrix published apps but then when I try to launch any application I get windows logon screen with the message “the username or password is incorrect” and in the event logs of the Domain Controller “The client certificate for the user domain`user is not valid, and resulted in a failed smartcard logon. Please contact the user for more information about the certificate they’re attempting to use for smartcard logon. The chain status was : The revocation function was unable to check revocation because the revocation server was offline”
Is firewall open between the VDA machine and the CRLs that you can see in the certificate? The CAPI2 event log might provide more details.
All firewalls are disabled on the CA, DC, Storefront, VDA and delivery controller
good evening Carl,
i implemented the advanced method for adfs saml authentication on netscaler.
doesnt seem to work with worksapce app, it only works on browser sadly.
however when a user goes through browser and activates workspace app it works just fine on the desktop.
any ideas where might be the issue ?
That means NetScaler can’t download the provisioning file from StoreFront. Is Account Services Address configured in your Session Policy? I’ve also seen this in specific builds of ADC.
Hi Carl,
Thanks for all your support on this.
Our environment is 1912 LTSR CU5. In testing single FQDN SAML with GSLB and lbvip with 2 Adc and 3 storefront servers when we switch browsers we end up getting cannot complete your request with event 10 and event 8 or sometimes http internal server error 43524 or 43549. Upon rebooting client it works again but it’s very on and off. I have 2 gateways configured on each storefront with their own ip and callback and a dedicated callback gateway on each gateway. If I test https://citrixcb.corp.domain.com/CitrixAuthService/AuthService.asmx in storefront I get empty response but https://citrixcb.corp.domain.com takes me to the logonpoint and certificate checks. I checked SSO domain settings, triple checked TLS, certificates and it’s still hit and miss. I have a ticket with support for more than 2 weeks. Thoughts?
Michael, did you find a root cause for this? I’m experiencing exactly the same issue with SAML and GLSB, and have not been able to find anything yet.
Hi Carl,
I am trying to setup shadowaccounts to allow a user to access resources on two different domains without trust relationship. I have configured citrix workspace with Azure AD authentication and setup a Citrix FAS on each location. I have also created shadowaccount with the upn matching the user emails suffix but I having the following error: [S103] Server [CC:60da6poppfzr] requested UPN [user.name@domain.com] SID S-1-5-21-3676925492-572991883-3269444322-1312, but lookup returned SID S-1-5-21-2053793227-2943714206-3195920420-14243. [correlation: cc#37424020-c340-4bd0-99aa-55d76feee3f7]
Have you ever seen that?
Is it a multi-domain forest? Maybe the account is in two different domains.
No multifomain forest, they are two different domains with the alternative upn suffix matching azure users. I have created the same test account in both domains with the safe alternative suffix. Since they are different accounts the sid is different thus the problem. Is the a way of bypassing the SID lookup?
Hello Carl,
Hello Thiago,
I’ve stumbled across the same issue, it’s only related to DaaS, as of a security perspective they require the SID. I’ve engineered the issue and found a solution, but you still need a NetScaler in between the communication (OnPrem / Adaptive Authentication / OnAzure / On Whatever) see my Post for all Details. https://www.julianjakob.com/citrix-fas-sid-lookup-mismatch-with-citrix-daas/
Hi Carl,
Sorry to bother you again. I am trying to move our netscaler to SAML and I have issues with the callback url.
We currently have 2 netscalers load balanced and 3 storefront servers load balanced as well. I have a main certificate with citrix.domain.com and subject alternate name citrixcb.domain.com. I am not entirely certain how to load balance the callbacks. For now I pointed the callback url to citrixcb.domain.com and made a hosts entry pointing to one of the two gateways ip address. I made a new callback gateway server on both servers just for the callback purpose and linked the certificate. I pointed hosts file on one of the storefronts to either one of the gateway ip address but I can’t make it work. I get CitrixAGBasic login request has failed403 forbidden url, none of the AG callback services responded. If I go to https://citrixcb.domain.com//CitrixAuthService/AuthService.asmx on the storefront I get an err_empty_response but if I go to https://citrixcb.domain.com I see a logonpoint index and certificate is ok.
I would appreciate your input please
I have an article on multiple callbacks – https://www.carlstalhood.com/storefront-cr-configuration-for-citrix-gateway/#multipledatacenters
Basically you add multiple Gateway objects to your StoreFront. Each Gateway object has the same URL. However, the vServer address is set to the VIP of the Gateway vServer for each ADC. Then you specify a unique callback for each Gateway object.
Hi Carl,
We have a single fqdn configuration and we would like to move it from ldap to saml authentication.
For internal users I have followed the Native SAML on StoreFront without Citrix ADC and configured FAS.
On FAS I have not restricted users but the delivery groups has AD security groups restrictions. Since I configured the SAML the restrictions on the Delivery groups are not enforced anymore.
We have multiple delivery groups with multiple desktops on the same VDA’s so I don’t believe I can use FAS custom rules. Thoughts?
SAML returns the user’s UPN, which StoreFront then uses to find a matching account in AD. Your AD account with matching UPN should have AD groups for authorization. Make sure the UPN matches the user you think it should be using.
Hi Carl,
Thanks for your reply. It affected just one user account that is part of multiple groups in ad but not part of the delivery group security group. The delivery group security group does not have any other security groups as members. We can live with that for now. Thanks again.
I had a similar issue where it was actually logging me in with a different account in the domain because it was trying to use the domain I was connecting to and not the one from the from the SAML IDP. The two accounts were very similar in that the UPN’s both started with jdoe. ie. jdoe@mydomain.com and jdoe@gmail.com. My issue was on the Citrix ADC, which I know you are not using. On the Session Profile>Published applications, I had the Single Sign-On Domain populated. So when I would login with jdoe@gmail.com, it was replacing gmail.com with mydomain.com, resulting in me being logged in with the wrong account. Clearing this setting fixed the issue. Do you have two very similar accounts like this in the domain and can you tell if you are logging in with that other one? Since you are not using Citrix ADC, I wonder if there is a similar setting during the FAS setup? I don’t recall if there was anything in there for that or not. I don’t know if this is the case, but in Citrix StoreFront there is a similar setting under Store>Manage Authentication Methods>User Name and Password>Configure Trusted Domains. I don’t know if having these set would result in the issue I was having and the one you are currently faced with. You might want to try playing with these.
Using OKTA with FAS, The setup was working fine for months and suddenly all the users started receiving Incorrect user name or Password ( Happens only for certain machines booted through PVS)
Checking the event logs found the below event on the servers
Event ID – 9 Kerberos, The client has failed to validate the Domain Controller certificate for XXX.domain.net , the following error was returned from the certificate validation process: The revocation function was unable to check revocation because the revocation server was offline.
Disabling Certification revocation check using the below registry fixed the problem. however our security team is not happy disabling the CRC
HKEY_LOCAL_MACHINE\SYSTEM\CCS\Control\LSA\Kerberos\Parameters\UseCachedCRLOnlyAndIgnoreRevocationUnknownErrors Type = DWORD
Value = 1
Validated the CDP links configured in the User certificate & Domain controller Kerberos certificate from the VDA machines,
The CDP targets are opening fine from the browser and prompts to download the CRL List from the VDA
Certutil -urlfetch -verify didn’t return any problem
Checked Root & Intermediate Certificate, The Certificate chain looks good.
HKLM\software\Microsoft\EnterpriseCertificates\NTAuth\Certificates are similar to the working and non working servers.
FAS servers are applied through policy and have verified it through registry its getting applied properly, Even when the users attempt to logon triggers S106 log in the application event logs.
We have two sub ordinate CA servers, Using PKIview.msc from the SUB CA servers I can check the CDP points & validate them, Both Sub CA are up and running but found they cannot talk to each other. However when checked individually I found both of them to be up and running . I don’t know if the two Sub CA need to talk to each other for anything.
Probably the firewall between them is blocking the communication but don’t I think this is the cause of the problem as we have another PVS image where FAS authentication works fine without disabling CRC.
The only difference between the working and non working servers are below registry
HKLM\System\CurrentControlSet\Control\LSA -> LMcompatiblitylevel is set to 3 in working machines and in non working machines its set to 5.
Yet to validate the registry so not sure changing it will make any difference.
Reverted the machines to the oldest Vdisk but no luck
Any thoughts on this or any one have encountered similar problems.
Does the CAPI2 log indicate where the problem is?
I have configured SAML with Azure IDP, my external and internal url works fine with NetScaler Gateway. I have few users who have Window NT account name different from Window- Pre2000 account and User authentication fails with event id 2,7 and 10. Anyone has come across this issue.
If I change NT account same with Pre-windows2000 name, then user is able to authenticate with FAS – StoreFront-Netscaler and AzureIDP.
Yes, we ran into this also and one of my co-workers found the fix. Adjust the WB Gateway Session Profile – Published Applications – UNCHECK the Single Sign-on Domain.
Carl, Above where you state, “Note: nFactor authentication is only available with ADC Advanced Edition and ADC Premium Edition.” I believe this is no longer the case, specifically for Citrix ADC Gateway.
https://docs.citrix.com/en-us/citrix-gateway/current-release/authentication-authorization/nfactor-for-gateway-authentication.html
Starting from release 13.0 build 67.x, nFactor authentication is supported with Standard license only for Gateway/VPN virtual server. In Standard license, the nFactor visualizer GUI cannot be used to create the EPA in the nFactor flow. Also, you cannot edit the login schema, but must use the out-of-the-box login schema as-is.
It’s limited, but usable.
I don’t want to encourage nFactor on Standard Edition. 🙂
Able to get this going but sadly, once enabled OneDrive most notably breaks. We had SSO for OneDrive and Office Apps where the user would be autoconfigured and not have to sign in at all. Now we see tenant info but not auto logging in forcing user to try to find icon and sign in. (We use published apps)
Seems Citrix Support believes issue is with AzurePRT not being able to be set when FAS is enabled. This breaks SSO For our users requiring they try to find a Sign In Button for OneDrive and login with EVERY Session sadly. Do you know of a workaround?
My customer has only one storefront store, with Azure AD as SAML IdP configured in Citrix Gateway. however, internal users can still launch apps/desktops without entering AD credential. I am baffled. I usually created 2 separate stores: one for FAS, one for Non-FAS (internal access only). Any idea?
Is pass-through authentication enabled?
Hey Carl, I’m looking to use Server Core for my FAS deployment. I see that 2019 & 2012 Server Core are specifically called out, but not Server 2022 core in the system requirements: https://docs.citrix.com/en-us/federated-authentication-service/system-requirements.html
Is this due to a renaming of Server 2022 since Core is now standard (and therefore implied as supported) or is only the Desktop version supported. I ask since it seems strange to me older Core versions are supported but the latest version is not.
Thanks!
There’s a link to leave feedback on the Docs article. They’re usually pretty good at responding or updating the article.
Hello Carl,
Is it necessary to have FAS server to enable native SAML authentication on the storefront?
In order for Storefront to read the token you have to use FAS. I will let Carl discuss more.
No. They are separate tools. SAML handles authentication to StoreFront. FAS handles SSON to the VDA when StoreFront doesn’t have the user’s password. SAML does not supply the user’s password to StoreFront and thus FAS is helpful for users.
Ive been looking for compatability matrixes but havent really found anything specifc for FAS.
If we upgrade our 7.15 FAS servers first to 2203 will we have any issues with our 7.15 environment until we can get it updated as well?
I think it will work since there aren’t many changes to FAS. I usually upgrade FAS when I upgrade StoreFront.
Hi Carl – quick note to say that as of CVAD 7 2203 LTSR FAS no longer has the auto enroll enabled for each certificate template (per section “Certificate Templates”
Thanks. But there’s no harm in double-checking. I’ll add a note.
Do authenticated users have to have enroll permissions? From what I can see in my environment it was set to write for Authenticated User by default for the Citrix_ templates.
I just redeployed the templates and Enroll is not one of the default permissions. All I see is Read permission.
Hi Carl,
Thank you for this article.
We follow the below youtube video and documentation of citrix to setup FAS for SSO.
https://www.youtube.com/watch?v=WQfn_rLyZWs
https://docs.citrix.com/en-us/citrix-workspace/optimize-cvad/workspace-federated-authentication.html
We use Azure AD as IDP, we are able to single sign on desktop experience but not on the virtual apps(web applications) who integrated to on- premise active directory. We ensure also that we set up UPN on the on-premise AD to sync it to the Azure AD.
This is the challenges we are facing right now,hoping for your response what are the things that we have missed? Thank you!
Regards
Are you saying that you can’t launch published apps? Or the published apps ask you to login?
Or are you saying that the websites you published no longer do SSO? FAS does not provide the user’s password so your SSO method must support Kerberos or NTLM.
Hi Carl,
Thank you for your response.
We are able to launch the published web applications but still requires us to login(sso not working). but on the desktop or VDI experience we are able to launch and sso is working fine.
The only challenge we have is the publised virtual apps which sso is not working.Web applications are already integrated to active directory,fyi. We actually dont know what we have missed.
Sorry, when you say must support kerberos or ntlm what does it mean? Where should we adjust it so that our sso settings for web or client apps works? Thanks Carl.
Regards
If Windows (not your app) is asking for login, then that usually means the FAS GPO is not applied to the VDAs hosting your published app. Check Event Viewer on the VDA for FAS events. Check registry on the VDA to make sure the GPO applied.
Thank you carl for your response. well check on this.
Hi Carl,
As per checking FAS GPO is applied on the registry, no errors found also VDA server on the event viewer related to FAS events.
Is single sign-on will work right without citrix gateway and storefront right? we are only using DAAS/CVAD service with Azure AD as IDP and default authentication method. we also make sure that our on-prem AD is sync to Azure AD and we created upn.
I don’t understand why VDI/Desktop experience single sign-on works but on the publish app it does not.
Don’t know if there is a limitation base on the app.
We just only follow the citrix documentation below.
https://www.youtube.com/watch?v=WQfn_rLyZWs
https://docs.citrix.com/en-us/citrix-workspace/optimize-cvad/workspace-federated-authentication.html
Regards
Hello Carl, Thank you for your excellent article. In trying to configure the StoreFront server, I get the error “Cannot validate argument on parameter ‘StoreService’. Any ideas?
PS C:\Users\JSubidoA> $StoreVirtualPath = “/Citrix/NetScalerStore”
$store = Get-STFStoreService -VirtualPath $StoreVirtualPath
$auth = Get-STFAuthenticationService -StoreService $store
Set-STFClaimsFactoryNames -AuthenticationService $auth -ClaimsFactoryName “FASClaimsFactory”
Set-STFStoreLaunchOptions -StoreService $store -VdaLogonDataProvider “FASLogonDataProvider”
Get-STFAuthenticationService : Cannot validate argument on parameter ‘StoreService’. The argument is null. Provide a valid value for the
argument, and then try running the command again.
At line:3 char:52
+ $auth = Get-STFAuthenticationService -StoreService $store
+ ~~~~~~
+ CategoryInfo : InvalidData: (:) [Get-STFAuthenticationService], ParameterBindingValidationException
+ FullyQualifiedErrorId : ParameterArgumentValidationError,Citrix.StoreFront.Authentication.Cmdlets.GetAuthenticationService
Set-STFClaimsFactoryNames : Cannot validate argument on parameter ‘AuthenticationService’. The argument is null. Provide a valid value for the
argument, and then try running the command again.
At line:4 char:50
+ Set-STFClaimsFactoryNames -AuthenticationService $auth -ClaimsFactory …
+ ~~~~~
+ CategoryInfo : InvalidData: (:) [Set-STFClaimsFactoryNames], ParameterBindingValidationException
+ FullyQualifiedErrorId : ParameterArgumentValidationError,Citrix.StoreFront.Authentication.Cmdlets.SetAllClaimFactoryName
Set-STFStoreLaunchOptions : Cannot validate argument on parameter ‘StoreService’. The argument is null or empty. Provide an argument that is
not null or empty, and then try the command again.
At line:5 char:41
+ Set-STFStoreLaunchOptions -StoreService $store -VdaLogonDataProvider …
+ ~~~~~~
+ CategoryInfo : InvalidData: (:) [Set-STFStoreLaunchOptions], ParameterBindingValidationException
+ FullyQualifiedErrorId : ParameterArgumentValidationError,Citrix.StoreFront.Stores.Cmdlets.SetStoreLaunchOptions
If you run the following, what do you see? You should see your string.
$StoreVirtualPath
Yes it does. It contains /Citrix/NetScalerStore which is my string. I’m using StoreFront 1912 LTSR CU4. Is this “StoreFront 3.9 or later”?
I think I found the problem. The variable $store is null (empty). Any ideas?
Your store path should not include the word “web”.
Hello Carl, I ran your script without modifications, here is the result.
PS C:\Users\JSubidoA>
$StoreVirtualPath = “/Citrix/Store”
$store = Get-STFStoreService -VirtualPath $StoreVirtualPath
$auth = Get-STFAuthenticationService -StoreService $store
Set-STFClaimsFactoryNames -AuthenticationService $auth -ClaimsFactoryName “FASClaimsFactory”
Set-STFStoreLaunchOptions -StoreService $store -VdaLogonDataProvider “FASLogonDataProvider”
Get-STFAuthenticationService : Cannot validate argument on parameter ‘StoreService’. The argument is null. Provide a valid value
for the argument, and then try running the command again.
At line:4 char:52
+ $auth = Get-STFAuthenticationService -StoreService $store
+ ~~~~~~
+ CategoryInfo : InvalidData: (:) [Get-STFAuthenticationService], ParameterBindingValidationException
+ FullyQualifiedErrorId : ParameterArgumentValidationError,Citrix.StoreFront.Authentication.Cmdlets.GetAuthenticationService
Set-STFClaimsFactoryNames : Cannot validate argument on parameter ‘AuthenticationService’. The argument is null. Provide a valid
value for the argument, and then try running the command again.
At line:5 char:50
+ Set-STFClaimsFactoryNames -AuthenticationService $auth -ClaimsFactory …
+ ~~~~~
+ CategoryInfo : InvalidData: (:) [Set-STFClaimsFactoryNames], ParameterBindingValidationException
+ FullyQualifiedErrorId : ParameterArgumentValidationError,Citrix.StoreFront.Authentication.Cmdlets.SetAllClaimFactoryName
Set-STFStoreLaunchOptions : Cannot validate argument on parameter ‘StoreService’. The argument is null or empty. Provide an
argument that is not null or empty, and then try the command again.
At line:6 char:41
+ Set-STFStoreLaunchOptions -StoreService $store -VdaLogonDataProvider …
+ ~~~~~~
+ CategoryInfo : InvalidData: (:) [Set-STFStoreLaunchOptions], ParameterBindingValidationException
+ FullyQualifiedErrorId : ParameterArgumentValidationError,Citrix.StoreFront.Stores.Cmdlets.SetStoreLaunchOptions
Is your store using a shared authentication service instead of separate per-store authentication service? If you installed StoreFront on Delivery Controller, then that’s the default. You might have to delete the store and recreate it.
What I’ve done:
I have three StoreFront 1912 LTSR CU4 servers. All exhibit the problem. I upgraded one of the StoreFront servers to the latest version 2203 LTSR with the same issue.
The problem is that the value of $store is blank. The following is failing:
$store = Get-STFStoreService -VirtualPath $StoreVirtualPath
Any ideas?
James, it sounds like the $StoreVirtualPath variable didn’t get properly set, probably because it couldn’t find the store with the virtual path you used. That would then lead to the $store variable not being properly set. Try running Get-STFStoreService without anything else. This should list all of your stores and show the VirtualPath variable for those stores. From there, you should be able to find the store you want to set and get it’s virtual path. If you originally ran the script without modification, then you probably had the wrong store name as your store is probably not “/Citrix/Store”. “/Citrix/Store” should be replaced with the Virtual path for your store. Once you know that, you should be able to set $StoreVirtualPath = “/Citrix/YOURSTORE” and then the rest of the scripts should be able to run without issue.
Thank you for your help Carl. I found the issue: There was already a pre-existing Store in place. I simply referenced that Store ($StoreVirtualPath = “/Citrix/VDITest”) and it worked.
In the citrix federated authentication document for 1912 cvad
it is mentioned that delivery controllers must be on 443 rather than 80 for security reasons,
is it really mandatory ? and how does the workflow work.
best regards
It’s certainly a best practice but I’m not sure it’s necessary. To install a cert, see https://www.carlstalhood.com/delivery-controller-cr-and-licensing/#ssl. Then configure StoreFront > Manage Delivery Controllers to be HTTPS transport type.
Thank you Carl, implemented this successfully because of your article.
appreciate your support
Carl, I am integrating Citrix NetScaler with Okta using SAML, the NetScaler is asking for the username first, then redirect respective users to Okta for authentication, the prospect is sending the on the redirect to Okta login, for which he is expecting Okta to automatically populate the username and not have the user type the username again. This post:
https://devforum.okta.com/t/specify-username-in-saml-authnrequest/14572
https://old.reddit.com/r/Citrix/comments/tmkfeb/nfactor_and_passing_login_field_to_saml_server/
describes the same expectation. Is this something that is possible.
Any guidance is much appreciated thank you! I can also reply with the nsconfig if it helps.
TLDR: Currently the SAML authentication works we would just like to ensure that the initial username entry is passed to the Okta username field and does not require a second input. Thank you!
Similar to this? https://discussions.citrix.com/topic/415527-citrix-gateway-with-azure-saml-and-login_hint-parameter/
Yes that is almost the exact issue. Users are in AD and being synced to Okta. They type their username into Citrix and then redirected to Okta. They can then sign in successfully but they have to enter the username twice. I would like to point out that FAS is not being used. I know this is recommended for this integration, is there a clear cut way on how to do this when using FAS? Also is there a way without using FAS? Thank you for the quick reply, had to whitelist the email so will see replies sooner thanks!
Hi Carl,
I have an issue with FAS certificate. In our enviorment, users are switching accounts in browser. Due to this two certificates are generated for login.
One generated by our FAS and one generated by the customer’s idp (smartcardlogon certificate.). How to stop accepting certs from customer IDP? I did saml tracer and it looks good. But for some reason Customer is sending their smarcard logon cert and 2 certs are there in the users cert profile.
Many Thanks
Saju
Can we achieve SAML without FAS. Customer have just Storefront and Netscaler.
Yes, but users will be prompted to login again at the VDA.
how would we set that up? SAML only on Storefront?
SAML on Citrix Gateway is preferred.
SAML on StoreFront doesn’t always work with some IdPs.
Is FAS impacted by KB5014754?
Maybe. But I haven’t seen any complaints about it yet.
We are seeing event is 39 in our Domain Controller System log for our FAS generated certificates. It’s just a warning for now but could be a problem in May 2023. Text is: The Key Distribution Center (KDC) encountered a user certificate that was valid but could not be mapped to a user in a secure way (such as via explicit mapping, key trust mapping, or a SID). Such certificates should either be replaced or mapped directly to the user via explicit mapping. See https://go.microsoft.com/fwlink/?linkid=2189925 to learn more.
We have same issue. Is this normal behaviour or can this somehow be mitigated
Hello Carl,
How do we do the setup where we need 2 FAS Servers .do we need to do separate FAS setup manually in both the servers and Define the FAS server FQDN in GPMC under federation Authenticated service ?
Yes.
great article, however i followed it all the way through but am getting 403 error Error:app_not configured_for user Service is not configured for this user. We are using google authentication for SAML. any thoughts are appreciated
Is that error coming from your IdP? Did you assign users to the app at your IdP?
We use ADC 13.1 configured for Citrix Gateway to Storefront LTSR 1912 CU3. I get past the Google authentication then error comes connecting Citrix gateway to storefront – it does not get to the published apps. We also setup a FAS since that was required to pass authentication across. Is there a log file I can check to see what is happening or where it is failing?
Thx
Check StoreFront Server > Event Viewer > Applications and Services > Citrix Delivery Service.
Hi Carl, any updates on when FAS will issue an Azure AD PRT? Without it, Azure resources (e.g., Outlook) require auth and SSO doesn’t work.
Are these hybrid-joined? If so, enable Seamless SSO in Azure AD Connect and it should be able to authenticate to Azure AD-authenticated resources using Kerberos. Are you saying that’s not working?
Yes they are hybrid joined but are Windows 10 machines so it looks like using Kerberos won’t work. Let me know if I’m misinterpreting the below.
“Seamless SSO needs the user’s device to be domain-joined, but it is not used on Windows 10 Azure AD joined devices or hybrid Azure AD joined devices.”
https://docs.microsoft.com/en-us/azure/active-directory/hybrid/how-to-connect-sso
10-months ago somebody said smart cards are not working with PRT – https://www.reddit.com/r/AZURE/comments/o1gz5a/azureprt_question/
Thanks Carl. That seems to be the case. If anyone else was able to get this working please reply.
Thanks Carl for sharing useful information about FAS.
I am looking for automating FAS deployment and configuration using Scripts specially for Azure Hosted Server. Is there any reference you can suggest?
I have gone through the link(https://www.citrix.com/blogs/2019/05/30/automating-federated-authentication-services-with-powershell/) that you mentioned above for the same has mentioned about it but cannot find actual code that I can refer.
Thanks for your help!
The blog post has a link to https://citrix.sharefile.com/share/view/s781a7e9e85144079
Thanks a lot for your help..!!
Sometime i wonder what would have been the situation of all Citrix folks if you were not around.
Hi! I followed “Configure Citrix ADC as SAML Service Provider”. It’s successfully login with Keycloak. But when it redirect to StoreFront web site, I got an error code 43531 from an empty page. There is an error message in ns.log like “[Remote ip = 10.100.130.111:62446] wi_server is either down or is not vip/csw type {user: eric.su, wihome URL: http://cxdcc.test.local/Citrix/testWeb/, port: 80 wi_server_state: 1, wi_server si_cur_flags: 0x24008000}”.
If you’re going through Citrix Gateway, then the SAML Reply URL should be https://mygateway.company.com/cgi/samlauth.
I try to set SAML Reply URL on keycloak. I still get the same error.
Here is same message in ns.log
“IDP: Checking whether current flow is SAML/OAuth IdP flow, input /Citrix/testWeb”
“Invaid tass cookie while checking whether current authentication is due to idp functionality: /Citrix/testWeb ”
“SAMLSP: Trying to detect Assertion replay for sessionid ab829cd9-b6a2-46b3-9860-623a6b90a4f4::cdefa596-ebbe-4b48-96ed-9e059da79e5f assertionid ID_eecf8ed6-35b4-462c-84d7-66c2ded48334”
“SAMLSP resumeNotification; entry not found, dht_error 6”
“get_session user: , aaa_info flags 1 flags2 0, new webview 0, sess flags2 0, flags3 0 flags4 8000 ssoDomain , ssoUsername: , ssoUsername2: ”
“SAMLSP: LOGIN SUCCESS; Core , Copying logout url to session for saml logout, user ”
10.100.130.22 04/15/2022:09:30:17 GMT NSG 0-PPE-1 : default AAA Message 320 0 : “Copying SAML logout URL from AAA session to VPN session for SAML single logout”
“In vpnsession_adv_policyeval : Calling action-trigger for policy = Receiver For Web”
“In vpnsession_adv_policyeval : Calling action-trigger for policy = SETVPNPARAMS_ADV_POL”
“VPN_DBSREP_GET{ns_vpn_getdbs_svc:10515}, dbsrep_name: cxdcc.test.local_0_50_ipv4, dbsrep: 0x120f41910, dbsrep->ref_cnt: 3”
“[Remote ip = 10.100.130.111:65157] VPN_DBSREP_GET{init_icamode_homepage:9807}, domain: cxdcc.test.local, servicetype: 0, port: 80, session: 0x122600000, user: eric.su, dbsrep: 0x120f41910, dbsrep->ref_cnt: 3”
“[Remote ip = 10.100.130.111:65157] wi_server is either down or is not vip/csw type {user: eric.su, wihome URL: http://cxdcc.test.local/Citrix/testWeb, port: 80 wi_server_state: 1, wi_server si_cur_flags: 0x24008000}”
“Ica mode status is not okay”
“Cannot complete login for user: sessionid , session state , reason: “
Does it work without SAML? Can ADC resolve the DNS name of your StoreFront URL? You can change it from FQDN to IP address. Can ADC reach the IP address of the StoreFront URL?
Thanks. I fix it when I user IP address. I added domain name to /etc/hosts and used it before. But ADC could not parse the domain.
P.S. Could you modify my name to Eric Su in the first comment? I accidentally used a Chinese name.
Hi Carl, first I would like to say thank you for all your contribution to the Citrix community. The work you put out is priceless. I have nothing by gratitude and appreciation.
I am setting up a FAS server for the first time and the issue is, it’s a bit similar to Naveen’s issue. When logging into the NetScaler which takes me to Okta. I put my credentials as a local user and get presented with my VDAs. However when I launch the VDA, it should take my credentials and log me in via SSO. It does not, It presents me with the last user logged in the VDA or requesting a logon. Any guidance you can share would be greatly appreciated. I have a case open with Citrix, and they are still logging into it.
Mustafa
Is the FAS GPO applied to the VDA machine? Check HKLM\Software\Policies\Citrix\Authentication.
Great article!
Are there any workarounds when users AD UserPrincipalName and SamAccountName are different when implementing Citrix FAS with Azure MFA?
SamAccountName is not considered when using FAS. Only the UPN is used. Azure AD needs to send back the user’s UPN in the Name ID SAML attribute.
So the user AD account must have these match when implementing? User profiles would still use SamAccountName, is it still functional if they don’t match? Thanks so much Carl!
Any possible workarounds with this?
You can bind a Traffic Policy to the Gateway. The Traffic Policy can construct a username in UPN format that uses one of the attributes returned by the SAML assertion.
I think I might be facing a similar situation. I have an external client using Azure AD idp to my ADC and implementing FAS. I have a user with a UPN of BOBWHITE@mail.com and a sAMAccountName of BWHITE. Once logged into the VDA, the user shows as being logged as BOBWHITE, pulling the username from the UPN. Prior to AzureAD IDP/ADC/FAS, it would show the user logged in as the sAMAccountName BWHITE, name the profile BWHITE, and any other internal server communication is done via the sAMAccountName (BWHITE). Now it appears that everything is being done via the UPN, which isn’t going to work for all of our programs that rely on that sAMAccountName. I am wondering if Carl’s suggestion of constructing a traffic policy would be able to get me back to passing the sAMAccountName to the VDA. If so, any tips on how to construct that policy? I’m a little green on the subject so any step by step help would be appreciated. Also, I see a major flaw in using the username of the UPN. When I tested this, I had a user BOBWHITE@mail.com and another user BOBWHITE@someotheraddressmail.com. They were completely different accounts, and when both were logged into the same VDA at the same time, they wrote to the same windows profile.
I have config SANL based authentication with nfactor authentication nd EPA enabled, my log in and authentication works absolutely fine but when i log in i don’t see any of resources rather i get a error ‘cannot complete your request’ upon successful sign in.
Are you doing StoreFront? Or are you doing VPN with clientless portal?
If StoreFront, what do you see in StoreFront Server > Event Viewer > Applications and Services > Citrix Delivery Services?
Nothing Much on storefront and Fas server
On the Storefront server Event ID -1 – The web application has started.
On the Fas server – Event Id – 105 –
[S105] Server [Domain\test123$] issued identity assertion [upn: abc@domain.com, role Default, Security Context: []]. [correlation: 0fe50fcc-1945-4264-9810-1acd92642013]
Fyi.. i have removed my domain name and user name and put the dummy name in the FAS Event logs above.
Hi Carl,
We are facing weird issue in SAML configuration. When we are enabling FAS on Storefront users are not able to launch applications. Application starts launching and disappears after few seconds. As i disable FAS on Storefront server application start launching fine. Same behavior if i am launching application from Storefront. Any help would be appreciated.
All servers are running on 2019 OS.
What do you see in StoreFront Server > Event Viewer > Applications and Services > Citrix Delivery Services and on the FAS Event Viewer?