Navigation
- Change Log
- Monitor
- Servers
- Service Group
- Responder
- Load Balancing Virtual Server
- SSL Redirect
- SSL Warning
- CLI Commands
Change Log
- 2018 Dec 20 – updated screenshots for ADC 12.1 build 50.
- 2017 Dec 25 – updated entire article for 12.0 build 56. Monitor section has new 12.0 build 56 instructions.
Monitor
12.0 build 56 and newer
Instructions for creating the monitor changed in 12.0 build 56 and newer. If your build is older, skip to the older instructions.
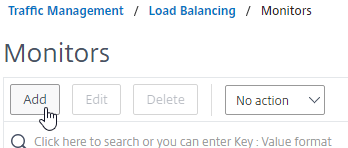
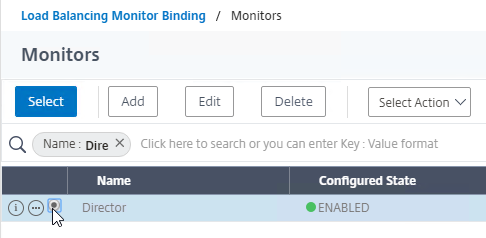
- On the left, expand Traffic Management, expand Load Balancing, and click Monitors.

- On the right, click Add.
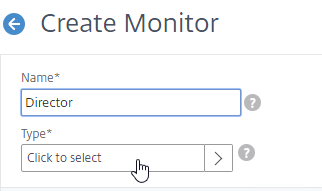
- Name it Director or similar.
- In the Type field, click where it says Click to select.
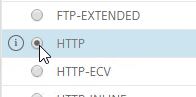
- Scroll down and click the circle next to HTTP.
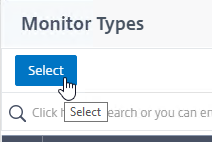
- At the top of the window, click the blue Select button.
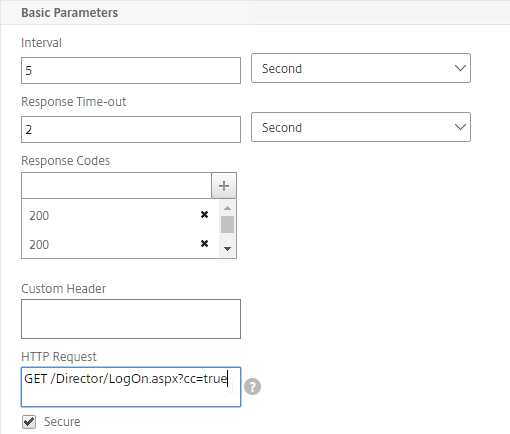
- Scroll down the Basic Parameters section, and check the box next to Secure. This checkbox instructs the monitor to connect to the Director Servers using https/SSL/TLS instead of http.
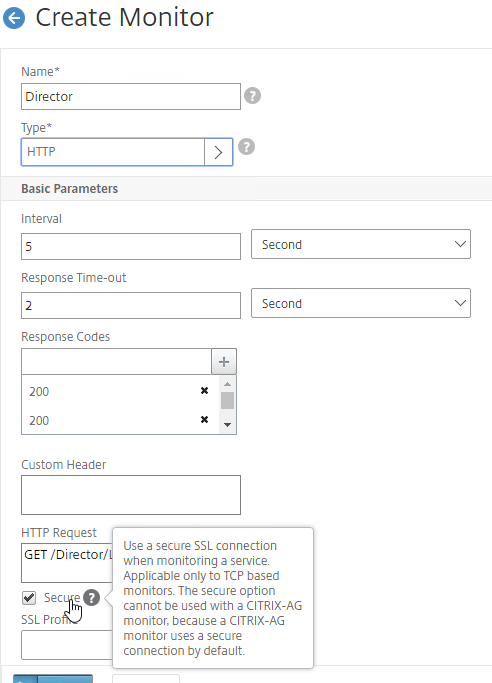
- In the HTTP Request box, enter
GET /Director/LogOn.aspx?cc=true.
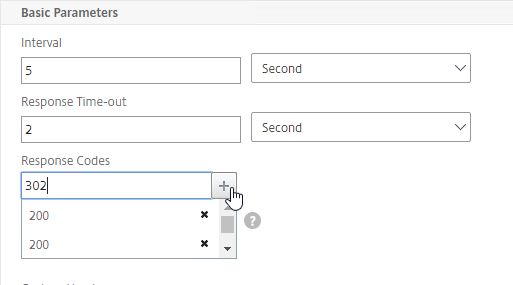
- If Single Sign-on (Windows Integrated Authentication) is enabled on Director, then you might have to add 302 as a Response Code.
- Scroll down, and click Create.

- Jump to the Servers section.
12.0 older than build 56
- On the left, expand Traffic Management, expand Load Balancing, and click Monitors.

- On the right, click Add.

- Name it Director or similar.
- Change the Type drop-down to HTTP.

- If you will use SSL to communicate with the Director servers, then on the Standard Parameters tab, scroll down, and check the box next to Secure.

- Scroll up, and switch to the Special Parameters tab.

- In the HTTP Request field, enter
GET /Director/LogOn.aspx?cc=true- If Single Sign-on is enabled on Director, then you might have to add 302 as a Response Code.
- Scroll down, and click Create.

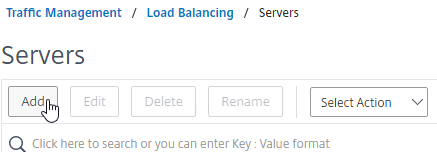
Servers
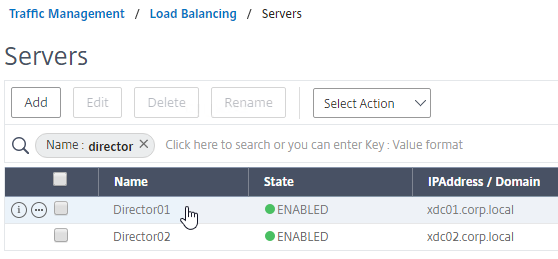
- On the left, expand Traffic Management, expand Load Balancing, and click Servers.

- On the right, click Add.
- Enter a descriptive server name. Usually it matches the actual server name.
- Enter the IP address of the Director server.
- Enter comments to describe the server. Click Create.
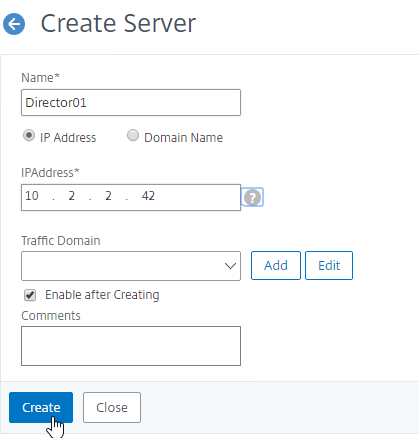
- Continue adding Director servers.
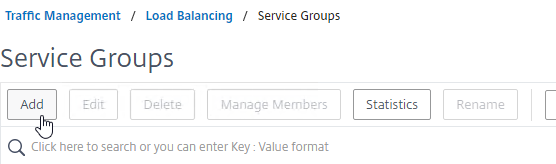
Service Group
- On the left, expand Traffic Management, expand Load Balancing, and click Service Groups.

- On the right, click Add.
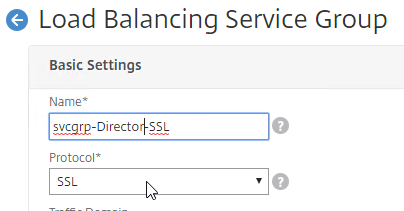
- Give the Service Group a descriptive name (e.g. svcgrp-Director-SSL).
- Change the Protocol to HTTP or SSL, depending on if IIS on the Director server is enabled for https or not.
- If the protocol is SSL, ensure the Monitor for Director has Secure enabled, as detailed earlier.
- Scroll down, and click OK.

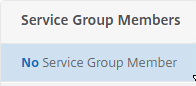
- On the left, in the Service Group Members section, click where it says No Service Group Member.
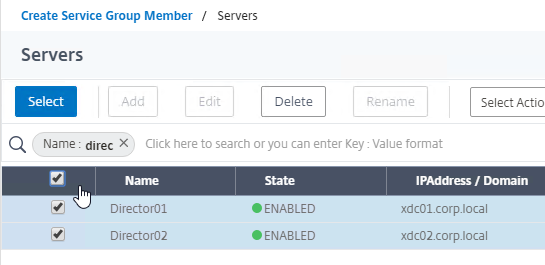
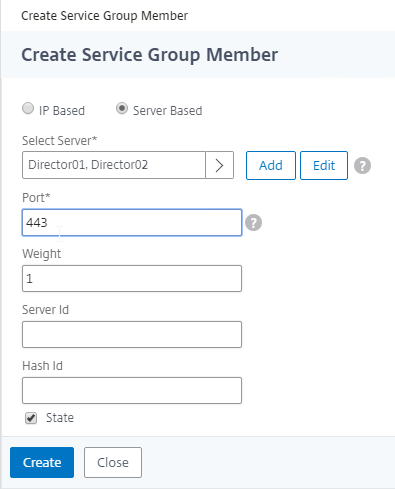
- Change the selection to Server Based, and then Click to select the Director server objects.
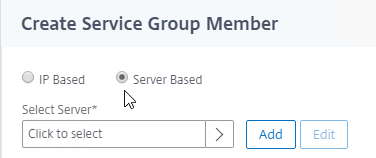
- Enter 80 or 443 as the port. Then click Create.
- Change the selection to Server Based, and then Click to select the Director server objects.
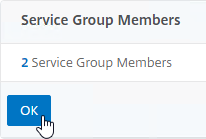
- Click OK to close the Service Group Members section.
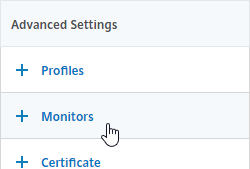
- On the right, under Advanced Settings, click Monitors.
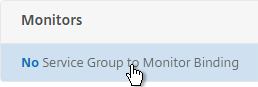
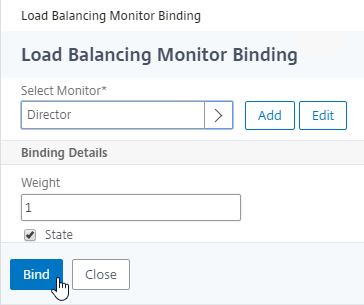
- On the left, in the Monitors section, click where it says No Service Group to Monitor Binding.
- Click where it says to Click to select.
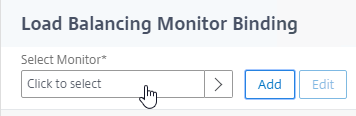
- Click the circle next to the Director monitor you created earlier. The monitor might be on Page 2.
- The circle must be clicked exactly (no room for error). If you click outside the circle, then the monitor will open for editing. If this happens, click Close to return to the selection screen.
- At the top of the window, click the blue Select button.
- Then click Bind.
- Click where it says to Click to select.
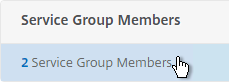
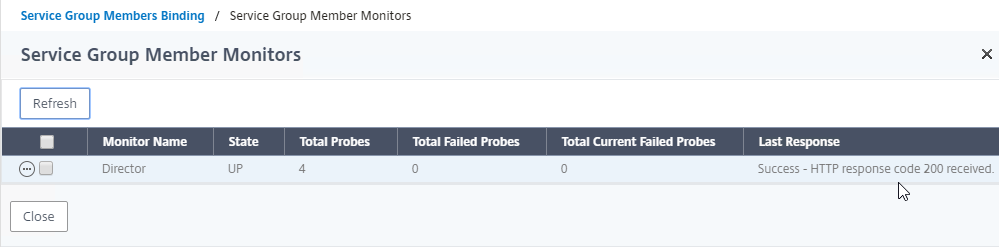
- To verify that the monitor is working, on the left, in the Service Group Members section, click the Service Group Members line.
- Right-click a member, and click Monitor Details.
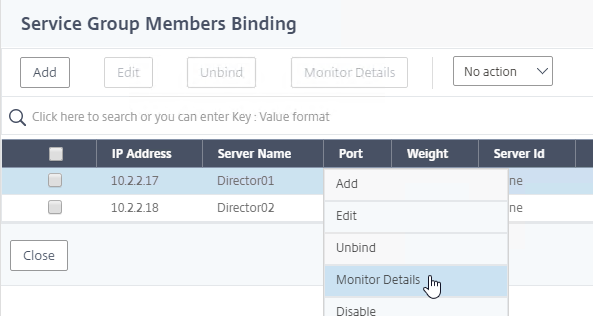
- The Last Response should be Success – HTTP response code 200 received. Click Close twice.
- Then click Done.

Responder
Create a Responder policy to redirect users from the root page to /Director.
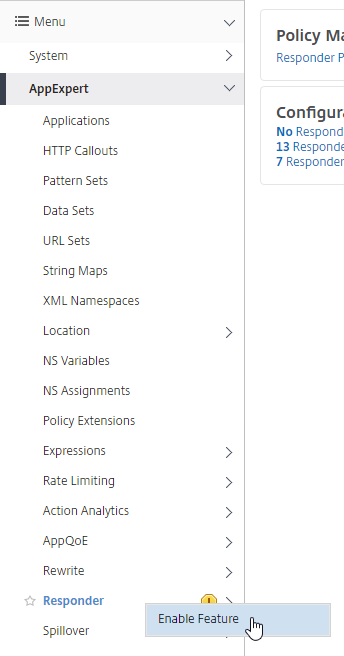
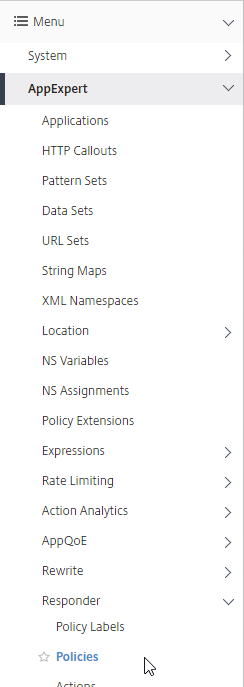
- Go to AppExpert > Responder, and enable the feature if it isn’t already enabled.
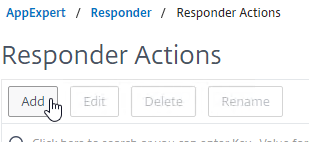
- Go to AppExpert > Responder > Actions.

- On the right, click Add.
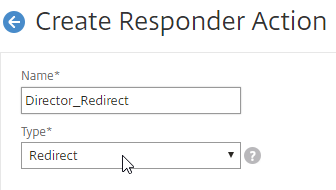
- Give the Action a name (e.g. Director_Redirect).
- Change the Type to Redirect.
- In the Expression box, enter
"/Director", including the quotes.
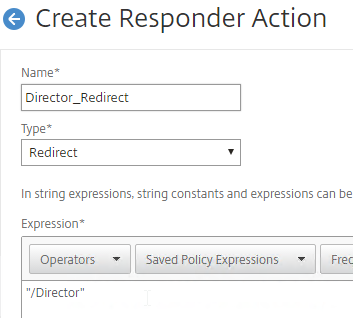
- On the bottom, click Create.

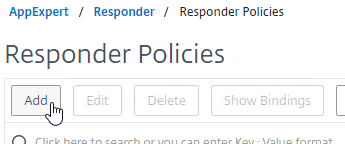
- Go to AppExpert > Responder > Policies.
- On the right, click Add.
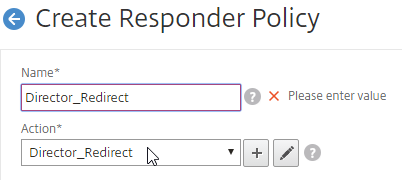
- Give the Policy a name (e.g. Director_Redirect).
- Select the previously created Action.
- In the Expression box, enter
HTTP.REQ.URL.PATH.EQ("/")
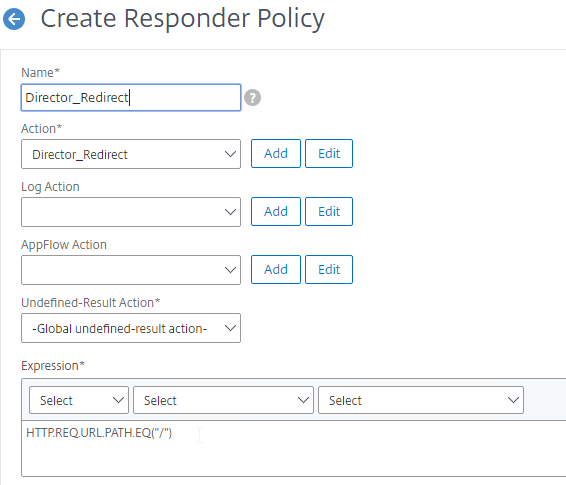
- On the bottom, click Create.

Load Balancing Virtual Server
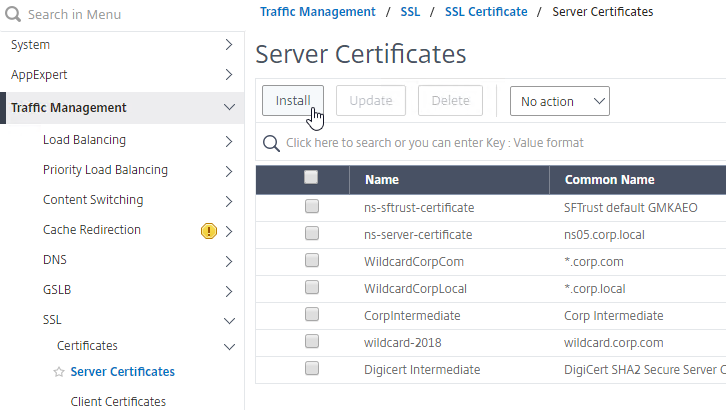
- Create or install a certificate that will be used by the SSL Virtual Server. This certificate must match the DNS name for the load balanced Director servers.
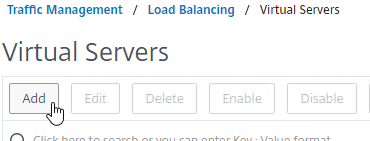
- On the left, under Traffic Management > Load Balancing, click Virtual Servers.

- On the right, click Add.
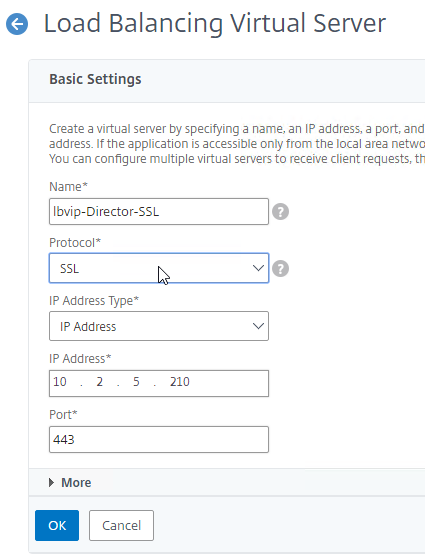
- Do the following in the Basic Settings section:
- Name it lbvip-Director-SSL or similar.
- Change the Protocol to SSL.
- Specify a new internal VIP.
- Enter 443 as the Port.
- Click OK to close the Basic Settings section.
- On the left, in the Services and Service section, click where it says No Load Balancing Virtual Server ServiceGroup Binding.
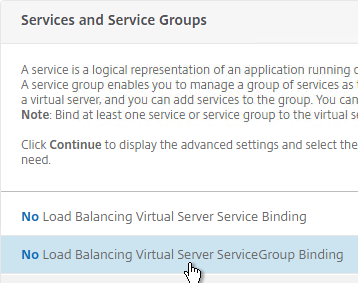
- Click where it says Click to select.
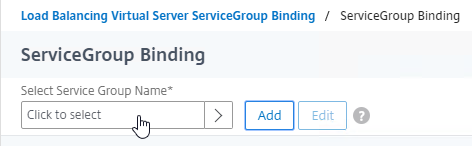
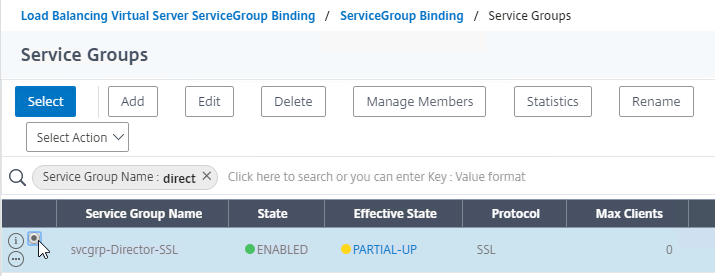
- Click the circle next to a previously created Service Group. It might be on page 2.
- The circle must be clicked exactly (no room for error). If you click outside the circle, then the Service Group will open for editing. If this happens, click the x on the top right, or the Done button on the bottom, to return to the selection screen.
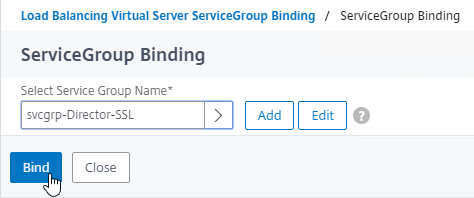
- At top of the screen, click the blue Select button.
- Click Bind.
- Click where it says Click to select.
- Click Continue to close the Services and Service Groups section.

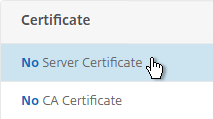
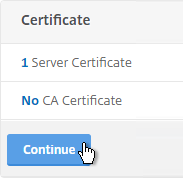
- Click where it says No Server Certificate.
- Click where it says Click to select.
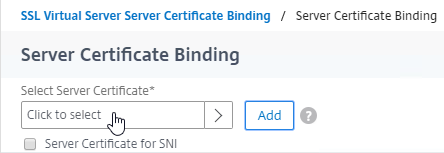
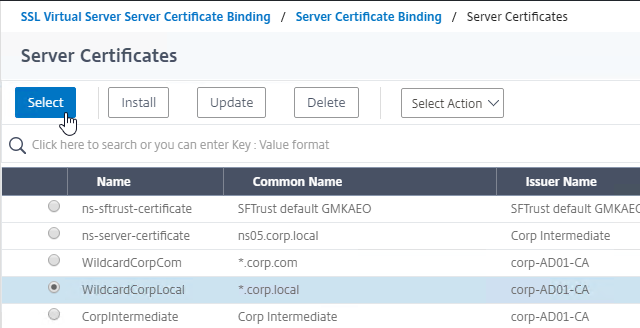
- Click the circle next to a certificate that matches the FQDN that resolves to this VIP. It might be on page 2.
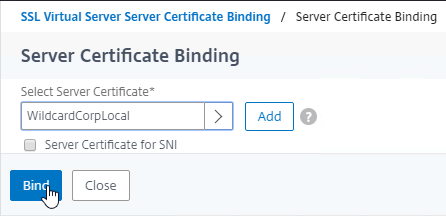
- At the top of the window, click the blue Select button.
- Click Bind.
- Click where it says Click to select.
- Click Continue to close the Certificate section.
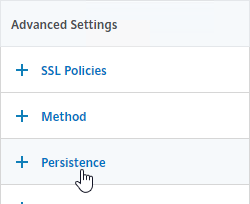
- On the right, in the Advanced Settings column, click Persistence.
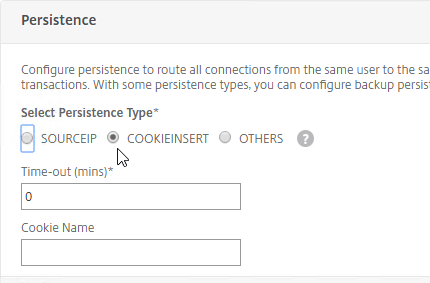
- On the left, in the Persistence section, do the following:
- Change the Persistence drop-down to COOKIEINSERT. The Persistence section in 12.0 build 56 and newer is slightly different than older builds.
- Set the Time-out to 0 minutes. This makes it a session cookie instead of a persistent cookie.
- Set the Backup Persistence to SOURCEIP.
- Set the Backup Time-out to match the timeout of Director. The default timeout for Director is 245 minutes.
- The IPv4 Netmask should default to 32 bits.
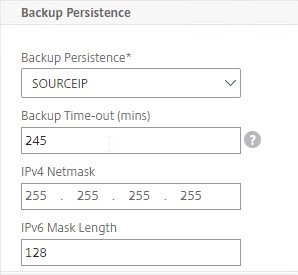
- Click OK to close the Persistence section.

- On the right, in the Advanced Settings section, add the Policies section.
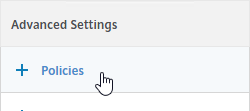
- On the left, in the Policies section, click the plus icon.

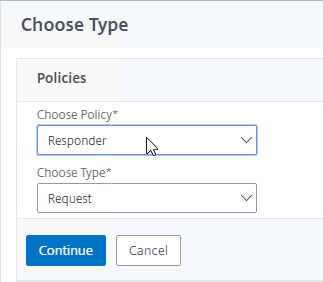
- Change the Choose Policy drop-down to Responder, and click Continue.
- Click to select the previously created Director_Redirect policy.

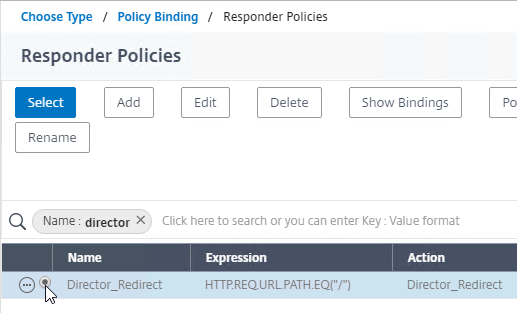
- The circle next to the Responder policy must be clicked exactly (no room for error). If you click outside the circle, then the policy will open for editing. If this happens, click Close to return to the selection screen.
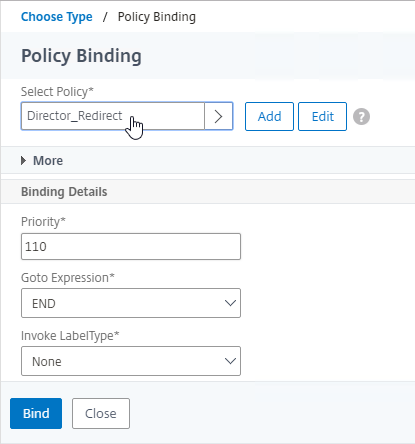
- After selecting, click Bind.
- Change the Choose Policy drop-down to Responder, and click Continue.
- If you haven’t enabled the Default SSL Profile, then perform other normal SSL configuration including: disable SSLv3, bind a Modern A+ Cipher Group, and enable Strict Transport Security.
SSL Redirect
Do one of the following to configure a redirect from HTTP to HTTPS:
- Add a new HTTP load balancer on port 80 and use Responder to redirect.
- Edit the existing SSL vServer and enable Redirect.
- Add a new HTTP load balancer on port 80 and configure the Redirect URL.
SSL Warning
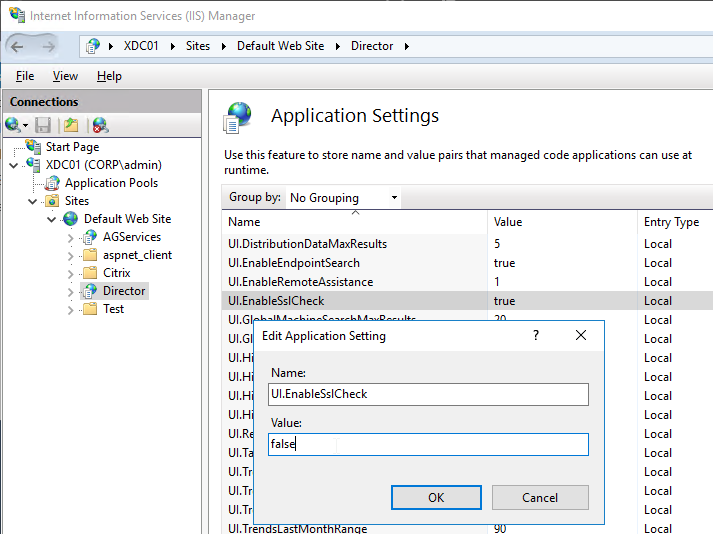
- If you are doing SSL Offload (SSL on front end, HTTP on back end), when connecting to Director, it might complain about “You are not using a secure connection”.

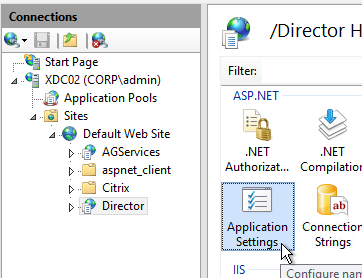
- To turn off this warning, login to the Director servers, and run IIS Manager.
- On the left, navigate to Server > Sites > Default Web Site > Director.
- In the middle, double-click Application Settings.
- Change UI.EnableSslCheck to false.
CLI Commands
Here is a list of NetScaler CLI commands for Director Load Balancing:
# SSL Global Parameters
set ssl parameter -denySSLReneg NONSECURE

# Certs
add ssl certKey WildcardCorpLocal -cert WildcardCorpLocal.pfx -key WildcardCorpLocal.pfx -inform PFX -passcrypt "Passw0rd"

# SSL Cipher Group
add ssl cipher custom-ssllabs-cipher
bind ssl cipher custom-ssllabs-cipher -cipherName TLS1.2-ECDHE-RSA-AES256-GCM-SHA384 -cipherPriority 1
bind ssl cipher custom-ssllabs-cipher -cipherName TLS1.2-ECDHE-RSA-AES128-GCM-SHA256 -cipherPriority 2
bind ssl cipher custom-ssllabs-cipher -cipherName TLS1.2-ECDHE-RSA-AES-256-SHA384 -cipherPriority 3
bind ssl cipher custom-ssllabs-cipher -cipherName TLS1.2-ECDHE-RSA-AES-128-SHA256 -cipherPriority 4
bind ssl cipher custom-ssllabs-cipher -cipherName TLS1-ECDHE-RSA-AES256-SHA -cipherPriority 5
bind ssl cipher custom-ssllabs-cipher -cipherName TLS1-ECDHE-RSA-AES128-SHA -cipherPriority 6
bind ssl cipher custom-ssllabs-cipher -cipherName TLS1.2-DHE-RSA-AES256-GCM-SHA384 -cipherPriority 7
bind ssl cipher custom-ssllabs-cipher -cipherName TLS1.2-DHE-RSA-AES128-GCM-SHA256 -cipherPriority 8
bind ssl cipher custom-ssllabs-cipher -cipherName TLS1-DHE-RSA-AES-256-CBC-SHA -cipherPriority 9
bind ssl cipher custom-ssllabs-cipher -cipherName TLS1-DHE-RSA-AES-128-CBC-SHA -cipherPriority 10
bind ssl cipher custom-ssllabs-cipher -cipherName TLS1-AES-256-CBC-SHA -cipherPriority 11
bind ssl cipher custom-ssllabs-cipher -cipherName TLS1-AES-128-CBC-SHA -cipherPriority 12

# Responder Actions
add responder action Director_Redirect redirect "\"/Director\"" -responseStatusCode 302

# Responder Policies
add responder policy Director_Redirect "HTTP.REQ.URL.PATH.EQ(\"/\")" Director_Redirect

# Load Balancing Global Parameters
enable ns mode FR L3 Edge USNIP PMTUD ULFD
set ns param -cookieversion 1
set ns tcpParam -WS ENABLED -SACK ENABLED
set ns httpParam -dropInvalReqs ON

# Monitors
add lb monitor Director HTTP -respCode 200 302 -httpRequest "GET /Director/LogOn.aspx?cc=true" -LRTM DISABLED -secure YES

# Servers
add server Director01 xdc01.corp.local
add server Director02 xdc02.corp.local

# Service Groups
add serviceGroup svcgrp-Director-SSL SSL -maxClient 0 -maxReq 0 -cip DISABLED -usip NO -useproxyport YES -cltTimeout 180 -svrTimeout 360 -CKA NO -TCPB NO -CMP YES
bind serviceGroup svcgrp-Director-SSL Director01 443
bind serviceGroup svcgrp-Director-SSL Director02 443
bind serviceGroup svcgrp-Director-SSL -monitorName Director

# Load Balancing Virtual Servers
add lb vserver lbvip-Director-SSL SSL 10.2.5.210 443 -persistenceType COOKIEINSERT -timeout 0 -persistenceBackup SOURCEIP -backupPersistenceTimeout 245 -cltTimeout 180 -redirectFromPort 80 -httpsRedirectUrl "https://director.corp.com"
bind lb vserver lbvip-Director-SSL svcgrp-Director-SSL
bind lb vserver lbvip-Director-SSL -policyName Director_Redirect -priority 100 -gotoPriorityExpression END -type REQUEST

# SSL Virtual Servers
set ssl vserver lbvip-Director-SSL -ssl3 DISABLED -HSTS ENABLED -maxage 157680000
unbind ssl vserver lbvip-Director-SSL -cipherName ALL
bind ssl vserver lbvip-Director-SSL -cipherName custom-ssllabs-cipher
bind ssl vserver lbvip-Director-SSL -certkeyName WildcardCorpLocal
bind ssl vserver lbvip-Director-SSL -eccCurveName P_256
bind ssl vserver lbvip-Director-SSL -eccCurveName P_384
bind ssl vserver lbvip-Director-SSL -eccCurveName P_224
bind ssl vserver lbvip-Director-SSL -eccCurveName P_521
Couldn’t see a version for WebStudio but it worked perfectly with a few tweaks to the Monitor and the Redirect path!
Thanks, great help as always.
Hi Carl
Thanks a lot for this post.
I’ve one question, I have connected my Director server to 2 VAD sites in 2 Active directory domains without any trust relationship between the 2 domains.
I want to pre load teh 2 domains in the domain filed on the logon page. Do you have any idea?
Many thanks
HI Carl
I would like to configure Citrix Director from my 2 Delivery Controllers on a Content switching.
I’m using a content Switching to “redirect” SSL connection to my different services. How I can do it?
Thanks
I can’t think of any reason why Content Switching wouldn’t work. Can you be more specific in what you are looking for?
Hi Carl, We are load balncing ctx director and have an SSL VIP with source IP persistence set, problem is once the user logs in and after a minute or so session gets timed out and returns back to the login page. I changed the persistence to cookie insert and still didn’t work. Any suggestions on this, I can take a pcap and see but anything to do with configuration
If you disable one of the load balancing services so only one is active, does it work?
Hi Carl, yes it does work if I disable one service. I suspect this to be a Load Balancing method chosen combined with the persistence. Does that sound right ?
What timeout did you configure for your persistence? The default is 2 minutes unless you try it.
Hi Carl, I set up the source ip persistence for 15 minutes.
Hi Carl, did you get a chance to suggest ? the persistence is source ip set to 15 minutes.
15 minutes seems low. How long will users stay connected to Director? Persistence timeout should be at least that long.
Well, users are getting timed out even before 15 minutes and this happens intermittently. When they login to the director after a couple of minutes they get timed out and they get back to the login screen.
When users connect to the VIP, are they going through a proxy server or NAT? Or is the connection directly to the VIP without any IP translation?
You can view the NetScaler persistence table by clicking Traffic Management on the left and there’s a link on the right.
You can also do a network trace on the NetScaler to see the client’s source IP.
Hi Carl, users won’t come via firewall or a proxy so no nat. I have already checked the persistence table and I could see the original IP of the client, and when they are browsing I could see them get timed out in spite of the connection still in the persistence table.
Is it actually sending them to a different server? If so, and if persistence table shows it should not be doing that, then that sounds like a bug.
Hi Carl, i have followed your guide to setup a Director pair and load balanced them successfully. This director pair points to 5 other DDCs pairs in different regions. Works well, but is there a way for me to connect this setup to NMAS/HDX Insight devices in each region so it appears in the network tab of each site in Director? I’m think we can only add one, which is a bummer. Unless their is another way you can suggest?
Thanks again for the articles, always appreciated.
Erk
Hi Carl, have you been able to look at my question?
I think you can only add one MAS appliance per Director server. You might have to call Citrix Support and submit an enhancement request.
Was thinking the same, thanks for confirming Carl.
Thought so, thanks for confirming Carl.
Hi Carl,
Thanks for this article. I need to replicate the existing DIrector configuration to the new Director box. What’s the best way to do it?. If I copy the IIS sub folder, will it work?.
What configurations? Most are in Application Settings, which are stored in /Director/web.config. I assume you can just copy that file to the new server, but I don’t think I’ve tried that.
Hi Carl, in the v11 guide you use a different method for persistency than v12 , is the v12 a better method than v11 ?
v11:
Select SOURCEIP persistence.
Set the timeout to match the timeout of Director. The default timeout for Director is 245 minutes.
v12:
Change the Persistence drop-down to COOKIEINSERT. The Persistence section in 12.0 build 56 and newer is slightly different than older builds.
Set the Time-out to 0 minutes. This makes it a session cookie instead of a persistent cookie.
keep up the great work!
Cookie is usually preferred for HTTP websites since it handles proxy connections and NAT connections. But it depends on the app.
I agree with you on that, Carl.
Would it be possible to update the 11.1 article with the same persistence? Or would there be a reason not to use it on NS ADC 11.1 when load balancing Citrix Director?