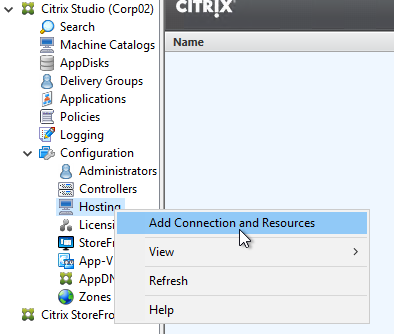
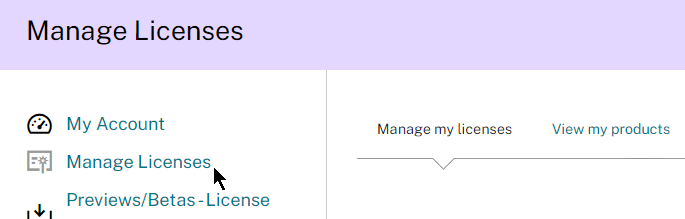
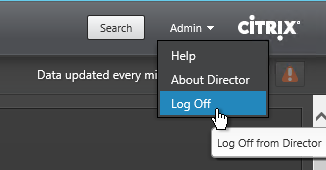
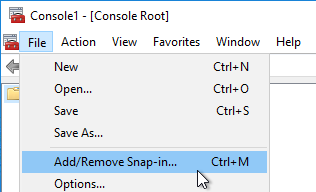
Navigation
- Change Log
- Director Licensing – Premium Edition
- Install/Upgrade Director 2311 on Standalone Server
- Director Default Webpage
- Director Spinning Circle
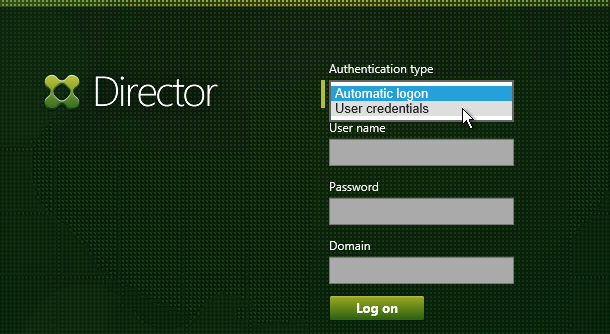
- Domain Field on Director Logon Page
- Director Tweaks
- Director – Saved Filters
- Director and HDX Insight
- Monitoring Database Grooming
- Director Single Sign On
- Director – Multiple Citrix Virtual Apps and Desktops Sites/Farms
- Director Process Monitoring
- Director Alerts and Notifications
- Director – StoreFront Probes
- Director – SCOM Integration
- Director – Custom Reports
- Use Director 2311
💡 = Recently Updated
Change Log
- 2023 Dec 22 – Use Director 2311 – new theme; Session Topology; Session Logon
- 2023 Dec 21 – Updated Install section for version 2311
- 2023 Sept 16 – Use Director 2308 – Session Experience metrics and new theme
- 2023 Sept 14 – Probe Agent 2308
- 2023 June 29 – added link to CTX493268 Automating Citrix Probe Agent Installation and Configuration
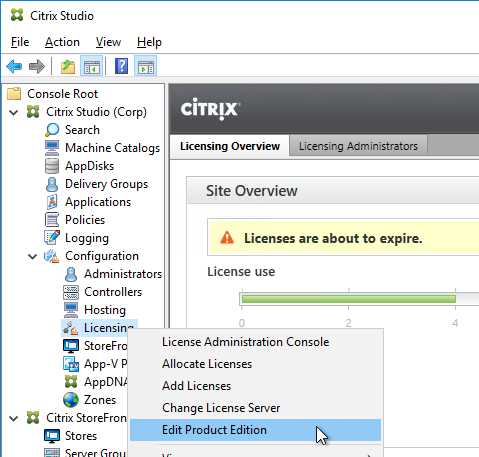
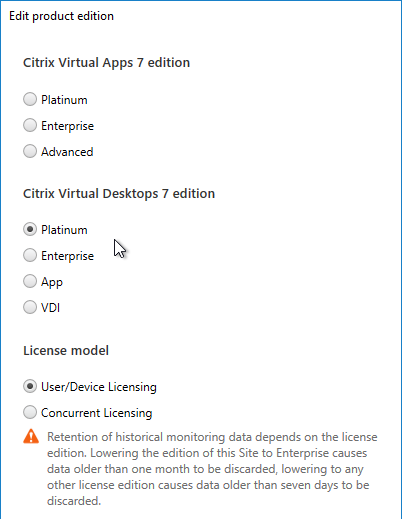
Director Licensing – Premium Edition
Here’s the list of Director features that require Premium Edition (aka Platinum Edition) licensing.
- Up to a year’s worth of performance data
- Other editions keep up to 30 days of performance data
- Application Probing
- Alerting, including SNMP integration
- SCOM alerts
- Single session OS (aka Desktop OS) and Multi-session OS (aka Server OS) usage reporting
- Create customized reports
- Reboot warnings
- Citrix ADM integration – HDX Insight
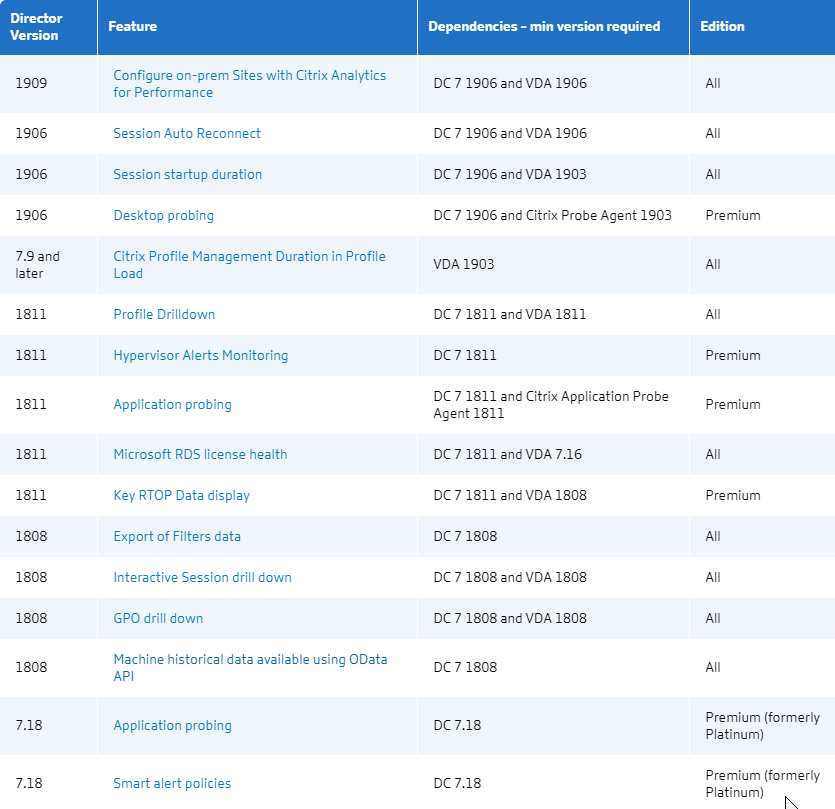
See Citrix Docs Feature compatibility matrix for a list of which Director feature came with each version, and the licensing Edition needed for each feature.
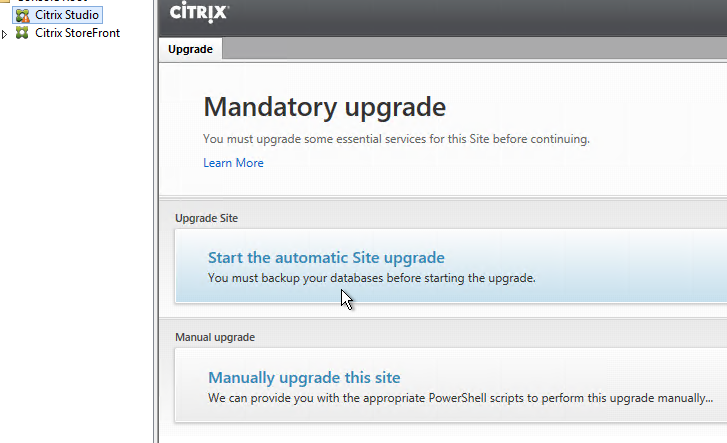
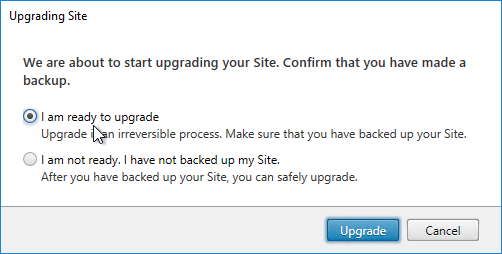
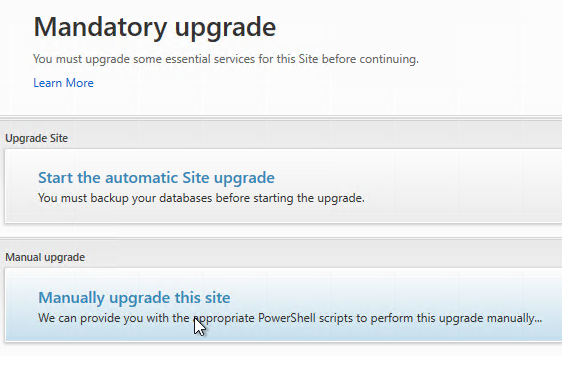
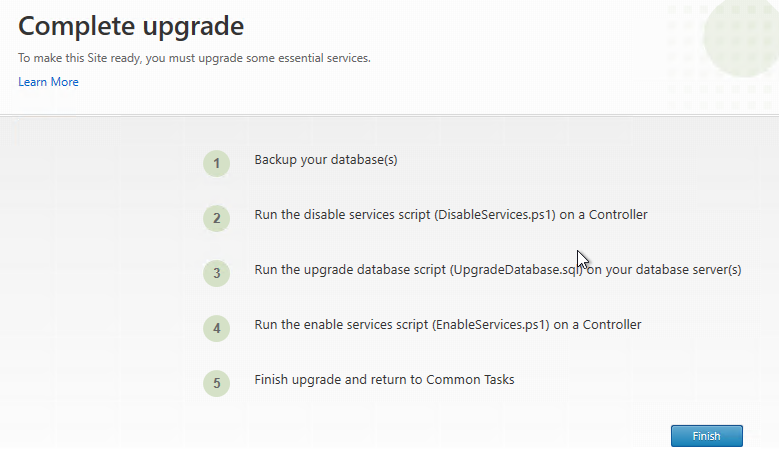
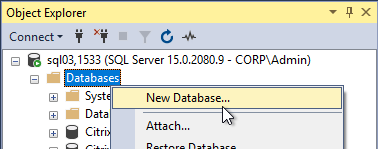
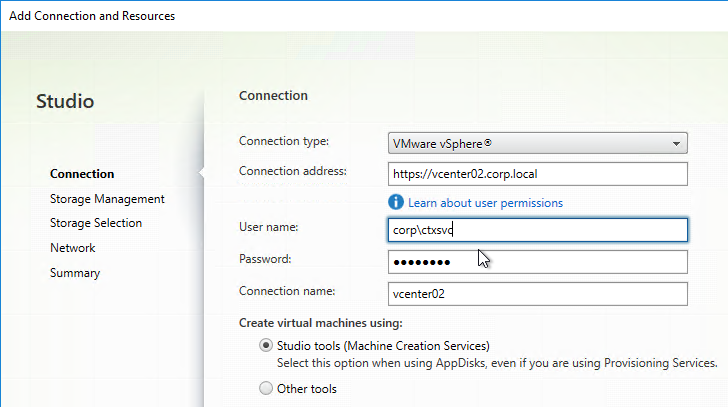
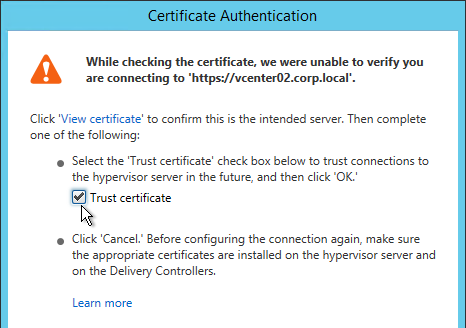
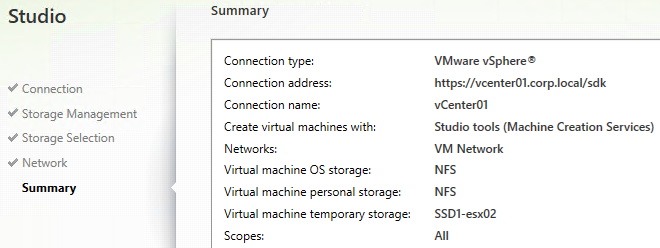
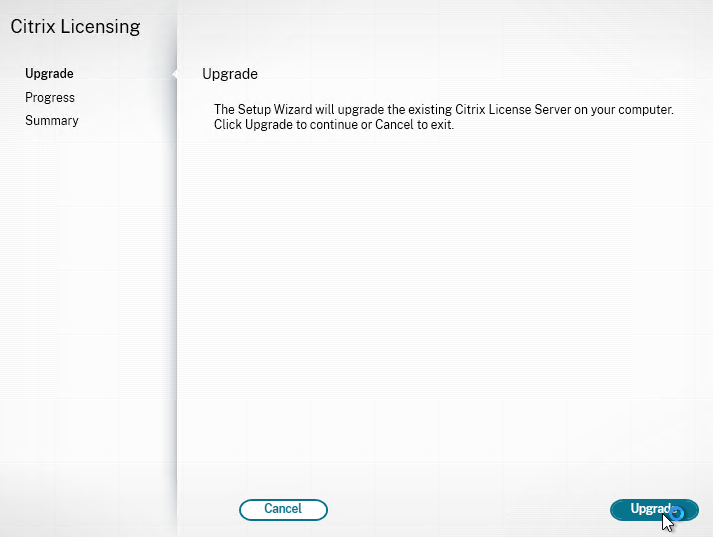
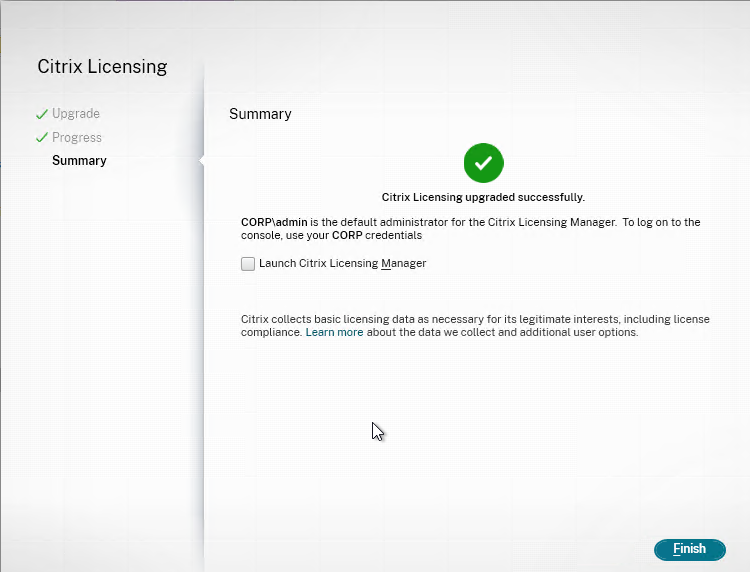
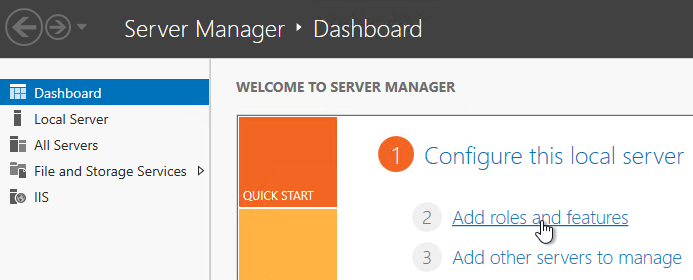
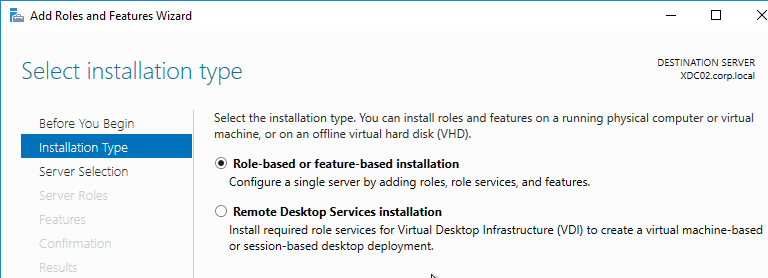
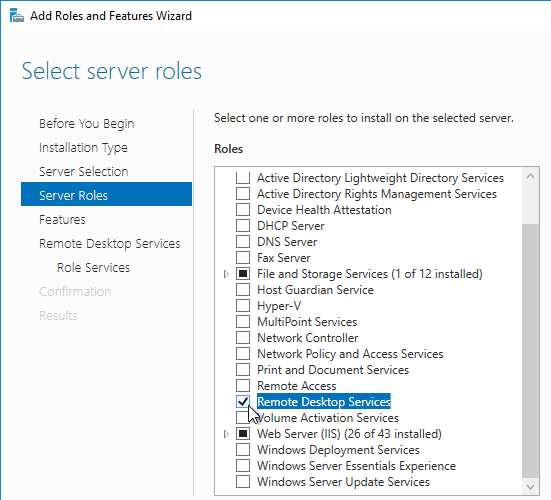
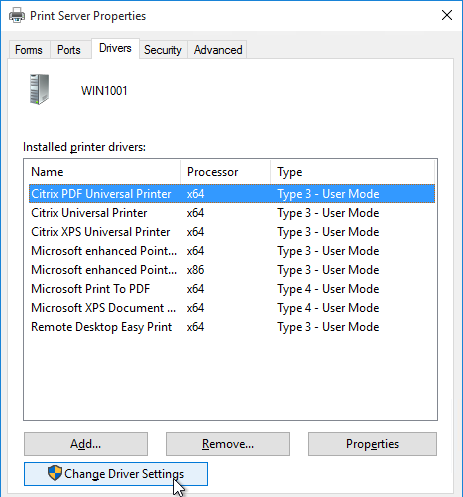
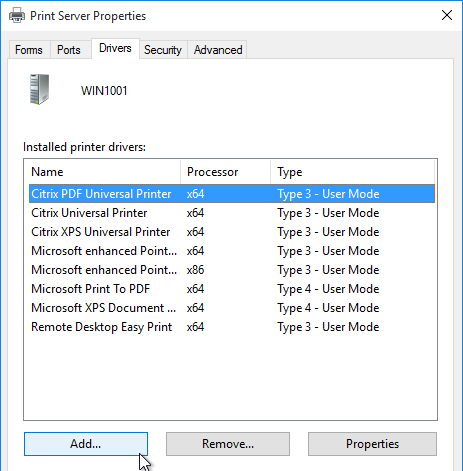
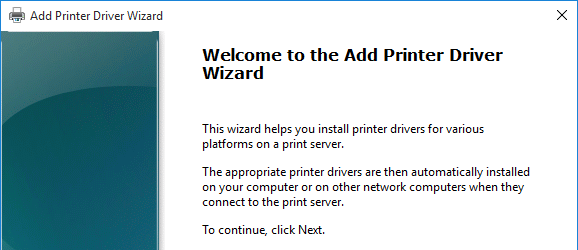
Install/Upgrade Director 2311 on Standalone Server
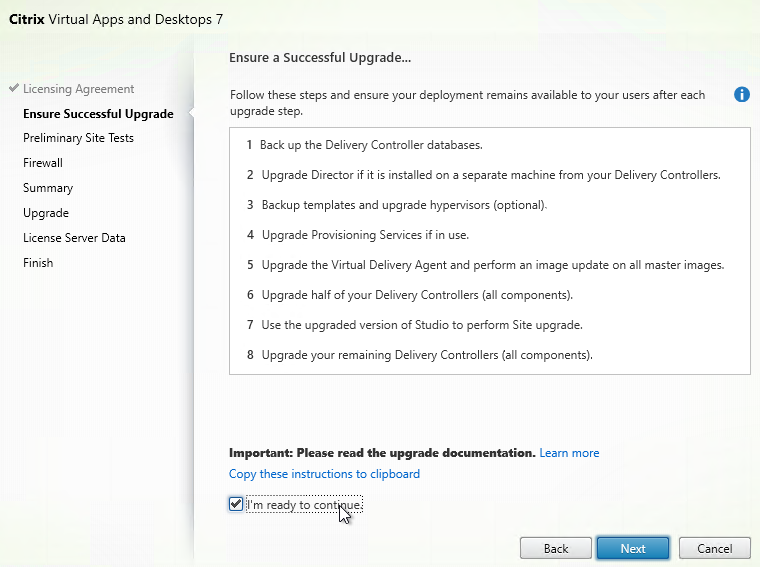
Current Release vs LTSR – Director version 2311 is a Current Release, which is only supported for 6 months from its release date, and you are expected to upgrade it every 3-6 months. If you prefer a release with a longer support cycle, see Director 2203 LTSR.
Install on Delivery Controller? – The Citrix Virtual Apps and Desktops (CVAD) Delivery Controller metainstaller has an option to install Director on the Delivery Controller machine. Or you can install Director on separate, dedicated machines.
- If Director will connect to multiple sites/farms, then install Director on its own servers.
- For small environments, it might be OK to install Director on the Delivery Controller machines. Otherwise, Director is usually installed on separate machines.
- Director is an IIS website. If you install Director, then IIS is also installed.
Director and Delivery Controller versions – Director 2311 supports Delivery Controllers 2203 and newer.
Installation guidance – For Director installation guidance, see the following:
- Citrix CTX222476 Install or Upgrade to Citrix Director 7.x Using Director .msi file
- Citrix CTX142260 Installing or Upgrading to Citrix Director 7.6.200.
Scripted install – To install and configure Director using a script, see Dennis Span Citrix Director unattended installation with PowerShell.
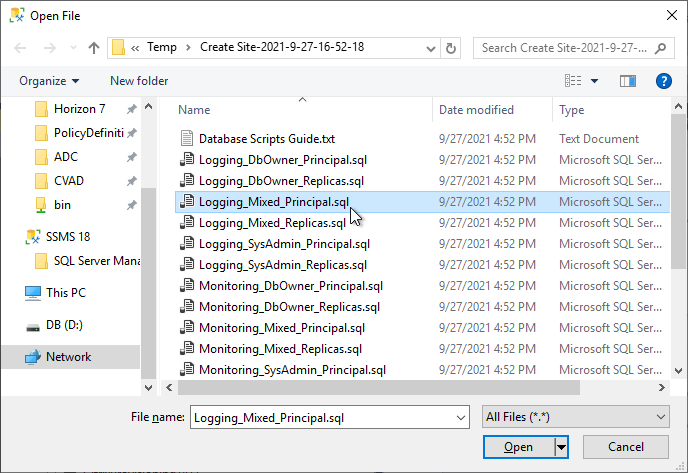
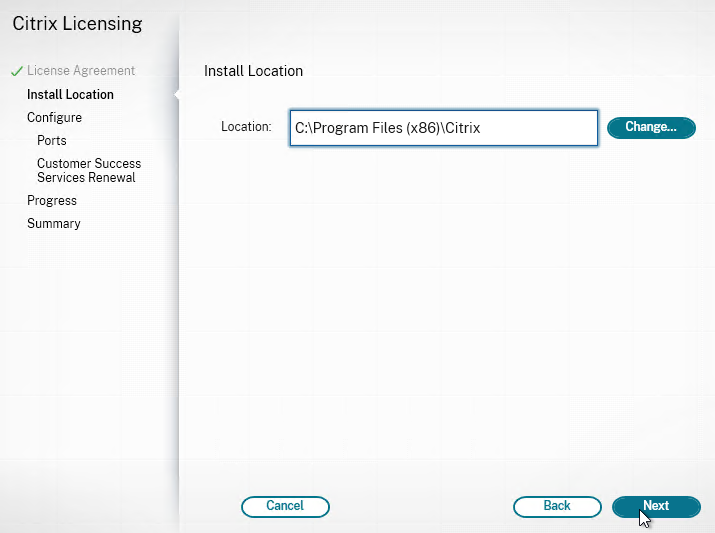
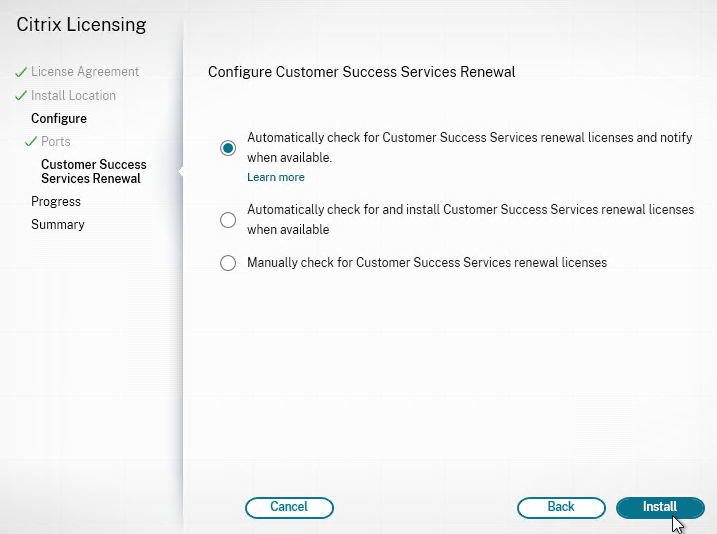
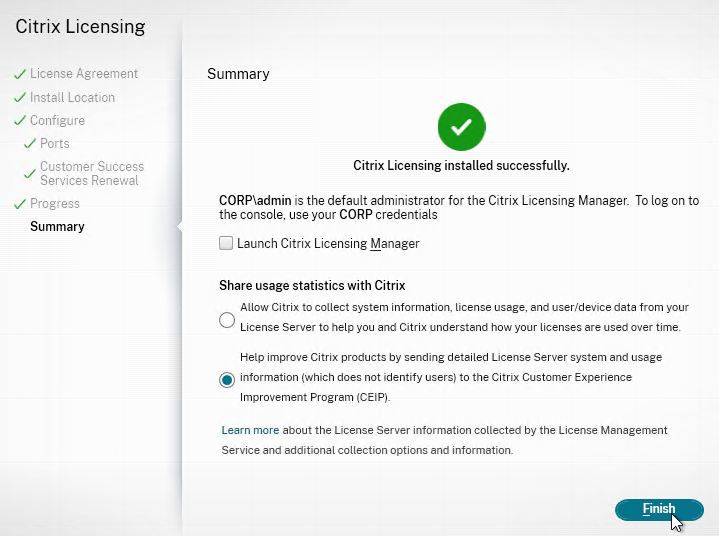
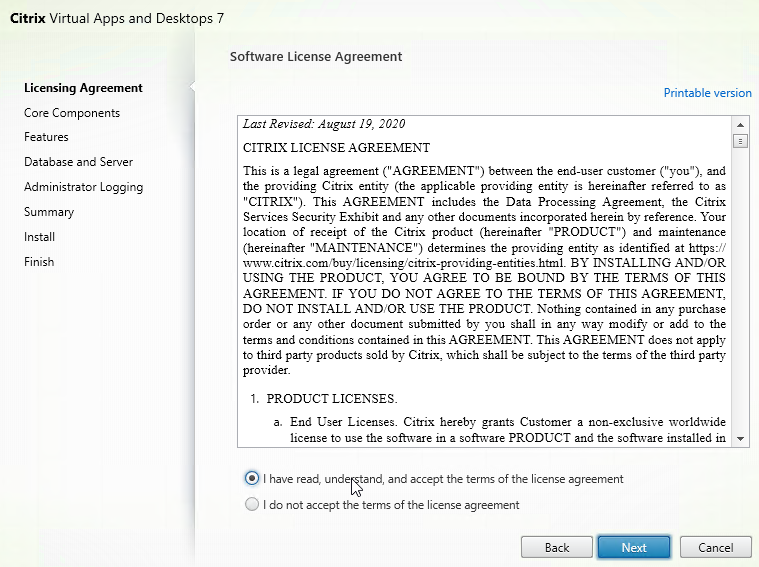
Manual installation – To install Director manually:
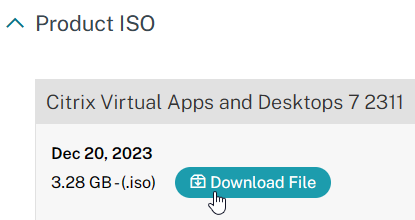
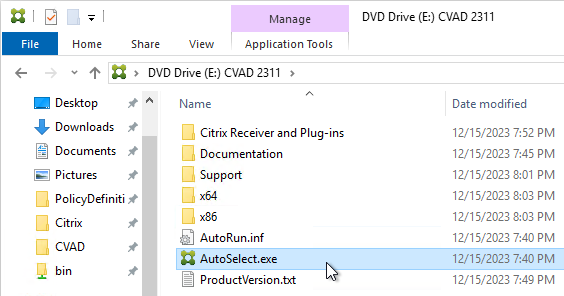
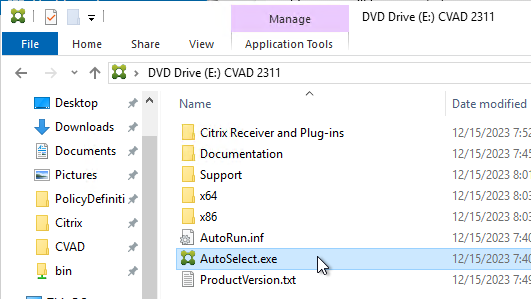
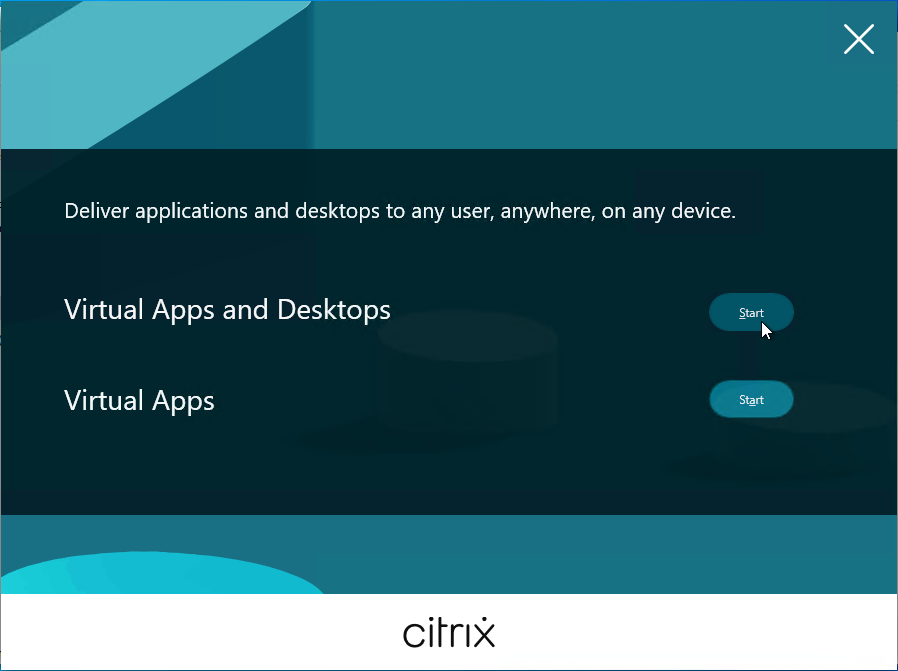
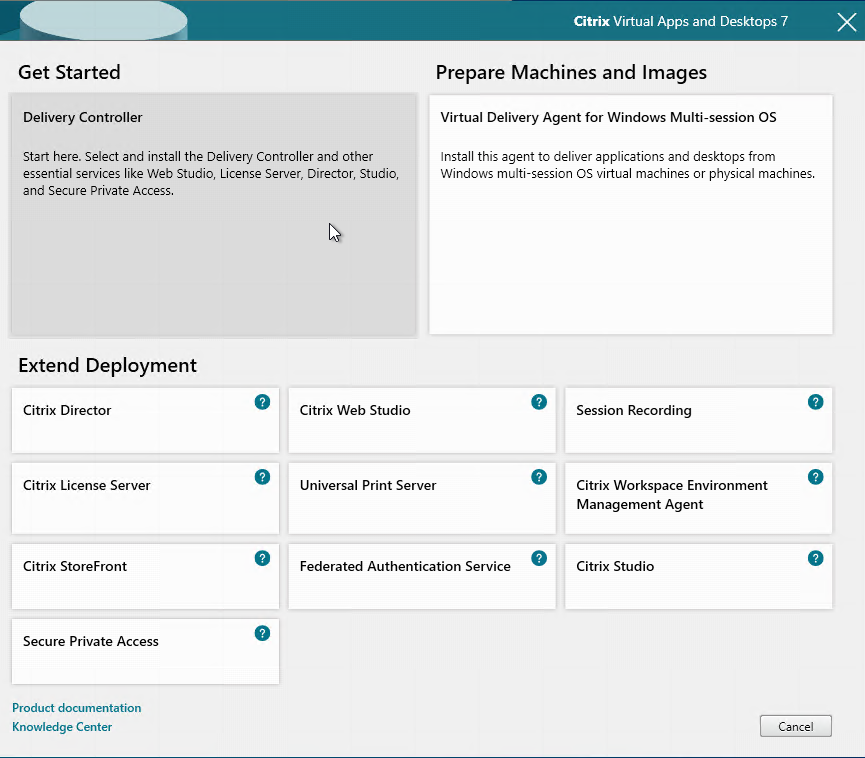
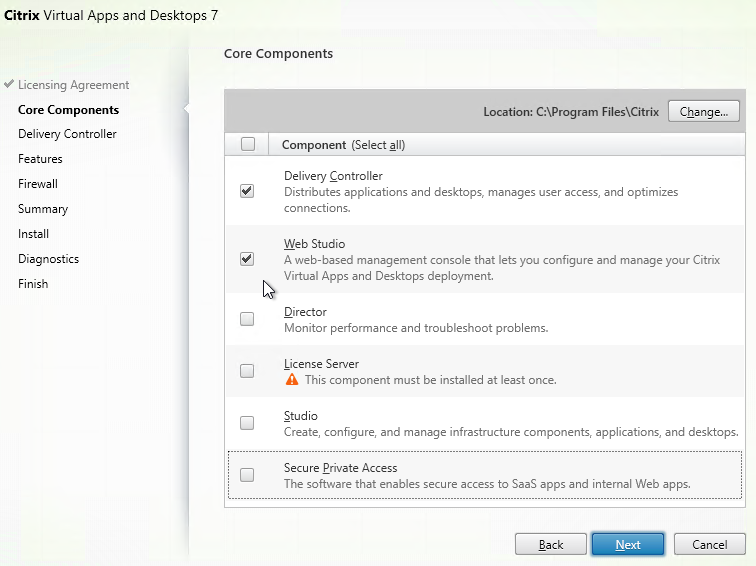
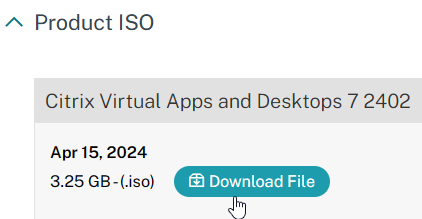
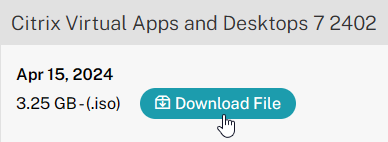
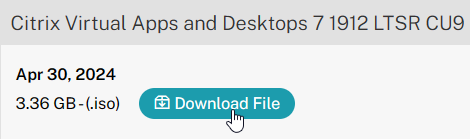
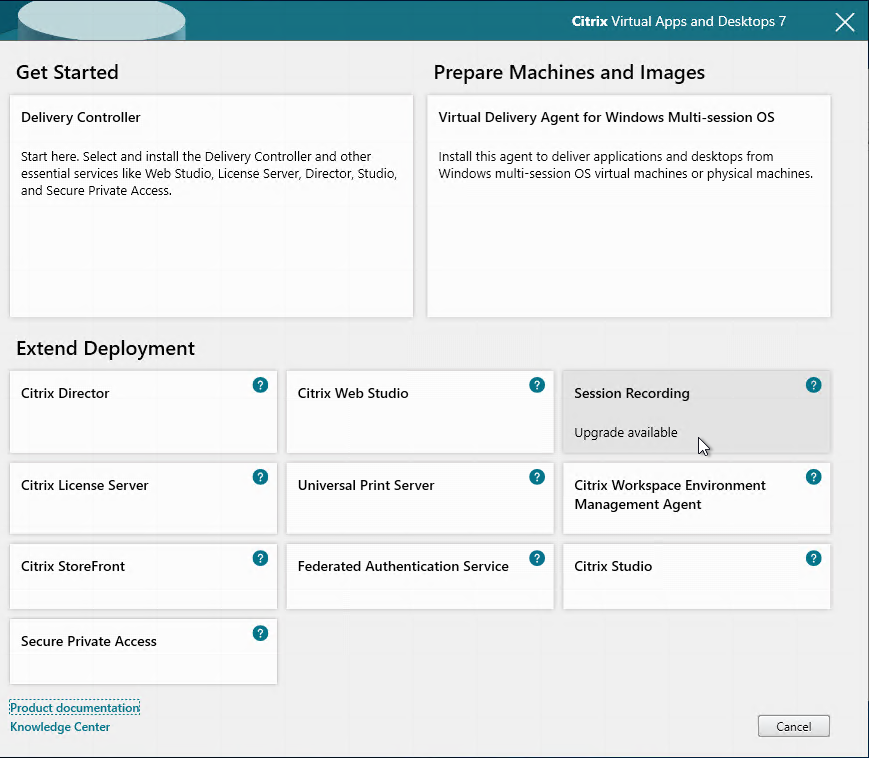
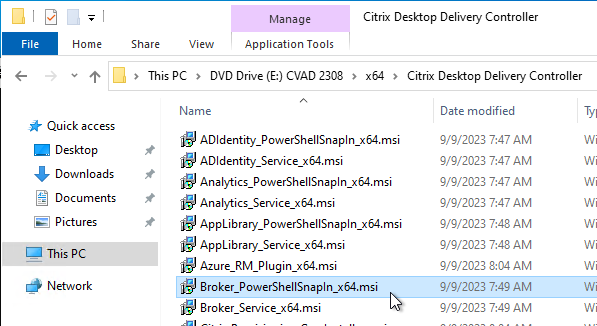
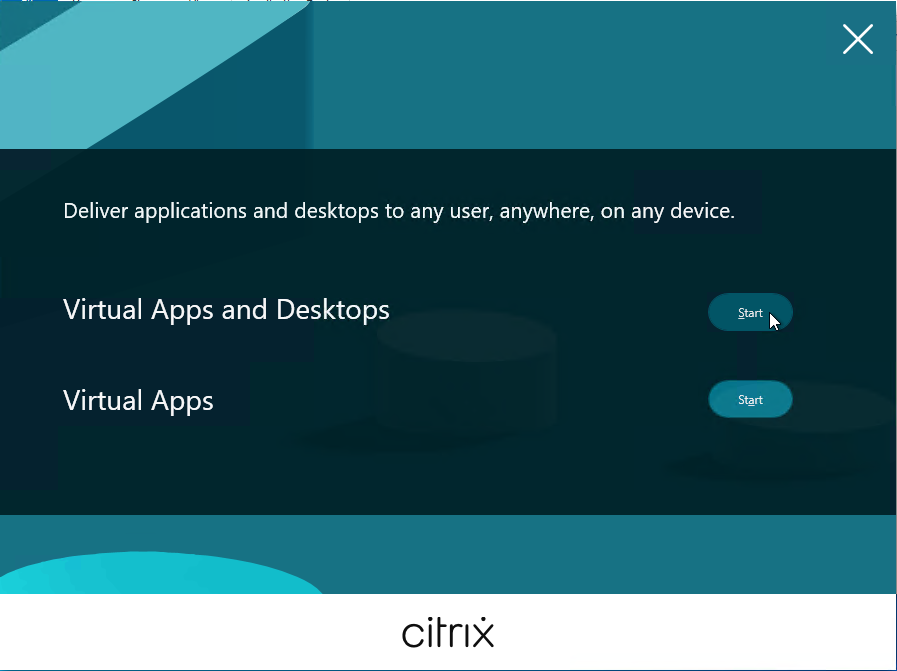
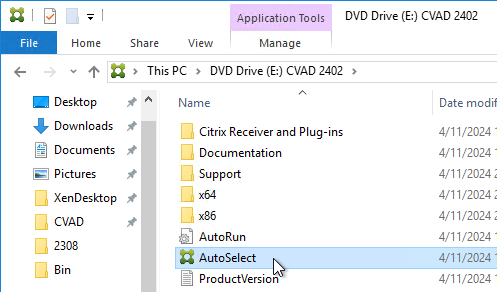
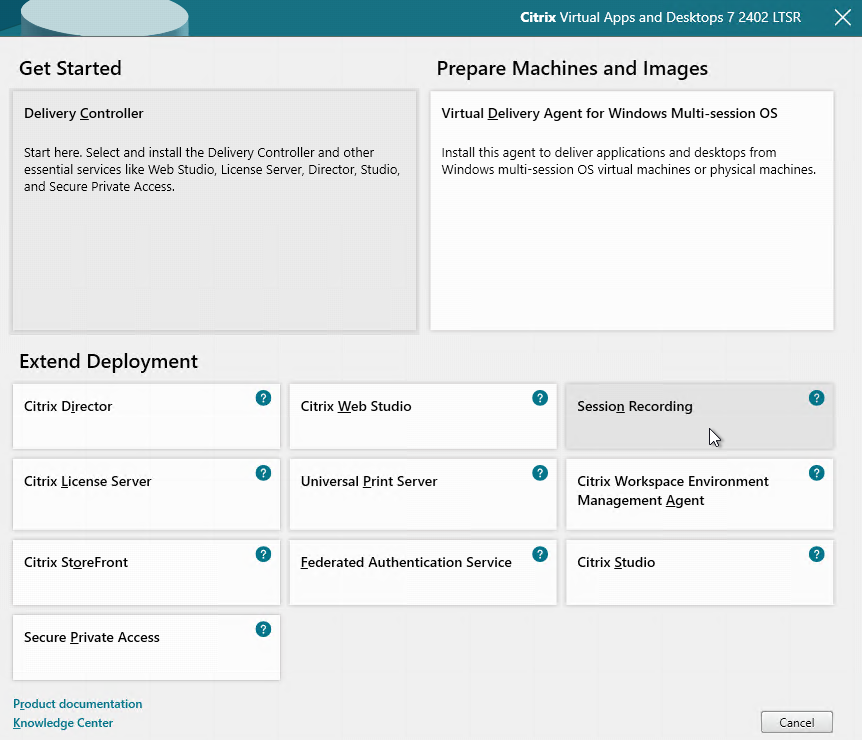
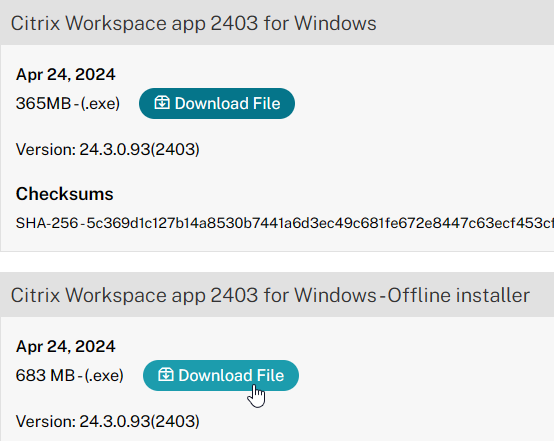
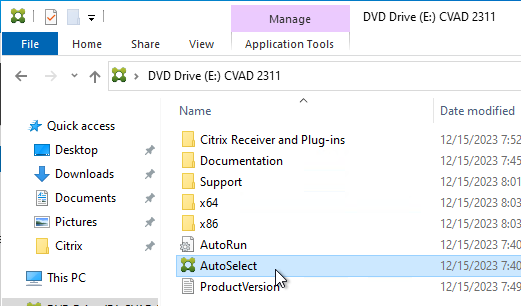
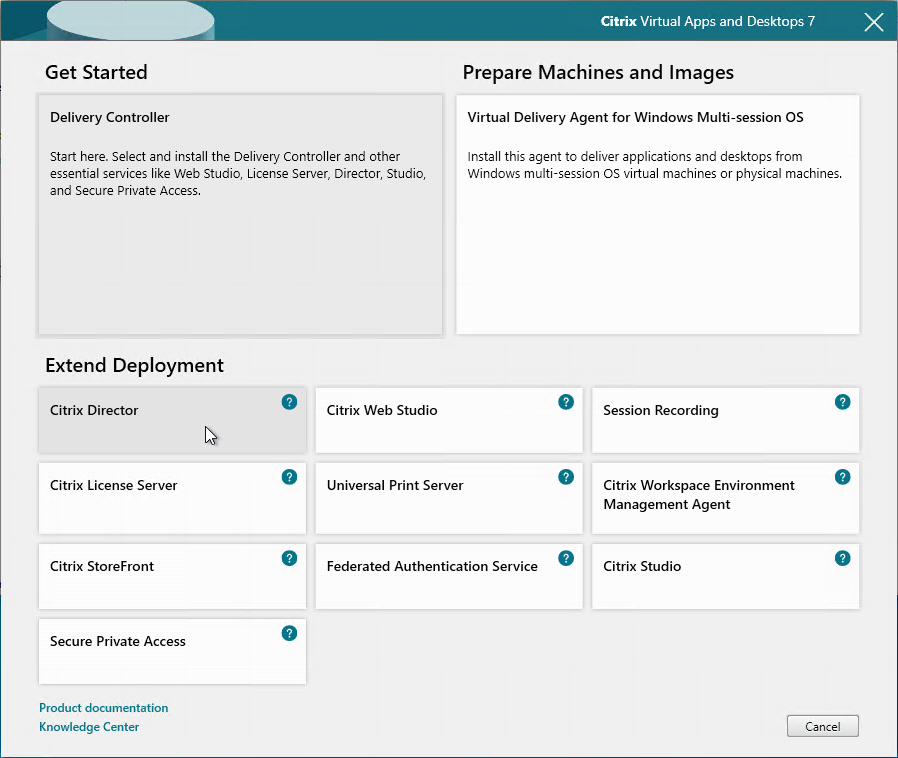
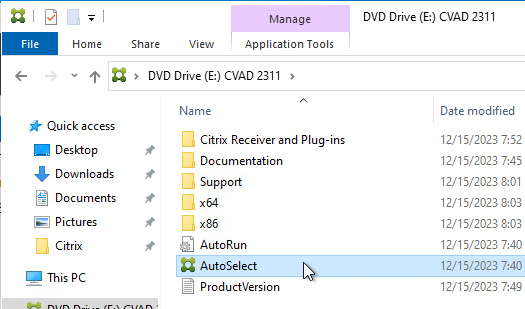
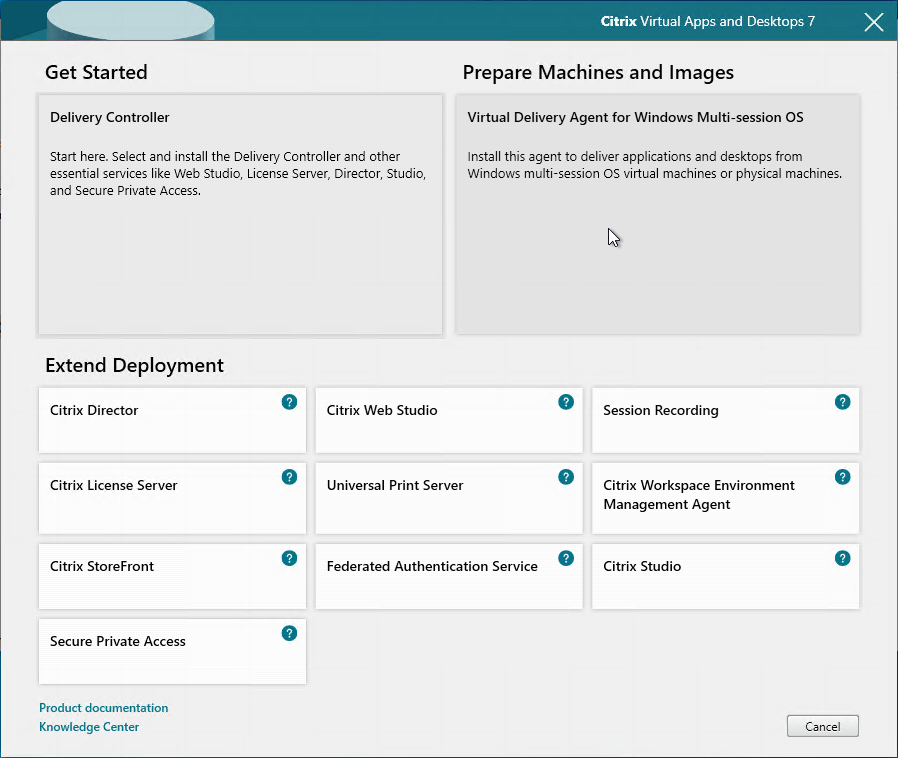
- Run AutoSelect.exe from the Citrix Virtual Apps and Desktops 2311 ISO.
- In the Extend Deployment section, on the bottom left, click Citrix Director.
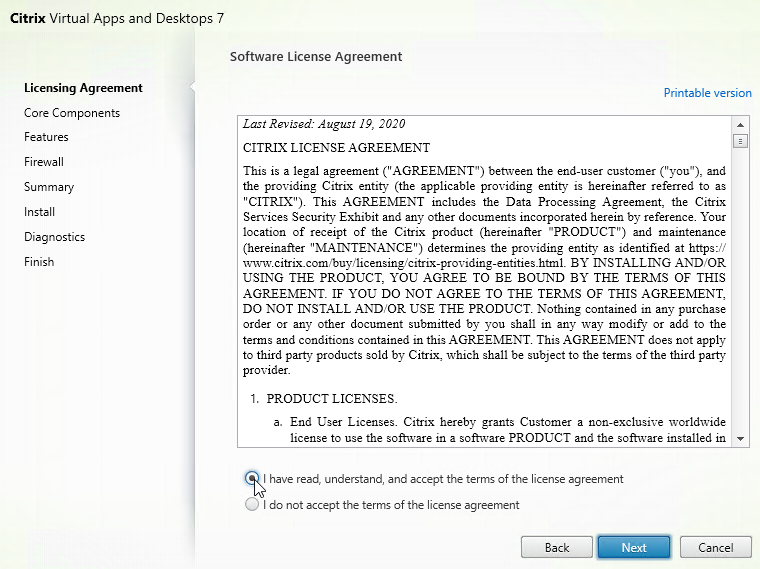
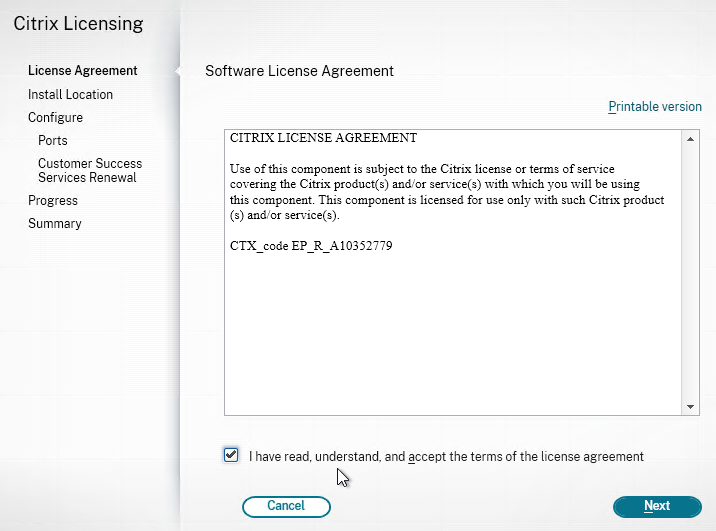
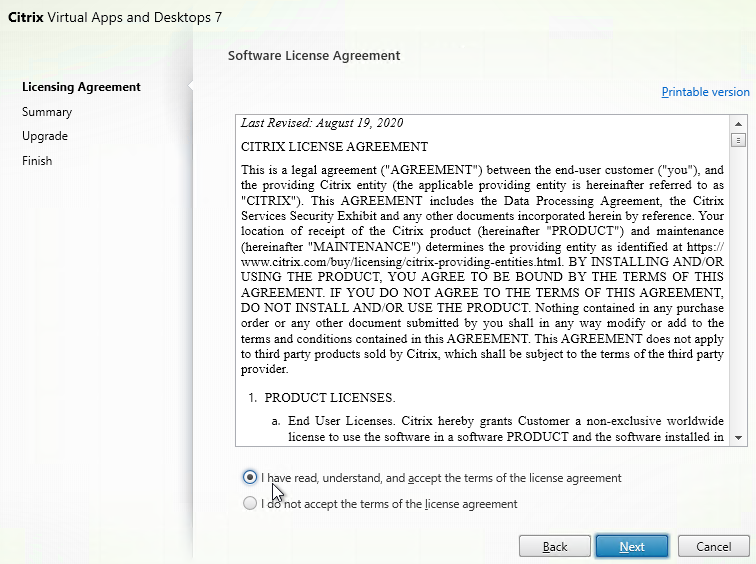
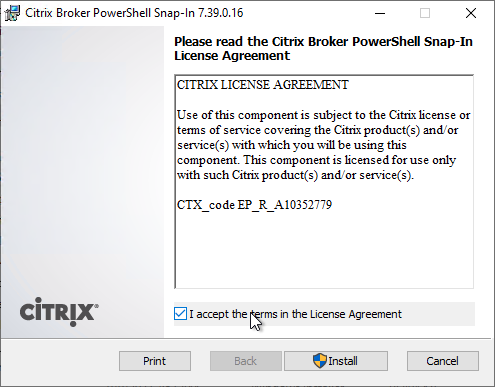
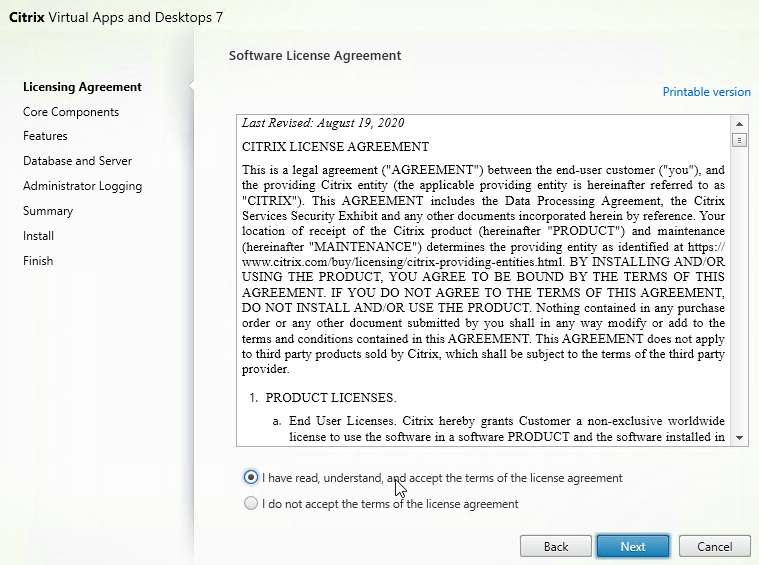
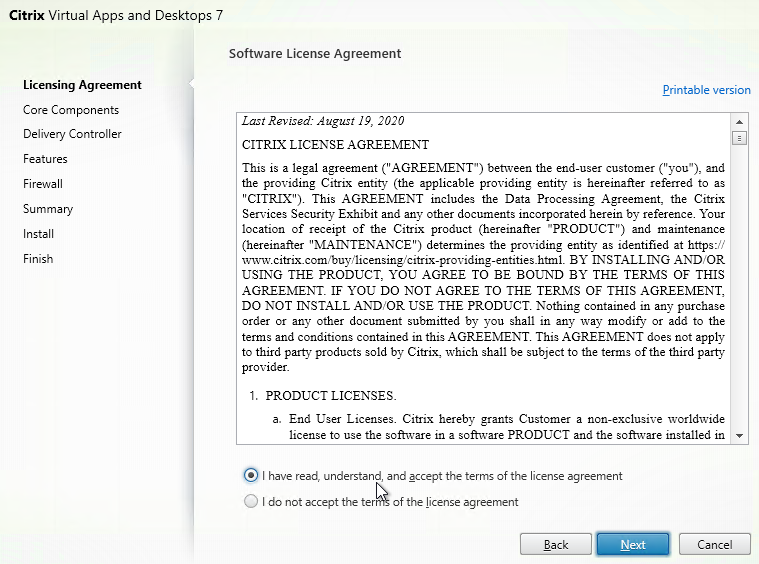
- In the Licensing Agreement page, select I have read, understand, and accept the terms, and click Next.
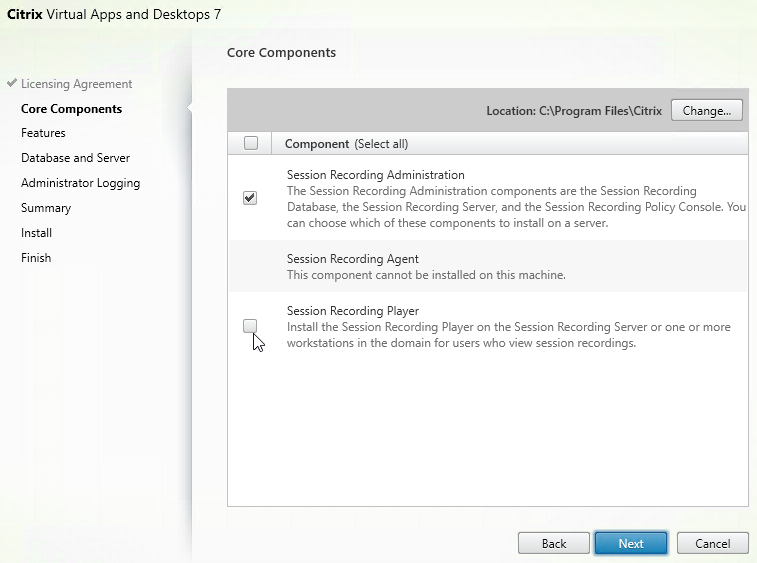
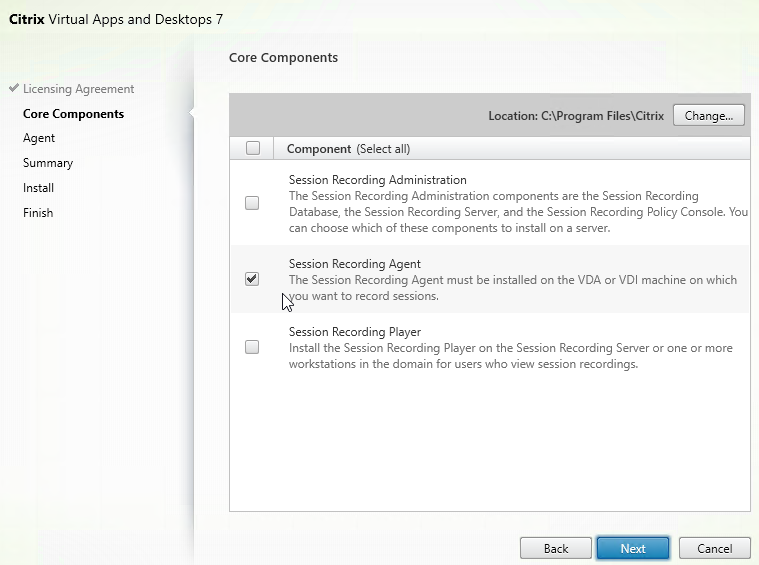
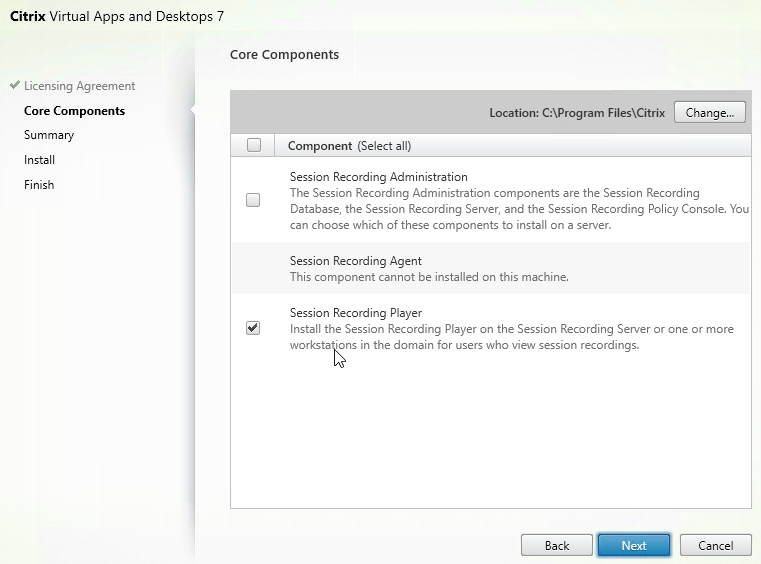
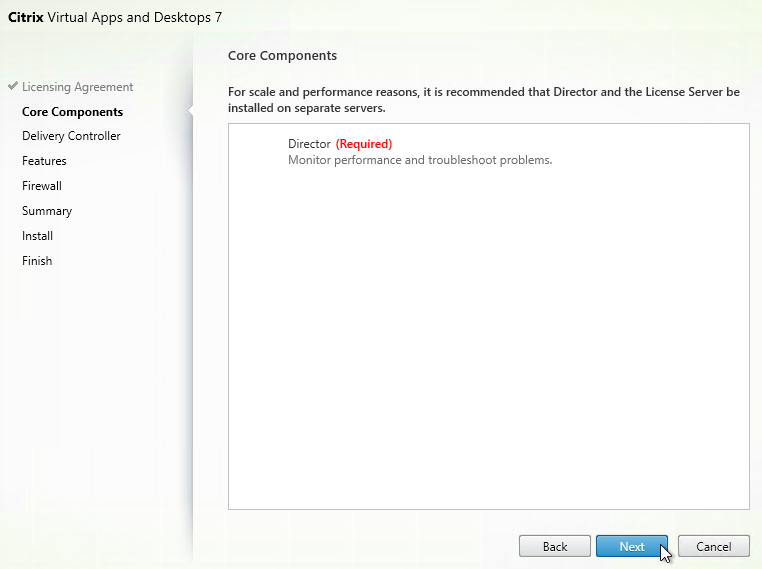
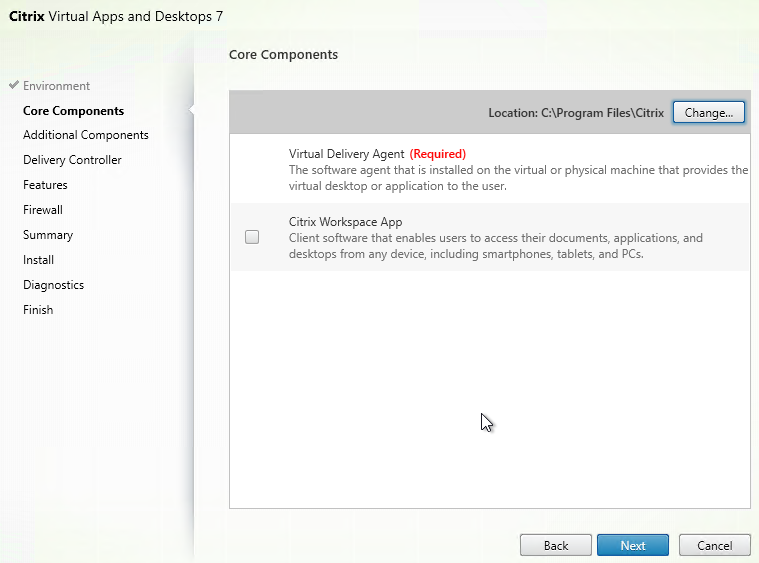
- In the Core Components page, click Next.
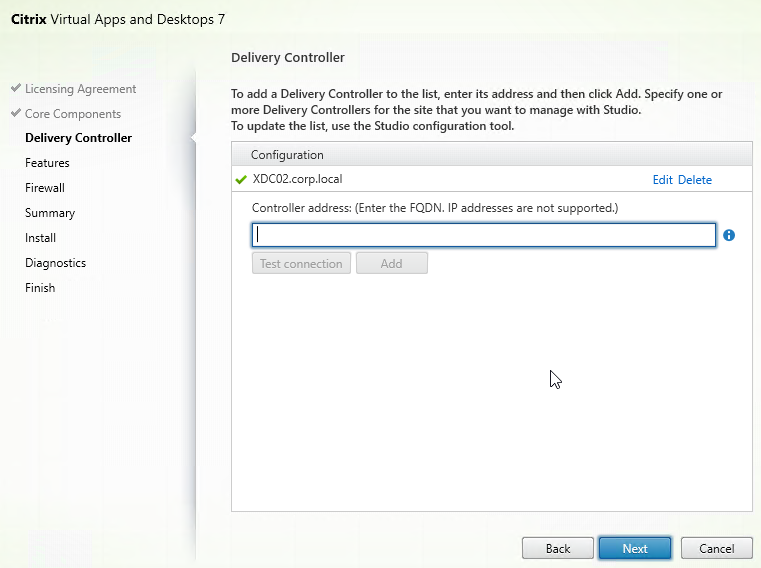
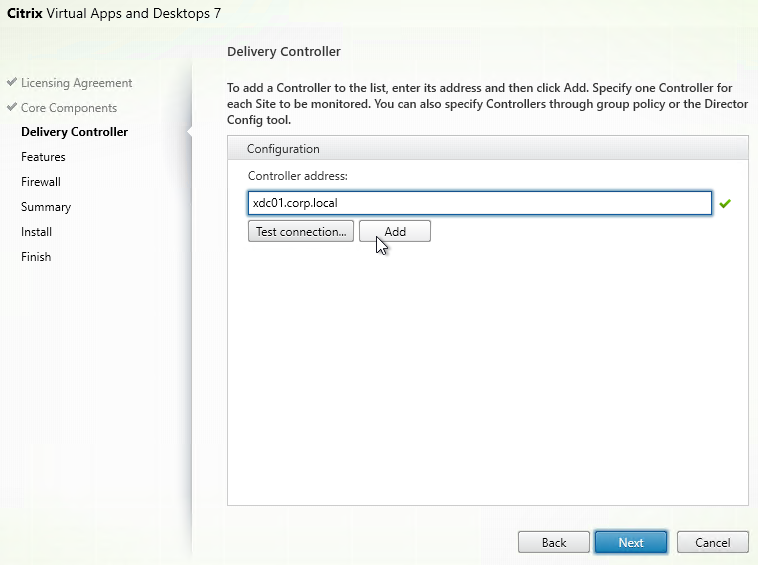
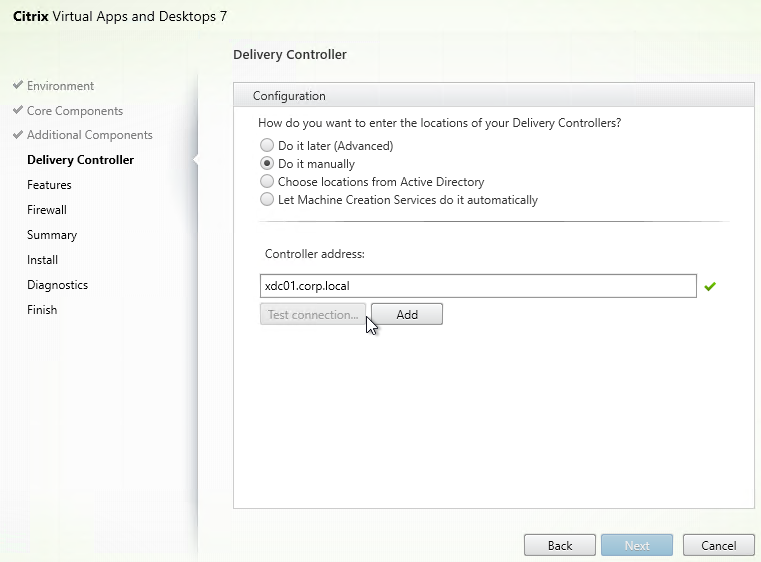
- In the Delivery Controller page, it will ask you for the location of one Delivery Controller in each farm. Only enter one Delivery Controller per farm. If you have multiple Director servers, each Director server can point to a different Delivery Controller in each farm.
- From Citrix Docs: Director automatically discovers all other Delivery Controllers in the same Site and falls back to those other Delivery Controllers if the Controller you specified fails. Click Test Connection, and then click Add.
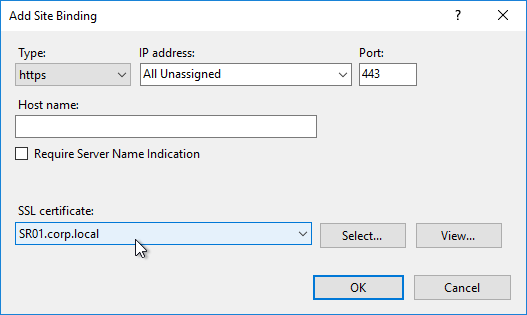
- You can optionally force SSL/TLS for the Monitoring service by following the instructions at Data Access Security at Citrix Developer Documentation. Also see CTX224433 Error: “Cannot Retrieve Data” on Citrix Director Dashboard After Securing OData Interface Through TLS.
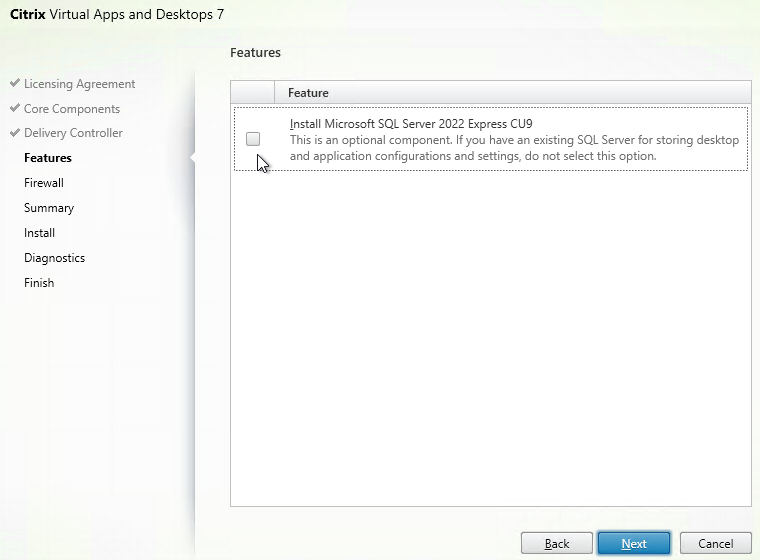
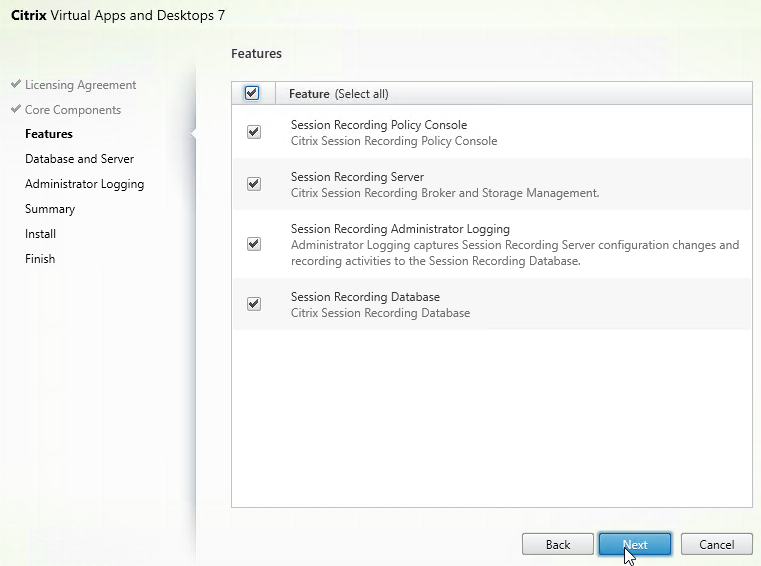
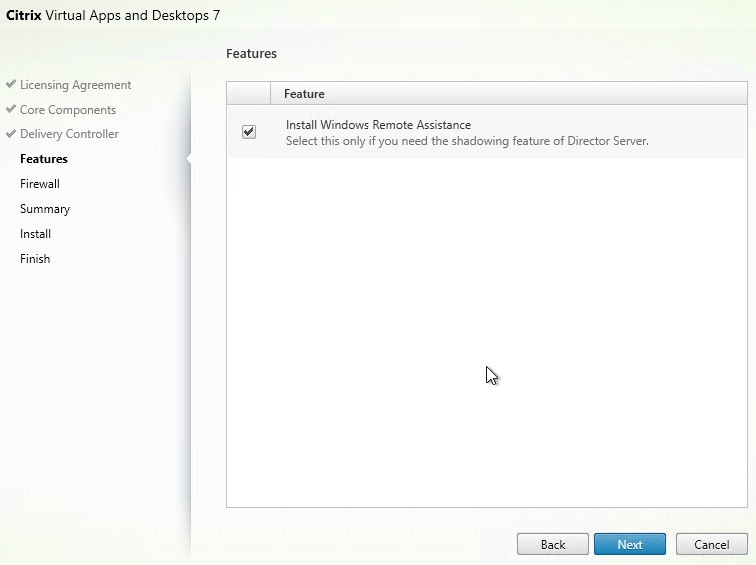
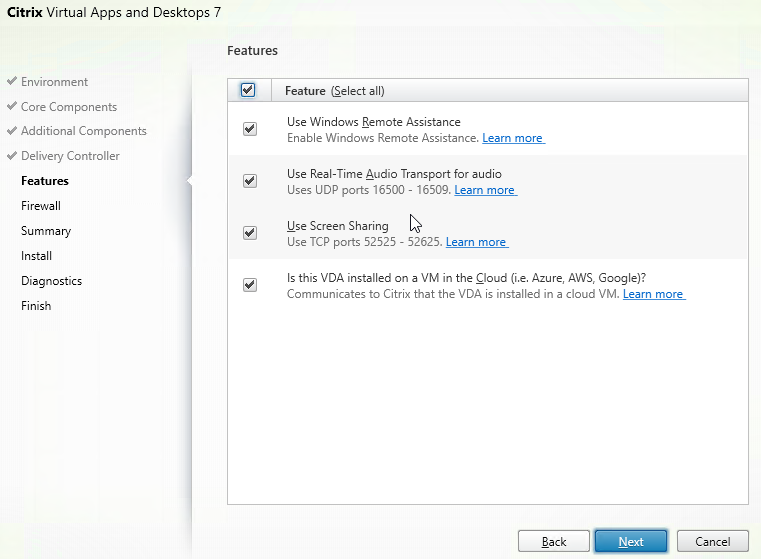
- In the Features page, click Next.
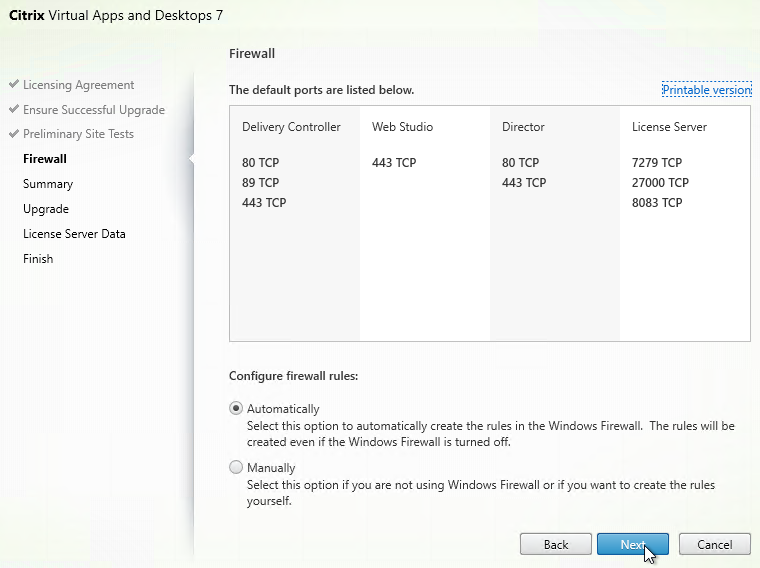
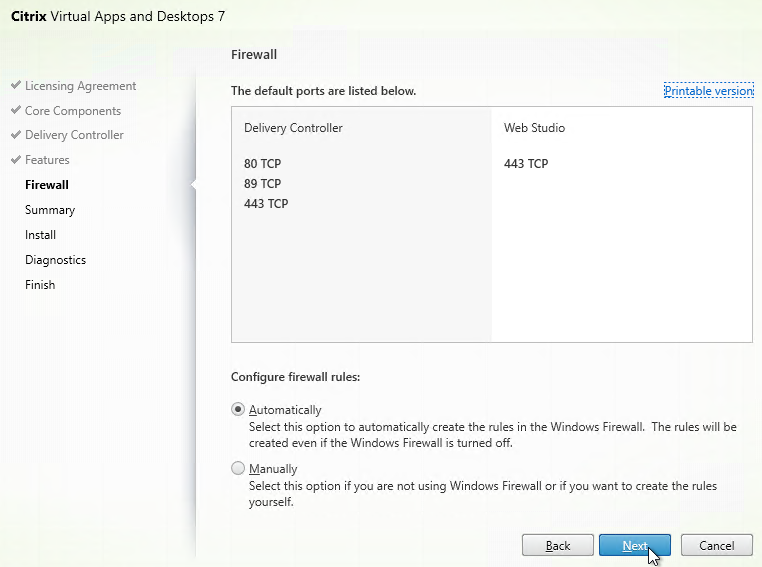
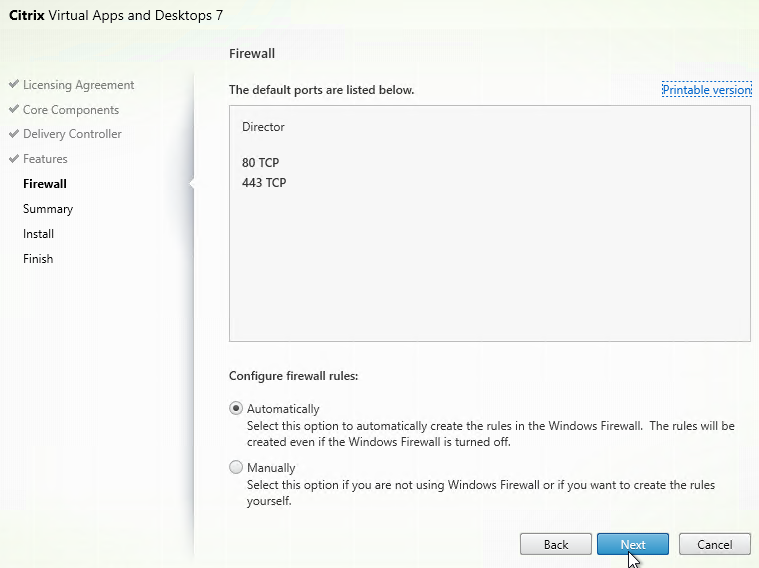
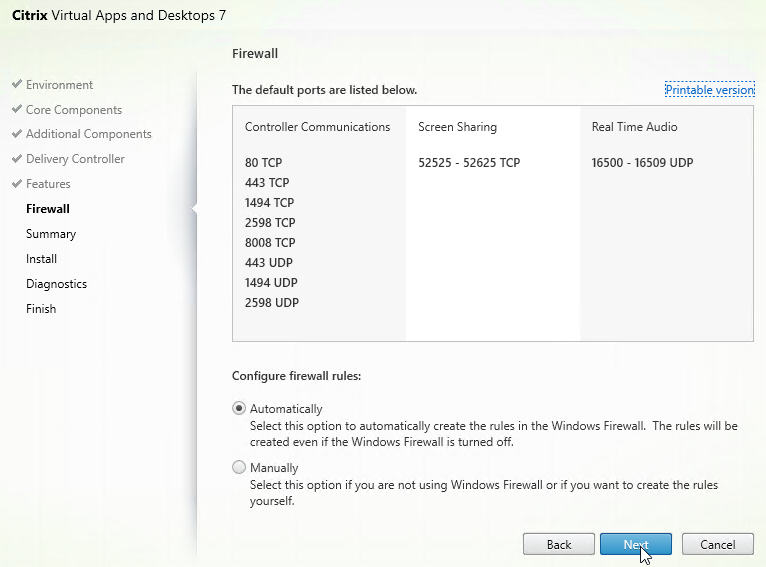
- In the Firewall page, click Next.
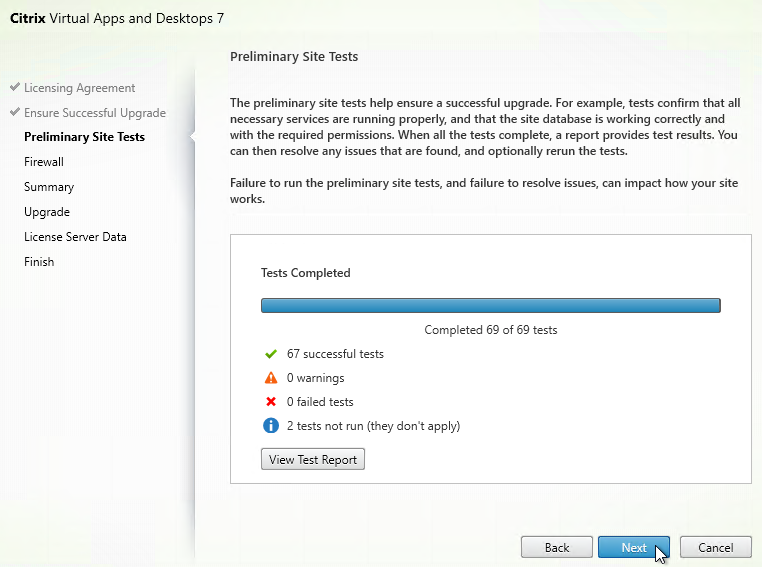
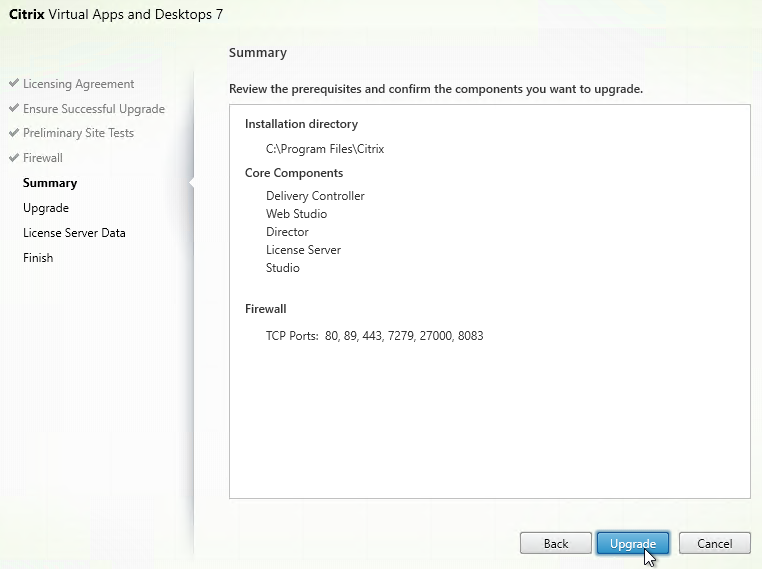
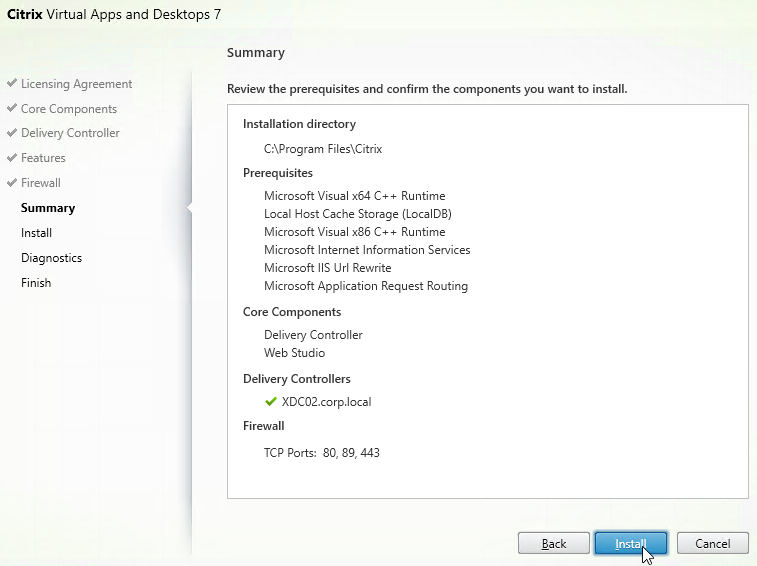
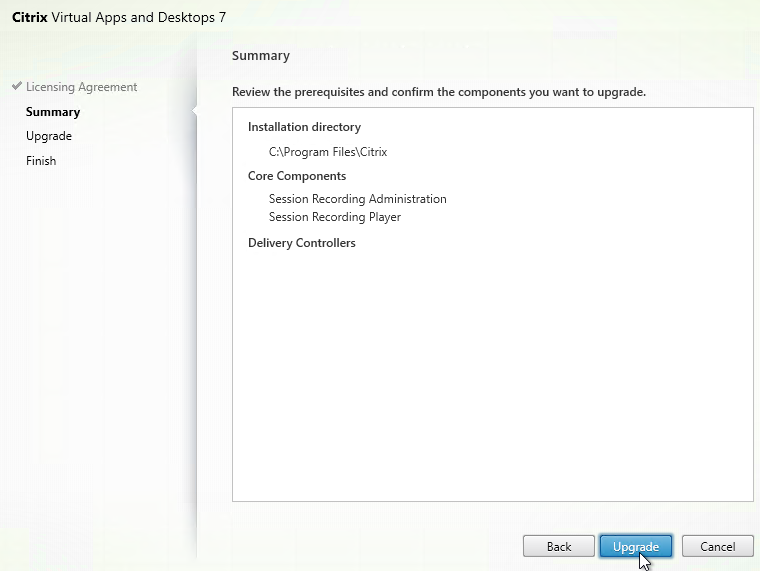
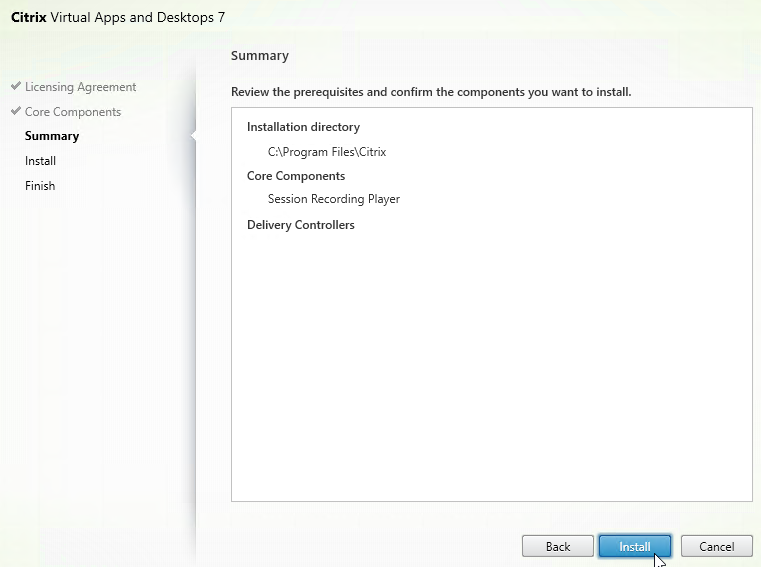
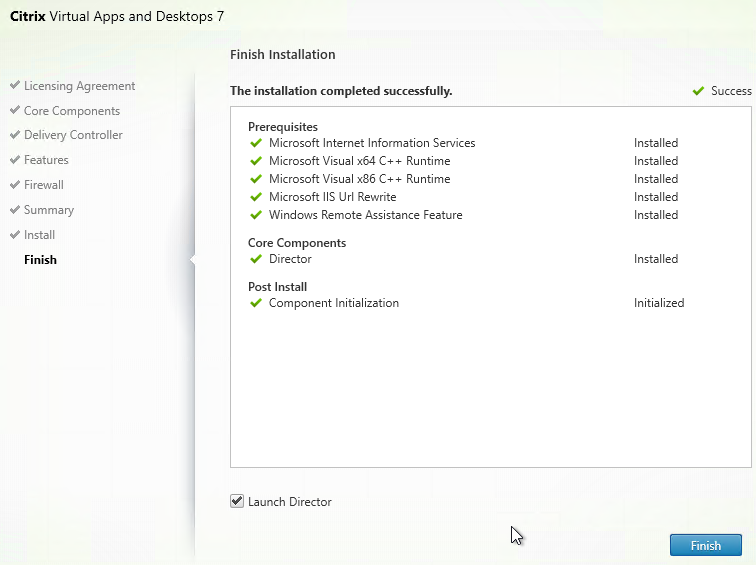
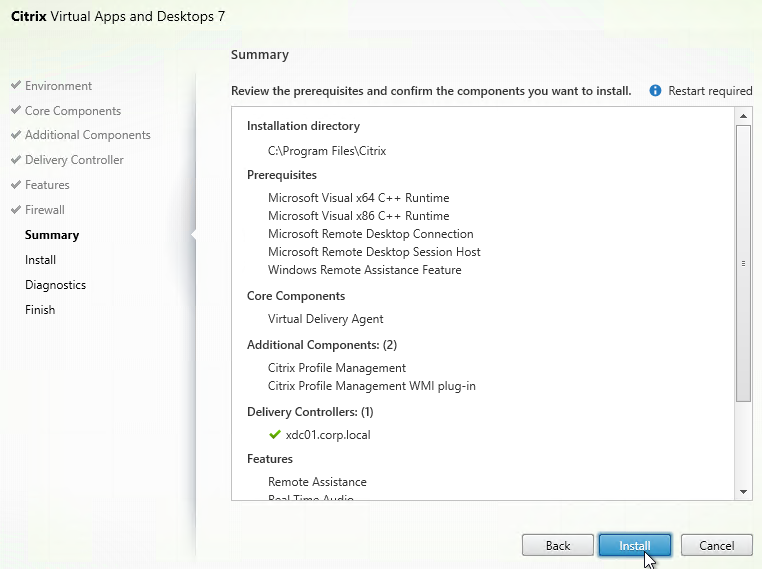
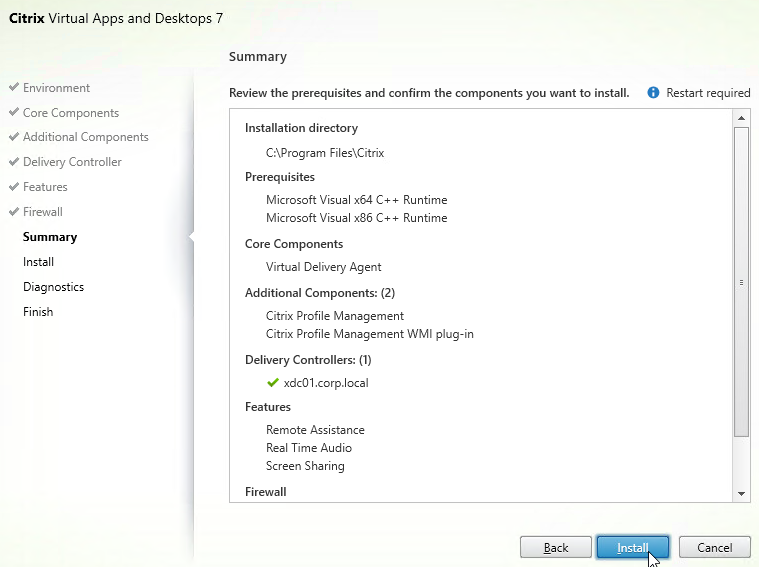
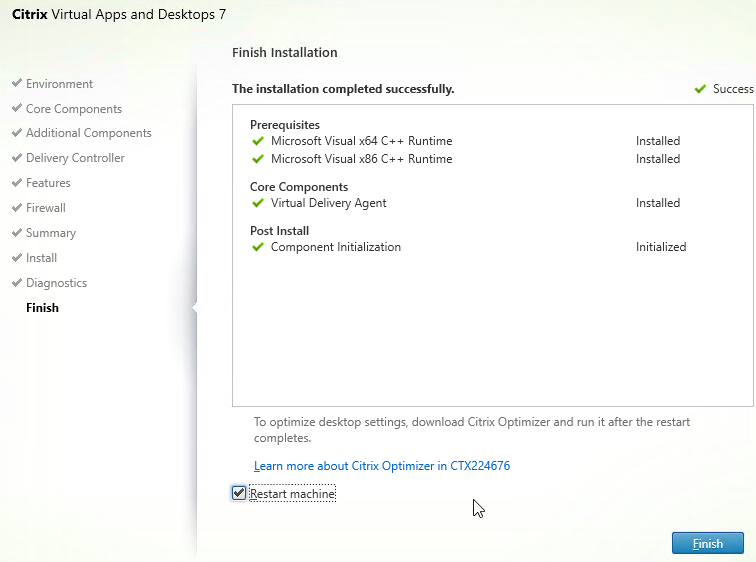
- In the Summary page, click Install.

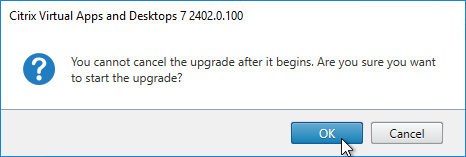
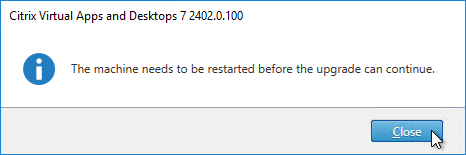
- The machine will probably restart.
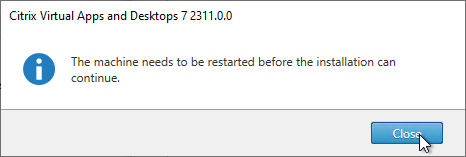
- After the machine reboots twice, login and installation should continue.
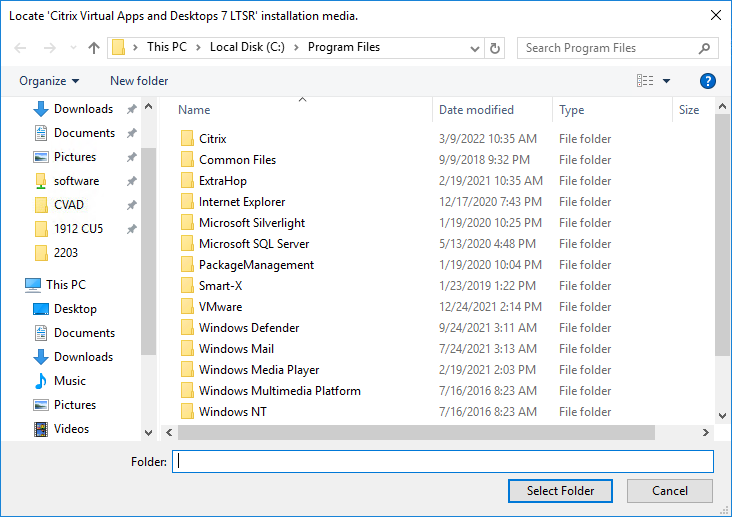
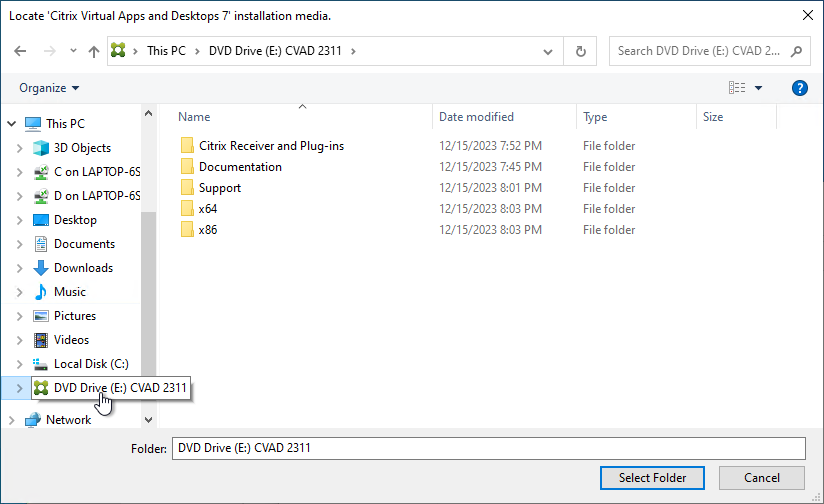
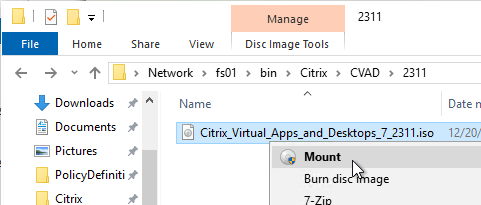
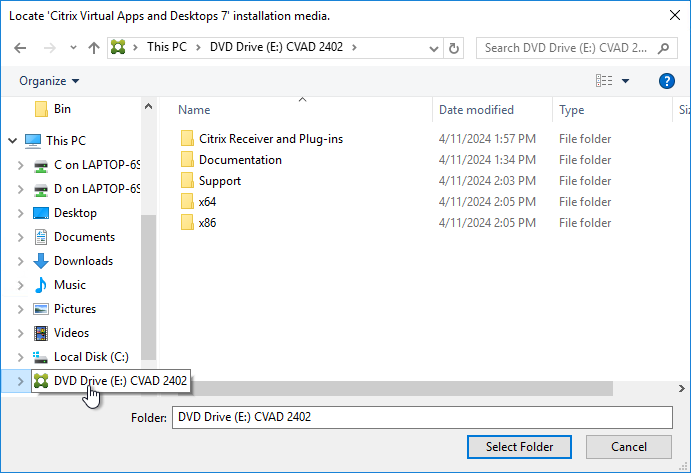
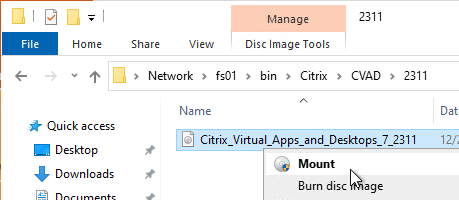
- If you see a Locate ‘Citrix Virtual Apps and Desktops 7’ installation media window, don’t click anything.
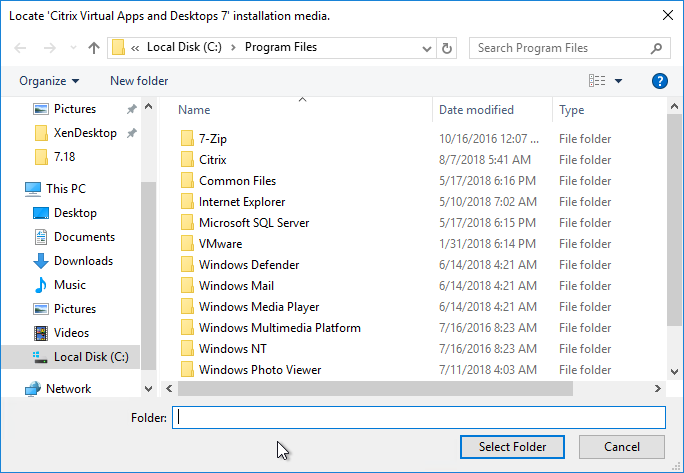
- Go to the Citrix_Virtual_Apps_and_Desktops_7_2311.iso file and mount it.

- Go back to the Locate ‘Citrix Virtual Apps and Desktops 7’ installation media window.
- On the left, expand This PC, and click the DVD Drive.
- Click Select Folder.

- Repeat these instructions every time you’re prompted to restart.
- If you see a Locate ‘Citrix Virtual Apps and Desktops 7’ installation media window, don’t click anything.
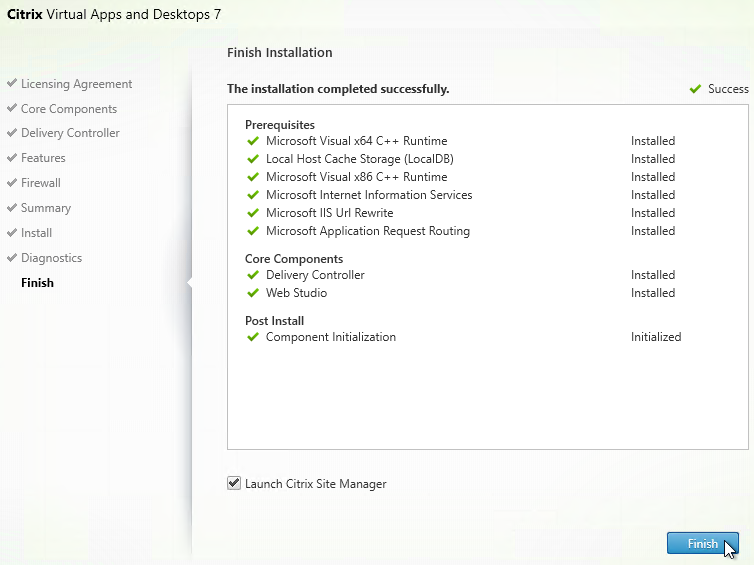
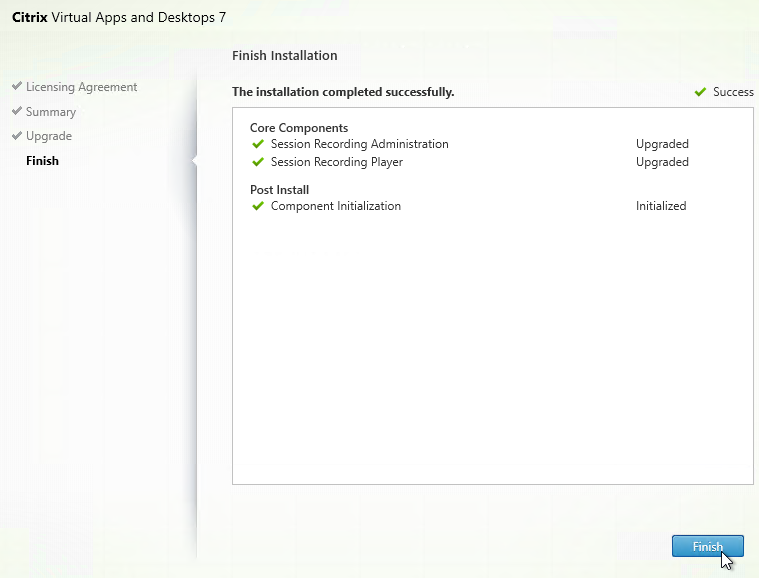
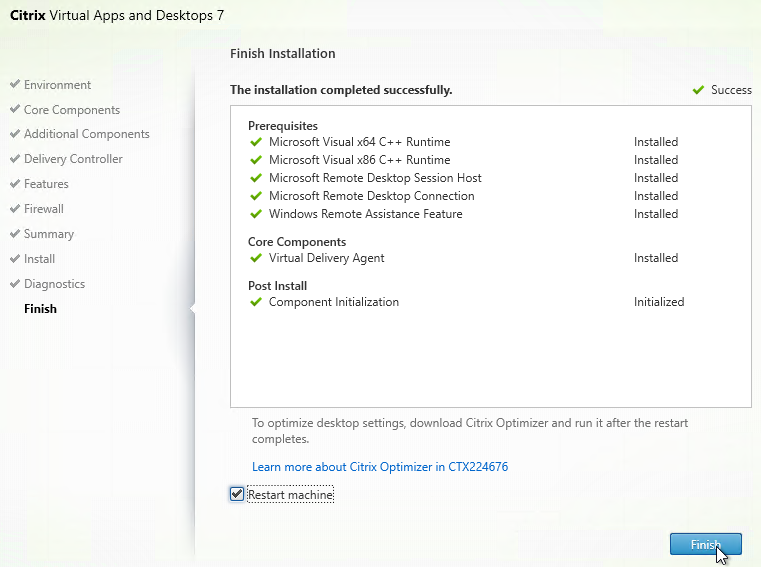
- In the Finish page, click Finish.
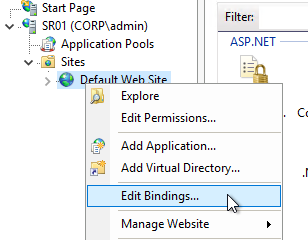
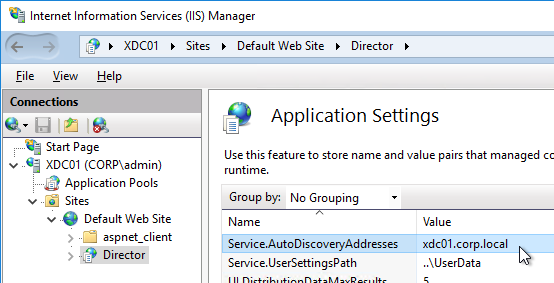
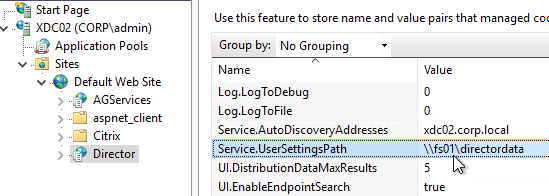
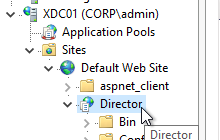
- In IIS Manager, go to Default Web Site > Director > Application Settings, find Service.AutoDiscoveryAddresses, and make sure it points to one Delivery Controller in the farm, and not to localhost. From Citrix Docs: Director automatically discovers all other Delivery Controllers in the same Site and falls back to those other Delivery Controllers if the Delivery Controller you specified fails.
- You can optionally force SSL/TLS for the Monitoring service by following the instructions at Data Access Security at Citrix Developer Documentation. Also see CTX224433 Error: “Cannot Retrieve Data” on Citrix Director Dashboard After Securing OData Interface Through TLS.
- You can optionally force SSL/TLS for the Monitoring service by following the instructions at Data Access Security at Citrix Developer Documentation. Also see CTX224433 Error: “Cannot Retrieve Data” on Citrix Director Dashboard After Securing OData Interface Through TLS.
- If you built multiple Director servers, use Citrix ADC to load balance them.
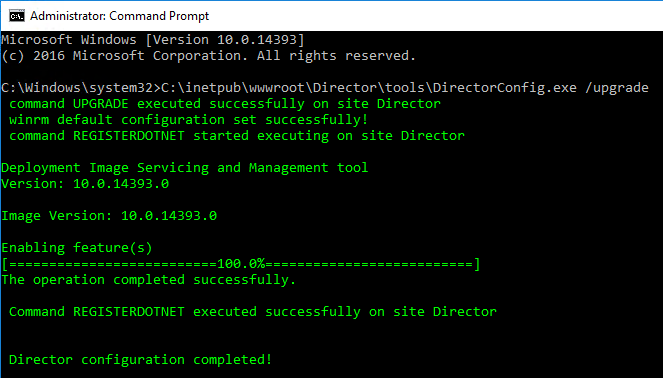
- If you are upgrading Director, run C:\inetpub\wwwroot\Director\tools\DirectorConfig.exe /upgrade to complete the upgrade process.
- Reconfigure the default domain in LogOn.aspx since upgrading overwrote your domain name configuration.
- For info on the new monitoring features in Director, see Use Director below.
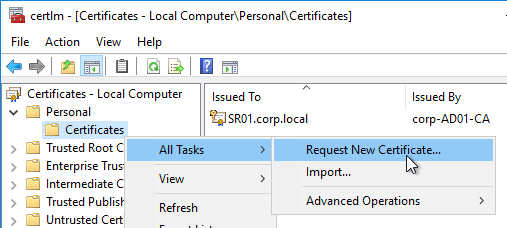
Director Default Web Page
From CTX223907 How to Make Director the Default Page within IIS: If Director is installed on a standalone server, do the following to set /Director as the default path. If Director and StoreFront are on the same server, then you’ll probably want StoreFront Receiver for Web as the default web page instead of Director.
- Open Notepad elevated (as administrator) and paste the following text:
<script type="text/javascript">
<!--
window.location="https://director.corp.com/Director";
// -->
</script>
- Adjust the window.location line to match your FQDN.
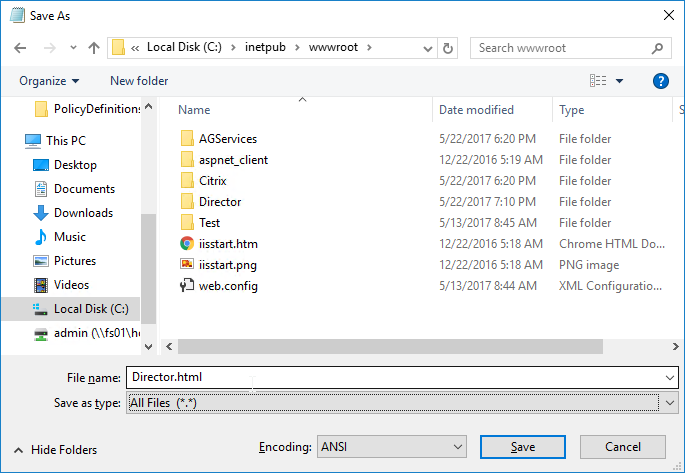
- Select File > Save As and browse to the IIS folder, by default C:\inetpub\wwwroot is the IIS folder.
- Select the Save as type to All types.
- Type a file name with an html extension, and select Save.
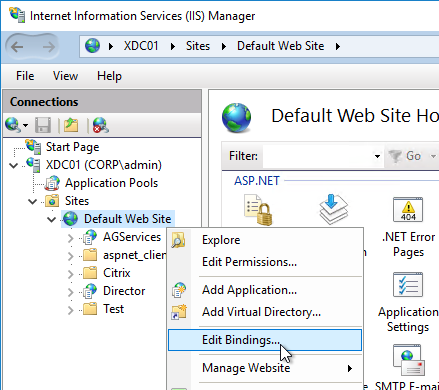
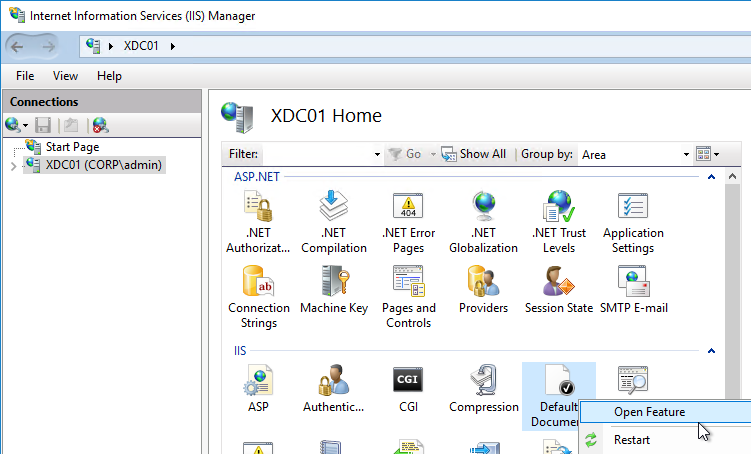
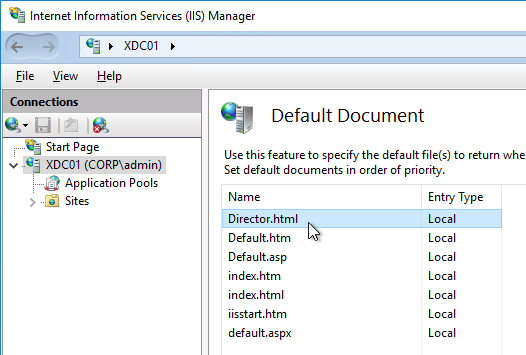
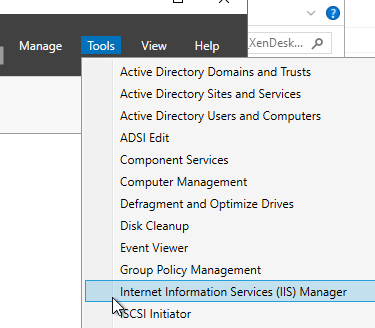
- Open IIS Manager.
- Select the SERVERNAME node (top-level), and double-click Default Document, as shown in the following screen shot:
- On the right, click Add…,
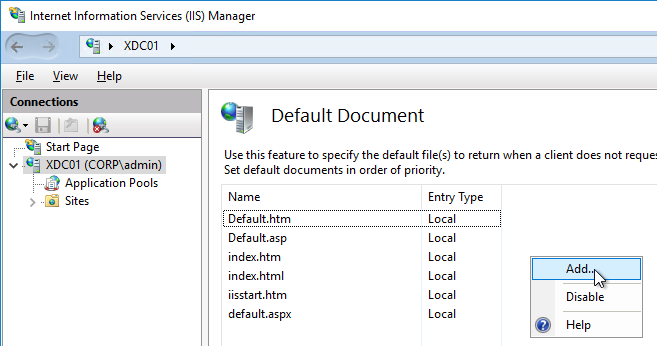
- Enter the file name of the .html file provided in Step 5.
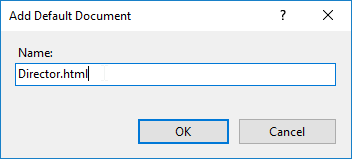
- Ensure the .html file is located at the top of the list, as shown in the following screen shot:
Director Spinning Circle
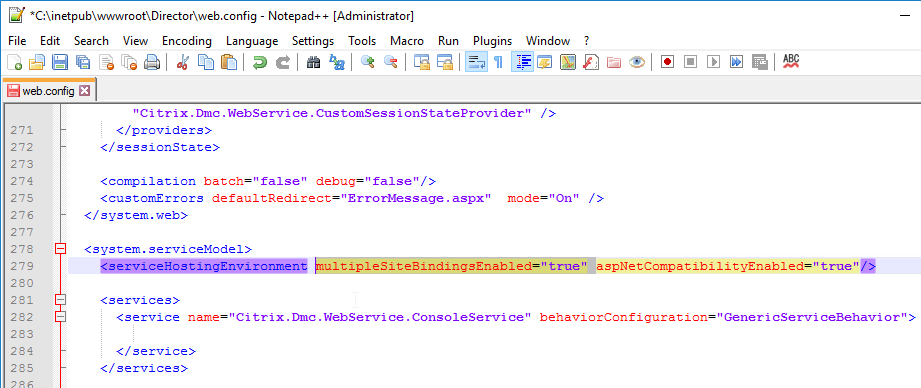
If after login to Director the spinning circle doesn’t go away…

…then do the following to fix it:
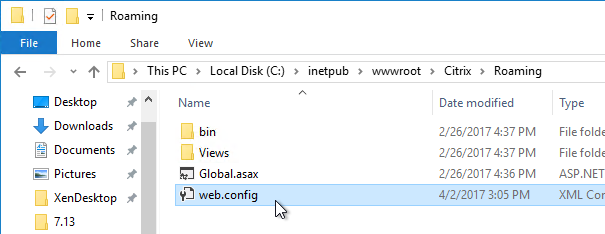
- Edit the file C:\inetpub\wwwroot\Director\web.config using an elevated text editor.
- Search for <serviceHostingEnvironment (line 279).
- Add the following attribute:
multipleSiteBindingsEnabled="true"
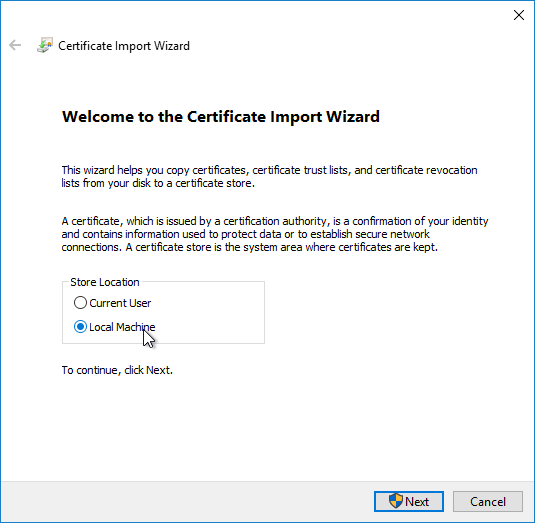
Also see CTX202564 Citrix Director Becomes Unresponsive after Submitting the Credentials when IIS X-Frame-Options is enabled
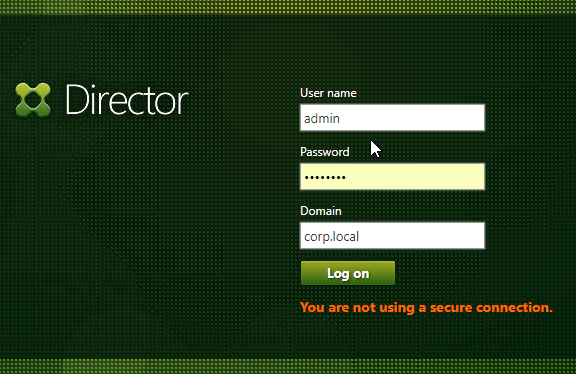
Director Domain Field
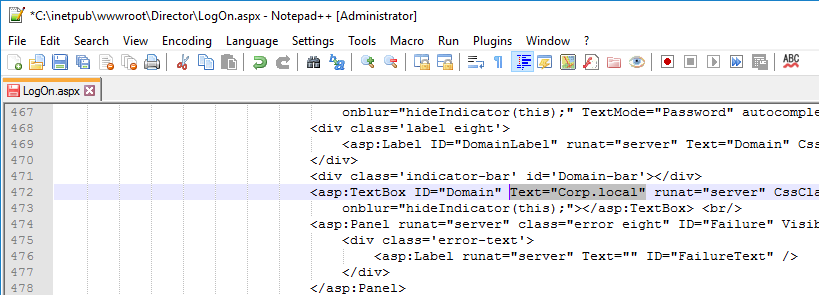
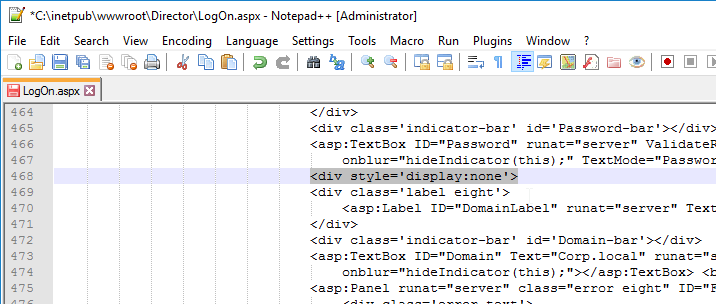
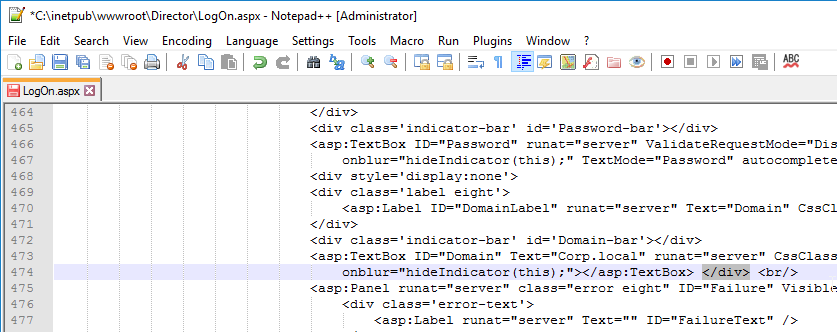
On the Director servers, locate and edit the ‘LogOn.aspx’ file. By default you can find it at C:\inetpub\wwwroot\Director\Logon.aspx
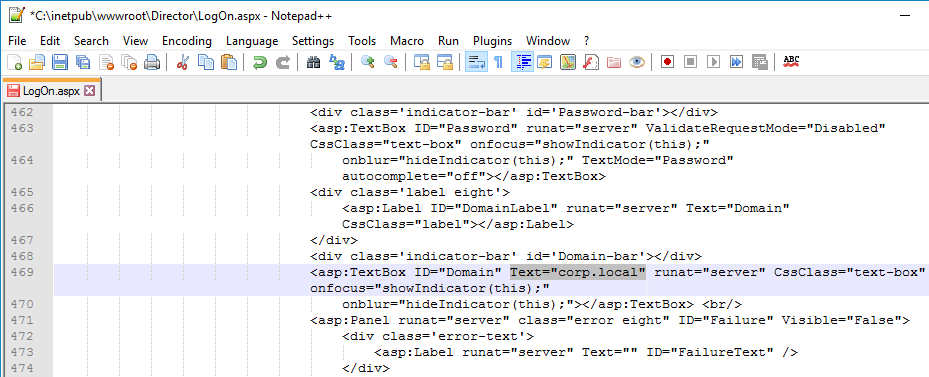
In line 472 you will have the following. To find the line, search for ID=”Domain”.
<asp:TextBox ID="Domain" runat="server" CssClass="text-box" onfocus="showIndicator(this);" onblur="hideIndicator(this);"></asp:TextBox>
In the ID=”Domain” element, insert a Text attribute and set it to your domain name. Don’t change or add any other attributes. Save the file.
<asp:TextBox ID="Domain" runat="server" Text="Corp.local" CssClass="text-box" onfocus="showIndicator(this);" onblur="hideIndicator(this);"></asp:TextBox>
This configuration prepopulates the domain field text box with your domain name and still allow the user to change it, if that should be required. Note: this only seems to work if Single Sign-on is disabled.
Citrix CTX227936 How to hide the domain from Director Logon Page:
- Edit the file C:\inetpub\wwwroot\Director\LogOn.aspx using an elevated text editor.
- Locate the tag which starts with:
<asp:Label ID="DomainLabel" - Immediately prior to that label, locate the tag:
<div class='label eight'> - Add the following before <div class=’label eight’>:
<div style='display:none'>
- In between “</asp:Textbox> <br />” add the following:
</div>

Director Tweaks
Session timeout
By default the idle time session limit of the Director is 245 min. If you wish to change the timeout, here is how to do it:
- Log on to the Director Server as an administrator
- Open the ‘IIS Manager’
- Browse to ‘Sites > Default Web Site > Director’ in the left hand pane.
- Open ‘Session State’ in the right hand pane.
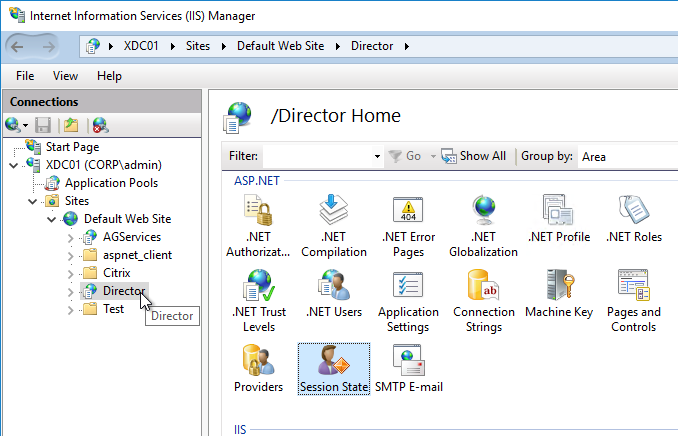
- Change the ‘Time-out (in minutes)’ value under ‘Cookie Settings’
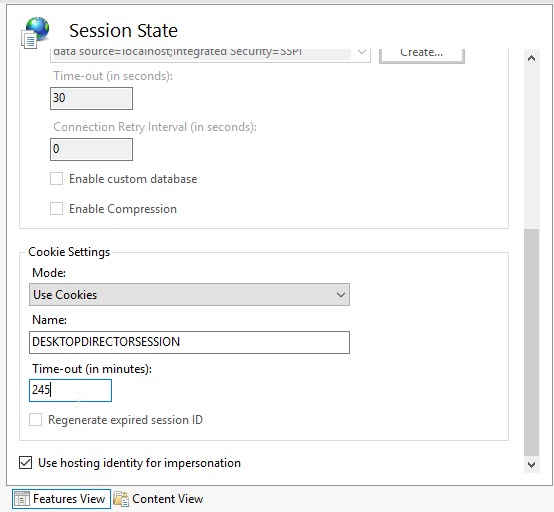
- Click ‘Apply’ in the Actions list
SSL Check
If you are not securing Director with an SSL certificate you will get this error at the logon screen.

To stop this:
- Log on to the Director Server as an administrator
- Open the ‘IIS Manager’
- Browse to ‘Sites > Default Web Site > Director’ in the left hand pane.
- Open ‘Application Settings’ in the right hand pane.
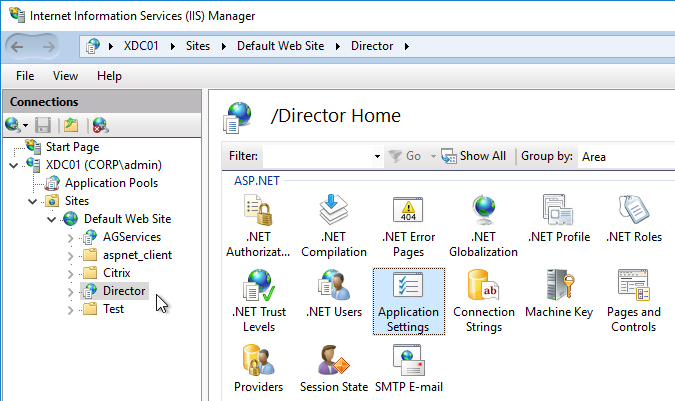
- Set UI.EnableSslCheck to false.

Disable Activity Manager
From Disable the visibility of running applications in the Activity Manager in Advanced Configuration at Citrix Docs: By default, the Activity Manager in Director displays a list of all the running applications and the Windows description in the title bars of any open applications for the user’s session. This information can be viewed by all administrators that have access to the Activity Manager feature in Director. For Delegated Administrator roles, this includes Full administrator, Delivery Group administrator, and Help Desk Administrator.
To protect the privacy of users and the applications they are running, you can disable the Applications tab from listing running applications.
- On the VDA, modify the registry key located at HKLM\Software\Citrix\Director\TaskManagerDataDisplayed. By default, the key is set to 1. Change the value to 0, which means the information will not be displayed in the Activity Manager.
- On the server with Director installed, modify the setting that controls the visibility of running applications. By default, the value is true, which allows visibility of running applications in the Applications tab. Change the value to false, which disables visibility. This option affects only the Activity Manager in Director, not the VDA. Modify the value of the following setting:
UI.TaskManager.EnableApplications = false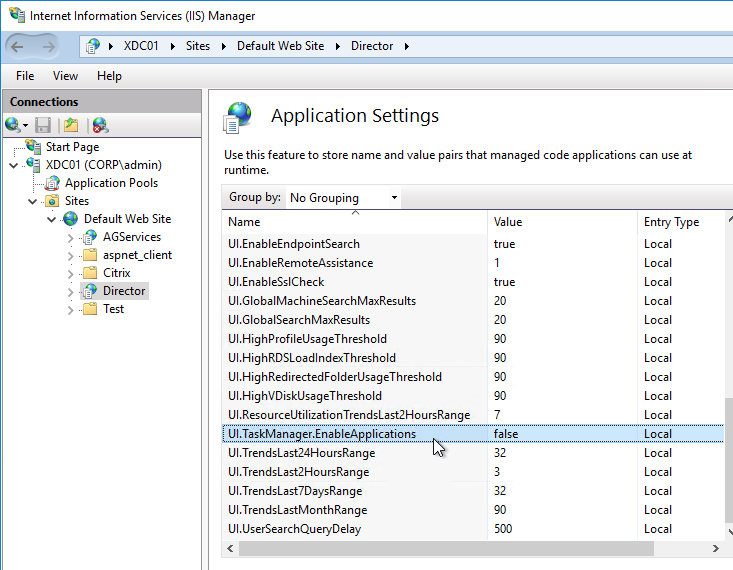
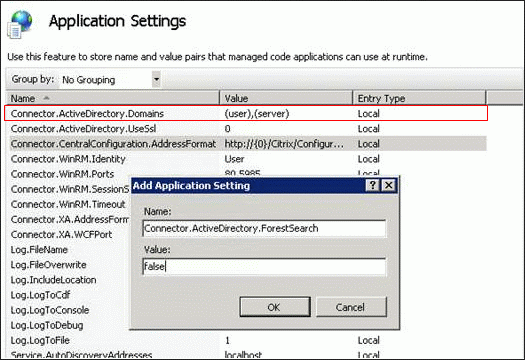
Large Active Directory / Multiple Forests
From CTX133013 Desktop Director User Account Search Process is Slow or Fails: By default, all the Global Catalogs for the Active Directory Forest are searched using Lightweight Directory Access Protocol (LDAP). In a large Active Directory environment, this query can take some time or even time out.
If multiple forests, see Citrix Blog Post Using Citrix Director in a MultiForest Environment.
- In Information Server (IIS) Management, under the Desktop Director site, select Application Settings and add a new value called Connector.ActiveDirectory.ForestSearch. Set it to False. This disables searching any domain except the user’s domain and the server’s domain.
- To search more domains, add the searchable domain or domains in the Connector.ActiveDirectory.Domains field.
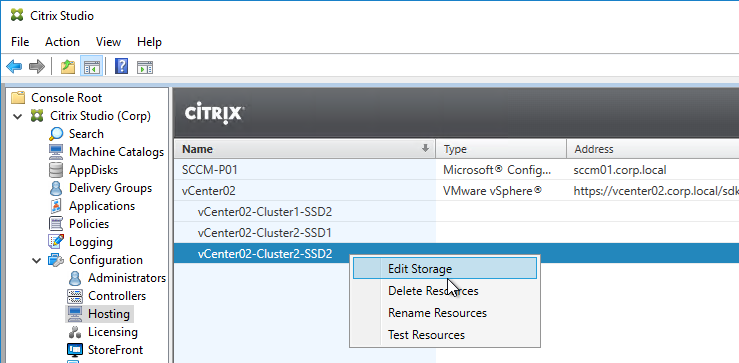
Site Groups
From Citrix Blog Post Citrix Director 7.6 Deep-Dive Part 4: Troubleshooting Machines:
If there are a large number of machines, the Director administrator can now configure site groups to perform machine search so that they can narrow down searching for the machine inside a site group. The site groups can be created on the Director server by running the configuration tool via command line by running the command:
C:\inetpub\wwwroot\Director\tools\DirectorConfig.exe /createsitegroups
Then provide a site group name and IP address of the delivery controller of the site to create the site group.
Director Configuration Script
Johan Greefkes at Script for configuring Director at Citrix Discussions was kind enough to provide a script that does the following:
- Sets the Delivery Controllers that Director communicates with
- Disables SSL Check
- Sets Logon.aspx file to default to a domain name
- Adds a footer that displays the name of the Director server
The same DirectorReconfigureWithLogonMod.ps1 script seems to be available at Citrix’s Github\Powershell-Scripts repository.
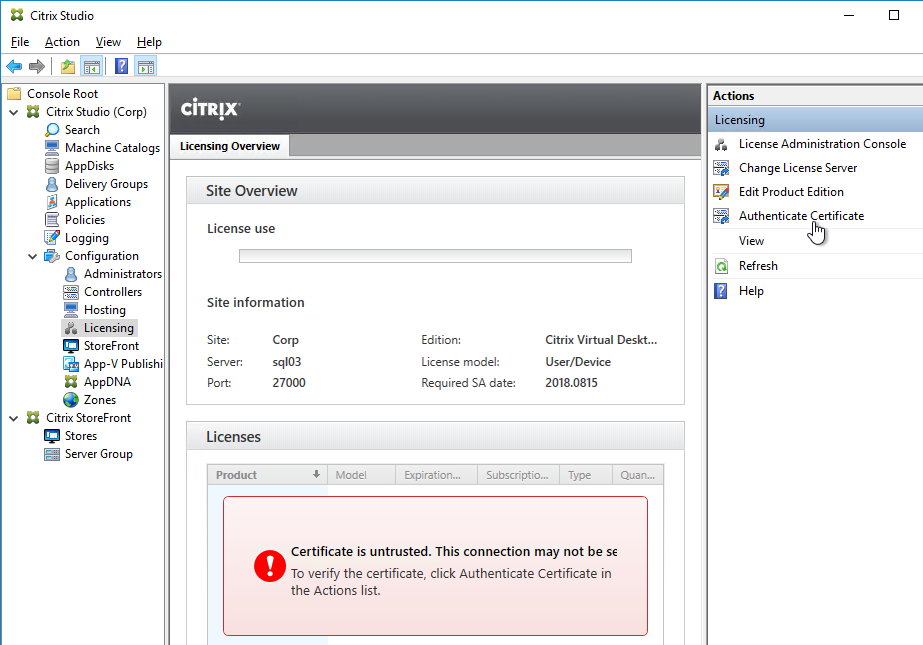
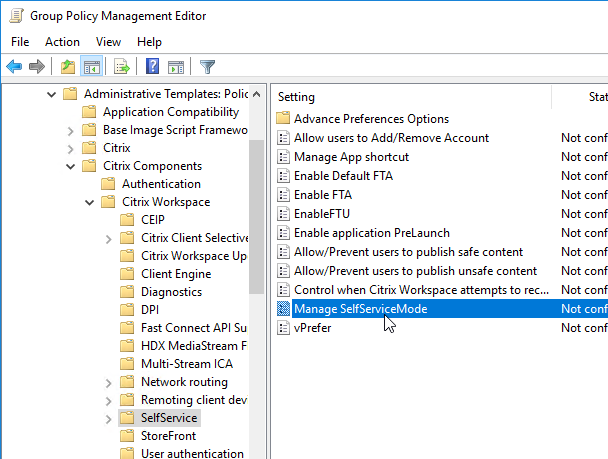
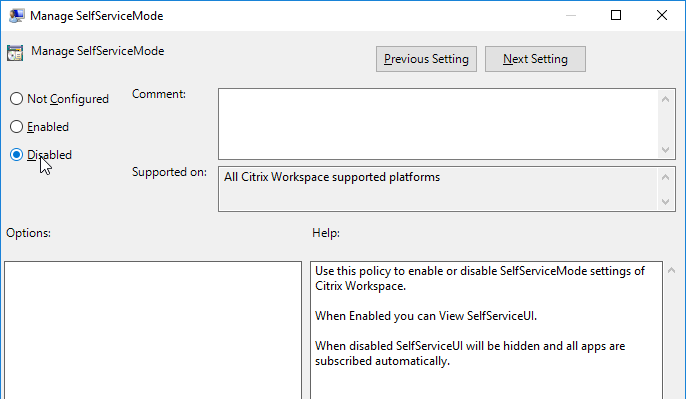
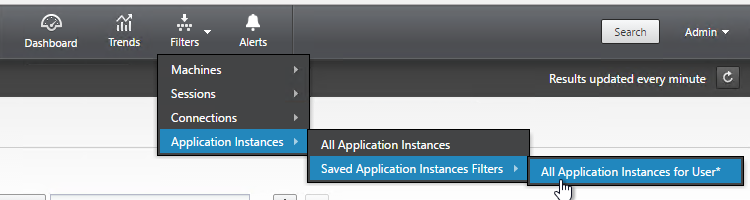
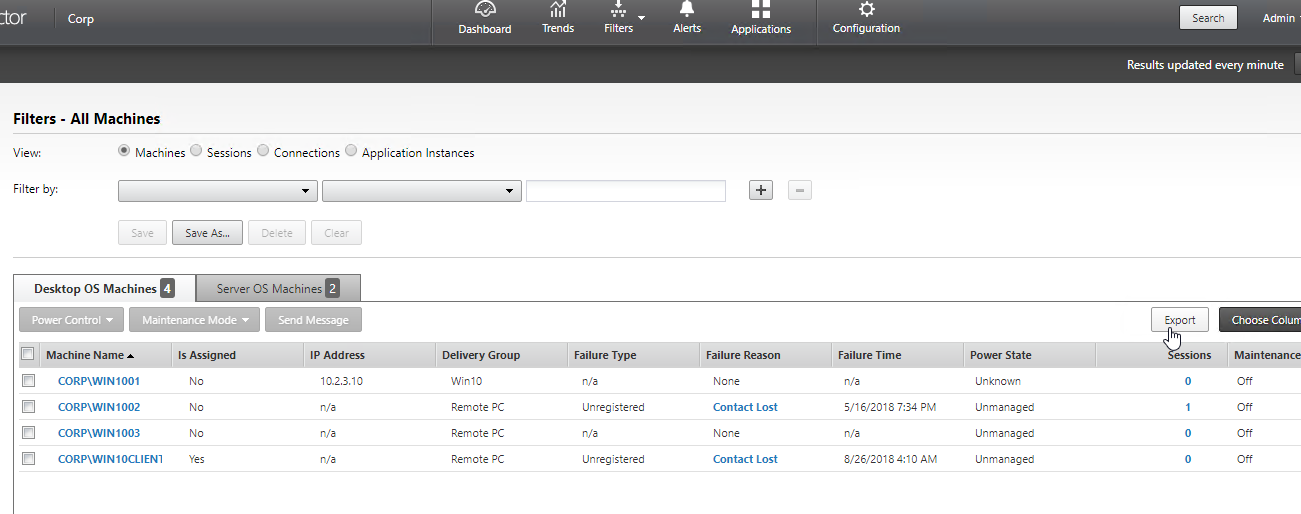
Director – Saved Filters
In Director, you can create a filter and save it.
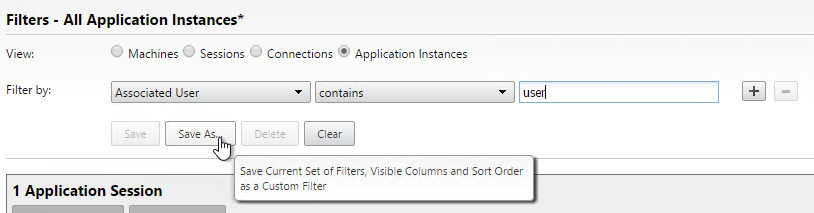
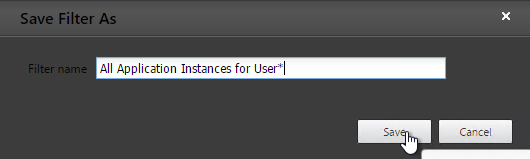
The saved filter is then accessible from the Filters menu structure.
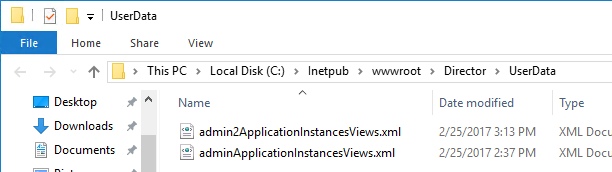
The saved filters are stored on each Director server at C:\Inetpub\wwwroot\Director\UserData. Each user has their own saved filters. The saved filters are not replicated across Director servers.
You can instead configure multiple Director servers to store the filters on a shared UNC path:
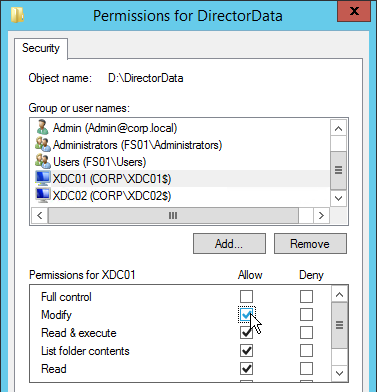
- Create and share a folder (e.g. DirectorData).
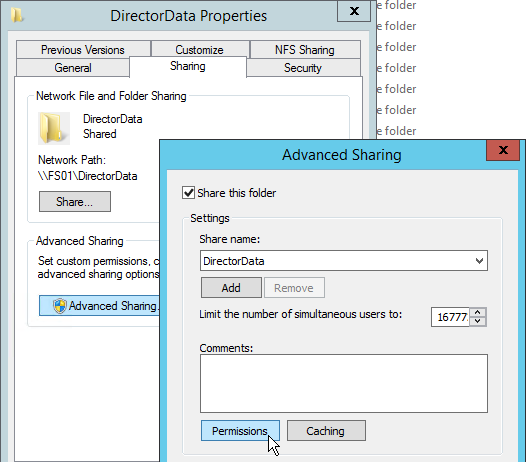
- The Director server computer accounts need Modify permission to the share.
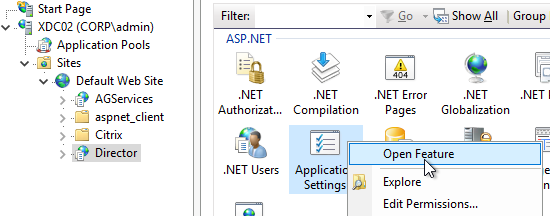
- On each Director server, run IIS Manager.
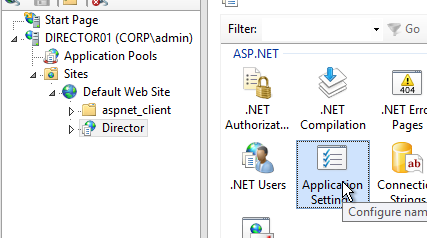
- Go to Sites > Default Web Site > Director. In the middle, double-click Application Settings.
- Change the Service.UserSettingsPath setting to the UNC path of the new share.
- Repeat this on other load balanced Director servers.
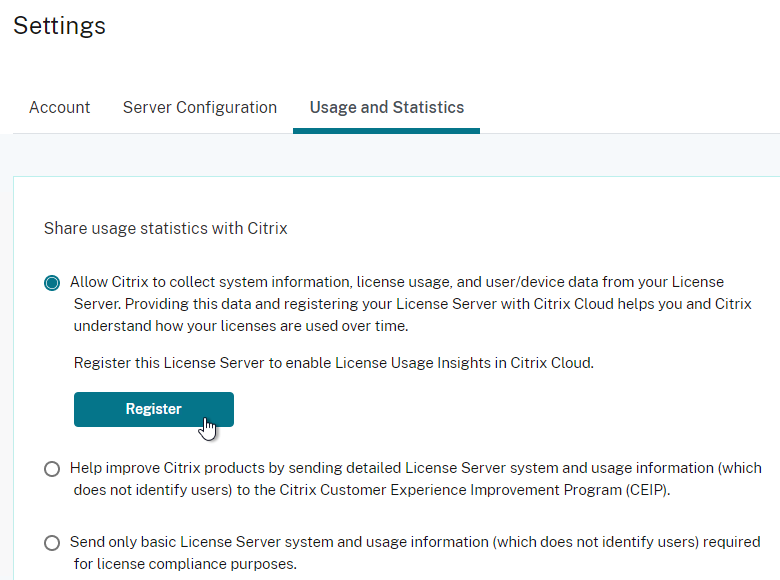
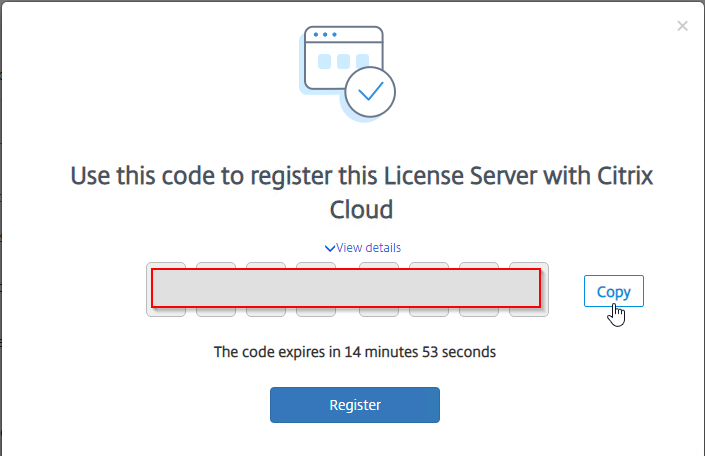
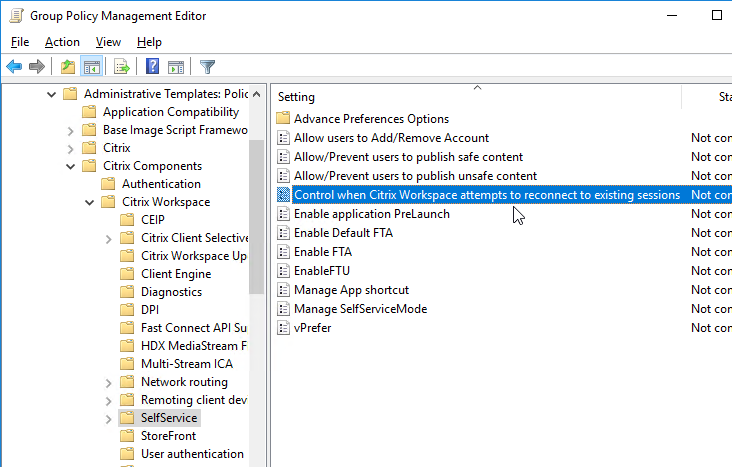
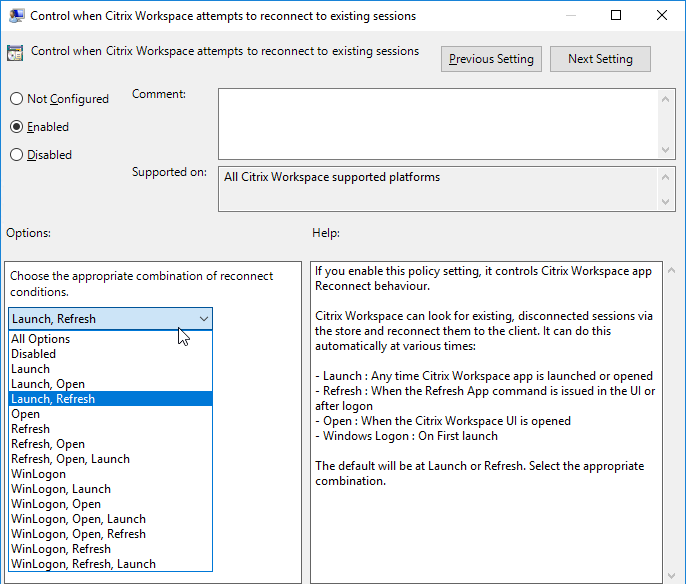
Director and HDX Insight
You can connect Director to Citrix Application Delivery Management (ADM) to add Network tabs to Director’s Trends and Machine Details views. Citrix Blog Post Configure Director with NetScaler Management & Analytics System (MAS).
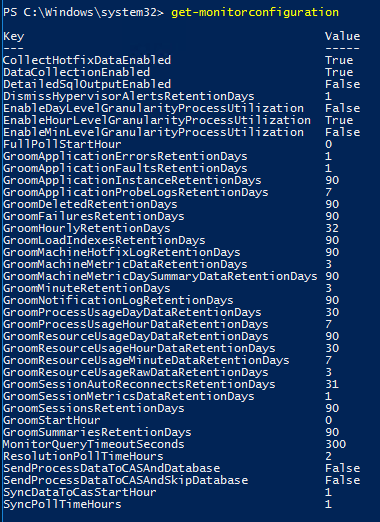
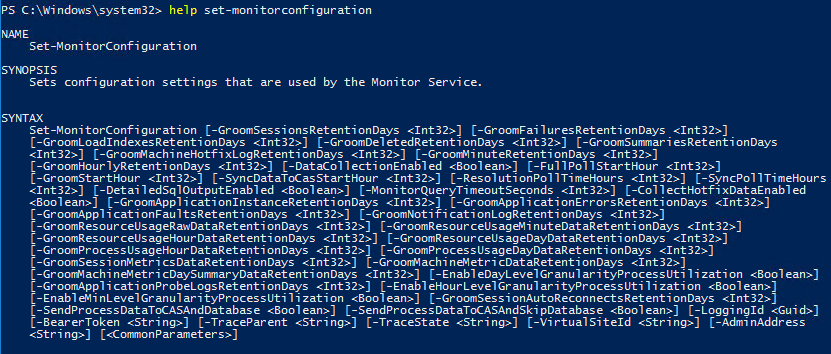
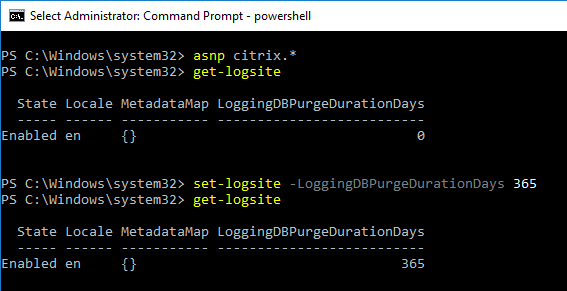
Director Grooming
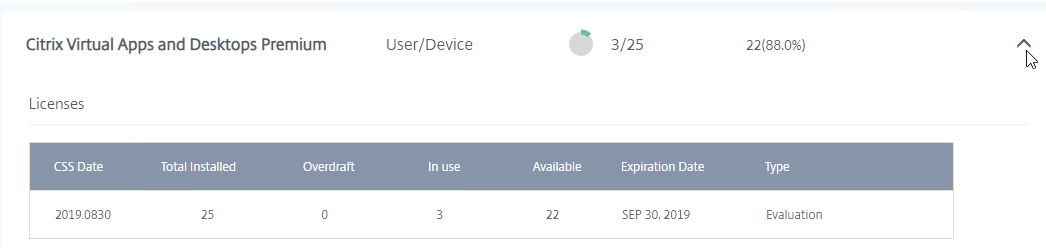
If Citrix Virtual Apps and Desktops (CVAD) is not Premium Edition, then all historical Director data is groomed at 30 days.
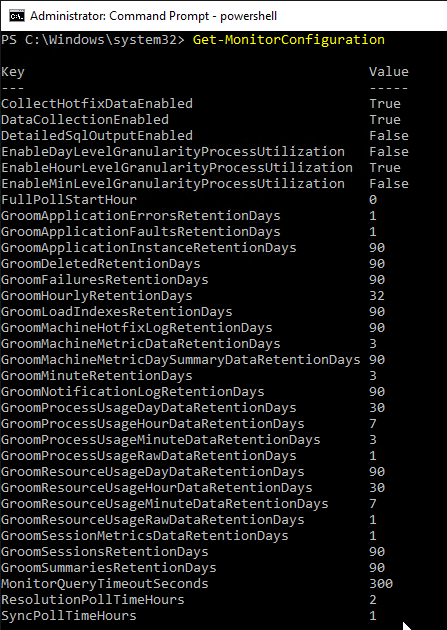
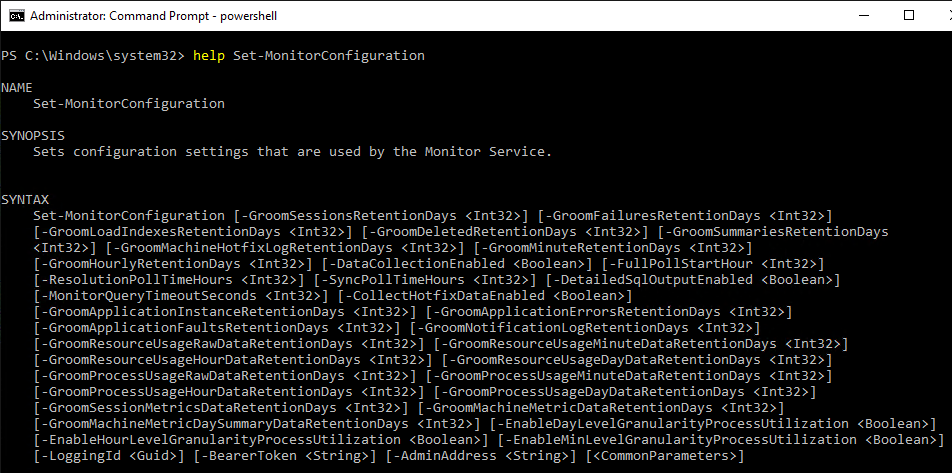
For Citrix Virtual Apps and Desktops (CVAD) Premium Edition, by default, most of the historical Director data is groomed at 90 days. This can be adjusted up to 367 days by running a PowerShell cmdlet.
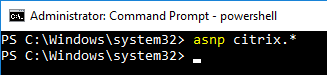
- On a Delivery Controller, run PowerShell and run asnp Citrix.*

- Run Get-MonitorConfiguration to see the current grooming settings.
- Run Set-MonitorConfiguration to change the grooming settings.
More details on Monitor Service data aggregation and retention can be found at Data granularity and retention at Citrix Docs.
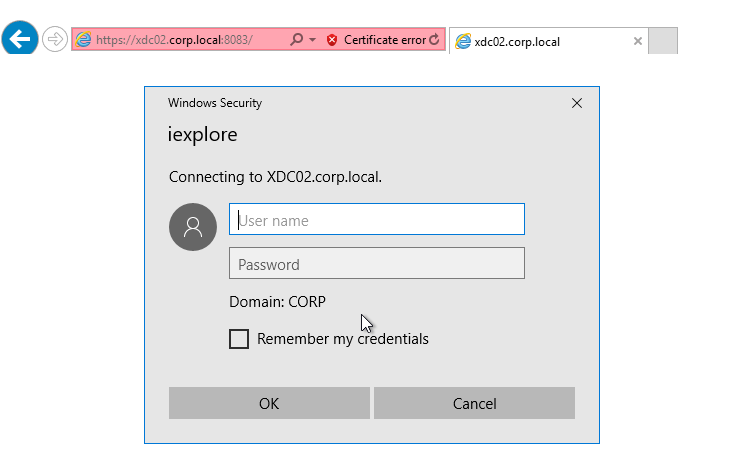
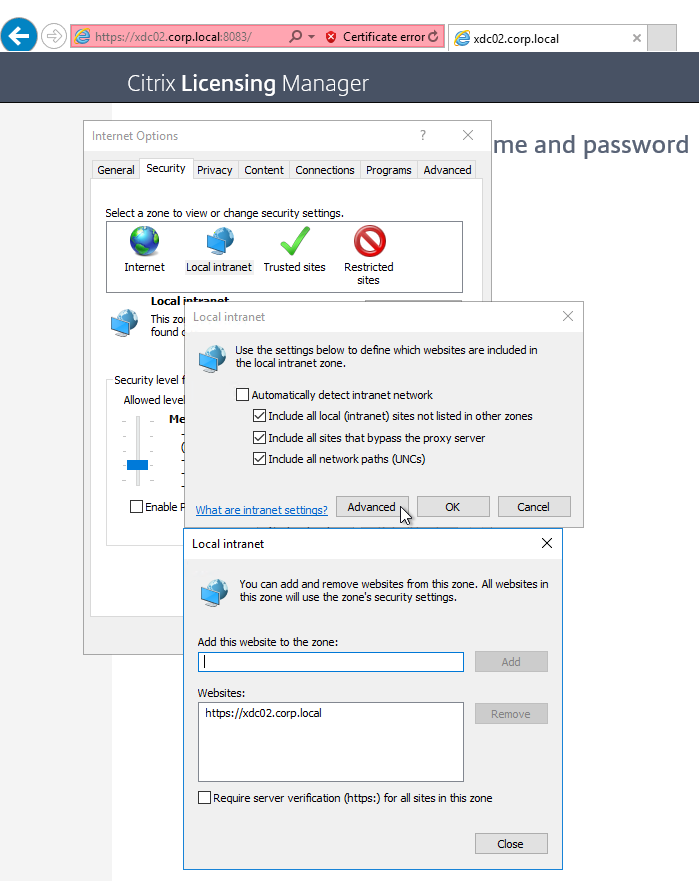
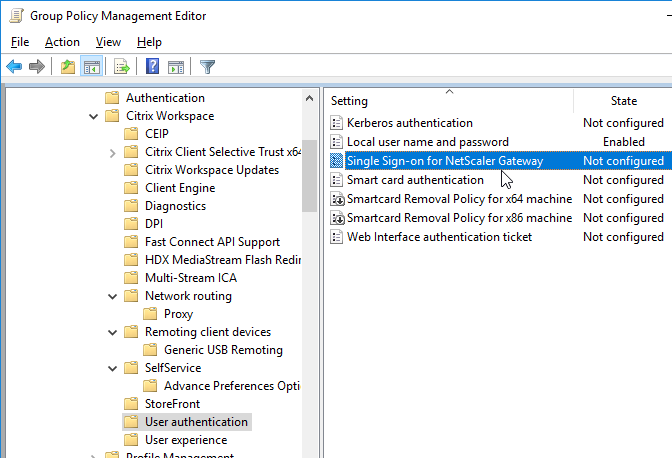
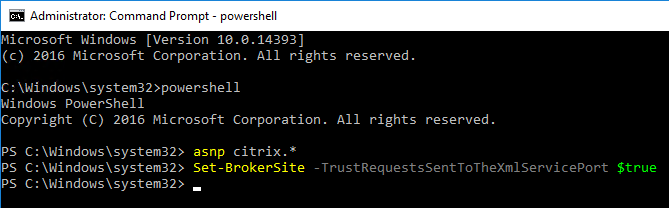
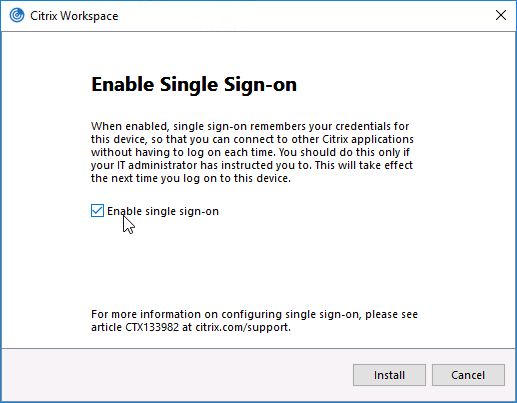
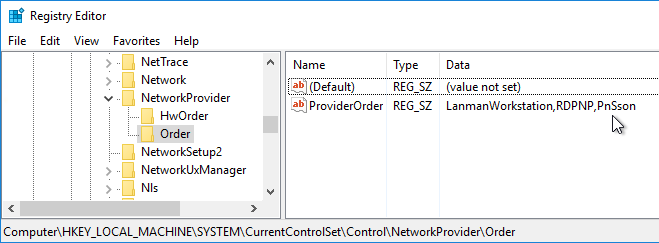
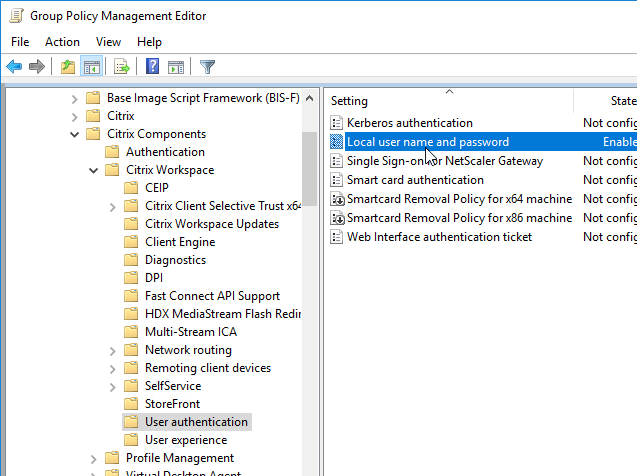
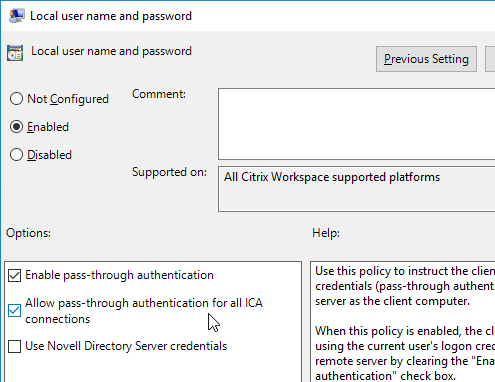
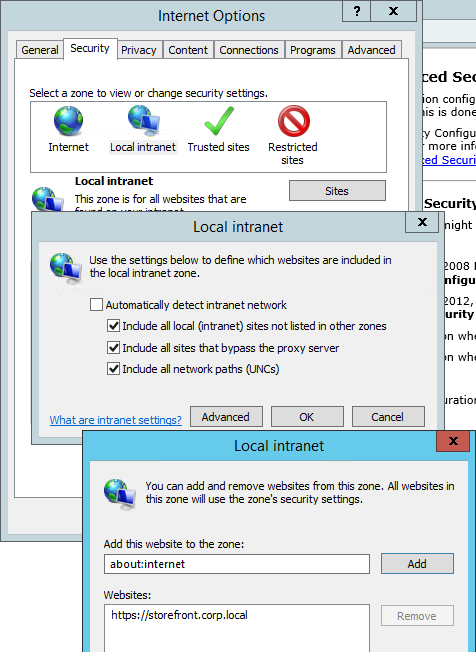
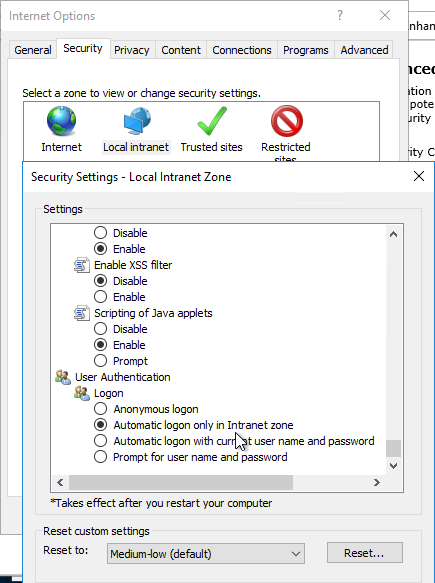
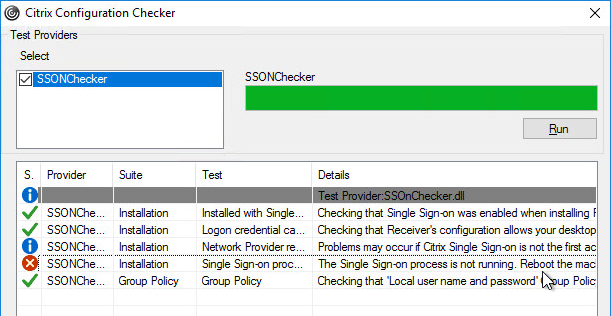
Director Single Sign-on
You can configure Director to support Integrated Windows Authentication (Single Sign-on). Note: there seem to be issues when not connecting from the local machine or when connecting through a load balancer.
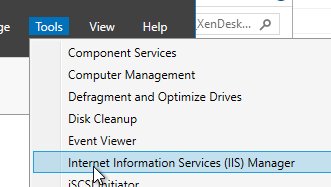
- Run IIS Manager. You can launch it from Server Manager (Tools menu), or from the Start Menu, or by running inetmgr.
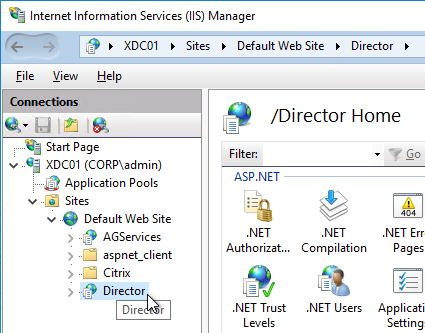
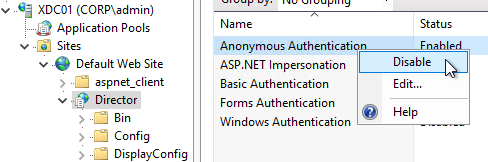
- On the left, expand Sites, expand Default Web Site, and click Director.
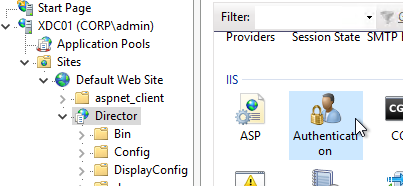
- In the middle, double-click Authentication in the IIS section.
- Right-click Windows Authentication, and Enable it.
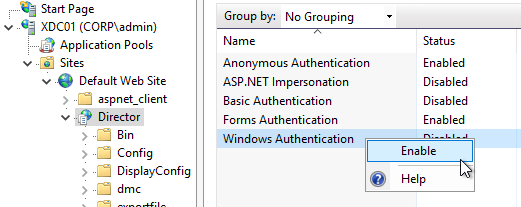
- Right-click Anonymous Authentication, and Disable it.
- Pass-through auth won’t work from another computer until you set the http SPN for the Director server. See Director 7.7 Windows Authentication not working with NS LB at Citrix Discussions.

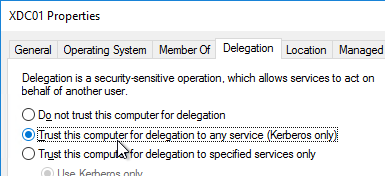
- If Director is not installed on a Controller, then you’ll need to configure Kerberos delegation.
- If you are load balancing Director then additional config is required. See Director 7.7 Windows Authentication not working with NS LB at Citrix Discussions for more info.
- The FQDN for Director load balancing should be different than the FQDN for StoreFront load balancing.
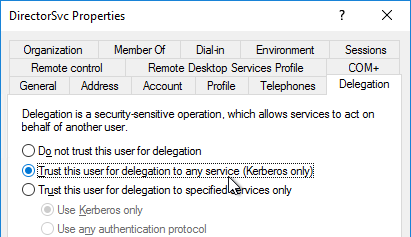
- Create an AD service account that will be used as the Director’s ApplicationPoolIdentity.
- Create SPN and link it to the service account.
setspn -S http/loadbalanced_URL domain\user
- Trust the user account for delegation to any service (Kerberos only) (trust the Director servers for delegation is not necessary in this case). You have to create the SPN before you can do this step.
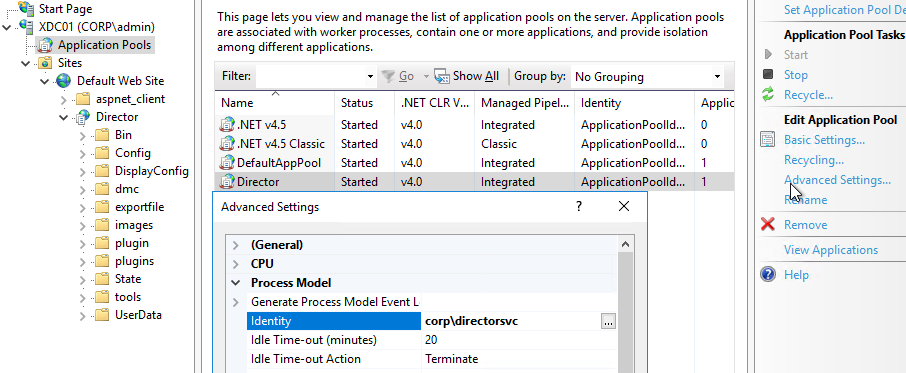
- In IIS manager, on the Application Pools (Director), specify the Identity as user we have created earlier.
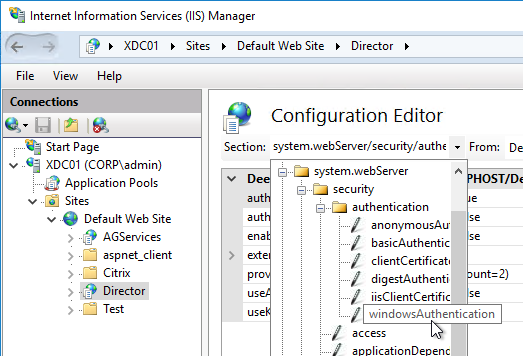
- In IIS manager, expand Default Web Site, select Director, and open the Configuration Editor (bottom of the middle pane).
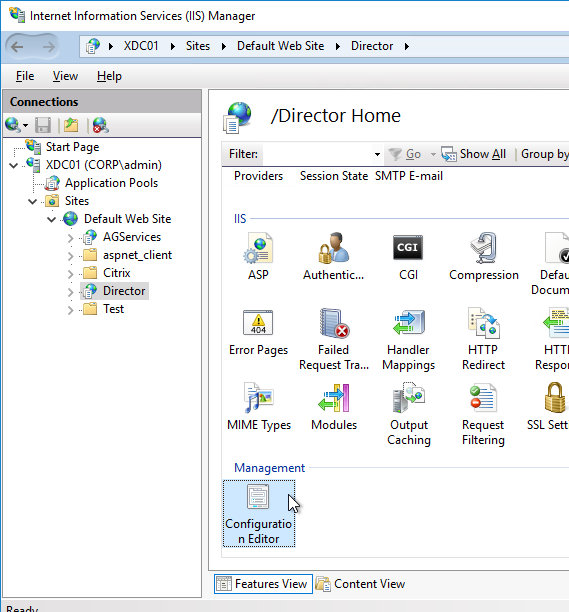
- Use the drop-down to navigate to the following section:
system.webServer/security/authentication/windowsAuthentication
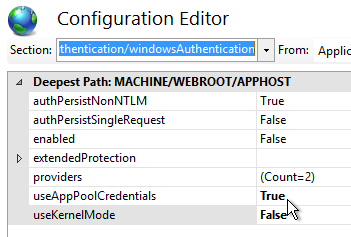
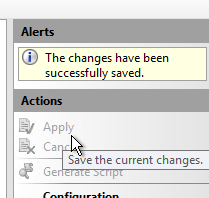
- Set useAppPoolCredentials = True, and useKernelMode = False. Click Apply on the top right.
- When you connect to Director you will be automatically logged in. You can change the login account by first logging off.
- Then change the drop-down to User credentials.
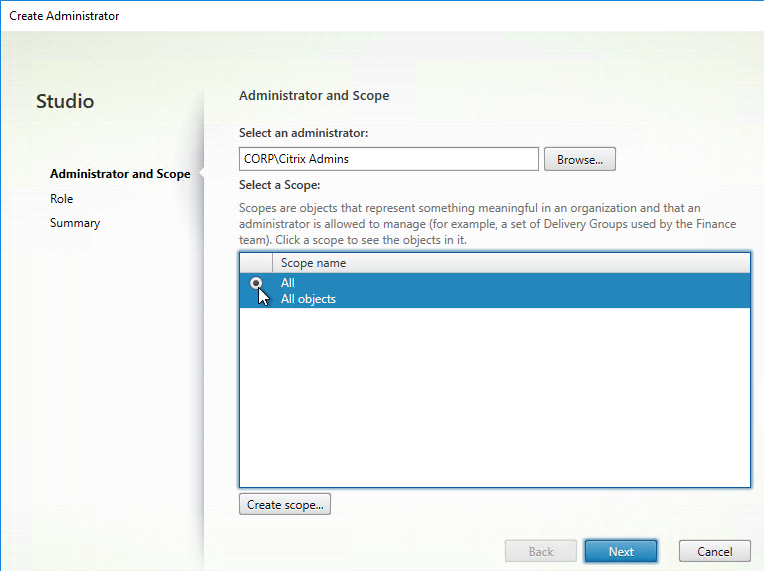
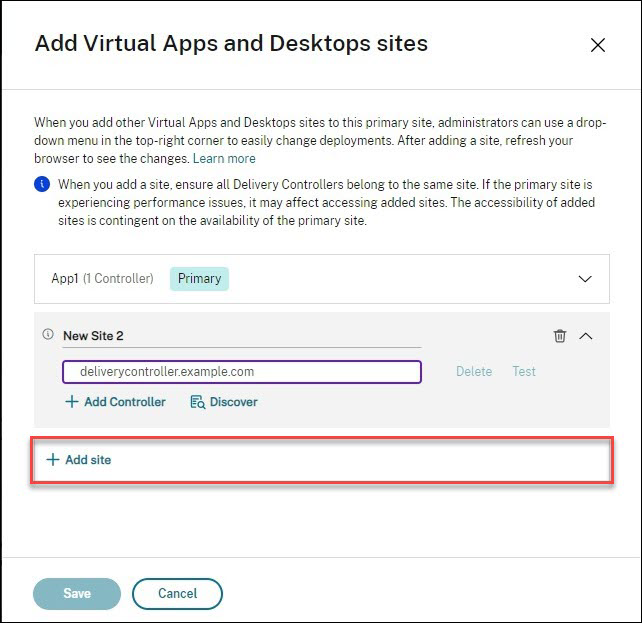
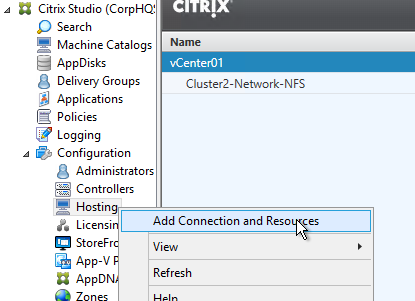
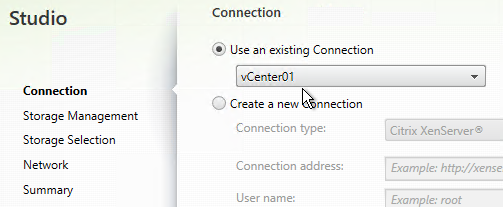
Director – Multiple Citrix Virtual Apps and Desktops (CVAD) Sites/Farms
- Run IIS Manager. You can launch it from Server Manager (Tools menu) or from the Start Menu, or by running inetmgr.
- On the left, expand Sites, expand Default Web Site, and click Director.
- In the middle pane, double-click Application Settings.
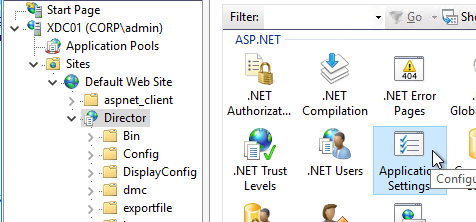
- Find the entry for Service.AutoDiscoveryAddresses, and double-click it.
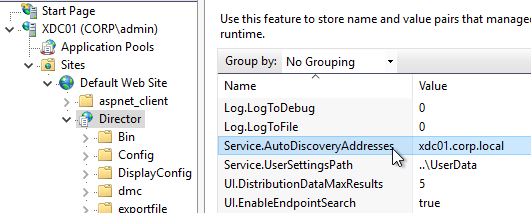
- If Director is installed on a Controller, localhost should already be entered.
- Add a comma, and the NetBIOS name of one of the controllers in the 2nd Citrix Virtual Apps and Desktops Site (farm). Only enter one Delivery Controller name. If you have multiple Director servers, you can point each Director server to a different Delivery in the 2nd Citrix Virtual Apps and Desktops Site (farm).
- From Citrix Docs: Director automatically discovers all other Delivery Controllers in the same Site and falls back to those other Delivery Controllers if the Delivery Controller you specified fails.
- You can optionally force SSL/TLS for the Monitoring service by following the instructions at Data Access Security at Citrix Developer Documentation. Also see CTX224433 Error: “Cannot Retrieve Data” on Citrix Director Dashboard After Securing OData Interface Through TLS.
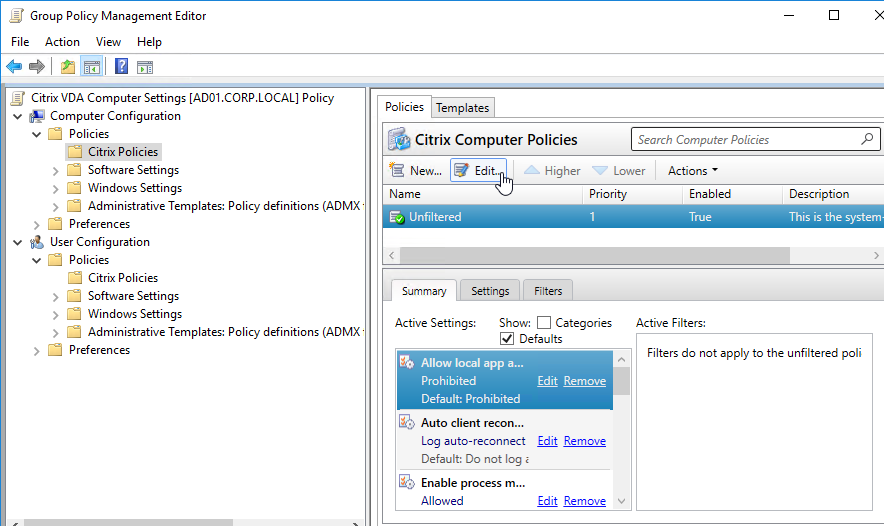
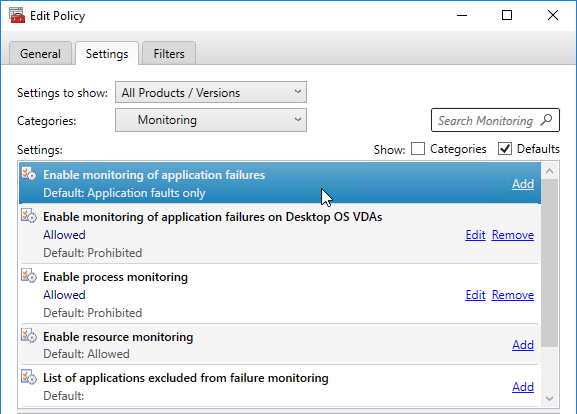
Director Process Monitoring
Director has Process Monitoring, which is detailed in Citrix Blog Post Citrix Director: CPU, Memory Usage and Process Information.
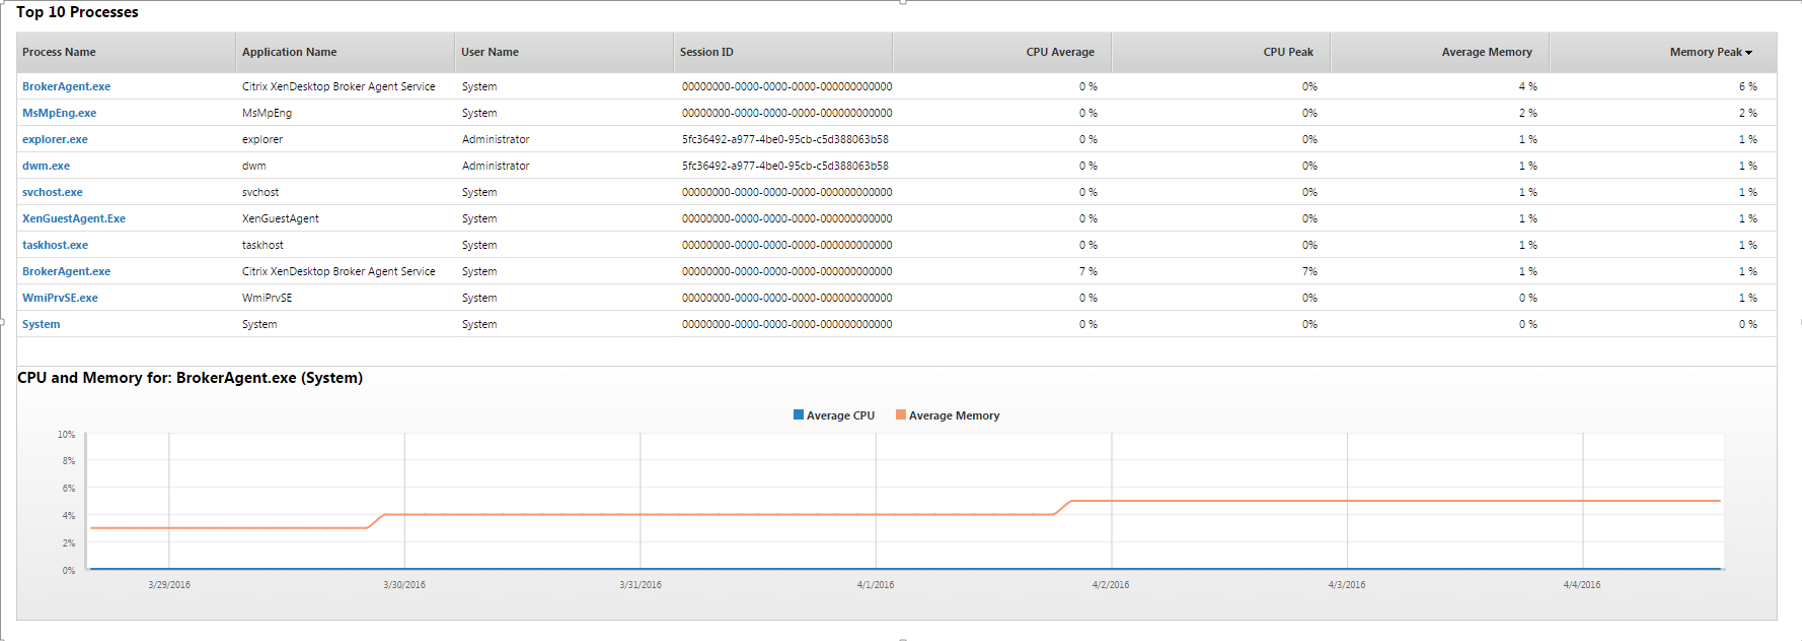
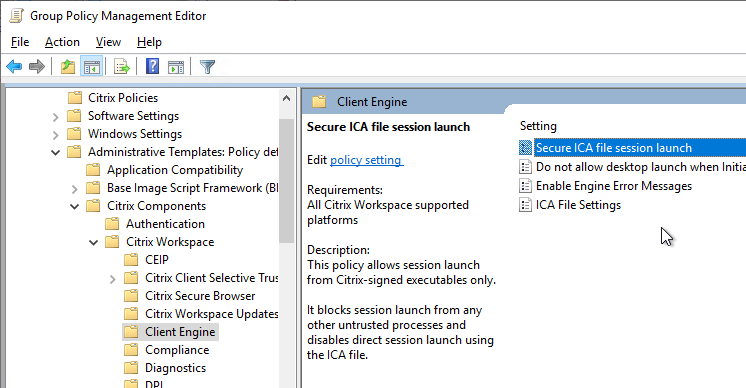
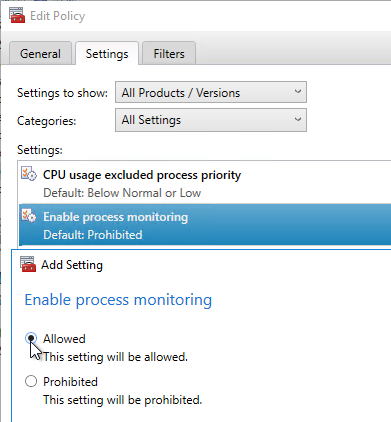
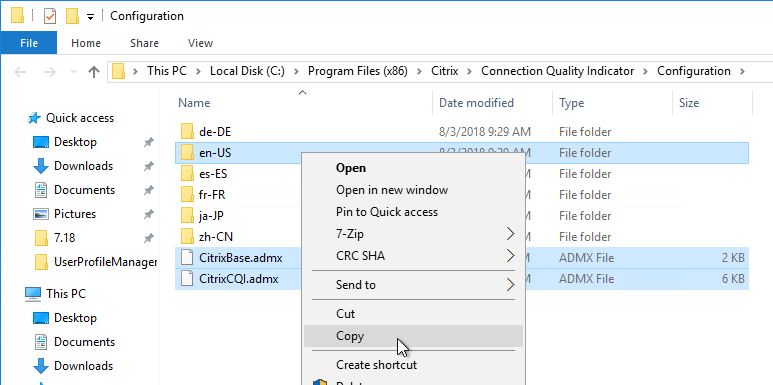
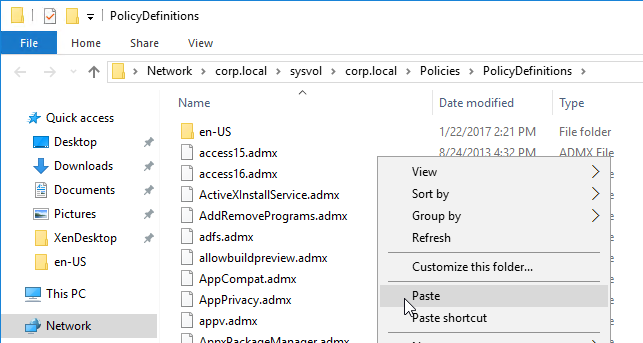
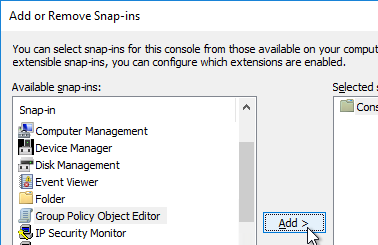
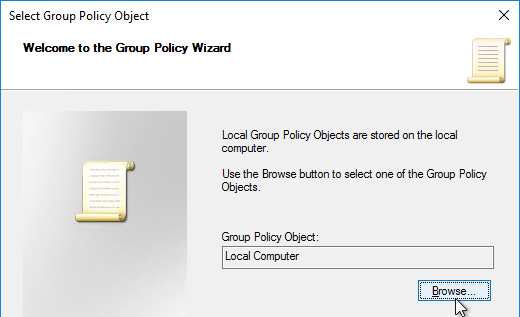
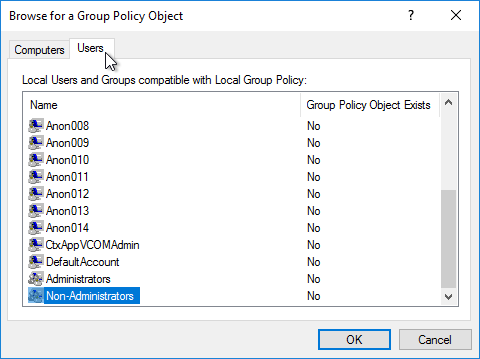
Process Monitoring is disabled by default. To enable it, configure the Enable process monitoring setting in a Citrix Policy. For Citrix Policies in a GPO, find this setting in the computer half of the GPO. Note: this setting could significantly increase the size of the Monitoring database.
Director Alerts and Notifications
Director supports alert conditions and email notifications. This feature requires Citrix Virtual Apps and Desktops (CVAD) to be licensed with Premium Edition. See Citrix Blog Post Configuring & Managing Alerts and Notifications Using Director for more information.
For CPU, Memory, and ICT RTT alerts, see Citrix Blog Post 7 New Categories in Director for Proactive Notifications & Alerts
Director supports Hypervisor Alerts from vSphere and Citrix Hypervisor. The alerts are configured in the hypervisor (e.g. vCenter). When triggered, the hypervisor alerts can be viewed in Director. Director can send email notifications when hypervisor alerts are triggered.
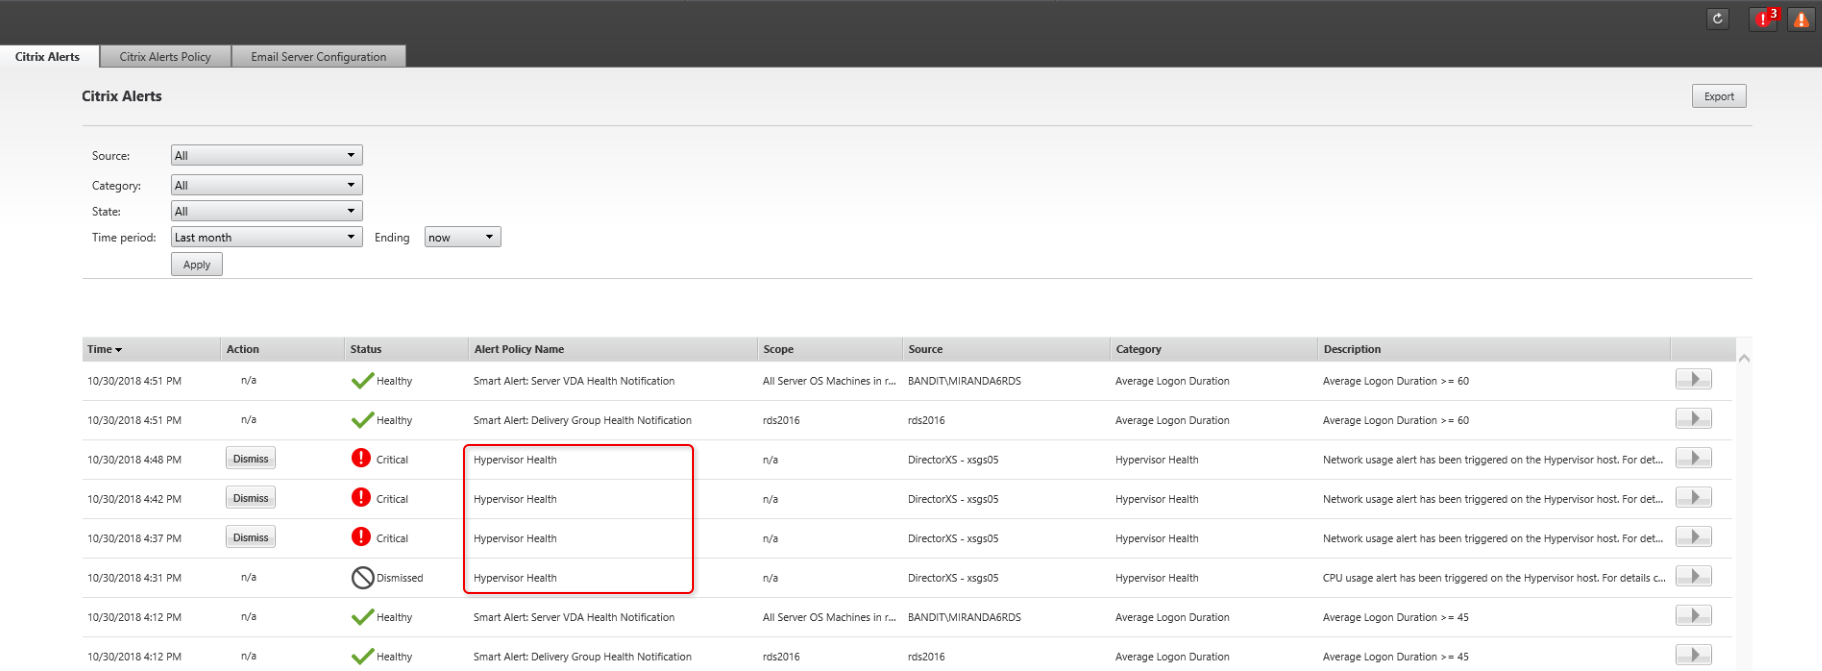
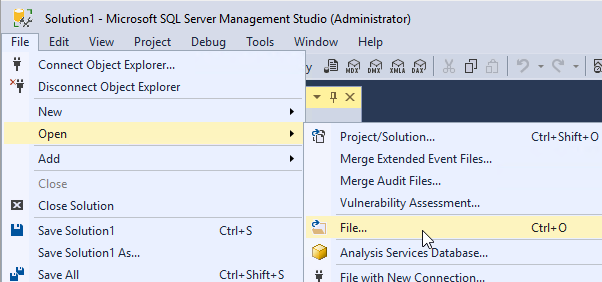
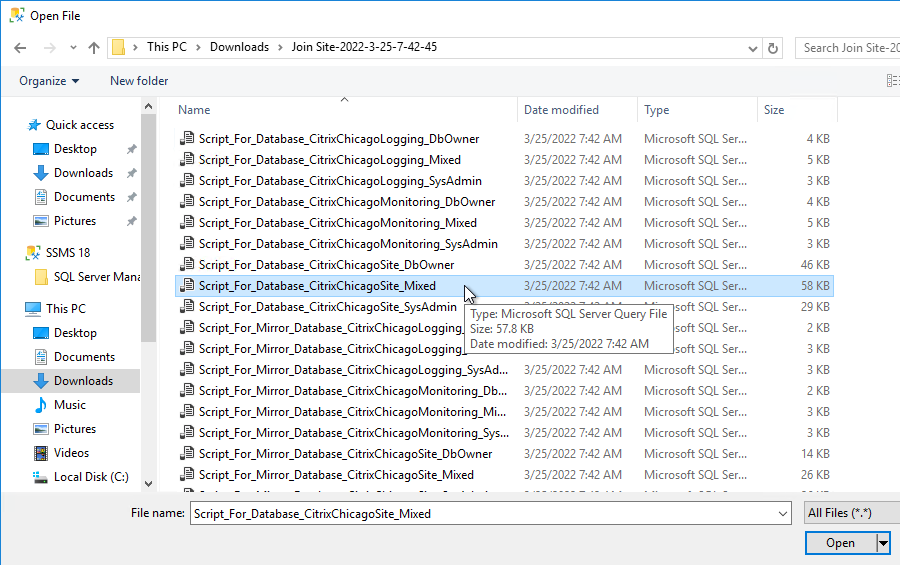
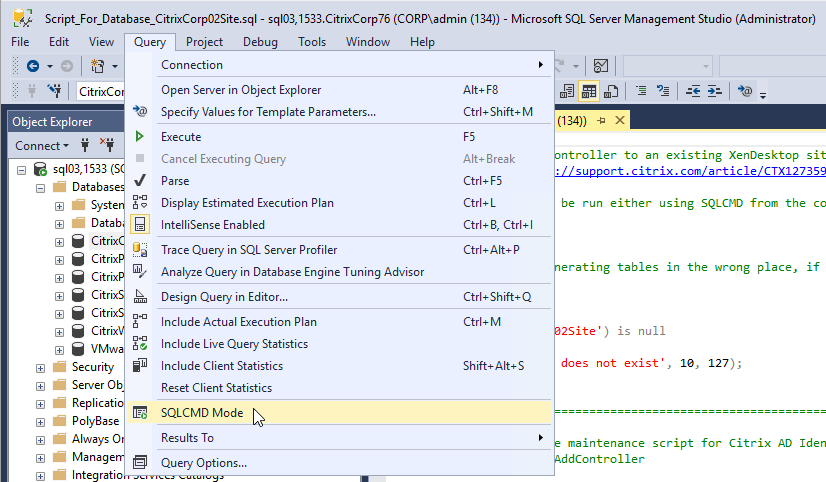
- Hypervisor can generate many alerts nut Director does not have a bulk method of clearing those alerts. Citrix wrote a PowerShell script named DismissAlerts.ps1 that runs a SQL query to clear the Hypervisor alerts. 💡
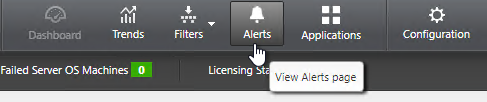
To configure alerts in Director:
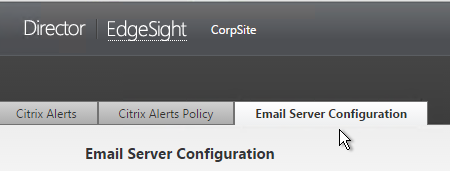
- While logged into Director, at the top of the page, click the Alerts button.
- Switch to the Email Server Configuration tab.
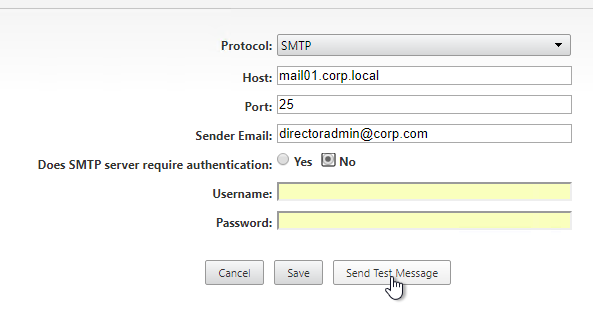
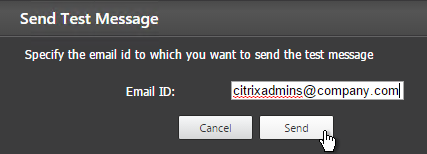
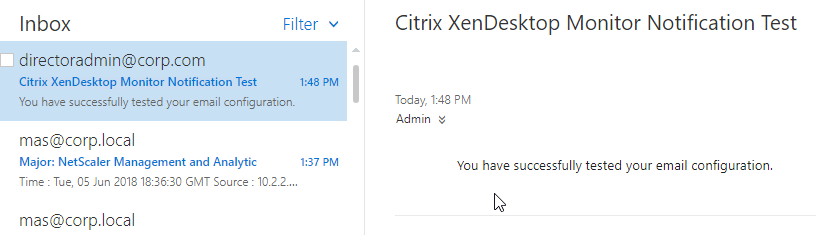
- Enter your SMTP information, and click Send Test Message. Then click Save.
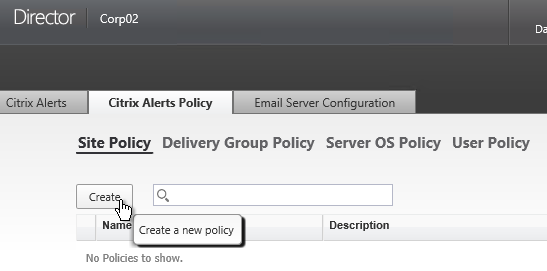
- Switch to the Citrix Alerts Policy tab.
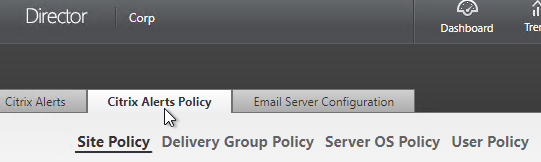
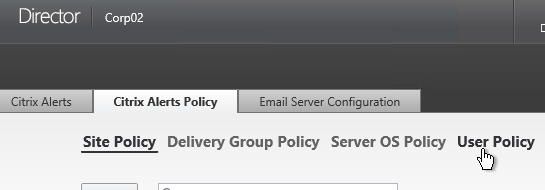
- There are four high-level categories of alerts: Site Policy, Delivery Group Policy, Multi-session OS Policy (aka Server OS Policy), and User Policy. Click whichever one you want to configure.
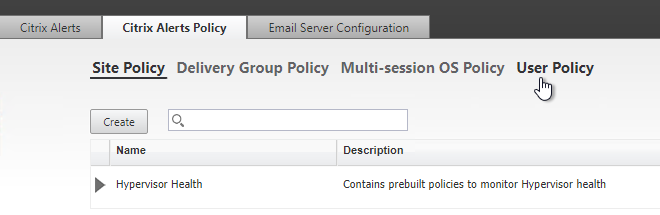
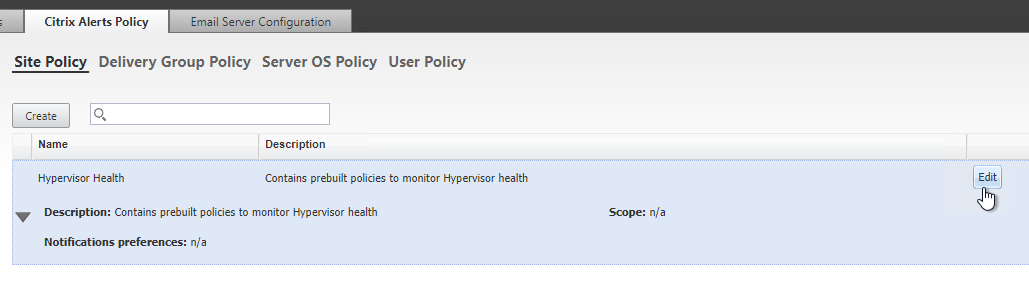
- Director has built-in alert policies. All you need to do is add notification email addresses to the built-in policies.
- In Director 1811 and newer, in the Site Policy tab, click Edit for the built-in Hypervisor Health policy.
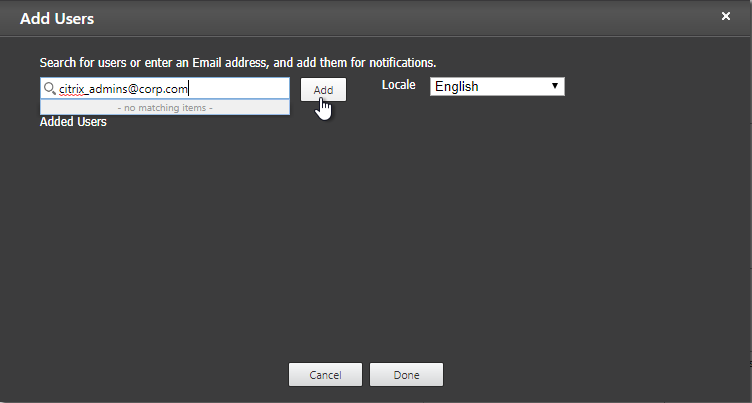
- On the bottom right in the Notification preferences section, click Add.
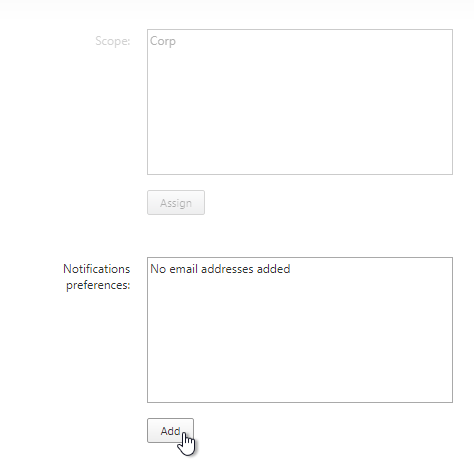
- Enter an email address and then click Add.
- Click Done when done.

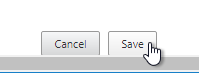
- On the bottom, click the Save button.
- On the bottom right in the Notification preferences section, click Add.
- On the Delivery Group Policy tab, find the built-in Smart Alert, and then click Edit. Note: this Smart Alert might not appear until you create a Delivery Group in Citrix Studio.
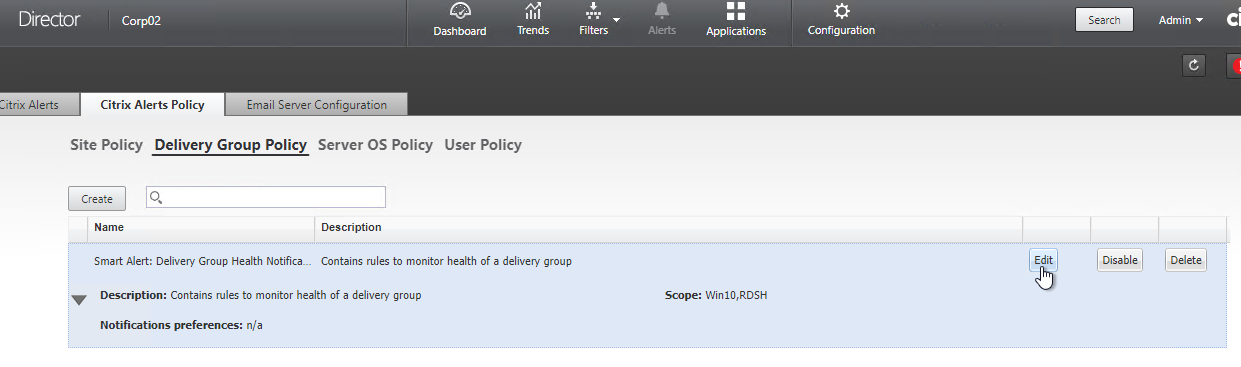
- Notice the Conditions that are already enabled. You can change them or add more.
- On the bottom right, in the Notification preferences section, click Add.

- Enter an email address, and click Done.
- On the bottom, click Save.

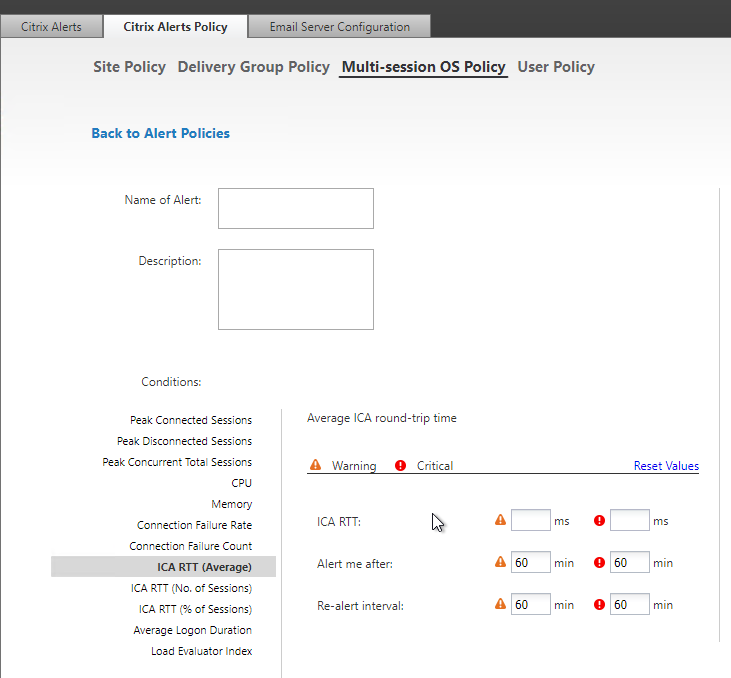
- You can create custom Alert Policies by clicking the Create button on any of these tabs.
- For Multi-session OS Policy (aka Server OS Policy) and User Policy, there are ICA RTT alerts.
- You can configure alerts to generate an SNMP trap. This is configured in PowerShell as described at Configure alerts policies with SNMP traps at Citrix Docs.
Set-MonitorNotificationSnmpServerConfiguration        #see Docs for parameter details
Set-MonitorNotificationPolicy -IsSnmpEnabled $true -Uid <Policy ID>
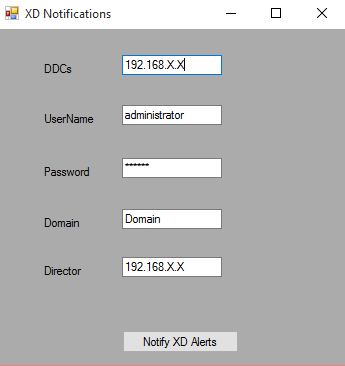
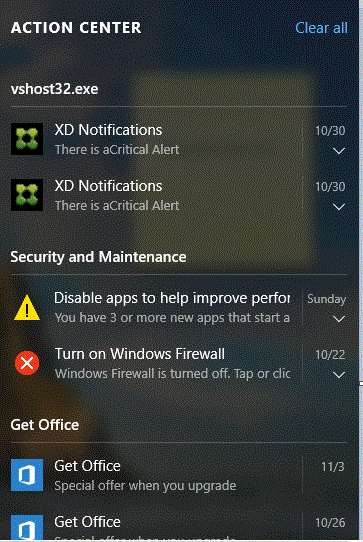
- Citrix has an experimental Desktop Notification Tool. See Citrix Blog Post Desktop Notification Tool For Citrix XenDesktop.
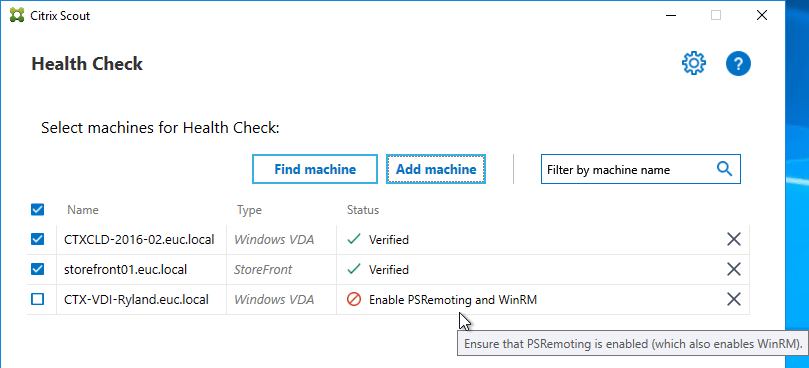
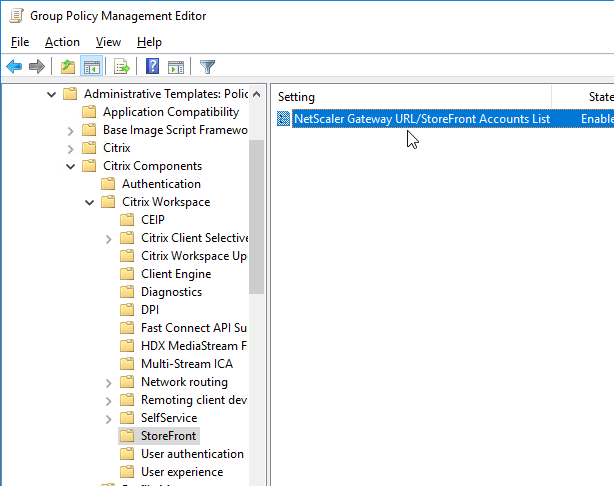
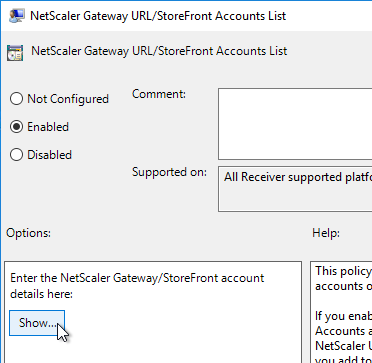
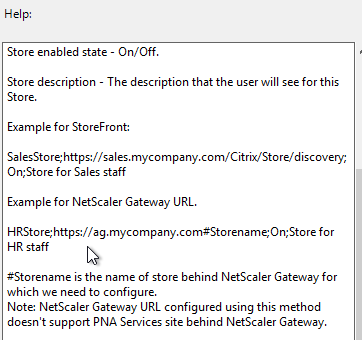
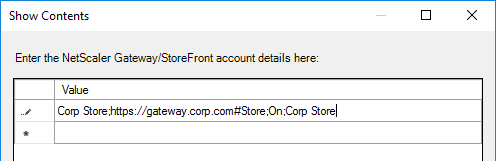
Director – StoreFront Probes
If you are licensed for Premium Edition, then you can install probe agents on remote machines, and the probe agents can periodically check if an application can be launched through StoreFront.
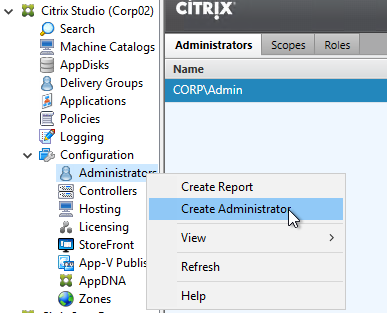
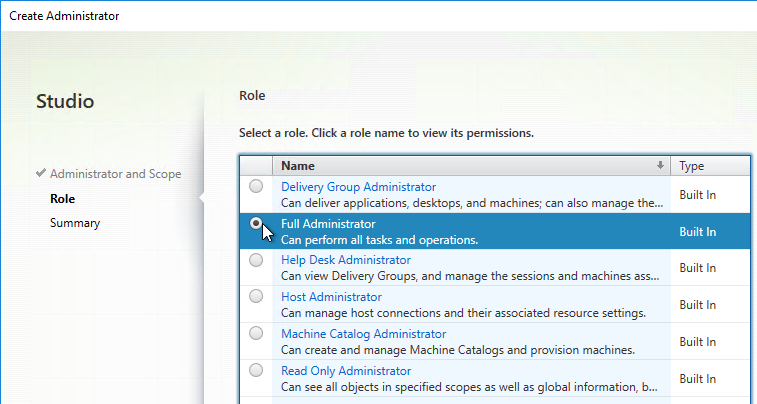
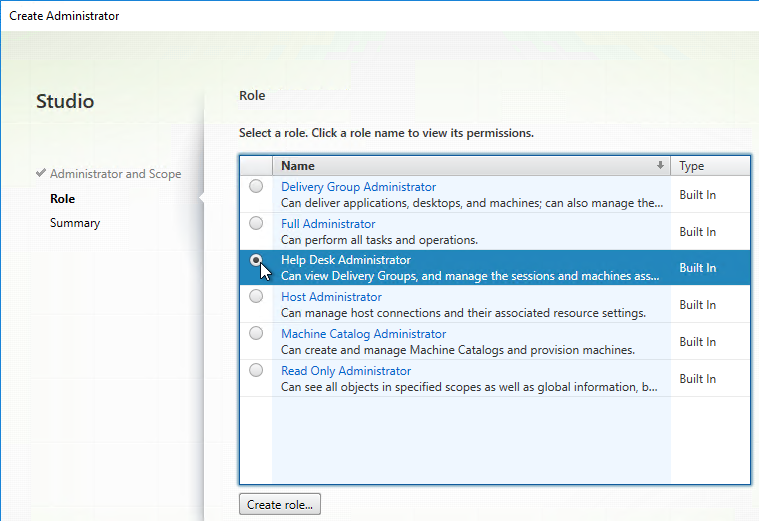
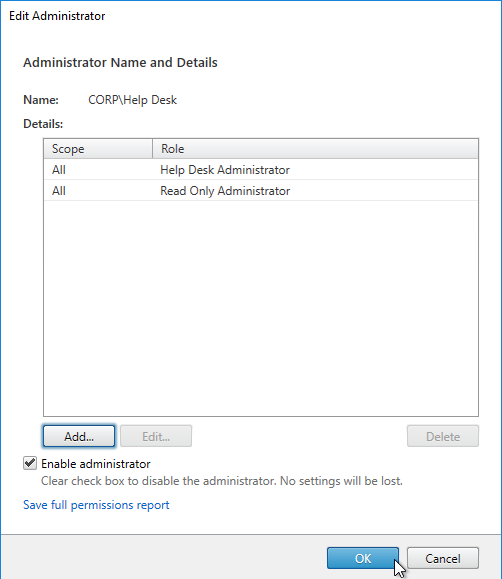
Custom Studio Role for Probe Administrator
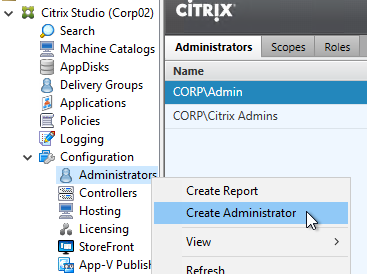
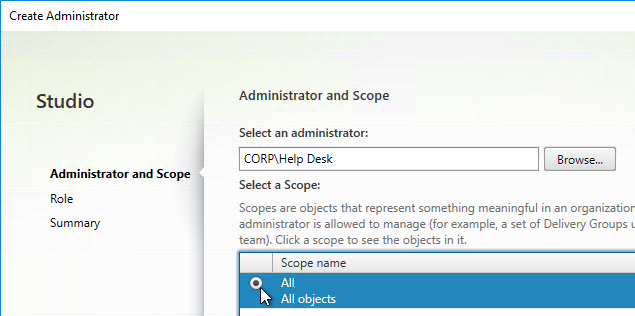
- Create a new user account just for probe administration (e.g CORP\ProbeAdmin).
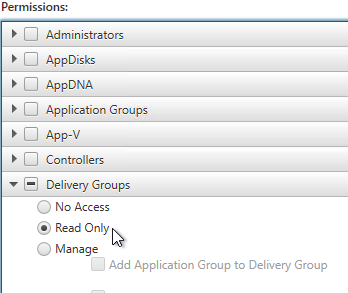
- In Citrix Studio, at Configuration > Administrators, on the Roles tab, create a new Role with the permissions shown below.
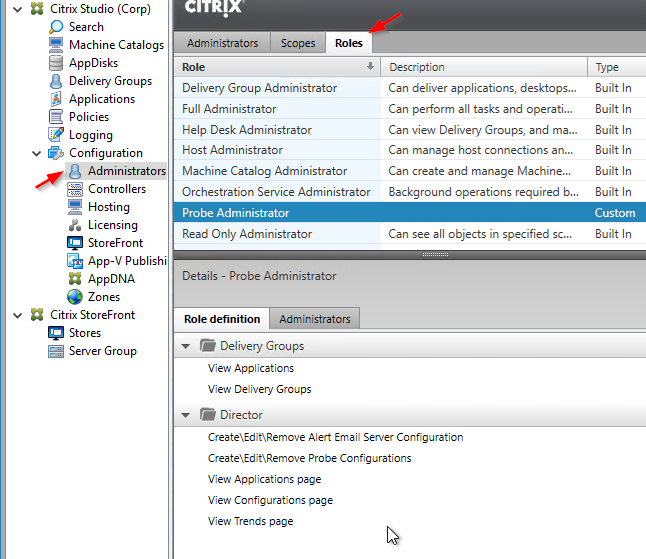
- Delivery Groups > Read-only
- Director > Create\Edit\Remove Alert Email Server Configuration
- Director > Create\Edit\Remove Probe Configurations
- Director > View Applications page
- Director > View Configurations page
- Director > View Trends page
- Delivery Groups > Read-only
- On the Administrators tab, add an administrator, select your ProbeAdmin account, and assign it the custom Probe Administrator role that you just created.

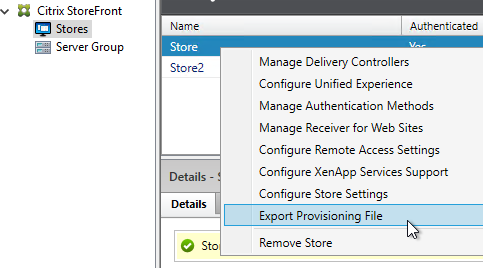
StoreFront HTTP Basic Authentication
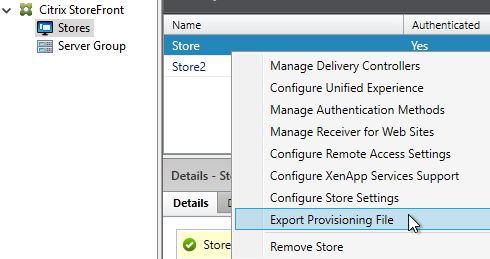
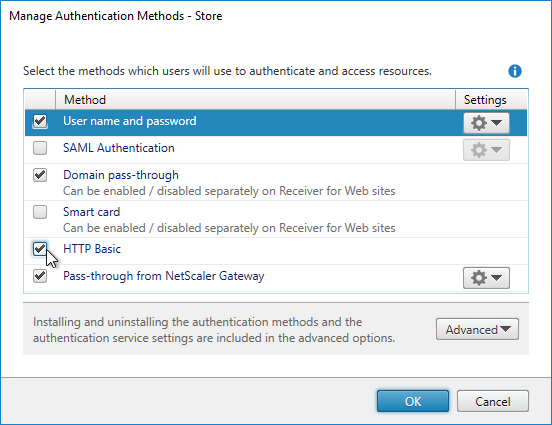
- In StoreFront Console, right-click your Store, and click Manage Authentication Methods.
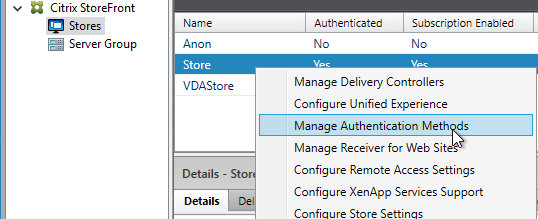
- Check the box next to HTTP Basic, and click OK.
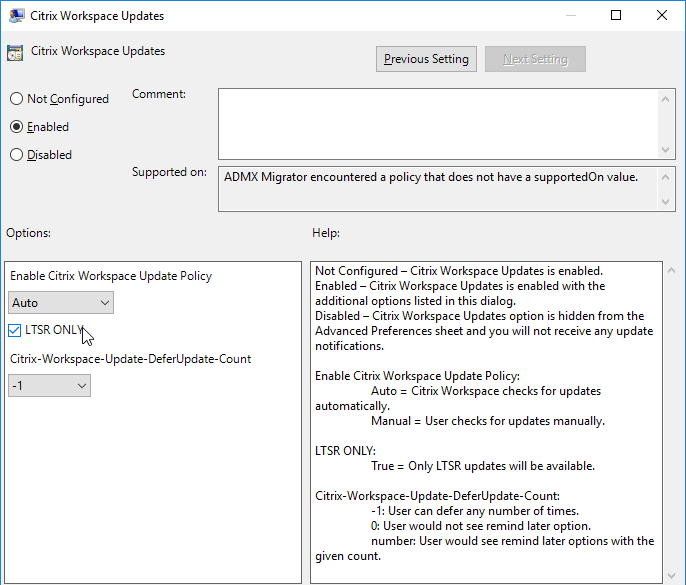
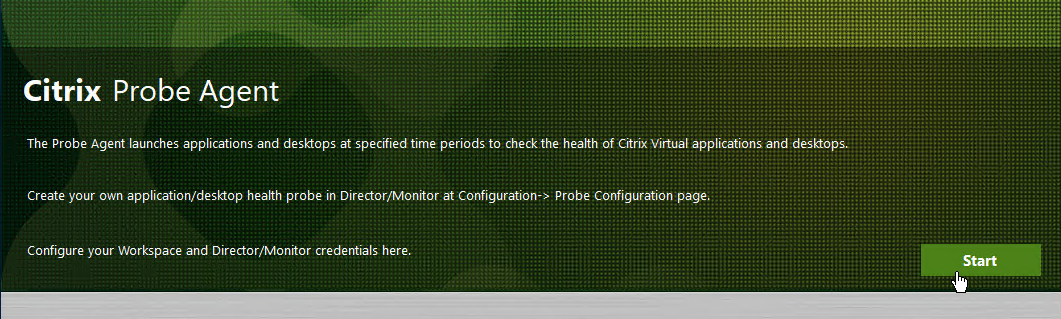
Install Probe Agent
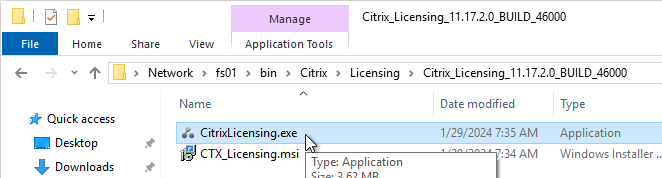
To automate the installation and configuration of the Probe Agent, see CTX493268 Automating Citrix Probe Agent Installation and Configuration, or see CTA Dennis Span Citrix Application Probe Agent unattended installation.
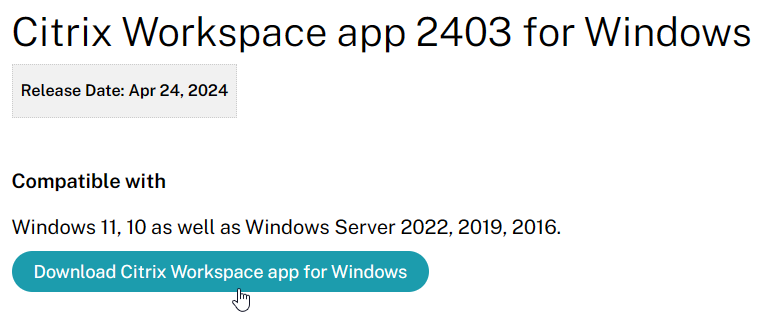
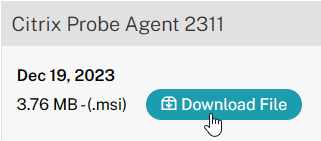
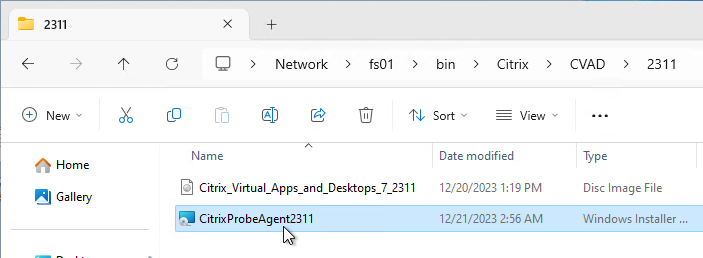
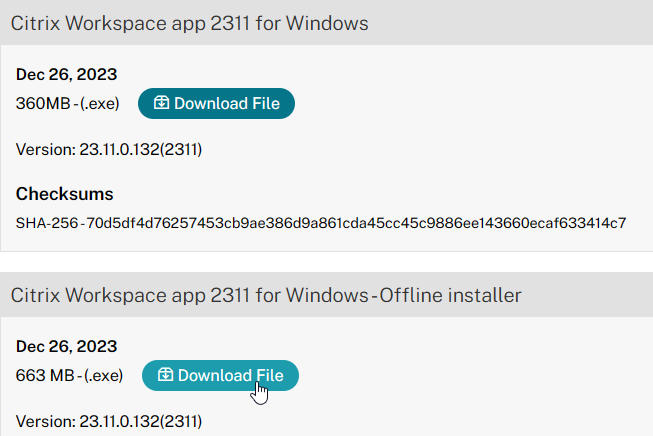
On one or more remote machines, download and install the Probe Agent.
- Download the Citrix Application Probe Agent 2311.
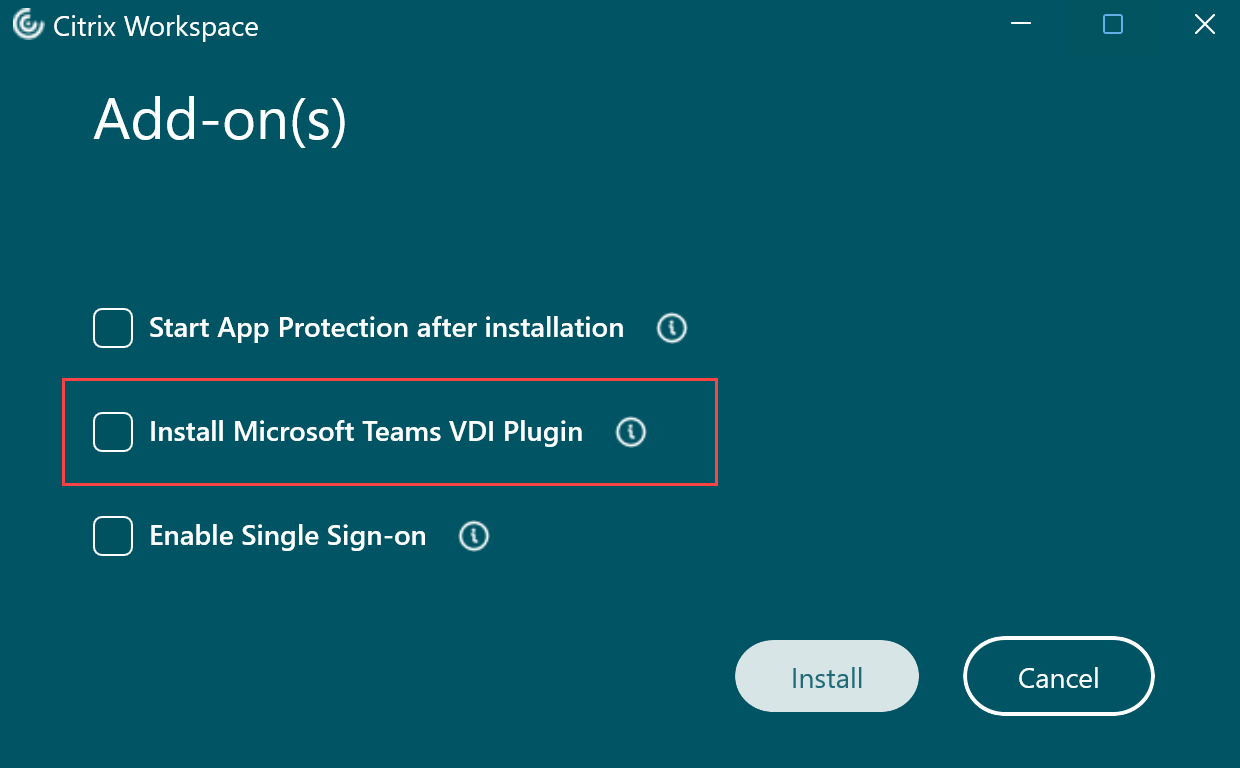
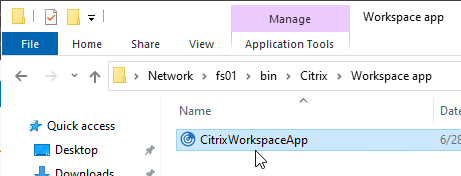
- On a physical machine in a remote office, install Workspace app 1903 or newer if it isn’t installed already.
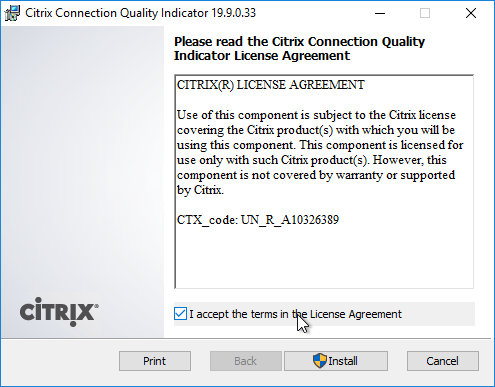
- Run the downloaded CitrixAppProbeAgent_2311.msi.
- In the Welcome to the Citrix Probe Agent Setup Wizard page, click Next.
- In the End-User License Agreement page, check the box next to I accept the terms, and click Next.
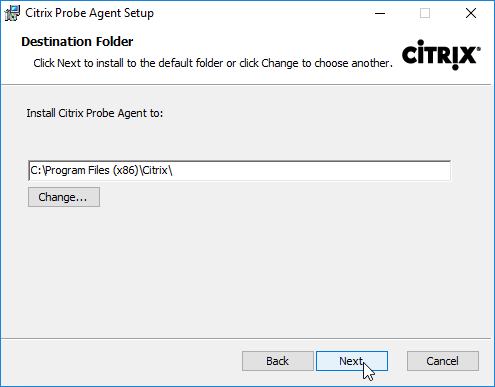
- In the Destination Folder page, click Next.
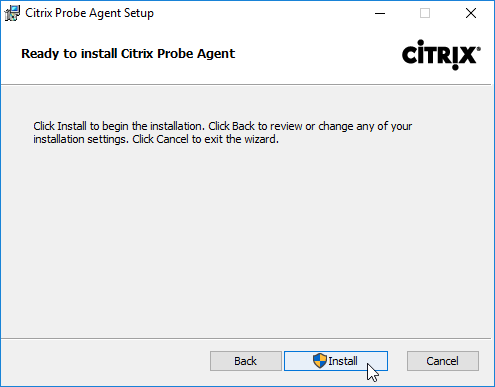
- In the Ready to install Citrix Probe Agent page, click Install.
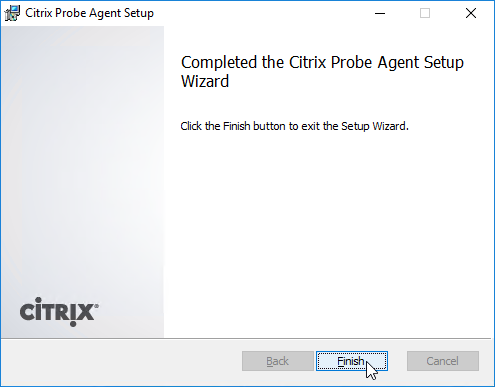
- In the Completed the Citrix Probe Agent Setup Wizard page, click Finish.
Configure Probe Agent
- Every Probe Agent machine should have unique StoreFront test user credentials. Create unique accounts for each machine.
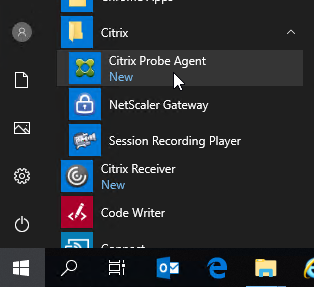
- From the Start Menu of the remote machine, launch Citrix Probe Agent.
- Click Start.
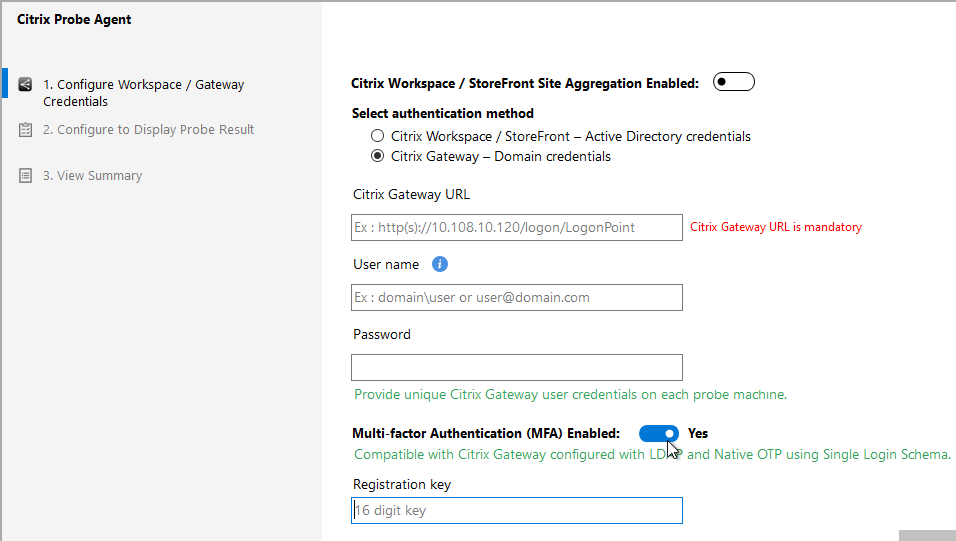
- In the Configure Workspace Credentials page, enter the StoreFront Receiver for Web URL, or enter a Citrix Gateway URL.
- For Gateway, the Gateway Virtual Server must be configured with RfWebUI theme. Other themes, like X1 theme, does not work.
- Enter the username and password for the probe user for this machine.
- Click Next.
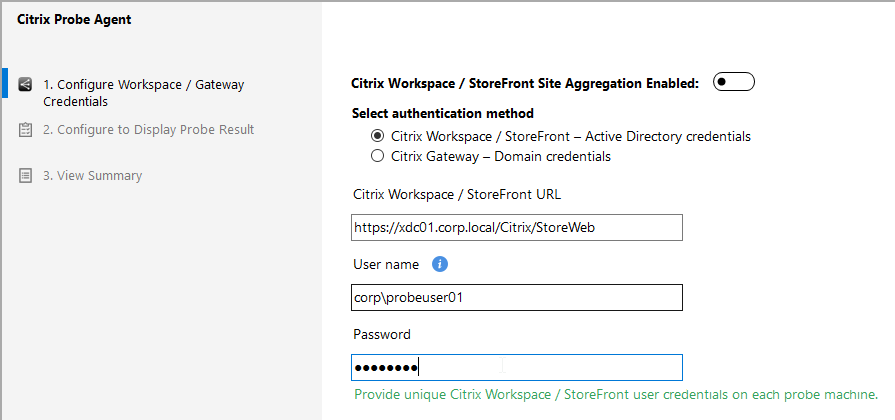
- Probe Agent 2308 and newer support Gateway authentication with Native OTP.
- Probe Agent 2308 and newer support Gateway authentication with Native OTP.
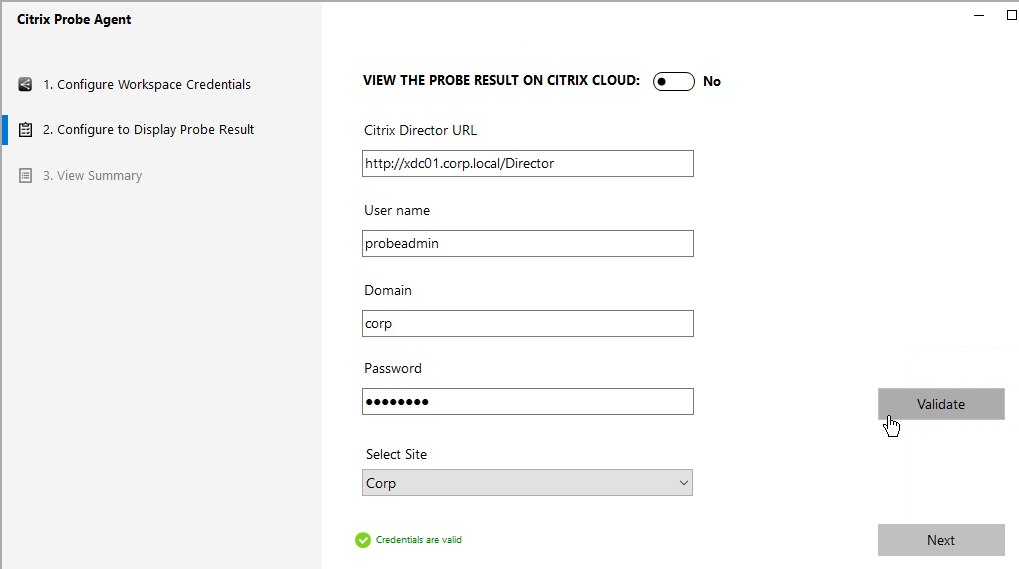
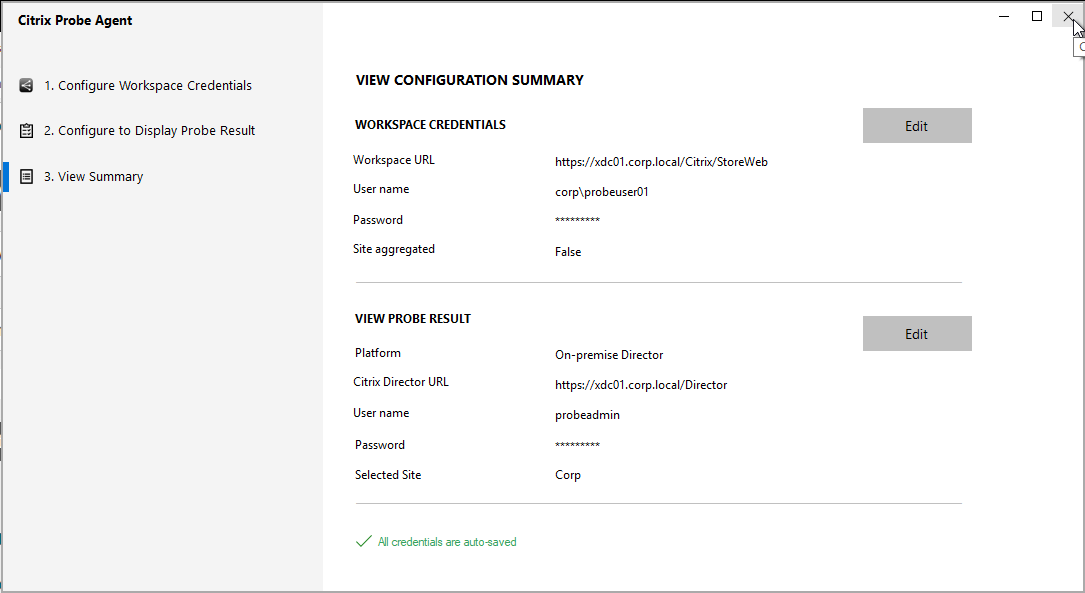
- In the Configure to Display Probe Result page, enter the URL to Director. Make sure you include /Director at the end of the URL.
- Enter the Probe Admin credentials and click Validate.
- Select a Site (farm) if there’s more than one.
- Click Next.
- In the View Summary page, you may close the window.
- Login to Director as the Probe Admin account.
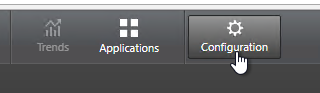
- On the top middle, click the Configuration button.
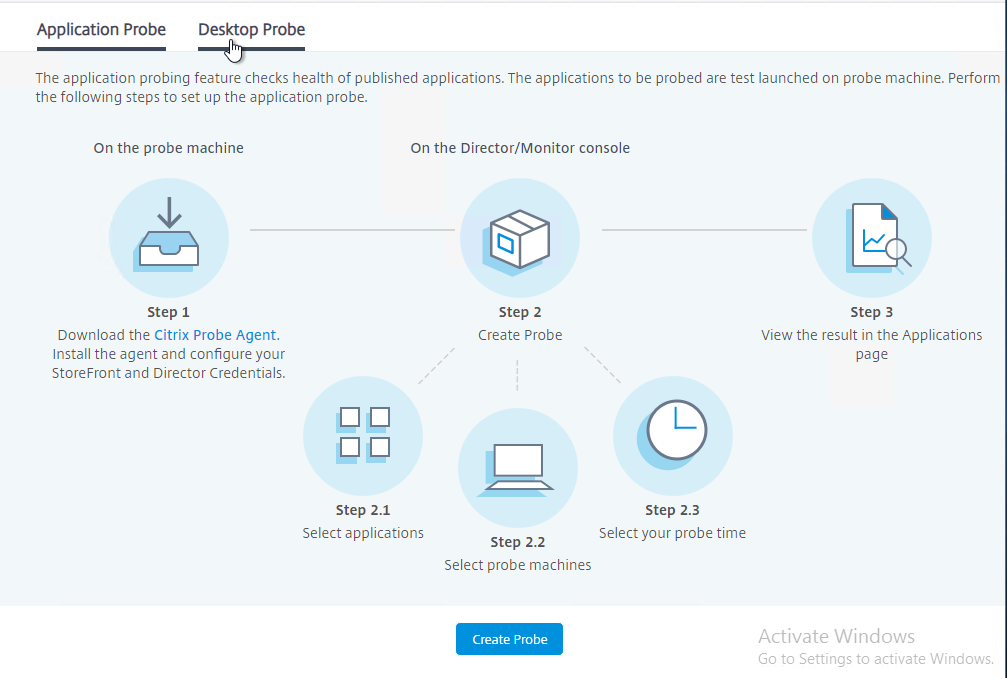
- At the top of the page, select either Application Probe, or Desktop Probe.
- Click Create Probe.
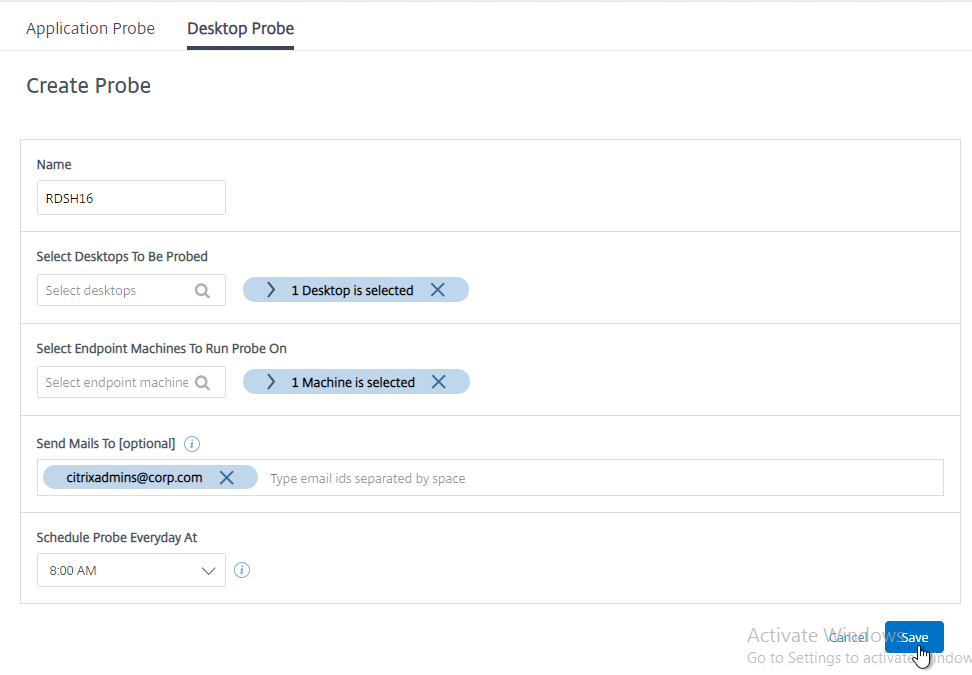
- In the Create Probe page:
- Give the probe configuration a name.
- Select one or more Applications or Desktops to test.
- Select the registered Probe Agent machine(s) to run the probe from.
- Enter an email address for probe result notifications.
- Select one time per day to run the probe. You can create multiple probe configurations to run the probe multiple times per day.
- Click Save.
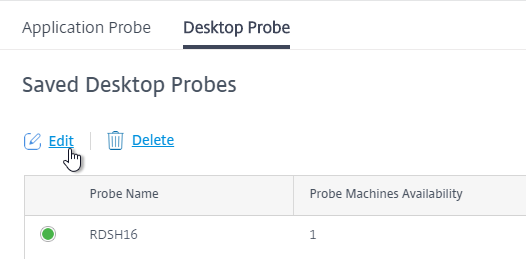
- If you go back to the Configuration page, to edit a probe configuration, select one, and then click the Edit link.
- The probe configurations are stored in the Monitoring database so there shouldn’t be any concerns with load balancing of Director.
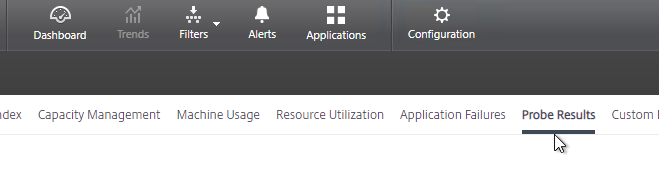
- To view the probe results, on the top, click Trends. Then switch to the Probe Results tab. This page seems to not tell you anything more than if the probe was successful or not.
Director – SCOM Integration
Director can display alerts from System Center Operations Manager (SCOM) 2012 or newer. This feature requires Citrix Virtual Apps and Desktops (CVAD) Premium Edition.
- See Configure SCOM integration at Citrix Docs for detailed configuration instructions. Also see Marius Sandbu Integrating Citrix XenDesktop 7.7 and System Center Operations Manager.
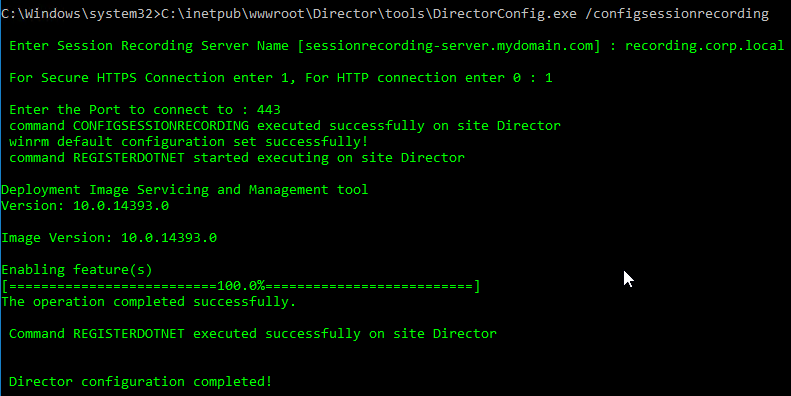
- On Director server, run C:\inetpub\wwwroot\Director\tools\DirectorConfig.exe /configscom
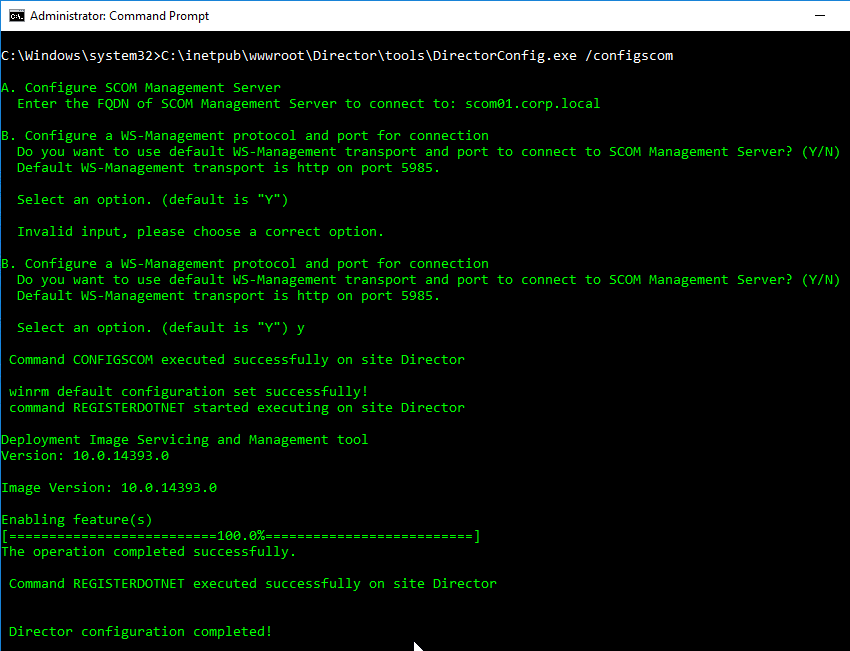
- FYI, the DirectorConfig.exe /configscom command enables the following features on the Director server: /FeatureName:IIS-NetFxExtensibility45 /FeatureName:IIS-ASPNET45 /FeatureName:WCF-HTTP-Activation45
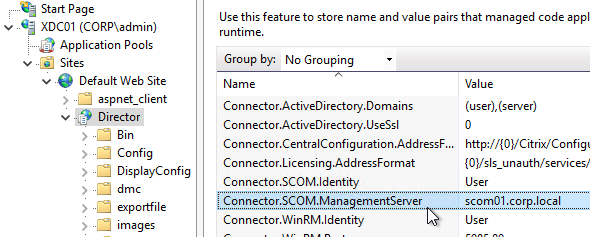
- FYI, the System Center Operations Manager server is listed in IIS Manager at Default Web Site > Director > Application Settings (middle pane) > Connector.SCOM.ManagementServer.
- On the System Center Operations Manager server, edit Remote Management Users local group, and add Citrix Admins, and other Director users.
- In System Center Operations Manager Console, go to Administration > User Roles, and edit Operations Manager Operators. Add the Citrix Admins, and other Director users.
- See Citrix Blog Post SCOM Alerts in Citrix Director for information on how to view System Center Operations Manager alerts in Director.
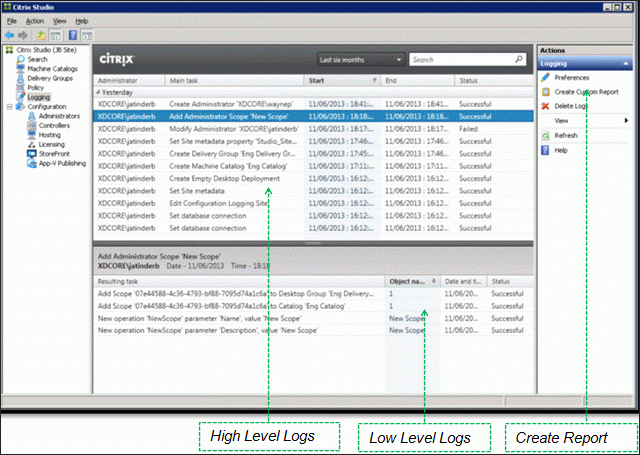
Director – Custom Reports
In Director, in the Trends view, there’s a Custom Reports tab that guides you through creating a custom OData Query. This tab only appears if you have Citrix Virtual Apps and Desktops (CVAD) Premium Edition.
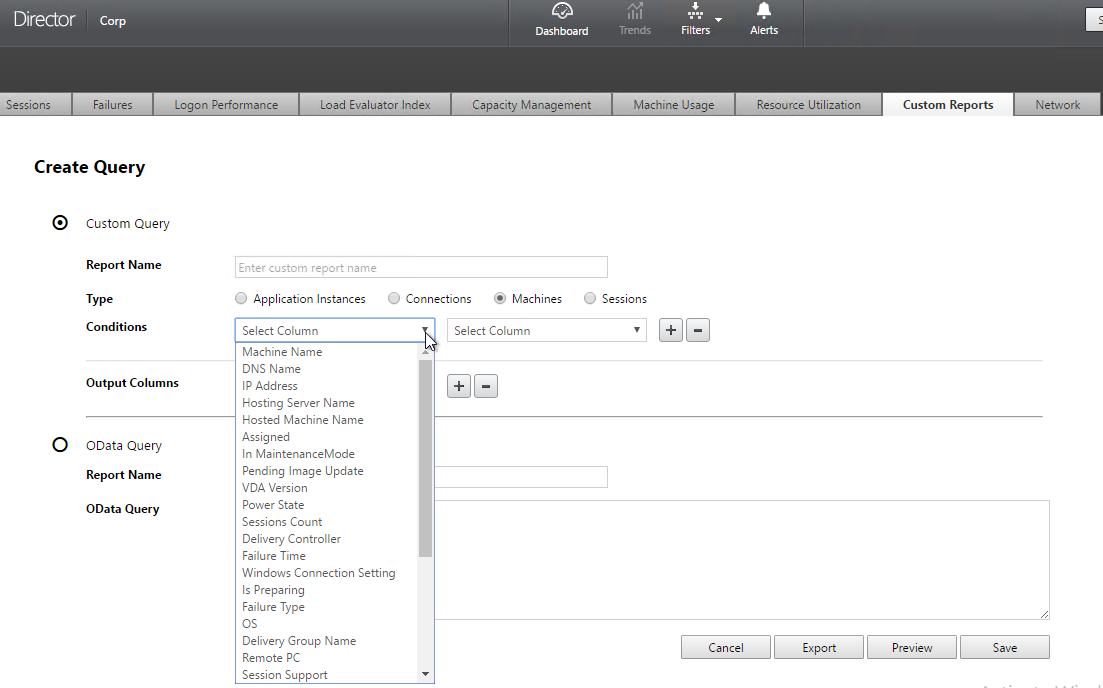
The Monitoring database contains more data than is exposed in Director. To view this data, the Monitoring service has an OData Data Feed that can be queried.
- You can use Excel to pull data from the OData Data feed. See Citrix Blog Post – Citrix Director – Analyzing the Monitoring Data by Means of Custom Reports. This particular blog post shows how to use an Excel PivotChart to display the connected Receiver versions.
- Also see Alexander Ollischer Citrix XenDesktop 7.x – Query Citrix Receiver Versions connecting to your environment – XLS Report
- Citrix CTX211428 Using Excel to Report on Desktop Director Data uses Power Pivot.
- Or for Linqpad, see Citrix Blog Post – Creating Director Custom reports for Monitoring XenDesktop using Linqpad
- CTA David Ott XenDesktop Usage Report shows that querying OData can be slow and it’s sometimes faster to query the actual Monitoring database. Updated Report.
Use Director
The newer Director features usually require Delivery Controllers and VDAs to be at the same version or newer than Director. Director depends on the Monitoring Service that is built into the Delivery Controller. The Monitoring Service gathers data from the VDAs.
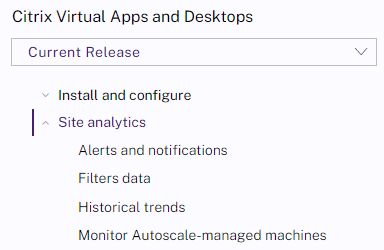
See Site Analytics at Citrix Docs.
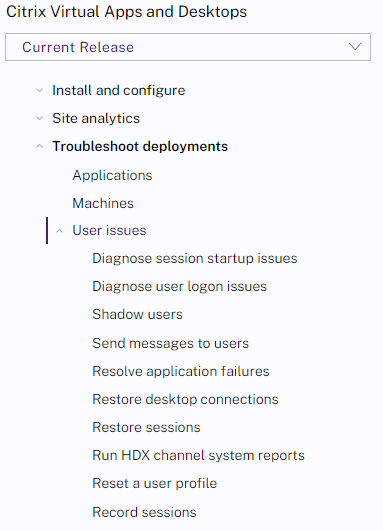
See the various Troubleshoot topics at Citrix Docs.
Director 2311 new features:
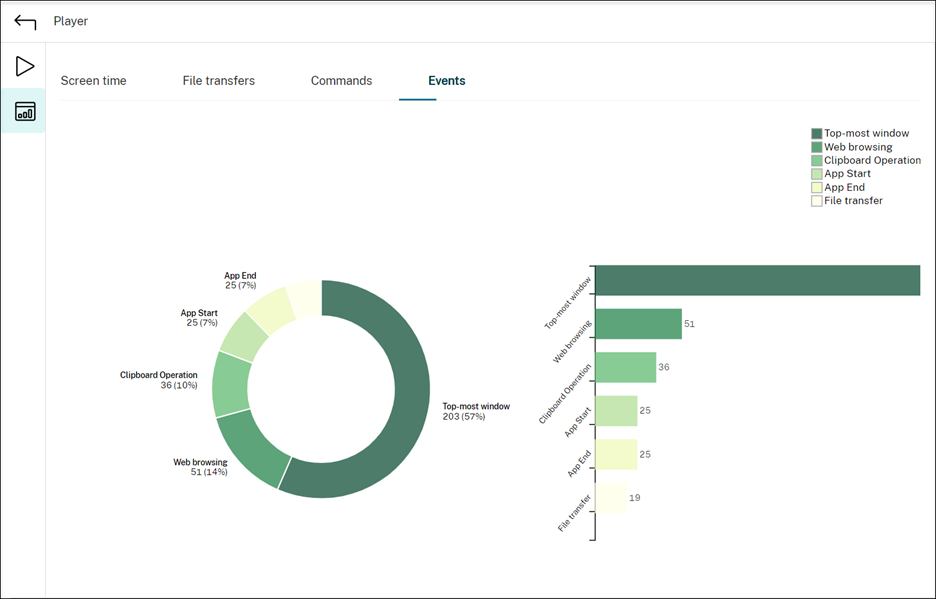
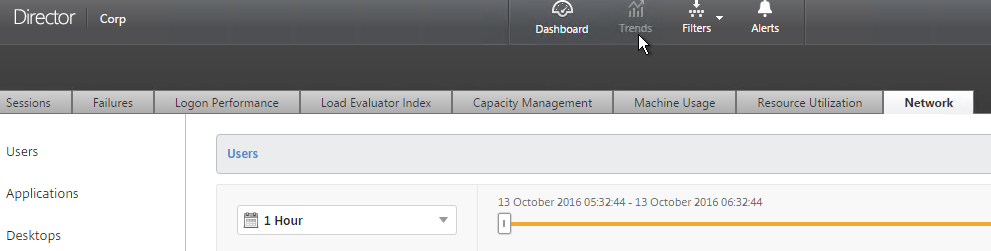
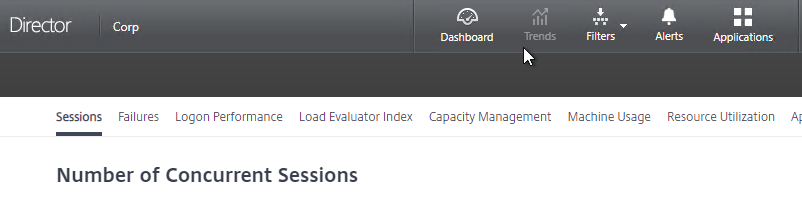
Director 2311 has a new theme. Tabs are now shown on the left.
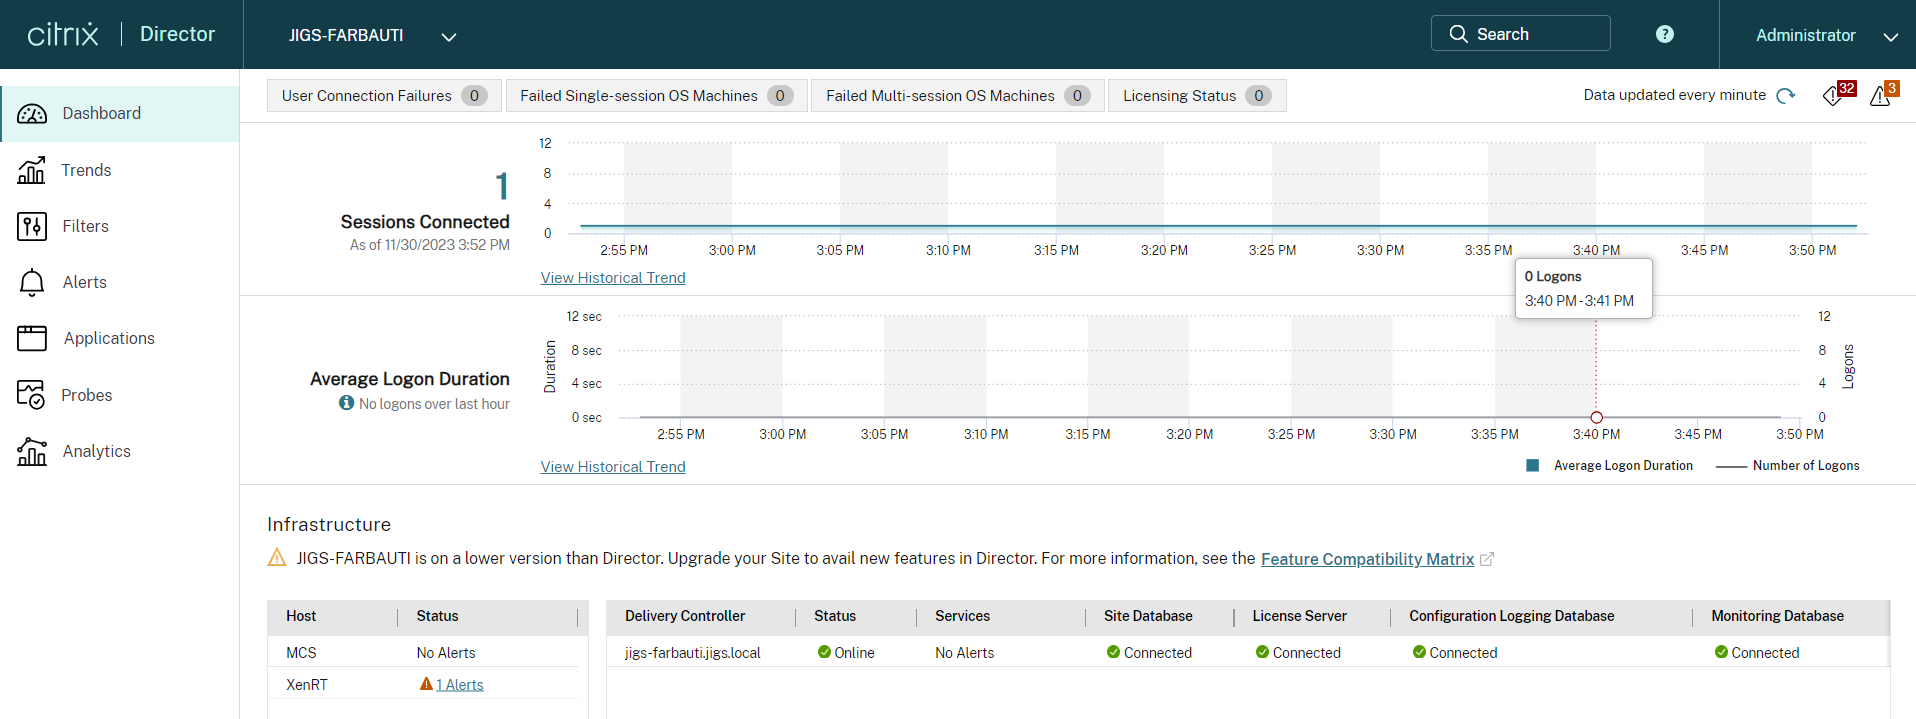
When you Search for a user and select a session you see the Activity Manager page. It has a new theme.
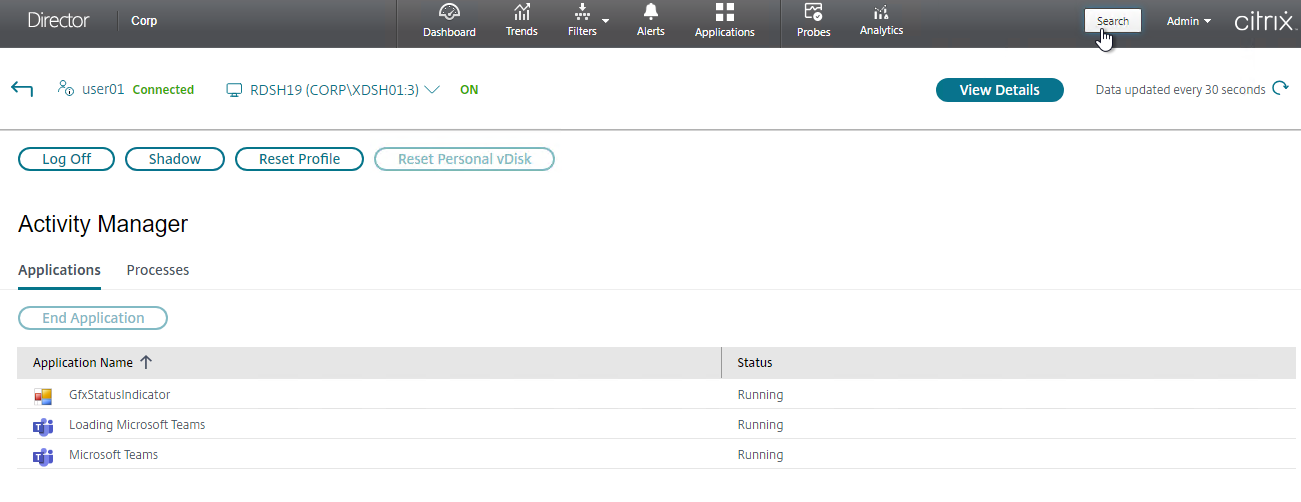
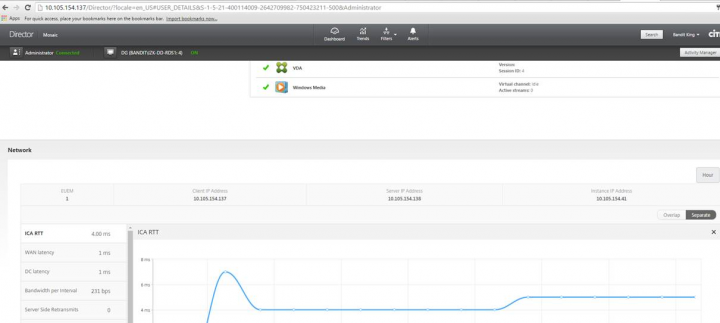
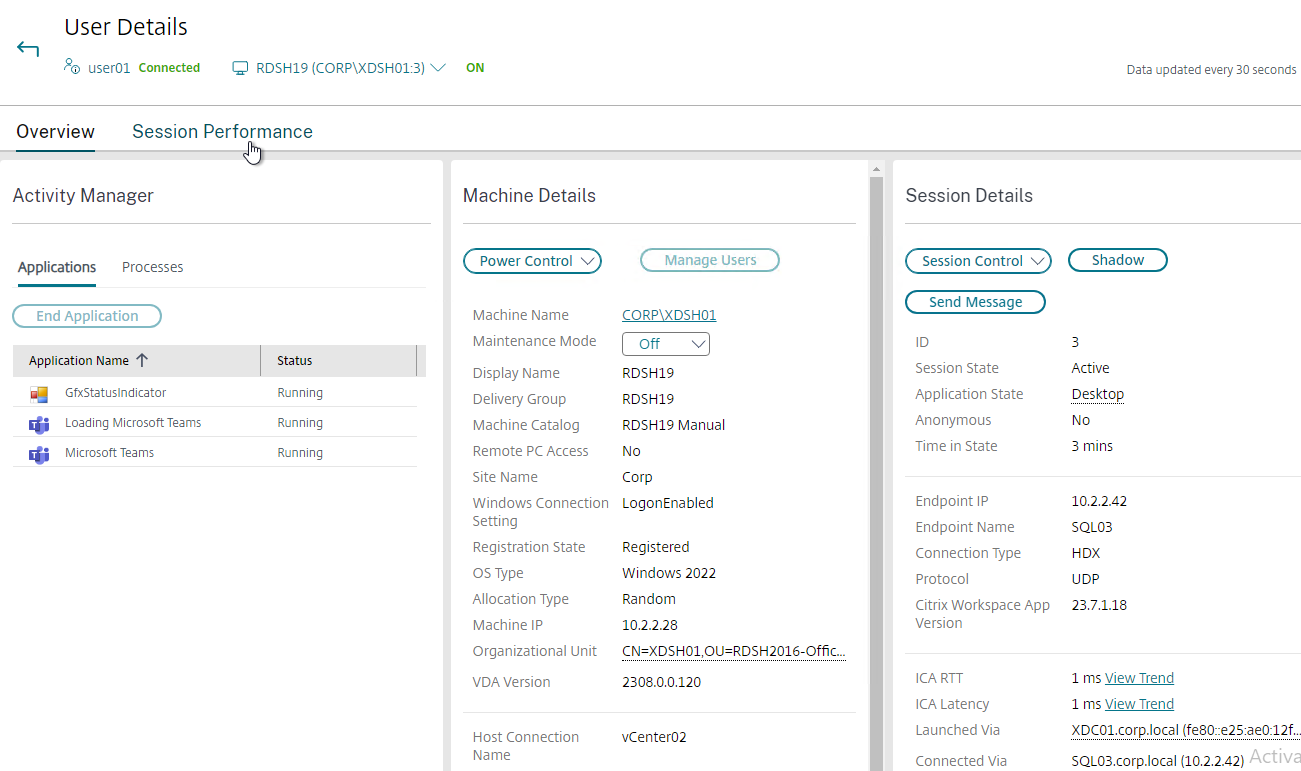
The User Details page also has a new theme.
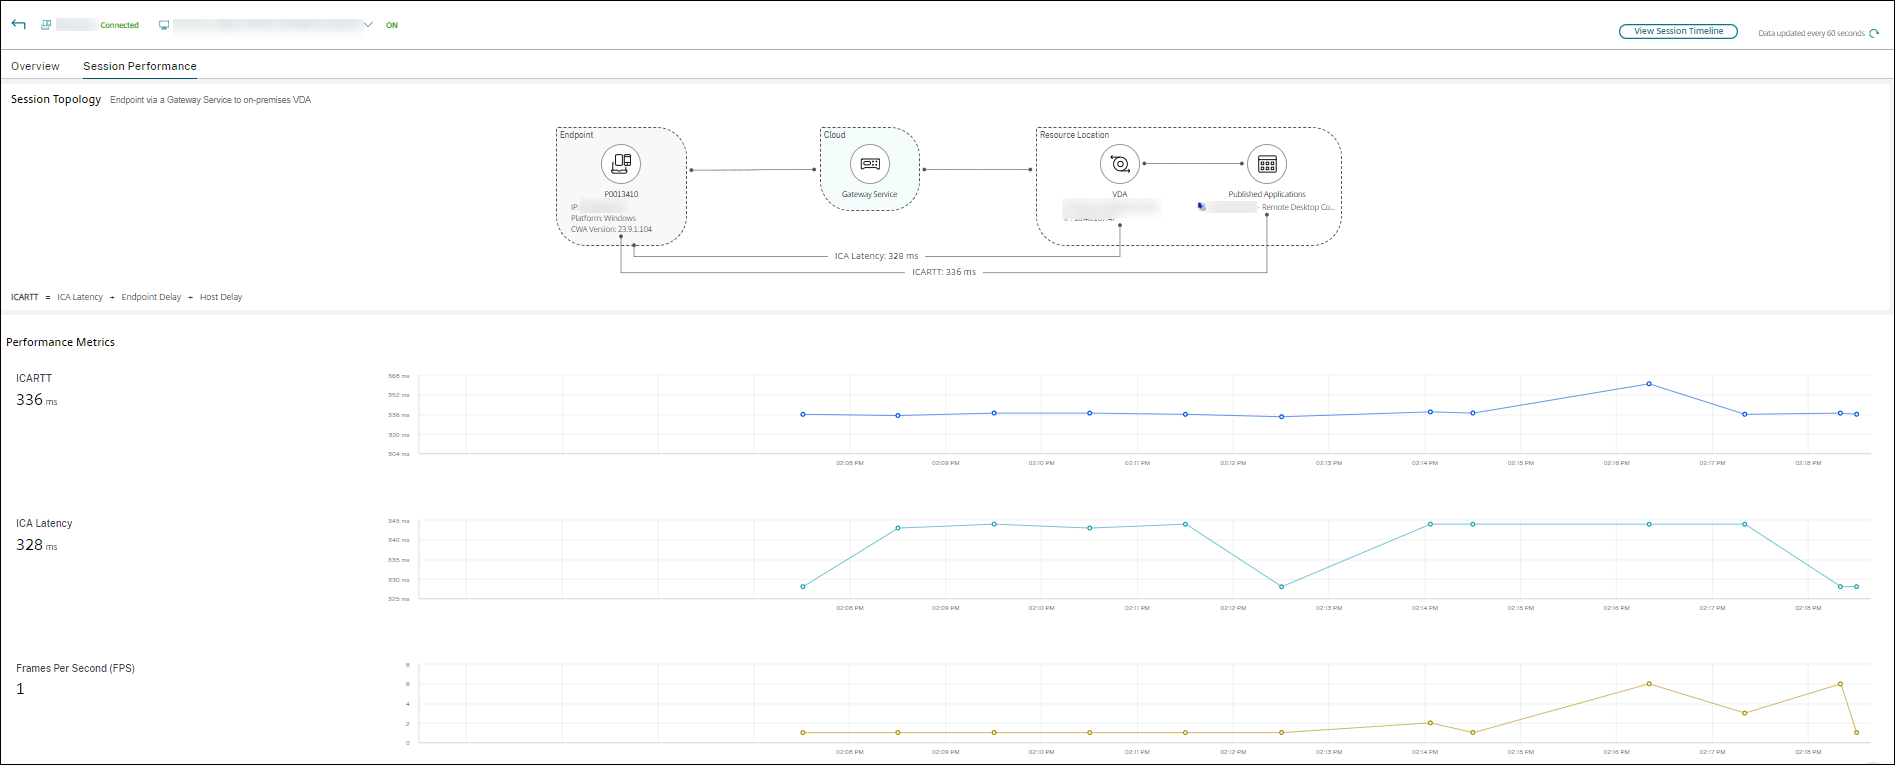
The Session Performance tab shows you trends of some network metrics. Director 2311 ads a Session Topology view. See Diagnose Session Performance issues.
Session Details shows if Teams is optimized or not.
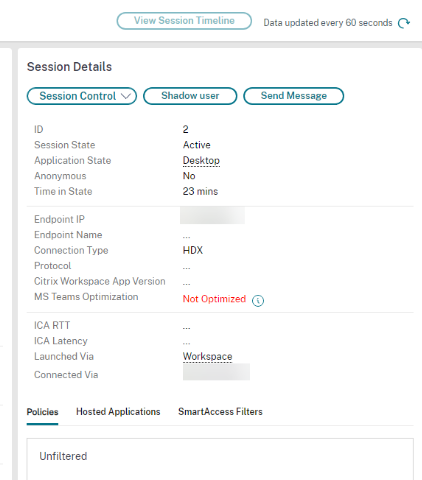
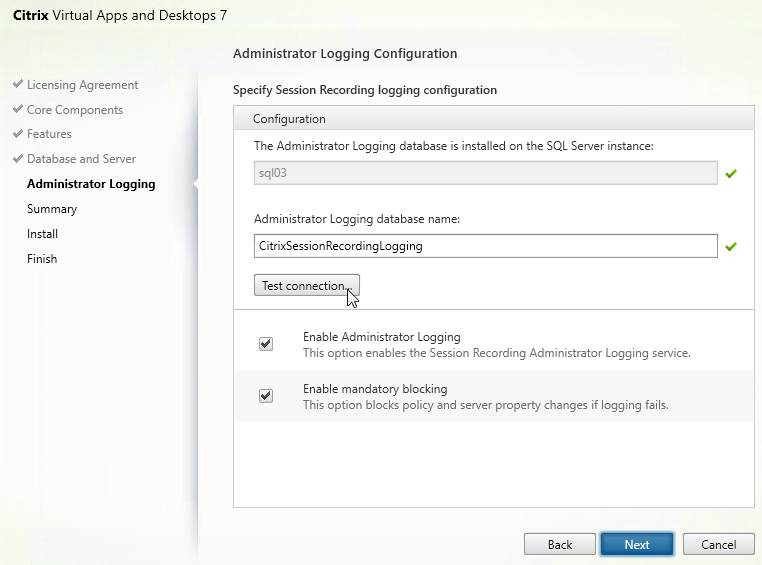
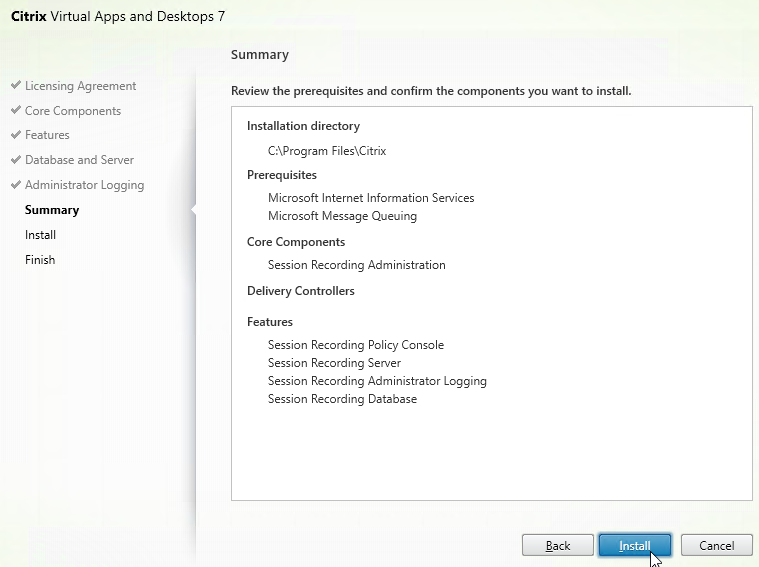
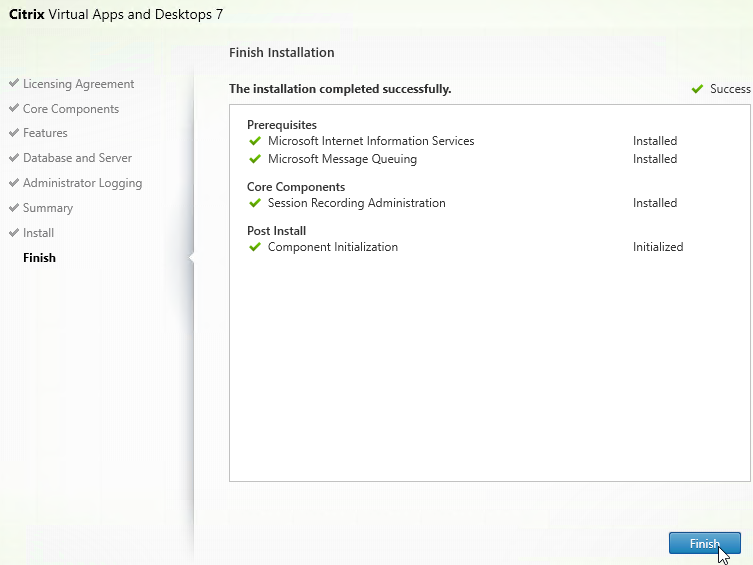
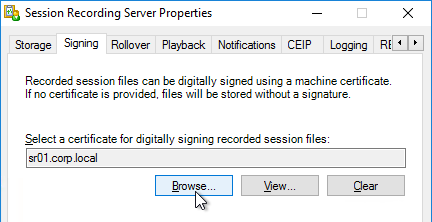
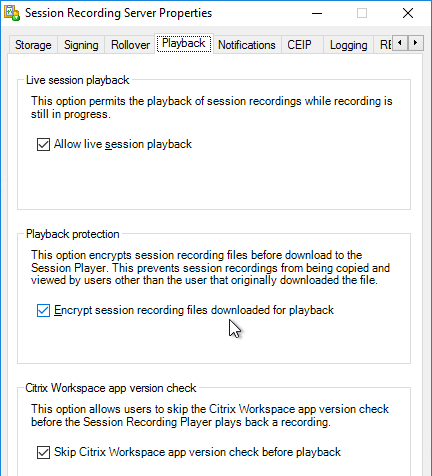
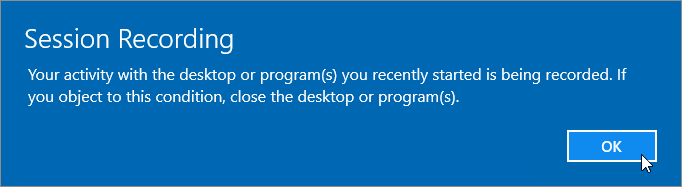
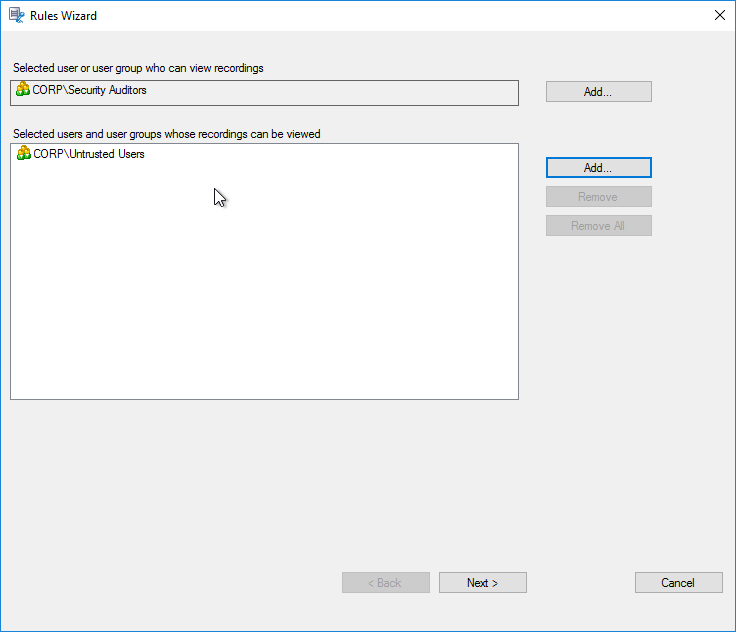
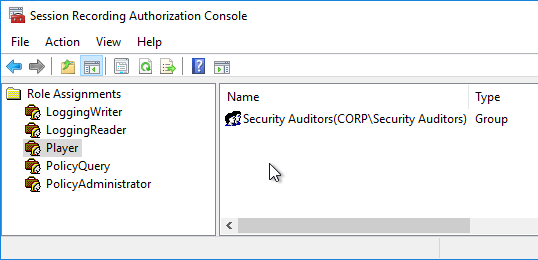
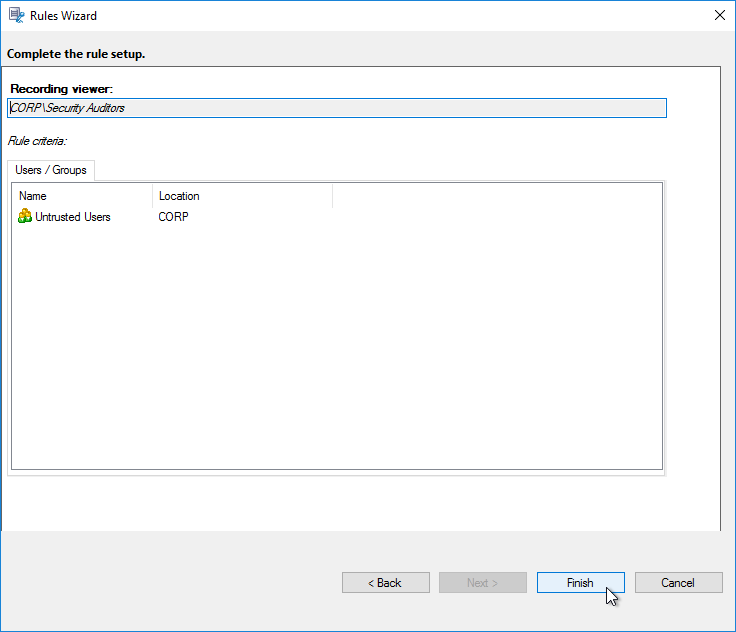
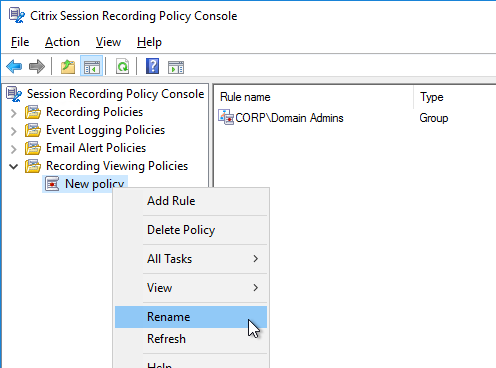
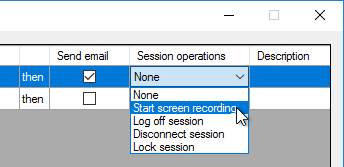
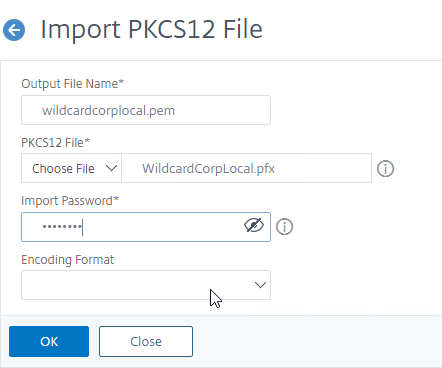
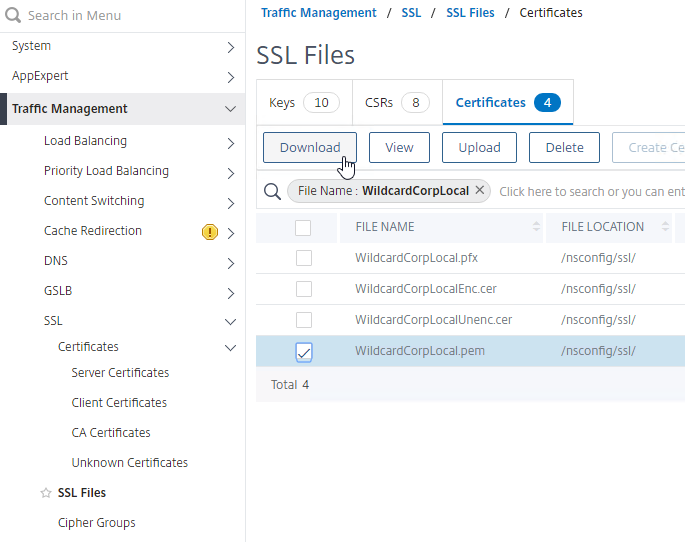
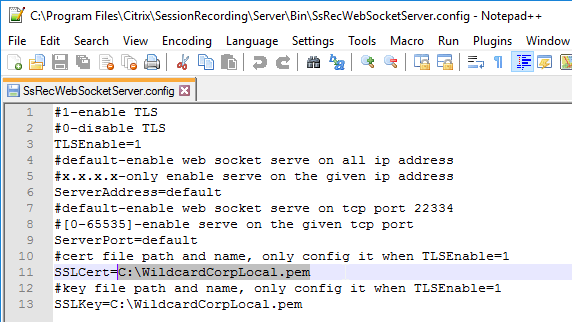
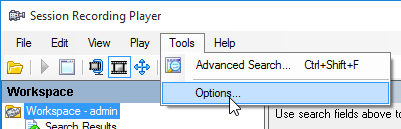
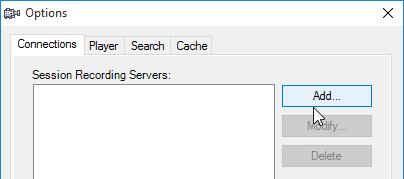
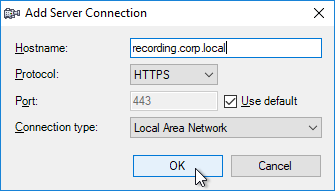
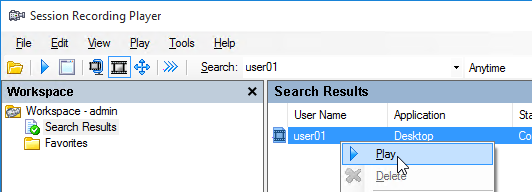
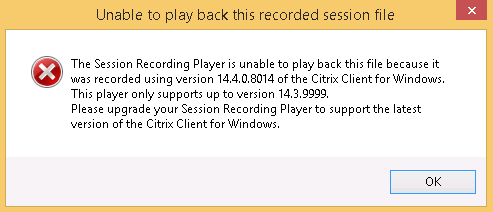
Session Details has an option to enable Session Recording for the session. Dynamic Session Recording requires the Session Recording cloud service. Policy based Session Recording requires running C:\inetpub\wwwroot\Director\tools\DirectorConfig.exe /configsessionrecording on the Director server.
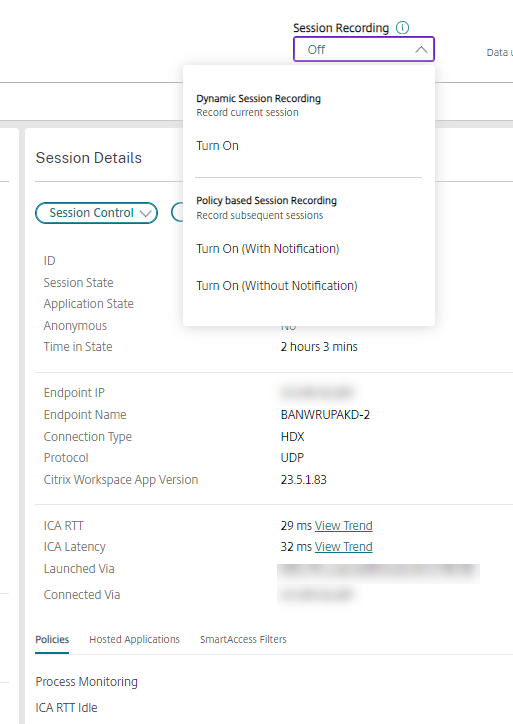
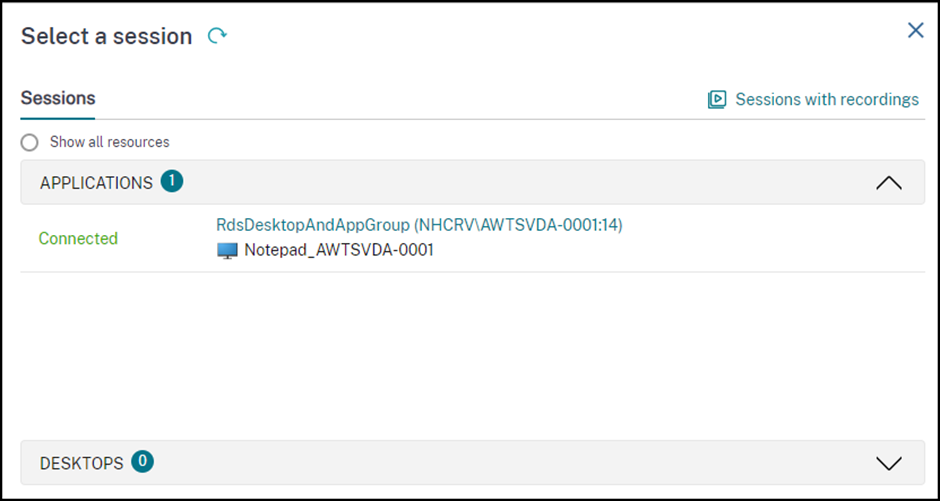
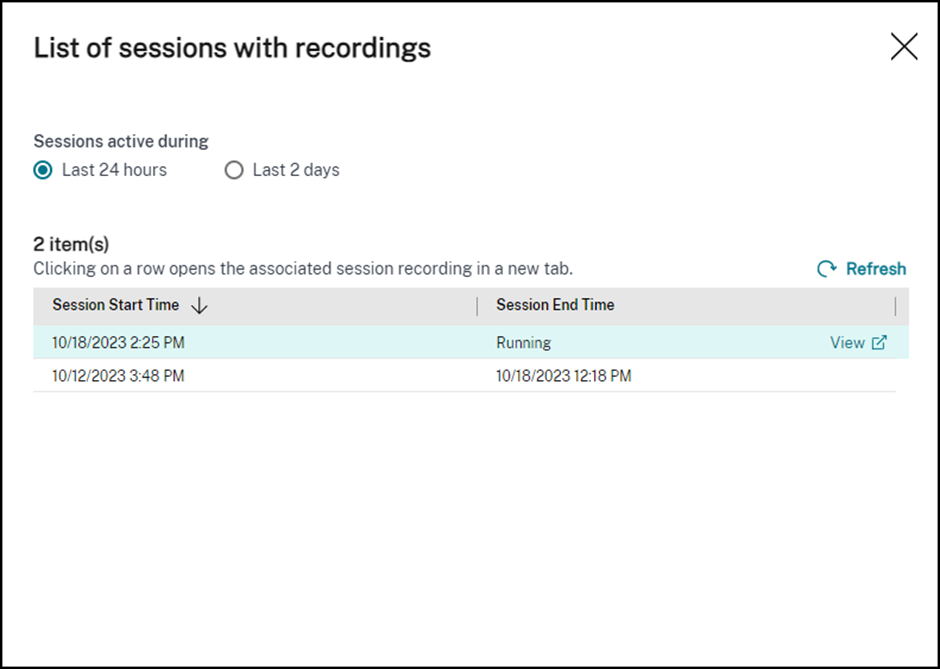
The Session Selector button lets you play recordings.
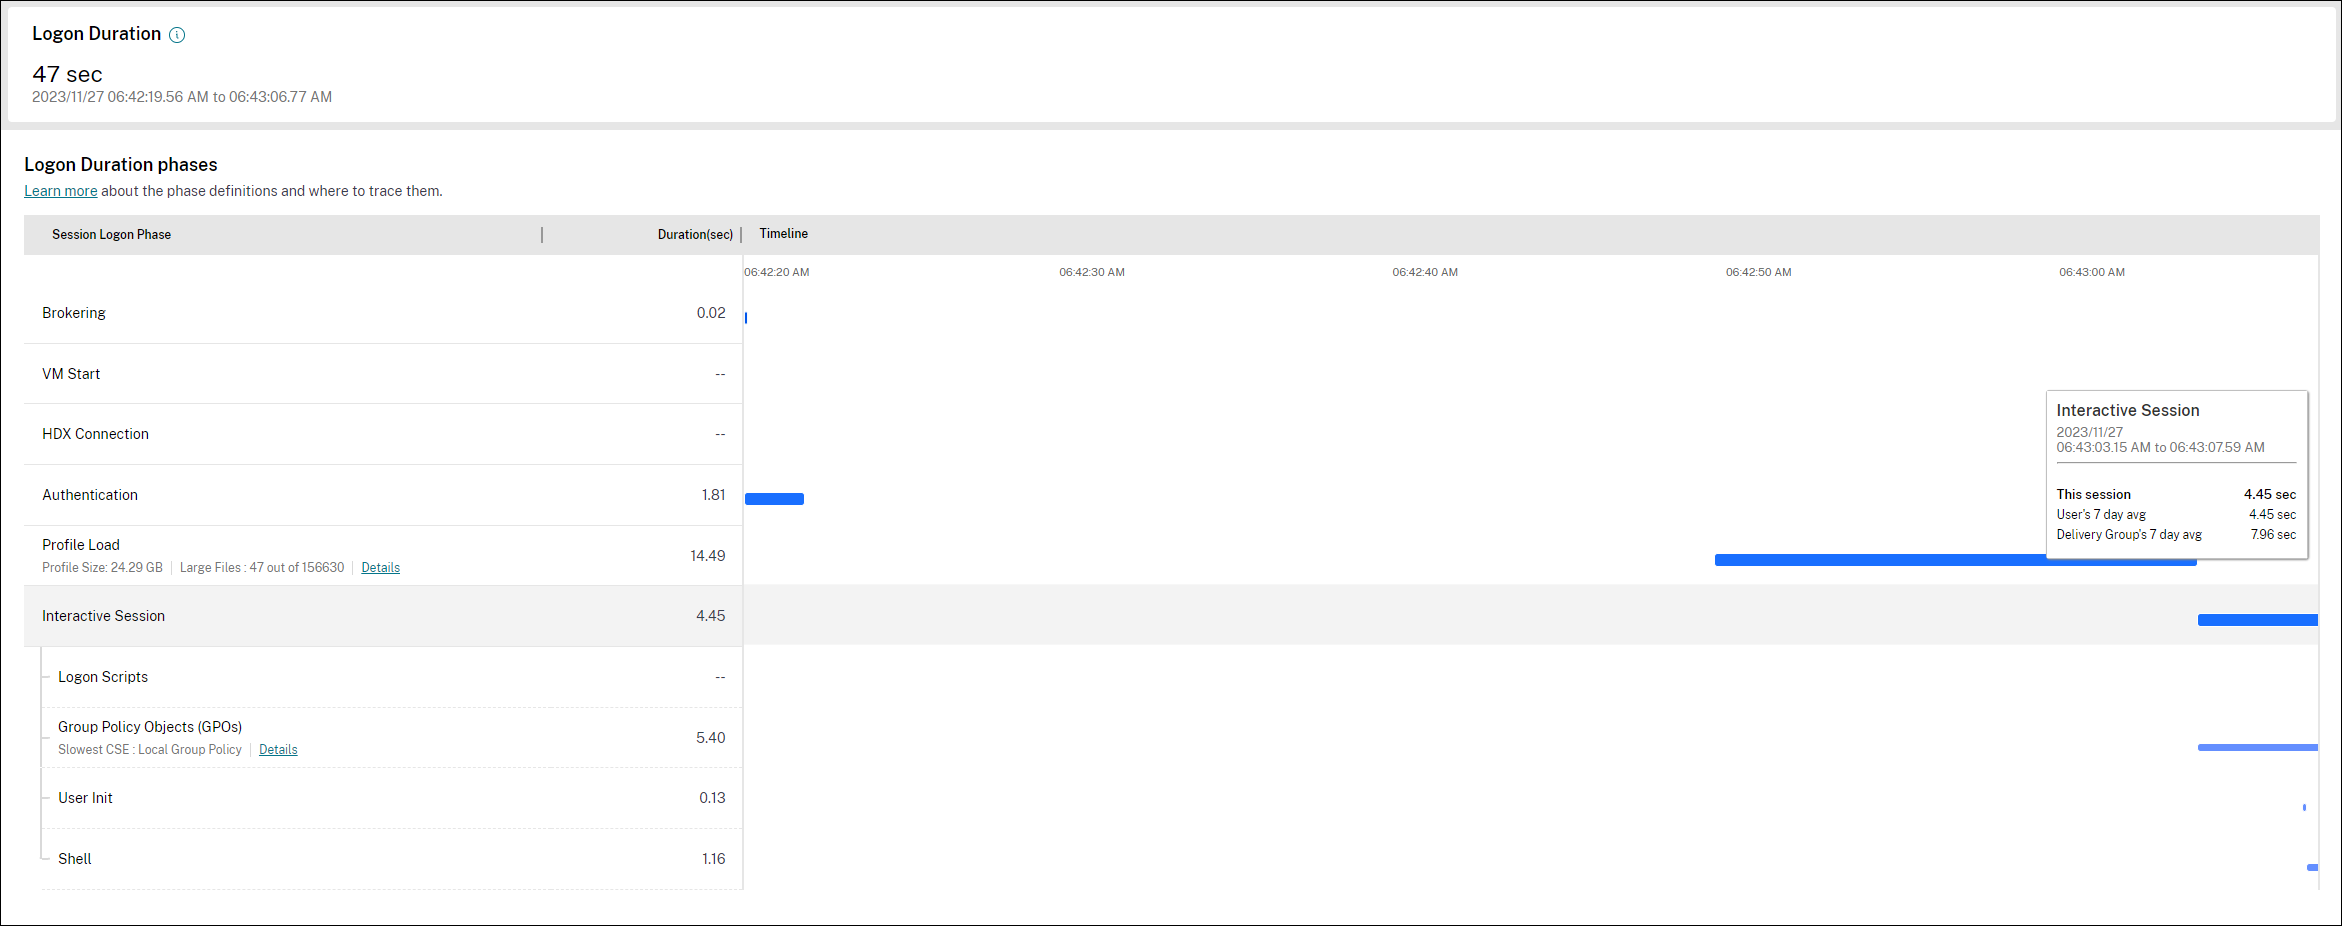
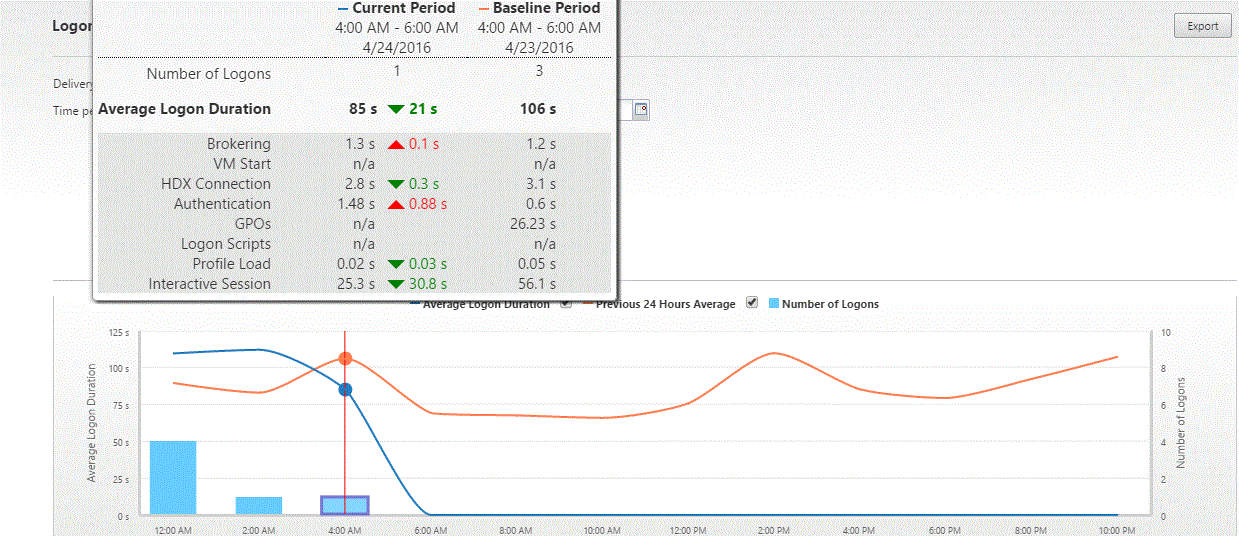
Session Logon tab in the User Details page has an enhanced visualization of the logon duration phases. The new representation shows the overlapping of the individual logon phases.
New features in Director since 7.15:
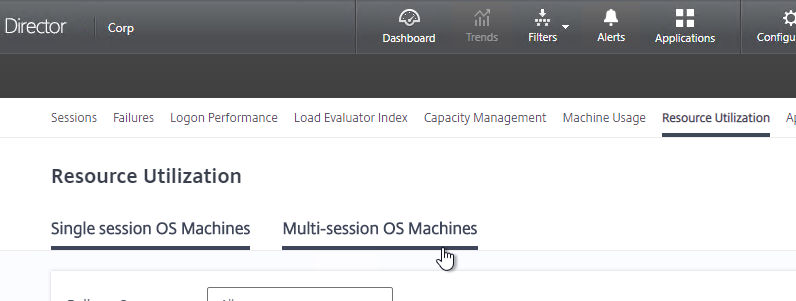
Server OS is renamed to Multi-session OS. Desktop OS is renamed to Single session OS.
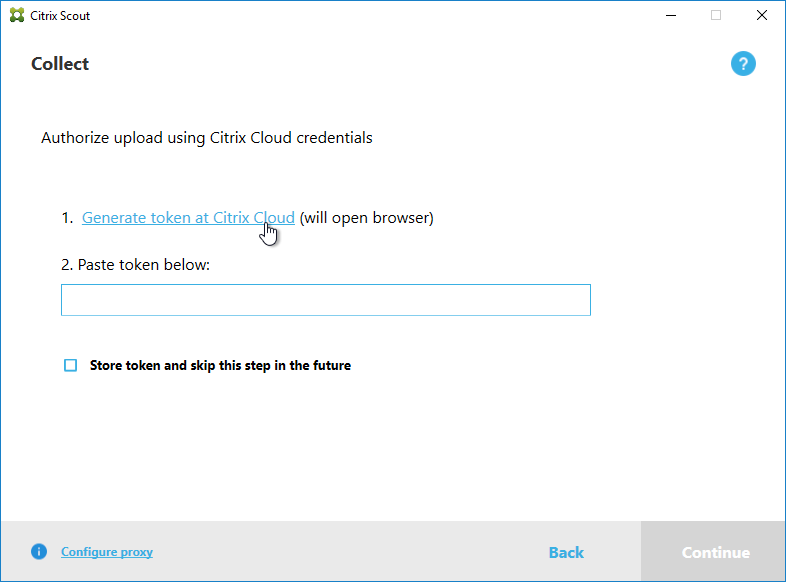
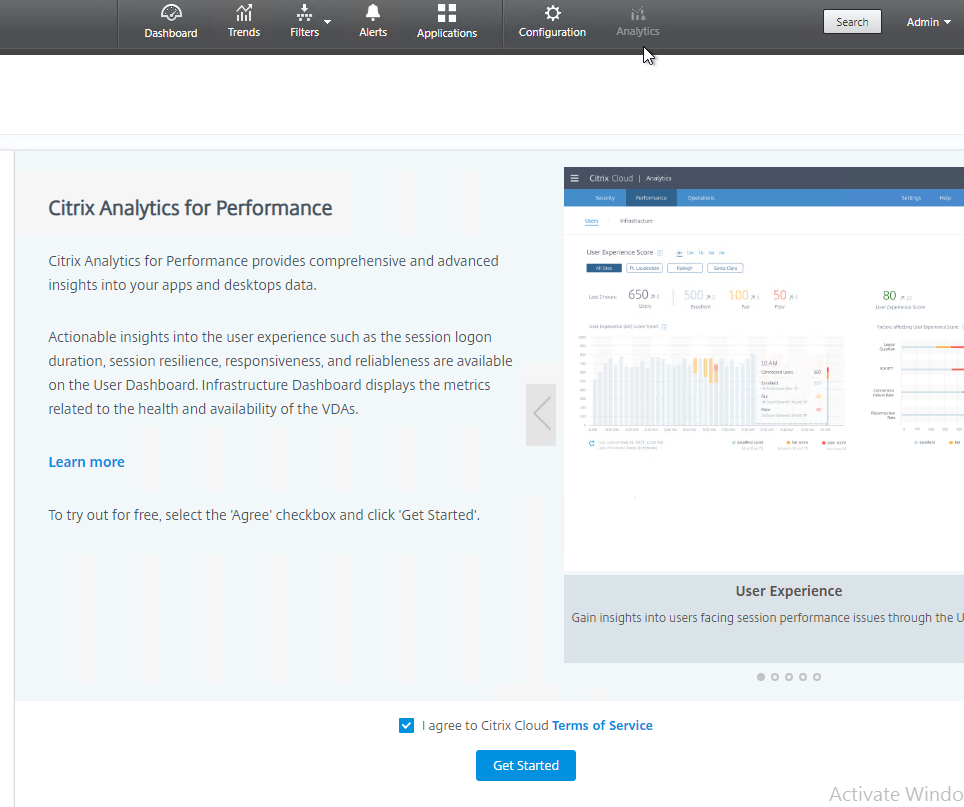
Analytics button lets you upload Director data to Citrix Cloud Performance Analytics. See Configuring on-premises Sites with Citrix Analytics for Performance at Citrix Docs.
The Trends views got a face lift.
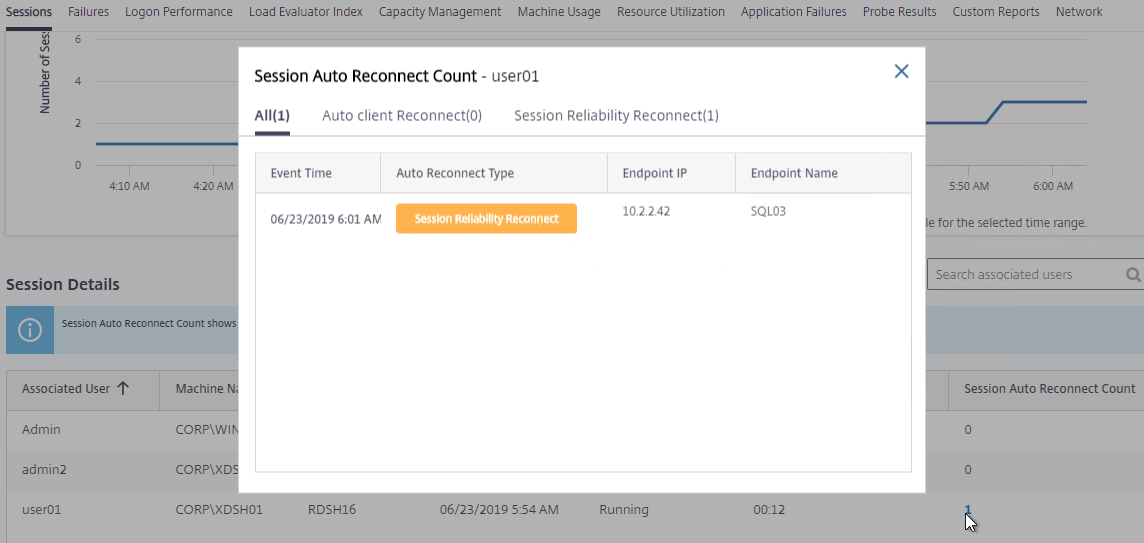
Session Auto Reconnects
- At Trends > Sessions, on the bottom is Session Details. Director also shows you the number of Session Auto Reconnects.
- If you click the number, you’ll see more info on the reconnect. Note: it might take a few minutes for the reconnect status to appear in Director.
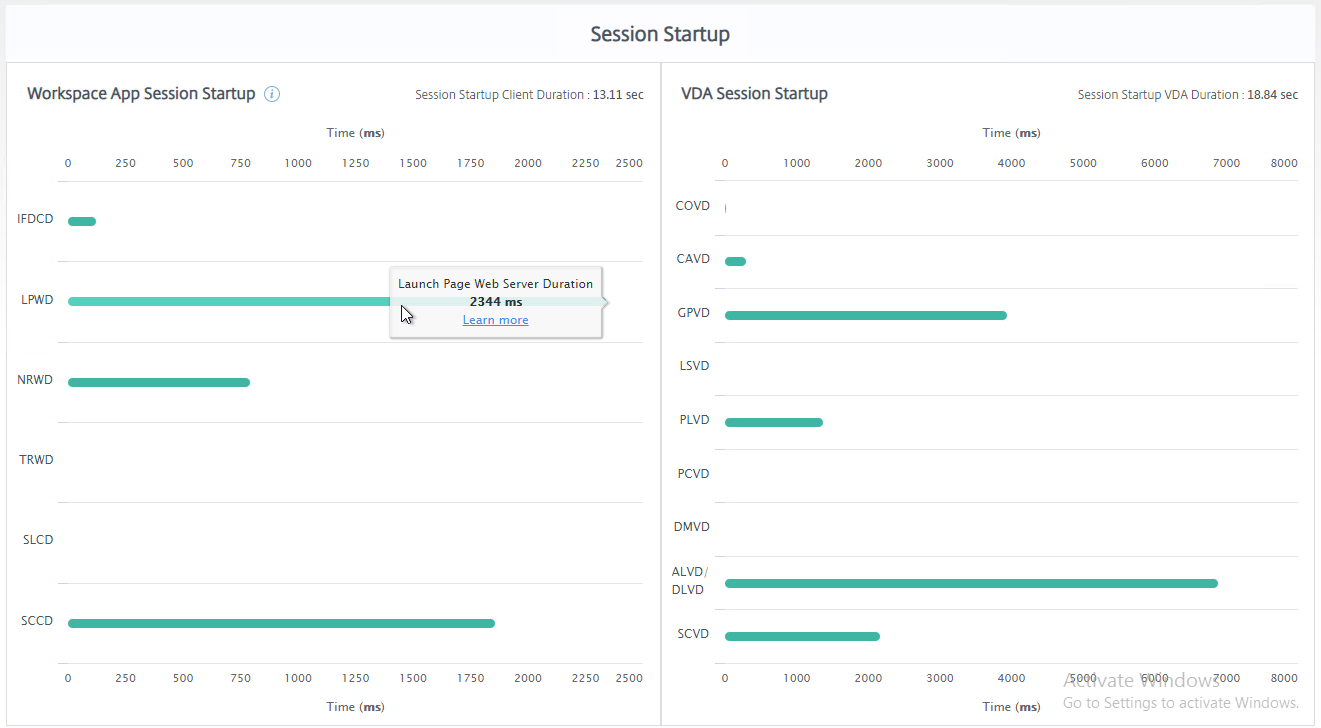
Workspace App Session Startup breakdown
- After searching for a user and selecting a session, click Details on the top right.
- Scroll down and you’ll see the Session Startup section with a new Workspace App Session Startup sub-section.
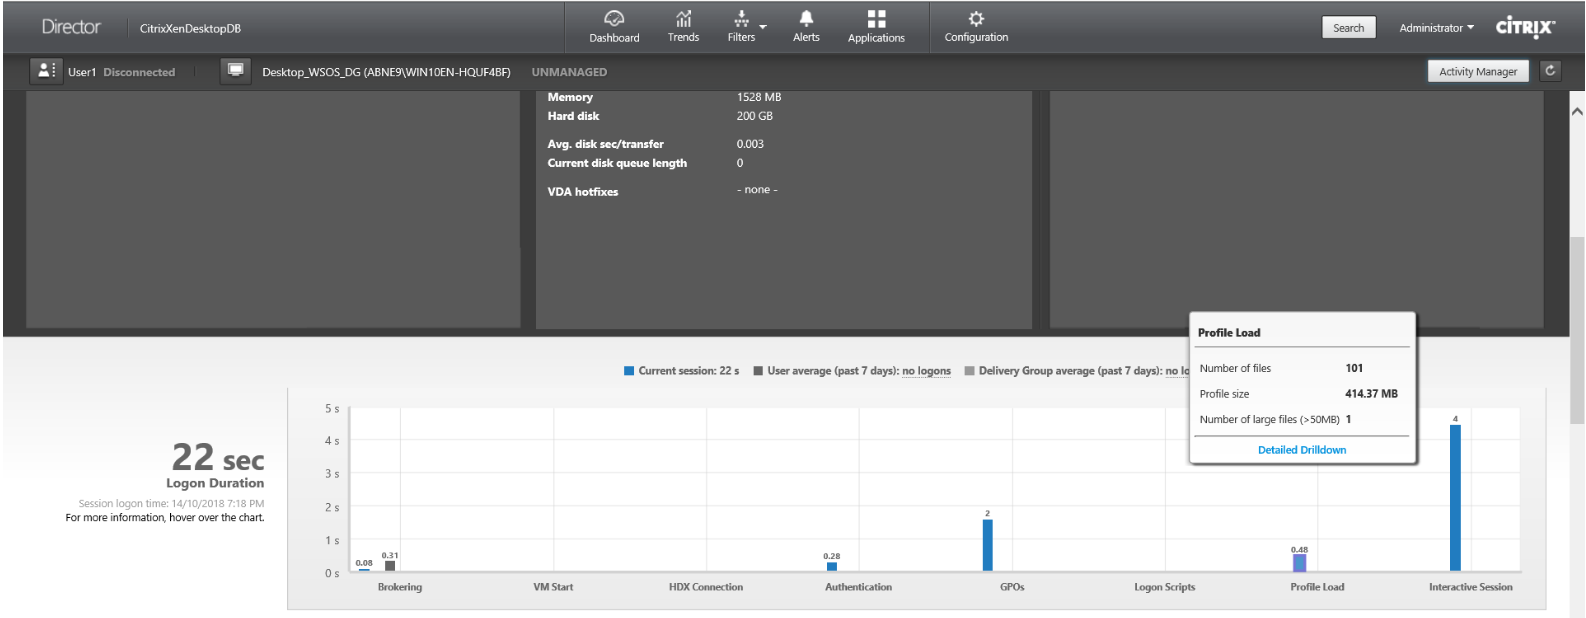
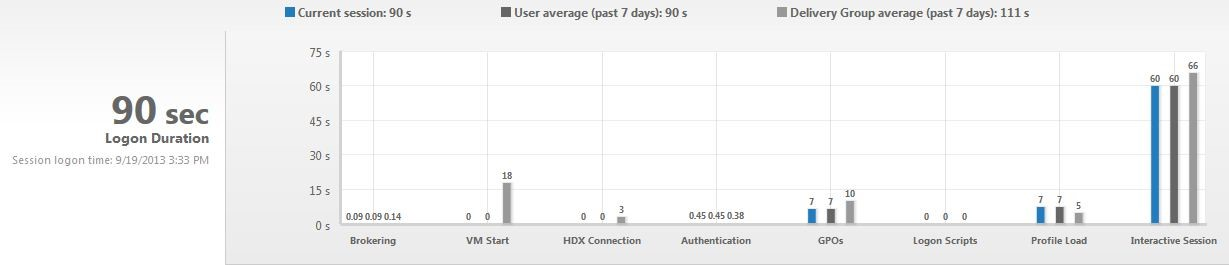
Profile Load Drilldown
- In a Session Details screen, scroll down to the Logon Duration panel. Hover your mouse over the Profile Load bar and then click Detailed Drilldown. You see the size of profile, and the size of the Folders inside the profile.
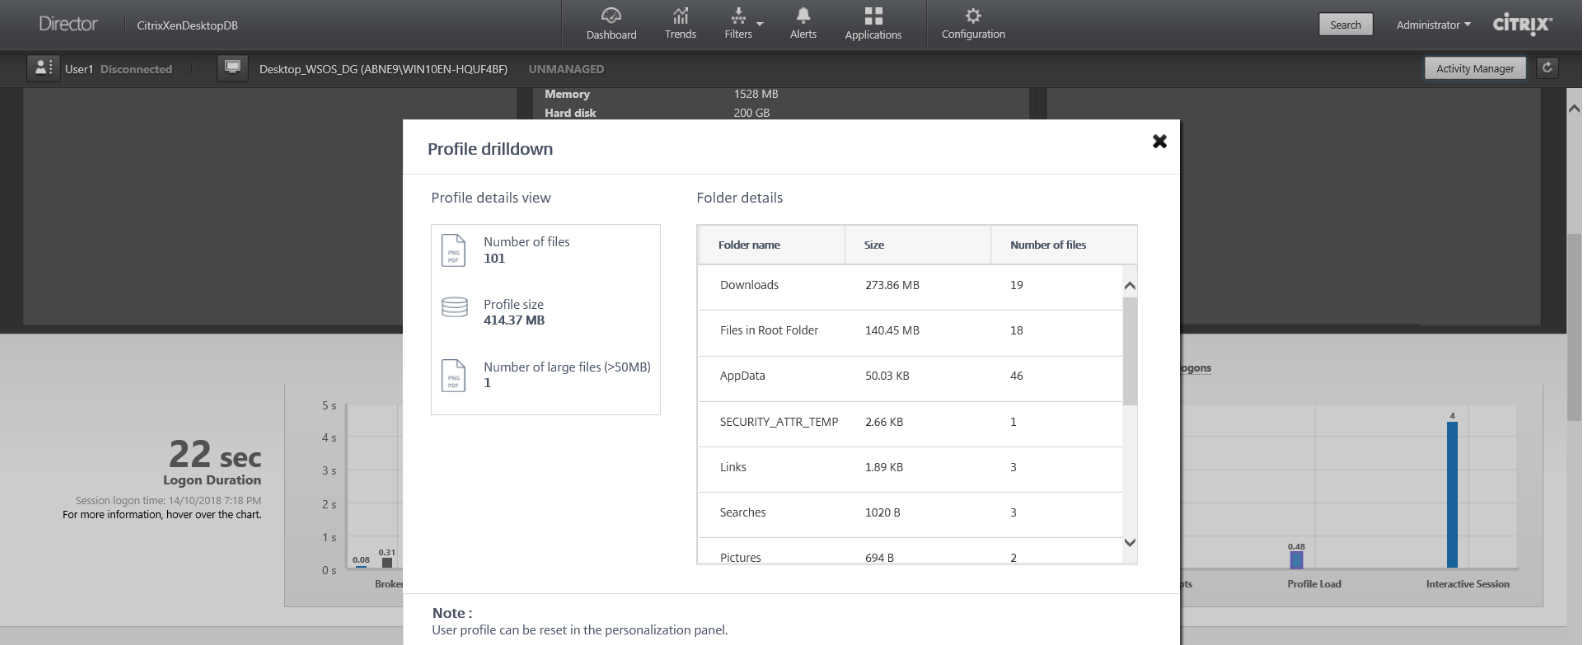
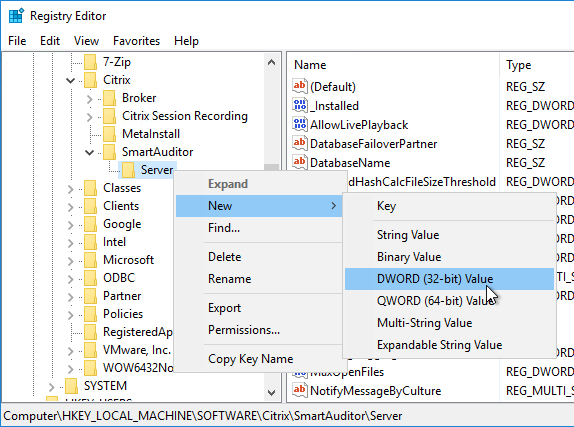
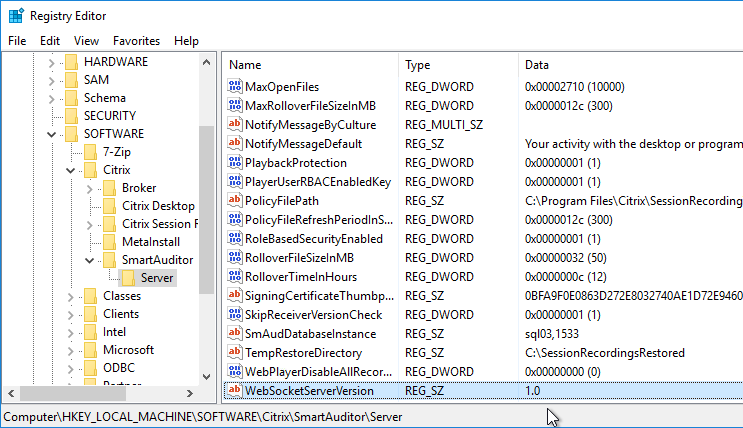
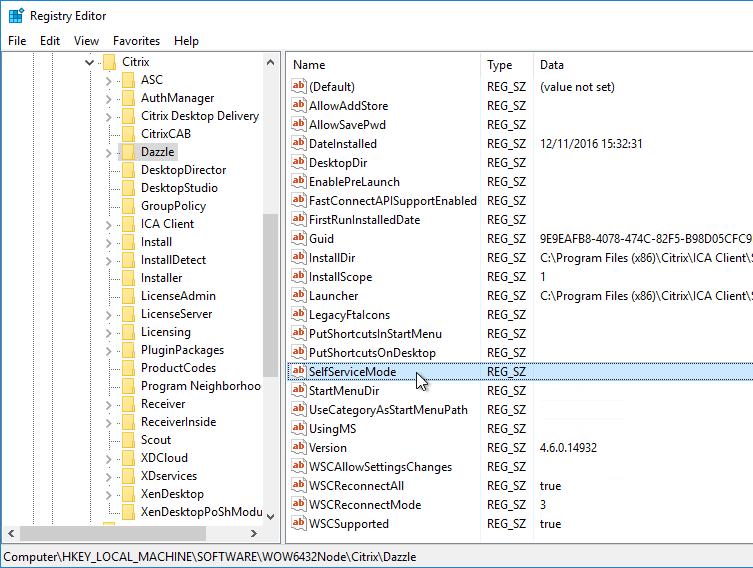
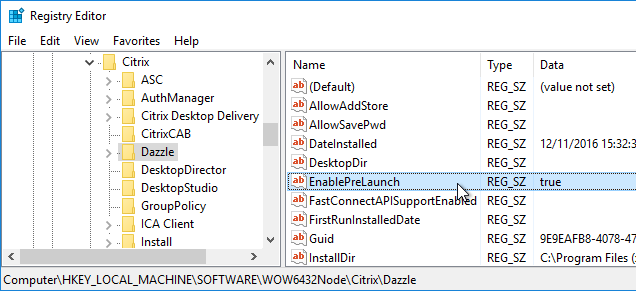
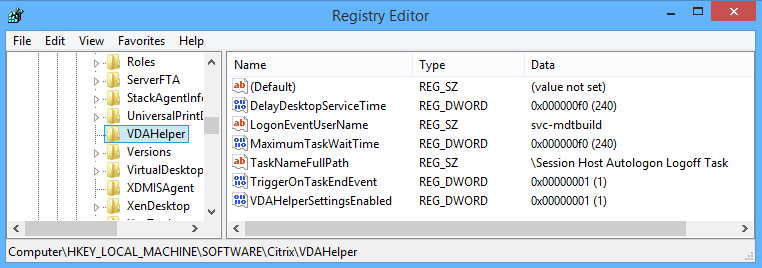
- By default, all folder names are visible. To hide the folder names, add a registry value on the VDA machines:
- Key = HKEY_LOCAL_MACHINE\Software\Citrix\Director\
- DWORD Value ProfileFoldersNameHidden = 1
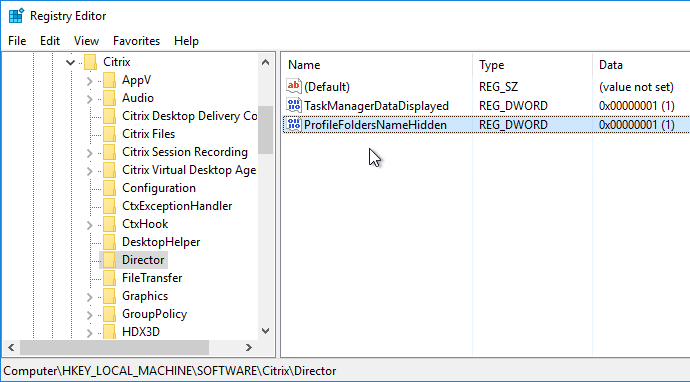
- DWORD Value ProfileFoldersNameHidden = 1
- Key = HKEY_LOCAL_MACHINE\Software\Citrix\Director\
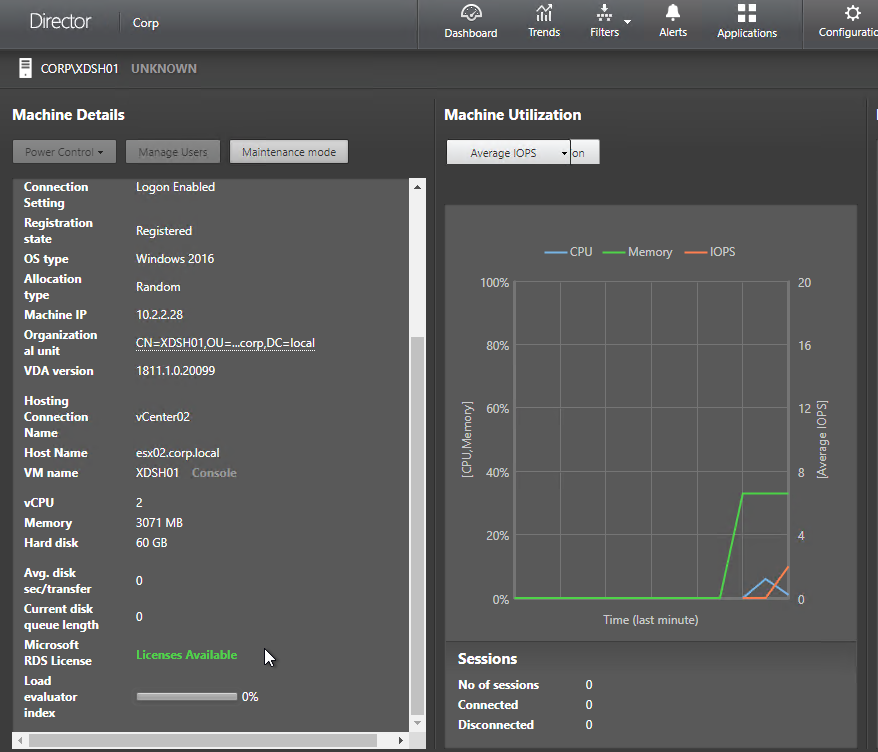
RDS Licensing status
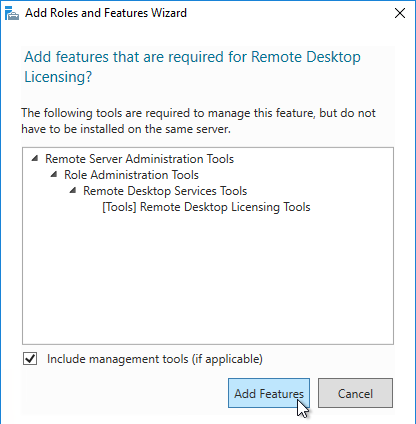
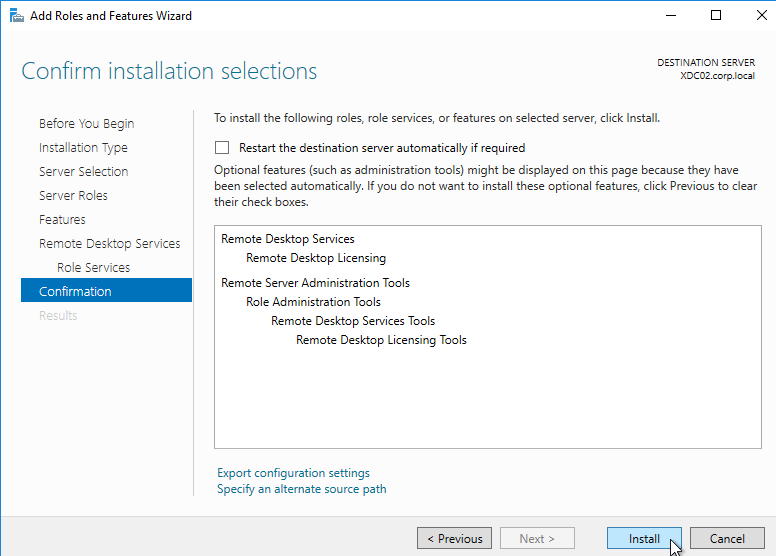
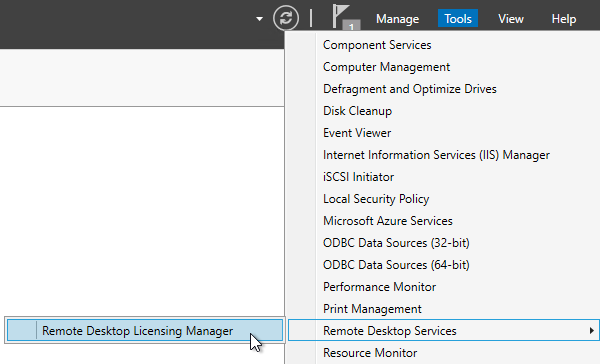
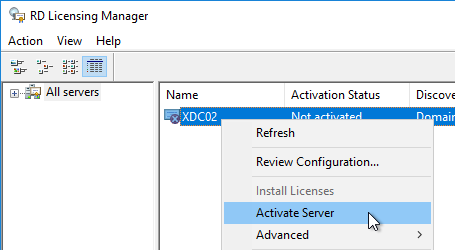
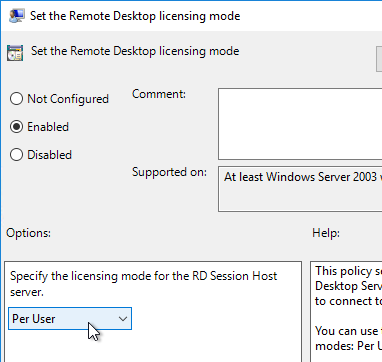
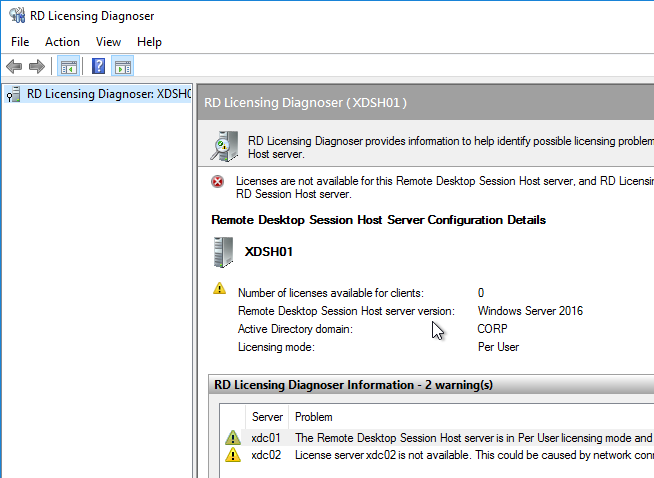
- The Machine Details panel shows the status of RDS Licensing for Multi-session OS (aka Server OS, aka RDSH) VDAs.
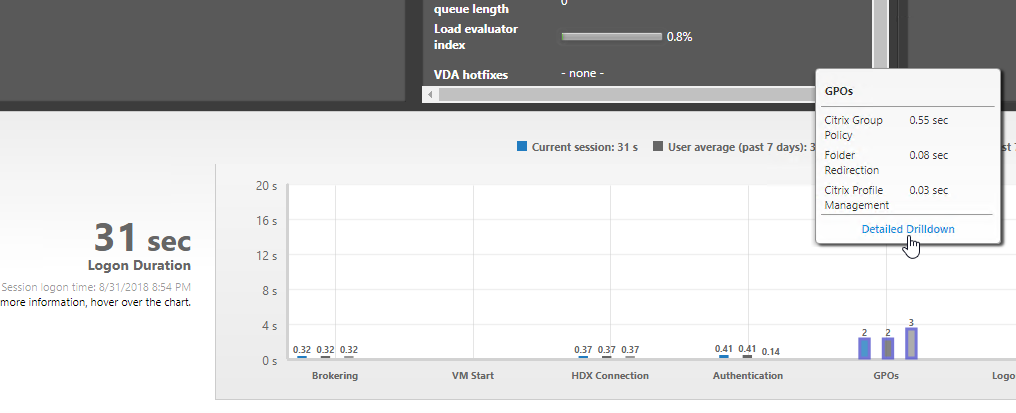
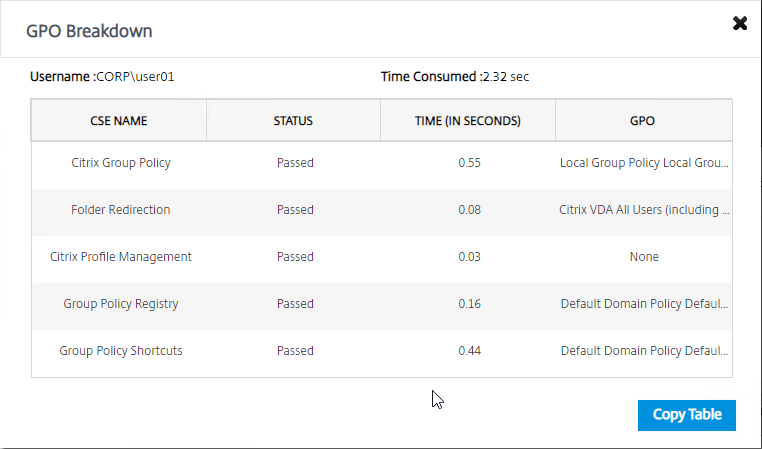
GPO Duration Drilldown
- In a Session Details screen, scroll down to the Logon Duration panel. Hover your mouse over the GPOs bars, and then click Detailed Drilldown. More info at CTX237427 Citrix Director: Group Policy breakdown of Logon Duration. And Dennis Span Enabling logon duration drill-down in Citrix Director.
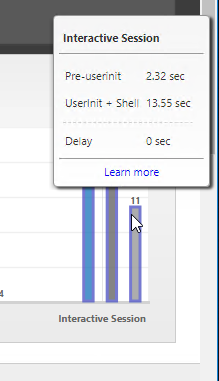
Interactive Session drilldown
- In the Logon Duration panel, hover your mouse over the Interactive Session bars to see this phase broken down. More info at Diagnose user logon issues at Citrix Docs.
Export of Filter Views to CSV file
- Open one of the Filter Views. Then click the Export button in the top right.
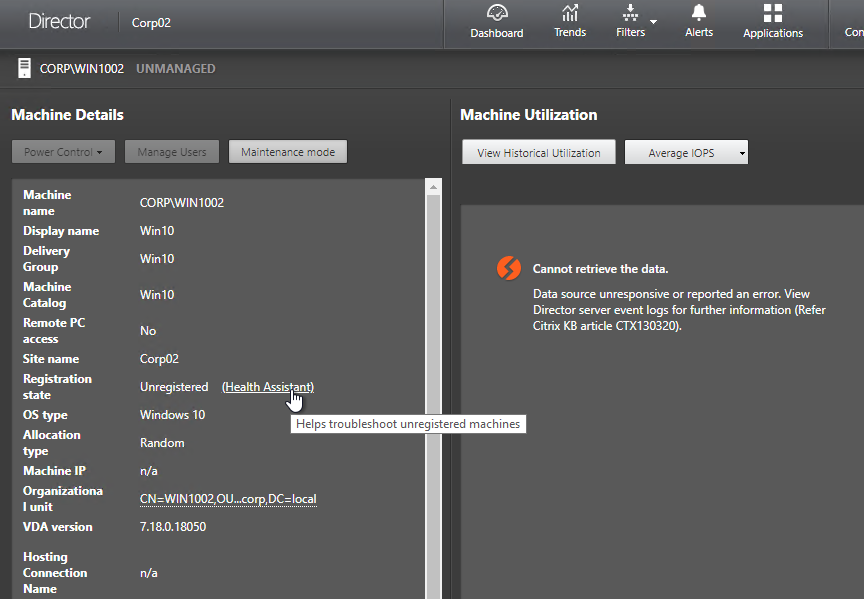
Health Assistant link
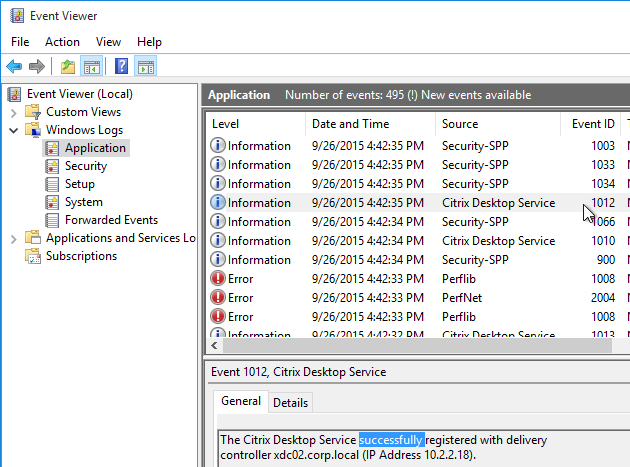
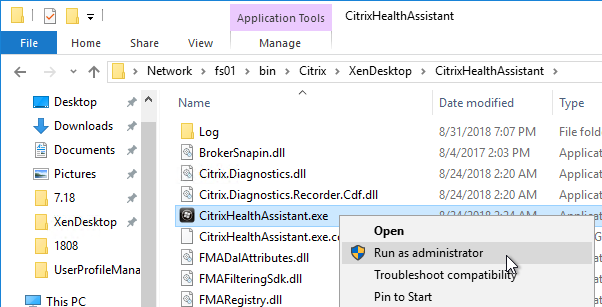
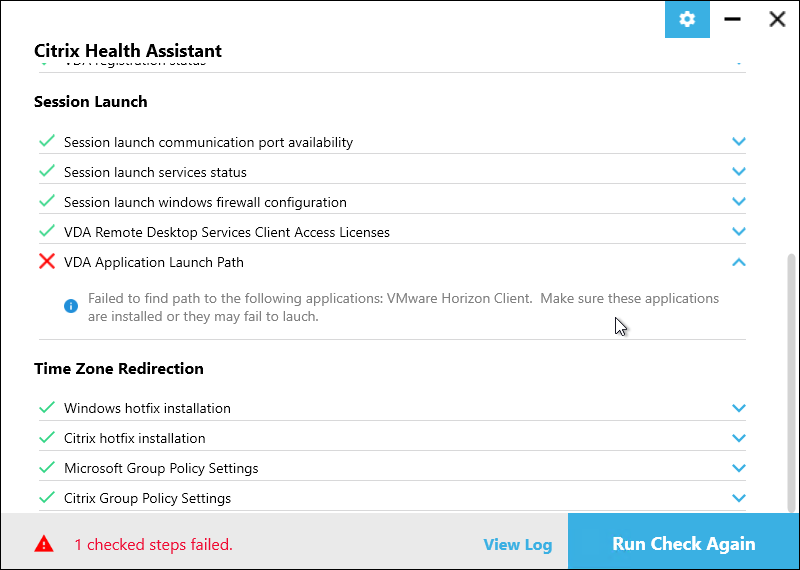
- In Director, you can view the details of a VDA machine (instead of a user session). If the machine is unregistered, then there’s a link to Health Assistant, which opens Troubleshoot machines at Citrix Docs.
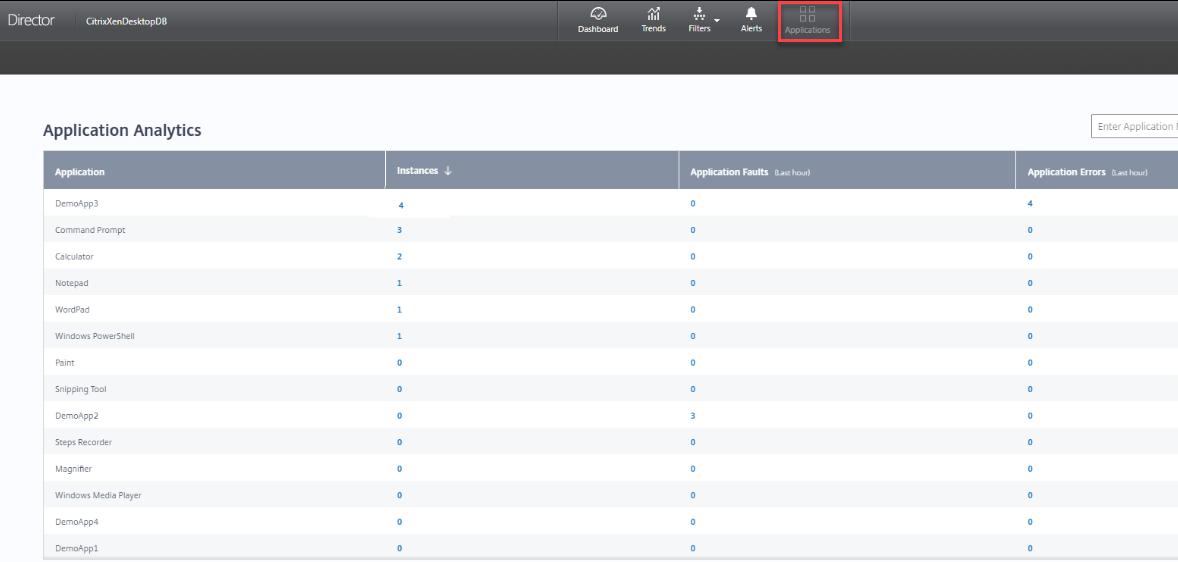
- Displays application-based analytics in a single, consolidated view – application usage, faults, and errors. Also see Citrix Blog Post Application Analytics in Citrix Director.
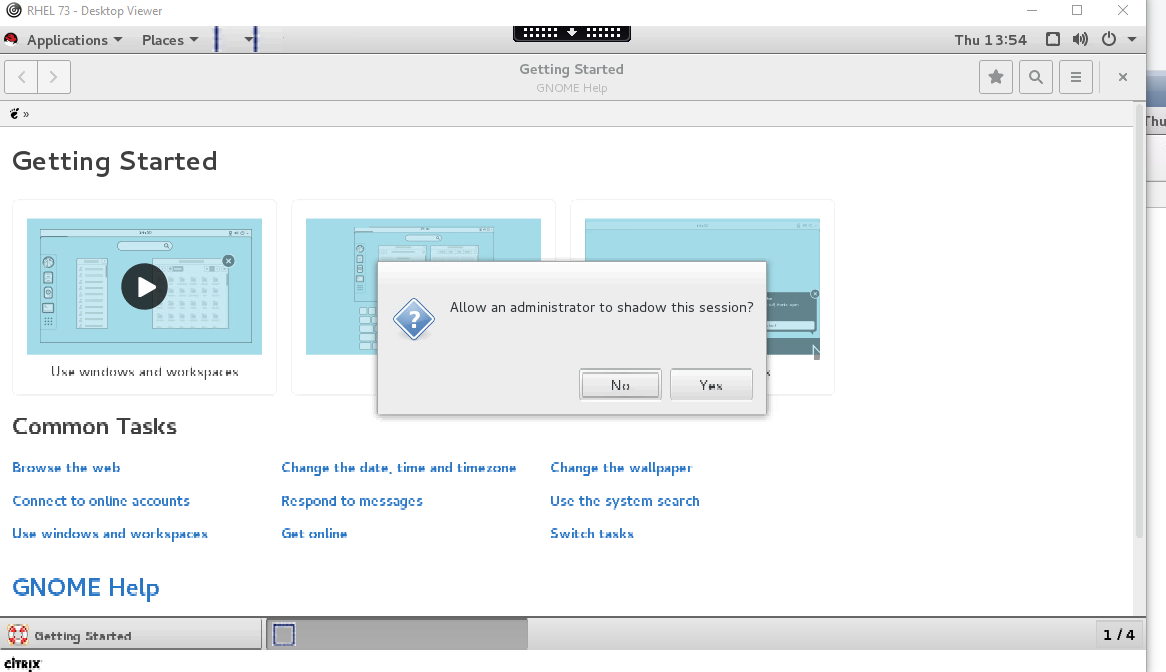
Citrix Blog Post – Citrix Director 7.16 Can Now Shadow Linux App & Desktop
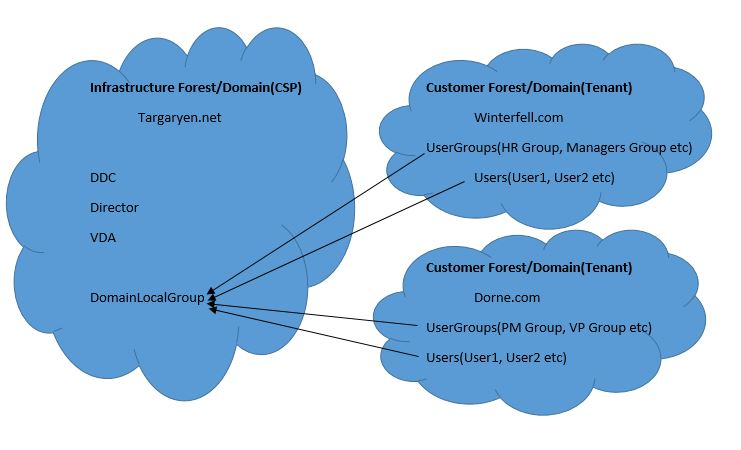
Citrix Blog Post Citrix Director Supports Domain local groups in XenApp & XenDesktop 7.16!
Citrix Monitor Service API 7.16
- The Monitor Service API uses the Open Data (OData) protocol, which is a Web protocol for querying and updating data, built upon Web technologies such as HTTP. You can use the API to:
- Analyze historical trends for future planning
- Perform detailed troubleshooting of connection and machine failures
- Extract information for feeding into other tools and processes; for example, using Microsoft Excel’s PowerPivot tables to display the data in different ways
- Build a custom user interface on top of the data that the API provides
- Run aggregation queries with the OData Version 4 endpoints to get basic grouping and aggregation functionality.
Citrix Hypervisor Console access:
- Troubleshoot machines at Citrix Docs details the new Console access to VDAs running on XenServer (Citrix Hypervisor) 7.3 and newer.
Director Features available in 7.15 and older:
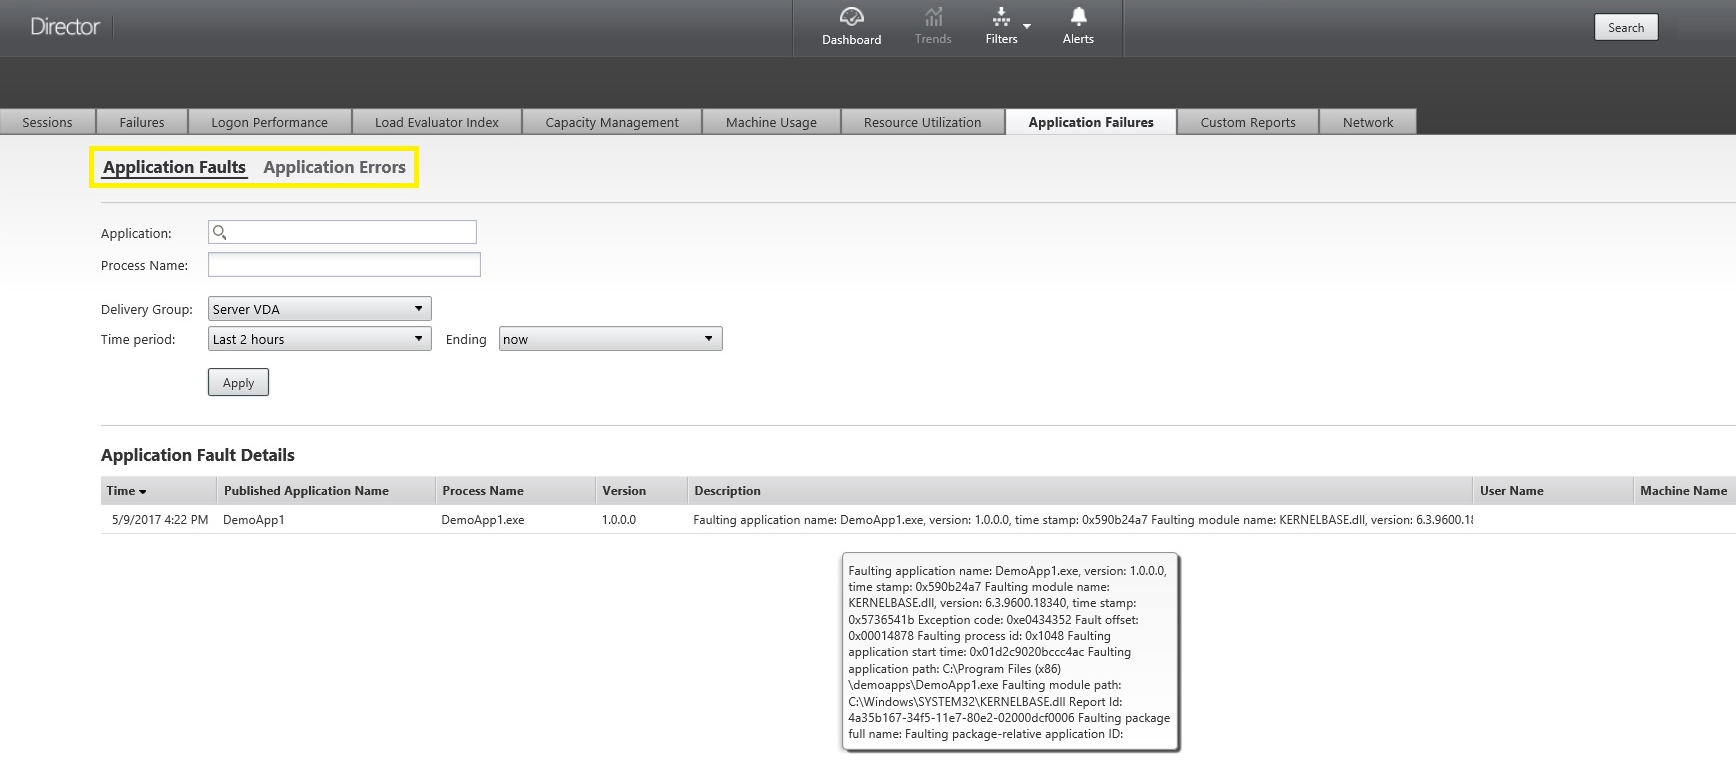
CTX223927 How to use Director to troubleshoot application launch errors. This feature is configured in Citrix Policy Settings located in the Computer half at Virtual Delivery Agent Settings > Monitoring. Also see Citrix Blog Post Application Related Session Failure Reporting in Citrix Director 7.15.
CTX223928 How to use Director to monitor storage performance.
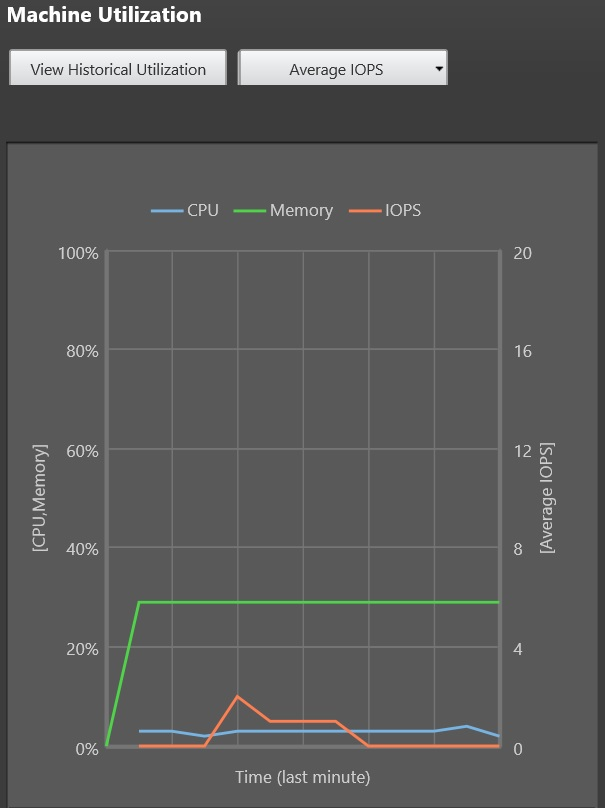
Citrix Blog Post Citrix Director Now Provides Disk Usage Information!:
- IOPS and disk latency data is enabled by default.
- IOPS and disk latency is pushed to the database from each VDA at 1 hour interval.
- Approximately 276 KB of disk space is required to store the CPU, memory, IOPS and disk latency data for one VDA over a period of one year.
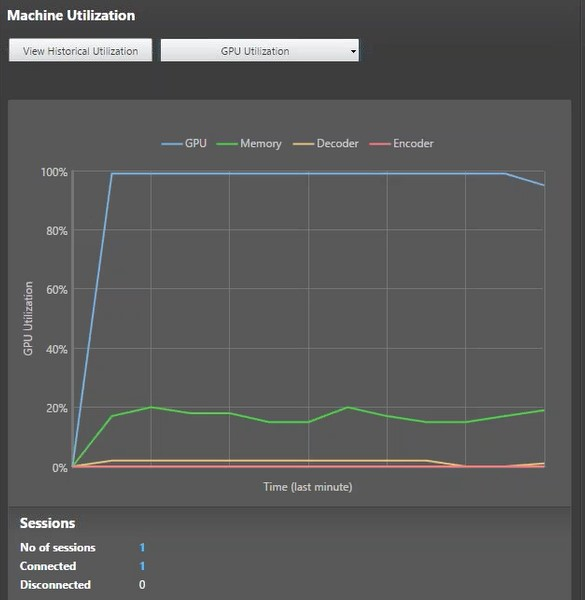
CTX223925 How to use Director to monitor NVIDIA GPU usage.
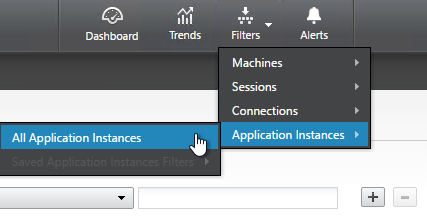
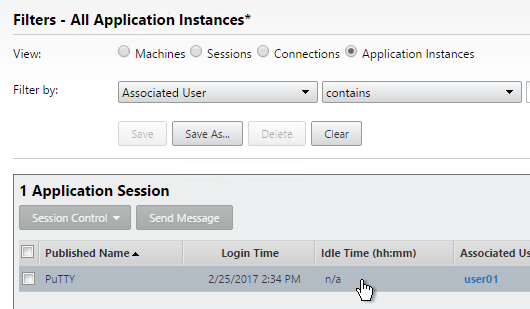
Citrix Director has an Application Instances tab on the Filters page that lets you filter published application sessions based on Session Idle Time (RDS sessions only), Application Name, and all other existing fields, like machine name, and so on. Requires Premium Edition licensing. See Citrix Blog Post Monitoring Idle Applications and Sessions in Citrix Director. See Troubleshoot applications at Citrix Docs.
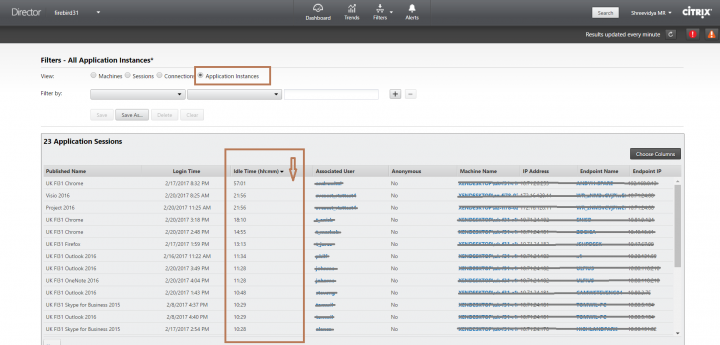
If idle time column shows n/a, then you need to wait 10-15 minutes.
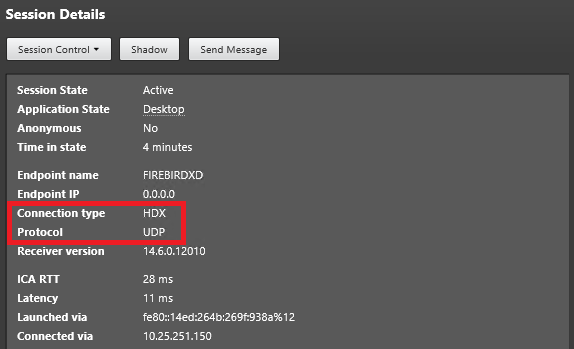
In Director, the Session Details panel can show if Enlightened Data Transport (EDT, aka HDX on UDP) is enabled in the user’s session. See Citrix Blog Post HDX Adaptive Transport Protocol Monitoring via Director.
CTP George Spiers has a comprehensive guide of all Director 7.16 features at http://www.jgspiers.com/citrix-director/.
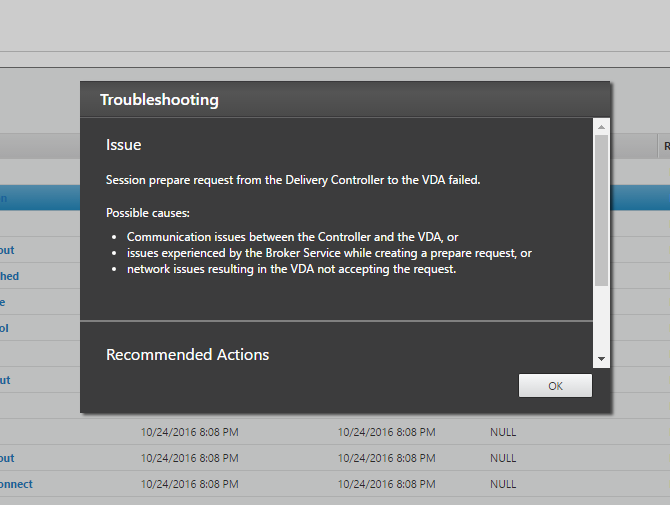
Connection Failure Details, which is detailed in Citrix Blog Post Director 7.12: Easier Troubleshooting of Machine & Connection Failures. Also see CTX223812 Citrix Director Failure Codes.
Process Monitoring, which is detailed in Citrix Blog Post Citrix Director: CPU, Memory Usage and Process Information.
Logon Duration improvements.
Citrix Blog Post Interactive Session of Logon Duration in Citrix Director – Explained: Interactive Session Duration = Desktop Ready Event Timestamp (EventId 1000 on VDA) – User Profile Loaded Event Timestamp (EventId 2 on VDA). More details in the Blog Post.
Citrix Blog Post Director 7.6 Failure Reasons Demystified lists possible failure reasons behind an Unregistered alert, and the true meaning of failure reasons such as Connection Refused and Communication Error. It details each failure reason, defines the meanings of these failures, and lists action items that serve as a starting point for troubleshooting the specific scenario.


 `
`