Citrix Federated Authentication Service (SAML) 2411

Last Modified: Dec 4, 2024 @ 2:28 am

Navigation

This article applies to Federated Authentication Service (FAS) versions 2411, 2402 LTSR CU1, 2203 LTSR CU5, 1912 LTSR CU9, and all other versions 7.9 and newer.

Change Log

Overview

Citrix Federated Authentication Service (FAS) enables users to log in to Citrix Gateway and Citrix StoreFront using SAML authentication.

With SAML, Citrix Gateway and StoreFront do not have access to the user’s password and thus cannot perform single sign-on to the VDA. FAS works around this limitation by using issuing certificates that can be used to logon to the VDA.

  • StoreFront asks Citrix Federated Authentication Service (FAS) to use a Microsoft Certificate Authority to issue Smart Card certificates on behalf of users.
  • The certificates are stored on the FAS server.
  • The VDA requests the user’s certificate from FAS so it can complete the VDA Windows logon process.

FAS can be used for any authentication scenario where the user’s password is not provided.

Requirements:

  • Microsoft Certification Authority (CA) in Enterprise mode.
    • When configuring FAS, you tell it what CA server to use.
    • You can build a new CA server just for FAS.
    • You can install CA on the FAS server.
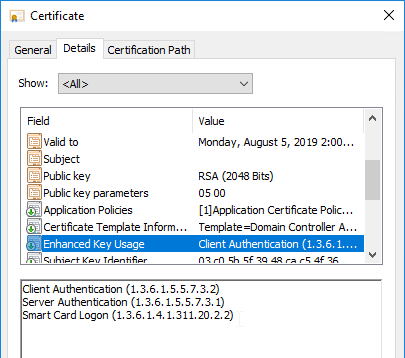
  • Domain Controllers must have Domain Controller certificates. See CTX218941 FAS – Request not supported.
    • The certificates on the Domain Controllers must support smart card authentication. Certificates created using the Microsoft CA certificate template named Domain Controller Authentication supports smart cards. Manually created Domain Controller certificates might not work. See CTX270737 for the Domain Controller certificate requirements.

  • Citrix Virtual Apps and Desktops or XenApp/XenDesktop 7.9 or newer
  • StoreFront 3.6 or newer
  • Citrix Gateway.
    • StoreFront 3.9 and newer also support SAML authentication natively without Citrix ADC.
  • SAML in an nFactor (Authentication Virtual Server) configuration works in both browsers and Workspace app.
  • For multiple domains, see Deployment Guide: Multi-Domain FAS Architecture at Citrix Tech Zone.

Configuration overview:

  1. Build one or more FAS servers.
    • For security reasons, FAS should be its own server and not installed on a Delivery Controller.
  2. Upload Certificate Templates to Active Directory and configure a CA server to issue certificates using the new templates.
    • Enterprise Admin permissions are needed to upload the Certificate Templates.
    • One of the Certificate Templates is for Smart Card logon to Citrix VDA.
    • The other two Certificate Templates are to authorize FAS as a certificate registration authority.
    • The registration authority certificate does not renew automatically so be prepared to renew it manually every two years. See Renew registration authority certificates at Citrix Docs.
  3. Install the Citrix FAS group policy .admx template into PolicyDefinitions.
  4. Create a group policy object (GPO) and configure the GPO with the addresses of the FAS servers.
    • The GPO must apply to FAS servers, StoreFront servers, and every VDA. It does not need to apply to Delivery Controllers, but there’s no harm in applying it to the Delivery Controllers.
  5. Authorize FAS to request certificates from a Microsoft CA server.
  6. Configure FAS Rules to permit StoreFront servers to request FAS to generate certificates for users and permit VDA machines to retrieve the certificates from FAS.
  7. Configure StoreFront to use FAS for VDA single sign-on.

Links:

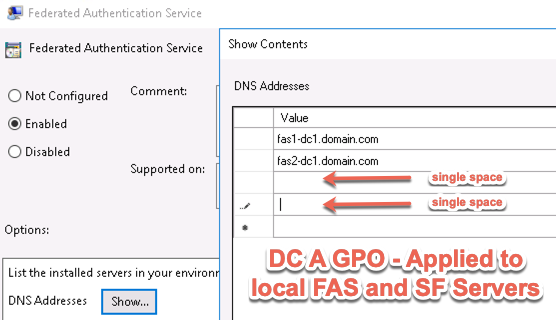
From Citrix CTX225721 Federated Authentication Service High Availability and Scalability: you can build multiple FAS servers. Enter all FAS server FQDNs in the Group Policy. StoreFront will then use a hashing algorithm on the username to select a FAS server.

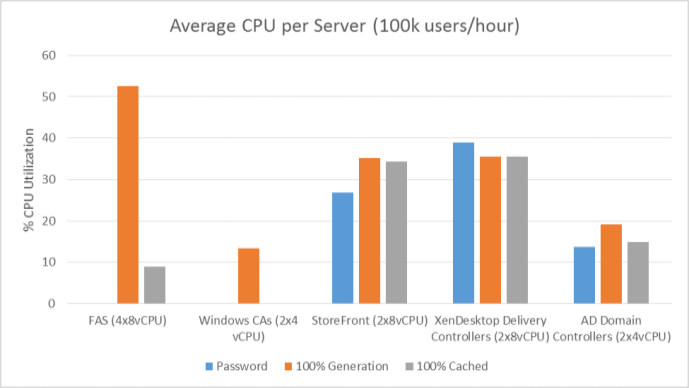
  1. If you have less than 10K users, one FAS server with 4 vCPUs (2.5Ghz) should be sufficient.
  2. You will require a minimum of one FAS server (with 8 vCPUs) per 25,000 users if all users expect to be able to logon under cold start conditions (no keys or certificates cached) within 60-90 minutes.
  3. A single FAS server can handle greater than 50K users under warm start conditions (keys and certificates pre-cached)
  4. One reserve FAS server for every four FAS servers for “Day 1” cold start (Users get new keys/certificates) & disaster recovery scenarios
  5. Split the FAS Certificate Authority from Certificate Authority that performs other tasks for both security and scalability purposes.

Michael Shuster explains the Group Policy configuration for FAS in multiple datacenters at HowTo: Active-Active Multi-Datacenter Citrix FAS.
Also see the Citrix Federated Authentication Service Scalability whitepaper.
Federated Authentication Service Versions

The most recent Federated Authentication Service Current Release is version 2411.

For LTSR versions of Citrix Virtual Apps and Desktops (CVAD) and StoreFront, install the version of FAS that comes with the CVAD LTSR version.

Install/Upgrade Federated Authentication Service

The service should be installed on a secure, standalone server that does not have any other Citrix components installed. The FAS server stores user authentication keys, and thus security is paramount.

  1. On the Federated Authentication Service server, go to the Citrix Virtual Apps and Desktops, or XenDesktop 7.9, or newer ISO, and run AutoSelect.exe. Or you can download the standalone installer and run that.
  2. In the lower half of the window, click Federated Authentication Service.
  3. In the Licensing Agreement page, select I have read, understand, and accept the terms of the license agreement, and click Next.
  4. In the Core Components page, click Next.
  5. In the Firewall page, click Next.
  6. In the Summary page, click Install.
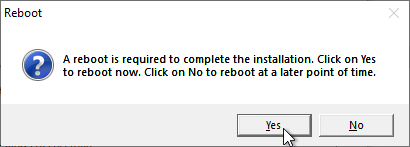
  7. The installer will probably ask for a restart.

    1. After the reboot, and after logging in again, you might see a Locate ‘Citrix Virtual Apps and Desktops 7’ installation media window. Don’t click anything yet.
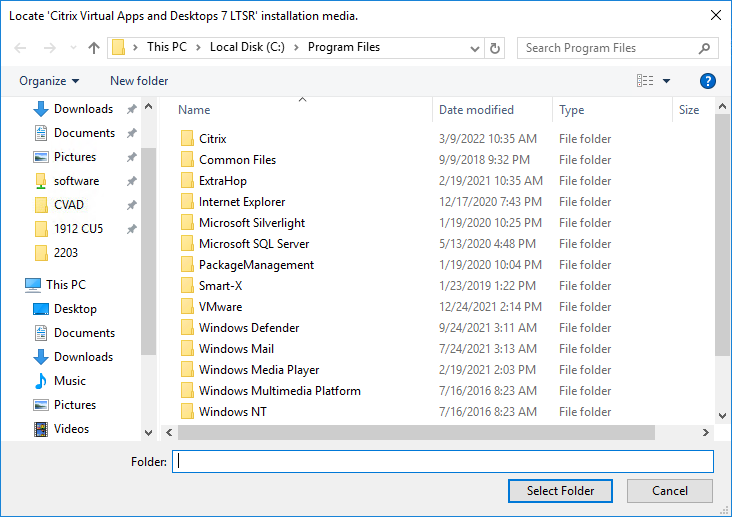
    2. Go to the Citrix_Virtual_Apps_and_Desktops_7_2411.iso file and mount it.
    3. Go back to the Locate ‘Citrix Virtual Apps and Desktops 7’ installation media window.
    4. On the left, expand This PC, and click the DVD Drive.
    5. Click Select Folder.
  8. Click Finish.

FAS Group Policy

Configure a Group Policy that instructs StoreFront servers and VDAs on how to locate the FAS servers.

  1. On the Federated Authentication Service server, browse to C:\Program Files\Citrix\Federated Authentication Service\PolicyDefinitions. Copy the files and folder.
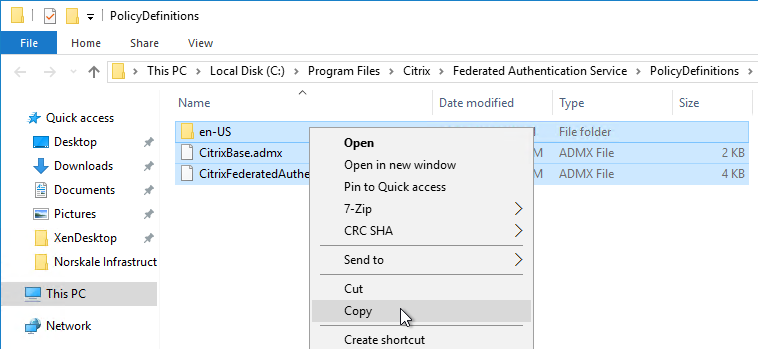
  2. Go to \\domain.com\SYSVOL\domain.com\Policies\PolicyDefinitions and paste the files and folder. If PolicyDefinitions doesn’t exist in SYSVOL, then copy them to C:\Windows\PolicyDefinitions instead.
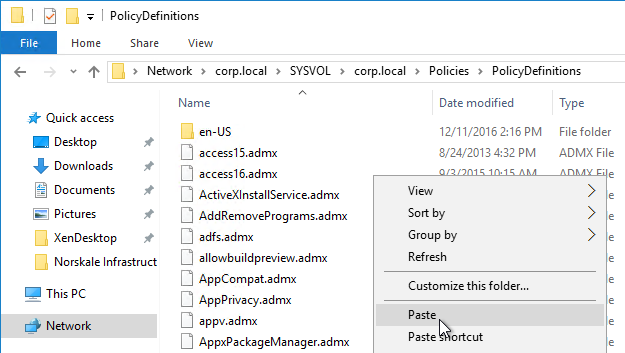
  3. Edit a GPO that applies to all StoreFront servers, all Federated Authentication Service servers, and all VDAs.
  4. Navigate to Computer Configuration > Policies > Administrative Templates > Citrix Components > Authentication.
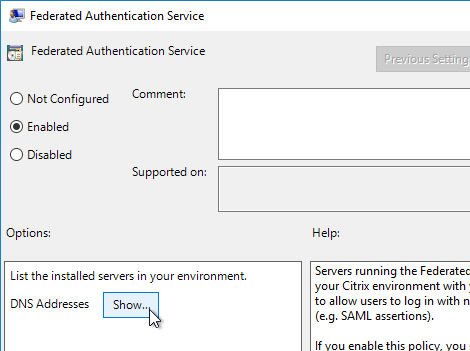
  5. Edit the setting Federated Authentication Service.
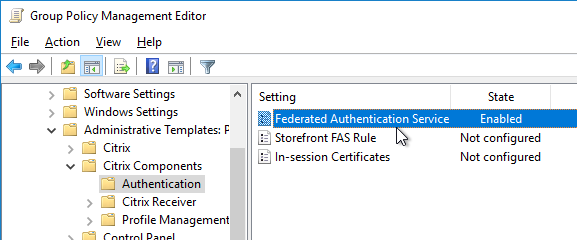
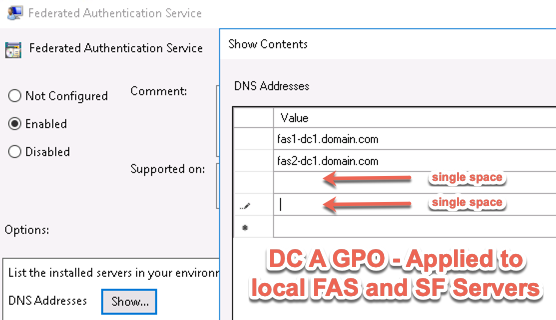
  6. Enable the setting and click Show.
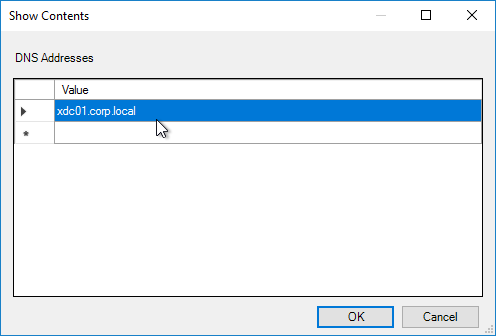
  7. Enter the FQDN of the Federated Authentication Service server. You can add more than one Federated Authentication Service server.
  8. Click OK twice.
  9. On the Federated Authentication Service server, and VDAs, run gpupdate.
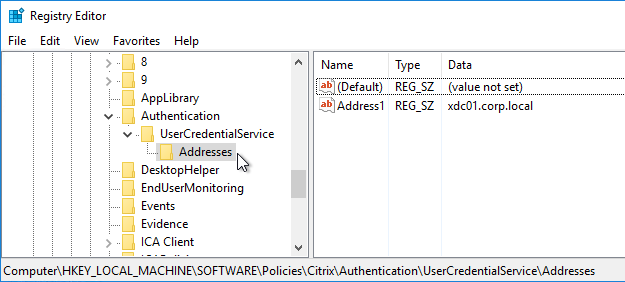
  10. On the FAS server, and on VDAs, look in the registry at HKLM\Software\Policies\Citrix\Authentication\UserCredentialService\Addresses. Make sure this key and value exists. The number one cause why FAS doesn’t work is because this key is missing from VDAs. The FAS Address GPO must apply to VDAs too.
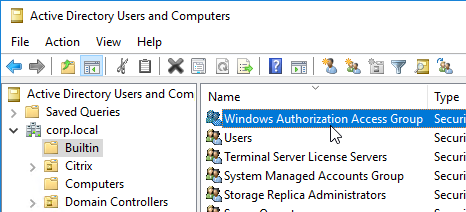
  11. If the VDAs and Users are in different domains, see CTX220497 Users from one AD Domain not able to get FAS user certificates from another trusted domain: add the Citrix StoreFront Servers, FAS server and VDA servers to the Windows Authorization Access Group in the users’ domain. Also see Deployment Guide: Multi-Domain FAS Architecture at Citrix Tech Zone.
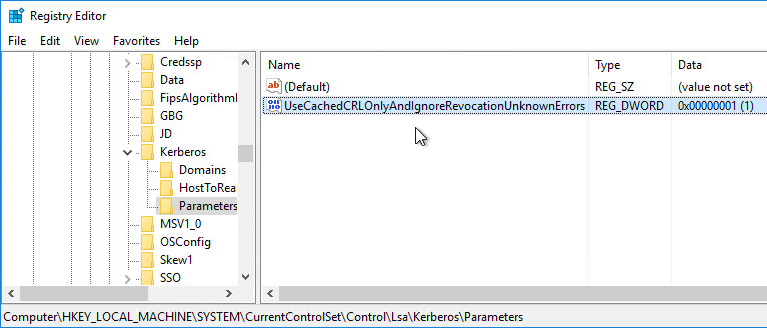
  12. By default, the VDAs will verify the certificates aren’t revoked by downloading the Certificate Revocation List. You can disable CRL checking by configuring HKEY_Local_Machine\System\CurrentControlSet\Control\LSA\Kerberos\Parameters\UseCachedCRLOnlyAndIgnoreRevocationUnknownErrors (DWORD) = 1 as detailed at CTX217150 Unable to login using the FAS Authentication – Getting Stuck on Please wait for local session manager.
  13. If your VDAs have third party credential providers (e.g., Duo), then it might interfere with FAS Single Sign-on.

FAS 1909+ Configuration

If you prefer to script the FAS configuration, then see Citrix Blog Post Automating the Citrix Federated Authentication Service with PowerShell.

FAS 1909 and newer have a different configuration GUI than FAS 1906 and older.

Here are 1909 and newer GUI configuration instructions:

  1. Log into the FAS server as an Enterprise Administrator that can upload certificate templates to Active Directory.
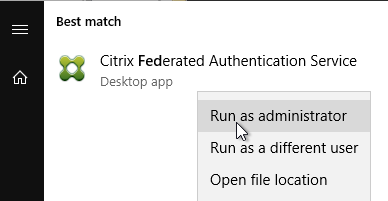
  2. On the FAS server, from the Start Menu, run Citrix Federated Authentication Service as administrator. Make sure you run it elevated.
  3. In the tab named Initial Setup, in the row named Deploy certificate templates, click Deploy.
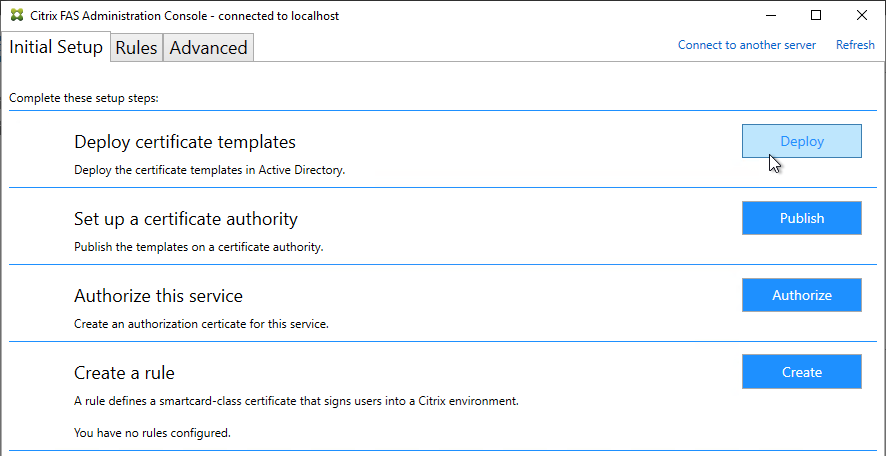
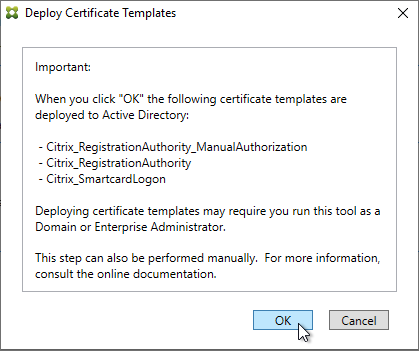
  4. Click OK to deploy the templates to Active Directory.
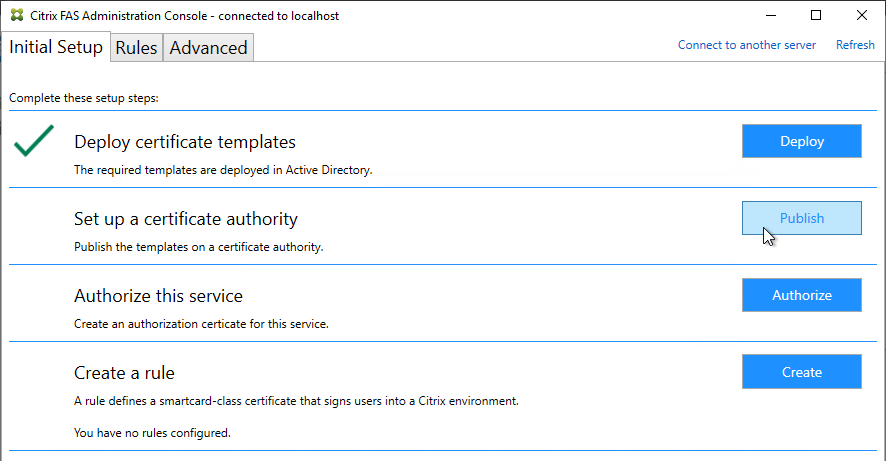
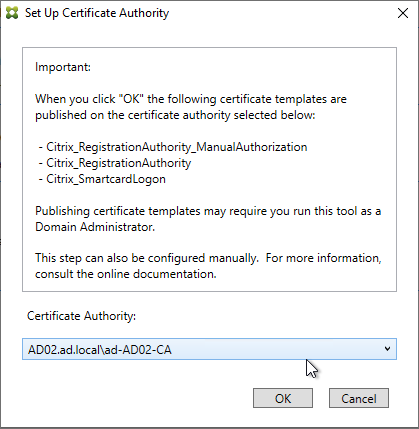
  5. In the row named Set up a certificate authority, click Publish.
  6. Select an Enterprise Certificate Authority that will be issue the FAS certificates and click OK.
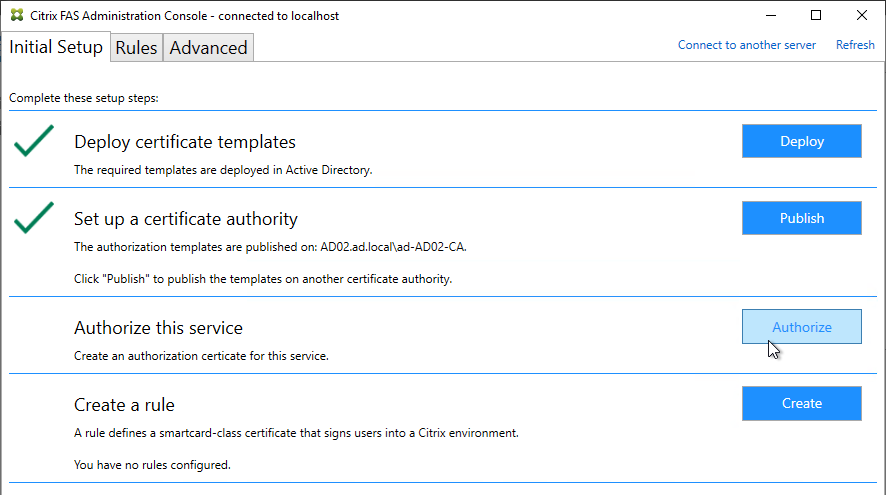
  7. In the row named Authorize this service, click Authorize.
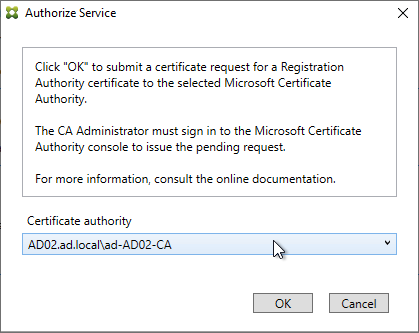
  8. Select a CA that will issue this FAS server a Registration Authority certificate. Later, you will need to open the Certificate Authority console on the chosen server. Click OK.
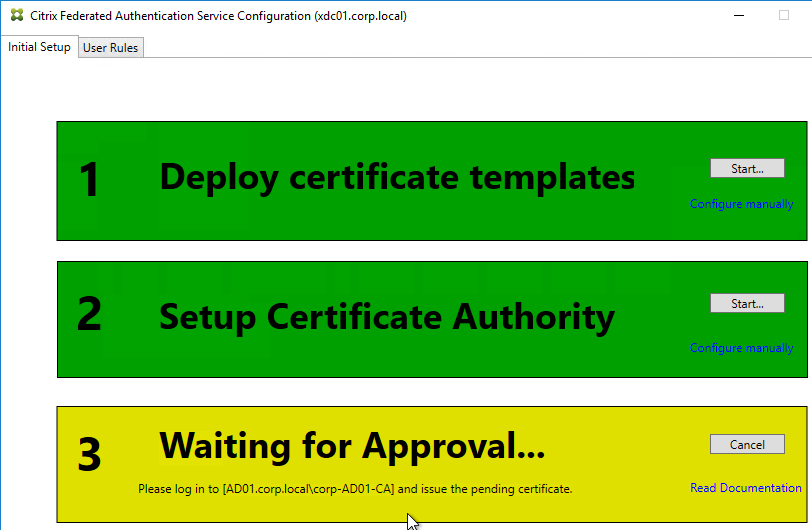
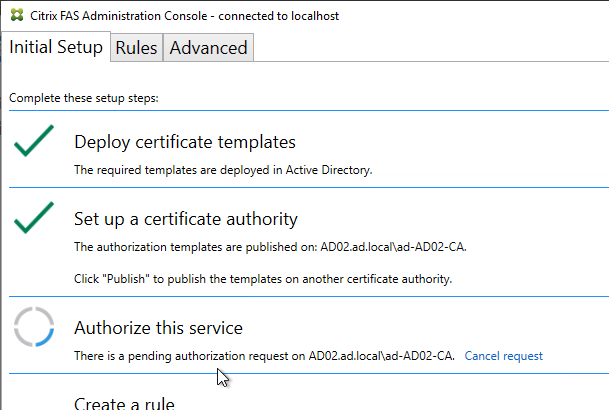
  9. The row named Authorize this service has a new icon indicating it is waiting on the registration authority certificate to be approved.
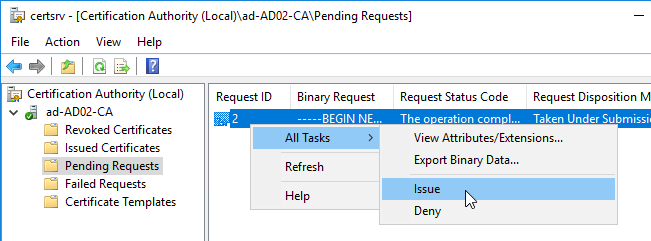
  10. Open the Certification Authority console and point it to the CA server. In the Pending Requests node, find the certificate request for the FAS server and Issue it.
  11. Back in the FAS Administration Console, on the top right, click Refresh.
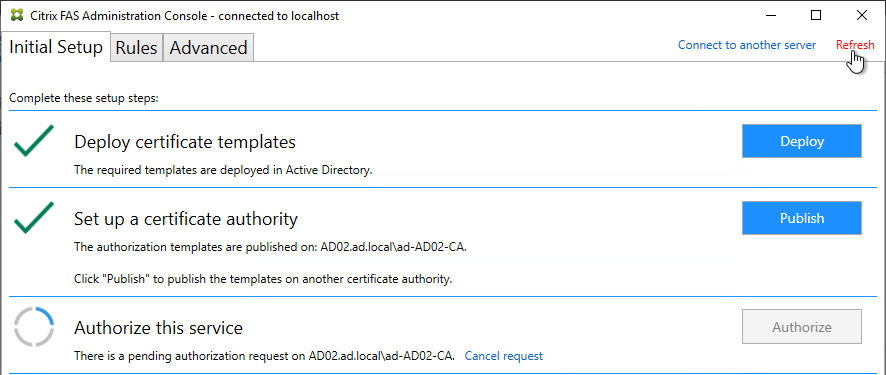
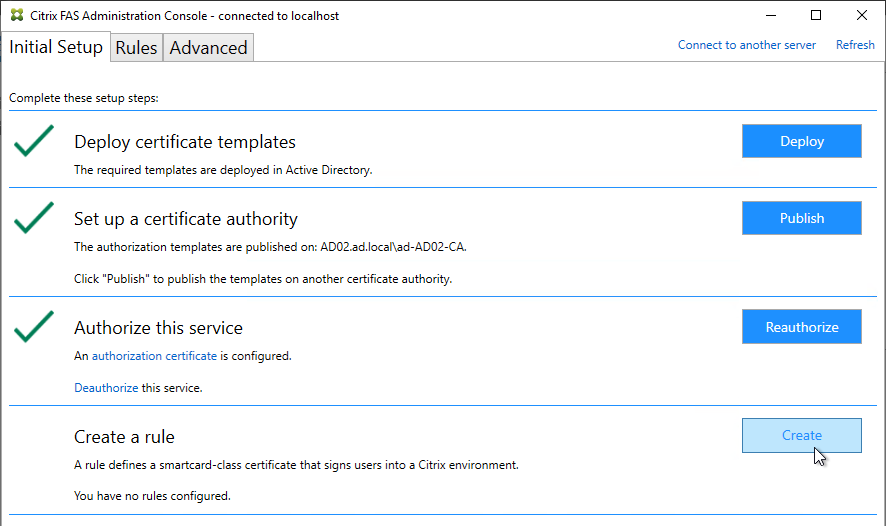
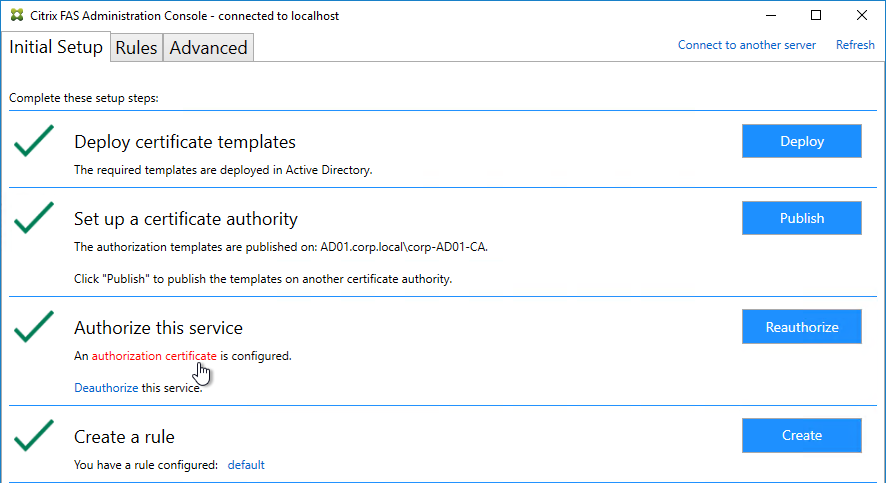
  12. The row named Authorize this service should now have a green check mark.
  13. In the row named Create a rule, click Create.
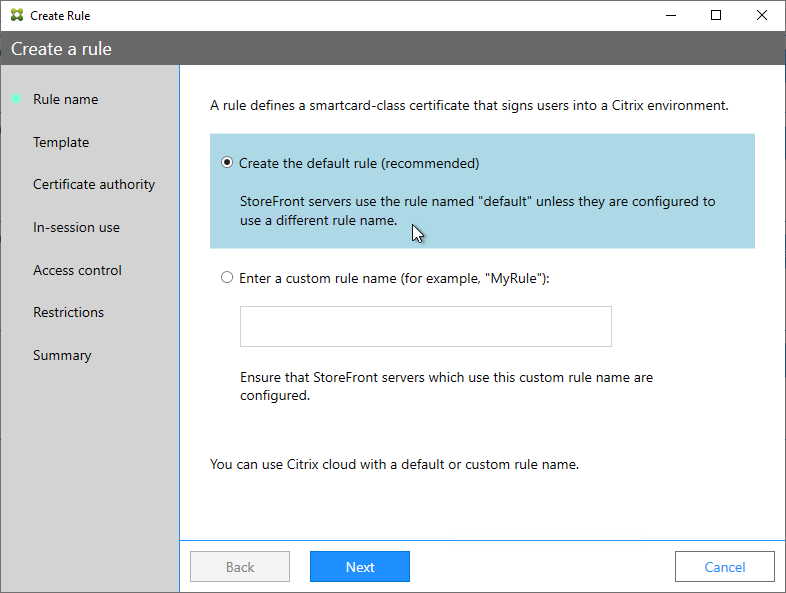
  14. In the Rule name page, leave it set to Create the default rule and click Next.
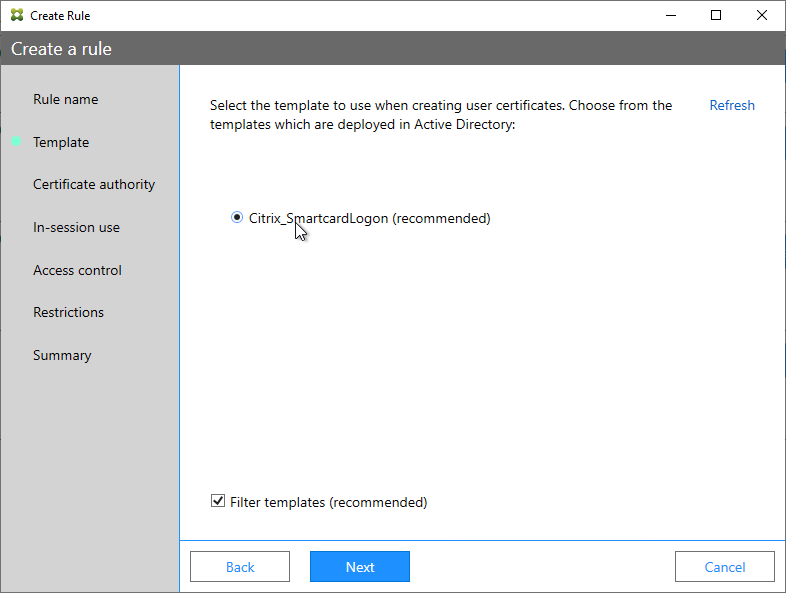
  15. In the Template page, click Next.
  16. In the Certificate authority page, select the CA that has the issuing templates configured and click Next. You can select more than one CA server.
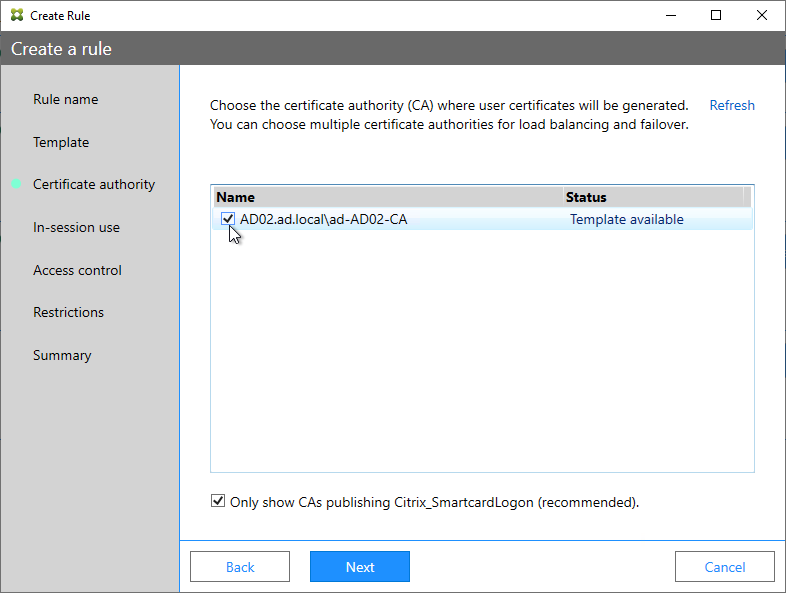
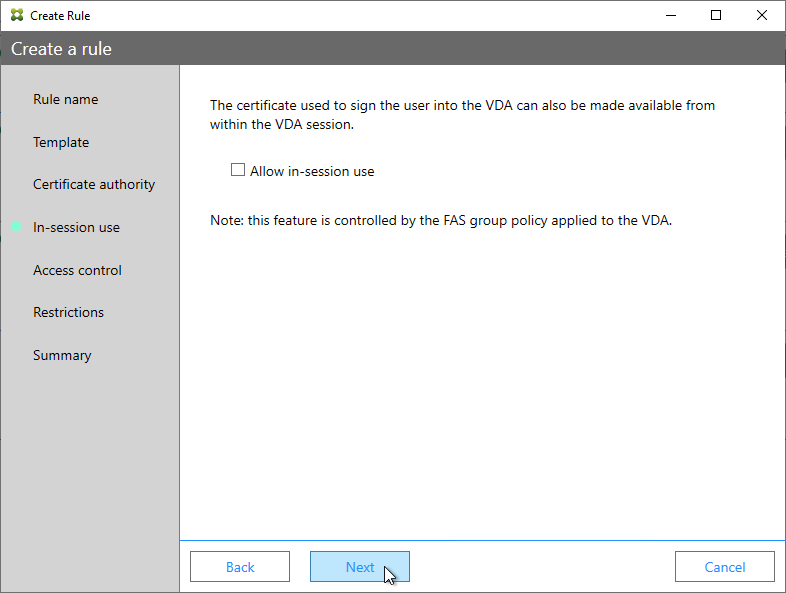
  17. In the In-session use page, click Next.
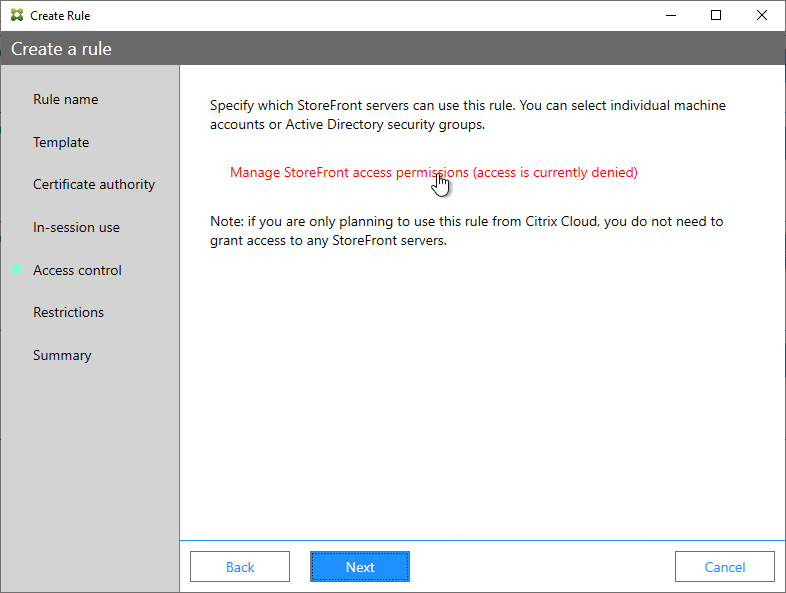
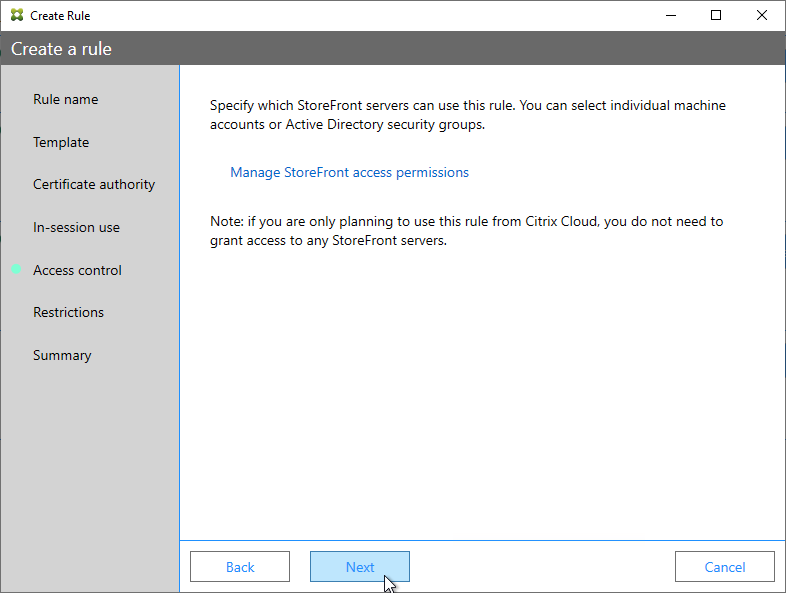
  18. In the Access control page, click the link to Manage StoreFront access permissions.
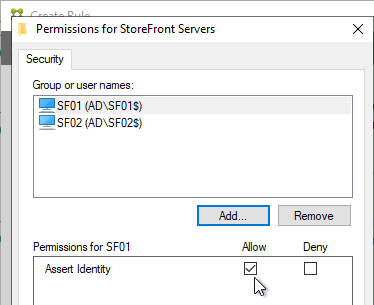
  19. In the Permission for StoreFront Servers page, add your StoreFront servers and give them the permission Assert Identity. Click OK.
  20. Back in the Create Rule wizard, click Next.
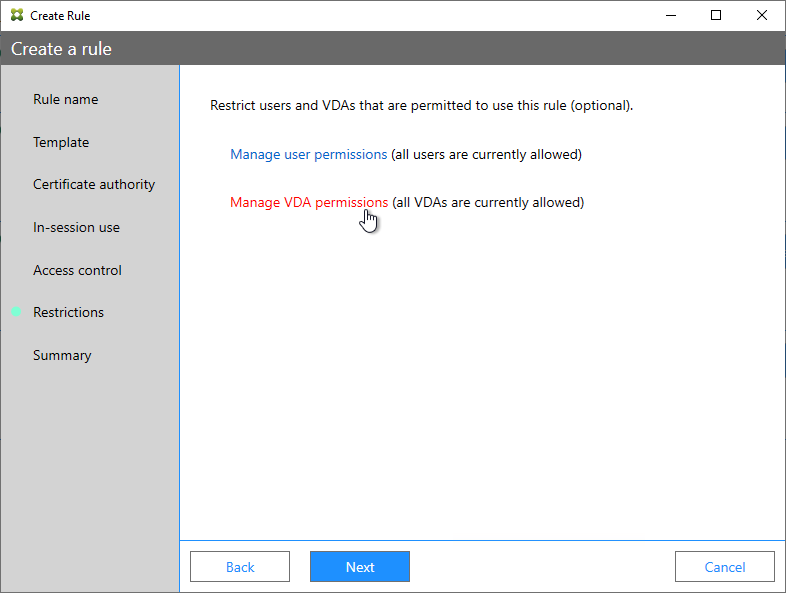
  21. In the Restrictions page, you can optionally reduce the VDAs that are authorized to use FAS. Click Next.
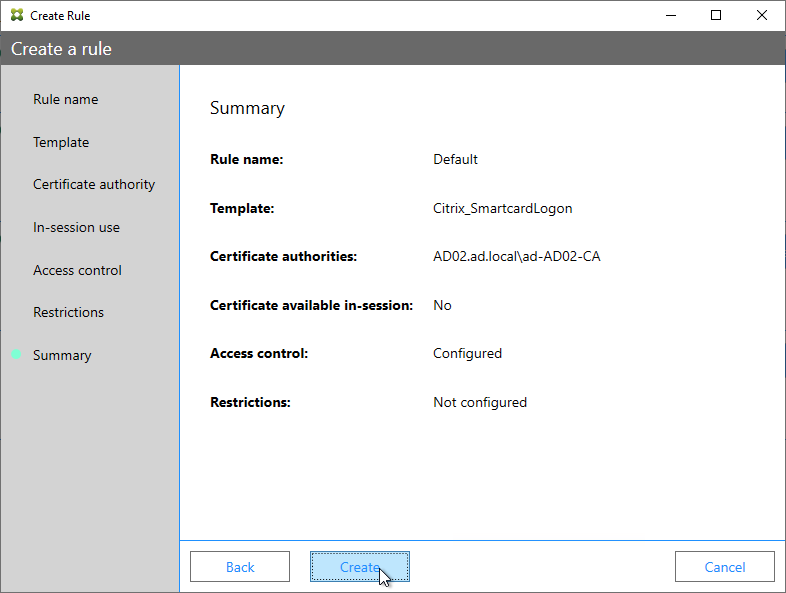
  22. In the Summary page, click Create.
  23. The FAS Registration Authority certificate expires in two years. You’ll need to manually renew the FAS Registration Authority certificate before it expires. Put a notification on your calendar. For details, see Renew registration authority certificates at Citrix Docs.
    • In the row named Authorize this service, you can click the link for authorization certificate to see when it expires. Before expiration, use the Reauthorize button on the right of the same row.
  24. Jump ahead to Certificate Templates.

FAS 1906 and older Configuration

If you prefer to script the FAS configuration, then see Citrix Blog Post Automating the Citrix Federated Authentication Service with PowerShell.

Here are GUI configuration instructions for FAS 1906 and older:

  1. Log into the FAS server as a Domain Administrator or Enterprise Administrator that can upload certificate templates to Active Directory.
  2. On the FAS server, from the Start Menu, run Citrix Federated Authentication Service as administrator. Make sure you run it elevated.
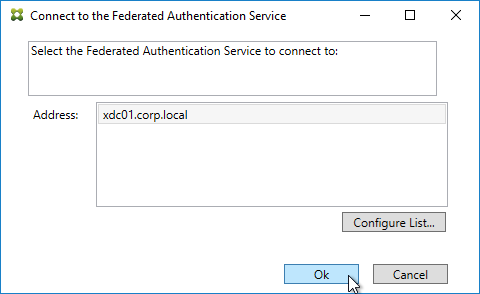
  3. The Federated Authentication Service FQDN should already be in the list (from group policy). Click OK.
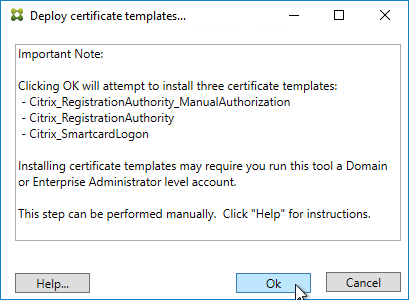
  4. In Step 1: Deploy certificate templates, click Start.
  5. Click OK to add certificate templates to Active Directory. Sufficient permission is required.
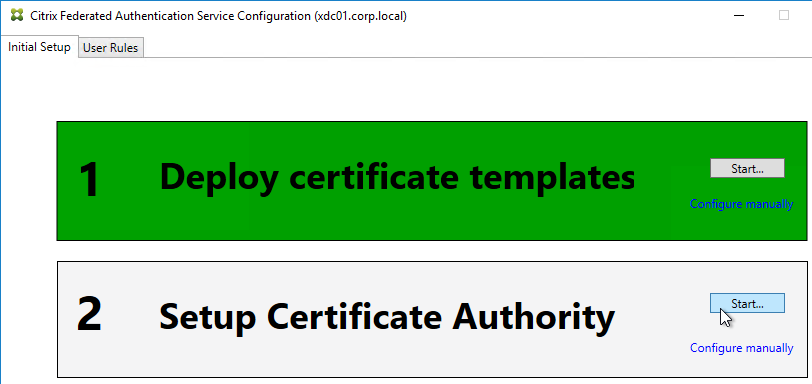
  6. In Step 2: Setup Certificate Authority, click Start.
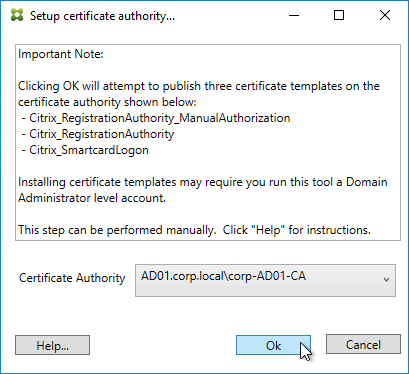
  7. Select a Certificate Authority to issue the certificates, and click Ok.
  8. In Step 3: Authorize this Service, click Start.
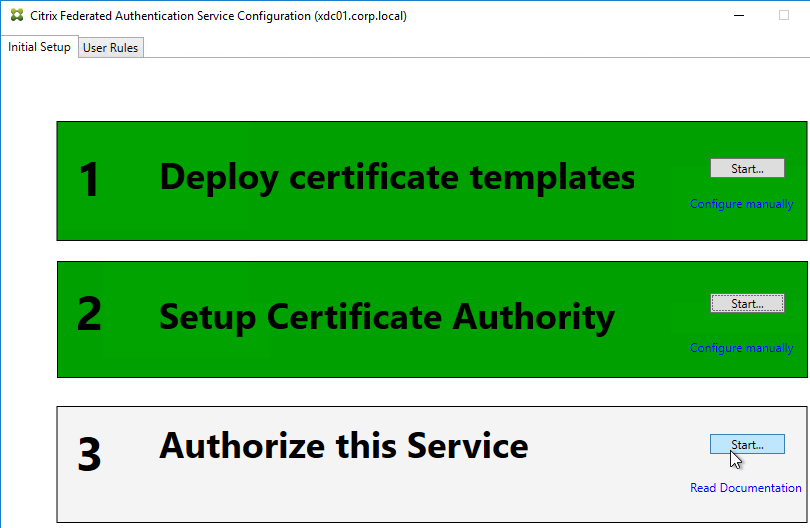
    • Step 3 automatically submits an online request for the Registration Authority certificate to the CA and stores the non-exportable private key in the standard Microsoft Enhanced RSA and AES Cryptographic Provider.
    • Alternatively, you can submit the certificate request manually, and store the private key in TPM or HSM as detailed at Federated Authentication Service private key protection at Citrix Docs. When running New-FasAuthorizationCertificateRequest, the -UseTPM switch is optional.
  9. Select the issuing Certificate Authority, and click OK.
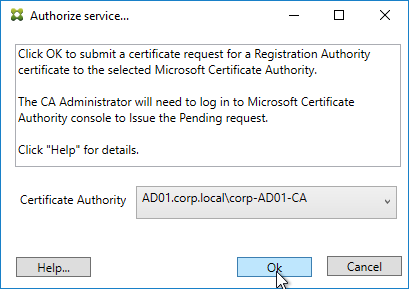
    • Authorize this Service only lets you select one Certificate Authority. If you want to load balance certificate requests against multiple Certificate Authorities, then see Set up multiple CA servers for use in FAS at Citrix Docs.
      Set-FasCertificateDefinition -Name default_Definition -CertificateAuthorities @("ca1.corp.local\CA1.corp.local", "ca2.corp.local\ca2.corp.local")
  10. Step 3 is now yellow.
  11. On the Microsoft CA server, go to the Certification Authority Console > Pending Requests. Find the pending request, and Issue it.
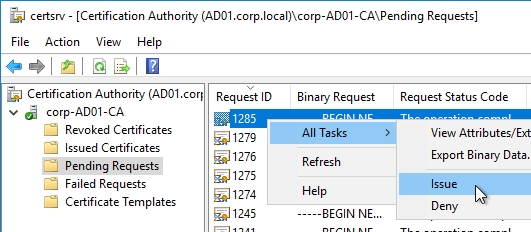
  12. In a minute or two, Federated Authentication Service will recognize the issued certificate and Step 3 will turn green.
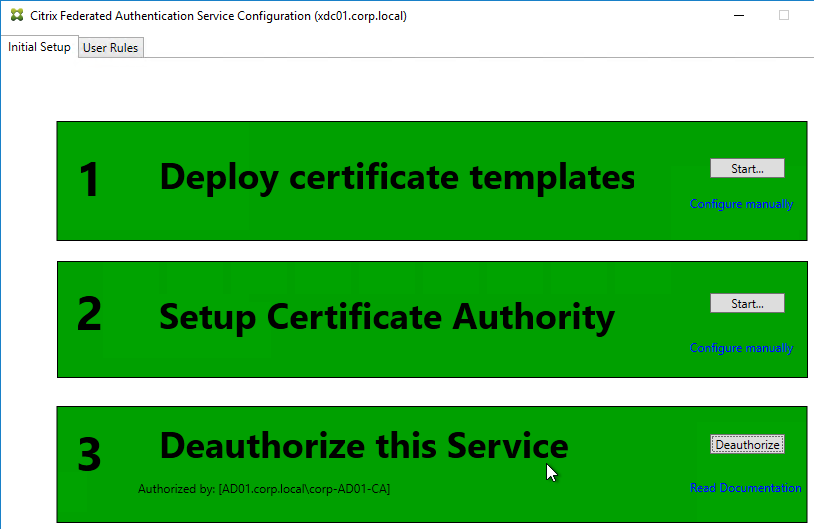
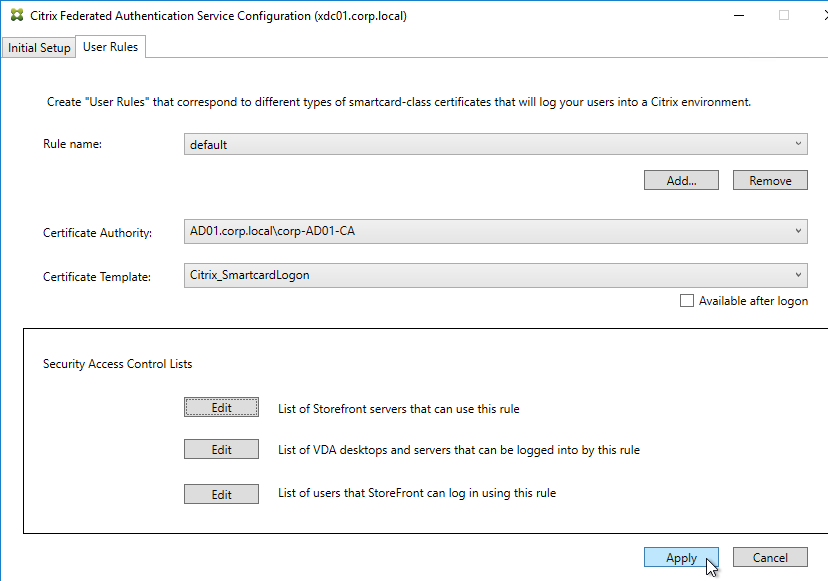
  13. After FAS authorization with the CA, in the FAS Configuration tool, switch to the User Rules tab.
  14. Use the Certificate Authority drop-down to select the issuing Certificate Authority.
  15. Use the Certificate Template drop-down to select the Citrix_SmartcardLogon template.
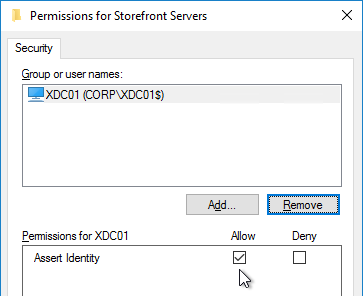
  16. Click Edit next to List of StoreFront servers that can use this rule.
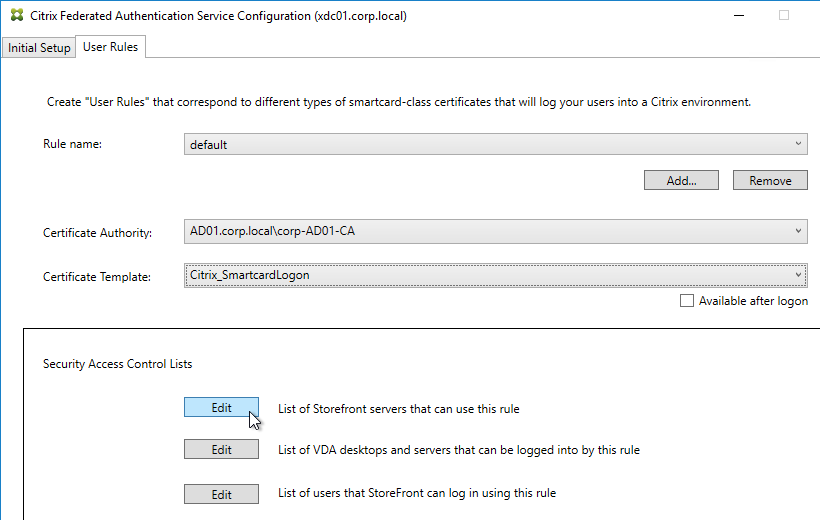
  17. Remove Domain Computers from the top half, and instead add your StoreFront servers. You could add an Active Directory security group instead of individual StoreFront servers.
  18. On the bottom half, make sure Assert Identity is Allowed. Click OK.
  19. By default, all users and all VDAs are allowed. You can click the other two Edit boxes to change this.
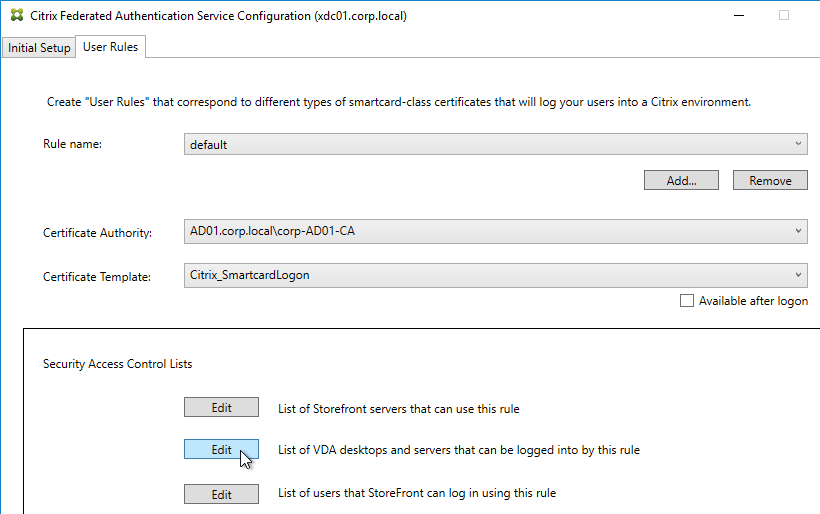
  20. When done, click Apply.
  21. Click OK when you see Rule updated successfully.
  22. The FAS Registration Authority certificate expires in two years. You’ll need to manually renew the FAS Registration Authority certificate before it expires. Put a notification on your calendar. For details, see Renew registration authority certificates at Citrix Docs.
    • To see the expiration date of the authorization certificate, run the following PowerShell command after running add-pssnapin Citrix.Authentication.FederatedAuthenticationService.V1:
      Get-FasAuthorizationCertificate -FullCertInfo -address myFASServer

Certificate Templates

The deployed FAS Certificate Templates from older versions of FAS have Autoenroll enabled. Newer versions of FAS (e.g., 2203) no longer have Autoenroll enabled.

  1. Open the Certificate Templates console. One option is to open the Certification Authority console, right-click Certificate Templates, and then click Manage.
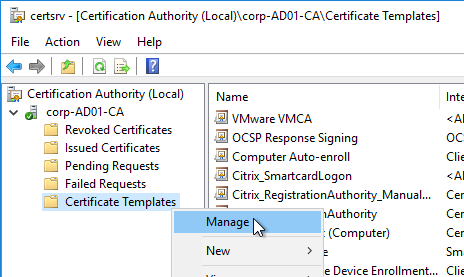
  2. There should be three templates with names starting with Citrix_. Open the properties on each one.
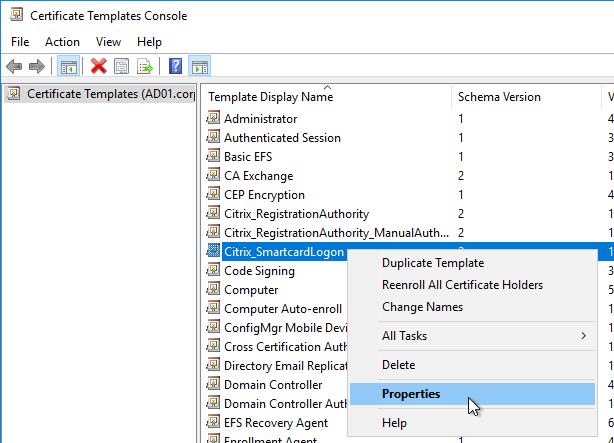
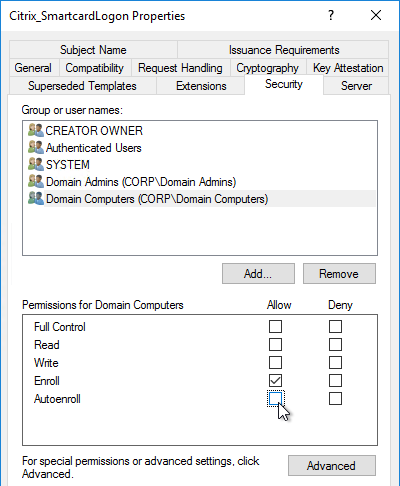
  3. On the Security tab, highlight each group assigned to the template.
  4. On the bottom half, uncheck the box in the Autoenroll row but leave Enroll checked. Perform this step for every group assigned to this template. Then click OK.
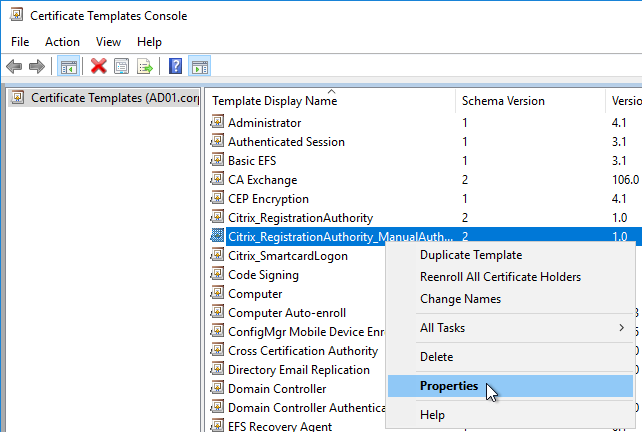
  5. Repeat disabling autoenroll for the other two templates.
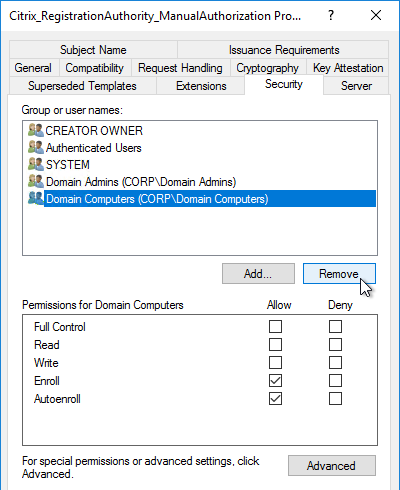
The Registration Authority certificate templates are permitted to all Domain Computers. You might want to change that.

  1. Open the Properties of one of the Citrix_RegistrationAuthority certificate templates.
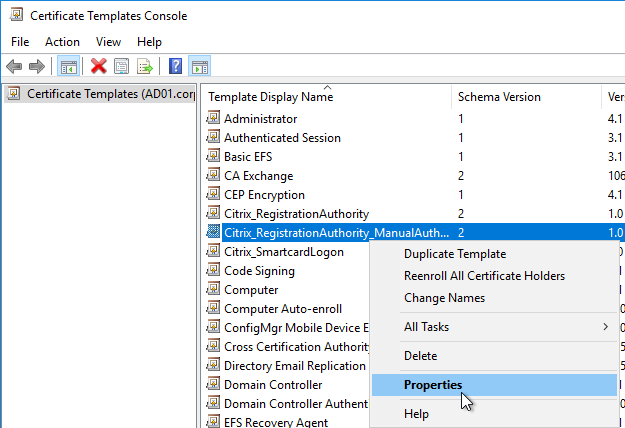
  2. On the Security tab, remove Domain Computers.
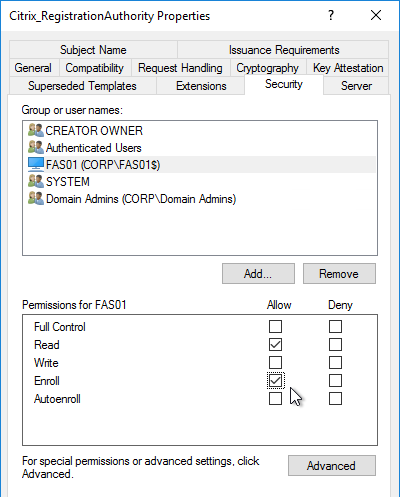
  3. Add your FAS servers and enable the Enroll permission.
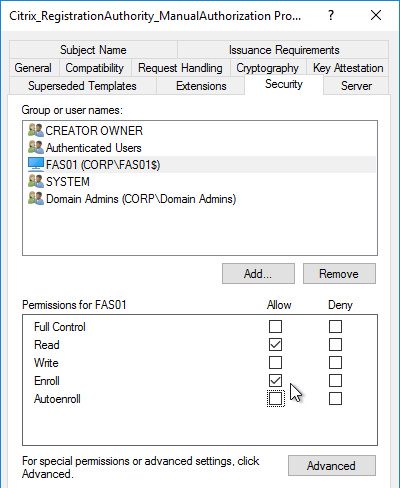
  4. Repeat for the other Registration Authority certificate.
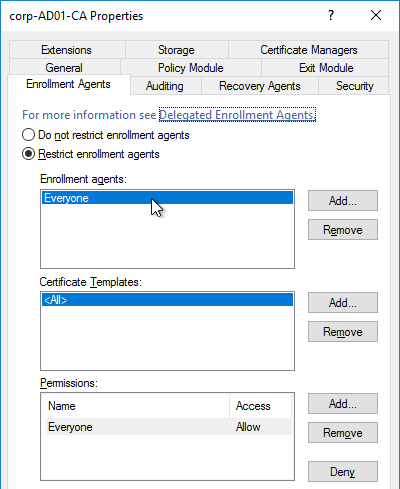
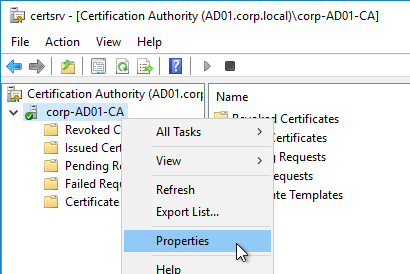
To further restrict who can be issued certificates, go to your Certificate Authority’s Properties and use the Enrollment Agents tab to restrict enrollment agents.
StoreFront Configuration

Once FAS is enabled on a StoreFront store, it applies to all connections through that store, including password-based authentications. One option is to create a new store just for FAS users.

  1. Check the registry at at HKLM\Software\Policies\Citrix\Authentication\UserCredentialService\Addresses to confirm that the group policy with FAS addresses has been applied to the StoreFront servers.
  2. On the StoreFront 3.6 or newer server, run the following elevated PowerShell command:
    & "$Env:PROGRAMFILES\Citrix\Receiver StoreFront\Scripts\ImportModules.ps1"
  3. Run the following commands. Adjust the store name as required.
    $StoreVirtualPath = "/Citrix/Store"
    $store = Get-STFStoreService -VirtualPath $StoreVirtualPath
    $auth = Get-STFAuthenticationService -StoreService $store
    Set-STFClaimsFactoryNames -AuthenticationService $auth -ClaimsFactoryName "FASClaimsFactory"
    Set-STFStoreLaunchOptions -StoreService $store -VdaLogonDataProvider "FASLogonDataProvider"
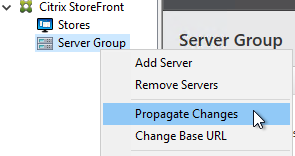
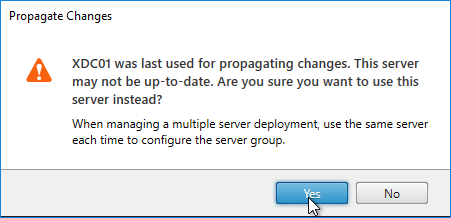
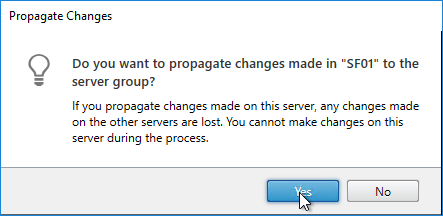
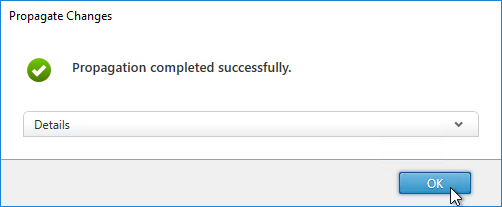
  4. If you have multiple StoreFront servers, Propagate Changes.
  5. In Web Studio (CVAD 2212 and newer), go to Settings and Enable XML Trust.

    • Or on a Citrix Delivery Controller, run the following PowerShell command:
      Set-BrokerSite -TrustRequestsSentToTheXmlServicePort $true

If you ever need to disable FAS on StoreFront, run the following commands. Adjust the store name as required.

$StoreVirtualPath = "/Citrix/Store"
$store = Get-STFStoreService -VirtualPath $StoreVirtualPath
$auth = Get-STFAuthenticationService -StoreService $store
Set-STFClaimsFactoryNames -AuthenticationService $auth -ClaimsFactoryName "standardClaimsFactory"
Set-STFStoreLaunchOptions -StoreService $store -VdaLogonDataProvider ""

SAML Configuration

SAML Flow

SAML flows like this:

  1. (Optional) User goes to the web application aka Service Provider (e.g. Citrix Gateway).
    • The Service Provider (SP) redirects the user’s browser to the Identity Provider’s (IdP) SAML Single Sign-on (SSO) URL and includes an authentication request in the Redirect. The IdP SSO URL might be different for each Service Provider.
    • The Authentication Request from the Service Provider includes a Service Provider Entity ID. The IdP matches the SP Entity ID with an entry in its database so it knows which SP is making the authentication request. The Entity ID must match on both the SP and the IdP.
    • If the Authentication Request is signed by the Service Provider’s certificate private key, then the IdP will verify the signature using the Service Provider’s certificate public key. In this scenario, the Service Provider’s certificate (without private key) must be loaded into the IdP.
  2. The user authenticates to the IdP, typically using Multi-factor Authentication.
    • If the user was redirected from the SP, then the IdP already knows which SP to authenticate with.
    • If the user went directly to the IdP, then the user typically needs to click an icon representing the web application (Service Provider).
  3. IdP generates a SAML Assertion containing the user’s userPrincipalName or email address.
    • Configure the IdP to include the user’s UPN or email address in the NameID field of the assertion. SAMAccountName won’t work with Citrix FAS.
    • The SAML Assertion also includes the Service Provider’s Entity ID. The ID in the Assertion must match the ID configured on the SP.
    • IdP signs the SAML Assertion using an IdP certificate private key.
    • IdP has a configuration for the SP that includes a SAML Assertion Consumer Service (ACS) URL. IdP redirects the user’s browser to the SP’s ACS URL and POST’s the SAML Assertion.
      • The ACS URL on Citrix Gateway ends in /cgi/samlauth
  4. SP uses the IdP certificate’s public key to verify the signature on the SAML Assertion.
    • The IdP’s certificate (without private key) is installed on the Citrix ADC so it can verify the Assertion’s signature.
  5. SP extracts the user’s userPrincipalName from the Assertion and uses the UPN for Single Sign-on to StoreFront and the rest of the Citrix components.
    • Note that the SP does not have access to the user’s password and thus that’s why we need Citrix FAS to generate certificates for each user.

Configure the SAML IdP

You typically start the configuration on the Identity Provider (IdP). Every IdP has unique instructions. Search Google for your IdP and Citrix ADC and you might find a IdP-specific guide. After IdP configuration, you download the IdP’s certificate and copy the IdP’s SSO URL so you can configure them on Citrix ADC.

Azure AD as SAML IdP

  1. In Azure Portal, go to Azure Active Directory.
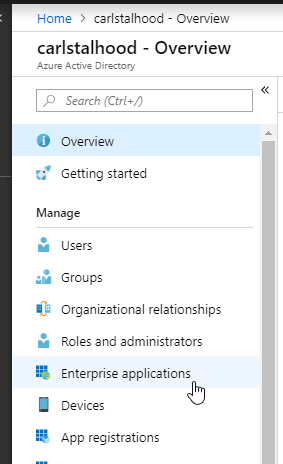
  2. On the left, click Enterprise applications.
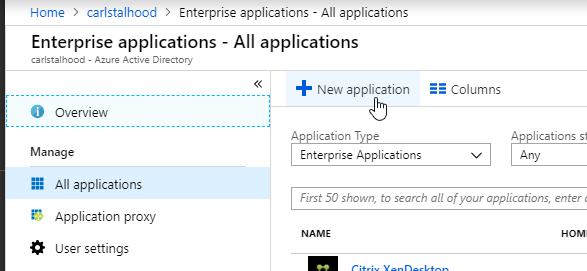
  3. In the new blade that appears, on the All applications page, on the right, click New application.
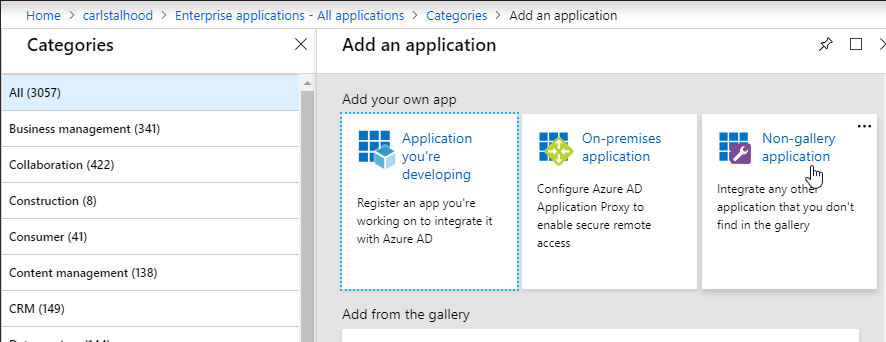
  4. In the All Categories view of the gallery, on the top right, click Non-gallery application.
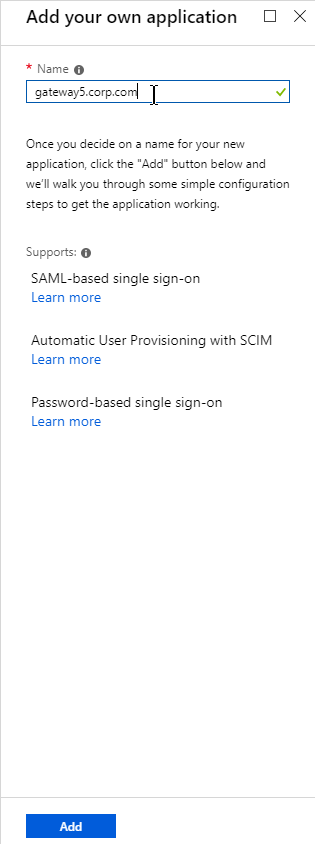
  5. Give the application a descriptive name. Azure AD shows this name in the myapps portal. Click Add.
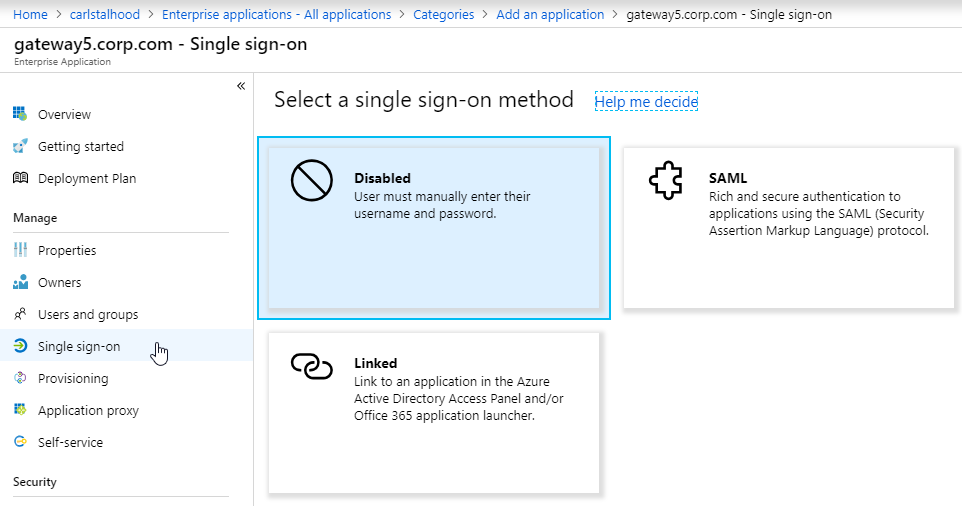
  6. After the application is created, on the left, in the Manage section, click Single sign-on.
  7. On the right, click the big button for SAML.
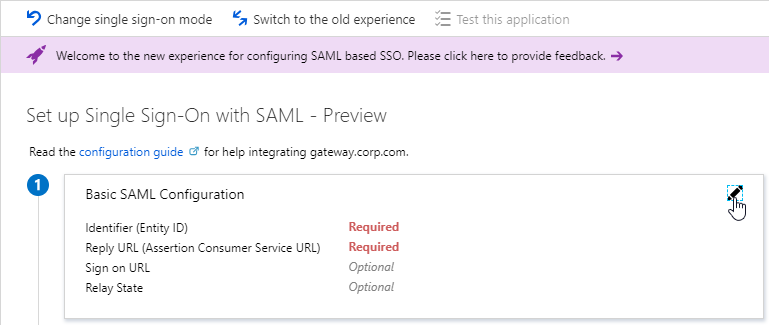
  8. In section 1 labelled Basic SAML Configuration, click the pencil icon.
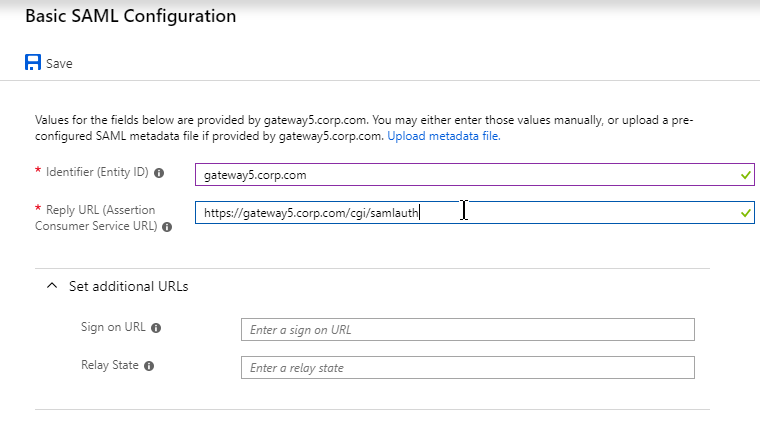
  9. In the Identifier (Entity ID) field, enter an identifier in URI format. Usually it matches the FQDN of the Citrix Gateway and can be entered in https://gateway.corp.com format. You’ll later need to specify the exact same Identifier on the Citrix ADC.
  10. In the Reply URL (Assertion Consumer Service URL) field, enter a URL similar to https://mygateway.company.com/cgi/samlauth. The path must be /cgi/samlauth. The scheme should be https. And the FQDN is your Citrix Gateway’s FQDN.
  11. Click Save. Then you might have to click the x on the top right to make it go away.
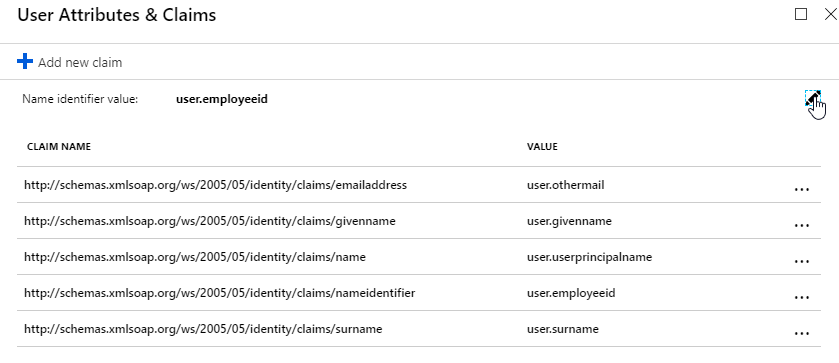
  12. In section 2 labelled User Attributes & Claims, notice that it defaults to sending the userprincipalname. You can click the pencil to change the attribute used for the Name identifier value. Whatever value you send will need to match the userPrincipalNames of local Active Directory accounts (aka shadow accounts).

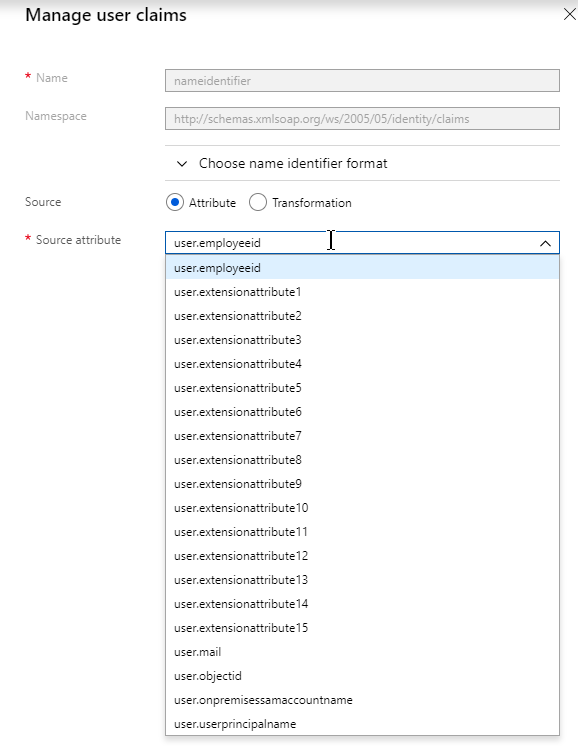
  13. In section 3 labelled SAML Signing Certificate, click the Download link in the Certificate (Base64) line.
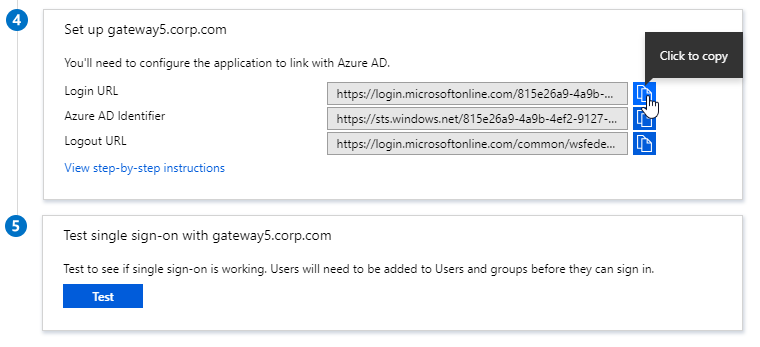
  14. Citrix ADC 12.1 and newer support SAML metadata so feel free to copy the App Federation Metadata Url field.
  15. If you are running NetScaler 12.0 or older, then you will need to copy the Login URL field from section 4 labelled Set up gateway5.corp.com
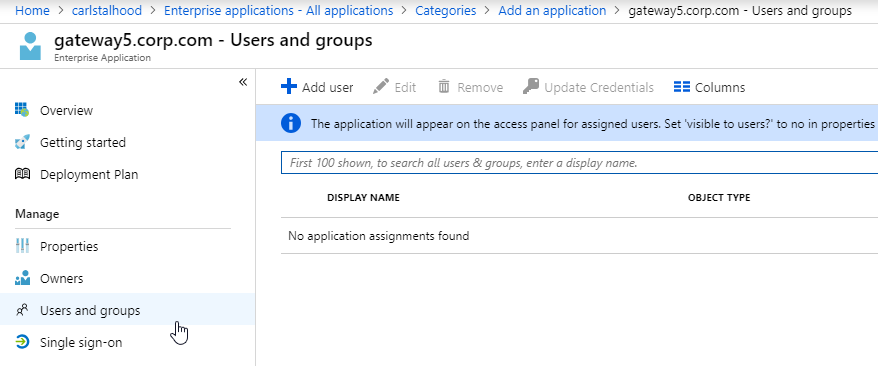
  16. On the left, under Manage, click Users and groups.
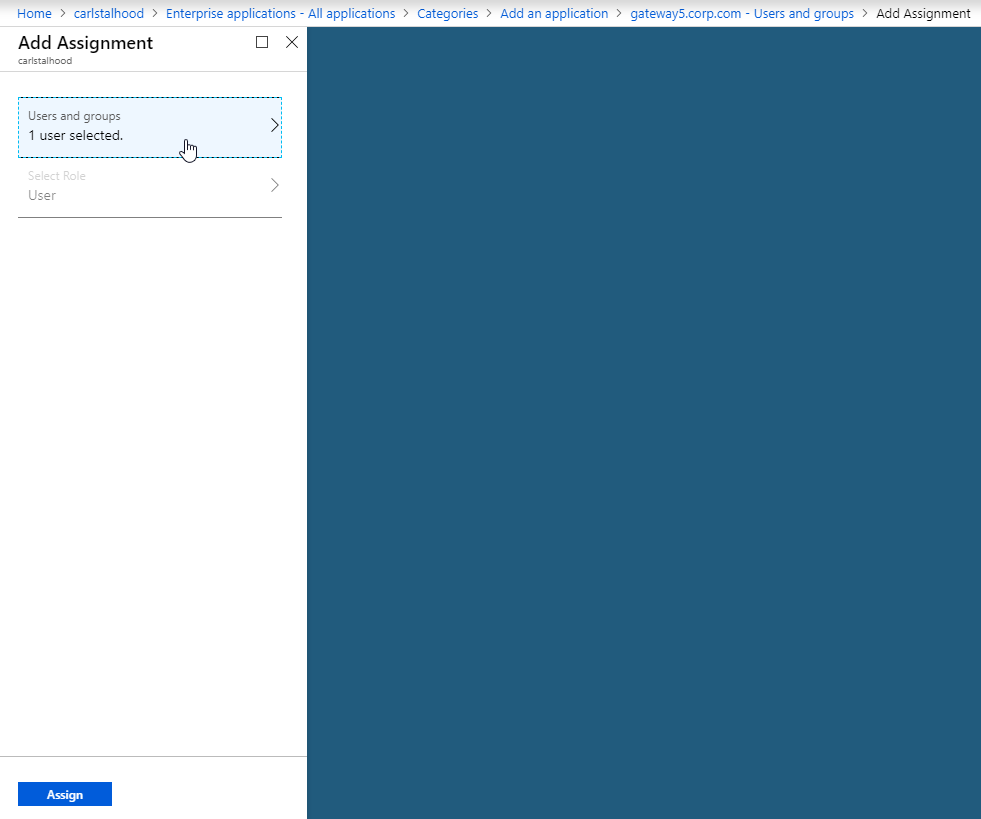
  17. Use the normal process to assign Azure AD users and groups to this application. Click Assign.
  18. Jump to the section named Citrix ADC SAML Configuration.

ADFS as SAML IdP

The screenshots in this section use ADFS as an example IdP. Your IdP will be different.

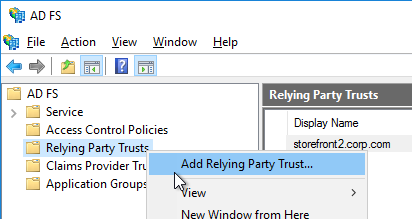
  1. In your SAML IdP, create a Relying Party Trust (aka service provider trust) or new Application.
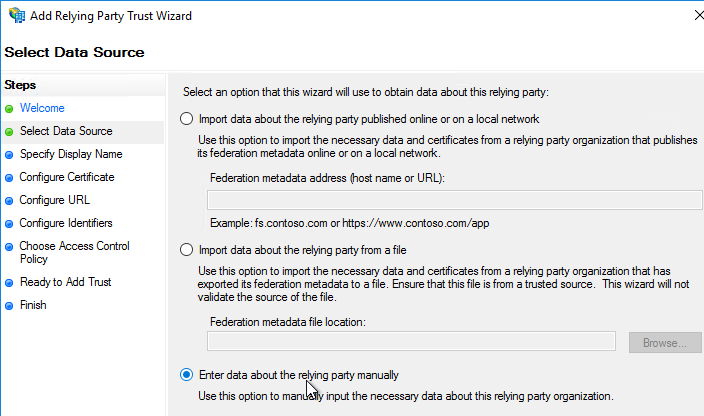
  2. Since we’re configuring the IdP before we configure Citrix ADC and thus don’t have access to the SP metadata, select the option to Enter data about the relying party manually.
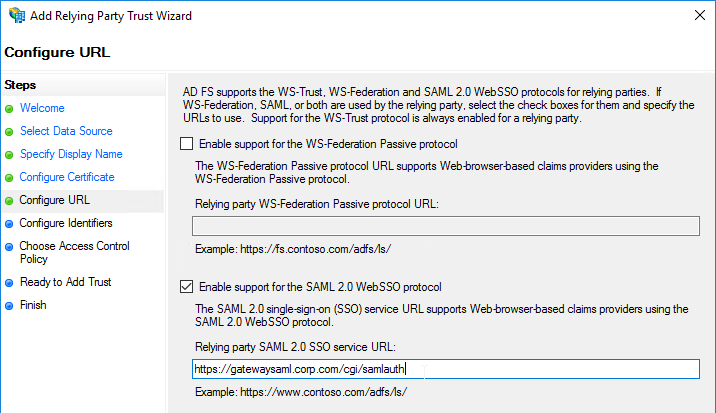
  3. For the Assertion Consumer Service URL (aka relying party service URL), enter the URL to your Citrix Gateway with /cgi/samlauth appended to the end (e.g. https://gateway.corp.com/cgi/samlauth)
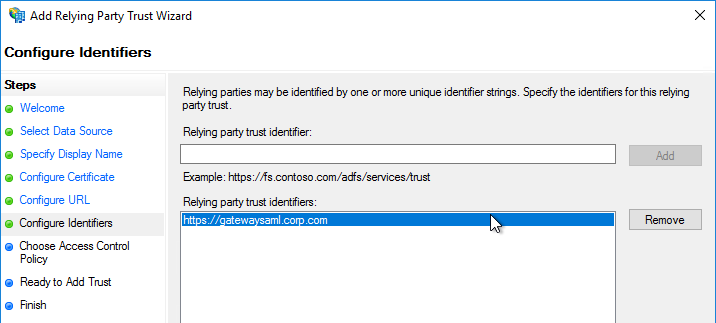
  4. Enter a Relying party trust identifier in URI format. You must specify the same identifier (Issuer Name) on the Citrix ADC as detailed in the next section.
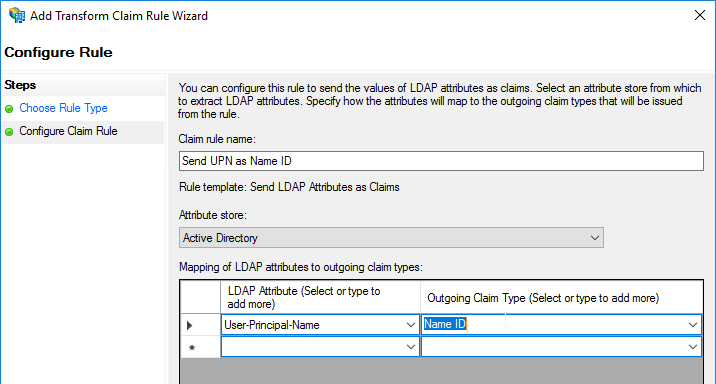
  5. Configure the SAML IdP to send email address or User-Principal-name as Name ID. Citrix ADC receives the Name ID and sends it to StoreFront. StoreFront will look in Active Directory for an account with userPrincipalName that matches the Name ID.
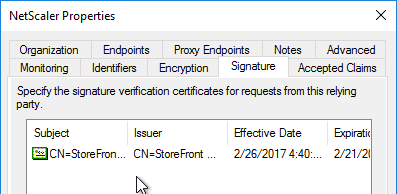
  6. Citrix ADC will sign the authentication requests it sends to the IdP. On the Citrix ADC, you will soon configure the Citrix ADC SAML SP signing certificate with private key that signs the authentication requests that are sent to the IdP. In your SAML IdP, import the same Citrix ADC SAML SP signing certificate but without the private key.
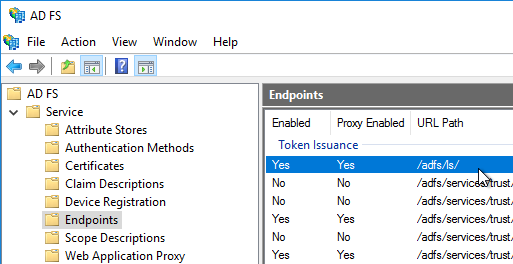
  7. Copy the SAML authentication URL (aka Token Issuance URL) from your SAML IdP. You’ll need to enter this same URL on your Citrix ADC later.
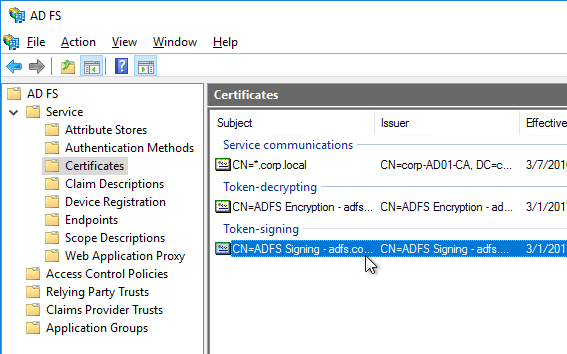
  8. Export the IdP Token-signing certificate from your SAML IdP. The IdP could be ADFS, Okta, Ping, etc.
Citrix ADC SAML Configuration

SAML Server/Action

  1. Instructions for Citrix ADC 13.0, Citrix ADC 12.1, NetScaler 12.0, and NetScaler 11.1 are essentially the same.
    • Citrix ADC 12.1 and newer support SAML Metadata while older versions of NetScaler do not support SAML Metadata.
    • NetScaler 11 is very similar, except Certificates are in a different place in the NetScaler menu tree.
  2. Workspace app support – If you bind a SAML Authentication Policy directly to the Gateway Virtual Server (no nFactor/AAA), then Workspace app and Gateway VPN plug-in won’t work. To support SAML with Workspace app and Gateway VPN plug-in, configure nFactor (Authentication Virtual Server with Authentication Profile) instead of directly on the Gateway Virtual Server.
  3. IdP Signing Certificate – On Citrix ADC, if you are not importing IdP metadata, then manually import the IdP SAML token-signing certificate (without private key) under Traffic Management > SSL > Certificates > CA Certificates. Citrix ADC uses this certificate to verify the signature of the SAML assertion from the IdP.
    Note: when you later create the SAML Action on Citrix ADC, there’s a place to add a SAML certificate. Unfortunately, the SAML Action is trying to import the wrong type of certificate since it wants the private key, which you don’t have access to. If you import the certificate here under CA Certificates, then there’s no prompt for private key.
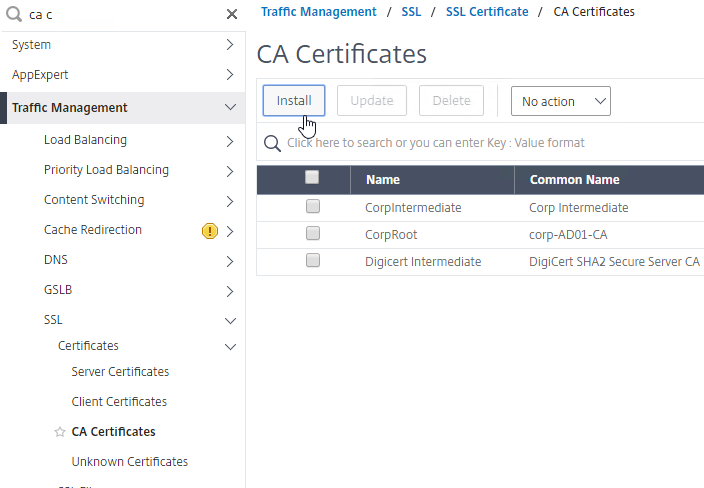
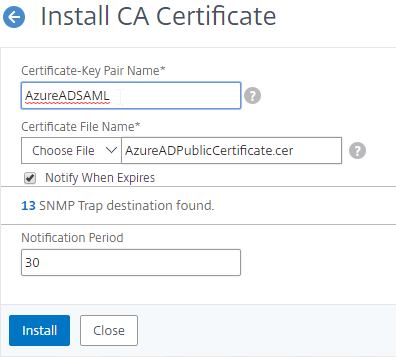
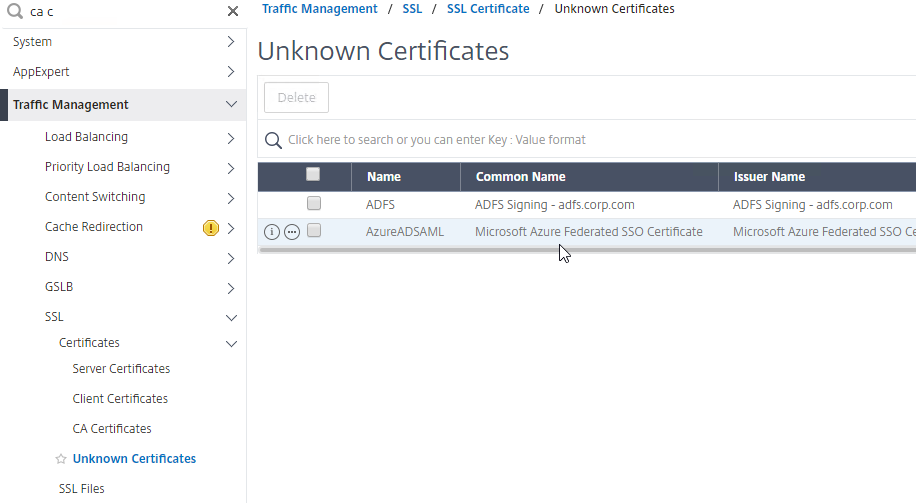
    • SAML IdP certificates are shown in the Unknown Certificates node.
  4. If you want ADC to sign the authentication requests it sends to the IdP, then do the following:
    1. Move up two nodes to Server Certificates and Import or create a SP SAML signing certificate with private key. This can be the same certificate used on Citrix Gateway. Or a more common practice is to create a self-signed certificate.
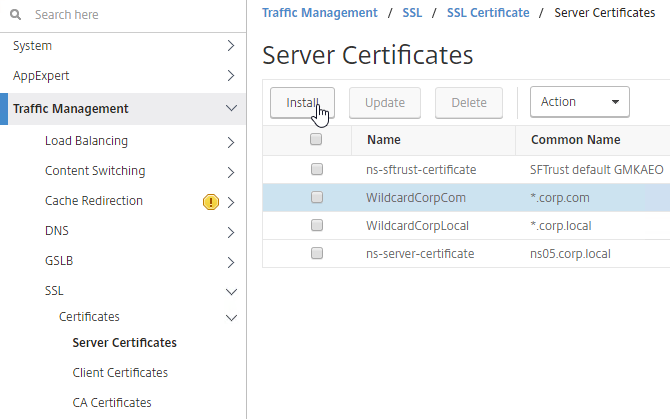
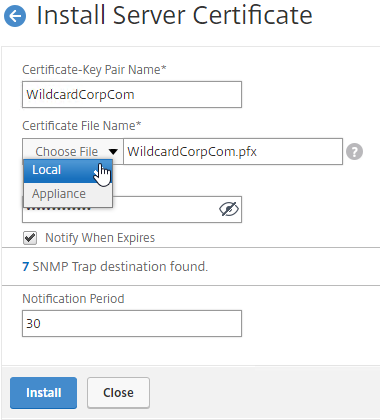
    2. You’ll also need to import this SAML SP signing certificate (without private key) to your SAML IdP so it can verify the SAML authentication request signature from the Citrix ADC.
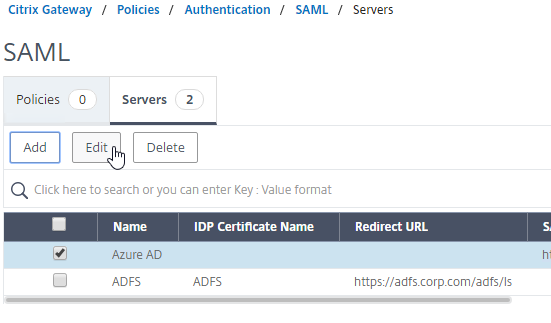
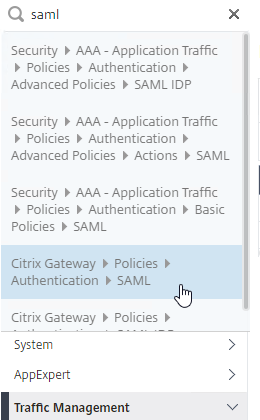
  5. Go to Citrix Gateway > Policies > Authentication > SAML. The quickest way to get here is to enter SAML in the search box on top of the menu.
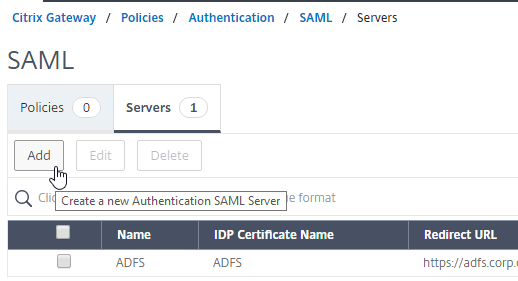
  6. On the right, switch to the tab labelled Servers, and click Add.
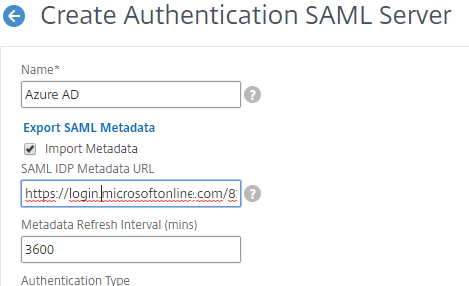
  7. In the Name field, give the SAML Action a name that indicates the IdP’s name.
  8. If your Citrix ADC is 12.1 or newer, then get the SAML Metadata URL (or file) from the IdP.

    1. In the SAML Server on Citrix ADC, in the SAML IDP Metadata URL field, paste in the URL. ADC should be able to extract the IdP’s certificate from the Metadata URL.
    2. In the Issuer Name field, enter the ID that the SAML IdP is expecting for the Relying Party.  This Issuer Name must match the name you configured on the IdP’s Relying Party (Service Provider) Trust. Azure AD calls this the Identifier or Entity ID.
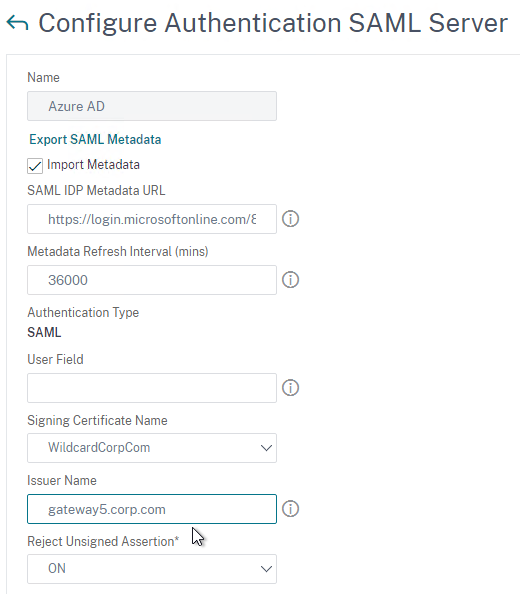
    3. Near the bottom, configure a Relay State Rule to prevent session hijack. It should check the Relay State field to make sure it matches the URL that users using to reach the Gateway Virtual Server. Make sure you include the forward slash at the end of the URL. Sample expression below. Pattern set is also possible. See CTX316577 for details. To avoid relay state “does not match” error, make sure users enter the Gateway URL instead of using a bookmark. 💡
      AAA.LOGIN.RELAYSTATE.EQ("https://gateway5.corp.com/")
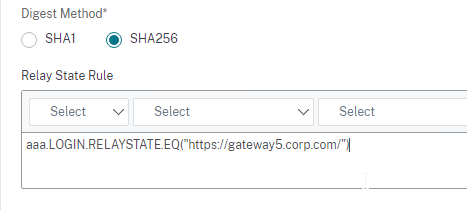
    4. Scroll down and click More.
    5. You can optionally check Force Authentication to prevent users from doing SAML authentication using cached credentials. This prompts for MFA every time the user accesses Citrix Gateway.
    6. Scroll down and click Create.
    7. Edit the SAML Server again.
    8. If you uncheck the box next to Import Metadata, you can see the fields that it filled in for you. Unfortunately, other fields must be configured manually as detailed soon.
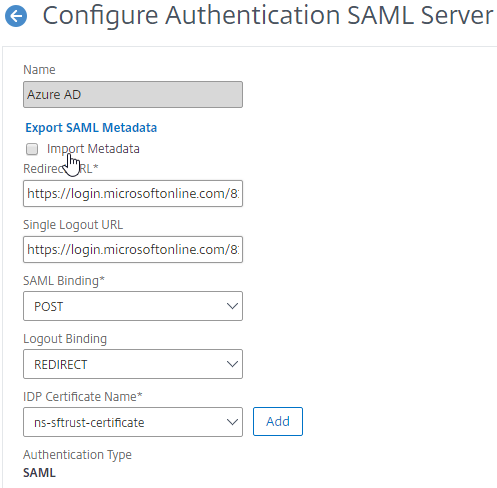
  9. Configure the SAML Server based on the data provided by your IdP. If you imported Metadata, then some of the fields might already be populated.
    1. For IDP Certificate Name, select the SAML IdP’s certificate that was exported from the SAML IdP and imported to Citrix ADC. Citrix ADC will use this IdP certificate to verify SAML assertions from the IdP.
      Note: the Add button here does not work correctly. Instead, if you need to import the SAML IDP certificate, then do it at the CA Certificates node as detailed earlier in this section.
    2. For Redirect URL, enter the URL to the SAML IdP’s authentication page. Citrix Gateway will redirect users to this URL. For ADFS, enter your ADFS URL appended with /adfs/ls (e.g. https://adfs.corp.com/adfs/ls). For other IdP’s, get the URL from your IdP.
    3. For User Field, enter the name of the SAML Claim from the IdP that contains the value that matches the userPrincipalName of your local Active Directory users (aka shadow accounts). This defaults to the NameID field, but you might have to use a different claim, like emailaddress.
    4. In the Issuer Name field, enter the ID that the SAML IdP is expecting for the Relying Party.  This Issuer Name must match the name you configured on the IdP’s Relying Party (Service Provider) Trust. Azure AD calls this the Identifier or Entity ID.
    5. Near the bottom, configure a Relay State Rule to prevent session hijack. It should check the Relay State field to make sure it matches the URL that users using to reach the Gateway Virtual Server. Make sure you include the forward slash at the end of the URL. Sample expression below. Pattern set is also possible. See CTX316577 for details. 💡
    6. Optionally, for Signing Certificate Name, select the SAML SP certificate (with private key) that Citrix ADC will use to sign authentication requests to the IdP. This same certificate (without private key) must be imported to the IdP, so the IdP can verify the authentication request signature. This field usually isn’t needed by most IdPs.
    7. Scroll down and click More.
    8. Citrix ADC defaults to SHA1. You might have to change the Signature Algorithm and Digest Method to SHA256.
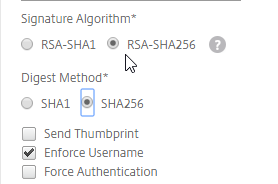
    9. Review the other settings as needed by your IdP. Click Create when done.

SAML Policy – Advanced (nFactor) Method

Workspace app and Gateway Plugin (i.e. VPN plugin) require nFactor (Advanced Authentication Policies) to support SAML authentication.

Licensing – nFactor requires NetScaler ADC Advanced Edition or NetScaler ADC Premium Edition. The newest builds of NetScaler ADC 13 have added nFactor support for NetScaler ADC Standard Edition, but the configuration of an Authentication Virtual Server is not directly accessible from the main menu. If you only have Standard Edition, then do the following to get to the Authentication Virtual Server:

  1. Go to Citrix Gateway > Virtual Servers and edit one.
  2. On the right, add the Authentication Profile section.
  3. On the left, in the Authentication Profile section, click Add to create an Authentication Profile.
  4. In the Authentication Virtual Server row, click Add to create an Authentication Virtual Server.
  5. The rest of the nFactor configuration is similar to what’s detailed below.

If you prefer to configure the older Classic Method, which doesn’t work with Workspace app, then skip to the Classic Method.

Do the following to create an Advanced Authentication Policy, an Authentication Virtual Server, and bind it to the Gateway Virtual Server:

  1. In the left menu, expand Security, expand AAA – Application Traffic, expand Policies, expand Authentication, expand Advanced Policies, and then click Policy.
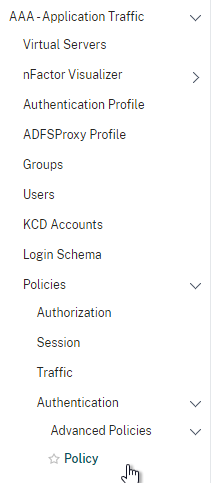
  2. On the right, click the button labelled Add.

    1. Change the drop-down for Action Type to SAML.
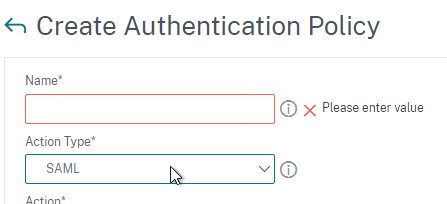
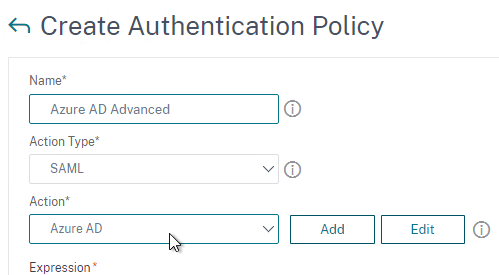
    2. Change the drop-down for Action to the SAML Action you created earlier.
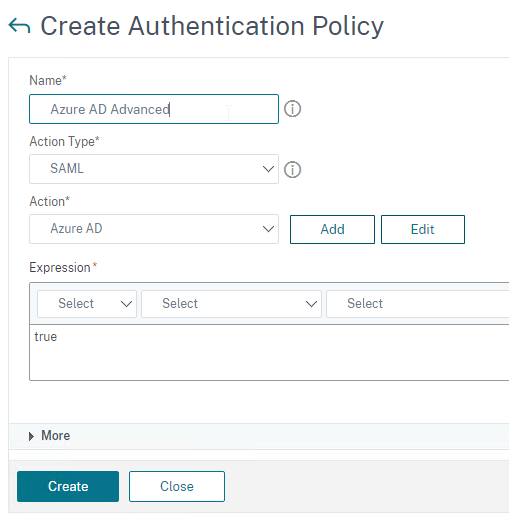
    3. In the box labelled Expression, enter true.
    4. Give the policy a name and click Create.
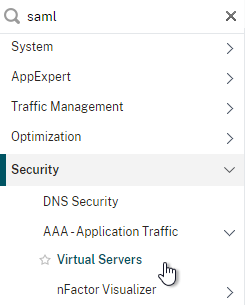
  3. In the left menu, expand Security, expand AAA – Application Traffic and then click Virtual Servers.
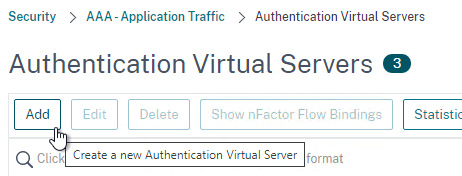
  4. On the right, click the button labelled Add.
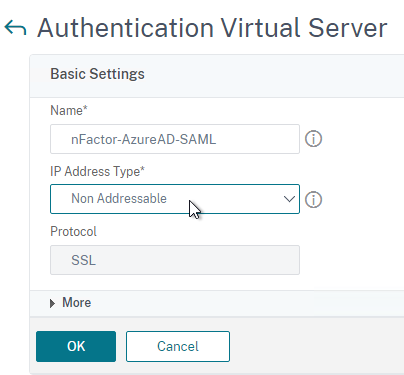
    1. Change the drop-down named IP Address Type to Non Addressable and then click OK.
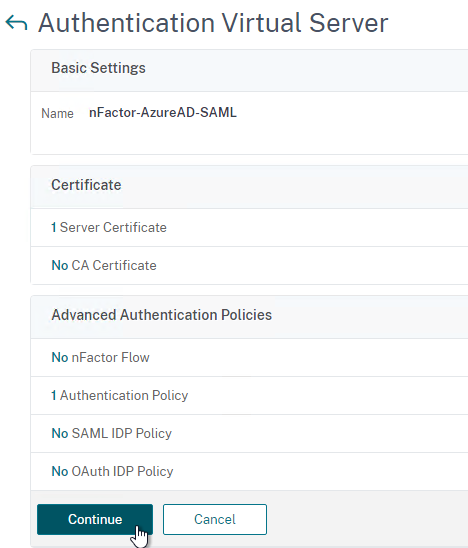
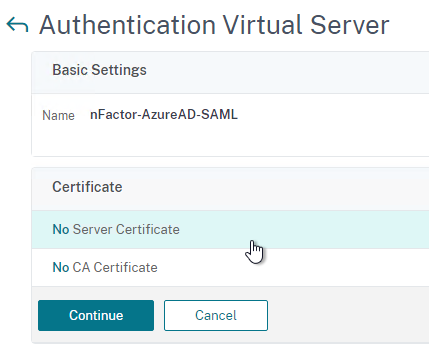
  5. You can optionally bind a Server Certificate. If you don’t bind a certificate, then the AAA vServer will be down but it will still work. It doesn’t matter what certificate you choose. Click Continue when done.
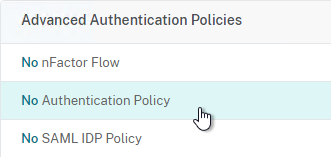
  6. On the left, in the section named Advanced Authentication Policies, click the row that says No Authentication Policy.
    1. Click where it says Click to select.
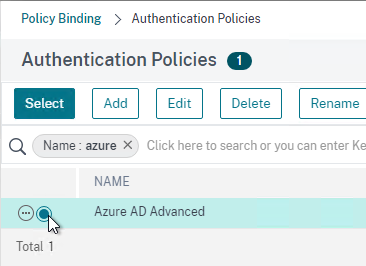
    2. Click the small circle to the left of the SAML Policy that you created earlier. Then click the blue button labelled Select at the top of the screen.
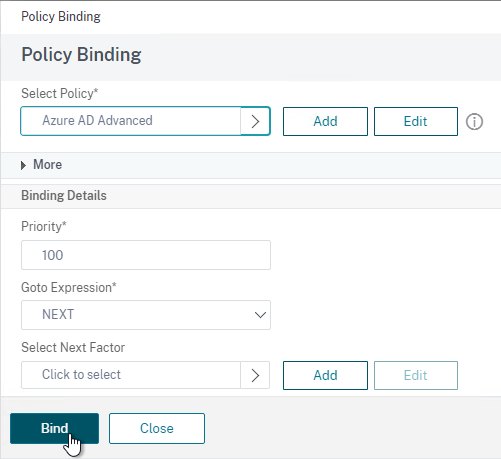
    3. There’s no need to configure Select Next Factor unless you want to bind an LDAP Policy with Authentication Disabled so you can extract groups from Active Directory and use those groups for Gateway authorization. This configuration procedure is detailed in the next section.
    4. Click the blue button labelled Bind at the bottom of the window.
  7. Click Continue,
  8. At the bottom of the page, click Done to finish creating the AAA vServer.
  9. In the left menu, expand Citrix Gateway and click Virtual Servers.
  10. On the right, edit your existing Gateway Virtual Server.
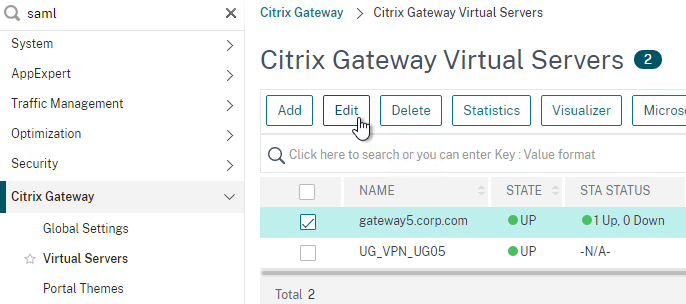
  11. On the right side of the screen, in the Advanced Settings column, click Authentication Profile.
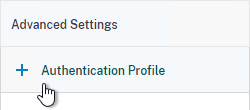
  12. On the left side of the screen, find the Authentication Profile section and then click the button labelled Add.
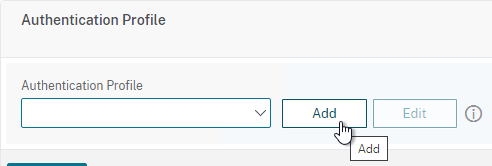
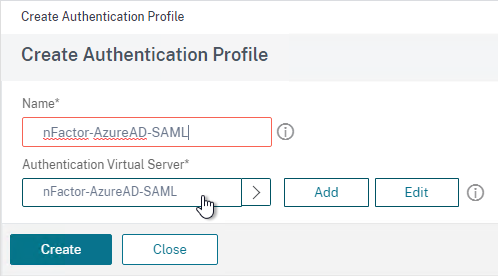
  13. Click where it says Click to Select and then select your AAA vServer.
  14. Give the Authentication Profile a name and then click the blue button named Create.
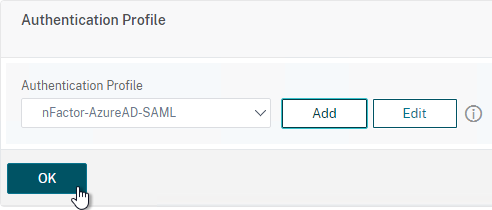
  15. Make sure you click the blue OK button before you click Done. If you don’t click OK then your changes won’t be saved.
Here are some sample CLI commands for this nFactor SAML configuration.

# SAML Actions
# ------------
add authentication samlAction "Azure AD" -samlIdPCertName AzureADSAML -samlSigningCertName WildcardCorpCom -samlRedirectUrl "https://login.microsoftonline.com/815e26a9-4a9b/saml2" -samlIssuerName gateway5.corp.com -Attribute1 emailaddress -logoutURL "https://login.microsoftonline.com/815e26a9/saml2" -logoutBinding REDIRECT -relaystateRule "aaa.LOGIN.RELAYSTATE.EQ(\"https://gateway5.corp.com/\")"

# SAML Authentication Policies
# ----------------------------
add authentication samlPolicy "Azure AD" ns_true "Azure AD"

# Advanced Authentication Policies
# --------------------------------
add authentication Policy "Azure AD Advanced" -rule true -action "Azure AD"

# Authentication Virtual Servers
# ------------------------------
add authentication vserver nFactor-AzureAD-SAML SSL 0.0.0.0
bind authentication vserver nFactor-AzureAD-SAML -policy "Azure AD Advanced" -priority 100 -gotoPriorityExpression NEXT

# Authentication Profiles
# -----------------------
add authentication authnProfile nFactor-AzureAD-SAML -authnVsName nFactor-AzureAD-SAML

# Citrix Gateway Virtual Servers
# ------------------------------
set vpn vserver gateway5.corp.com -authnProfile nFactor-AzureAD-SAML

SAML nFactor LDAP Group Extraction

If you use AAA Groups with Citrix Gateway, then be aware that SAML usually does not provide the user’s group membership. Instead, configure a LDAP Policy to get the user’s groups from Active Directory so the groups can be later used by Citrix Gateway.

If you don’t need LDAP Group Extraction, then skip ahead to the StoreFront section.

Do the following to configure LDAP Group Extraction.

  1. Create a new LDAP Action.
    1. Use the Search in Menu to find LDAP then pick any of the results.
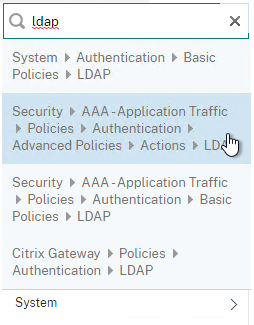
    2. Check the box next to an existing LDAP policy and click Add to copy its configuration. Or create a new one.
    3. Change the name of the LDAP Action.
    4. On the top right, uncheck the box next to Authentication.
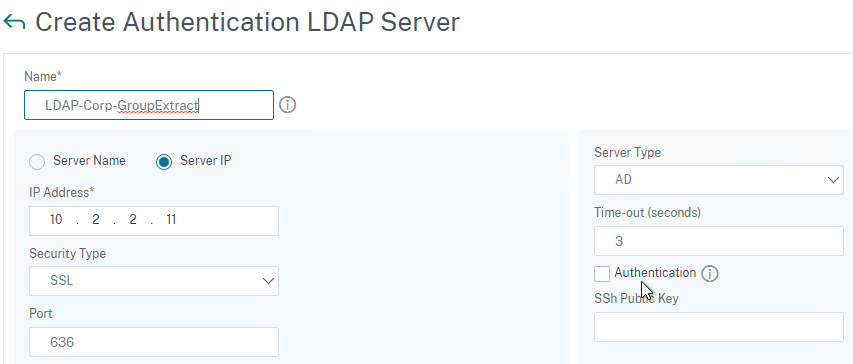
    5. Scroll down a bit and in the right side re-enter the Administrator Password. Copying an existing LDAP Action does not copy the Bind password.
    6. Scroll down to the Other Settings section.
    7. On the left, change Server Logon Name Attribute to –<< New >>–.
    8. Enter userPrincipalName. The UPN is extracted from the SAML Assertion.
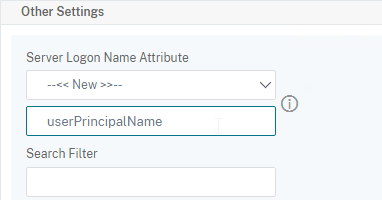
    9. Scroll down and click Create.
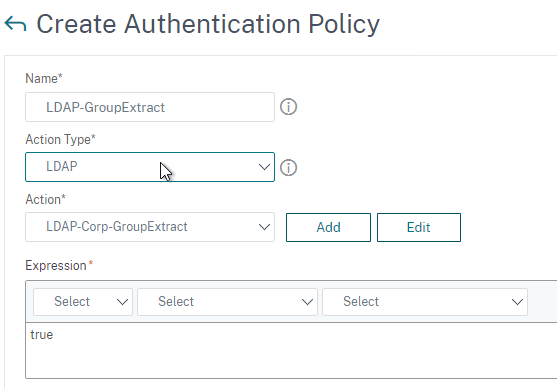
  2. On the left, go to Security > AAA – Application Traffic > Policies > Authentication > Advanced Policies > Policy and click Add to create a new Policy.

    1. Change Action Type to LDAP.
    2. Expression = true.
    3. Click Create.
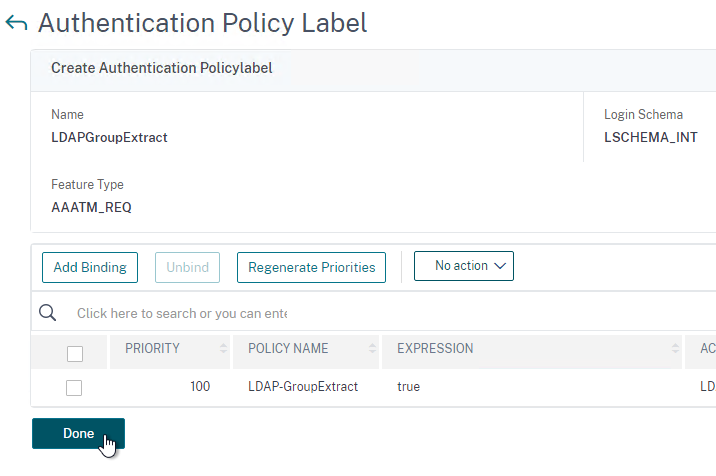
  3. On the left, go to Security > AAA – Application Traffic > Policies > Authentication > Advanced Policies > Policy Label. On the right, click Add.

    1. Give the Policy Label a name and click Continue. The Login Schema should be LSCHEMA_INT.
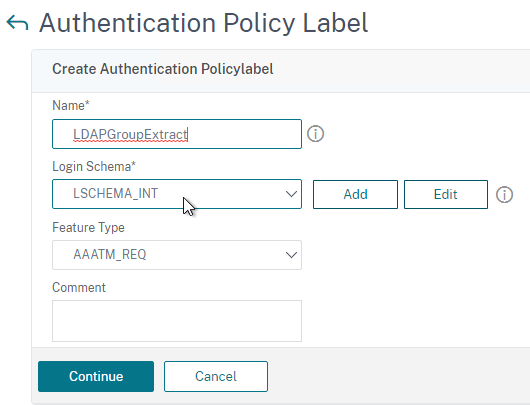
    2. Select your LDAP Group Extract policy and then on the bottom click Bind.
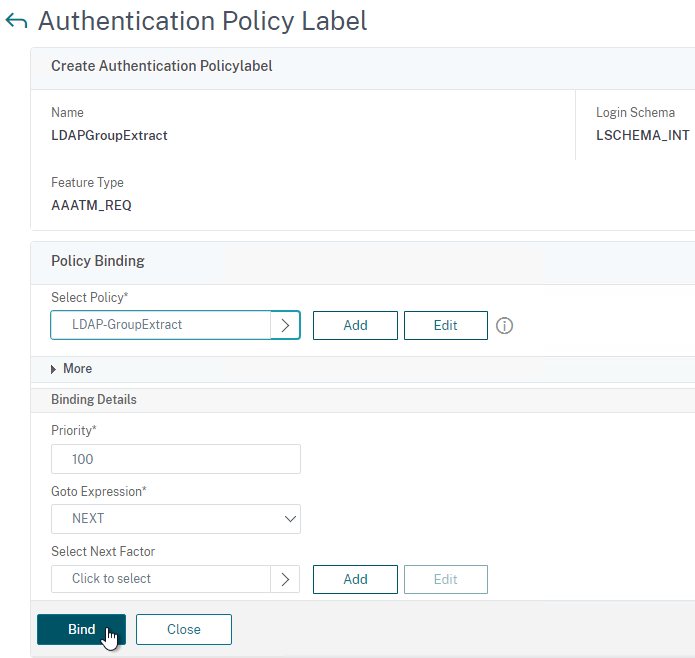
    3. Click Done to close the Policy Label.
  4. On the left, go to Security > AAA – Application Traffic > Virtual Servers. On the right, edit your SAML AAA vServer.
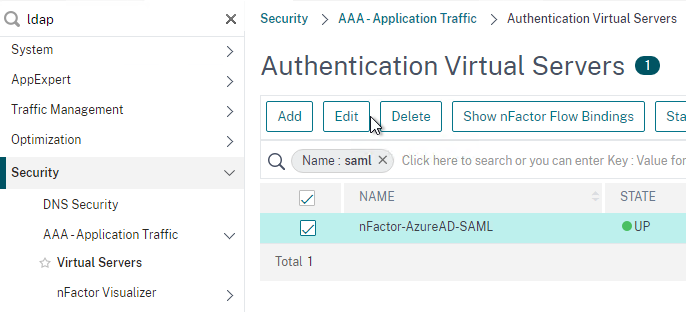
    1. Click where it says 1 Authentication Policy.
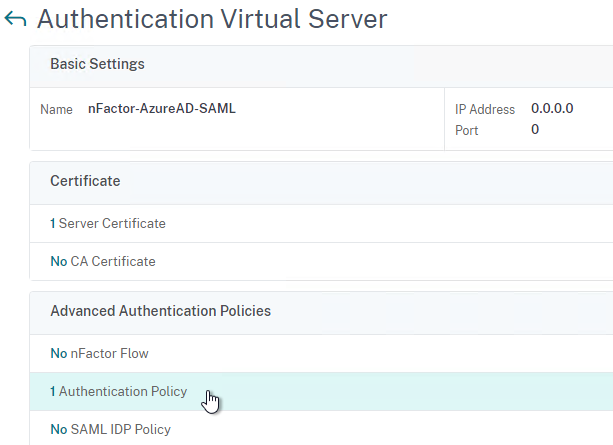
    2. Right-click the Authentication Policy and then click Edit Binding.
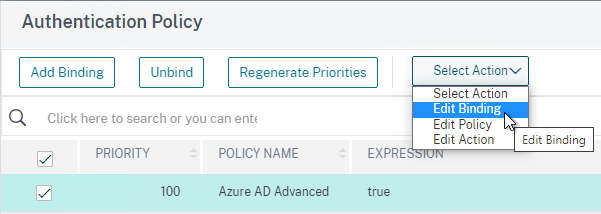
    3. In the Select Next Factor field, click where it says Click to select.
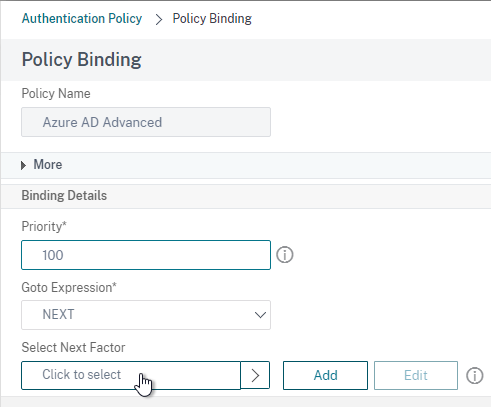
    4. Select your LDAP Group Extract Policy Label and then click Bind.
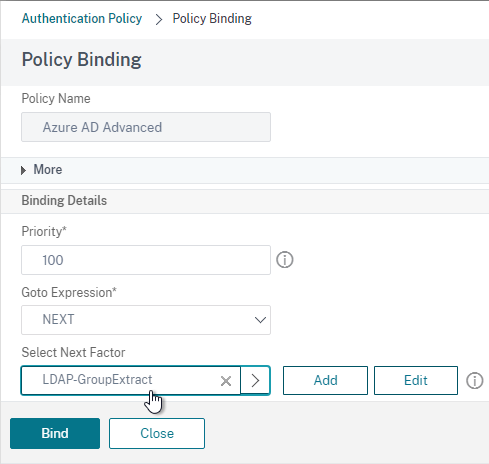
  5. Skip ahead to the StoreFront section.

Here are some sample CLI commands for this nFactor SAML LDAP Group Extract configuration.

# LDAP Actions
# ------------
add authentication ldapAction LDAP-GroupExtract -serverIP 10.2.2.11 -serverPort 636 -ldapBase "dc=corp,dc=local" -ldapBindDn ctxsvc@corp.local -ldapBindDnPassword ****** -ldapLoginName userPrincipalName -groupAttrName memberOf -subAttributeName cn -secType SSL -authentication DISABLED

# LDAP Policies
# -------------
add authentication ldapPolicy LDAP-Corp ns_true LDAP-Corp

# Authentication Policy Labels
# ----------------------------
add authentication policylabel LDAP-GroupExtract -loginSchema LSCHEMA_INT
bind authentication policylabel LDAP-GroupExtract -policyName LDAP-GroupExtract -priority 100 -gotoPriorityExpression NEXT

# Authentication Virtual Servers
# ------------------------------
bind authentication vserver nFactor-AzureAD-SAML -policy "Azure AD Advanced" -priority 100 -nextFactor LDAP-GroupExtract -gotoPriorityExpression NEXT

Configure StoreFront for SAML Citrix Gateway

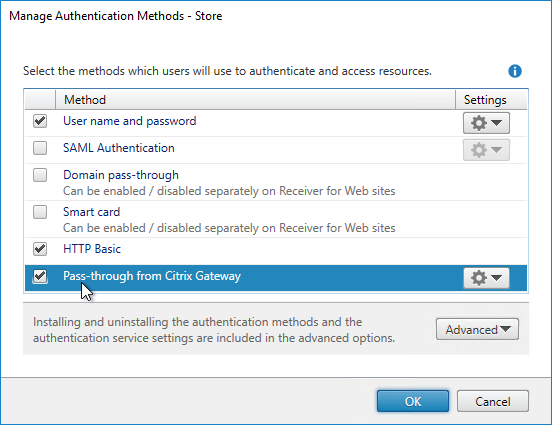
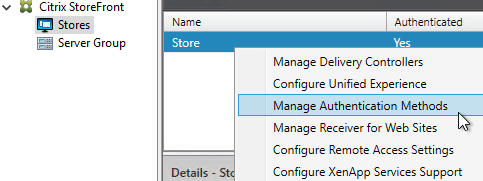
  1. In StoreFront 3.6 or newer, in the StoreFront Console, go to Stores, right-click the store, and click Manage Authentication Methods.
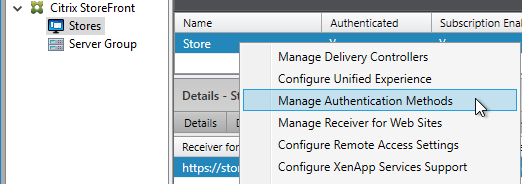
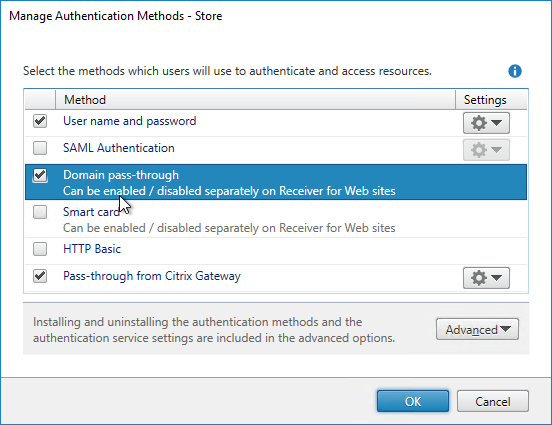
  2. Make sure Pass-through from Citrix Gateway is selected.
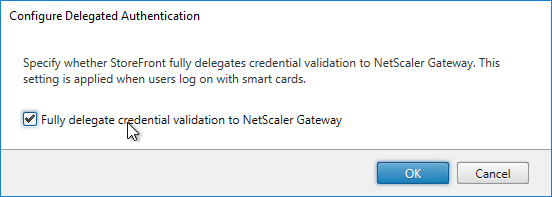
  3. Click the bottom gear icon on the right, and click Configure Delegated Authentication.
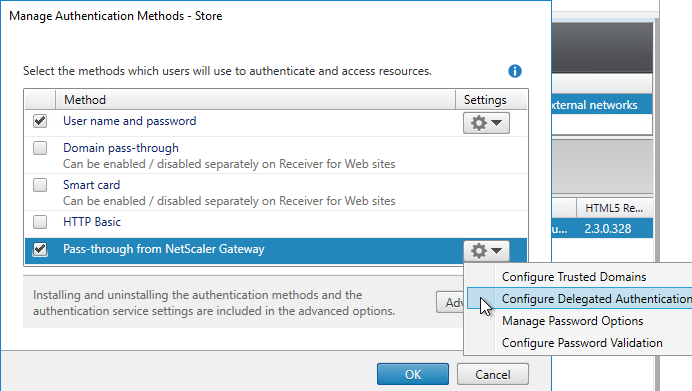
  4. Check the box next to Fully delegate credential validation to Citrix Gateway and click OK twice.
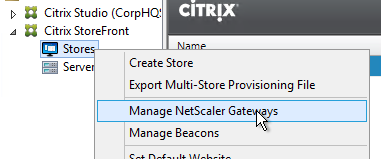
  5. In StoreFront, add a Citrix Gateway object that matches the FQDN of the Citrix Gateway Virtual Server that has SAML enabled.
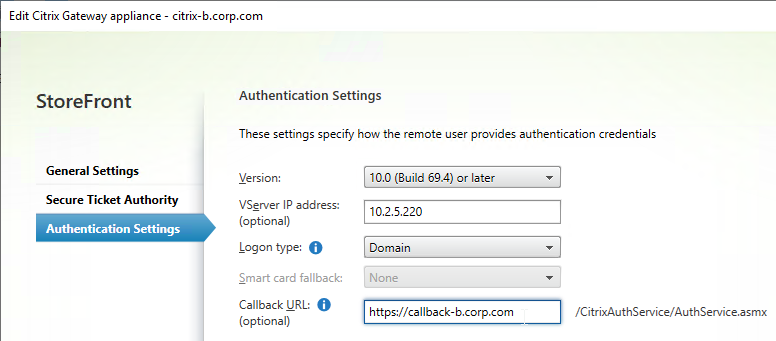
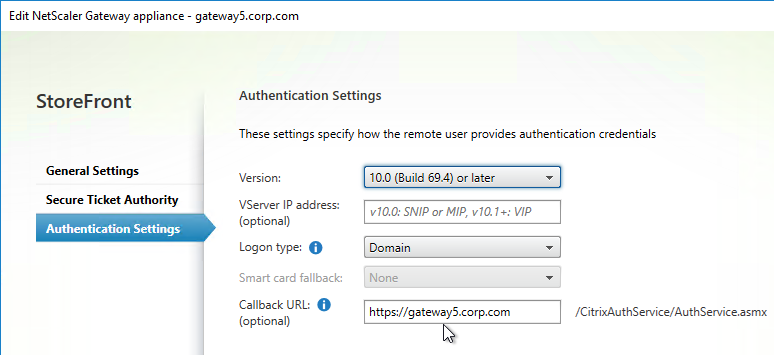
  6. On the Authentication Settings page, make sure you configure a Callback URL. It won’t work without it.
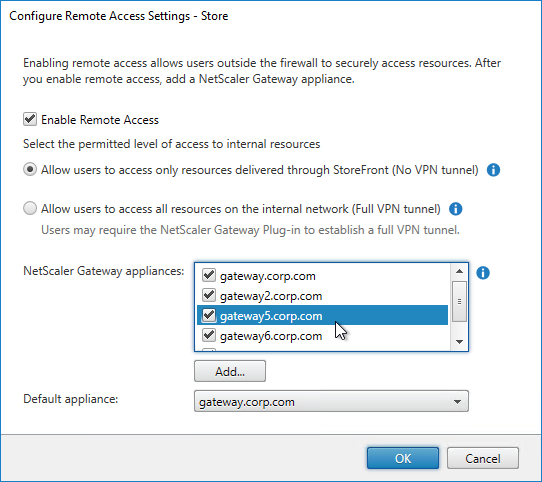
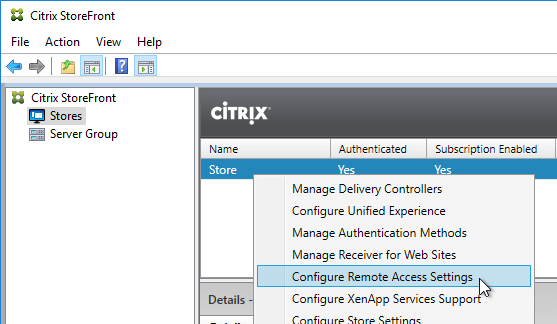
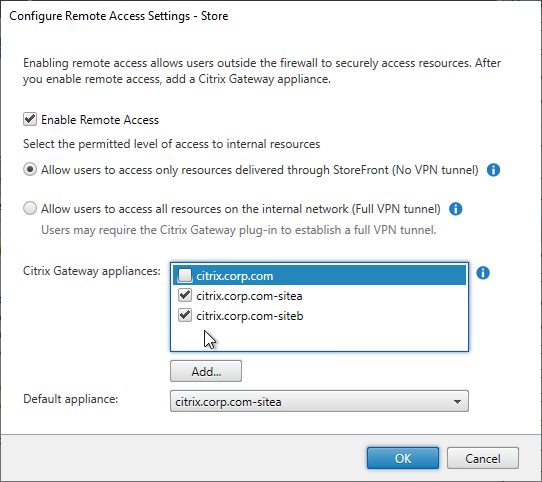
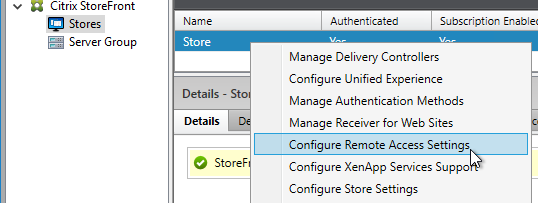
  7. Then assign (Configure Remote Access Settings) the Gateway to your Store.
  8. Next step: create Active Directory Shadow Accounts

Native SAML on StoreFront without Citrix ADC

StoreFront 3.9 and newer have native support for SAML Authentication without Citrix ADC. Notes:

  • SAML overrides Explicit and Pass-through authentication.
  • SAML in StoreFront without Citrix ADC seems to work in Workspace app and Receiver Self-Service for Windows.

For an example configuration using StoreFront PowerShell commands and SAML metadata, see CTX232042 Configure StoreFront with OKTA.

To configure native SAML in StoreFront 3.9 or newer:

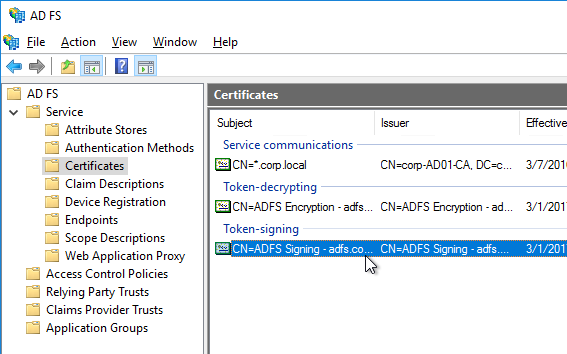
  1. Export the signing certificate from your SAML IdP. The IdP could be ADFS, Okta, Ping Identity, etc.
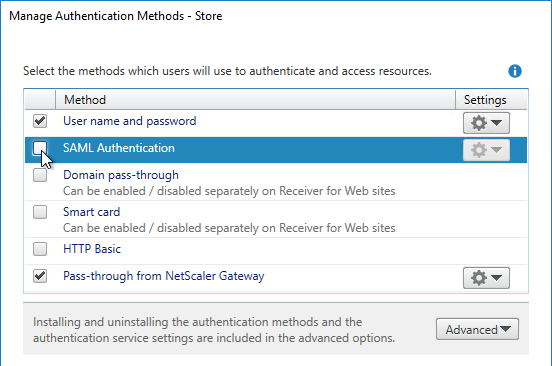
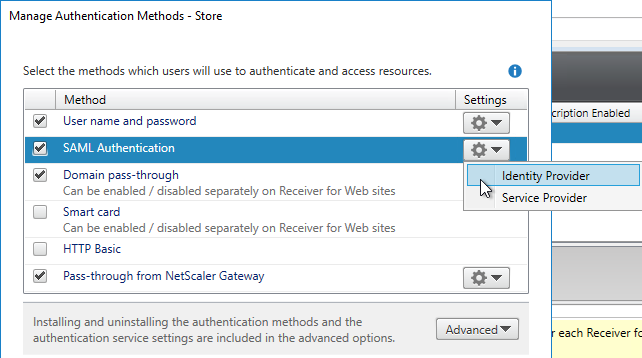
  2. In StoreFront 3.9 or newer console, right-click a Store, and click Manage Authentication Methods.
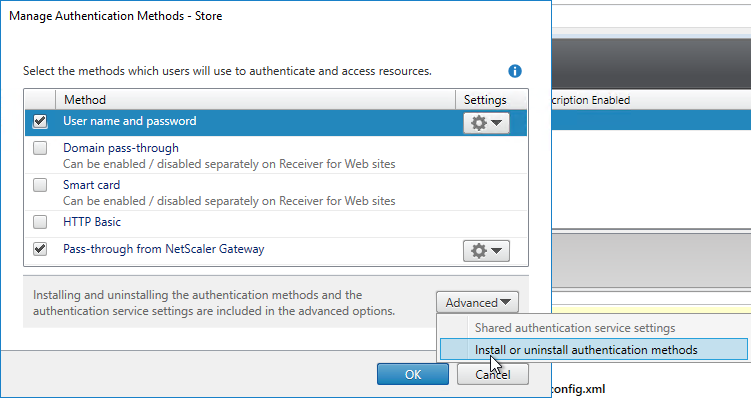
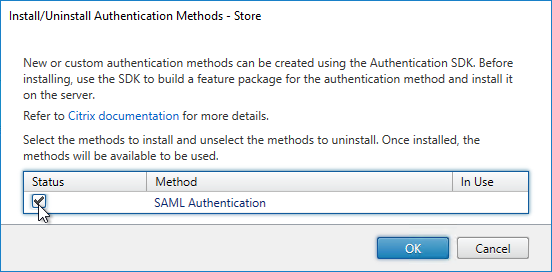
  3. Check the box next to SAML Authentication. If you don’t see this option (because you upgraded from an older version), click the Advanced button on the bottom of the window, and install the authentication method.
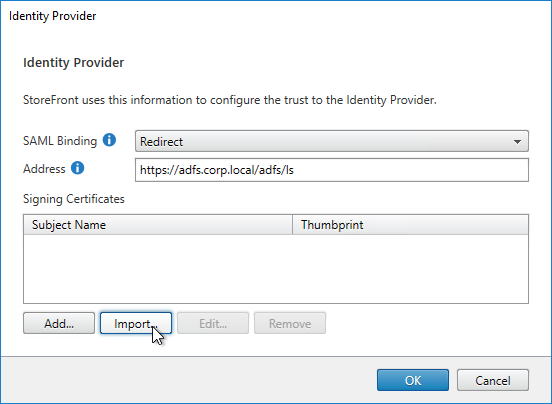
  4. On the right, click the gear icon for SAML, and click Identity Provider.
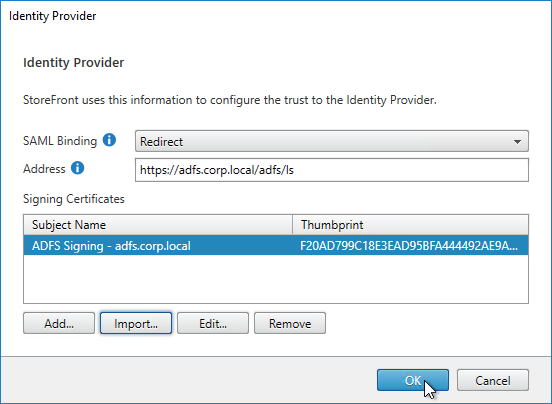
  5. Change the SAML Binding to the method your IdP expects.
  6. Enter the IdP token issuance endpoint URL. For example, in ADFS, the path is /adfs/ls.
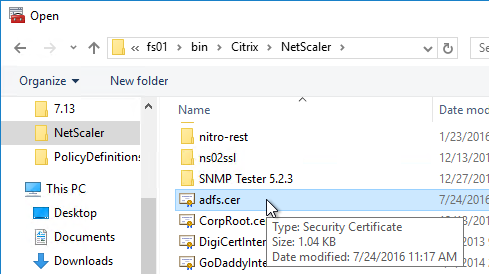
  7.  Click Import.
  8. Browse to the signing certificate exported from your IdP, and click Open.
  9. Then click OK to close the Identity Provider window.
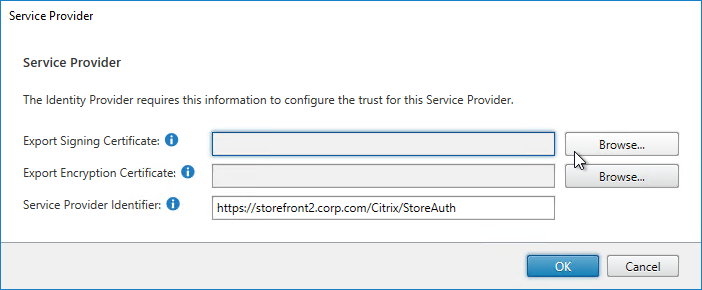
  10. On the right, in the SAML Authentication row, click the gear icon, and then click Service Provider.
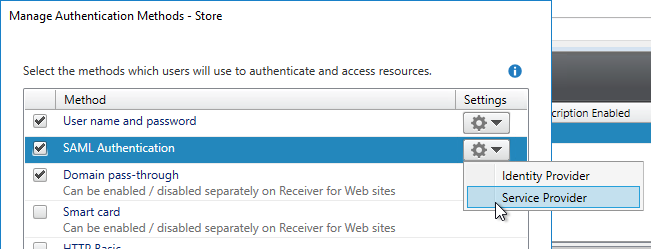
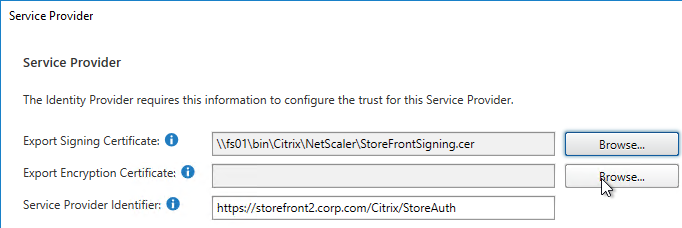
  11. Click the first Browse button.
  12. Give the Signing certificate a name, and save it somewhere.
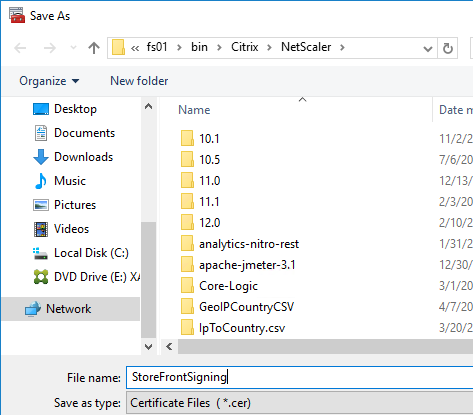
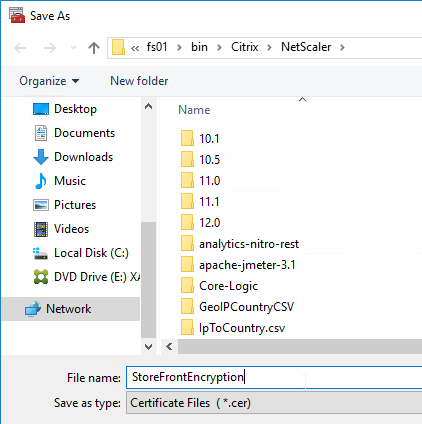
  13. Click the second Browse button.
  14. Give the Encryption certificate a name, and save it somewhere.
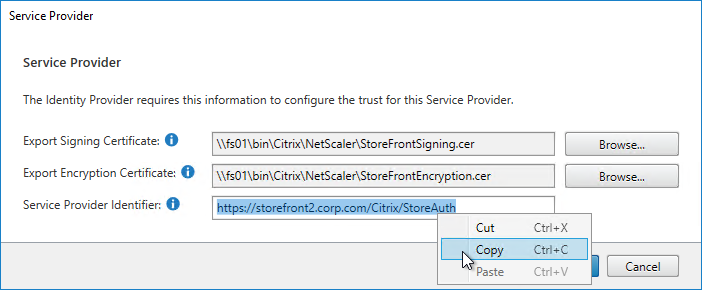
  15. Copy the Service Provider Identifier. Or you can change it to your desired value. Then click OK.
  16. In your IdP (e.g. ADFS), create a Relying Party Trust.
  17. Import the Encryption certificate that you exported from StoreFront.
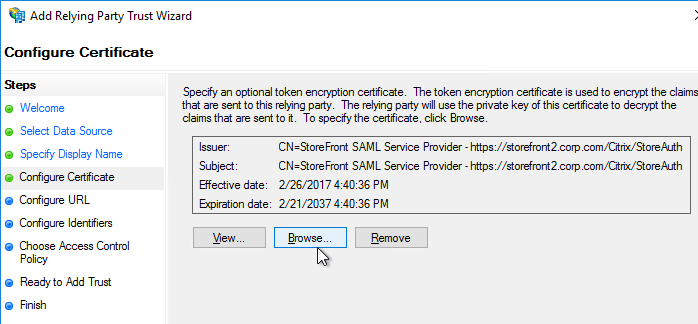
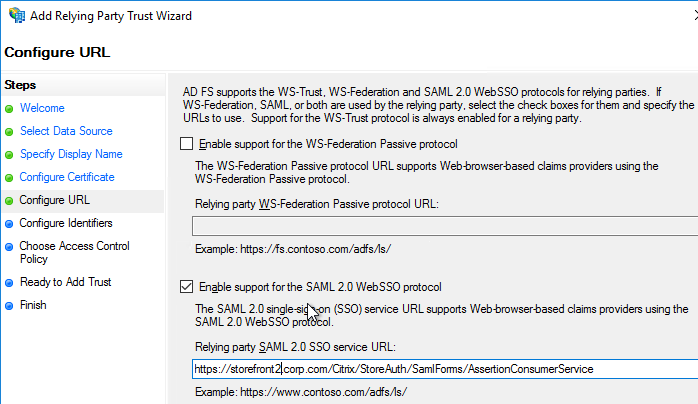
  18. Enable SAML 2.0.
  19. For the Assertion Consumer Service (ACS) path, enter something similar to https://storefront.corp.com/Citrix/StoreAuth/SamlForms/AssertionConsumerService. The hostname portion of the URL is equivalent to your StoreFront Base URL. /Citrix/StoreAuth matches your Store name with Auth on the end. The rest of the path must be /SamlForms/AssertionConsumerService. You can get this ACS value by looking in the SAML metadata at the bottom of https://<storefront host>/Citrix/StoreAuth/SamlForms/ServiceProvider/Metadata.

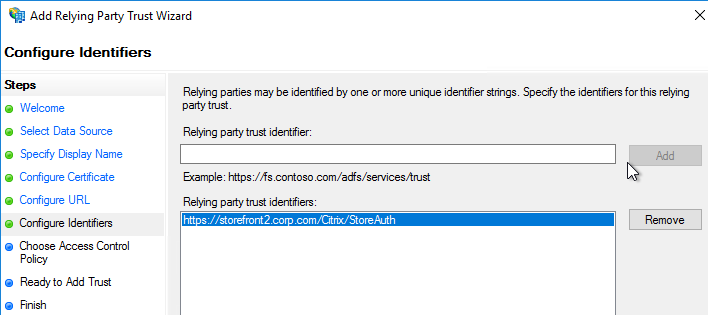
  20. For the Relying party trust identifier, enter the identifier you copied from the Service Provider window in StoreFront.
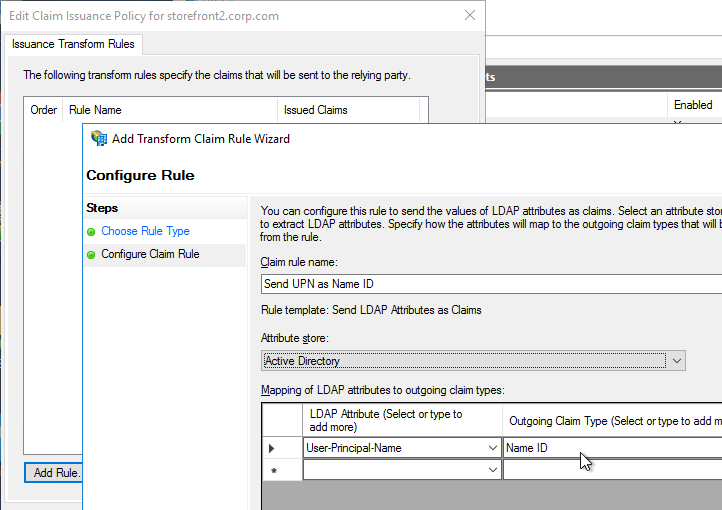
  21. Configure the Claim Rules to send the user’s email address or userPrincipalName as Name ID.
  22. Edit the Relying Party Trust. Import the Signing certificate that you exported from StoreFront.
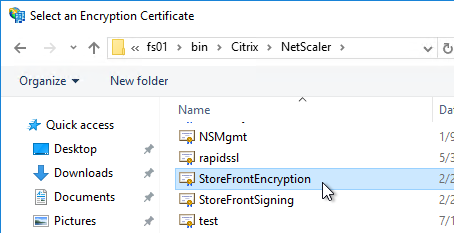
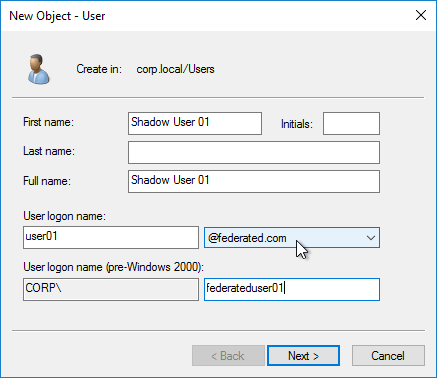
  23. Create Active Directory Shadow Accounts. Federated users must be userPrincipalName mapped to local Active Directory accounts.
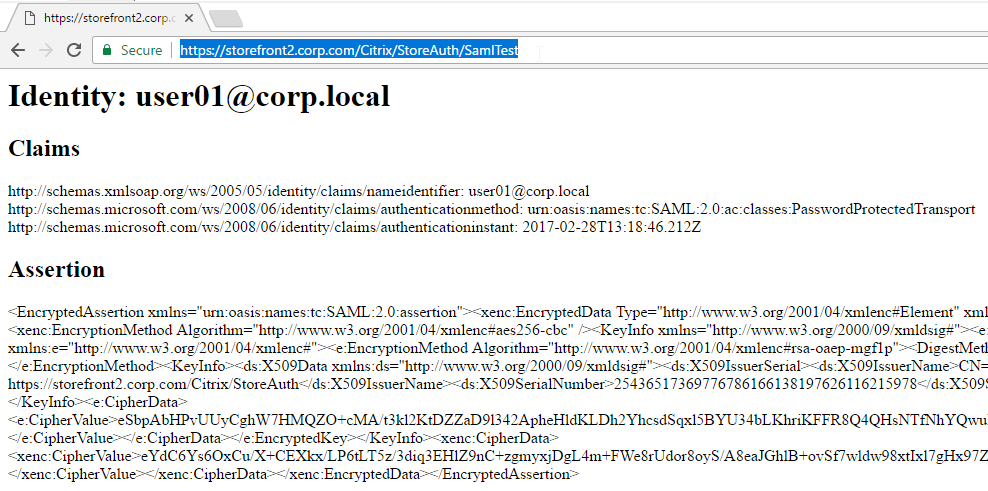
  24. If you point your browser to https://<storefront-host>/Citrix/<storename>Auth/SamlTest, it should perform a SAML Login, and then show you the assertion that was returned from the IdP. See Citrix CTX220639 How to configure SAML Authentication-Test Configuration.
  25. See Citrix CTX220682 Storefront SAML Troubleshooting Guide for event logs, SAML Metadata, Active Directory account mapping, Trust XML, etc.
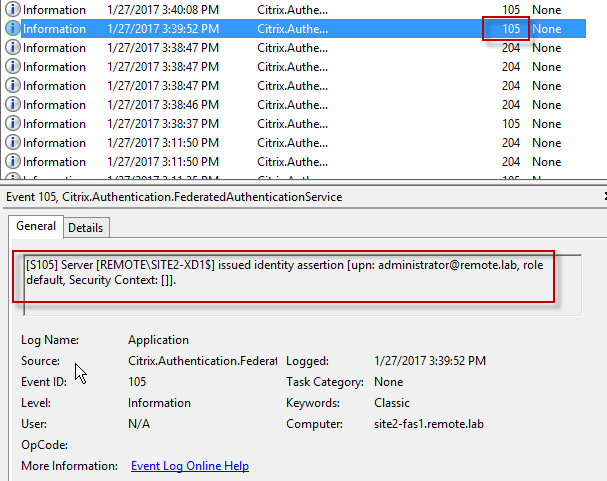
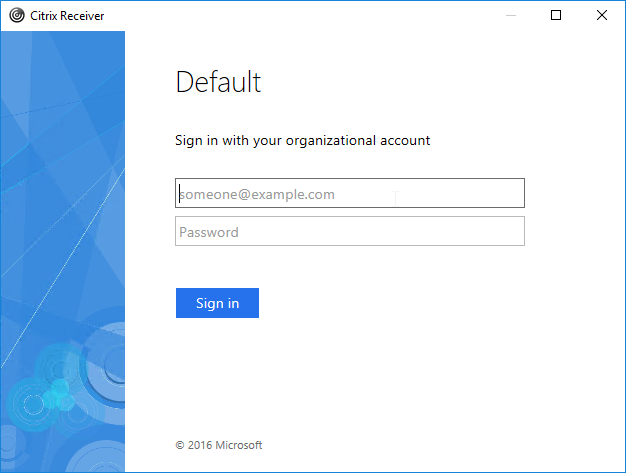
  26. When you go to your Receiver for Web page, it should automatically redirect you to your IdP. After authentication, it should redirect you back to StoreFront and show you your icons.
  27. ADFS also works in Receiver 4.6 and newer, and Workspace app.
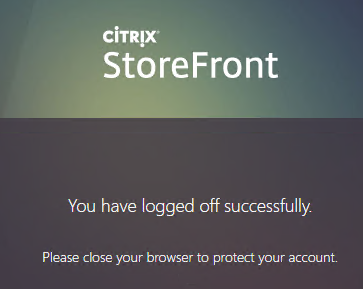
  28. When you logoff, it won’t let you log on again unless you close your browser and reopen it.
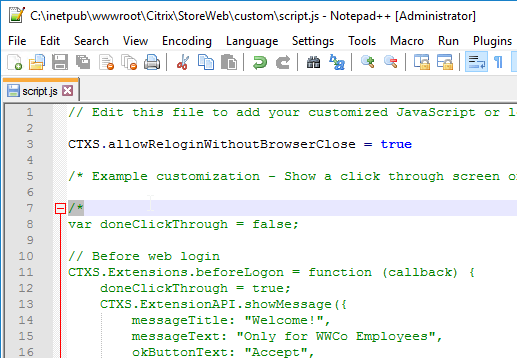
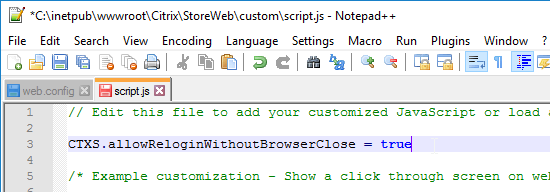
  29. To fix this problem, see CTP Sacha Thomet StoreFront – Allow relogin without browser close. Edit the file C:\inetpub\wwwroot\Citrix\StoreWeb\custom\script.js, and add the following line:
    CTXS.allowReloginWithoutBrowserClose = true
  30. Now when you logoff, you’re given an option to log on again.
Active Directory Shadow Accounts

To login to Windows (Citrix VDA), every user must have an Active Directory account in a domain trusted by the VDA. For Federated Users, you typically need to create shadow accounts for each Federated user in your local Active Directory. These Shadow accounts need a userPrincipalName that matches the SAML attribute (usually email address) provided by the SAML IdP.

If the email address provided by the SAML IdP does not match the UPN suffix for your domain, then do the following:

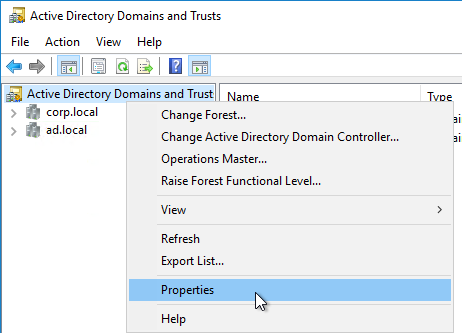
  1. Open Active Directory Domains and Trust.
  2. Right-click the top left node (not a domain node), and click Properties.
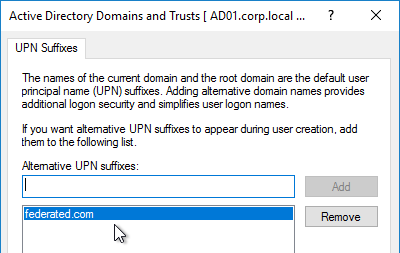
  3. In the UPN Suffixes tab, add a UPN suffix that matches the email suffix provided by the SAML IdP.
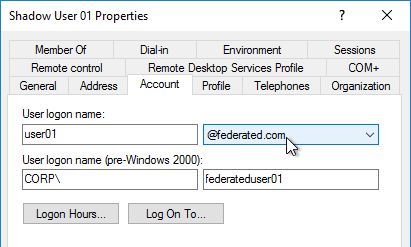
  4. When creating a shadow account in your Active Directory, the new UPN suffix is available in the drop-down list. Note that the pre-Windows 2000 logon name can’t conflict with any other user in the domain.
  5. The password for these Shadow accounts can be any random complex password since the Federated users never need the Shadow account’s password.
  6. If the shadow account is already created, edit the account, and on the Account tab, use the drop-down to select the new UPN suffix.
  7. Create a shadow account for every federated user. There are third party Identity Management tools that can automate this. Or get an export from the IdP and use PowerShell scripting to create the acccounts.

Verify FAS

When FAS is enabled on StoreFront, every user that logs into StoreFront (local or remote) causes a user certificate to be created on the FAS server. You can see these user certificates by running the following PowerShell commands:

Add-PSSnapin Citrix.Authentication.FederatedAuthenticationService.V1
Get-FasUserCertificate -address fas01.corp.local
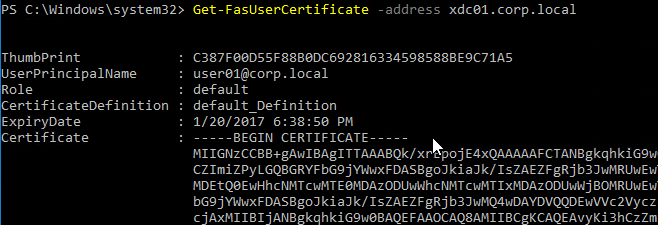
Citrix uses these certificates to logon to the VDA as the user. No password needed.
StoreFront 2411 through 3.5 – Tweaks

Last Modified: Dec 4, 2024 @ 2:51 am

Navigation

This article applies to StoreFront versions 2411, 2402 LTSR, 2203 LTSR, 1912 LTSR CU8 and all other versions 3.5 and newer.

💡 = Recently Updated

Change Log

CRL Checking – Disable

When the StoreFront server checks certificate revocation for its locally signed files, a delay can occur before the StoreFront logon page is displayed.

  1. Run the following PowerShell commands:
    Add-PSSnapin Citrix.DeliveryServices.Framework.Commands
    Set-DSAssemblyVerification $false
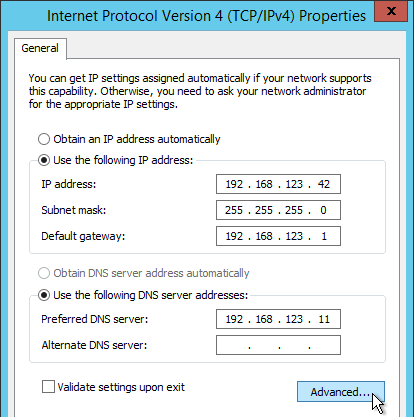
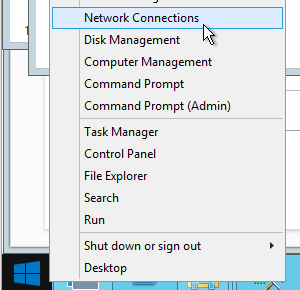
  2. Another potential tweak to speed up StoreFront is to disable NetBIOS. Right-click the Start Menu and click Network Connections.
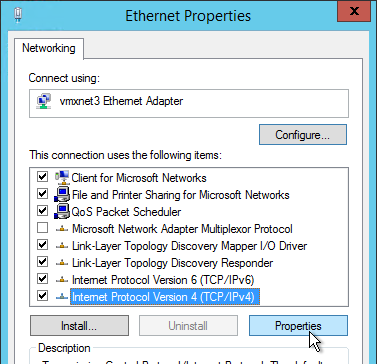
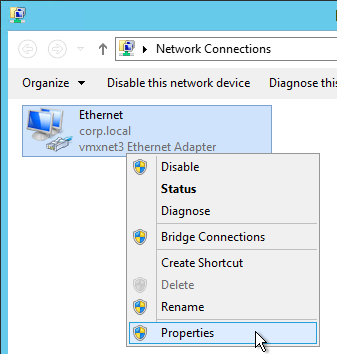
  3. Right-click the NIC and click Properties.
  4. Highlight Internet Protocol Version 4 and click Properties.
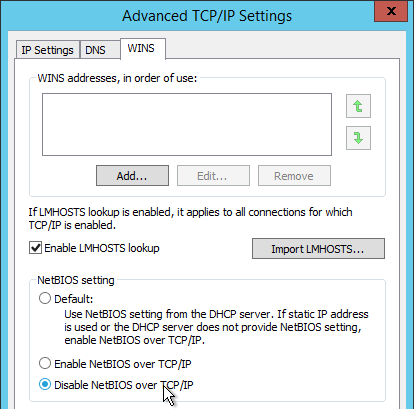
  5. Click Advanced.
  6. On the WINS tab, change the selection to Disable NetBIOS over TCP/IP and click OK twice and Close once.
  7. Repeat on the other StoreFront servers.

Note: According to Microsoft, it is no longer necessary to configure generatePublisherEvidence in C:\Windows\Microsoft.NET\Framework\v4.0.30319\aspnet.config.

Receiver Shortcuts

You can use StoreFront to control placement of shortcuts on Receiver machines.

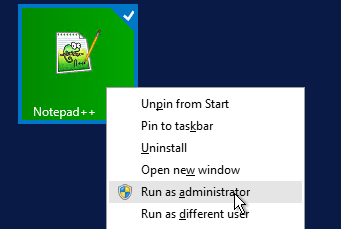
  1. Run Notepad elevated (as administrator).
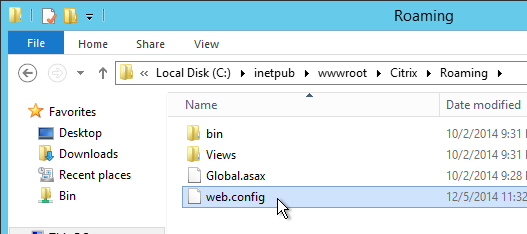
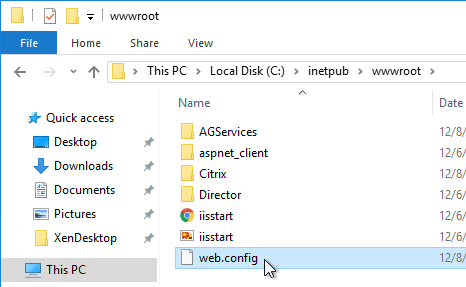
  2. Edit the file C:\inetpub\wwwroot\Citrix\Roaming\web.config.
  3. Search for <account id. Find the Store name in the name attribute.
  4. Scroll down to the first <properties> section located under <annotatedServices>.
  5. See Using StoreFront account settings to customize app shortcut locations at Citrix Docs for a list of properties. Add the properties as detailed at Citrix Docs. The properties should be added after the clear tag.
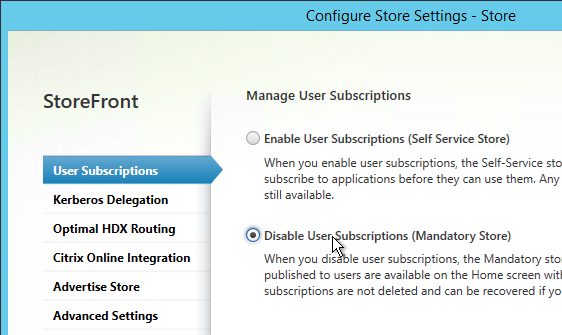
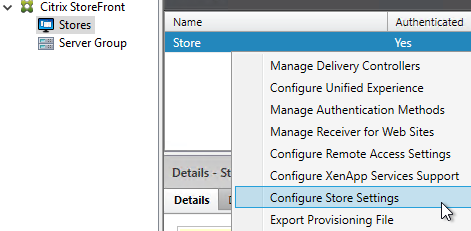
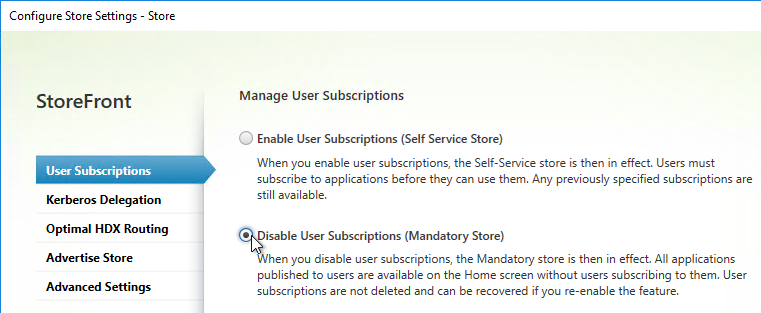
  6. Note: if subscriptions are enabled in StoreFront then only Favorites are added to the Start Menu and Desktop. If subscriptions are disabled then all applications are placed on the Start Menu or Desktop.
  7. Close and save the file.
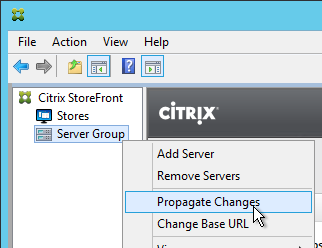
  8. Then Propagate Changes.

PNAgent Authentication and Default Store

Default Store

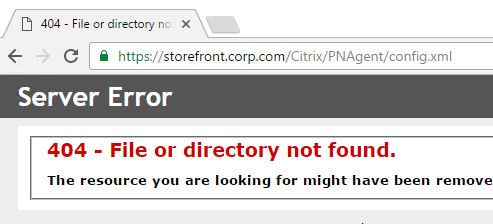
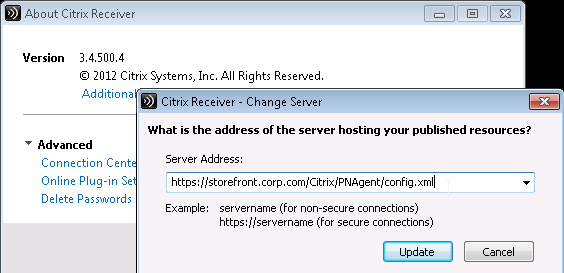
If you point your browser to https://storefront.corp.com/Citrix/PNAgent/config.xml, which is the typical path for PNAgent, you’ll get a 404.

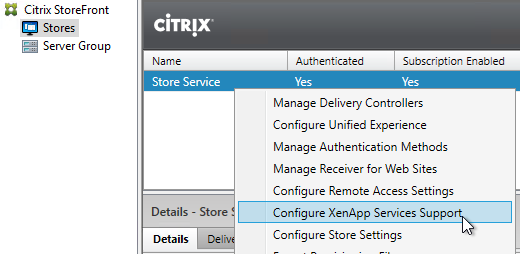
To fix this, in the StoreFront console, right-click the store, and click Configure XenApp Services Support.

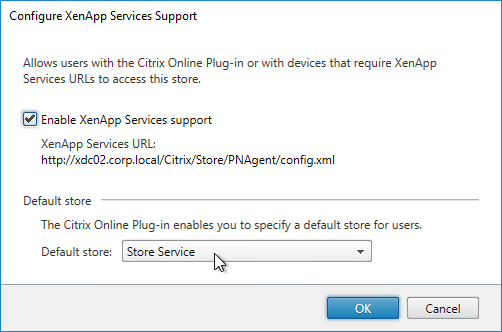
In the bottom of the window, select the Default store, and click OK.

Now PNAgent can point to StoreFront without needing to specify a custom path. Note: this only works for /Citrix/PNAgent/config.xml.

Single Sign-on

From Configure authentication for XenApp Services URLs at Citrix Docs: XenApp Services URLs support explicit, domain pass-through, and pass-through with smart card authentication. Explicit authentication is enabled by default. You can change the authentication method, but only one authentication method can be configured for each XenApp Services URL. To enable multiple authentication methods, create separate stores, each with a XenApp Services URL, for each authentication method. To change the authentication method for a XenApp Services URL, you run a Windows PowerShell script.

  1. On the primary StoreFront server in your deployment, use an account with local administrator permissions to start Windows PowerShell.
  2. At a command prompt, type the following command to configure the user authentication method for users accessing the store through the XenApp Services URL.
    & "C:\Program Files\Citrix\Receiver StoreFront\Scripts\EnablePnaForStore.ps1" –SiteId 1 -ResourcesVirtualPath /Citrix/Store –LogonMethod sson
  3. Propagate changes.

Remember my password

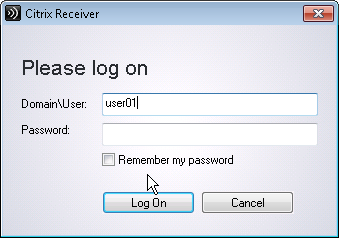
If you leave PNAgent authentication set to Prompt, you can enable the Remember my password box by doing the following:

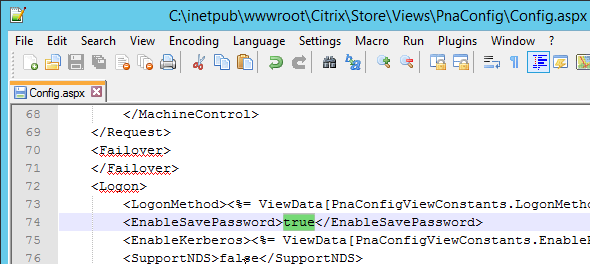
  1. Run Notepad as Administrator and edit the file C:\inetpub\wwwroot\Citrix\Store\Views\PnaConfig\Config.aspx.
  2. Near line 74 is EnableSavePassword. Change it to true.
  3. When PNAgent connects, there should now be a Remember my password checkbox.

Hide Applications

You can hide all icons of a particular type (Applications, Desktops, Documents). Or you can hide icons with a specific keyword.

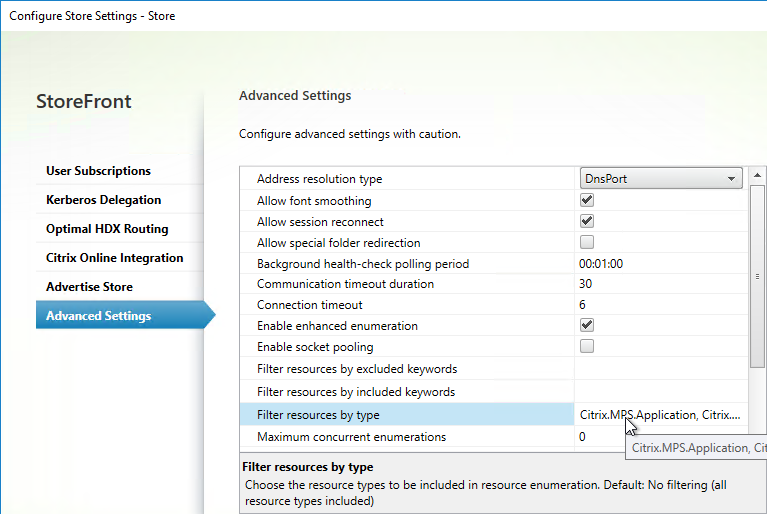
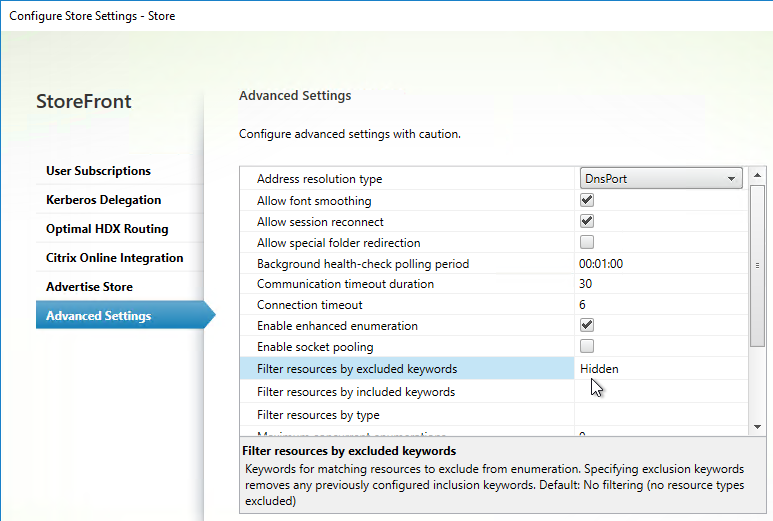
Go to Stores > MyStore > Configure Store Settings > Advanced Settings, and look for the Filter options.

Filter resources by type lets you hide all Applications or all Desktops. If you are running Receiver inside a published desktop, then you probably don’t want desktop icons to be delivered by Receiver. In that case, create a new Store and filter the Desktop icons. Then only the application icons will be delivered.

Filter resources by excluded keywords lets you filter published icons that match a custom keyword.

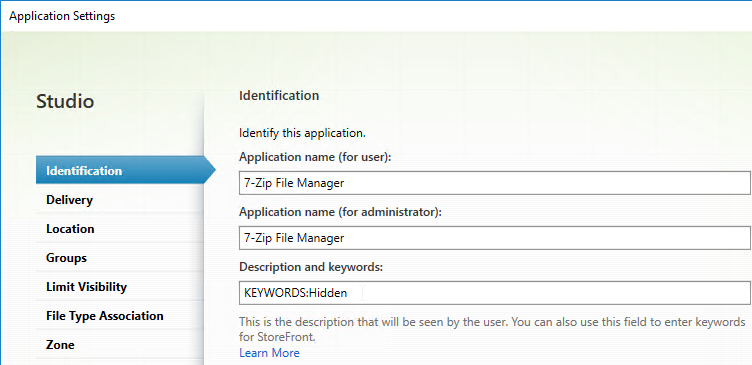
Once the ExcludeKeyword has been defined, add the keyword to a published application or published desktop description, and that application/desktop will no longer display in Receiver. This works for both Receiver for Web and Receiver Self-Service (non-browser).

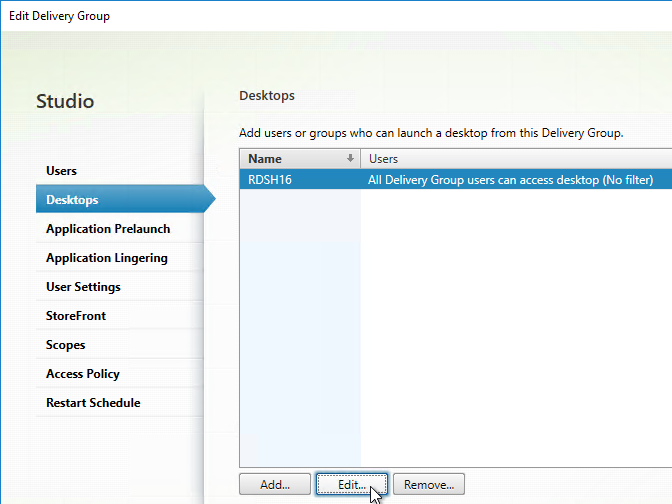
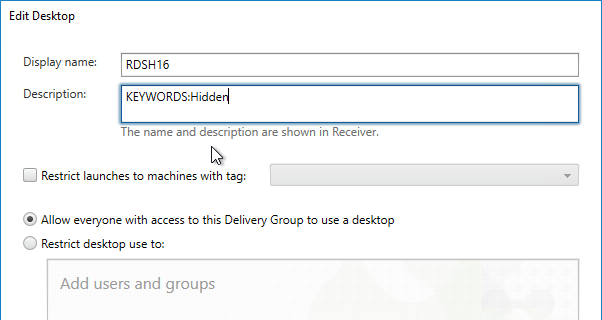
In XenDesktop 7.9 and and newer and Citrix Virtual Apps and Desktops, to assign a description to a Desktop, you edit the Delivery Group, go to the Desktops page, and edit one of the Desktops. Citrix CTX220429 Configure Resource Filtering to Allow Desktops to be filtered on Storefront.

Desktop Autolaunch

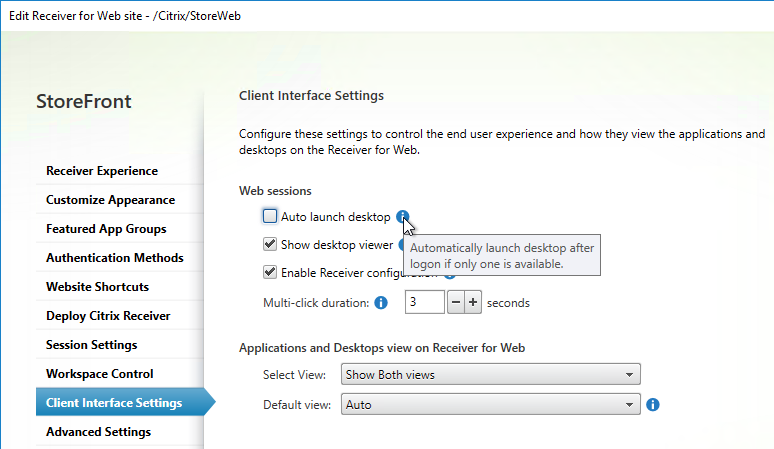
By default, if only a single desktop is published to the user, Receiver for Web will auto-launch it. You can change this behavior by going to Stores > MyStore > Manage Receiver for Web Sites > Configure > Client Interface Settings and uncheck the box next to Auto launch desktop.

Full Screen Desktop

Citrix CTX139762 How to Configure StoreFront to Start Published Desktops in Full Screen Mode: This article describes how to configure StoreFront to start published desktops in Full Screen Mode.

  1. Open the file C:\inetpub\wwwroot\Citrix\Store\App_Data\default.ica on the StoreFront server(s) with notepad (as Administrator)
  2. Add the line:
    [Application]
    DesktopViewer-ForceFullScreenStartup=On
  3. In older versions of StoreFront, it should be true instead of On.
  4. Save the file.
  5. Open the command prompt (cmd) and run iisreset.

Autolaunch Application

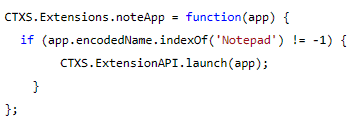
See CTX572543 How to auto launch published app while logon Storefront Web URL. Add the following code to the end of C:\inetpub\wwwroot\Citrix\<StoreName>Web\custom\script.js.

var ctxAppName = "AppName";
CTXS.Extensions.noteApp = function (app) {
  if(app.name == ctxAppName){ 
    CTXS.ExtensionAPI.launch(app);
  }
};

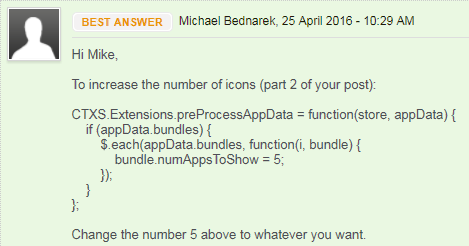
See the script.js code posted by Michael Bednarek at Citrix Discussions.

Store for Anonymous

If you intend to publish applications to anonymous users, then you can create a StoreFront store that does not require authentication. Note: anonymous stores only work internally (no NetScaler Gateway).

  1. On the VDAs, create and configure anonymous accounts.
  2. In Citrix Studio, configure a Delivery Group to accept unauthenticated (anonymous) users.
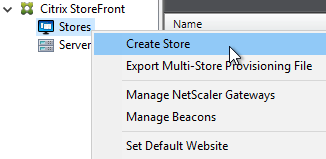
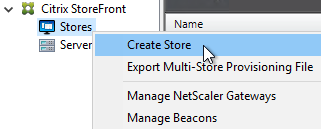
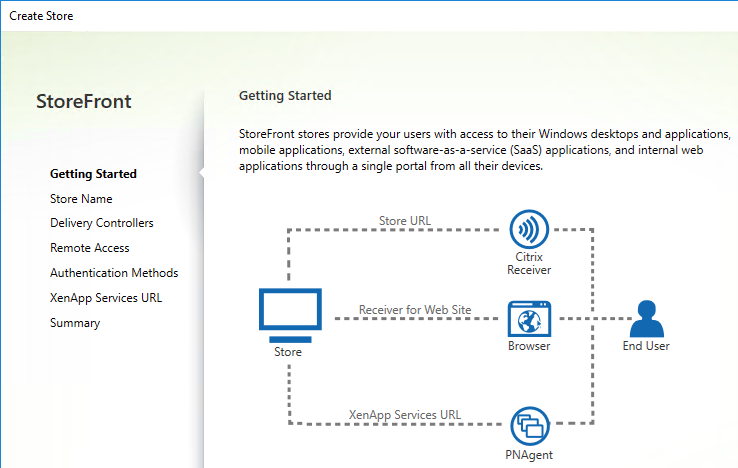
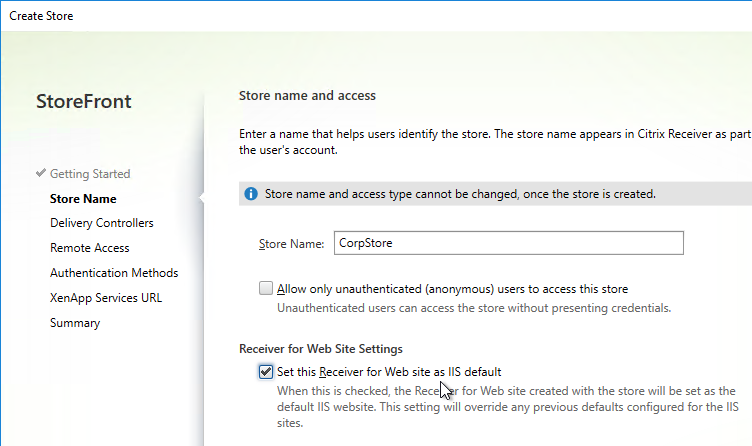
  3. In the StoreFront Console, right-click Stores, and click Create Store.
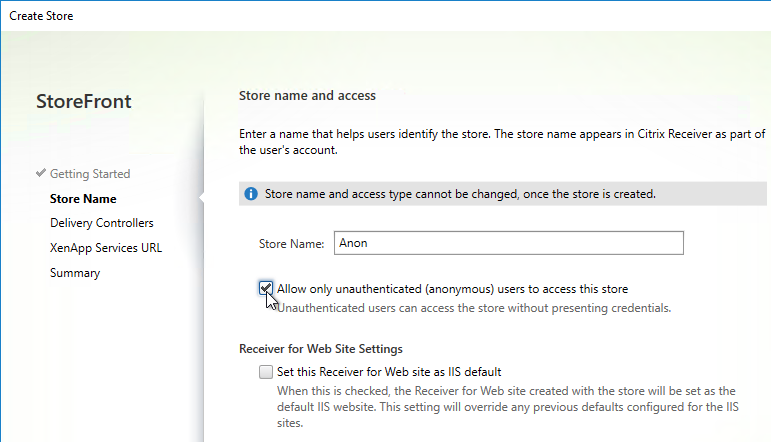
  4. In the Store Name and Access page, enter a new store name.
  5. Check the box next to Allow only unauthenticated users to access this store.
  6. Then click Next and finish the wizard like normal.
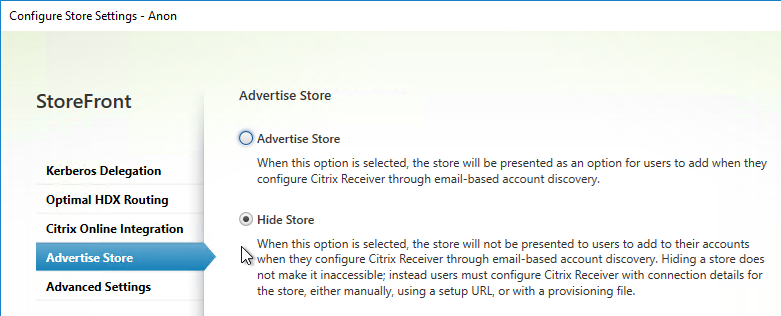
  7. By default, Anonymous stores are hidden (not advertised). When performing discovery in Receiver you’ll need to enter the full path to the store (e.g. https://storefront.corp.com/Citrix/Anon/discovery).

Workspace Control

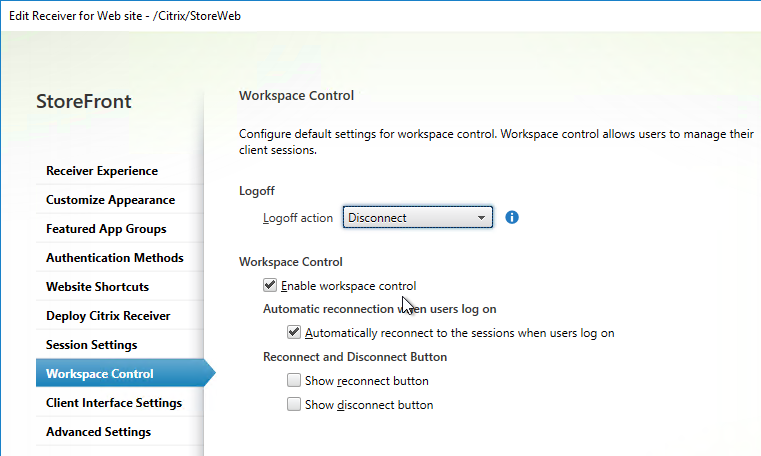
Workspace Control reconnects user sessions. It can be disabled. Or configure various reconnection options.

Citrix Blog Post Workspace Control: When You DON’T Want to Roam details complete session reconnection configuration instructions for XenApp, Remote Desktop Services, StoreFront, and Receiver.

Receiver for Web

Go to Stores > MyStore > Manage Receiver for Web Sites > Configure > Workspace Control page.

Receiver Self-Service

Citrix Blog Post – How to Disable Workspace Control Reconnect: For Receiver for Windows, Workspace Control can be managed on client devices by modifying the registry. Please see this Knowledgebase Article for how to implement it. This can also be done for domain-joined client devices using Group Policy.

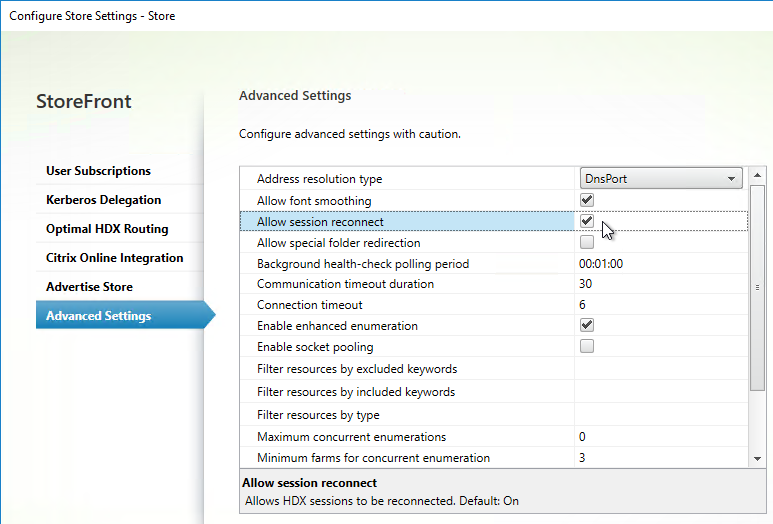
In StoreFront Console, go to Stores > MyStore > Configure Store Settings > Advanced Settings, and there’s a setting for Allow session reconnect.

Treat Desktops as Applications

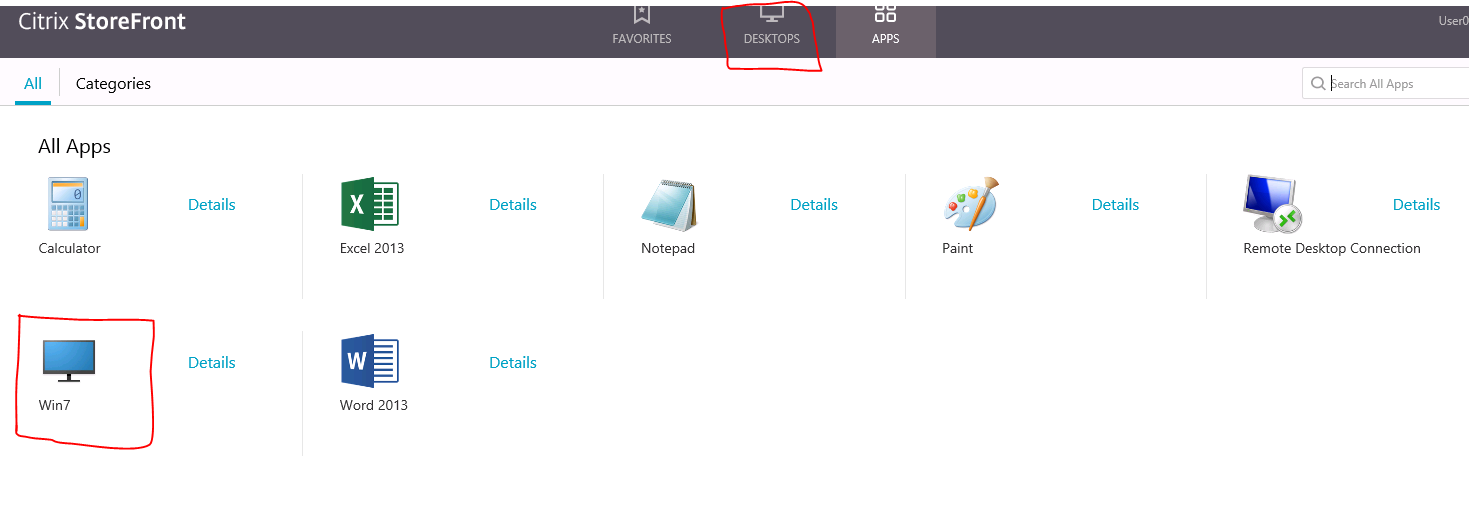
From Treating All Desktops as Applications at Citrix Blog Post What’s New in StoreFront 3.0: Desktops are treated differently from applications in StoreFront/Receivers. They are placed in a separate Desktop tab and in the case of Receiver for Web, they are not reconnected with workspace control. In some use cases, it is desirable to treat desktops as applications so that they are placed together with applications and get reconnected as part of workspace control. With StoreFront 2.x, you have to add the TreatAsApp keyword to all published desktops to achieve this effect. StoreFront 3.0 enables you to configure treating all desktops as applications at the store level without the need of adding the TreatAsApp keyword to all the published desktops. This is configurable using a PowerShell cmdlet.

& "C:\Program Files\Citrix\Receiver StoreFront\Scripts\ImportModules.ps1"

Set-EnhancedEnumerationOptions -siteId 1 -storeVirtualPath /Citrix/Store `
-treatDesktopsAsApps $true

Also see Citrix CTX223817 How to Configure “TreatAsApp” in XenDesktop 7.8.

Special Folder Redirection

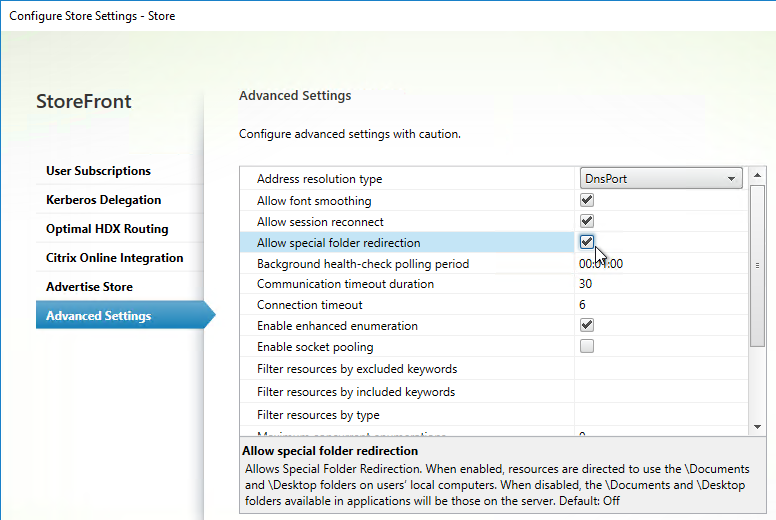
From Configure special folder redirection at Citrix Docs: With Special Folder Redirection configured, Citrix maps Windows special folders for the server, to those on their local computers. Special folders refer to standard Windows folders, such as \Documents and \Desktop.

In StoreFront Console, go to Stores > Configure Store Settings > Advanced Settings and there’s an option for Allow special folder redirection.

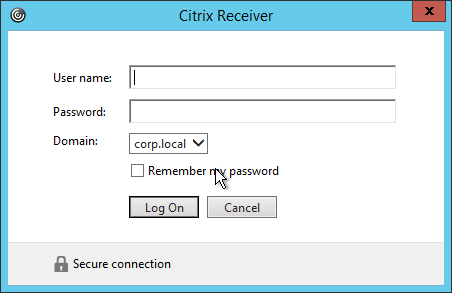
Receiver Self-service – Disable “Remember My Password”

By default, when Receiver Self-Service connects internally to StoreFront, the user is able to check the box next to Remember my password. Note: When connecting through NetScaler Gateway, this checkbox is never available.

This can be disabled by making a change on the StoreFront server. This procedure is documented by John Ashman at Citrix Discussions and Prevent Citrix Receiver for Windows from caching passwords and usernames at Citrix Docs.

  1. Note that this procedure seems to prevent Receiver for iOS from adding accounts.
  2. On the StoreFront server, run a text editor elevated (as administrator).
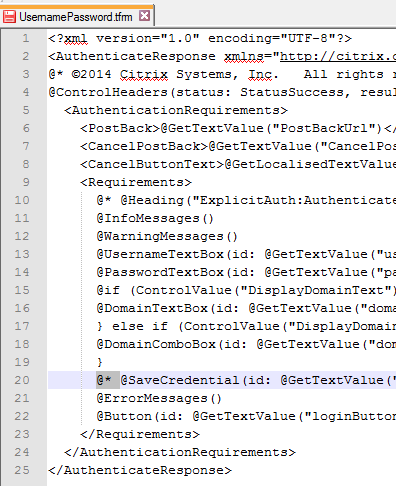
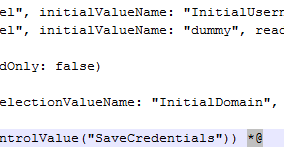
  3. Open the file C:\inetpub\wwwroot\Citrix\StoreAuth\App_Data\Templates\UsernamePassword.tfrm.
  4. Go to line 20, which should start with @SaveCredential.
  5. To comment out the line, wrap it in @* and *@. Save the file when done.

  6. Now the Remember My Password checkbox is gone.

“Activate” Option in Web Page – Disable

From Citrix Discussions: to disable the “activate…”; function for Citrix receiver for windows that is visible when a user clicks their username in the upper right hand corner of Receiver for Web, in StoreFront Console, go to Stores > MyStore > Manage Receiver for Web Sites > Configure > Client Interface Settings page. There’s a checkbox for Enable Receiver configuration.

Logoff Receiver for Web Seconds after Icon Launch

From Citrix Blog Post Logging Off Receiver for Web after an Application/Desktop Launch: Simply add the following code snippet to script.js in the custom folder for the Receiver for Web site (typically C:\inetpub\wwwroot\Citrix\StoreWeb\custom\) you would like to customize:

var delayLogoffInSeconds = 10;

CTXS.Extensions.beforeWebLogoffIca = function(action) {
    return 'none';
};

CTXS.Extensions.postLaunch = function(app, status) {
    if (! CTXS.Device.isNativeClient()) {
        if (status == CTXS.LAUNCH_SUCCESS) {
            function logoff() {
                CTXS.Environment.logOff();
            }
            window.setTimeout(logoff, delayLogoffInSeconds * 1000);
        }
    }
};

Customize Receiver UI in StoreFront 3.x

StoreFront 3.x customizations are visible in both Receiver for Web and in Receiver Self-Service.

Note: these customizations might not work in StoreFront 1811 and newer, which has a different user interface.

If you are load balancing StoreFront and want to put the server name on the webpage (or Receiver), see Citrix Blog Post How To: Add a Server Identifier to the StoreFront Page Footer. This works in StoreFront 1811 and newer.

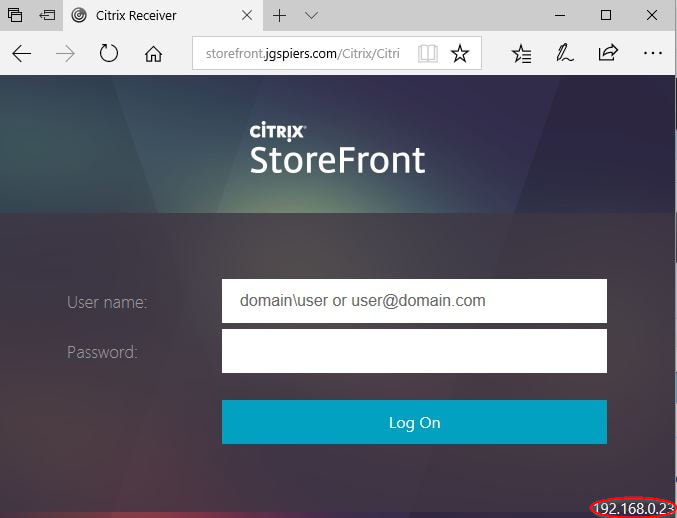
George Spiers Insert Client IPs into the StoreFront logon page.

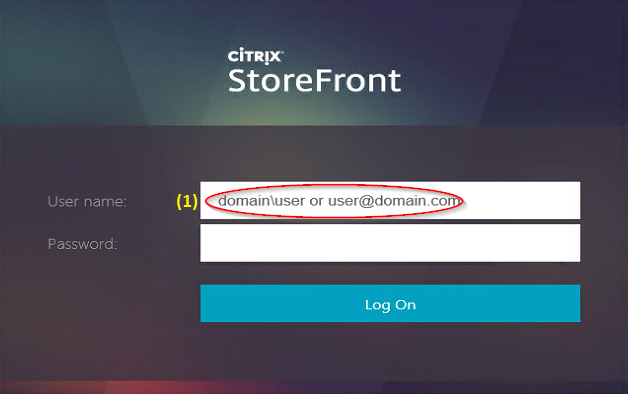
John Billekens Hide or change “domain\user or username@domain.com” text in Storefront: In C:\inetpub\wwwroot\Citrix\<Store>Web\custom\style.css, add the following to hide the text:

.credentialform span.pseudo-input.show {
 visibility: hidden;
}

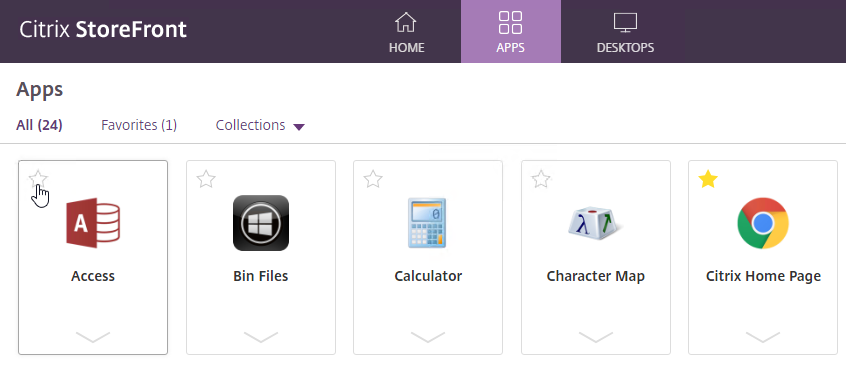
For StoreFront older than version 1811, Citrix Blog Post Dynamic Subscription Icons in StoreFront explains how to change the Details link to a star icon based on subscription status. The star icons are not clickable like they are in StoreFront 1811 and newer.

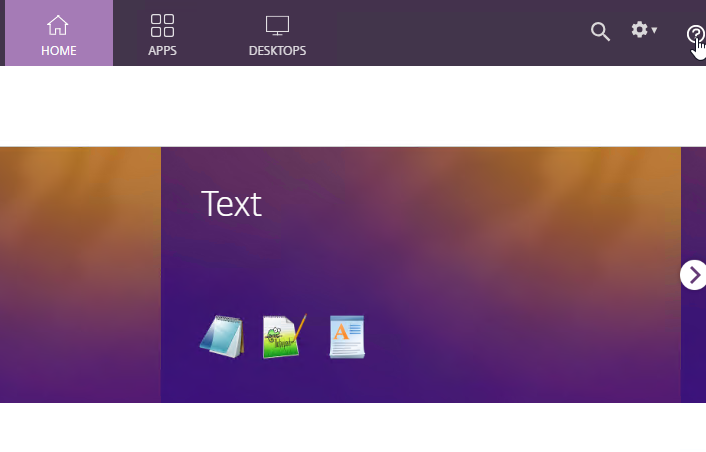
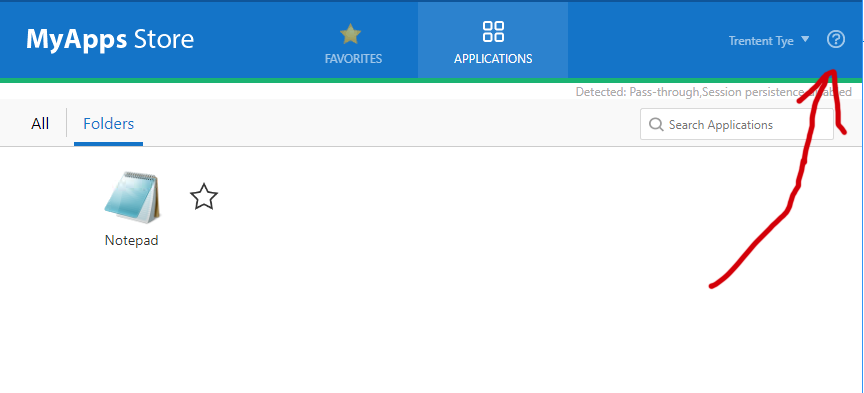
Trentent Tye at Citrix Storefront – Adventures in customization – Add a help button to your Storefront UI uses CTXS.ExtensionAPI.addHelpButton() and CTXS.ExtensionAPI.openUrl() to add a help button which opens a help page URL. This also works in StoreFront 1811 and newer.

CTP Sam Jacobs and Rich Minichiello Adding an EULA Checkbox to StoreFront logon page

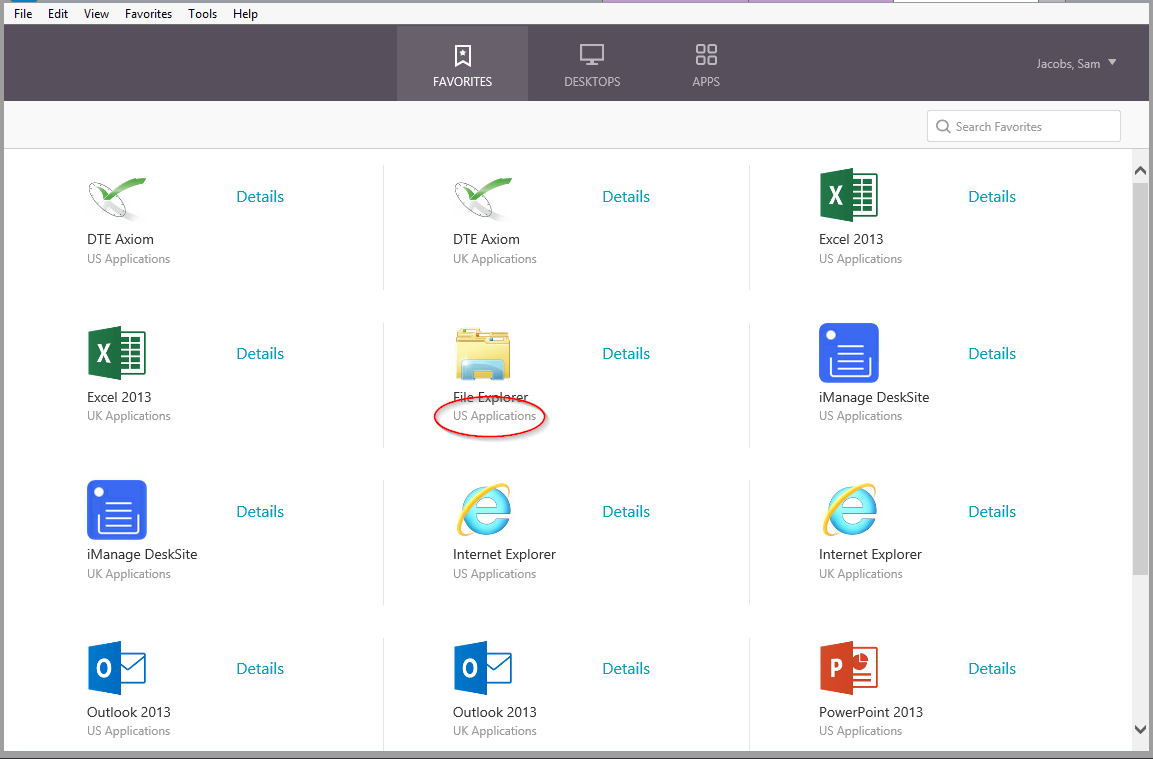
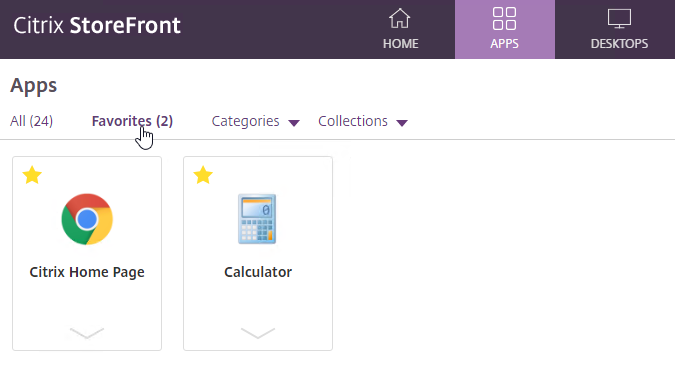
From CTP Sam Jacobs at StoreFront: Add Application Categories to Favorites Tab at CUGC. It’s a simple matter to get it to again appear. Back up the file \inetpub\wwwroot\citrix\<store>Web\custom\style.css, and add the following to the bottom of the file:

.largeTiles .myapps-view .storeapp-category {
display: block;
}

Nicolas Ignoto Lab: Part 22 – Ultimate StoreFront 3 customization guide contains many StoreFront customizations including:

  • Add disclaimer
  • Change logo/background
  • Add header
  • Add text
  • Change colors
  • Etc.


Citrix Blog Post Citrix Customization Cookbook contains a collection of customizations including:

  • Add Static or dynamic (read from file) text to the header and/or footer of the login page.
  • Click-through disclaimer before or after login page
  • Footer for every page
  • Default to Folder view when visiting the Apps tab
  • Change default text
  • Change background images for featured categories
  • Background image


Citrix Blog Post Storefront 3 Web Customization: Branding Your Deployment describes how to modify the following CSS to customize the appearance of StoreFront 3.x

  • Background images
  • Logon button
  • Colors for page and text
  • How to view the mobile version of the page
  • CSS for mobile pages


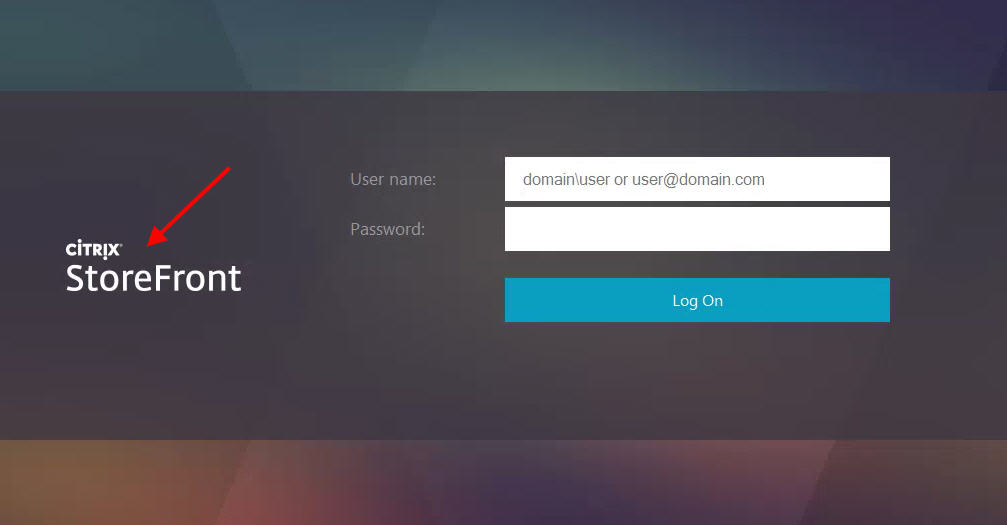
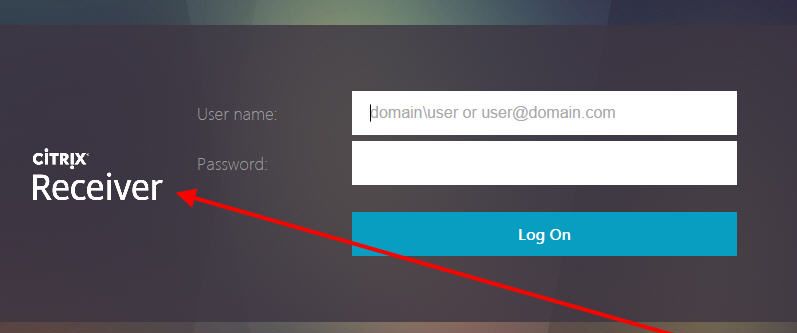
Jason Samuel Upgrading Citrix StoreFront 2.6 to StoreFront 3.0 – Things to Know details how to change the StoreFront logo to a Receiver logo.


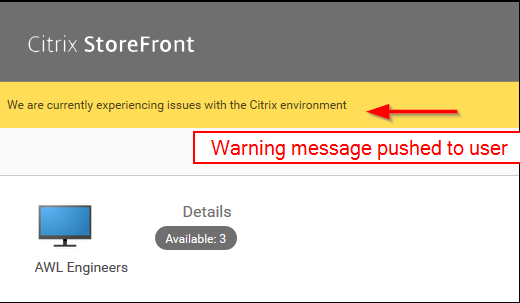
Citrix Blog Post StoreFront Message Customization describes how to add a scrolling message to the top of the screen. This is displayed in both Browsers and Receivers. This post contains a new version of the executable that supports StoreFront 3.0 and newer.


Migrate Web Interface features to StoreFront at Citrix Docs details how to configure Web Interface features in StoreFront. This includes:

  • Enable return to last folder
  • Header logo
  • Pre-logon welcome message
  • Logon screen customization
  • Footer text

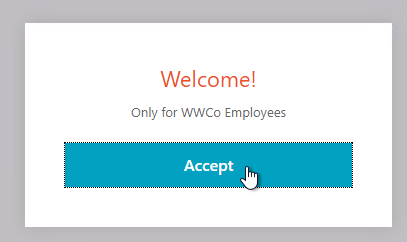
The code for pre-login message is already included in C:\inetpub\wwwroot\Citrix\StoreWeb\custom\script.js. Just remove the comment. Source = Citrix CTX227805 StoreFront 3.11 >>How to get the login banner on Storefront page


Rody Kossen and his colleague Leon Koppel built a customisation layer that reads the state of the resources presented to the end-user. If a desktop is under maintenance, inform the user so he knows before he tries to access the resource. Get the code from Citrix Blog Post Putting the Experience First, Where it Belongs.  💡


StoreFront 3.0 Receiver Customization APIs are detailed at Citrix Developer. Use the Receiver Customization API to brand or customize your end users’ app and desktop selection experience beyond capabilities provided in the StoreFront admin console. Customizations apply to latest Web, Chrome, Windows, Mac and Linux clients, and will be extended to mobile devices in future releases.


CTX221097 How to rename items on StoreFront? describes the strings that can be changed.

  1. Go to C:\inetpub\wwwroot\Citrix\<StoreName>Web\custom
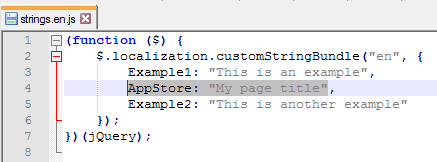
  2. Open strings.en.js file
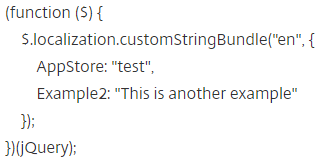
  3. See below for an example of overriding one of the built-in strings. See the article for the full list of strings.
  4. AppStore defines the title of the website. (Source = CTX236110 How to customize the storefront website title)


Citrix Blog Post Receiver X1 APIs describes the following:

  • Overview of the CSS classes that can be customized.
  • Override Citrix’s JavaScript functions to modify behavior – exclude or restyle apps, change a sort order, add a warning message etc.
  • How to force X1 UI to display in either phone or larger mode.


Citrix Blog Post X1 Customization: Going deeper with CSS describes the following:

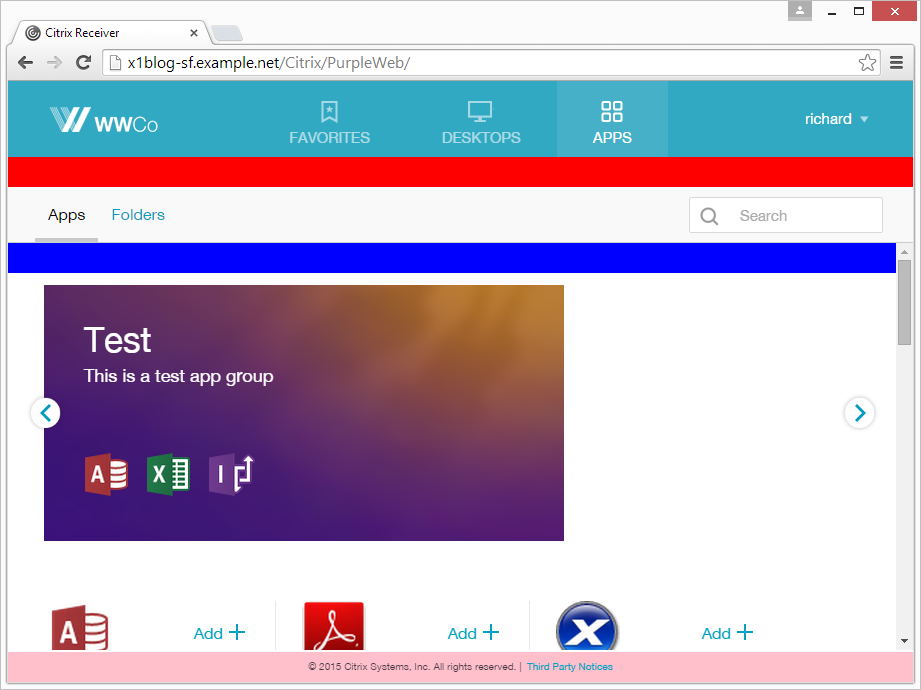
  • Use CSS (/custom/style.css) to style the three custom regions (#customTop, #customBottom, #customScrollTop). Shown below in red, blue, and pink.
  • Marker classes for showing/hiding or highlighting parts of the UI: large display, small display, high DPI, Favorites view, Desktops view, Apps view, appinfo view.


Citrix Blog Post Scripting X1 describes the following:

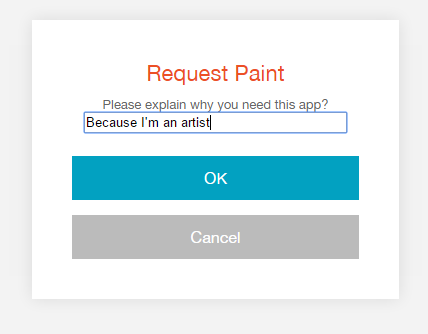
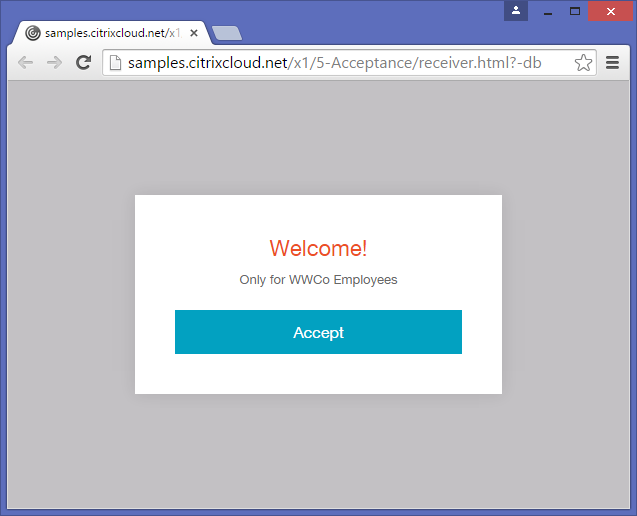
  • JavaScript code to display an Acceptance dialog box before users can login.
  • Use JQuery to add HTML code to custom regions (e.g. #customScrollTop) including using CSS to hide the HTML code unless a specific tab is selected by the user.

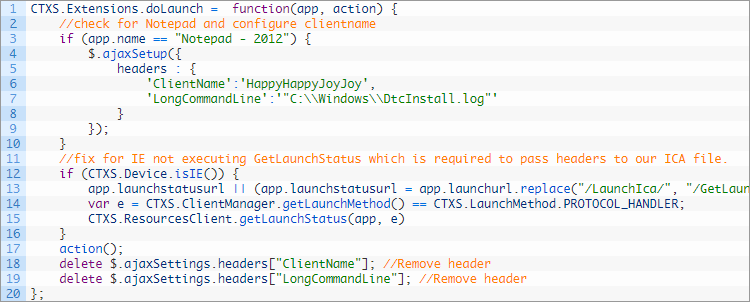
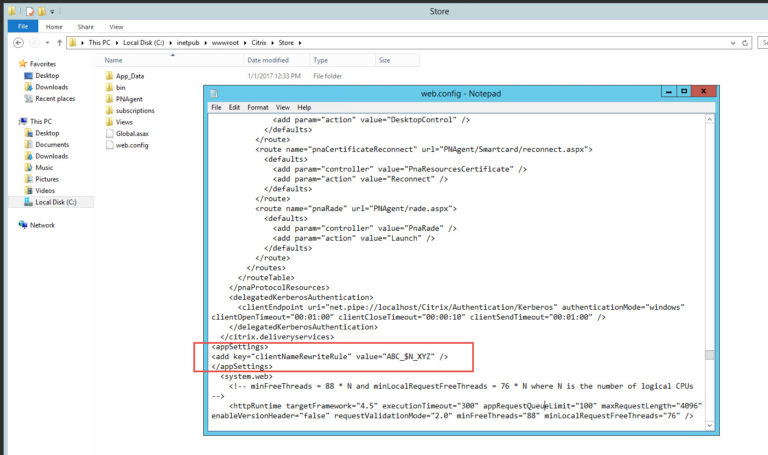
Citrix Blog Post – Rewriting the Session ClientName from StoreFront: I would like to offer the following customisation DLL which can apply client name rewrites based on a template. The customisation template can be any string, but where that string contains a particular token, the token will be replaced by some information from the User Context. If the intent was just to replace the ClientName with the user name, the template is then just “$U”. More details and the .dll file are in the blog post.

StoreFront Store Customization SDK at Citrix Developer: The Store Customization SDK allows you to apply custom logic to the process of displaying resources to users and to adjust launch parameters. For example, you can use the SDK to control which apps and desktops are displayed to users, to change ICA virtual channel parameters, or to modify access conditions through XenApp and XenDesktop policy selection. Key Customization Points:

  • Post-Enumeration
  • Post-Launch ICA File
  • Post-Session Enumeration
  • Access Conditions (pre-launch and pre-enumeration)
  • Provider List
  • Device information

Citrix Blog Post Adding a Language to StoreFront 3.0: A new language pack is comprised of a culture definition file, a string bundle file and a custom string bundle file. See the Blog Post for more details.

To force StoreFront to only use English, add the following to c:\inetpub\wwwroot\Citrix\StoreWeb\custom\script.js as detailed at Set default language to EN at Citrix Discussions:
CTXS.Environment.getPreferredLanguages = function () { return null; }


To change the StoreFront page title, see Sam Jacobs How to Change the Page Title in Citrix Receiver 3.x at mycugc.org.


Customizations detailed at topic Modify Receiver for Web site at Citrix Discussions:

  • Add Featured App Groups to Categories View
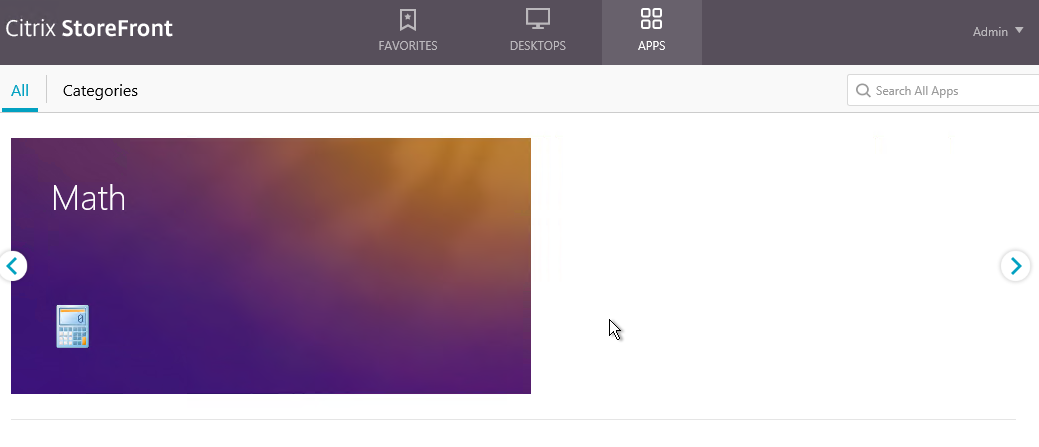
  • Increase the number of Featured applications beyond the default of 3.


StoreFront SDKs

Most of the StoreFront SDK documentation can be found at https://developer-docs.citrix.com/projects/storefront-sdk/en/latest/

StoreFront Store Customization SDK – Use the Store Customization SDK to apply custom logic to the process of displaying resources to users and to adjust launch parameters.  For example, you can use the SDK to control which apps and desktops are displayed to users, to change ICA virtual channel parameters, or to modify access conditions through XenApp and XenDesktop policy selection.

StoreFront Web API – Receiver for Web is a component of Citrix StoreFront that provides access to applications and desktops using a Web browser. It consists of a User Interface tier and a StoreFront Services Web Proxy tier.

StoreFront Authentication SDKs – With StoreFront 3.0, we have introduced a new Unified UI that is delivered from StoreFront to Receiver on all client platforms. Use the Receiver Customization API to brand or customize your end users’ app and desktop selection experience beyond capabilities provided in the StoreFront admin console. Customizations apply to latest Web, Chrome, Windows, Mac and Linux clients, and will be extended to mobile devices in future releases.

StoreFront PowerShell SDK – Citrix StoreFront provides an SDK based on a number of Microsoft Windows PowerShell version 3.0 modules. With this SDK, you can perform the same tasks as you would with the StoreFront MMC console, together with tasks you cannot do with the console alone.

Related Pages

StoreFront 2411 – Configuration for Citrix Gateway

Last Modified: Dec 4, 2024 @ 2:51 am

Navigation

This article applies to StoreFront versions 2411, 2402 LTSR, 2203 LTSR, 1912 LTSR CU8 and all other versions 3.5 and newer.

Changelog

StoreFront Configuration for Citrix Gateway

See the Citrix Gateway ICA Proxy for instructions to create a Citrix Gateway Virtual Server for ICA Proxy and StoreFront. You then must configure StoreFront to enable the Gateway.

  1. In the StoreFront Console, in the middle, right-click your Store, and click Manage Authentication Methods.
  2. Ensure Pass-through from Citrix Gateway is selected and click OK.
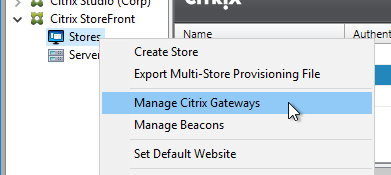
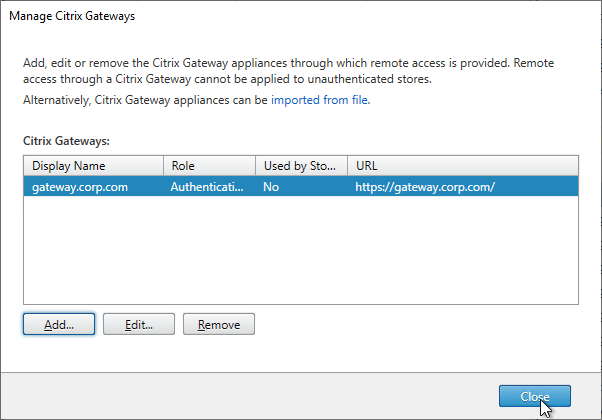
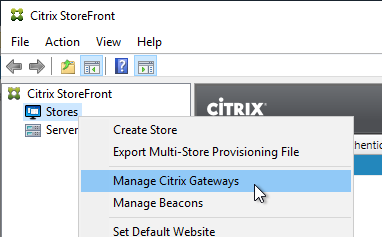
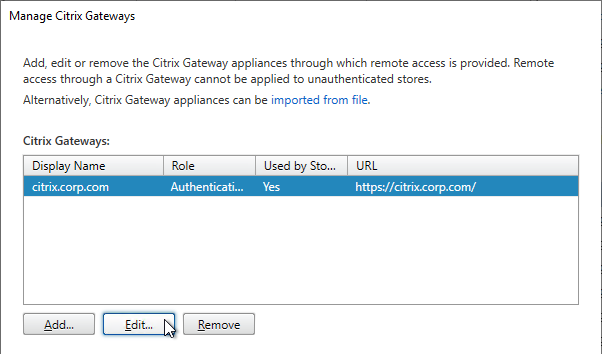
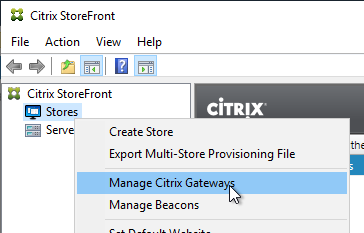
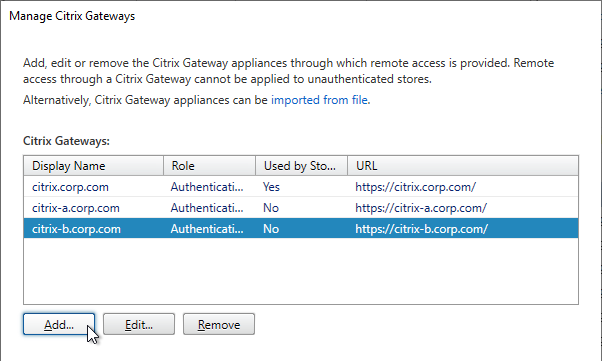
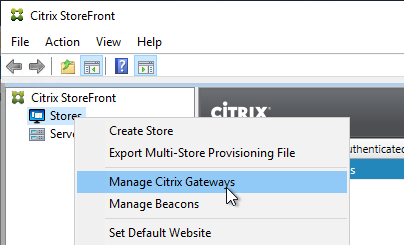
  3. In the StoreFront Console, right-click the Stores node, and click Manage Citrix Gateways.
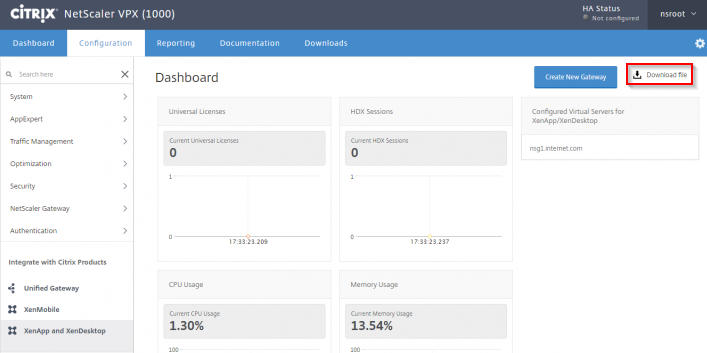
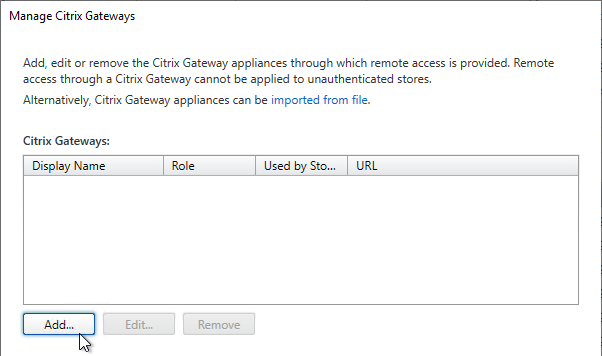
  4. If StoreFront 3.6 or newer, notice the imported from file link on top. This is a new feature of NetScaler 11.1 and newer. An example configuration that uses this feature can be found in the StoreFrontAuth page.

  5. If you’re not using the Gateway config file from NetScaler 11.1 and newer, click Add.

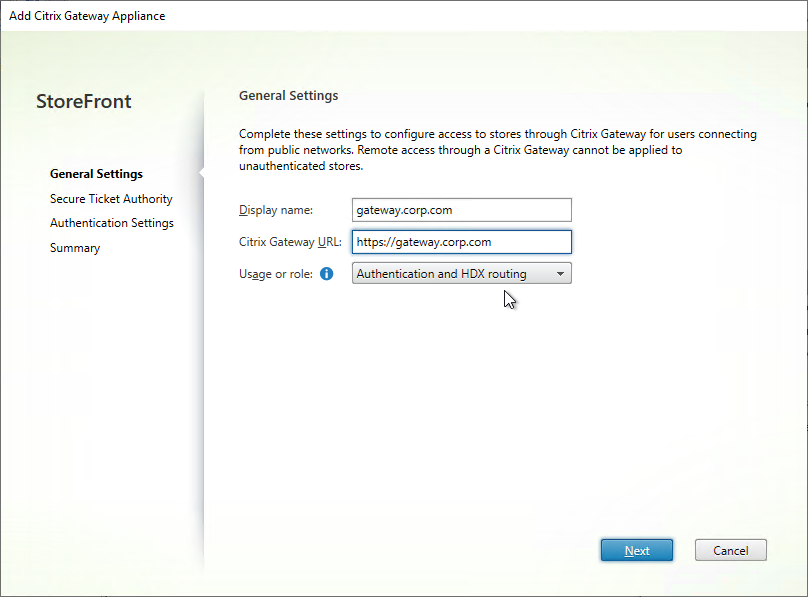
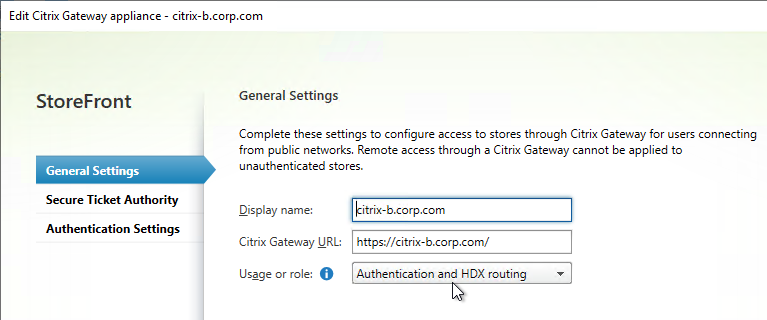
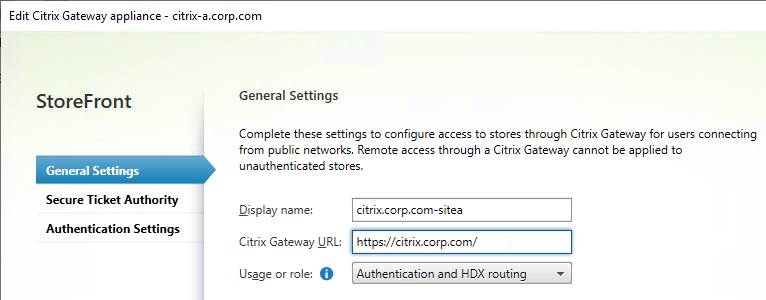
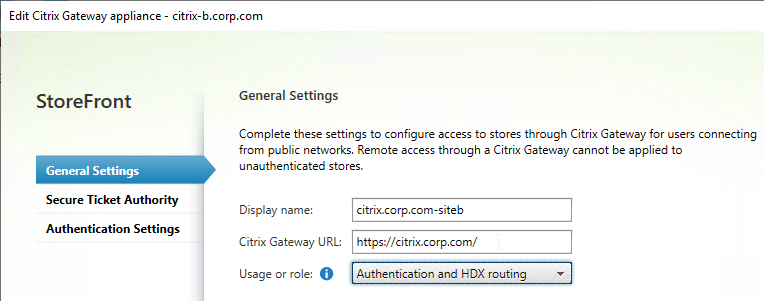
    1. In the General Settings page, enter a display name. This name appears in Citrix Receiver or Citrix Workspace app, so make it descriptive.
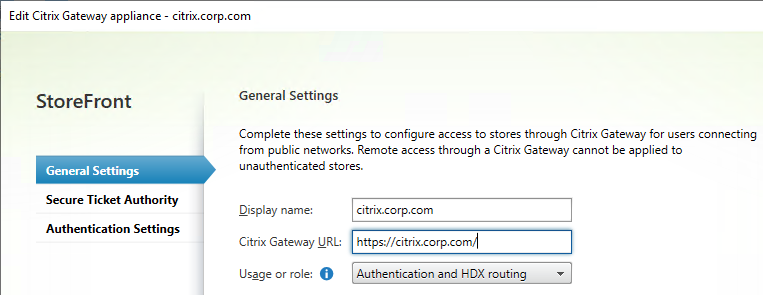
    2. In the Citrix Gateway URL field, enter the Citrix Gateway Public URL that resolves to the Citrix Gateway VIP.
      • The URL entered here must match what users enter into their browser address bars.
      • This URL can be a GSLB-enabled DNS name.
      • The Gateway URL usually does not need to be reachable from StoreFront unless you need the Callback for SmartAccess or non-password authentication (e.g. Smart Cards or Citrix Federated Authentication Service).
    3. Click Next.
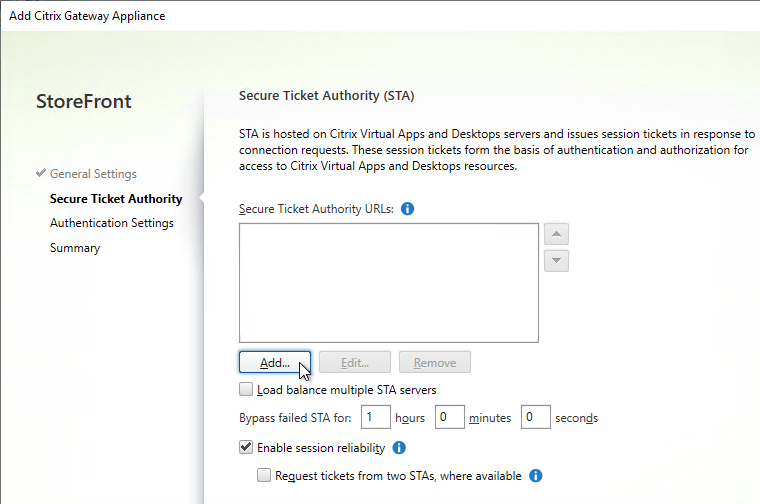
    4. In the Secure Ticket Authority page, click Add.
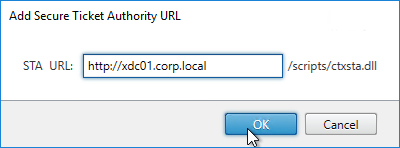
    5. Enter the URL to a Delivery Controller. This can be http or https.
      • STA is installed automatically on Delivery Controllers.
      • There is no relationship between STA and CVAD farms. Any CVAD farm can use any STA server.
      • StoreFront chooses the STA server. Citrix Gateway must be configured to use the same STA servers that StoreFront chose.
    6. Click OK.
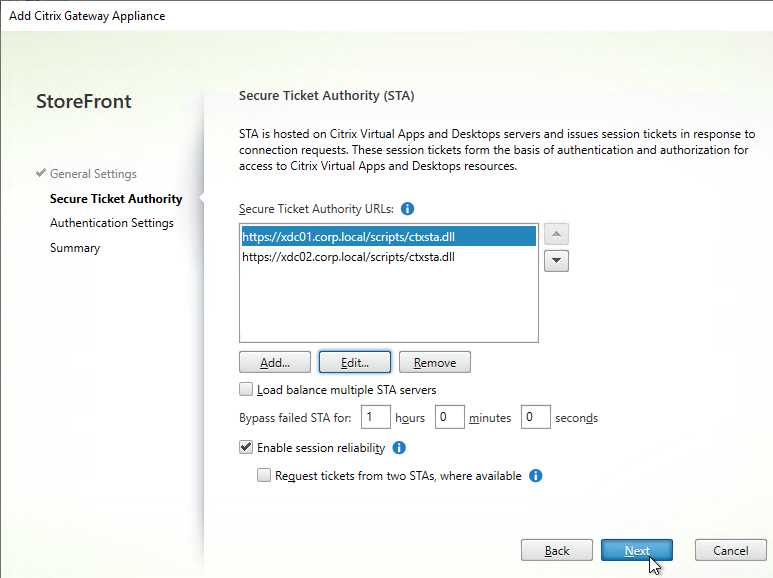
    7. Continue adding Secure Ticket Authorities (Delivery Controllers). Whatever Secure Ticket Authorities you add here must also be added to the Citrix Gateway Virtual Server on the Citrix ADC appliance. Click Next.
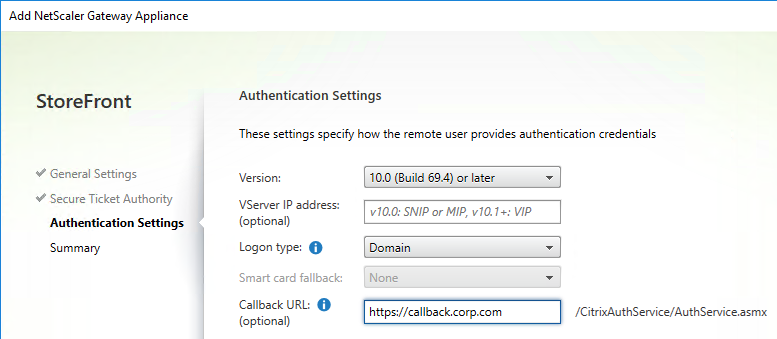
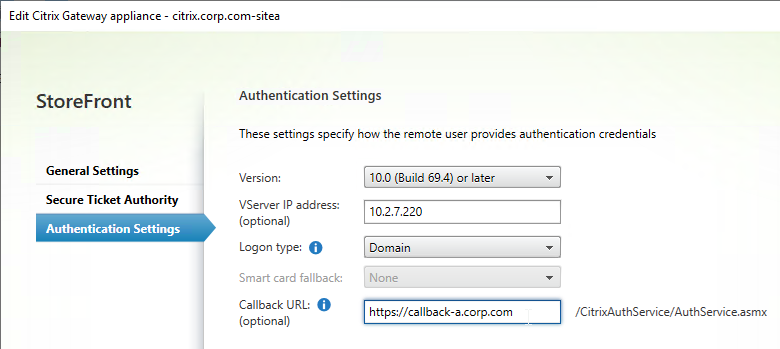
    8. In the Authentication Settings page, the VServer IP Address field is typically left blank. You only use this field if you have multiple Gateways (on separate appliance pairs) connecting to one StoreFront server. See below for details.
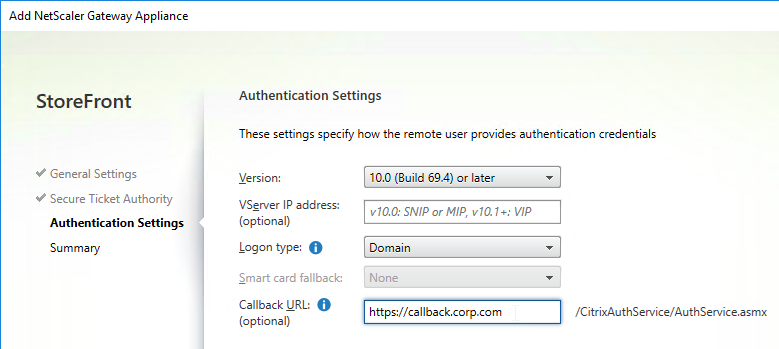
    9. If you need SmartAccess or non-password authentication (e.g. Smart Cards or Citrix Federated Authentication Service), then enter the Callback URL.
      • The Callback URL must resolve to any Citrix Gateway VIP on the same appliance that authenticated the user. Edit the HOSTS file on the StoreFront server so the Callback URL resolves correctly.
      • If you are configuring Single FQDN, then the Callback URL must be different than the Single FQDN.
      • The Gateway Virtual Server that the Callback URL resolves to must have a trusted and valid certificate that matches the FQDN you are entering here.
      • The Gateway Virtual Server that the Callback URL resolves to must not have client certificates set to Mandatory.
      • See CTX399424 Gateway Callback and / or XML Communication fails after upgrade to Storefront 2203 for a workaround.
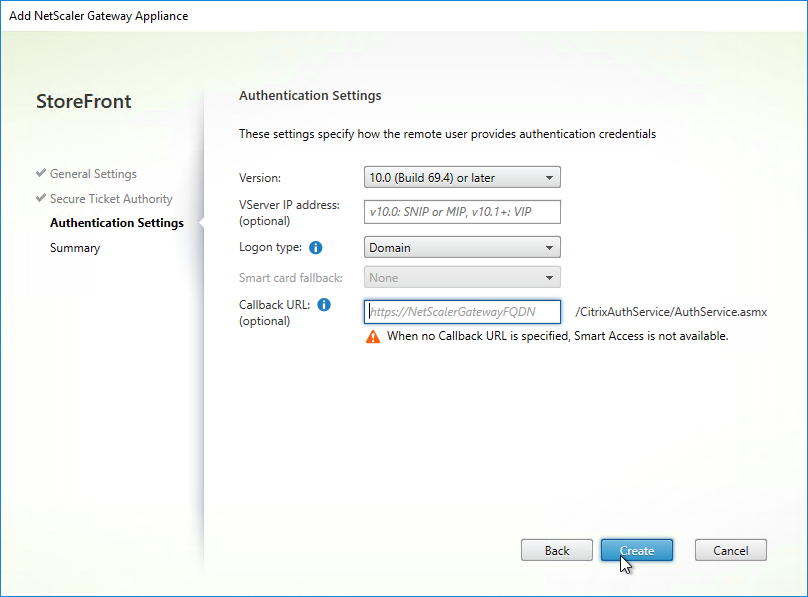
    10. If you don’t need SmartAccess or non-password authentication, then leave the Callback URL field empty.
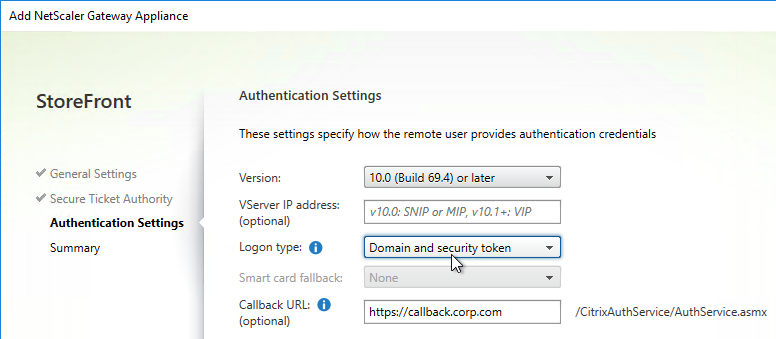
    11. If you enabled two-factor authentication (LDAP and RADIUS) on your Citrix Gateway, change the Logon type to Domain and security token. Otherwise leave it set to Domain only.
    12. Click Create.
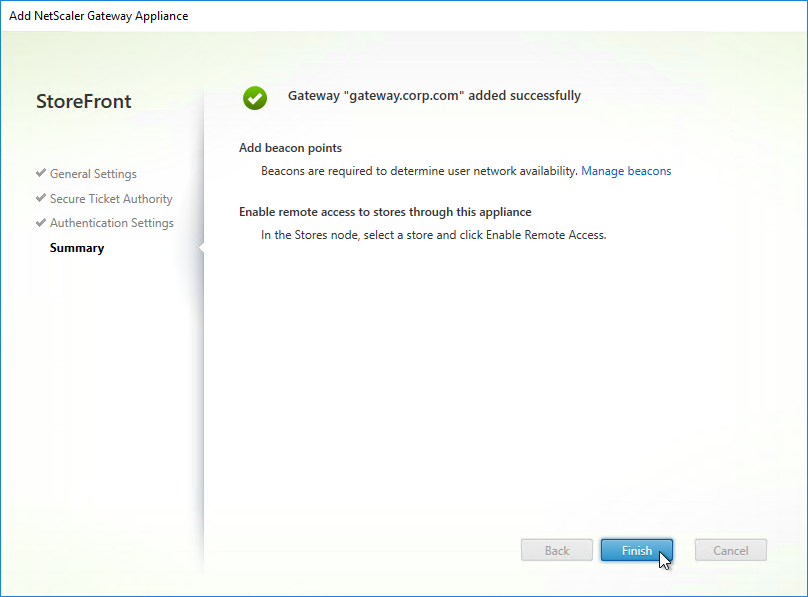
    13. Then click Finish.
  6. You can add more Gateways depending on your design. Multiple datacenters typically requires multiple Gateways. Click Close when done.
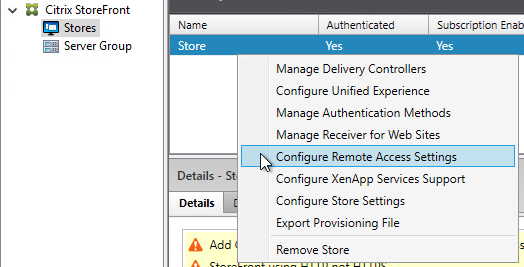
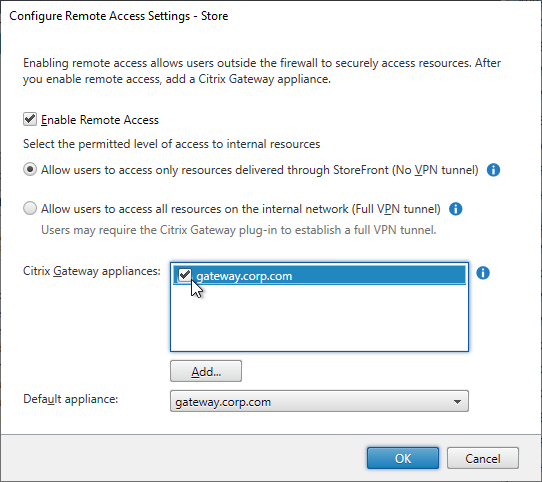
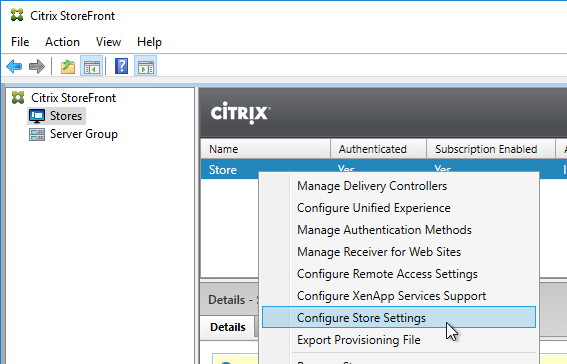
  7. To enable the store to use Citrix Gateway, in the middle, right-click your store, and click Configure Remote Access Settings.

    1. Check the box next to Enable Remote Access.
    2. Leave it set to No VPN tunnel.
    3. Check the box next to the Citrix Gateway object you just created. This binds the Gateway to the Store.
    4. If you have multiple Gateways, select one of them as the Default appliance.
      • Note: when you point Receiver to a Citrix Gateway URL for Discovery, after Discovery is complete, the Default appliance selected here is the Gateway that Receiver uses. In other words, Receiver ignores the Gateway you entered during discovery.
    5. Click OK to close the Configure Remote Access Settings dialog box.
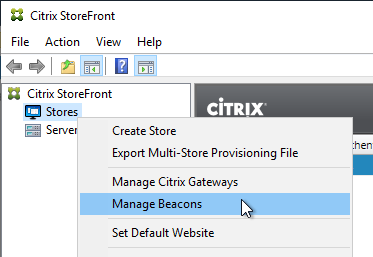
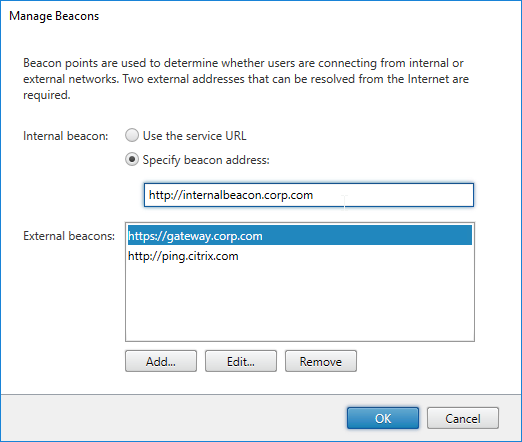
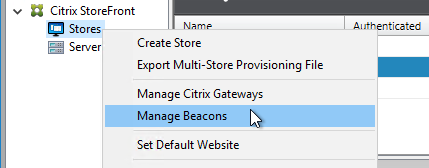
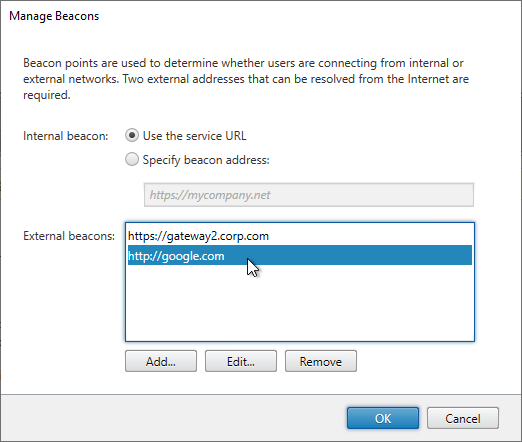
  8. In the StoreFront Console, right-click the Stores node, and click Manage Beacons.
  9. In the top half of the window, make sure the Internal beacon is set to a URL that is only reachable internally.
    1. If you are configuring Single FQDN, then the Internal beacon must be different than the Single FQDN.
    2. Service URL = the StoreFront Base URL. If you’re not configuring Single FQDN, then the Base URL is usually not accessible externally and is acceptable as an Internal Beacon.
    3. The Internal beacon must never go down. If it’s down, then internal native Receivers will stop working. One option is to configure a Citrix ADC Responder HTML page as detailed at Julian Mooren Citrix ADC – How to create a High Available Beacon Point for Citrix StoreFront. 💡
    4. Click OK when done.
  10. Right-click the Server Group node, and click Propagate Changes.

Citrix Gateway Logon Page Theme

To make the Citrix Gateway logon page look like Receiver 3.0 and newer, see Citrix Gateway 12 Portal Theme. The Citrix Gateway X1 theme has the fewest issues and the most readily available documentation for customization. The Citrix Gateway RfWebUI theme has less documentation for customizations.

Single FQDN

Overview

Links:

You can either define separate FQDNs for StoreFront Load Balancing (internal) and Citrix Gateway (external). Or, you can define a Single FQDN for both.

Single FQDN has the following requirements:

  • Receivers:
    • Receiver for Windows 4.2 or newer. Or upgrade to Workspace app.
    • Receiver for Mac 11.9 or newer. Or upgrade to Workspace app.
    • Mobile Receivers
  • StoreFront 2.6 or newer
  • Split DNS – different DNS resolution for internal vs external
    • Internal DNS should resolve the Single FQDN to the StoreFront Load Balancing VIP
    • External DNS should resolve the Single FQDN to the Citrix Gateway VIP (public IP)
  • NetScaler 10.1 or newer
  • The FQDN for Internal Beacon must be different than the Single FQDN.
    • The Internal Beacon URL must not be externally resolvable or accessible.
    • If Internal Beacon is down, then internal Receiver Self-Service clients will not function correctly.
    • Internal Beacon URL can be http instead of https.
    • If Internal Beacon URL is https, then the machine hosting the IP address for the Internal Beacon must have a certificate that matches the Internal Beacon FQDN.
  • The FQDN for Citrix Gateway Callback must be a different FQDN than the Single FQDN. Callback is only needed for SmartAccess and SAML.
    • Callback FQDN can resolve tot he same Gateway VIP used by external users. Or, you can create a new Gateway VIP on the same appliance that authenticated the users.
    • The Gateway Virtual Server for Callback must have a certificate that matches the Callback FQDN.

DNS caching interferes with Single FQDN – Note: if you have laptops that move from internal to external and back again, then DNS caching will interfere with Single FQDN. The DNS response for Single FQDN needs to change whenever the device moves from internal to external and back again. However, Receiver uses the same DNS cache as Internet Explorer, which caches DNS responses for 30 minutes. To clear the DNS cache, you have to close Receiver and re-open it. The DNS response you see when you ping the Single FQDN does not necessarily match the DNS response used by Internet Explorer and Receiver.

Configure Single FQDN without email-based discovery

If you don’t care about email-based discovery, then the configuration of Single FQDN is fairly simple. Sample DNS names are used below. Make sure the certificates match the DNS names.

  1. Internal DNS name = the Single FQDN (e.g. storefront.corp.com). Internally, the DNS name resolves to the internal Load Balancing VIP for StoreFront. Set the StoreFront Base URL to this address.
  2. External DNS name = the Single FQDN (e.g. storefront.corp.com). Externally, the DNS name resolves to a public IP, which is NAT’d to Citrix Gateway VIP on DMZ Citrix ADC. Set the Citrix Gateway object in StoreFront to this FQDN.


  3. If you need SmartAccess, then the Callback URL = any DNS name (e.g. callback.corp.com) that resolves to a Citrix Gateway VIP on the same DMZ Citrix ADC appliance that authenticated the user. The Callback URL cannot be the Single FQDN.

    • Callback URL can be omitted if you don’t need SmartAccess features, or SAML authentication.
    • The callback DNS name must be different than the Single FQDN.
    • The callback DNS name must resolve to a Citrix Gateway VIP on the same appliance that authenticated the user. This could be the same DMZ Gateway VIP used by external users. Or you can create a separate internal Gateway VIP on the same appliance.
    • The Citrix Gateway vServer for callback must have a certificate that matches the Callback DNS name.
  4. Internal Beacon = any internal website URL that is not externally accessible. You can’t use the Single FQDN as the Internal Beacon. Note: if the internal beacon is down, then internal Receiver Self-service will not work correctly.

    • Make sure the Internal Beacon is not resolvable externally.
    • The Internal Beacon URL cannot be the Single FQDN. It must be different.
    • Ideally, the Internal Beacon should be a new DNS name that resolves to a StoreFront Load Balancing VIP.
    • If the internal beacon is https, then the certificate must match the internal beacon DNS name. However, http URLs also work.
    • See CTX218708 How to Configure Internal Beacon for Single FQDN on StoreFront.
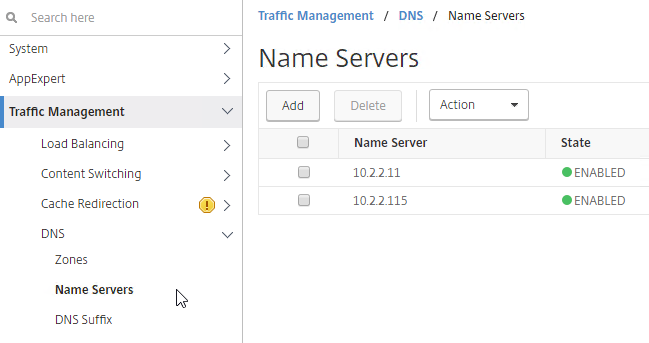
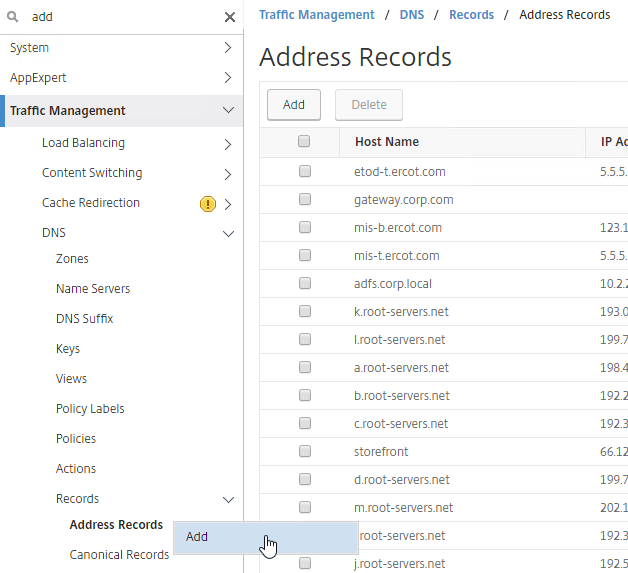
  5. Make sure the DMZ Citrix ADC resolves the Single FQDN to the internal StoreFront Load Balancing VIP. You typically add internal DNS servers to the Citrix ADC. Or you can create a local Address Record on Citrix ADC for the Single FQDN.

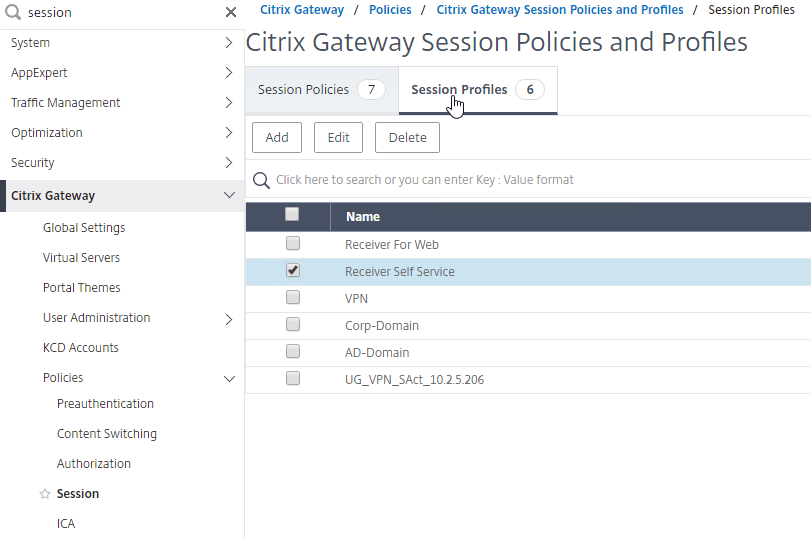
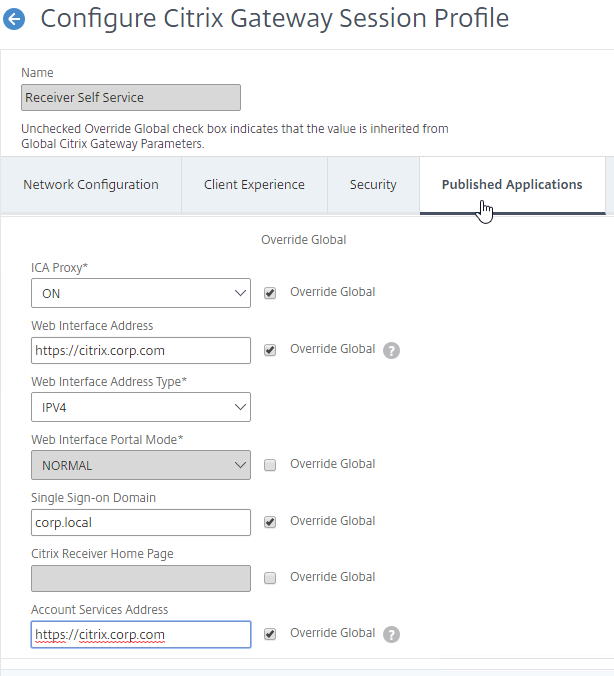
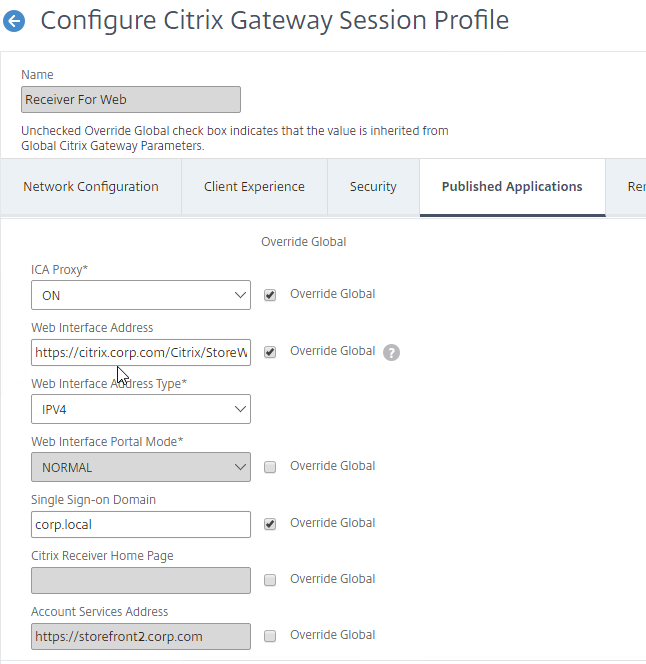
  6. In the Citrix Gateway Session Profiles, on the Published Applications tab, set the Web Interface Address, and the Account Services Address to the Single FQDN.


  7. That’s all you need to implement Single FQDN. If you made changes to an existing StoreFront deployment, then you might have to remove accounts from Receiver, and re-add the account.

If you need email-based discovery, then here’s an example configuration for ICA Proxy Citrix Gateway

DNS:

  • Sample DNS names:
    • Single FQDN = citrix.corp.com
    • Callback FQDN = callback.corp.com
    • Internal Beacon FQDN = internalbeacon.corp.com
  • External DNS:
    • citrix.corp.com resolves to a public IP, which is NAT’d to a Citrix Gateway VIP on a DMZ Citrix ADC.
    • If email-based discovery, SRV record for _citrixreceiver._tcp.email.suffix points to citrix.corp.com. Create this SRV record in every email suffix DNS zone.
  • Internal DNS:
    • citrix.corp.com resolves to the Load Balancing VIP for StoreFront
    • callback.corp.com resolves to a Citrix Gateway VIP on the same Citrix ADC that authenticated the user. Usually only needed for SmartAccess and/or SAML.
    • For the internal beacon, FQDN of any internal web server. Make sure this name is not resolvable externally.
    • If email-based discovery, SRV record for _citrixreceiver._tcp.email.suffix points to citrix.corp.com. Create this SRV record in every email suffix DNS zone.

Certificates:

  • External, publicly-signed certificate for Citrix Gateway:
    • One option is wildcard for *.corp.com. Assumes email suffix is also corp.com. If you more than one email suffix, then wildcard will not work.
    • Another option is the following Subject Alternative Names:
      • citrix.corp.com
      • callback.corp.com – for callback URL. Only accessed from internal.
        • Or you can create a separate internally-facing Gateway vServer for callback with a separate certificate.
      • If email-based discovery, discoverReceiver.email.suffix for each email suffix. If you have multiple email suffixes, you’ll need multiple SAN Names.
  • Internal certificate for StoreFront Load Balancing:
    • Publicly-signed certificate is recommended, especially for mobile devices and thin clients.
    • Since you have the same DNS name for internal and external, you can use the external certificate for internal StoreFront.
    • One option is wildcard for *.corp.com. Assumes email suffix is also corp.com. If you have more than one email suffix, then wildcard will not work.
    • Another option is the following Subject Alternative Names:
      • citrix.corp.com
      • If email-based discovery, discoverReceiver.email.suffix for every email suffix. If you have multiple email suffixes, then you will have multiple SAN names.

StoreFront Configuration:

  • Base URL = https://citrix.corp.com
  • Internal beacon = https://internalbeacon.corp.com. Make sure it’s not resolvable externally.
  • Gateway object:
    • Gateway URL = https://citrix.corp.com
    • Callback URL = https://callback.corp.com

Receiver for Web session policy:

  • Policy expression = REQ.HTTP.HEADER User-Agent NOTCONTAINS CitrixReceiver
  • Client Experience tab:
    • Clientless Access = Allow or Off
    • Plug-in Type = Java
    • Single Sign-on to Web Applications = checked
  • Security tab:
    • Default authorization = ALLOW
  • Published Applications tab:
    • ICA Proxy = On
    • Web Interface address = https://citrix.corp.com/Citrix/StoreWeb
    • Single Sign-on Domain = Corp

Receiver Self-Service session policy:

  • Policy expression = REQ.HTTP.HEADER User-Agent CONTAINS CitrixReceiver
  • Client Experience tab:
    • Clientless Access = Allow or Off
    • Plug-in Type = Java
    • Single Sign-on to Web Applications = checked
  • Security tab:
    • Default authorization = ALLOW
  • Published Applications tab:
    • ICA Proxy = On
    • Web Interface address = https://citrix.corp.com
    • Single Sign-on Domain = Corp
    • Account Services address = https://citrix.corp.com

Multiple Datacenters / Farms

Multi-datacenter Citrix Gateway and StoreFront Design

HTTP vs ICA

There are two connections from every Citrix client:

  • HTTP (SSL required) – goes to StoreFront
    • HTTP is usually proxied through Citrix ADC load balancing
    • If external, HTTP is proxied through Citrix Gateway, which proxies it through Citrix ADC load balancing.
    • HTTP traffic is initiated by either a web browser, or by Receiver Self-Service
  • ICA (SSL optional) – goes to Virtual Delivery Agent
    • ICA can go direct (internal) to a VDA
    • Or ICA can be proxied through Citrix Gateway ICA Proxy
    • ICA traffic is handled by Workspace app’s ICA engine – either locally installed Workspace app, or HTML5 Workspace app

The FQDN for the HTTP connection can be the same or different than the FQDN for the ICA connection.

The HTTP connection is easily handled by GSLB, HTTP/SSL load balancing, etc.

  1. DNS name – Users connect to a DNS name that resolves to StoreFront and/or Citrix Gateway.
    1. StoreFront is usually proxied through Citrix ADC Load Balancing.
    2. If Citrix Gateway, the HTTP connection is proxied to StoreFront, usually through Load Balancing.
  2. Separate VIP per datacenter – For multiple datacenters, each datacenter has its own StoreFront and/or Citrix Gateway VIP.
  3. GSLB resolves the DNS name to one of the datacenter VIPs.
    1. This can be active/active, or active/passive.
  4. Proximity and persistence – For active/active, since StoreFront traffic (HTTP) is so minimal, it usually doesn’t matter which datacenter is selected. But you can optionally enable one of the Proximity GSLB load balancing algorithms so the closest datacenter is selected.
    1. Enable one of the GSLB Service cookie-based persistence methods. Connection Proxy is the easiest to configure.

The ICA connection is dictated by StoreFront.

  1. .ica file – When a user clicks an icon in StoreFront, StoreFront generates an .ica file containing an address.
    1. If the user is internal, then the .ica file usually contains the private IP address of the Virtual Delivery Agent. Receiver connects directly to the VDA’s private IP.
    2. If the user is connecting through Citrix Gateway, or if HDX Optimal Routing is enabled, then the .ica file usually contains the FQDN of a Citrix Gateway that can proxy the ICA connection.
  2. Receiver engine for ICA protocol – The StoreFront provided .ica file is given to a Receiver engine. Receiver engine (locally installed Receiver, or HTML5 Receiver), uses ICA protocol to connect to the address contained inside the .ica file.
  3. One public IP – For external users, an advantage of Citrix Gateway is that you only have to expose one public IP address per datacenter no matter how many VDAs you have.
  4. FQDN for Gateway – For Citrix Gateway, StoreFront inserts a FQDN into the .ica file. This FQDN can be one of the following:
    1. Active/active GSLB
    2. Datacenter-specific – If you have two datacenters, each datacenter has a unique FQDN that resolves to a specific Citrix Gateway VIP in a specific datacenter. GSLB active/passive handles failover if the datacenter-specific VIP is down.
  5. ICA Routing – ICA traffic is heavier and more latency sensitive than StoreFront. Thus you typically want to control which datacenter is used for the ICA connection. There are two common designs:
    1. Proxy ICA traffic through a Citrix Gateway that’s in the same datacenter as the VDA.
    2. Proxy ICA traffic through the Citrix Gateway that’s closest to the user. The idea here is that back haul WAN connections are faster than Internet connection to a remote datacenter.
  6. HDX Optimal Routing – For proxying ICA through Citrix Gateway in the same datacenter as the VDA, StoreFront has two methods for identifying the Citrix Gateway that’s closest to the VDA:
    1. Different Citrix Virtual Apps and Desktops site/farm in each datacenter. If a VDA is launched from a particular site/farm, then provide the Citrix Gateway FQDN that is associated with that site/farm. This is configured using HDX Optimal Routing.
    2. Different Citrix Virtual Apps and Desktops zone per datacenter. If the VDA is launched from a particular zone, then provide the Citrix Gateway FQDN that is associated with that zone. This is configured using HDX Optimal Routing.
  7. Proximity and Persistence – For proxying ICA through a Citrix Gateway that is closest to the user, StoreFront returns an FQDN that is GSLB Active/Active load balanced using a Proximity load balancing algorithm.
    1. ICA is usually a long-lived TCP connection to the Citrix Gateway VIP.
    2. You can enable Source IP persistence on the active/active GSLB Virtual Server.
    3. Another method of proximity load balancing ICA is to configure Citrix ADC to insert a header to StoreFront indicating the Citrix Virtual Apps and Desktops zone the user is connecting from. See the GSLB Powered Zone Preference whitepaper.

Internal Citrix Gateway ICA Proxy? – Internal users typically have direct connectivity to VDA Private IP addresses, so you usually don’t need to use Citrix Gateway ICA Proxy internally. However, an advantage of using Citrix Gateway ICA Proxy internally is that now all ICA traffic is going through a Citrix Gateway, which makes it easy to enable AppFlow (HDX Insight) reporting to Citrix Application Delivery Management (ADM).

  • ICA Proxy through Citrix Gateway wraps ICA traffic in SSL, increasing the packet size.
  • SSL-Encrypted ICA packets cannot be optimized by normal WAN optimization products.

StoreFront and Multiple Sites/Farms

A Citrix Virtual Apps and Desktops Site/Farm is a collection of Delivery Controllers that share a single Site SQL Database. Multiple Citrix Virtual Apps and Desktops Sites/Farms implies multiple Site SQL databases, each configured separately. Note: farm is the old name for Citrix Virtual Apps and Desktops Site.

  • If you stretch a single Citrix Virtual Apps and Desktops Site/Farm across datacenters, then you have to deal with replication and recovery of the single SQL database.
  • Citrix Virtual Apps and Desktops Zones and Local Host Cache make it more feasible to stretch a farm. See XenDesktop Site Failover – how do you do it? at CUGC for an excellent discussion on multi-datacenter zone design.
  • VDAs can only register with one Citrix Virtual Apps and Desktops Site/farm.

Multiple Citrix Virtual Apps and Desktops Sites/Farms – StoreFront can enumerate icons from multiple Citrix Virtual Apps and Desktops Sites/Farms. If there are identical icons in multiple farms, then the icons can be aggregated so that only a single icon is displayed to the user. When the user clicks the icon, StoreFront then needs to select a site/farm.

  • CVAD 2311 and newer have multiple site management in Web Studio in the Settings node.

    • Use the Site selector at the top right of the page.
  • In StoreFront, Sites/Farms can be prioritized (active/passive) for different Active Directory groups. This allows you to specify a “home” site for specific users. Typically, you set the preferred site/farm to be in the same datacenter that contains the user’s home directory and roaming profile.
  • Or sites/farms can be active/active load balanced. This works best for applications that have synchronized active/active back-end data.

Icon aggregation – There are two methods of configuring icon aggregation in StoreFront:

  • StoreFront Console GUI – The most common multi-site/farm configurations can be done in the StoreFront Console GUI, including configuration of “Home Sites” (different AD groups prioritizing different sites/farms).
  • XML files – for more complex multi-site configurations. See Citrix Docs – Set up highly available multi-site store configurations

Note: if you have existing subscriptions/favorites, then enabling icon aggregation will cause the existing subscriptions to be ignored. You can migrate the existing subscriptions by exporting, modifying, and importing. See Subscriptions Missing after Enabling Aggregation at Citrix Discussions.

StoreFront in Multiple Datacenters

Stretching – Citrix does not support stretching a single StoreFront Server Group across multiple datacenters. Each datacenter is expected be a different StoreFront Server Group.

  • Citrix provides scaling guidance for up to 6 servers in a single StoreFront Server Group.

Management – Each StoreFront Server Group is managed separately.

  • Subscriptions/Favorites can be replicated between the two StoreFront Sever Groups.

Receiver Roaming – When Citrix Receiver switches between different StoreFront Server Groups in multiple datacenters, it’s possible for each datacenter to be treated as a separate Store, causing multiple Store entries in Receiver. This can be prevented by ensuring the following configurations are identical in both datacenters. Source = Juan Zevallos at Citrix Discussions:

  • Match the SRID – in StoreFront, if you use the same Base URL in the 2 separate installations, then the SRID should end up being identical. If the Base URL is changed after the initial setup, the SRID doesn’t change. The SRID can be safely edited in the \inetpub\wwwroot\Citrix\Roaming\web.config file. It will be replicated into the discovery servicerecord entry in the Store web.config, which can be edited as well, or refreshed from the admin console by going into Remote Access setup for the store, and hitting OK. Make sure to propagate changes to other servers in the group.
  • Match the Base URL
  • Match the Delivery Controller names under “Manage Delivery Controllers” – The XML brokers can be different, but the actual name of the Delivery Controller/Farms must be identical.

Typical Multi-Datacenter Configuration

Here’s a typical active/active Citrix Virtual Apps and Desktops configuration using separate sites/farms in each datacenter. Another option is zones.

  • Citrix Virtual Apps and Desktops Sites/Farms: Separate Citrix Virtual Apps and Desktops sites/farms in each datacenter.
    • The Delivery Controllers for each site/farm point to a SQL database in the local datacenter. There usually is no need to enable SQL failover across datacenters.
    • Each datacenter is managed separately. But Citrix Policies in a GPO can apply to both sites/farms.
    • An advantage of separate sites/farms is that you can upgrade one datacenter before upgrading the other.
  • StoreFront Server Groups: Separate StoreFront Server Groups in each datacenter.
    • Citrix doesn’t support stretching a single StoreFront Server Group across a WAN link.
    • Each Server Group is configured identically. You can export the config from one Server Group, and import it to the other. Or configure each of them separately, but identically. Identical means: same Base URL, same farms (Manage Delivery Controllers), same SRID, same Gateways, and same Beacons.
    • If subscriptions/favorites are enabled, use PowerShell commands to configure subscription replication between the two Server Groups.
  • StoreFront Load Balancing: Separate StoreFront load balancing VIP in each datacenter
    • Each Load Balancing VIP can be active/passive. Active = the StoreFront servers in the local datacenter. Passive = the StoreFront servers in the remote datacenter.
      • Create two Load Balancing vServers: one for local StoreFront, one for remote StoreFront. In the Active (local) Load Balancing vServer, add the Protection section, and configure the Backup (remote) vServer.
      • When the active StoreFront is down, Citrix Gateway will use StoreFront in the remote datacenter. However, the remote datacenter has its own Citrix Gateway, thus there will be two different Citrix Gateways connecting to one StoreFront Server Group. If you use SmartAccess or SAML and need the Callback URL, then you’ll need a special StoreFront configuration to handle the Callback URL from multiple Gateway appliances.
  • Icon aggregation: Configure StoreFront to aggregate icons from the two farms.
    • Use AD groups to specify a user’s home datacenter, which contains the user’s roaming profile and home directory.
    • Configure farm priority based on AD groups. For an aggregated icon, the AD group and farm priority determines which farm the icon is launched from.
  • External Citrix Gateways: Externally-accessible Citrix Gateway ICA Proxy VIPs in both datacenters.
    • The main Citrix Gateway DNS name is active/active GSLB. For example: citrix.company.com)
    • Each datacenter has a datacenter-specific GSLB active/passive DNS name for Citrix Gateway. For example: citrix-a.company.com, and citrix-b.company.com
    • The Gateway SSL certificate needs to match all three DNS names: the main active/active DNS name, and the two datacenter-specific active/passive DNS names.
  • Internal Citrix Gateways: Internally-accessible Citrix Gateway ICA Proxy VIPs in both datacenters for AppFlow reporting.
    • For AppFlow/Insight reporting, Citrix Gateway ICA Proxy is typically used internally too. If you don’t need AppFlow, then you don’t need internal Citrix Gateway.
    • To handle Single Sign-on from Receiver, internal Receivers will connect HTTP directly to StoreFront Load Balancing instead of proxied through Citrix Gateway.
      • This implies that you have separate DNS names for StoreFront and Citrix Gateway.
    • HDX Optimal Routing will force the ICA connection to go through Citrix Gateway instead of directly to the VDA.
    • HDX Optimal Routing is a global setting that applies to both internal and external users. The DNS name used by HDX Optimal Routing must be valid for both internal and external. If this is not the case, then you can deploy separate StoreFront servers for internal and external.
    • DNS:
      • The main Citrix Gateway DNS name is active/active GSLB. For example: citrix.company.com.
      • Each datacenter has a datacenter-specific GSLB active/passive DNS name for Citrix Gateway. For example: citrix-a.company.com, and citrix-b.company.com
      • The Gateway SSL certificate needs to match all three DNS names – the main active/active DNS name, and the two datacenter-specific active/passive DNS names.
  • Main StoreFront and Gateway FQDNs: separate FQDNs for StoreFront and Citrix Gateway.
    • Externally,  citrix.company.com resolves to a Citrix Gateway VIP.
    • Internally,  storefront.company.com resolves to a StoreFront Load balancing VIP.
    • Single FQDN usually causes more problems than it’s worth. If you don’t do Single FQDN, then you can hide the StoreFront DNS name by pushing the store configuration to Receiver using Group Policy. Browser users would only need to know the Citrix Gateway DNS name.
  • DNS Delegation for GSLB: multiple DNS names are delegated from internal DNS and public DNS to Citrix ADNS (internal and external) for GSLB.
    • Internal GSLB and public GSLB need to resolve citrix.company.com differently. Public GSLB should resolve it to public IPs. Internal GSLB should resolve it to internal IPs.
    • Combining internal and public GSLB on the same Citrix ADC is not recommended. Public GSLB should be handled by DMZ Citrix ADC appliances. Internal GSLB should be handled by Internal Citrix ADC appliances.
    • If you only have one Citrix ADC appliance for both internal and public, then see One appliance resolving a single DNS name differently for internal and public at GSLB Planning.
    • citrix.company.com is configured as Active/Active GSLB with Proximity Load Balancing, and Site Persistence equal or greater than StoreFront RfWeb timeout.
    • citrix-a.company.com is configured as Active/Passive GSLB with Datacenter A as the Active service.
    • citrix-b.company.com is configured as Active/Passive GSLB with Datacenter B as the Active service.
    • storefront.company.com is configured as Active/Active GSLB with Proximity Load Balancing, and Site Persistence equal or greater than StoreFront RfWeb timeout.
  • HDX Optimal Routing: Use HDX Optimal Routing to route ICA traffic through the Citrix Gateway that is closest to the destination farm. This requires datacenter-specific DNS names (e.g. citrix-a.company.com, citrix-b.company.com)
    • You can use one of these DNS names to connect to StoreFront in a specific datacenter, which is helpful for testing.
  • STAs: each StoreFront Server Group uses STAs in the local datacenter. Since ICA Traffic could end up on either Citrix ADC, all STAs must be added to all Citrix Gateways.
  • Beacons: the internal beacon is critical. If the internal beacon is down then Receiver Self-service won’t be able to determine if the client device is internal or not. GSLB can be used for the internal beacon DNS name.
  • Roaming Profiles: If you are running Citrix Virtual Apps and Desktops in multiple datacenters, you must design roaming profiles and home directories correctly.

Icon Aggregation and Home Sites

To configure icon aggregation using PowerShell, see CTA Dennis Span at Citrix StoreFront Multi-Site Aggregation with PowerShell at CUGC. The PowerShell cmdlets include the following:

  • New-STFEquivalentFarmset
  • Add-STFUserFarmMapping

To configure icon aggregation using the StoreFront Console:

  1. In StoreFront Console, go to Stores.
  2. In the middle, right-click your Store, and click Manage Delivery Controllers.
  3. Add multiple sites/farms. Typically, each datacenter is a separate farm.
  4. After adding multiple farms, the Configure button becomes available. Click it.
  5. If you are publishing identical resources from multiple farms, click the link to Aggregate resources.
  6. In the Aggregate Resources dialog box, do the following:
    1. Select the farms with identical resources that you want to aggregate.
    2. Notice the checkboxes on the bottom. If your goal is to configure home sites, then make sure you uncheck Load balance resources across controllers.
    3. Click the Aggregate button to move them up to the Aggregated section.
    4. Note: if you have existing subscriptions/favorites, then enabling icon aggregation will cause the existing subscriptions to be ignored. You can migrate the existing subscriptions/favorites by exporting, modifying, and importing. See Subscriptions Missing after Enabling Aggregation at Citrix Discussions.
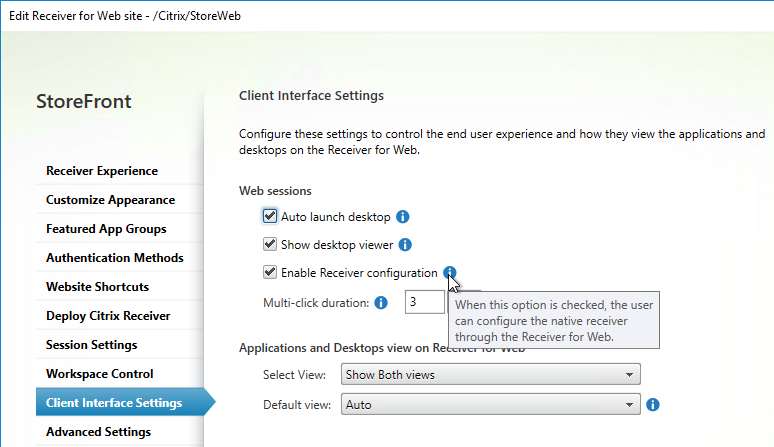
    5. Click OK when done.
  7. Back in the Configure User Mapping and Multi-Site Aggregation window, click Map users to controllers.
  8. In the Create User Mapping wizard, do the following:
    1. If you want the same farm failover order (active/passive) or farm load balancing settings for everyone, then leave the User Groups page set to Everyone. Or if you intend to have different home sites for different users, add a user group that contains the users that will be homed to a particular datacenter. You can run this wizard multiple times to specify different home sites for different user groups. Click Next.
    2. In the Controllers page, click Add.
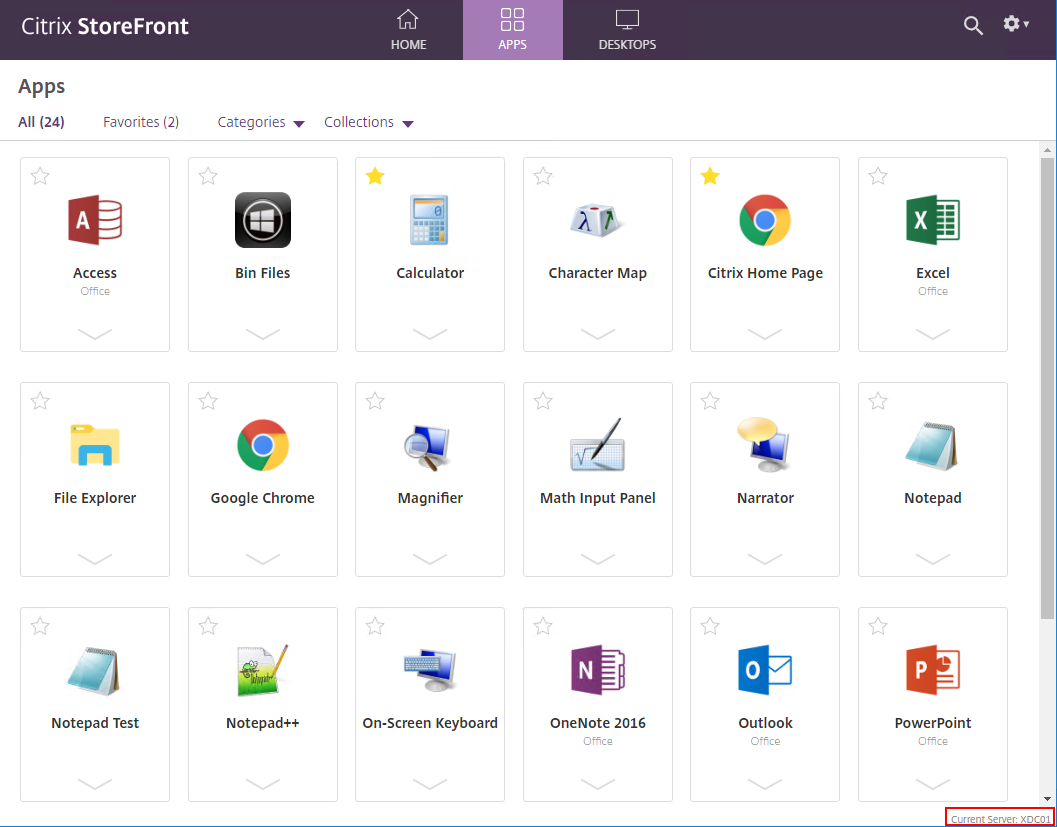
    3. Select the farms that these users will have access to, and click OK.
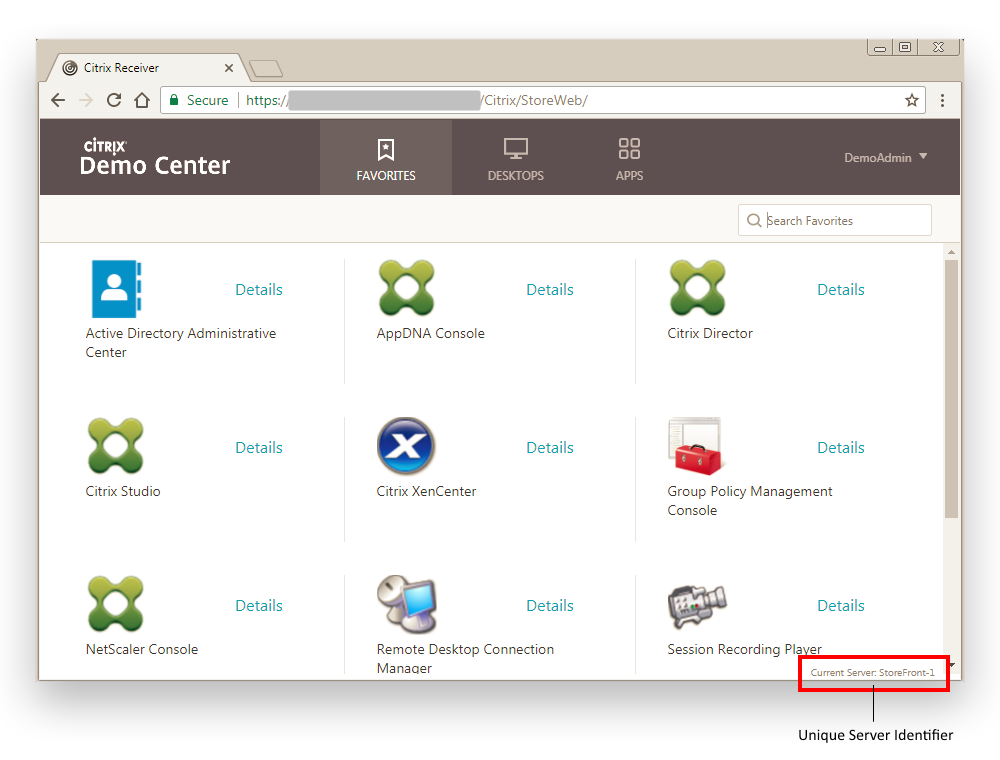
    4. If you configured farm aggregation without load balancing, then use the up and down arrow buttons to put the active site/farm for this group of users on top. The lower priority sites will only be accessed if the primary site is down. You can run this wizard multiple times to specify different active sites for different users.
    5. If farm aggregation is configured for load balancing, then there are no arrows to prioritize the farms.
    6. Click Create.
  9. You can click Add to add more user mappings. If you add multiple user groups, you can assign different primary sites/farms to each Active Directory group. This is how you configure “home sites”. Click OK twice when done.

Shaun Ritchie Citrix StoreFront High Availability and Aggregation – A dual site Active Active design has a sample multi-site configuration using XML Notepad and explains how to use the Primary and Secondary keywords to override farm priority order.

Citrix Blogs StoreFront Multi-Site Settings: Some Examples has example XML configurations for various multi-datacenter Load Balancing and failover scenarios.

HDX Optimal Routing

The Optimal Gateway feature lets you control the Citrix Gateway used for ICA connections. Here are some scenarios where this would be useful:

  • Multi-site Load Balancing. If the icon selected by the user is published from Citrix Virtual Apps and Desktops in Datacenter A, then you probably want the ICA connection to go through a Citrix Gateway Virtual Server in Datacenter A.
    • If the main DNS name for accessing Citrix Gateway is GSLB load balanced across datacenters, then you need additional datacenter-specific DNS names so you can control which datacenter the ICA connection goes through.
    • Note: Optimal Gateway is configured at the farm/site level, or zone level.
  • Citrix Gateway for internal connections (AppFlow). If you want to force internal ICA connections to go through Citrix Gateway so AppFlow data can be sent to Citrix Application Delivery Management (ADM), then you can do that using HDX Optimal Gateway, even if the user originally connected directly to the StoreFront server. See CTX200129 How to Force Connections through NetScaler Gateway Using Optimal Gateways Feature of StoreFront for more information.
  • The Citrix Gateway Virtual Server requires user certificates. If ICA traffic goes through a Citrix Gateway Virtual Server that requires user certificates (e.g. Smart Card), then each session launch will result in a PIN prompt. To prevent these extra prompts, build a separate Citrix Gateway Virtual Server that doesn’t have user certificates as Mandatory. Use Optimal Gateway to force ICA connections through the other Citrix Gateway Virtual Server. Note: SmartAccess Callback URL also cannot use a Citrix Gateway Virtual Server where client certificates are set to Mandatory, so the extra Citrix Gateway Virtual Server would be useful for that scenario too.

HDX Optimal Gateway can be configured in the StoreFront Console:

  1. Right-click the Stores node, and click Manage Citrix Gateways.
  2. Add more Citrix Gateways: one for each datacenter.
  3. When adding a Gateway, you can designate a Usage or role.
    1. The Gateway accessed through the active/active GSLB DNS name must be set to Authentication and HDX routing.
    2. The Gateways for Optimal Routing could be set to HDX routing only. Or if test users will use these datacenter-specific DNS names to connect to Gateways in specific datacenters, leave them set to Authentication and HDX routing. There’s no harm in leaving all of the Gateways set to Authentication and HDX routing.
  4. Go to Stores, right-click your store in the middle pane, and click Configure Store Settings.
  5. Go to the Optimal HDX Routing page.
  6. Highlight one of the datacenter-specific Gateways, and click Manage Delivery Controllers.
  7. Select the farms that should use this gateway, and click OK.
  8. Repeat for the other datacenter-specific Gateways.
  9. The Gateway for the active/active GSLB-enabled DNS name doesn’t need any farms associated with it.
  10. If you want to use Citrix Gateway internally for AppFlow reporting, then uncheck the External only checkbox.

    1. Another option for Optimal Gateway selection is zones. In XenApp/XenDesktop 7.7 and newer and Citrix Virtual Apps and Desktops, you can stretch a farm across datacenters (zones), and use a different Gateway for each zone. Highlight a Gateway. Click Manage Zones, and add the zone name. This assumes the zone name has also been specified in the Manage Delivery Controllers dialog box > Advanced Settings.
  11. Click OK when done.
  12. In summary, users will connect to the active/active GSLB-enabled Gateway and login. After clicking an icon, HDX will be routed through one of the datacenter-specific Gateways based on the farm the icon was launched from.

Multiple Gateways (GSLB) to One StoreFront Server Group

This section applies to SmartAccess, or SAML, and the Callback URL. If you don’t need the Callback URL for SmartAccess or SAML, then skip this section.

The Callback URL must go to the same Citrix ADC appliance that authenticated the user. If you have multiple Citrix ADC appliance pairs communicating with a single StoreFront server, then StoreFront needs to identify which Citrix ADC appliance pair the request came from, so it can perform a callback to that particular appliance pair.

If each of the Citrix Gateways uses the same DNS name (e.g. GSLB), then you can’t use the DNS name to distinguish one appliance from the other. Instead, StoreFront can use the Gateway VIP to distinguish appliances so the callback goes to the correct appliance.

  1. Create datacenter-specific callback DNS names. For example: callback-a.corp.com and callback-b.corp.com.
  2. The datacenter-specific callback DNS name must match the certificate on the Citrix Gateway Virtual Server that is handling the callback. Here are some options to handle the certificate requirement:
    • On the main Citrix Gateway Virtual Server, assign a wildcard certificate that matches both the GSLB name, and the datacenter-specific callback name.
    • On the main Citrix Gateway Virtual Server, assign an SSL certificate with Subject Alternative Names for both the GSLB name, and the datacenter-specific callback name.
    • Create an additional Citrix Gateway Virtual Server on the appliance. Bind a certificate that matches the datacenter-specific callback name.
  3. In the StoreFront console, create multiple Citrix Gateway appliances, one for each datacenter.
  4. Give each of the gateway objects unique Display names. You can’t have two Gateway objects with the same display name.
  5. Enter the same Citrix Gateway URL in all of the gateway appliances.

  6. In the Authentication Settings page, in the VServer IP address field, enter the Gateway VIP for this particular appliance pair. StoreFront will use this VIP to distinguish one Citrix ADC appliance from another.
    • When users use HTTP to connect to a Citrix Gateway for authentication and icon enumeration, when Citrix Gateway communicates with StoreFront, Citrix Gateway inserts its VIP into a HTTP Header field named X-Citrix-Via-VIP. StoreFront reads this VIP header, and compares it to the Gateway objects bound to the Store. If there’s a match, StoreFront uses the Callback URL configured for that Gateway object.
  7. The callback URL must be unique for each Citrix ADC appliance pair (e.g. callback-a.corp.com). The callback URL must resolve to a Citrix Gateway VIP on the same appliance pair that authenticated the user.

  8. When enabling Remote Access on the store, select both Gateway appliances. Select one as the default appliance. It shouldn’t matter which one is default.

Related Pages

StoreFront 2411 through 3.5 – Basic Configuration

Last Modified: Dec 13, 2024 @ 10:00 am

Navigation

This article applies to StoreFront versions 2411, 2402 LTSR CU1, 2203 LTSR CU5, 1912 LTSR CU9, and all other versions 3.5 and newer.

💡 = Recently Updated

Change Log

StoreFront Versions

The most recent StoreFront release is version 2411.

  • Starting with version 1811, the version numbering changed to a YYMM (year/month) format.
  • Versions 2402, 2203, and 1912 are Long Term Service Releases (LTSR).

The default user interface in StoreFront 1811 and newer is now the “purple” interface, which is different from versions 3.16 and older. Be aware of this change before you upgrade StoreFront. Customizations might not work in the new interface. There doesn’t appear to be any way to revert to the older user interface. The Next-gen experience in 2311 and newer is not enabled by default but can be enabled manually.

Download one of the following versions of StoreFront. For LTSR versions of Citrix Virtual Apps and Desktops (CVAD), deploy the StoreFront that comes with your version of LSTR CVAD.

StoreFront Installation / Upgrade

For small environments, it might be OK to install StoreFront on the Delivery Controller machines. But usually StoreFront and Delivery Controllers are separate machines.

  • If StoreFront will pull icons from multiple Citrix Virtual Apps and Desktops sites/farms, then StoreFront should be installed on its own machines.

To automate the installation of StoreFront, see Dennis Span Citrix StoreFront unattended installation with PowerShell.

The default user interface in StoreFront 1811 and newer is now the “purple” interface, which is different from versions 3.16 and older. Be aware of this change before you upgrade StoreFront. There doesn’t appear to be any way to revert to the older user interface.

Citrix Blog Post StoreFront 3.0 Scalability recommends StoreFront servers to be sized with 4 vCPU and 8 GB RAM.

  1. If upgrading, do the following before beginning the upgrade:
    1. Other Users – Use Task Manager > Users tab to logoff any other user currently logged into the machine.
    2. Export the StoreFront configuration so you can restore it if something goes wrong.
    3. Stop the World Wide Web Publishing Service.
    4. Stop all StoreFront services.
    5. Close all PowerShell and StoreFront consoles.
    6. Citrix CTX226419 StoreFront upgrade fails to keep the setting in default ICA file. Take a backup of default.ica and usernamepassword.tfrm from C:\inetpub\wwwroot\Citrix\StoreName\App_Data. After upgrading StoreFront, replace the new default.ica and usernamepassword.tfrm with the old default.ica and usernamepassword.tfrm files to ensure you retain the old settings.
    7. If Microsoft SCOM Agent is installed, then stop the Microsoft Monitoring Agent service.
    8. See Patrick van den Born Avoid 1603 errors when upgrading Citrix StoreFront 2.x to Citrix StoreFront 3.5
  2. Operating system support:
    • StoreFront 2407 and newer are not supported on Windows Server 2016.
    • StoreFront 2203 and newer are supported on Windows Server 2022.
    • StoreFront 2203 is not supported on Windows Server 2012 R2.
    • StoreFront 1912 and newer are supported on Windows Server 2019.
  3. Run CitrixStoreFront-x64.exe from the CVAD ISO at /x64/StoreFront. Or download it separately.
  4. Click Yes if asked to install .NET Runtime Version 8.

    1. Click Install.
    2. Click Close.
  5. In the License Agreement page, check the box next to I accept the terms, and click Next.
  6. In the Review prerequisites page, click Next.
  7. In the Ready to install page, click Install.
  8. In the Successfully installed StoreFront page, click Finish.
  9. Click Yes if prompted to reboot.
  10. FAS – If you upgraded a StoreFront server that was connected to Citrix Federated Authentication Service (FAS), then also upgrade Citrix Federated Authentication Service.

If this is a new install, skip to the Initial Configuration.

If you are upgrading from StoreFront 3.8 or older, then do the following to add SAML Authentication as an option. This feature lets you perform SAML against StoreFront without needing Citrix Gateway. If you did a fresh deployment of 3.9 or newer, then SAML is already added.

  1. Right-click your Store and click Manage Authentication Methods.
  2. On the bottom, click the Advanced button, and click Install or uninstall authentication methods.
  3. Check the box next to SAML Authentication, and click OK.
  4. If you don’t want to configure SAML at this time, then uncheck the authentication method. See the Federated Authentication Service article for SAML details.

Initial Configuration

In StoreFront 3.8 and newer, you can create multiple stores in different IIS websites. This functionality is not exposed in the GUI and instead the entire StoreFront configuration must be performed using PowerShell. See Citrix Blog Post StoreFront 3.8 is Available NOW! for sample PowerShell commands to create the stores.

You can also use PowerShell to create a store and configure it as detailed at CTX206009 How to configure a Store via Powershell.

If this is a new deployment of StoreFront, do the following to perform the initial configuration:

  1. In PowerShell, run Set-ExecutionPolicy RemoteSigned.
  2. The management console should launch automatically. If not, launch Citrix StoreFront from the Start Menu.
  3. In the middle, click Create a new deployment.
  4. In the Base URL page, if you installed an SSL certificate on the StoreFront server, then the Hostname should already be filled in. For now, you can leave it set to the server’s name and then change it later once you set up SSL and load balancing. Click Next.
  5. In the Getting Started page, click Next.
  6. In the Store Name page, enter a name for the store. The name entered here is part of the URL path (e.g. /Citrix/CorpStoreWeb)
  7. Check the box next to Set this Receiver for Web site as IIS default and click Next.
  8. In the Delivery Controllers page, click Add.
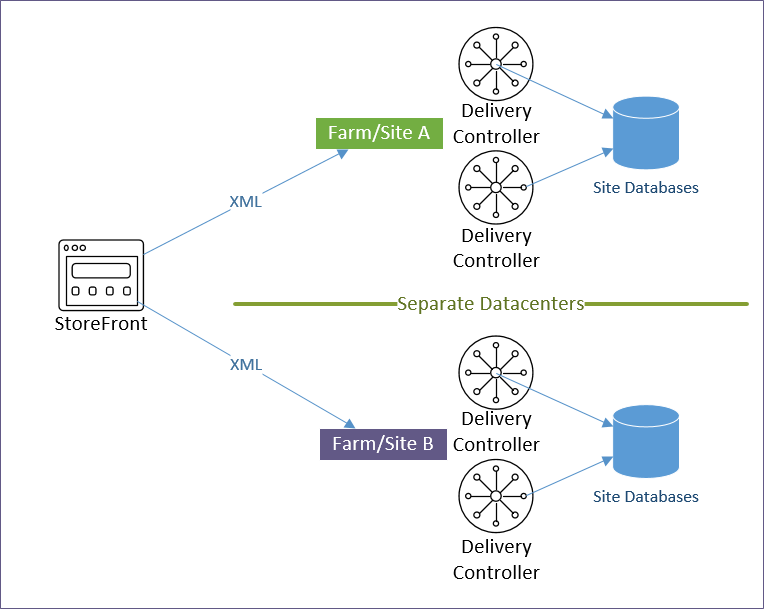
  9. Enter a descriptive name for the Citrix Virtual Apps and Desktops (CVAD). This name does not need to match the actual farm name.
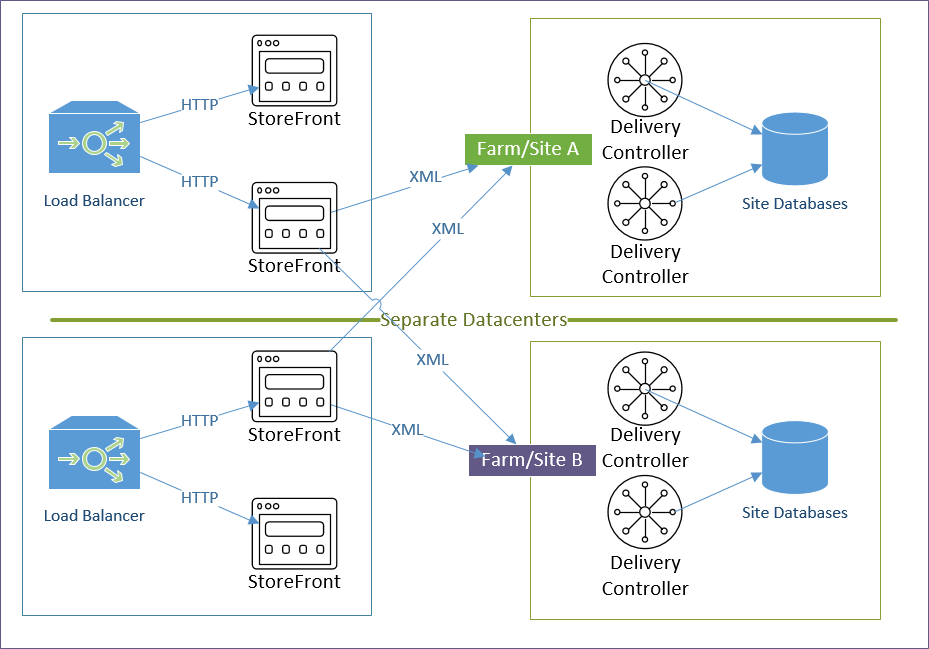
  10. Add the two Delivery Controllers. Change the Transport Type to HTTP. Click OK. You can set it to HTTPS is you have valid certificates (trusted by StoreFront) installed on your Delivery Controllers.
  11. If you have multiple Citrix Virtual Apps and Desktops sites/farms, feel free to add them now. You can also add older XenApp 6.5 farms. Click Next when done.
  12. In the Remote Access page, don’t check the box. Just click Next. You can set this up later.
  13. In the Authentication Methods page, check the boxes next to Domain pass-through and Pass-through from Citrix Gateway. Click Next.
    Note: if you want Domain pass-through authentication for browser users, you also need to enable it for Receiver for Web as detailed later in this article.

  14. In the XenApp Services URL page, click Create.
  15. In the Summary page, click Finish.

Second StoreFront Server

After the server group is created, NT SERVICE\CitrixConfigurationReplication and NT SERVICE\CitrixClusterService must remain in the Administrators group on both StoreFront servers or propagation will fail.

  1. Install StoreFront on the second server.
  2. Create/Import an SSL certificate and bind it to the Default Web Site.
  3. Login to the first StoreFront server. In the StoreFront management console, right-click Server Group and click Add Server.
  4. Copy the Authorization code.
    Note: the Please wait message means it is waiting on you to add the 2nd server. You don’t actually have to wait.

  5. Login to the second StoreFront server and launch the management console. In the middle, click Join existing server group.
  6. In the Join Server Group page, enter the name of the first StoreFront server and enter the Authorization code copied earlier. Click Join.
  7. Then click OK.
  8. Go back to the first server. Click OK.
  9. Notice this message. It is good advice.
  10. All changes made on one StoreFront server must be manually propagated to the other StoreFront server. You do that by right-clicking Server Group, and clicking Propagate Changes.
  11. When you propagate changes, the default web page might not be replicated to the other nodes. Copy C:\inetpub\wwwroot\web.config manually to each node.

Customer Experience Improvement Program

StoreFront 3.9 and newer enable Customer Experience Improvement Program (CEIP) by default. To disable it, create the registry value HKEY_LOCAL_MACHINE\SOFTWARE\Citrix\Telemetry\CEIP\Enabled (DWORD) and set it to 0 (zero). Also see CEIP at Install, set up, upgrade, and uninstall at Citrix Docs.

See https://www.carlstalhood.com/delivery-controller-2203-ltsr-and-licensing/#ceip for additional places where CEIP is enabled.

Citrix Analytics

StoreFront 1906 and newer supports uploading data to Citrix Analytics.

The client devices must be running Workspace app 1903 and newer.

See Enable Analytics on Virtual Apps and Desktops on-premises at Citrix Docs.

Store Name – Rename

If you installed StoreFront on your Delivery Controller, it will have a default store named Store. If you don’t like the default Store Name (/Citrix/Store) then you will need to remove the store and re-add it.

Note: Some at Citrix Discussions (A protocol error occurred while communicating with the Authentication Service) have reported authentication issues after following this procedure. It’s probably cleaner to uninstall StoreFront and reinstall it.

  1. In the StoreFront console, on the left, click Stores.
  2. Right-click your store, and click Remove Store.
  3. Click Yes.
  4. On the left, right-click Stores, and click Create Store.
  5. In the Getting Started page, click Next.
  6. In the Store Name page, enter a name for the store. The name entered here is part of the URL path (e.g. /Citrix/CorpStoreWeb).
  7. Check the box next to Set this Receiver for Web site as IIS default and click Next.
  8. In the Delivery Controllers page, click Add.
  9. Enter a descriptive name for the Citrix Virtual Apps and Desktops farm. This name does not need to match the actual farm name. (If StoreFront 3.5, don’t put spaces or periods in the farm name)
  10. Change the Type to XenDesktop or Citrix Virtual Apps and Desktops.
  11. Add the two Delivery Controllers.
  12. Change the Transport Type to HTTP. Click OK. You can leave it set to HTTPS (recommended) if you have valid certificates (trusted by StoreFront) on your Delivery Controllers.
  13. If you have multiple Citrix Virtual Apps and Desktops farms, feel free to add them now. You can also add older XenApp farms. Or later, you can add farms in Store > Manage Delivery Controllers. Click Next when done.
  14. In the Remote Access page, don’t check the box and click Next. You can set this up later.
  15. In the Authentication Methods page, check the boxes next to Domain pass-through and Pass-through from Citrix Gateway. Click Next.
  16. In the XenApp Services URL page, click Create.
  17. In the Created Successfully page, click Finish.

SSL Certificate

StoreFront requires SSL. You will save yourself much heartache if you install valid, trusted certificates on the StoreFront servers or your load balancer. There are two options for StoreFront SSL.

  • SSL Offload: Use Citrix ADC to do SSL Offload and load balancing. In this scenario, install the SSL certificate on the load balancer. You can leave the StoreFront servers listening on HTTP and no IIS server certificate. The SSL certificate on the Citrix ADC must match the DNS name that resolves to the load balancing VIP.
  • SSL End-to-end: Install an SSL certificate on each StoreFront server and bind it to IIS. This allows you to use SSL protocol between the load balancer and the StoreFront servers.

If your load balancer cannot terminate SSL, then the StoreFront IIS certificate must match the DNS name that resolves to the load balancing VIP.

For load balancers that can terminate SSL (e.g., Citrix ADC), the StoreFront IIS server certificate should match the StoreFront server name. If StoreFront is installed on the Delivery Controllers, with server-specific certificates you can later enable HTTPS in the StoreFront Store Delivery Controller configuration.

Another option is to create an SSL certificate with Subject Alternative Names for the load balanced DNS name and each of the StoreFront server FQDNs. Then import this one certificate on all StoreFront servers. Or a wildcard certificate could match all of these names.

In either case, be aware that Email-based discovery in Citrix Receiver requires the certificate to not only match the StoreFront load balanced DNS name but the certificate must also match discoverReceiver.email.suffix for every email domain. Usually, the only option to match multiple email domains is with Subject Alternative Names. If you have multiple email suffixes, then you will need multiple Subject Alternative Names, each beginning with discoverReceiver. If you don’t plan on implementing email-based discovery, then you don’t have to worry about these discoverReceiver Subject Alternative Names.

If the certificate does not match discoverReceiver.email.suffix, then users will see this message when attempting to use email discovery in Citrix Workspace app.

When adding Subject Alternative Names to a certificate, the first Subject Alternative Name should be the same as the Load Balancing FQDN. The remaining Subject Alternative Names should be discoverReceiver.email.suffix for every email domain.

When you view a Subject Alternative Name certificate, on the Details tab, click Subject Alternative Name to verify that all names are listed including the DNS name that resolves to the load balancing VIP.

There are several methods of creating a certificate for StoreFront.

  • If you are implementing Single FQDN for internal and external users, then the certificate for external Citrix Gateway can also be used for internal StoreFront.
    • Single FQDN has additional Subject Alternative Name certificate requirements, including Internal Beacon FQDN and Callback FQDN.
  • If you will support non-domain-joined machines (e.g., iPads, thin clients) connecting to your internal StoreFront, then the StoreFront certificate should be signed by a public Certificate Authority. You can use IIS to request the certificate. You can then export the certificate from IIS and import it to Citrix ADC (for Load Balancing and Citrix Gateway). Public Certificate Authorities (e.g., GoDaddy, Digicert, etc.) let you enter additional Subject Alternative Names when you purchase the certificate.

  • If all internal machines are domain-joined, then you can use an internal Certificate Authority to create the StoreFront certificate. The Certificates MMC snap-in can be used to create an internal certificate signed by a Microsoft Certificate Authority. The MMC method allows you to specify Subject Alternative Names.

Once the certificate is created or imported, bind it to IIS:

  1. In IIS Manager, right-click the Default Web Site, and click Edit Bindings.
  2. Click Add.
  3. Change the Type to https and select the SSL certificate. Do NOT put anything in the Host name field. Click OK, and then click Close.

Delivery Controllers – SSL

Delivery Controllers can be SSL enabled by using one of two methods:

  • If IIS is installed on the Delivery Controller, simply install/create a certificate, and bind it to the Default Web Site.
  • If IIS is not installed on the Delivery Controller, then you need to run a command line program as described at SSL for Delivery Controller.

Once SSL certificates are installed on the Delivery Controller servers, then you can configure the StoreFront Store to use SSL when communicating with the Delivery Controllers.

  1. In the StoreFront Console, on the left click Stores.
  2. In the middle, right-click your store, and click Manage Delivery Controllers.
  3. Highlight the deployment and click Edit.
  4. The Servers list must contain FQDNs that match the certificates installed on those Delivery Controller servers.
  5. Change the Transport type to HTTPS.
  6. Click OK twice.
  7. See CTX399424 Gateway Callback and / or XML Communication fails after upgrade to Storefront 2203 for a workaround. The fix is included in StoreFront 2203.1.

Base URL – Change

  1. Configure load balancing of the StoreFront servers, including SSL certificate.
  2. In the Citrix StoreFront console, right-click Server Group, and click Change Base URL.
  3. Enter the StoreFront Load Balancing FQDN as the new Base URL in https://storefront.corp.com format.
    1. Receiver requires that the Base URL is https. It won’t accept http.
    2. If you want the StoreFront Base URL to be the same as your Gateway FQDN, then see the Single FQDN instructions.
  4. Click OK.

If the Base URL is https, but you don’t have certificates installed on your StoreFront servers (aka SSL Offload), then you’ll need to do the following:

  1. On the left, click the Stores node.
  2. In the middle, right-click your store, and click Manage Receiver for Web Sites.
  3. Click Configure.
  4. On the Advanced Settings page, change Enable loopback communication to OnUsingHttp. Click OK, and then click Close.

Default Web Page

After changing the Base URL, you’ll need to update the IIS Default Website.

  1. On the left, right-click Stores, and click Set Default Website.
  2. Check the box next to Set a Receiver for Web site as the default page in IIS and click OK.
  3. Click Yes to overwrite.
  4. If you go to C:\inetpub\wwwroot and edit the file web.config, you’ll see the redirect.

Authentication Configuration

  1. In the Citrix StoreFront console, on the left, click the Stores node.
  2. In the middle, right-click your store, and click Manage Authentication Methods.
  3. Check the boxes next to Domain pass-through and Pass-through from Citrix Gateway.
  4. If you intend to enable pass-through authentication from Receiver Self-Service (native Workspace app) or from Receiver for Web (web browser), then in Web Studio (CVAD 2212 and newer), go to Settings and Enable XML trust.

    • Or go to a Delivery Controller and run the command
      Set-BrokerSite -TrustRequestsSentToTheXmlServicePort $True from a Windows PowerShell command prompt. You might have to run asnp citrix.* first.
  5. If StoreFront is not in the same domain (or trusted domain) as the users, then you can configure StoreFront to delegate authentication to the Delivery Controllers. See XML service-based authentication at Citrix Docs.
    • StoreFront 3.6 and newer can be workgroup members without joining a domain.
  6. Click the top gear icon, and then click Configure Trusted Domains.
  7. Select Trusted domains only, click Add, and enter the domain names in DNS format. The DNS suffix is needed if doing userPrincipalName authentication from Citrix Gateway.
  8. Select one of the domains as the default.
  9. If desired, check the box next to Show domains list in logon page. Click OK.
  10. Click the top gear icon, and then click Manage Password Options.
  11. Make your selection, and click OK.
  12. Be careful with password changes. Any time somebody changes their password through StoreFront, a profile will be created for that user on the StoreFront server. Use a tool like delprof2.exe to periodically delete these local profiles.
  13. If you have Citrix Virtual Apps and Desktops and installed Self-Service Password Reset, you can integrate SSPR with StoreFront 3.7 or newer by clicking the top gear icon and clicking Configure Account Self-Service. This option is only available if your Base URL is https (encrypted). See the following for detailed implementation guides.
  14. Change the selection to Citrix SSPR, and click Configure.
  15. Check both boxes and enter the URL of the SSPR server using the displayed example (with /MPMService on the end). Click OK three times.
  16. With SSPR enabled, a new Tasks tab lets users enroll with SSPR.
  17. The logon page also has an Account Self-Service link.

Next Generation Experience

In StoreFront 2411 and newer, you can do the following to enable the Next-gen experience theme, which looks the same as Workspace in Citrix Cloud, including the Activity Manager.

  1. In the StoreFront Console, on the left, click the Stores node.
  2. In the middle, right-click your store, and click Manage Receiver for Web Sites.
  3. Click Configure.
  4. On the UI Experience page, select Next generation experience and click OK.
  5. StoreFront 2411 adds Pinned Links to the Next generation experience.

Customize Receiver Appearance

You can go to Stores > Manage Receiver for Web Sites > Configure > Customize Appearance to change logos and colors. Additional customization can be performed using the SDK.

You can also Manage Featured App Groups.

In StoreFront 1811 and newer, Featured App Groups are shown in the user interface as Collections.

  • The HOME page shows the Feature App Groups in a ribbon with arrows to let the user see more Featured App Groups. The ribbon view is limited to three icons per Featured App Group. When the user clicks a Featured App Group, every icon in the Featured App Groups is shown.
  • The APPS page has a Collections tab showing all collections and the number of icons in each Collection.
  • When the user clicks a collection, all icons in the collection are shown. The user can click Add All on the top right to mark all of the icons as Favorites.

To create Featured App Groups:

  1. Go to Stores > myStore > Manage Receiver for Web Sites > Configure.
  2. In the Edit Receiver for Web site window, on the Featured App Groups page, click Create.
  3. Give the Collection a name and a description.
  4. At the bottom, there are three methods of adding icons to the Feature App Group.
  5. If you select the Keyword option, then enter a keyword that will be added to the published apps that are in this collection.
  6. In Citrix Studio, go to the Properties of a published application. In the Description field, at the end, enter KEYWORDS:myCollectionKeyword.

In StoreFront older than version 1811:

  • Featured App Groups are displayed at the top of the Apps > All page.
  • By default, Featured App Groups are displayed with continual horizontal scrolling. This is OK if you have several Featured App Groups but doesn’t look right if you only have one Featured App Group.
  • Michael Bednarek has posted some code at Citrix Discussions to disable the continuous horizontal scrolling.
  • If you want to display more than 3 apps per group, see Michael Bednarek at Modify Receiver for Web site at Citrix Discussions.

Receiver for Web (browser) Pass-through Authentication

  1. On the left, click the Stores node.
  2. In the middle, right-click your store, and click Manage Receiver for Web Sites.
  3. Click Configure.
  4. On the Authentication Methods page, if desired, check the box next to Domain pass-through. Click OK.
  5. If the StoreFront URL is in the browser’s Local Intranet zone, then you’ll see a prompt to automatically Log On. This only appears once.
  6. If you want to default to Pass-through without any user prompt, then see Citrix Blog Post Configuring domain pass-through as your default authentication method.

Workspace app for HTML5 2411

  1. On the left, click the Stores node.
  2. In the middle, right-click your store, and click Manage Receiver for Web Sites.
  3. Click Configure.
  4. In StoreFront 2411 and newer, on the Launch Preferences page, change the drop-down to Use Receiver for HTML5 if local Citrix Receiver/Workspace is unavailable.

    • Prior to StoreFront 2411, on the Deploy Citrix Receiver / Workspace app page, change the drop-down to Use Receiver for HTML5 if local Citrix Receiver/Workspace is unavailable.
  5. By default, the HTML5 session opens in a new tab. You can optionally enable Launch applications in the same tab as Receiver for Web. See Configure Citrix Receiver for HTML5 use of browser tabs at Citrix Docs for more information.
  6. Click OK, and then click Close.
  7. Download the Workspace app 2411 for HTML5.
    Note: new versions of Workspace app for HTML5 are released frequently. For example, 2306 and newer support the new launch experience.

  8. Install the HTML5 Workspace app (CitrixHTML5Client-x64.exe) on one of the StoreFront servers. It installs without prompting. Repeat this step on all StoreFront servers in the Server Group since Propagate Changes doesn’t seem to propagate the new Workspace App.

  9. To see the installed version of HTML5 Workspace app, in StoreFront console, click the Stores node on the left.
  10. In the middle pane, in the bottom half, switch to the Receiver for Web Sites tab. You might have to click Refresh to see the new version.

HTML5 Workspace app configuration

  1. Copy/paste of text using Ctrl+C and Ctrl+V – HTML5 Workspace app version 1907 app adds support for copy/paste of text using Ctrl+C and Ctrl+V and the feature is enabled by default. More info at Enhanced clipboard experience at Citrix Docs.
  2. Multi-monitor – HTML5 Workspace app has a multi-monitor feature, which is enabled by default.
  3. To configure HTML5 Workspace app, edit the file “C:\Program Files\Citrix\Receiver StoreFront\HTML5Client\configuration.js”.

    1. Customer Experience Improvement Program (CEIP) is enabled by default. To disable CEIP in HTML5 Workspace App 1906 and newer, find the first analytics section and change enabled to false.
    2. To disable CEIP in HTML5 Workspace App 1905 and older, search for the ceip section, and change it to false.
  4. In the StoreFront console, on the left, right-click Server Group, and click Propagate Changes.
  5. For VDA 7.15 and older, optionally, install Citrix PDF Printer on the VDAs. The PDF printer is in the Additional Components section of the HTML5 Workspace app download page.
    Note: in VDA 7.16 and newer, the PDF Printer is included with the VDA installation and no longer needs to be installed separately.

Other HTML5 Receiver configurations you can change by either editing C:\Program Files\Citrix\Receiver StoreFront\HTML5Client\configuration.js, or use the Citrix Workspace app (earlier known as Citrix Receiver) for Chrome and HTML5 – Configuration Utility downloadable from CTX229141.

  • HTML5 Workspace app has improved PDF printing in Chrome and Firefox. Enable it by setting supportedBrowsers to true.
  • When printing from HTML5 Workspace app to the Citrix PDF Printer, the user must click Continue to show the PDF. You can get rid of this prompt. In the configuration.js file, scroll down to the line containing printDialog and set it to true.


  • The new HTML5 Workspace app toolbar can be disabled or customized by editing the file C:\Program Files\Citrix\Receiver StoreFront\HTML5Client\configuration.js.


If HTML5 Workspace app is enabled, users have the option of selecting either native or HTML5 by clicking Change Citrix Receiver or Change Citrix Workspace app.

  1. In StoreFront 1912 and newer, click the gear icon on the top right and then click Account Settings.
  2. Click either Change Citrix Workspace app or Change Citrix Receiver..

  3. If you want to use the locally installed Workspace app, then click the blue Detect Citrix Workspace app or blue Detect Receiver button. If you want to use the HTML5 Client, click Use light version.


Citrix Blog Post Receiver for HTML5 and Chrome File Transfer Explained:

  • How to use the toolbar to transfer files
  • Citrix Policy settings to enable/disable file transfer
  • VDA registry settings to control file transfer
  • HTML5Client\Configuration.js settings for client-side configuration
  • How to view HTML5Client log file

Deploy Citrix Workspace app

  1. Citrix recommends that all users install the Citrix Workspace Web Extension in their endpoint browsers. This extension eliminates the need for StoreFront to detect the locally installed Workspace app and enables .ica files to be downloaded to memory instead of to disk. StoreFront support for the extension is enabled by default in StoreFront 2311 and newer. See Citrix Workspace web extensions at Citrix Docs.
  2. StoreFront can deploy Workspace app to users that don’t have Workspace app installed. In StoreFront console, on the left, click the Stores node.
  3. In the middle, right-click your store, and click Manage Receiver for Web Sites.
  4. Click Configure.
  5. On the Deploy Citrix Receiver/ Workspace app page, check the box next to Allow users to download HDX engine (plug in).
  6. Change both source drop-downs to Local files on the StoreFront server.

    1. For Windows, download one of the following:
      • Workspace app for Windows 2409. Version 2409 is a Current Release.
      • For LTSR, download Citrix Workspace app for Windows LTSR 2402 CU1.
    2. For Mac, download Workspace app 2411 for Mac.
    3. Click each of the Browse buttons and browse to the downloaded Workspace app.
    4. You can optionally enable Upgrade plug-in at logon.
    5. StoreFront 2411 and newer have an option to Require end users to use locally installed Citrix app only.

    6. Click OK when done, and Close when done.
  7. If you prefer for users to download Workspace app from the Citrix website, then note that StoreFront might default to downloading Receiver instead of Workspace app. To change it to Workspace app, do the following:
    1. In StoreFront Console, in the Deploy Citrix Receiver/ Workspace app page, change Windows source and Mac source to Files on remote server (through URL).
    2. Enter the following paths. The default paths might be http instead of https and you should change them to https.
      Windows Receiver = https://downloadplugins.citrix.com/Windows/CitrixWorkspaceApp.exe
      Mac Receiver = https://downloadplugins.citrix.com/Mac/CitrixWorkspaceApp.dmg
  8. When users connect to Receiver for Web, they will be prompted to install or upgrade. In StoreFront 2203 and newer, the screens say Workspace app.
  9. In older versions of StoreFront, the screens might say Citrix Receiver instead of Citrix Workspace app.


  10. You can change it to Citrix Workspace app by following the instructions at CTX221097 How to rename items on StoreFront?.

    • Search the list of strings in the KB article for any string containing the word Receiver, copy the string to C:\inetpub\wwwroot\Citrix\StoreWeb\custom\strings.en.js, and change it to Workspace app. A few of the strings are shown below. Make sure there are commas between each item except the last item.
  11. If you don’t want StoreFront to detect the locally installed Workspace app, then edit the Receiver for Web site, switch to the Advanced Settings page and uncheck the box next to Enable protocol handler. This disables the button that asks users to Detect Workspace app.

Receiver for Web Timeout

  1. On the left, click the Stores node.
  2. In the middle, right-click your store, and click Manage Receiver for Web Sites.
  3. Click Configure.
  4. On the Session Settings page, set the Session timeout as desired, and click OK.
  5. If you are using a Citrix ADC, you will need to change the Global Session Timeout located at Citrix Gateway => Global Settings => Change Global Settings (right pane) => Client Experience (tab) => Session Time-out (mins).


  6. From Change the session time-out of Citrix Receiver for Web at Citrix Docs: If you increase the session timeout for RfWeb to be more than 1 hour, you must also increase the maxLifetime appropriately in c:\inetpub\wwwroot\Citrix\Authentication\Web.config.
  7. If your desired timeout value is greater than 8 hours, you should also edit tokenLifeTime in c:\inetpub\wwwroot\Citrix\StoreWeb\web.config.

Favorites, Categories, and Default Tab

By default, when a user logs into StoreFront, the HOME tab or Favorites tab is selected. Users can go to other tabs to add icons to the list of Favorites.

In StoreFront 1811 and newer:

  • Favorites are shown on the HOME tab.
  • Favorites are also shown on the APPS view on the Favorites tab.
  • The user can click the star icon next to a published icon to mark that published icon as a Favorite and add it to the HOME view and Favorites tab.
  • On the APPS view, the user can expand the Categories drop-down and select a Category to view all icons in that Category.

    • To default to the Categories view, see the custom code at CTX559036 Storefront 2302 CU2 – All Apps are now showing on initial landing page instead of categories view.
    • StoreFront 1912 CU2 and newer has an option to collapse the categories after one is selected. Notice the Uncategorized folder.
    • After clicking a category, the user must click Categories again to switch to a different category.
    • StoreFront 1912 CU5 and StoreFront 2203 have an option to show Uncategorized icons directly below the Categories list if no Category is selected by the user.
    • This feature is configured in StoreFront console > click your store > Manage Receiver for Web sites > Configure > Category Settings. 1912 CU5 and 2203 adds the checkbox option to Move uncategorized apps into an Uncategorized folder. It’s checked by default, but you can uncheck it.
  • Categories are configured in the Properties of the published application on the Delivery page.
  • Collections are configured as Featured App Groups.

In StoreFront older than 1811:

  • There’s a FAVORITES view.
  • On the APPS or DESKTOPS views, the user can click the Details link next to a published icon.
  • Then the user can click Add to Favorites to add the icon to the FAVORITES view.

Favorites can be controlled by the administrator:

  • You can completely remove the FAVORITES or HOME views by going to Stores > myStore > Configure Store Settings > User Subscriptions, and choose Disable User Subscriptions (Mandatory Store).

  • To force a published application to be favorited (subscribed), use one of the following keywords in the published application description:
    • KEYWORDS: Auto = the application is automatically subscribed. But users can remove the favorite.
    • KEYWORDS: Mandatory = the application is automatically subscribed, and users cannot remove the favorite.
    • With Mandatory applications there is no option to remove the application from Favorites.
  • Citrix Blog Post How to implement dynamic landing pages in StoreFront has code for the following: If favorites exist, go to favorites tab. If favorites do not exist, go to the store tab. 💡
    //If favorites exist, go to favorites tab. If favorites do not exist, go to the store tab.
    var favoritesExist = false;
    
    CTXS.Extensions.sortMyAppList = function (app_array,defaultSortFn) {
    //This version checks if the amount of user favorites are greater than or equal
    //to "favoriteThreshold".
      var favoriteThreshold = 1;
      var favoriteCount = 0;
      for (var i = 0; i < app_array.length; i++){ if (app_array[i].canBeRemoved()){ favoriteCount++; } } if (favoriteCount >= favoriteThreshold){
        favoritesExist = true;
      }
    
      //This should always be called at the end
      defaultSortFn();
    };
    
    CTXS.Extensions.afterDisplayHomeScreen = function (callback) {
      if (favoritesExist == false){
        CTXS.ExtensionAPI.changeView("store");
      }
    };
    
  • Trentent Tye has a simple customization for C:\inetpub\wwwroot\Citrix\StoreWeb\custom\script.js to default to the APPS view if the user doesn’t have any favorites. See Citrix Storefront – Adventures in customization – Default to “Store” view if you have no favourited app’s.
    CTXS.Extensions.afterDisplayHomeScreen = function (callback) {
     /* If the user has no favorited apps, set the view to the apps view */
     if (CTXS.Store.getMyApps().length == 0) {
     CTXS.ExtensionAPI.changeView("store")
     }
    };
  • You can change the default view and view visibility by going to the Stores > myStore > Manage Receiver for Web Sites > Configure > Client Interface Settings page.
  • In StoreFront 1811 and newer, if you want to default to the APPS tab with Categories view expanded, then see CTP Sam Jacobs at Storefront 1811 – Default to Categories view at Citrix Discussions. Or see Citrix Blog Post How to land on the categories view in StoreFront 1811+.

    • Add the following to C:\Inetpub\wwwroot\Citrix\StoreWeb\custom\script.js.
      Note: if you already have afterDisplayHomeScreen in your script.js file, then you’ll need to merge them.
      function categoriesDelay() {
      $('#categoriesTabBtn').click();
      }
      
      CTXS.Extensions.afterDisplayHomeScreen = function (callback) {
      CTXS.ExtensionAPI.changeView('store');
      window.setTimeout(categoriesDelay,250);
      callback();
      };
  • In StoreFront older than version 1811, if you change the default view to APPS, then you might also want to default to the Categories view instead of the All view.

    • When publishing applications in Citrix Studio, on the Delivery page, specify an Application category so that the applications are organized into folders.
    • To default the Apps view to the Categories view instead of the All view, add the following code to the end of the file C:\Inetpub\wwwroot\Citrix\StoreWeb\custom\script.js. More details at Storefront 3.0 – change default view at Citrix Discussions.
      CTXS.Extensions.afterDisplayHomeScreen = function (callback) {
           CTXS.ExtensionAPI.navigateToFolder('/');
      };
      
      CTXS.Extensions.onViewChange = function (viewName) {
        if (viewName == 'store') {
          window.setTimeout(function () {
          CTXS.ExtensionAPI.navigateToFolder('\\');
          }, 0);
        }
      };
      

    • Then when you login to StoreFront, you’ll see Apps > Categories as the default view. This works in Workspace app too.

Beacons

  1. On the left, right-click Stores, and click Manage Beacons.
  2. Configure an Internal Beacon. Receiver Self-Service (Workspace app native interface) tries to connect to the Internal Beacon to determine if Workspace app is currently internal or not. If the Internal Beacon is reachable then Receiver Self-Service assumes it is internal, and thus connects to the StoreFront Base URL. If the Internal Beacon is not reachable, then Receiver Self-Service assumes it is external and thus connects to Citrix Gateway. For this to work properly, the Internal Beacon must not be resolvable externally.
    If you are not doing Single FQDN, then the Internal Beacon can be the StoreFront FQDN since the StoreFront FQDN is usually only available internally.
    If you are doing Single FQDN, then you can’t use the StoreFront FQDN. Instead, you must use a different internal website for the beacon. If you need to support internal iPads, due to differences in how iPads determine location, the Internal Beacon should be a new FQDN that resolves to the StoreFront Load Balancing VIP, thus requiring the StoreFront certificate to match both the Internal Beacon and the Base URL. If internal iPads are not needed, then the Internal Beacon can be any internal website.
    If you want to force internal Receiver Self-Service users to connect through Citrix Gateway (for AppFlow reporting), you can set the Internal Beacon to a fake URL. Since the Internal Beacon is never resolvable, Receiver Self-Service always uses Citrix Gateway. Or you can use Optimal Gateway to achieve the same goal.
  3. The External beacons are used by Workspace app to determine if Workspace app has Internet access or not. You can use any reliable Internet DNS name. http://ping.citrix.com is no longer valid and should be changed to some other address. Click OK when done.

Propagate Changes

Any time you make a change on one StoreFront server, you must propagate the changes to the other StoreFront server.

  1. In the StoreFront console, on the left, right-click Server Group, and click Propagate Changes.
  2. You might see a message saying that you made changes on the wrong server.
  3. Click Yes when asked to propagate changes.
  4. Click OK when done.
  5. When you propagate changes, the default web page is not replicated to the other nodes. Copy C:\inetpub\wwwroot\web.config manually to each node.

Export/Import StoreFront Configuration

Use the following PowerShell cmdlets to export StoreFront Configuration into a .zip file (encryption optional) and import to a different StoreFront server group:

  • Export-STFConfiguration
  • Import-STFConfiguration

See Export and import the StoreFront configuration at Citrix Docs for details.

Logon Simulator

ControlUp has ScoutBees logon simulator for StoreFront and Citrix Gateway.

eG Innovations has a free Logon Simulator for Citrix XenApp and XenDesktop.

Related Pages