Navigation
This page details creation of session profiles and session policies for NetScaler Gateway 11.1 where ICA Only is checked.
Partly based on Citrix Knowledgebase Article CTX139963 – How to Configure NetScaler Gateway with StoreFront
Session Profiles/Policies CLI Commands
The CLI commands are shown below:
add vpn sessionAction "Receiver Self-Service" -transparentInterception OFF -defaultAuthorizationAction ALLOW -SSO ON -icaProxy ON -wihome "https://storefront.corp.com" -ntDomain Corp -clientlessVpnMode OFF -storefronturl "https://storefront.corp.com"

add vpn sessionAction "Receiver for Web" -transparentInterception OFF -defaultAuthorizationAction ALLOW -SSO ON -icaProxy ON -wihome "https://storefront.corp.com/Citrix/StoreWeb" -ntDomain Corp -clientlessVpnMode OFF

add vpn sessionPolicy "Receiver Self-Service" "REQ.HTTP.HEADER User-Agent CONTAINS CitrixReceiver" "Receiver Self-Service"

add vpn sessionPolicy "Receiver for Web" "REQ.HTTP.HEADER User-Agent NOTCONTAINS CitrixReceiver" "Receiver for Web"
Session Profiles
Or use the GUI to create the policies/profiles:
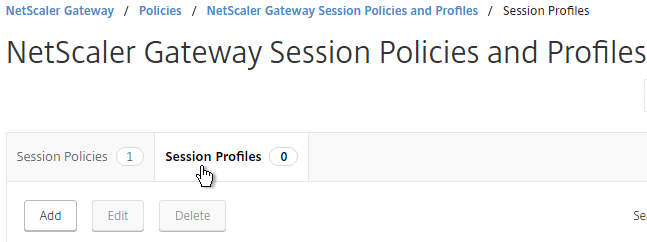
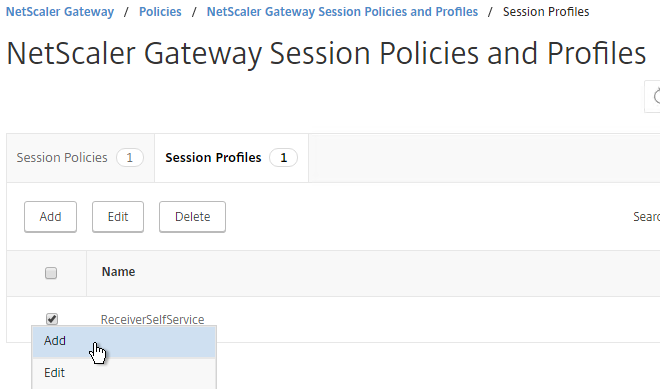
- On the left, expand NetScaler Gateway, expand Policies and click Session.

- On the right, switch to the Session Profiles tab, and click Add.
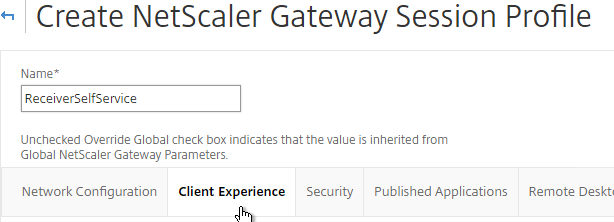
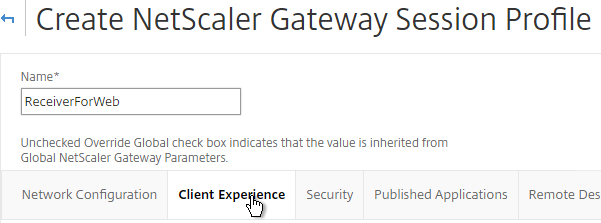
- Name the first one ReceiverSelfService or similar. This is for Receiver Self-Service (not in a web browser).
- Switch to the Client Experience tab.
- On the Client Experience tab, check the Override Global box next to Clientless Access and set it to Allow. Scroll down.
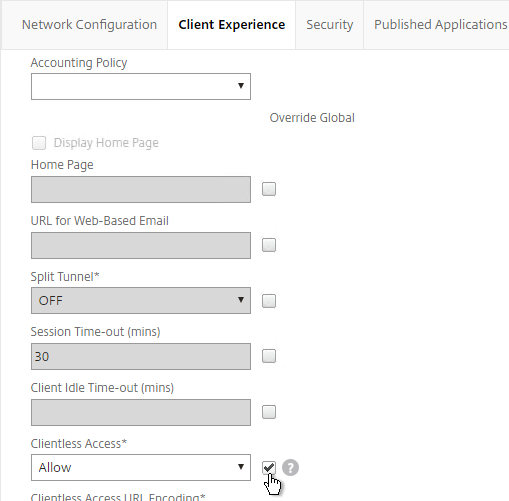
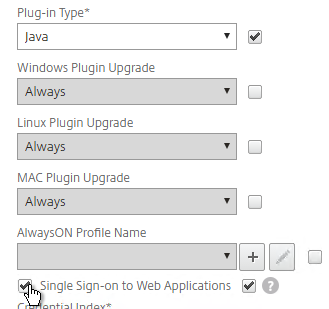
- Check the Override Global box next to Plug-in Type and set it to Java.
- Check the Override Global box next to Single Sign-on to Web Applications and enable it. Scroll up.
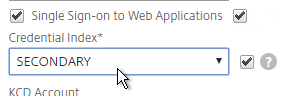
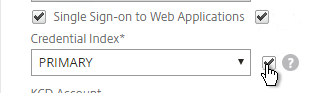
- If you need two-factor authentication, the session policy for Receiver Self-Service needs to be adjusted to indicate which authentication field contains the Active Directory password. On the Client Experience tab is Credential Index. This needs to be changed to SECONDARY. Leave the session policy for Web Browsers set to PRIMARY.
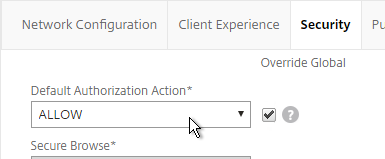
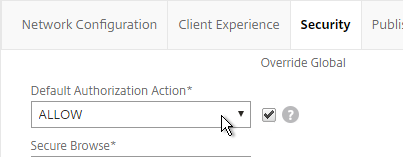
- On the Security tab, check the Override Global box next to Default Authorization Action and set it to Allow.
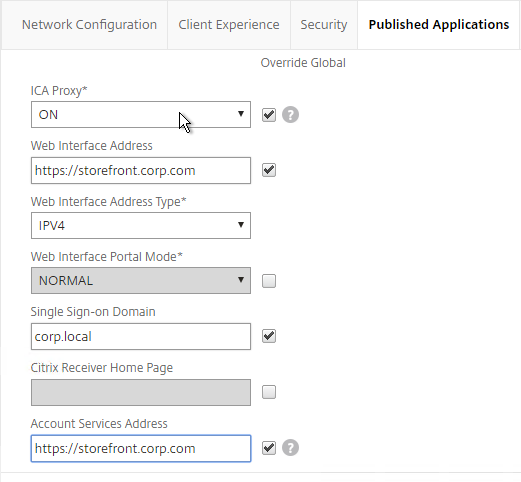
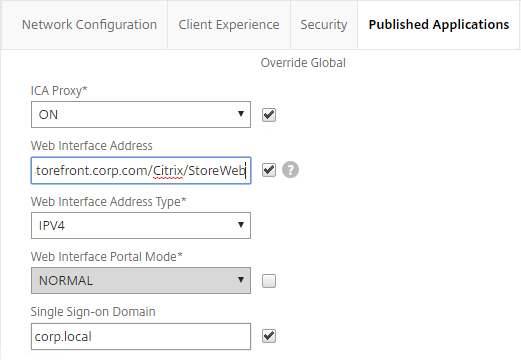
- On the Published Applications tab, check the Override Global box next to ICA Proxy and set it to ON.
- Check the Override Global box next to Web Interface Address and enter the load balanced URL to the StoreFront servers. You can use an IP address. Don’t add any path to the end of the URL.
- If you only have one domain, then check the Override Global box next to Single Sign-on Domain and enter the name of your Active Directory domain. StoreFront needs to accept this domain name (Configure Trusted Domains).
- If you have multiple domains, then leave Single Sign-on Domain field blank, and ensure the LDAP authentication servers have userPrincipalName in the SSO Name Attribute field.
- For Account Services Address, enter the Base URL for StoreFront. NetScaler needs to be able to resolve this DNS name.
- Click Create.

- Click the ellipsis next to the existing session profile and click Add. This copies the settings from the existing profile into the new one.
- Change the name of the second Session Profile to ReceiverForWeb or similar.
- On the Client Experience tab, Clientless Access should be set to Allow. Scroll down.
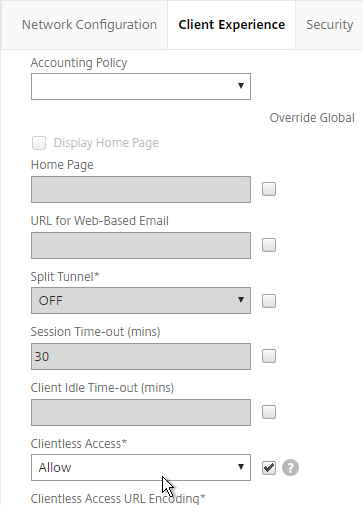
- Plug-in Type should still be set to Java.
- Single Sign-on to Web Applications should be enabled.
- If you need two-factor authentication, the session policy for Receiver for Web needs Credential Index set to PRIMARY. Only the Receiver Self-Service policy needs SECONDARY as detailed earlier.
- On the Security tab, the Default Authorization Action should still be Allow.
- On the Published Applications page, for the Web Interface Address field, add the path to your Receiver for Web site (e.g. /Citrix/StoreWeb).
- Everything else should be the same. If you only have one domain, then check the Override Global box next to Single Sign-on Domain and enter the name of your Active Directory domain. If you have multiple domains, then leave this field blank and ensure the LDAP authentication servers have userPrincipalName in the SSO Name Attribute field.
- Account Services Address is not needed in this profile but there’s no harm in leaving it.
- Click Create.

Session Policies
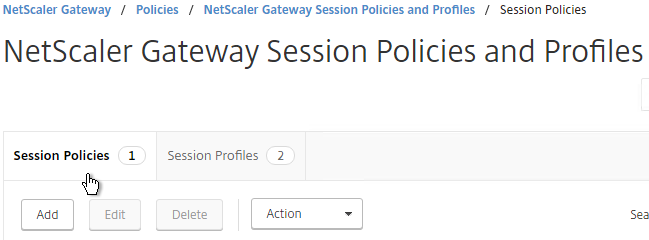
- On the right, switch to the Session Policies tab, and click Add.
- Name the Policy ReceiverSelfService or similar.
- Change the Request Profile to ReceiverSelfService.
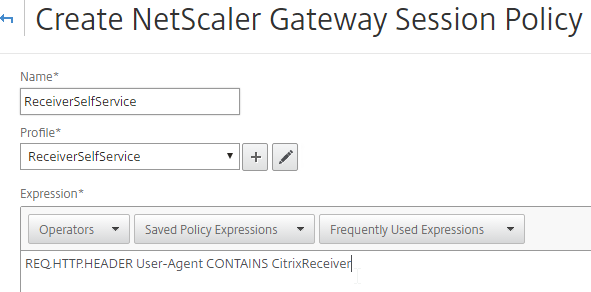
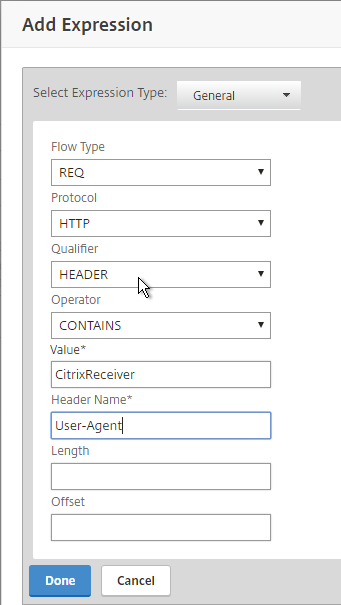
- In the Expression box, either type in the following, or use the Expression Editor link to build the following expression:
REQ.HTTP.HEADER User-Agent CONTAINS CitrixReceiver
- Then click Create.
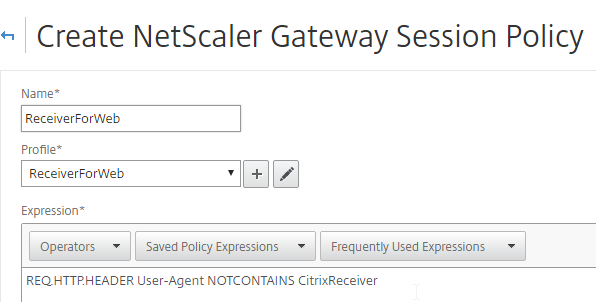
- Add another policy, and name it ReceiverForWeb or similar.
- Change the Action to ReceiverForWeb.
- In the Expression box, either type in the following, or use the Expression Editor. It’s the same as the previous expression, except it’s NOTCONTAINS instead of CONTAINS.
REQ.HTTP.HEADER User-Agent NOTCONTAINS CitrixReceiver - Click Create.