EUC Weekly Digest – August 3, 2019

Last Modified: Nov 7, 2020 @ 6:34 am

Interesting EUC items from last week:

Citrix Virtual Apps and Desktops

Citrix App Layering

Citrix Cloud

VMware

Microsoft

For more immediate updates, follow me at http://twitter.com/cstalhood.

For a list of updates at carlstalhood.com, see the Detailed Change Log.

EUC Weekly Digest – July 27, 2019

Last Modified: Nov 7, 2020 @ 6:34 am

Interesting EUC items from last week:

Citrix VDA

Citrix Provisioning

Citrix ADC

Citrix Gateway

Citrix SD-WAN

Citrix Endpoint Management

Citrix Cloud

For more immediate updates, follow me at http://twitter.com/cstalhood.

For a list of updates at carlstalhood.com, see the Detailed Change Log.

EUC Weekly Digest – July 20, 2019

Last Modified: Nov 7, 2020 @ 6:34 am

Interesting EUC items from last week:

Citrix App Layering

Citrix WEM and Profile Management

Citrix StoreFront

Citrix Workspace app

Citrix ADC

Citrix ADM

Citrix Cloud

VMware

For more immediate updates, follow me at http://twitter.com/cstalhood.

For a list of updates at carlstalhood.com, see the Detailed Change Log.

EUC Weekly Digest – July 13, 2019

Last Modified: Nov 7, 2020 @ 6:34 am

Interesting EUC items from last week:

Citrix VDA

Citrix Workspace app

Citrix StoreFront

Citrix App Layering

Citrix ADC

Citrix Gateway

Citrix Cloud

Microsoft

VMware

For more immediate updates, follow me at http://twitter.com/cstalhood.

For a list of updates at carlstalhood.com, see the Detailed Change Log.

EUC Weekly Digest – July 6, 2019

Last Modified: Nov 7, 2020 @ 6:34 am

Interesting EUC items from last week:

Citrix Virtual Apps and Desktops

Citrix Director / Monitoring

Citrix StoreFront

Citrix Workspace app

Citrix ADC

Citrix ADM

VMware

Microsoft

Other

For more immediate updates, follow me at http://twitter.com/cstalhood.

For a list of updates at carlstalhood.com, see the Detailed Change Log.

EUC Weekly Digest – June 22, 2019

Last Modified: Nov 7, 2020 @ 6:34 am

Interesting EUC items from last week:

Citrix Virtual Apps and Desktops

Citrix VDA

  • Session Recording 1906 – RBAC policies to place granular rules who can view recorded sessions; tag browser URLs

Citrix WEM and Profile Management

Citrix Provisioning

Citrix StoreFront

Citrix Workspace app

Citrix ADC

Citrix Cloud

VMware

Microsoft

Other

For more immediate updates, follow me at http://twitter.com/cstalhood.

For a list of updates at carlstalhood.com, see the Detailed Change Log.

EUC Weekly Digest – June 15, 2019

Last Modified: Nov 7, 2020 @ 6:34 am

Interesting EUC items from last week:

Citrix StoreFront

Citrix ADC

Citrix ADM

Citrix Gateway

Other

For more immediate updates, follow me at http://twitter.com/cstalhood.

For a list of updates at carlstalhood.com, see the Detailed Change Log.

SSL Virtual Servers – Citrix ADC 13

Last Modified: Apr 26, 2024 @ 7:34 am

Navigation

This page contains generic SSL instructions for all SSL-based Virtual Servers, including: Load Balancing, Citrix Gateway, Content Switching, and AAA.

💡 = Recently Updated

Change Log

Custom Cipher Group

References:

To get an A+ at SSL Labs, create a custom secure cipher group:

  1. Enable SSL Secure Renegotiation:
    1. In the left menu, expand Traffic Management, and then click SSL.
    2. On the right, in the right column, click Change advanced SSL settings.
    3. Find Deny SSL Renegotiation, and set the drop-down to NONSECURE.
    4. Scroll down and click OK.

      set ssl parameter -denySSLReneg NONSECURE
  2. The easiest way to create a cipher group is from the CLI. See Citrix Blogs Scoring an A+ at SSLlabs.com with Citrix NetScaler – Q2 2018 update for cipher group CLI commands. Putty (SSH) to the Citrix ADC and paste the following commands.
    Note: The TLS 1.3 ciphers are not in the Citrix Blog Post. You can add TLS 1.3 ciphers to the cipher group. Make sure the TLS 1.3 ciphers are listed first (top of the list).
    add ssl cipher ssllabs-smw-q2-2018
    bind ssl cipher ssllabs-smw-q2-2018 -cipherName TLS1.3-AES256-GCM-SHA384 -cipherPriority 1
    bind ssl cipher ssllabs-smw-q2-2018 -cipherName TLS1.3-CHACHA20-POLY1305-SHA256 -cipherPriority 2
    bind ssl cipher ssllabs-smw-q2-2018 -cipherName TLS1.3-AES128-GCM-SHA256 -cipherPriority 3
    bind ssl cipher ssllabs-smw-q2-2018 -cipherName TLS1.2-ECDHE-ECDSA-AES128-GCM-SHA256
    bind ssl cipher ssllabs-smw-q2-2018 -cipherName TLS1.2-ECDHE-ECDSA-AES256-GCM-SHA384
    bind ssl cipher ssllabs-smw-q2-2018 -cipherName TLS1.2-ECDHE-ECDSA-AES128-SHA256
    bind ssl cipher ssllabs-smw-q2-2018 -cipherName TLS1.2-ECDHE-ECDSA-AES256-SHA384
    bind ssl cipher ssllabs-smw-q2-2018 -cipherName TLS1-ECDHE-ECDSA-AES128-SHA
    bind ssl cipher ssllabs-smw-q2-2018 -cipherName TLS1-ECDHE-ECDSA-AES256-SHA
    bind ssl cipher ssllabs-smw-q2-2018 -cipherName TLS1.2-ECDHE-RSA-AES128-GCM-SHA256
    bind ssl cipher ssllabs-smw-q2-2018 -cipherName TLS1.2-ECDHE-RSA-AES256-GCM-SHA384
    bind ssl cipher ssllabs-smw-q2-2018 -cipherName TLS1.2-ECDHE-RSA-AES-128-SHA256
    bind ssl cipher ssllabs-smw-q2-2018 -cipherName TLS1.2-ECDHE-RSA-AES-256-SHA384
    bind ssl cipher ssllabs-smw-q2-2018 -cipherName TLS1-ECDHE-RSA-AES128-SHA
    bind ssl cipher ssllabs-smw-q2-2018 -cipherName TLS1-ECDHE-RSA-AES256-SHA
    bind ssl cipher ssllabs-smw-q2-2018 -cipherName TLS1.2-DHE-RSA-AES128-GCM-SHA256
    bind ssl cipher ssllabs-smw-q2-2018 -cipherName TLS1.2-DHE-RSA-AES256-GCM-SHA384
    bind ssl cipher ssllabs-smw-q2-2018 -cipherName TLS1-DHE-RSA-AES-128-CBC-SHA
    bind ssl cipher ssllabs-smw-q2-2018 -cipherName TLS1-DHE-RSA-AES-256-CBC-SHA
    bind ssl cipher ssllabs-smw-q2-2018 -cipherName TLS1-AES-128-CBC-SHA
    bind ssl cipher ssllabs-smw-q2-2018 -cipherName TLS1-AES-256-CBC-SHA
  3. Or you can create the cipher group using the GUI.
    1. Go to Traffic Management > SSL > Cipher Groups.
    2. On the right, click Add.
    3. Name it SSL Labs or similar.
    4. In the middle, click the button named Add.
    5. Use the search box to find a particular cipher.
    6. Check the box next to one of the results, and click the arrow to move it to the right.
    7. For TLS 1.3 support, add the TLS 1.3 ciphers first.
    8. Then add the ciphers from Citrix Blog Post Scoring an A+ at SSLlabs.com with Citrix NetScaler – Q2 2018 update.
    9. Use the up and down arrows to order the ciphers. Citrix ADC prefers the ciphers on top of the list, so the ciphers at the top of the list should be the most secure ciphers (TLS 1.3).
    10. Click Create when done.

Strict Transport Security – Rewrite Policy Method

To get an A+ at SSLLabs.com, you need to insert the Strict-Transport-Security HTTP header in the responses. Citrix ADC Rewrite Policy is one method of doing this. Another method is to enable HSTS in an SSL Profile, or enable it in SSL Parameters on a SSL vServer.

To create a Rewrite Policy that inserts the Strict-Transport-Security HTTP header:

  1. In the left menu, expand AppExpert, right-click Rewrite, and click Enable Feature.
  2. Create the Rewrite Action:
    1. Go to AppExpert > Rewrite > Actions.
    2. On the right, click Add.
    3. Name the action insert_STS_header or similar.
    4. The Type should be INSERT_HTTP_HEADER.
    5. In the Header Name field, enter Strict-Transport-Security.
    6. In the Expression field, enter the following:
      "max-age=157680000"

    7. Click Create.
  3. Create the Rewrite Policy:
    1. On the left, go to AppExpert > Rewrite > Policies.
    2. On the right, click Add.
    3. Name it insert_STS_header or similar.
    4. Select the previously created Action.
    5. In the Expression box, enter HTTP.REQ.IS_VALID.
    6. Click Create.
  4. Now you can bind this Rewrite Response policy to SSL-based SSL vServers.
    1. Edit an SSL vServer (Gateway vServer, Load Balancing vServer, etc.).
    2. if the Policies section doesn’t exist on the left, then add it from the Advanced Settings column on the right.
    3. On the left, in the Policies section, click the plus icon.
    4. Change the Choose Policy drop-down to Rewrite.
    5. Change the Choose Type drop-down to Response, and click Continue.
    6. In the Select Policy field, click where it says Click to select.
    7. Click the small circle next to insert_STS_header, and then click the blue Select button at the top of the page.
    8. Click Bind.
enable ns feature rewrite

add rewrite action insert_STS_header insert_http_header Strict-Transport-Security "\"max-age=157680000\""

add rewrite policy insert_STS_header true insert_STS_header

bind lb vserver MyvServer -policyName insert_STS_header -priority 100 -gotoPriorityExpression END -type RESPONSE

SSL Profiles – Default and Custom

You can use SSL Profiles to package several SSL settings together and apply the settings package (Profile) to SSL-based Virtual Servers and SSL-based Services. These SSL settings include:

  • Disable SSLv3, TLSv1, TLSv11
  • Bind secure ciphers
  • Bind ECC curves
  • Enable Extended Master Secret (EMS)
  • Enable HSTS (Strict Transport Security), etc.

There are default SSL Profiles, and there are custom SSL Profiles. The default SSL Profiles are disabled by default because they would impact every SSL-based Virtual Server and Service on the appliance. Once default SSL Profiles are enabled, you cannot disable the default SSL Profiles.

  • Some features of custom SSL Profiles require default SSL Profiles to be enabled. For example, you cannot configure ciphers in a custom SSL Profile unless the default SSL Profiles are enabled.

Default SSL Profiles are intended to provide a baseline SSL configuration for all newly created SSL Virtual Servers and SSL Services. You can still create Custom SSL Profiles to override the Default SSL Profiles.

Enabling the default SSL profile will wipe out any SSL configuration on SSL entities (e.g. SSL Virtual Servers) that do not have a custom SSL profile bound. Citrix offers a script that can read your existing SSL entity SSL configuration and convert them to custom SSL Profiles. See Enabling the Default Profiles at Citrix Docs. The default_profile_script can be downloaded from Github. The commands output by the script won’t work until the default SSL Profile is enabled.

To enable Default SSL profiles

Enabling Default SSL Profiles is irreversible.

  1. Make sure you are connected to the appliance NSIP using http, and not https.
  2. In the left menu, go to Traffic Management > SSL.
  3. On the right, in the right column, click Change advanced SSL settings.
  4. Near the bottom, check the box next to Enable Default Profile. Note: this will change SSL settings on all SSL Virtual Servers to match the default SSL profile. You might want to do this during a maintenance window.
  5. Click OK at the bottom of the page.
  6. Click Yes to confirm that you are enabling the Default profile.
  7. If you go back into Change Advanced SSL Settings, notice that the Default Profile is enabled, and there’s no way to disable it.

Edit Default SSL Profile with Recommended SSL Profile Settings

The Default SSL Profile applies to all newly created SSL vServers and all newly created SSL Services.

The Default SSL Profile also applies to the management GUI unless you change the SSL Profile assigned to the management Internal Services.

  1. In the left menu, expand System, and click Profiles.
  2. On the right, switch to the SSL Profile tab.
  3. Edit the default frontend or backend profile.
    • Frontend = client-side connections to SSL Virtual Servers.
    • Backend = server-side connections (SSL Services and Service Groups).
    • ns_default_ssl_profile_frontend is automatically applied to all newly created SSL vServers.
    • ns_default_ssl_profile_backend is automatically applied to all newly created SSL Services.
  4. This section focuses on FrontEnd profiles so edit ns_default_ssl_profile_frontend.
  5. Click the pencil icon in the Basic Settings section.

    1. Scroll all the way down to the Protocol section.
    2. Notice that SSLv3 is already unchecked.
    3. It’s recommended that you uncheck TLSv1 and TLSv11 in the Default FrontEnd SSL profile.
      • If you have a website that requires TLSv1, then you can create another Custom FrontEnd SSL Profile that has TLSv1 enabled and manually bind the new Custom SSL Profile to the SSL vServers that need it.
    4. TLSv13 is an option.

      • You can either enable TLSv13 in this Default SSL Profile, or you can create new Custom SSL Profiles that have TLSv13 enabled.
      • If you enable TLSv13, then make sure your cipher group includes TLS 1.3 ciphers.
      • To log SSL Protocol usage, see NetScaler SSL Protocol’s Used (SSLv3, TLS1.0, etc) at Citrix Discussions.
    5. In ADC 13.0 build 61 and newer, just below the protocols. there is an option to enable Allow Extended Master Secret. Windows machines enforce EMS for resumption. 💡
    6. Find Deny SSL Renegotiation and set it to NONSECURE. To find the setting, press Ctrl+F in your browser and search for it.
    7. To enable Strict Transport Security (HSTS), scroll up a little, and check the box next to HSTS.
    8. Enter 157680000 in the Max Age box.

      • You can either enable HSTS in an SSL Profile, or you can enable HSTS by binding a Rewrite policy to your SSL vServer. Do not use both methods at the same time or else you will end up with two Strict-Transport-Security headers in your responses.
    9. If you do any SSL Offload (SSL on the client side, HTTP on the server side), then you’ll need to enable SSL Redirect. It’s above HSTS. With this option enabled, any 301/302 redirects from the server with HTTP Location headers are rewritten to HTTPS Location headers. You might need this option for StoreFront load balancing if doing SSL Offload (port 80 to the StoreFront servers).

      • This setting might be more appropriate in a Custom SSL Profile instead of the Default SSL Profile.
    10. For SSL vServers that need multiple SSL certificates, you can enable the SNI Enable checkbox.

      • This setting might be more appropriate in a Custom SSL Profile instead of the Default SSL Profile.
    11. Click OK when done modifying the Basic Settings section.
  6. Scroll down to the SSL Ciphers section, and click the pencil icon.

    1. Scroll down, and select your custom cipher group (e.g. SSL Labs). Click the arrow to move it to the right.
      If you enabled TLS 1.3, then make sure your cipher group includes TLS 1.3 ciphers.

    2. In the Configured list on the right, click the minus sign next to the DEFAULT cipher group to remove it from the Configured list.
    3. Click OK to close the SSL Ciphers section.
    4. If you make changes to the Custom Cipher Group, then you might have to edit the SSL Profile, remove the Custom Cipher Group, and rebind it.

Create a custom SSL Profile

You can create Custom SSL Profiles to override the Default SSL Profile.

  1. In the left menu, expand System, and click Profiles.
  2. On the right, switch to the tab named SSL Profile.
  3. To copy the existing settings from the Default SSL Profile, check the box next to ns_default_ssl_profile_frontend and then click the button named Add.

    1. Enter a name.
    2. Change the SSL Profile Type to FrontEnd or BackEnd.
    3. Configure SSL Profile settings as desired (see above for some recommendations).
    4. For example, your Custom SSL Profile can enable TLSv13 protocol and include TLSv13 ciphers.
    5. For example, your Custom SSL Profile can enable Client Authentication (client certificates).
    6. Another example, your Custom SSL Profile can enable SNI.
    7. When done, click OK at the bottom of the page.
  4. When you clone an SSL Profile, the Ciphers are not cloned so you’ll have to rebind the ciphers to the Custom SSL Profile.
  5. After the SSL Profile is created, edit any SSL-based Virtual Server.

    1. If you don’t see the SSL Profile section on the left, then on the right, in the Advanced Settings column, click SSL Profile to add the section to the left.
    2. On the left, scroll down to the SSL Profile section and click the pencil icon.
    3. Select an SSL Profile.
    4. Click OK to close the SSL Profile section.

SSL vServers – Bind Certificate, Bind Cipher Group, Disable SSLv3, Enable STS

If you enabled the Default SSL Profiles feature, you can either leave the vServer configured with the Default SSL Profile; or you can change the vServer to use a Custom SSL Profile.

If you don’t use the Default SSL Profiles feature, then you’ll need to manually configure ciphers and SSL settings on every SSL vServer.

Do the following on every SSL vServer:

  1. When creating an SSL Virtual Server (e.g. SSL Load Balancing vServer), on the left, in the Certificates section, click where it says No Server Certificate.

    1. In the Select Server Certificate field, click where it says Click to select.
    2. Click the small circle next to a certificate, and then click the blue Select button at the top of the page.
    3. Click Bind.

      bind ssl vserver MyvServer -certkeyName MyCert
  2. You can bind a Custom SSL Profile:
    1. Find the SSL Profile section on the left, and click the pencil icon.

      • If you don’t see the SSL Profile section on the left, then add the SSL Profile section from the Advanced Settings column on the right.
    2. Select a Custom SSL Profile, and click OK.
  3. If default SSL Profiles are not enabled:
    1. On the left, in the SSL Parameters section, click the pencil icon. You won’t see this section if Default SSL Profiles are enabled.
    2. Uncheck the box next to SSLv3.
    3. Optionally uncheck the boxes next to TLSv1 and TLSv11.
    4. Make sure TLSv12 is checked.
    5. TLSv13 is an option. If you enable this, then make sure your cipher group includes TLS 1.3 ciphers.
    6. Click OK.

      set ssl vserver MyvServer -ssl3 DISABLED -tls12 ENABLED
    7. Scroll to the SSL Ciphers section, and click the pencil icon.
    8. In the middle, click Add.
    9. Select your custom cipher group. It’s probably at the bottom of the list. If you enabled TLS 1.3, then make sure your cipher group includes TLS 1.3 ciphers. Move the cipher group to the right.
    10. Remove the DEFAULT cipher group from the Configured list

      unbind ssl vserver MyvServer -cipherName ALL
      bind ssl vserver MyvServer -cipherName ssllabs-smw-q2-2018
    11. Then click OK to close the SSL Ciphers section.
  4. SSL Virtual Servers created on newer versions of Citrix ADC will automatically have ECC Curves bound to them. However, if this appliance was upgraded from an older version, then the ECC Curves might not be bound. If you are not using SSL Profile, then on the right, in the Advanced Settings column, click ECC Curve.

    1. On the left, in the ECC Curve section, click where it says No ECC Curve.
    2. In the ECC Curve Binding field, click where it says Click to select.
    3. Click the small circle next to ALL, and then click the blue Select button at the top of the page.
    4. Click Bind.

      bind ssl vserver MyvServer -eccCurveName ALL
  5. If HSTS is not enabled in a bound SSL Profile, you can enable it in SSL Parameters, or you can enable it by binding a Rewrite policy.
  6. To enable HSTS by configuring SSL Parameters:
    1. On the left, find the SSL Parameters section, and click the pencil icon. This section is only present if Default SSL Profiles are not enabled.
    2. In the right column, check the box next to HSTS.
    3. Enter 157680000 in the Max Age box.
    4. Click OK to close SSL Parameters.
  7. If enabling HSTS in an SSL Profile or SSL Parameters causes technical issues, then bind a Rewrite policy instead. Don’t do both methods.
    1. If the Policies section doesn’t exist on the left, then add it from the Advanced Settings column on the right.
    2. On the left, find the Policies section, and click the plus icon.
    3. Change the Choose Policy drop-down to Rewrite.
    4. Change the Choose Type drop-down to Response, and click Continue.
    5. In the Select Policy field, click where it says Click to select.
    6. Click the small circle next to the insert_STS_header policy, and then click the blue Select button at the top of the page.
    7. Click Bind.

      bind lb vserver MyvServer -policyName insert_STS_header -priority 100 -gotoPriorityExpression END -type RESPONSE

If you experience SSL performance problems on a Citrix ADC MPX, Citrix CTX207005 Performance Issues with NetScaler MPX SSL recommends creating and binding the following TCP Profile:

add ns tcpProfile tcp_test -WS ENABLED -SACK ENABLED -maxBurst 20 -initialCwnd 8 -bufferSize 4096000 -flavor BIC -dynamicReceiveBuffering DISABLED -sendBuffsize 4096000

SSL Tests

After you’ve created an SSL Virtual Server and configured SSL settings, run the following test:

SSL Redirect – Methods

There are typically three methods of performing SSL Redirect (http to https) in Citrix ADC:

  • Load Balancing Virtual Server Method – enable SSL Redirect directly on the Load Balancing Virtual Server. This is the easiest method.
    • This option is not available for Gateway Virtual Servers and Content Switching Virtual Servers.
    • There’s nothing in the GUI to indicate that the SSL Virtual Server is also listening on port 80.
  • Down vServer Method – create a new Load Balancing Virtual Server on Port 80, and configure the Redirect URL for when it is down.
    • The Virtual Server must be DOWN for the Redirect to occur. These Virtual Servers are shown as Red instead of Green.
  • Responder Method – create a new Load Balancing Virtual Server on Port 80, and bind a Responder policy that redirects to https.
    • The Responder policy only works if the Virtual Server is UP, which means it is shown as Green.
    • Some setup tasks are required – create the AlwaysUP service, and create the Responder Policy. But once setup is complete, it only requires slightly more steps than the Down vServer method.

SSL Redirect – SSL Load Balancing vServer Method

You can configure SSL Redirect directly in an SSL Load Balancing vServer (port 443) instead of creating a separate HTTP (port 80) Load Balancing vServer.

Limitations:

  • This is only an option for SSL Load Balancing vServers; it’s not configurable in Gateway vServers or Content Switching vServers.
  • Only one Redirect URL can be specified. Alternatively, the Responder method can handle multiple FQDNs to one VIP (e.g. wildcard certificate) and/or IP address URLs.

To configure an SSL Load Balancing vServer to redirect from HTTP to HTTPS:

  1. Edit the SSL Load Balancing vServer (port 443).
  2. In the Basic Settings section, click the pencil icon.
  3. Click More.
  4. In the Redirect from Port field, enter 80.
  5. In the HTTPS Redirect URL field, enter https://MyFQDN.
  6. Click Continue twice.
  7. When you view the list of Load Balancing Virtual Servers, there’s no indication that it’s listening on port 80.

SSL Redirect – Down vServer Method

If you created an SSL Virtual Server that only listens on SSL 443, then users must enter https:// when navigating to the website. To make it easier for the users, create another load balancing Virtual Server on the same VIP, but listens on HTTP 80, and then redirects the user’s browser to reconnect on SSL 443.

The Down Virtual Server Method is easy, but the Redirect Virtual Server must be down in order for the redirect to take effect. Another option is to use Responder policies to perform the redirect.

To create the down Redirect Virtual Server:

  1. On the left, under Traffic Management > Load Balancing, click Virtual Servers.
  2. On the right, right-click an SSL Virtual Server you’ve already created, and click Add. Doing it this way copies some of the data from the already created Virtual Server.
  3. Or, if you are redirecting Citrix Gateway, create a new Load Balancing vServer with the same VIP as the Gateway.
  4. Change the name of the Virtual Server to indicate that this new Virtual Server is an SSL Redirect.
  5. Change the Protocol to HTTP on Port 80.
  6. The IP Address should already be filled in. It must match the original SSL Virtual Server (or Gateway vServer). Click OK.
  7. Don’t bind any services. This vServer must intentionally be marked down so the redirect will take effect. Click Continue.
  8. On the right, in the Advanced Settings column, click Protection.
  9. On the left, in the Protection section, in the Redirect URL field, enter the full URL including https://. For example: https://storefront.corp.com/Citrix/StoreWeb.
  10. Click OK to close the Protection section.
  11. Click Done.
  12. When you view the SSL redirect Virtual Server in the list, it will have a state of DOWN. That’s expected. The Port 80 Virtual Server must be DOWN for this redirect method to work.

SSL Redirect – Responder Method

The Down Virtual Server Method is easy, but the Redirect Virtual Server must be down in order for the redirect to take effect. Another option is to use Responder policies to perform the redirect. The Responder method requires the Redirect Virtual Server to be UP.

Responder Method Setup Tasks

The following setup tasks are performed once no matter how many redirects you want to configure.

Create a dummy Load Balancing service. This dummy service can be bound to multiple Redirect Virtual Servers.

  1. Go to Traffic Management > Load Balancing > Services.
  2. On the right, click Add.
  3. Name the service AlwaysUp or similar.
  4. Enter a fake IP address. Try not to use any IP address owned by the Citrix ADC to avoid being able to access the ADC management web page.
  5. Click the More link.
  6. This dummy service must always be UP, so uncheck the box next to Health Monitoring.
  7. Click OK, and then click Done to close the Load Balancing Service.

    add server 1.1.1.1 1.1.1.1
    add service AlwaysUp 1.1.1.1 HTTP 80 -healthMonitor NO

Create the Responder Action:

  1. On the left, expand AppExpert, and click Responder.
  2. If Responder feature is not enabled, right-click Responder, and click Enable Feature.

    enable ns feature RESPONDER
  3. Under Responder, click Actions.
  4. On the right, click Add.
  5. Give the action a name.
  6. Change the Type to Redirect. If you leave this set to Respond With then it won’t work.
  7. Enter an expression. The following expression redirects to https on the same URL the user entered in the browser. Or you can create a Responder Action with a more specific Target.
    "https://" + HTTP.REQ.HOSTNAME.HTTP_URL_SAFE + HTTP.REQ.URL.PATH_AND_QUERY.HTTP_URL_SAFE

    add responder action http_to_ssl_redirect_responderact redirect "\"https://\" + HTTP.REQ.HOSTNAME.HTTP_URL_SAFE + HTTP.REQ.URL.PATH_AND_QUERY.HTTP_URL_SAFE" -responseStatusCode 302
  8. Click Create.

Create the Responder Policy:

  1. On the left, under Responder, click Policies.
  2. On the right, click Add.
  3. Give the policy a name.
  4. Select the previously created Responder action.
  5. For the expression, enter the following.
    HTTP.REQ.IS_VALID

    add responder policy http_to_ssl_redirect_responderpol HTTP.REQ.IS_VALID http_to_ssl_redirect_responderact
  6. Then click Create.

Enable Redirect using Responder Policy

Repeat this section for each HTTP to HTTPS redirect that you want to configure:

  1. Create a Load Balancing Virtual Server with Protocol HTTP, and Port 80.
  2. The vServer’s VIP should match an existing SSL Virtual Server or existing Citrix Gateway Virtual Server.

  3. Bind the AlwaysUp service.
    1. In the Services and Service Groups section, click where it says No Load Balancing Virtual Server Service Binding.
    2. In the Select Service field, click where it says Click to select.
    3. Check the box next to AlwaysUp, and then click the blue Select button at the top of the page.
    4. Click Bind.
    5. Click Continue to close Services and Service Groups.
  4. Bind the Responder Policy:
    1. On the right, in the Advanced Settings column, click Policies.
    2. On the left, scroll down to the Policies section, and click the plus icon in the top right of the Policies box.
    3. Change the Choose Policy drop-down to Responder. Click Continue.
    4. In the Select Policy field, click where it says Click to select.
    5. Click the small circle next to the redirect Responder policy, and then click the blue Select button at the top of the page.
    6. Click Bind.
    7. Then click Done to close the Load Balancing Virtual Server.

      add lb vserver MyvServer-HTTP-SSLRedirect HTTP 10.2.2.201 80
      
      bind lb vserver storefront.corp.com-HTTP-SSLRedirect AlwaysUp
      
      bind lb vserver storefront.corp.com-HTTP-SSLRedirect -policyName http_to_ssl_redirect_responderpol -priority 100 -gotoPriorityExpression END -type REQUEST
  5. The primary advantage of this method is that the Redirect Virtual Server is UP.

Related Pages

Certificates – Citrix ADC 13

Last Modified: Dec 6, 2020 @ 8:27 am

Navigation

💡 = Recently Updated

Change Log

  • 2020 Dec 6 – 13.0 build 71 and newer shows SANs (Subject Alternative Names) in Certificate Details
  • Updated screenshots and procedures for ADC 13

Convert .PFX Certificate to PEM Format

You can export a certificate (with private key) from Windows, and import it to Citrix ADC.

To export a Windows certificate in .pfx format

  1. If Windows Server 2012 or newer, on the Windows server that has the certificate, you can run certlm.msc to open the Certificates console pointing at Local Computer.
    1. Or, run mmc.exe, manually add the Certificates snap-in, and point it to Local Computer.
  2. Go to Personal > Certificates.
  3. Right-click the certificate, expand All Tasks, and click Export.
  4. On the Welcome to the Certificate Export Wizard page, click Next.
  5. On the Export Private Key page, select Yes, export the private key, and click Next.
  6. On the Export File Format page, click Next.
  7. On the Security page, check the box next to Password, and enter a new temporary password. Click Next.
  8. On the File to Export page, specify a save location and name the .pfx file. Don’t put any spaces in the filename. Click Next.
  9. In the Completing the Certificate Export Wizard page, click Finish.
  10. Click OK when prompted that the export was successful.

Import a .pfx file to Citrix ADC

Citrix ADC 13 imports .pfx files and uses them in their native encrypted format.

To import the .pfx file:

  1. On the Citrix ADC, expand Traffic Management, and click SSL.
  2. If the SSL feature is disabled, right-click the SSL node, and click Enable Feature.
  3. Go to Traffic Management > SSL > Certificates > Server Certificates.
  4. There are four different certificate nodes:
    1. Server Certificates have private keys. These certificates are intended to be bound to SSL vServers.
    2. Client Certificates also have private keys, but they are intended to be bound to Services so Citrix ADC can perform client-certificate authentication against back-end web servers.
    3. CA Certificates don’t have private keys. The CA certificates node contains intermediate certificates that are linked to Server Certificates. CA certificates can also be used for SAML authentication, and to verify client certificates.
    4. Unknown Certificates list the certificates that don’t fall under the other categories. Some SAML certificates (e.g. Azure) show up here.
  5. On the left, click the Server Certificates node.
  6. On the right, click Install.
  7. Give the certificate (Certificate-Key Pair) a name.
  8. Click the drop-down next to Choose File, select Local, and browse to the .pfx file that you exported earlier.
  9. After browsing to the .pfx file, Citrix ADC will prompt you to enter the Password for the .pfx file. Ignore the Key File Name field.
  10. Then click Install.
  11. If you click the information icon next to the new certificate…
  12. You’ll see that Citrix ADC uses the file in native .pfx format. No PEM conversion.
  13. In 13.0 build 71 and newer, if you right-click the certificate and click Details, you can see the SANs (Subject Alternative Names) in the certificate.

  14. You can now link an intermediate certificate to this SSL certificate, and then bind this SSL certificate to SSL and/or Citrix Gateway Virtual Servers.
  15. To automatically backup SSL certificates and receive notification when the certificates are about the expire, deploy Citrix Application Delivery Management (ADM). Also see Citrix CTX213342 How to handle certificate expiry on NetScaler.

To convert PFX to PEM (with Private Key encryption)

If you followed the previous section to import a .pfx in native format, then you can skip this section.

Sometimes you need to convert a .pfx file to PEM format so you can use the PEM certificate on other systems. To use Citrix ADC to convert PFX to PEM, do the following:

  1. In the Citrix ADC Configuration GUI, on the left, expand Traffic Management, and click SSL.
  2. In the right column of the right pane, in the Tools section, click Import PKCS#12.
  3. In the Import PKCS12 File dialog box:
    1. In the Output File Name field, enter a name for a new file where the converted PEM certificate and private key will be placed. This new file is created under /nsconfig/ssl on the Citrix ADC appliance.
    2. In the PKCS12 File field, click Choose File, and browse to the .pfx file.
    3. In the Import Password field, enter the password you specified when you previously exported the .pfx file.
    4. By default, the private key in the new PEM file is unencrypted. To encrypt the private key, change the Encoding Format selection to AES256 or DES3. This causes the new PEM file to be password protected, and encrypted.
    5. Enter a permanent password for the new PEM file, and click OK.
  4. You can use the Manage Certificates / Keys / CSRs link to view the new PEM file.

    1. The new file is usually at the bottom of the page.
    2. Right-click the new file, and click View.
    3. Notice that the Private Key is encrypted.
    4. If you scroll down, notice that the file contains both the certificate, and the RSA Private key.
  5. If you want to use this PEM certificate on a different system, then you can right-click the file and Download it.

Install PEM Certificate on Citrix ADC

If you want to bind the PEM certificate to ADC SSL Virtual Servers, then you must first install the PEM certificate. Or you can import a .pfx file in native format as described earlier.

  1. ADC probably won’t import the PEM certificate file if it contains CA certificates. Download the PEM file.

    1. Edit the downloaded file.
    2. Scroll down. Skip the first certificate. Then delete the rest of the certificates in the file. When done, you should have a Private Key and one Certificate (the first one in the file).
    3. Save the file with a new name. You can upload the file, or browse to it later when installing the certificate.
  2. On the left side of the Citrix ADC Configuration GUI, go to Traffic Management > SSLCertificates > Server Certificates.
  3. On the right, click Install.
  4. In the Certificate-Key Pair Name field, enter a friendly name for this certificate.
  5. In the Certificate File Name field, click the drop-down next to Choose File, and select Local.
  6. Browse to the PEM file that you downloaded and edited to remove the CA certificates.
  7. Citrix ADC will ask you to enter the Password for the encrypted private key.
  8. Ignore the Key File Name since the converted PEM file contains both the certificate and the key.
  9. Click Install.
  10. In 13.0 build 71 and newer, if you right-click the certificate and click Details, you can see the SANs (Subject Alternative Names) in the certificate.

  11. You can now link an intermediate certificate to this SSL certificate, and then bind this SSL certificate to SSL and/or Citrix Gateway Virtual Servers.
  12. To automatically backup SSL certificates and receive notification when the certificates are about the expire, deploy Citrix Application Delivery Management (ADM). Also see Citrix CTX213342 How to handle certificate expiry on NetScaler.
  13. You can also export the certificate files and use them on a different Citrix ADC.

Create Key and Certificate Request

If you want to create free Let’s Encrypt certificates, see John Billekens’ PowerShell script detailed at Let’s Encrypt Certificates on a NetScaler.

You can create a key pair and Certificate Signing Request (CSR) directly on the Citrix ADC appliance. The CSR can then be signed by an internal, or public, Certificate Authority.

Most Certificate Authorities let you add Subject Alternative Names when creating (or purchasing) a signed certificate, and thus there’s no reason to include Subject Alternative Names in the CSR created on Citrix ADC. You typically create a CSR with a single DNS name. Then when submitting the CSR to the Certificate Authority, you type in additional DNS names.

  • For a Microsoft Certificate Authority, you can enter Subject Alternative Names in the Attributes box of the Web Enrollment wizard.
  • For public Certificate Authorities, you purchase a UCC certificate or purchase a certificate option that lets you type in additional names.

To create a key pair on Citrix ADC

  1. On the left, expand Traffic Management, expand SSL, and click SSL Files.
  2. On the right, switch to the tab named Keys.
  3. Click the button named Create RSA Key.
  4. In the Key Filename box, enter a new filename (e.g. wildcard.key). Key pair files typically have a .key extension.
  5. In the Key Size field, enter 2048 bits.
  6. By default, the private key is unencrypted. To encrypt it, set the PEM Encoding Algorithm drop-down to AES256 or DES3.
  7. Enter a password to encrypt the private key.
  8. Click Create.
  9. The new file is probably at the bottom of the list. Select it and click the button named View.
  10. The Private Key should be encrypted with your chosen encoding algorithm.

To create CSR file

  1. Back in the SSL Files page, on the right, switch to the tab named CSRs.
  2. Click the button named Create Certificate Signing Request (CSR).
  3. In the Request File Name field, enter the name of a new CSR file. CSR files typically have .csr or .txt extension.
  4. In the Key Filename field, click Choose File (Appliance) and select the previously created .key file. It’s probably at the bottom of the list.

  5. If the key file is encrypted, enter the password.
  6. You can optionally change the CSR Digest Method to SHA256. This only applies to the CSR and does not affect the CA-signed certificate.
  7. Citrix ADC 13 lets you specify up to three Subject Alternative Names in the CSR. Some Certificate Authorities ignore this field and instead require you to specify the Subject Alternative Names when purchasing the signed certificate. See CTX232305 How to create a SAN CSR in NetScaler 12.0 57.19.
  8. In the Common Name field, enter the FQDN of the SSL enabled-website. If this is a wildcard certificate, enter * for the left part of the FQDN. This is the field that normally must match what users enter into their browser address bars.
  9. In the Organization Name field, enter your official Organization Name.
  10. Enter IT, or similar, as the Organization Unit.
  11. Enter the City name.
  12. In the State field, enter your state name without abbreviating.
  13. Scroll down and click Create.
  14. The new CSR file is at the bottom of the list. You can select the new .csr file, and click the buttons named View or Download.

Get CSR signed by CA, and then install certificate on Citrix ADC

  1. View the CSR file or open the downloaded .csr file with Notepad, and send the contents to your Certificate Authority.

    1. Chrome requires every certificate to have at least one Subject Alternative Name that matches the FQDN entered in Chrome’s address bar. Public CAs will handle this automatically. But for Internal CAs, you typically must specify the Subject Alternative Names manually when signing the certificate.

    2. If the CA asks you for the type of web server, select Apache, or save the CA response as a Base 64 file.
  2. After you get the signed certificate, on the left side of the Citrix ADC Configuration GUI, expand Traffic Management > SSL > Certificates, and click Server Certificates.
  3. On the right, click Install.
  4. In the Certificate-Key Pair Name field, enter a friendly name for this certificate.
  5. In the Certificate File Name field, click the drop-down next to Choose File, and select Local.
  6. Browse to the Base64 (Apache) .cer file you received from the Certificate Authority.
  7. In the Key File Name field, click the drop-down next to Choose File, and select Appliance.
  8. Select the key file you created earlier, and click Open. It’s probably at the bottom of the list.
  9. If the key file is encrypted, enter the password.
  10. Click Install.
  11. The certificate is now added to the list.
  12. In 13.0 build 71 and newer, if you right-click the certificate and click Details, you can see the SANs (Subject Alternative Names) in the certificate.

  13. You can now link an intermediate certificate to this SSL certificate, and then bind this SSL certificate to SSL and/or Citrix Gateway Virtual Servers.
  14. To automatically backup SSL certificates and receive notification when the certificates are about the expire, deploy Citrix Application Delivery Management (ADM). Also see Citrix CTX213342 How to handle certificate expiry on NetScaler.
  15. You can also export the certificate files and use them on a different Citrix ADC.

Intermediate Certificate

If your Server Certificate is signed by an intermediate Certificate Authority, then you must install the intermediate Certificate Authority’s certificate on the Citrix ADC. This Intermediate Certificate then must be linked to the Server Certificate.

Get the correct intermediate certificate

  1. Log into Windows, and double-click the signed certificate file.
  2. On the Certification Path tab, double-click the intermediate certificate (e.g. Go Daddy Secure Certificate Authority. It’s the one in the middle).
  3. On the Details tab, click Copy to File.
  4. In the Welcome to the Certificate Export Wizard page, click Next.
  5. In the Export File Format page, select Base-64 encoded, and click Next.
  6. Give it a file name, and click Next.
  7. In the Completing the Certificate Export Wizard page, click Finish.

To import the intermediate certificate

  1. In the Citrix ADC configuration GUI, expand Traffic Management, expand SSL, expand Certificates, and click CA Certificates.
  2. On the right, click Install.
  3. Name it Intermediate or similar.
  4. Click the arrow next to Choose File, select Local, and browse to the Intermediate certificate file and open it.
  5. Click Install.

Link Intermediate Certificate to Server Certificate

  1. Go back to Traffic Management > SSL > Certificates >Server Certificates.
  2. On the right, right-click the server certificate, and click Link.
  3. The previously imported Intermediate certificate should already be selected. Click OK.
  4. You might be tempted to link the Intermediate certificate to a Root certificate. Don’t do this. Root certificates are installed on client machines, not on Citrix ADC. Citrix ADC must never send the root certificate to the client device. If you run ssllabs.com against your website, SSL Labs might show Contains anchor. If so, then you linked your intermediate to your root when you shouldn’t have.

Export Certificate Files from Citrix ADC

You can easily export certificate files from the Citrix ADC, and import them to a different Citrix ADC.

  1. In the menu, expand Traffic Management, expand SSL, expand Certificates, and click one of the certificate types.
  2. Move your mouse over the certificate you want to export, and then click the information icon on the far left.
  3. Note the file names. There could be one file name or two file names.
  4. On the left, go to Traffic Management > SSL.
  5. On the right, in the right column, click Manage Certificates / Keys / CSRs.
  6. Find the file(s) in the list, right-click the file, and click Download.
    1. You can only download one file at a time.
    2. In the search area, you can enter “Name:myfilename” to filter the list.
    3. You might have to increase the number of files shown per page, or go to a different page.
  7. Also download the files for any linked intermediate certificate.
  8. You can also use WinSCP to download the SSL certificate files from /nsconfig/ssl.
  9. You can now use the downloaded files to install certificates on a different Citrix ADC.

Replace Management Certificate

You can replace the default management certificate with a new trusted management certificate.

High Availability – When a management certificate is installed on one node of a High Availability pair, the management certificate is synchronized to the other node and used for the other node’s NSIP too. So make sure the management certificate matches the DNS names of both nodes. This is easily doable using a Subject Alternative Name certificate. Here are some SAN names the management certificate should match (note: a wildcard certificate won’t match all of these names):

  • The FQDN for each node’s NSIP. Example: adc01.corp.local and adc02.corp.local
  • The shortnames (left label) for each node’s NSIP. Example: adc01 and adc02
  • The NSIP IP address of each node. Example: 192.168.123.14 and 192.168.123.29
  • If you enabled management access on your SNIPs, add names for the SNIPs:
    • FQDN for the SNIP. Example: adc.corp.local
    • Shortname for the SNIP. Example: adc
    • SNIP IP address. Example: 192.168.123.30

If you prefer to create a separate management certificate for each HA node, then see CTP George Spiers How to secure management access to NetScaler and create unique certificates in a highly available setup.

Request Management Certificate

If you are creating a Subject Alternative Name certificate, it’s probably easiest to request a SAN certificate from an internal CA using the MMC Certificates snap-in on a Windows box.:

  1. Open the MMC certificates snap-in by running certlm.msc on a Windows 2012 or newer machine.
  2. Go to Personal, right-click Certificate, expand All Tasks, and click Request New Certificate.
  3. A web server certificate template should let you specify subject information.
  4. In the top half, change the Subject name > Type drop-down to Common Name. Enter a DNS name, and click Add to move it to the right.
  5. In the bottom half, change the Alternative Name > Type drop-down to either DNS or IP address (v4).
  6. Type in different names or IPs as detailed earlier, and click Add to move them to the right.
  7. Switch to the tab named Private Key.
  8. Expand Key Options, and make sure Mark private key as exportable is checked.
  9. Click OK. Then finish Enrolling the certificate.
  10. Export the certificate and Private Key to a .pfx file.

  11. Then follow one of the procedures below to replace the ADC’s management certificate.

Methods of replacing the Management Certificate

There are two methods of replacing the management certificate:

  • In the Citrix ADC GUI, right-click ns-server-certificate, and click Update. This automatically updates all of the Internal Services bindings too. This method is intended for dedicated management certificates, not wildcard certificates. Notes:
    • You cannot rename the ns-server-certificate in the Citrix ADC GUI. It remains as ns-server-certificate.
    • ns-server-certificate cannot be bound to Virtual Servers, so make sure you are replacing it with a dedicated management certificate.
  • Or manually Bind a new management certificate to each of the Internal Services.

Update Certificate Method

The Update Certificate button method is detailed below:

  1. The Update method doesn’t work with .pfx files so you’ll first have to convert your .pfx to PEM.
    1. In the Citrix ADC Configuration GUI, on the left, expand Traffic Management, and click SSL.
    2. In the right column of the right pane, in the Tools section, click Import PKCS#12.
    3. In the Output File Name field, enter a name for a new file where the converted PEM certificate and private key will be placed. This new file is created under /nsconfig/ssl on the Citrix ADC appliance.
    4. In the PKCS12 File field, click Choose File, and browse to the .pfx file.
    5. In the Import Password field, enter the password you specified when you previously exported the .pfx file.
    6. By default, the private key in the new PEM file is unencrypted. To encrypt the private key, change the Encoding Format selection to AES256 or DES3. This causes the new PEM file to be password protected, and encrypted.
    7. Enter a permanent password for the new PEM file, and click OK.
  2. You can’t update the certificate while connected to the Citrix ADC using https, so make sure you connect using http.
  3. On the left, expand Traffic Management, expand SSL, expand Certificates, and click Server Certificates.
  4. On the right, right-click ns-server-certificate, and click Update.
  5. Check the box next to Click to update the certificate and key.
  6. Click Choose File, and browse to the new PEM (not PFX) management certificate. It could be on the appliance, or it could be on your local machine.
  7. Click Yes to update the certificate.
  8. For the Key File Name, browse to the same PEM certificate file.
  9. If the PEM private key is encrypted, enter the password.
  10. Check the box next to No Domain Check. Click OK.
  11. You can now connect to the Citrix ADC using https protocol. The certificate should be valid (no certificate errors).

Manual Binding Method

The manual Binding to Internal Services method is detailed below:

  1. You can’t update the certificate while connected to the Citrix ADC using https, so make sure you connect using http.
  2. On the left, expand Traffic Management, expand SSL, expand Certificates, and click Server Certificates.
  3. On the right, use the Install button to install the new management certificate, which can be .pfx format, or PEM format.

  4. In the menu, expand Traffic Management, expand Load Balancing, and click Services.
  5. On the right, switch to the tab named Internal Services.
  6. Right-click one of the services, and click Edit.
  7. Scroll down to the Certificate section and click where it says 1 Server Certificate.
  8. Click the button named Add Binding.
  9. In the Select Server Certificate field, click where it says Click to select.
  10. Click the small circle next to the new management certificate and then click the blue Select button at the top of the page.
  11. Click Bind.
  12. Click Close.
  13. If Default SSL Profile is not enabled, then you can modify the SSL Parameters and/or Ciphers on each of these Internal Services to disable SSLv3 and bind stronger ciphers.

  14. Repeat for each of the rest of the internal services. There should be at least 6 services. Additional Internal Services are created for SNIPs that have management access enabled.

Force Management SSL

By default, administrators can connect to the NSIP using HTTP or SSL. This section details how to disable HTTP.

  1. Connect to the NSIP using https.
  2. On the left, expand System, expand Network, and click IPs.
  3. On the right, right-click your NetScaler IP, and click Edit.
  4. Near the bottom, check the box next to Secure access only, and then click OK.

    set ns ip 10.2.2.126 -gui SECUREONLY
  5. Repeat this procedure on the secondary appliance.
  6. Repeat for any SNIPs that have management access enabled.

Also see:

SSL Certificate – Update

There are two options for updating a certificate:

  • Create or Import a new certificate to Citrix ADC > Traffic Management > SSL > Certificates > Server Certificates. Then find all of the places the original certificate is bound, and manually replace the original certificate binding with the new certificate. This method is obviously prone to errors.
    • You can right-click a certificate and click Show Bindings to see where the certificate is being used.
  • On Citrix ADC, simply right-click the existing certificate, and click Update. This automatically updates all of the bindings. Much faster and easier.

To update a certificate using the Update method:

  1. Create an updated certificate, and export it as .pfx file (with private key). Don’t install the certificate onto Citrix ADC yet, but instead, simply have access to the .pfx file.
  2. In Citrix ADC, navigate to Traffic Management > SSL > Certificates > Server Certificates.
  3. On the right, right-click the certificate you intend to update, and click Update.
  4. Check the box next to Update the certificate and key.
  5. Click Choose File > Local, and browse to the updated .pfx file.
  6. For Key File Name, browse to the same .pfx file.
  7. Enter the .pfx file password.
  8. Click OK. This will automatically update every Virtual Server on which this certificate is bound.
  9. Click OK when told that cert links were broken.
  10. Intermediate certificate – After replacing the certificate, you might have to update the cert link to a new Intermediate certificate.
    1. Right-click the updated certificate, and click Cert Links, to see if it is currently linked to an intermediate certificate.
    2. If not, right-click the updated certificate, and click Link, to link it to an intermediate certificate. If it doesn’t give you an option to link it to, then you’ll first have to install the new intermediate certificate on the Citrix ADC.

Certificates can also be updated in Citrix Application Delivery Management (ADM).

Certificates can be updated from the CLI by running update ssl certKey MyCert. However, the certificate files must be stored somewhere on the appliance, and already be in PEM format.

Next Steps

System Configuration – NetScaler 14.1 – Citrix ADC 13

Last Modified: Apr 25, 2024 @ 1:39 pm

Navigation

💡 = Recently Updated

Change Log

VPX Virtual Hardware

Magnus Andersson Deploy Citrix ADC VPX On Nutanix AHV

VMware Compatibility (source = Support matrix for Citrix ADC at Citrix Docs)

  • Citrix ADC 13.1 build 21.50 and newer support VMware ESXi 7.0 update 3c.
  • Citrix ADC 13.0 build 71 and newer supports ESXi 7.0.

Download and import VPX:

  1. Download Citrix ADC VPX Release 13.1 or NetScaler Release 14.1 Virtual Appliance.

  2. Download one of the VPX Packages for New Installation.

  3. Extract the downloaded .zip file.
  4. In vSphere Client, Deploy OVF template.

Before powering on the appliance, edit the virtual hardware.

  1. If you are licensed for VPX 1000 or higher, increase the CPU count. VPX 1000 is licensed for 4 vCPUs.
  2. Consider setting Memory to 4 GB for each packet engine. A VPX 200 has one packet engine. A VPX 1000 has three packet engines.
  3. Change the NIC Adapter type to VMXNET3 or SR-IOV.
    • Citrix CTX224576 NetScaler VPX Loses Network Connectivity Intermittently on VMware ESXi After Upgrading to Version 12.0 recommends VMXNET3 as a workaround to network connectivity issues in recent Citrix ADC VPX builds.
    • If you choose to use VMXNET3 instead of E1000, make sure all of the NICs are VMXNET3. You cannot mix NIC types.
    • If you already licensed your appliance, jot down the E1000 MAC address, and configure the new VMXNET3 NIC with the same MAC address as the E1000 NIC so you don’t have to redo your license file.
    • To change the NIC Adapter Type, remove the existing NIC, click OK to close Edit Settings, then go back into Edit Settings and Add New Device.
  4. NetScaler 14.1 build 21 and later let you expand size of Hard Disk 1 and after the reboot NetScaler will automatically expand the /var partition, which you can see by running df -h in the shell.

  5. ADC 13.1 build 21.50 and later let you add a second disk to the ADC for storage of logs and crash files. These log and crash files tend to consume disk space on the main drive, which prevents firmware updates, so moving them to a second disk should allow firmware updates to succeed. You can add the second disk at any time, but pre-existing files will not be moved, so it’s best to add the second disk when the VPX is first deployed.

    • The new disk is mounted under /var/crash.
    • The /var/crash directory has several folders that are symlinked from the first drive to the second drive.

  6. NetScaler 14.1 build 21 and later let you expand size of Hard Disk 1 and after the reboot NetScaler will automatically expand the /var partition, which you can see by running df -h in the shell.

  7. Or see NetScaler Article Manually adjust NetScaler VPX Disk Space to use gpart to increase the partition size.

Auto-Provision IP Address

When importing VPX into a hypervisor, you can use VM advanced configuration parameters to set the NSIP. See CTX128250 How to Auto-Provision NetScaler VPX Appliance on a VMware ESX or ESXi Host, and CTX128236 How To Auto-Provision NetScaler VPX on XenServer.

Power On VPX and configure NSIP

  1. After importing the VPX OVF file and changing the NICs to VMXNET3, power on the Citrix ADC VPX appliance.
  2. Configure the management IP from the VM’s console.
  3. Then point your browser to the management IP using either http or https and login as nsroot with password nsroot.
  4. In ADC 13.0 build 67 and newer, you’ll be prompted to change the default nsroot password.

Customer User Experience Improvement Program

  1. You might be prompted to enable the Customer User Experience Improvement Program. Either click Enable, or click Skip.
  2. You can also enable or disable the Customer Experience Improvement Program by going to System > Settings.
  3. On the right is Change CUXIP Settings.
  4. Make your selection and click OK.
  5. See https://www.carlstalhood.com/delivery-controller-cr-and-licensing/#ceip for additional places where CEIP is enabled.
set system parameter -doppler ENABLED

Welcome Wizard

Citrix ADC has a Welcome! Wizard that lets you set the NSIP, hostname, DNS, licensing, etc. It appears automatically the first time you login.

  1. Click the Subnet IP Address box.
  2. You can either enter a SNIP for one of your production interfaces, or you can click Do it later and add SNIPs later after you configure Port Channels and VLANs.
    Note: If you have a dedicated management network, to prevent the management network from being used for outgoing traffic, don’t put a SNIP on the management subnet.

    add ns ip 10.2.2.60 255.255.255.0 -type SNIP
  3. Click the Host Name, DNS IP Address, Time Zone and NTP Server box.
  4. Enter a hostname. In a High Availability pair each node can have a different hostname. You typically create a DNS record that resolves the hostname to the NSIP (management IP).
  5. Enter one or more DNS Server IP addresses. Use the plus icon on the right to add more servers.
  6. Change the time zone to GMT-05:00-CDT-America/Chicago or similar.
  7. Add one or more NTP Servers.
  8. Click Done.

    set ns hostname ns02
    
    add dns nameServer 10.2.2.11
    
    set ns param -timezone "GMT-06:00-CST-America/Chicago"
  9. Click Yes to save and reboot.
  10. Click the Licenses box.
  11. On the far right side of the screen you’ll see the Host ID. You’ll need this to allocate your licenses at mycitrix.com. See below for detailed instructions on how to allocate the license to this Host ID.
  12. On the left, select Upload license files, and click Browse.
  13. Browse to the license file, open it, and click Reboot when prompted.

    • License files are stored in /nsconfig/license.
  14. After the reboot and logging in, a box will pop up showing you the installed license, including Days to Expiration.
  15. Also look in the top left corner to make sure it doesn’t say ADC VPX (Freemium). The number in the parentheses should match the MPX or VPX model number.

  16. 30 days prior to license expiration will be a banner at the top of the GUI. It also sends an SNMP trap.
  17. In ADC 13.1 build 24 and newer, you can adjust the number of days before expiration by clicking Manage Licenses, and then edit the Notification Settings on the bottom.

Licensing – VPX Mac Address

To license a Citrix ADC VPX appliance, you will need its MAC address.

  1. Go to the Configuration tab.
  2. In the right pane, look down for the Host Id field. This is the MAC address you need for license allocation.
  3. Another option is to SSH to the appliance and run shell.
  4. Then run lmutil lmhostid. The MAC address is returned.

License Allocation at MyCitrix.com

Allocate a Citrix ADC VPX license:

  1. Login to http://mycitrix.com.
  2. On the left, click Manage Licenses.
  3. If you are activating an eval license, at the bottom of the page, click Don’t see a new license and enter the eval license key.

  4. In the blue Find a license by… box, change the drop-down to Product name, enter adc in the text box, and click Search.
  5. Select one of your ADC VPX licenses, open the Select an action menu, and click Allocate licenses.
  6. Change the quantity to 1.
  7. In the Host field, enter the Host ID (Mac Address) you got from your VPX appliance.
  8. Click Create license file.
  9. Click Yes, create license file.
  10. Click Download license file and save it somewhere.

In Citrix ADC Standard Edition or higher, some Citrix Gateway Universal Licenses are included in your Citrix ADC platform license. There is no need to allocate a license file for these built-in licenses.

  • Citrix ADC Standard Edition comes with 500 Gateway Universal licenses
  • Citrix ADC Advanced Edition comes with 1,000 Gateway Universal licenses
  • Citrix ADC Premium Edition comes with unlimited Gateway Universal licenses

Citrix Gateway VPX Enterprise Edition does not come with any Gateway Universal Licenses. Citrix Gateway VPX Enterprise Edition is a Gateway-only edition that has fewer features than Citrix ADC Standard Edition.

If you need more Gateway Universal licenses than your ADC Edition provides, then you can acquire Gateway Universal licenses by purchasing Citrix Virtual Apps and Desktops (CVAD) Premium Edition, Citrix Endpoint Management Enterprise Edition, or a la carte. Then allocate the additional Citrix Gateway Universal licenses at mycitrix.com.

  1. Search for gateway licenses, select Citrix Gateway Universal License, open the Select an action menu, and click Allocate licenses.
  2. Change the quantity, or leave it set to allocate all licenses.
  3. Enter your appliance hostname (not Mac address). If you have two appliances in a HA pair, allocate these licenses to the first appliance hostname, then reallocate them to the second appliance hostname.

    1. To get a Citrix ADC’s hostname, login to the ADC as nsroot, and then click the gear icon on the top right.
    2. In the third row, notice the case sensitive Host Name.
  4. Click Create license file.
  5. Click Yes, create license file.
  6. Click OK when prompted to download your license file. Save it somewhere you know where you are saving it.
  7. If you have two appliances in a High Availability pair with different hostnames then you will need to return the Citrix Gateway Universal licenses and reallocate them to the other hostname. The Select an action menu has a Return allocations option.

Install Licenses on Appliance

If you haven’t already installed licenses on your appliance, then do the following:

  1. If the Setup wizard is open, click the fourth row for Licenses.
  2. Otherwise, in the Citrix ADC Configuration GUI, on the left, expand System, and click Licenses.
  3. On the top right, click Manage Licenses.
  4. Click Add New License.
  5. If you have a license file, select Upload license files, and then click Browse. Select the license file(s), and click Open.

    • License files are stored in /nsconfig/license.
  6. Click Reboot when prompted.


  7. After reboot, log in. If you allocated and installed your license correctly, then the top left should no longer say Freemium.
  8. A window will appear showing the installed license.

    1. Notice that Maximum ICA Users Allowed is set to Unlimited.
    2. Maximum NetScaler Gateway Users Allowed will vary depending on your Citrix ADC Edition.
    3. Days to Expiration is shown.
  9. Note: the Citrix ADC SNMP counter allnic_tot_rx_mbits must remain less than the licensed bandwidth or packets will drop.

VPX 100% CPU

Citrix ADC VPX packet engine consumes 100% of the hypervisor CPU. VPX 200 and lower only have one packet engine, so it’s probably consuming around 50% CPU.

You can change this behavior by doing the following:

  1. On the left, go to System > Settings.
  2. On the right, in the bottom of the second column, click Change VPX Configuration Settings.
  3. Change the CPU Yield drop-down to YES, and click OK.

  4. After making this change, you can see an immediate drop-off in CPU consumption.

Upgrade Firmware

Citrix CTX241500 Citrix ADC Firmware Release Cycle:

  • Versions that end in x.1 (e.g. 11.1, 12.1, 13.1, 14.1 etc.) get three years of maintenance releases after one year of feature releases (new features).
  • Versions that end in x.0 (e.g. 12.0, 13.0, 14.0, etc.) get one year of maintenance releases after one year of feature releases (new features).

See the Health Check article for the latest firmware versions that resolve security vulnerabilities.

License – Newer firmware is enforcing license subscription dates in the license file. If you don’t have pooled licensing, then check the CSS dates in your license file:

  1. On NetScaler ADC, go to /nsconfig/license and edit your license file.
  2. Make sure the left date is newer than today. If not, then you’ll need to go to http://citrix.com/account and re-download the license file for this appliance. The newer license file should have a newer date.

Classic Policies – Gateway Classic Policies (classic authentication policies, classic Session Policies, classic Authorization Policies, etc.) still work in NetScaler 14.1, so it’s not necessary to convert your Gateway Classic Policies to Gateway Advanced Policies before you upgrade.

In ADC 13.1 and newer, some non-Gateway features have been removed. To verify that your config does not use the removed features, see Citrix’s Github for a validation script. NetScaler 14.1 build 17 and newer have an upgrade option in the GUI to Enable NSPEPI Tool to check the config before upgrading.

  1. Go to the root of the Github ADC-scripts repository, click the green Code button and then click Download ZIP. Unzip it after downloading.
  2. Use WinSCP or similar to upload the files to the ADC. In the nspepi folder, upload the files nspepi and check_invalid_config to /netscaler on the ADC. Also upload the \nspepi\nspepi2 folder to the /netscaler/nspepi2 folder on the ADC. Replace the existing files.
  3. SSH to ADC and run shell.
  4. Run the following commands and then review the output:
    cd /netscaler
    chmod +x check_invalid_config
    ./check_invalid_config /nsconfig/ns.conf

NetScaler Console (formerly known as Citrix ADM) can upgrade firmware. NetScaler Console can also schedule the firmware upgrade instead of doing it immediately. NetScaler Console does a precheck to make sure there are no upgrade issues. For more details, see Creating Maintenance Tasks at NetScaler Docs.

To upgrade firmware using the NetScaler GUI (source = Upgrade a high availability pair at NetScaler Docs):

  1. To do an ISSU upgrade (zero downtime, no TCP disconnects), NetScaler Docs says that HA Sync VLAN should be configured. In a typical deployment where NSIP is not on a tagged VLAN, set it to VLAN 1. Set it on each node at System > High Availability > Nodes > 0 > Edit.
  2. Download firmware. Ask your Citrix Partner or Citrix Support for recommended versions and builds. You want the Firmware Build, not the VPX (Virtual Appliance).
    Note: Firmware for NetScaler Gateway is identical to firmware for NetScaler. Either one will work on either appliance type.

  3. Watch the Security Bulletins to determine which versions and builds resolve security issues. You can subscribe to the Security Bulletins at http://support.citrix.com by clicking your avatar on the top right after logging in and then clicking My support alerts.

    • Some security updates require additional configuration. For example, CTX330728 requires the nsapimgr_wr.sh command.
      nsapimgr_wr.sh -ys maxclientForHttpdInternalService=30
  4. Save config – Make sure you Save the config before beginning the upgrade. If you do this on the Primary, then both nodes will save their configs.
  5. License – Transferring the firmware upgrade file to the appliance will be slow unless you license the appliance first. An unlicensed appliance will reduce the maximum upload speed to 20 Mbps.
  6. Backup – Before upgrading the appliance, consider using WinSCP or similar to back up the /flash/nsconfig directory.
  7. Start with the Secondary appliance.
  8. Disk Cleanup – VPXs usually don’t have enough free space to perform the upgrade.

    • NetScaler 14.1 build 21 and later let you expand size of Hard Disk 1 and after the reboot NetScaler will automatically expand the /var partition, which you can see by running df -h in the shell.

    • If you SSH to the appliance, run shell, run cd /var, then you can run the following command to see disk space consumption sorted by highest:
      du -d 1 | sort -n -r

    • /var/nsinstall has old firmware upgrades that can be deleted.
    • Check /var/netscaler/nsbackup for old backup files.
    • A common consumer of disk is the counter files located in /var/nslog.
    • Also look in /var/core for crash dumps.
  9. In the Citrix ADC GUI, with the top left node System selected, on the right, click System Upgrade.
  10. Click Choose File and browse to the build…tgz file.
  11. NetScaler 14.1 build 17 and newer have an upgrade option to Enable NSPEPI Tool to check the config before upgrading.
  12. Click Upgrade.
  13. The firmware will upload.
  14. You should eventually see a System Upgrade window with text in it. If you previously saved your config, then click Yes when asked to reboot. Otherwise, click No, save your config, and then click Reboot.
  15. Go back to the System node. On the right, click the Reboot button.
  16. Click OK to reboot.
  17. After the reboot, after you login, you can see the firmware version by clicking your name on the top right of the browser window.
  18. Once the Secondary is done, login, go to System, and click the Migration button to start the zero downtime upgrade as detailed at NetScaler Docs. This is a new feature in ADC 13.

    • Or go to System > High Availability > Nodes and do a Force Failover.
  19. Click Start Migration. It will take some time for client connections to drain off of the Primary and move to the upgraded appliance.
  20. You can go back into the Migration window and click the link labelled Click to show migration details to see if the failover is complete or not.

  21. Then upgrade the firmware on the former Primary.
  22. Go to System > HA > Nodes and verify the Synchronization State. If one of them is disabled, then edit the node, and check the box next to Secondary node will fetch the configuration from Primary.

To install firmware by using the command-line interface

  1. To upload the software to the Citrix ADC, use a secure FTP client (e.g. WinSCP) to connect to the appliance.
  2. Create a version directory under /var/nsinstall (e.g. /var/nsinstall/14.1.36.27).
  3. Copy the software from your computer to the /var/nsinstall/<version> (e.g. /var/nsinstall/14.1.26.27) directory on the appliance.
  4. Open a Secure Shell (SSH) client (e.g. Putty) to open an SSH connection to the appliance.
  5. At a command prompt, type shell.
  6. At a command prompt, type cd /var/nsinstall/<version> to change to the nsinstall directory.
  7. To view the contents of the directory, type ls.
  8. To unpack the software, type tar -xvzf build_X_XX.tgz, where build_X_XX.tgz is the name of the build to which you want to upgrade.
  9. To start the installation, at a command prompt, type ./installns.
  10. When the installation is complete, restart Citrix ADC.
  11. When the Citrix ADC restarts, at a command prompt type what or show version to verify successful installation.
  12. To failover the pair without downtime, enter migrate ns and wait for connections to drain off the former primary appliance.
  13. Then repeat these steps to upgrade the former primary appliance.

High Availability

Configure High Availability as soon as possible to ensure that almost all configurations are synchronized across the two appliances. The synchronization exceptions are mainly network interface configurations (e.g. LACP).

High Availability will also sync files between the two appliances. See CTX138748 File Synchronization in NetScaler High Availability Setup for more information.

  1. Prepare the secondary appliance:
    1. The secondary appliance must be the same hardware as the primary appliance.
    2. Login to the second appliance and configure a NSIP.
    3. Don’t configure a SNIP. In Step 2, Subnet IP Address, you can click Do It Later to skip the wizard. You’ll get the SNIP later when you pair it with the primary.
    4. Configure Hostname, Time Zone, and NTP Servers.
    5. Don’t configure DNS since you’ll get those addresses when you pair it. However, if NTP points to a DNS name, then NTP won’t work until you pair the appliance.
    6. License the secondary appliance. The new secondary appliance must be the same edition (License Type) as the former primary appliance.

    7. Upgrade firmware on the secondary appliance. The firmware of both nodes must be identical.
  2. On the secondary appliance, go to System > High Availability > Nodes.
  3. On the right, edit the local node.

    1. Change High Availability Status to STAY SECONDARY and click OK. If you don’t do this then you run the risk of losing your config when you pair the appliances.

      set ha node -hastatus STAYSECONDARY
  4. On the primary appliance, on the left, expand System, expand Network, and click Interfaces.

    1. On the right, look for any interface that is currently DOWN.
    2. You need to disable those disconnected interfaces before enabling High Availability. Right-click the disconnected interface, and click Disable. Repeat for the remaining disconnected interfaces.

      show interface
      disable interface 1/1
  5. On the primary appliance, on the left, expand System, expand High Availability, and click Nodes.
  6. On the right, edit node 0.

    1. Change the High Availability Status to STAY PRIMARY, and click OK.
  7. On the right, click Add.

    1. Enter the other Citrix ADC’s NSIP address.
    2. Enter the other Citrix ADC’s login credentials, and click Create.

      add ha node 1 192.168.123.14
      Note: this CLI command must be run separately on each appliance.
  8. If you click the refresh icon near the top right, Synchronization State will probably say IN PROGRESS. Keep refreshing until it says SUCCESS.
  9. Edit Node ID 0 (the local appliance).

    1. Change High Availability State back to ENABLED.
    2. Under Fail-safe Mode, check the box next to Maintain one primary node even when both nodes are unhealthy.
    3. Scroll down, and click OK.

      set ha node -failSafe ON
  10. If you login to the Secondary appliance, you might see a message warning you against making changes. Always apply changes to the Primary appliance.
  11. On the secondary appliance, go to System > High Availability > Nodes and edit the local node 0.
  12. Change it from STAY SECONDARY to ENABLED. Also enable Fail-safe Mode. Click OK.
  13. On the new secondary appliance, go to System > Network > Routes, and make sure you don’t have two 0.0.0.0/0.0.0.0 routes. Joining an appliance to an HA pair causes the default route on the primary appliance to sync to the secondary appliance. But, it doesn’t delete the default gateway that was formerly configured on the secondary appliance.
  14. From the Citrix ADC CLI (SSH), run “sh ha node” to see the status. You should see heartbeats on all interfaces. If not, configure VLANs as detailed later..
  15. You can also disable HA heartbeats on specific network interfaces (System > Network > Interfaces).

    1. Note: Make sure HA heartbeats are enabled on at least one interface/channel.
    2. Note: this is an interface configuration, which means this configuration change is not propagated to the other node.
  16. To do an ISSU upgrade (zero downtime, no TCP disconnects), Citrix Docs says that HA Sync VLAN should be configured. In a typical deployment where NSIP is not on a tagged VLAN, set it to VLAN 1. Set it on each node at System > High Availability > Nodes > 0 > Edit.

HA Failover

  1. HA Failover changes the MAC address associated with VIPs and SNIPs. If your firewall (e.g. Cisco ASA) doesn’t like Gratuitous ARP, then see CTX112701 – The Firewall Does not Update the Address Resolution Protocol Table
  2. ADC 13 adds a graceful node Migrate operation which drains sessions instead of drops sessions.
    1. Once migration is started, the two nodes no longer synchronize their configurations. The only way to clear the migration status is to reboot the Secondary. See zero downtime upgrade at Citrix Docs.
    2. Go to System, and click the Migrate button to start the Migrate operation.
    3. Click Start Migration. It will take some time for client connections to drain off of the Primary and move to the upgraded appliance.

      migrate ns
    4. To clear the migration and allow nodes to be failed over again, reboot the secondary.
    5. Go to System > HA > Nodes and verify the Synchronization State. If one of them is disabled, then edit the node, and check the box next to Secondary node will fetch the configuration from Primary.

  3. Instead of Migrate, you can do a Force Failover, which does not require a reboot, and the nodes continue synchronizing.
    1. Go to System > High Availability > Nodes, open the menu named Select Action, and do a Force Failover.

      force ha failover

Port Channels on Physical Citrix ADC MPX

If you are configuring a Citrix ADC MPX (physical appliance), and if you plugged in multiple cables, and if more than one of those cables is configured on the switch for the same VLAN(s), then you must bond the interfaces together by configuring a Port Channel.

  • On the switch, create a Port Channel, preferably with LACP enabled.
  • The Port Channel can be an Access Port (one VLAN), or a Trunk Port (multiple VLANs).
  • On the Citrix ADC, configure LACP on the network interfaces, or create a Channel manually. Both methods are detailed below.

Also see Webinar: Troubleshooting Common Network Related Issues with NetScaler.

LACP Port Channel

To configure Port Channels on a Citrix ADC, you can either enable LACP, or you can configure a Channel manually. If your switch is configured for LACP, do the following on Citrix ADC to enable LACP on the member interfaces.

  1. Go to System > Network > Interfaces.
  2. On the right, edit one of the Port Channel member interfaces.
  3. Scroll down.
  4. Check the box next to Enable LACP.
  5. In the LACP Key field, enter a number. The number you enter here becomes the channel number. For example, if you enter 1, Citrix ADC creates a Channel named LA/1. All member interfaces of the same Port Channel must have the same LACP Key. Click OK when done.
  6. Continue enabling LACP on member interfaces and specifying the key (channel number). If you are connected to two port channels, one set of member interfaces should have LACP Key 1, while the other set of member interfaces should have LACP Key 2.
  7. In an HA pair, you must perform this interface configuration separately on both nodes. The LACP commands are not propagated across the HA pair.
  8. If you go to System > Network > Channels.
  9. You’ll see the LACP Channels on the right. These were created automatically after you set the LACP Key on the interface.
  10. If you edit a Channel, there’s a LACP Details tab that shows you the member interfaces.

Manual Channel

If your switch ports are not configured for LACP, then you can instead create a Channel manually.

  1. Go to System > Network > Channels.
  2. On the right, click Add.
  3. At the top, choose an unused Channel ID (e.g. LA/1).
  4. On the bottom, in the Bind/Unbind section, click Add.
  5. Click the plus icon next to each member interface to move it to the right. Then click Create.

Redundant Interface Set

You can also configure the Citrix ADC for switch-independent teaming. Create a Channel manually, but select a Channel ID starts with LR instead of LA. This is called Link Redundancy or Redundant Interface Set.

Channel Minimum Throughput

Channels can be configured so that a High Availability failover occurs when the Channel throughput drops below a configured value. For example, if you have four members in a Channel, you might want a High Availability failover to occur when two of the member interfaces fail.

  1. Go to System > Network > Channels, and edit a Channel.
  2. Near the top, enter a minimum threshold value in the Throughput field. If the total bonded throughput drops below this level, a High Availability failover will occur.

Trunk Port and High Availability

If you are trunking multiple VLANs across the channel, and if every VLAN is tagged (no native VLAN), then a special configuration is needed to allow High Availability heartbeats across the channel.

  1. Go to System > Network > VLAN.
  2. Add a VLAN object.
  3. Bind the VLAN to a channel or interface. To bind multiple VLANs to a single interface/channel, the VLANs must be tagged.
  4. Configure one of the VLANs as untagged. Only untag one of the VLANs. Which one you untag doesn’t matter. If your switch doesn’t allow untagged packets, don’t worry, we’ll fix that soon.
  5. If your switch doesn’t allow untagged packets, go to System > Network > Channels, and edit the channel.
  6. Scroll down and switch to the tab named Settings.
  7. Set Tag all VLANs to ON to cause Citrix ADC to tag all packets, including the VLAN you formerly marked as untagged.
    • We essentially moved the VLAN tagging from the VLAN to the Channel/Interface, which means VLAN tagging happens lower in the network stack so High Availability heartbeat packets are also tagged.
  8. Note: in an HA pair, you must perform this Tagall configuration separately on both nodes. The Tagall command is not propagated across the HA pair.

Common physical interface configuration

Here is a common Citrix ADC networking configuration for a physical Citrix ADC MPX that is connected to both internal and DMZ.

Note: If the appliance is connected to both DMZ and internal, then be aware that this configuration essentially bypasses (straddles) the DMZ-to-internal firewall. That’s because if a user connects to a public/DMZ VIP, then Citrix ADC could use an internal SNIP to connect to the internal server: in other words, traffic comes into a DMZ VLAN, but goes out an internal VLAN. A more secure approach is to have different appliances for internal and DMZ. Or use Citrix ADC SDX, partitioning, or traffic domains.

  • 0/1 connected to a dedicated management network. NSIP is on this network.
    • No data on 0/1 – 0/1 is not optimized for high throughput so don’t put data traffic on this interface. If you don’t have a dedicated management network, then put your NSIP on one of the other interfaces (1/1, 10/1, LA/1, etc.) and don’t connect any cables to 0/1.
    • No SNIP on management network – To prevent Citrix ADC from using this dedicated management interface for outbound data traffic, don’t put a SNIP on this management network, and configure the default gateway (route 0.0.0.0) to use a router on a different data network (typically the DMZ VLAN). However, if there’s no SNIP on this VLAN, and if the default gateway is on a different network, then there will be asymmetric routing for management traffic, since inbound management traffic goes in 0/1, but reply traffic goes out LA/1 or LA/2. To work around this problem, enable Mac Based Forwarding, or configure Policy Based Routing. Both of these options are detailed in the next section.
    • Management VLAN tagging – It’s easiest if the switch port for this dedicated management interface is an Access Port (untagged). If VLAN tagging is required, then NSVLAN must be configured on the Citrix ADC.
  • 10/1 and 10/2 in a LACP port channel (LA/1) connected to internal VLAN(s). Static routes to internal networks through a router on one of these internal VLANs.
    • Access Port – If only one internal VLAN, configure the switch ports/channel as an Access Port.
    • Trunk Port – If multiple internal VLANs, configure the switch ports/channel as a Trunk Port. Set one of the VLANs as the channel’s Native VLAN so it doesn’t have to be tagged.
    • Tag HA heartbeat packets – If the networking team is unwilling to configure a Native VLAN on the Trunk Port, then Citrix ADC needs special configuration (tagall) to ensure HA heartbeat packets are tagged.
  • 1/1 and 1/2 in a LACP port channel (LA/2) connected to DMZ VLAN(s). The default gateway (route 0.0.0.0) points to a router on a DMZ VLAN so replies can be sent to Internet clients.
    • Access Port – If only one DMZ VLAN, configure the switch ports/channel as an Access Port.
    • Trunk Port – If multiple DMZ VLANs, configure the switch ports/channel as a Trunk Port. Set one of the VLANs as the channel’s Native VLAN so it doesn’t have to be tagged.
    • Tag HA heartbeat packets – If the networking team is unwilling to configure a Native VLAN on the Trunk Port, then Citrix ADC needs special configuration (tagall) to ensure HA heartbeat packets are tagged.

Dedicated Management Subnet

If your Citrix ADC is connected to multiple subnets, then one of those subnets could be a Dedicated Management Subnet. If you have a subnet that is for NSIP only, and if you don’t want to use the NSIP subnet for data traffic, then you’ll want to move the default route off of the NSIP subnet and onto a different data subnet. However, moving the default route breaks traffic from the NSIP. To work around this problem, create PBRs for the NSIP traffic, including both replies from NSIP, and traffic sourced by the NSIP (e.g. Syslog).

Citrix Blog Post Separating NetScaler Management and Data Traffic for DISA STIGs also uses PBRs.

  1. Go to System > Network > PBRs. You can also search the menu for PBRs.
  2. On the right, click Add.
  3. Give the PBR a name (e.g. NSIP)
  4. Set the Next Hop Type drop-down to New.
  5. In the Next Hop field, enter the router IP address that is on the same network as the NSIP.
  6. In the Configure IP section, set the first Operation drop-down to =.
  7. In the Source IP Low field, enter the NSIP. This causes the PBR to match all traffic with NSIP as the Source IP address.
    • In an HA pair, the PBR command is synced and applied to both nodes in the pair. To accommodate this, in the Source IP Low field, enter the lower NSIP address. Then in the Source IP High field, enter the higher NSIP address.
  8. You don’t need anything else.
  9. Scroll down, and click Create. This rule routes any traffic with NSIP as source IP address through a router on the NSIP subnet. The default route will be ignored, but only for NSIP traffic.
  10. DNS traffic is special. To handle DNS traffic sourced by the NSIP, create another PBR by right-clicking the existing one, and clicking Add.
  11. Change the name to NSIP-DNS or similar.
  12. Change the Action drop-down to DENY, which tells ADC that traffic matching this PBR should use normal routing instead of overriding to a different gateway.
  13. Change the Priority to a lower number than the original PBR so this rule is matched before the general NSIP rule. Scroll down.
  14. In the Configure IP section, remove all settings.
  15. In the Configure Protocol section, click the Protocol drop-down, and select UDP (17).
  16. Above the two Destination port fields, change the Operation to =.
  17. In the Destination port Low field, enter 53.
  18. Scroll down, and click Create.
  19. Make sure the DENY PBR is higher in the list (lower priority number) than the ALLOW PBR.
  20. Then open the Action menu, and click Apply.
  21. Click Yes to apply.

    add ns pbr NSIP-DNS DENY -destPort = 53 -nextHop 10.2.2.1 -protocol UDP -priority 5
    add ns pbr NSIP ALLOW -srcIP = 10.2.2.126-10.2.2.127 -nextHop 10.2.2.1
    apply ns pbrs

Floating Management IP

If you want a floating management IP that is always on the Primary appliance, here’s a method of granting management access without adding a SNIP to the management subnet:

  1. Create a Load Balancing Service on HTTP 80 on IP address 127.0.0.1. Note: Citrix ADC doesn’t allow creating a Load Balancing service on IP address 127.0.0.1 and port 443 (SSL).

    • The IP address you enter is 127.0.0.1. When you view the Load Balancing Service, it shows the local NSIP. After a HA failover, the IP Address will change to the other NSIP.
  2. Create a Load Balancing Virtual Server using a VIP on the management subnet. Protocol = SSL. Port number = 443. Bind a certificate.

    1. Bind the loopback:80 service to the Load Balancing Virtual Server. In summary: the front end is 443 SSL, while the LB Service is 80 HTTP.
  3. Add the new VIP to the PBRs so the replies go out the correct interface. Re-apply the PBRs after you modify them.


  4. You should then be able to point your browser to https://Step2VIP to manage the appliance.
  5. You can perform the same loopback trick for 22 SSH. Create a Load Balancing Service on TCP 22 on IP address 127.0.0.1.
  6. Create a Load Balancing Virtual Server using the same management VIP specified earlier. Protocol = TCP. Port number = 22.

    1. Bind the loopback:TCP:22 service to the Load Balancing Virtual Server.
  7. You should then be able to point your SSH Client to <Step2VIP> to manage the appliance.
  8. CLI Commands for the floating management VIP:
    add service mgmt 127.0.0.1 HTTP 80
    add service mgmt-SSH 127.0.0.1 TCP 22
    add lb vserver mgmt-SSL SSL 10.2.2.128 443
    add lb vserver mgmt-SSH TCP 10.2.2.128 22
    bind lb vserver mgmt-SSL mgmt
    bind lb vserver mgmt-SSH mgmt-SSH
    set ns pbr NSIP-DNS DENY -srcIP = 10.2.2.126-10.2.2.128 -destPort = 53 -protocol UDP -priority 5
    set ns pbr NSIP ALLOW -srcIP = 10.2.2.126-10.2.2.128 -nextHop 10.2.2.1
    apply ns pbrs

Multiple Subnets / Multiple VLANs

Best practices for network configurations at Citrix Docs and Citrix CTX214033 Networking and VLAN Best Practices for NetScaler discusses many of the same topics detailed in this section.

If this is a physical MPX appliance, see the previous Port Channel section first.

If you only connected Citrix ADC to one subnet (one VLAN) then skip ahead to DNS servers.

Configuration Overview

The general configuration process for multiple subnets is this:

  1. Create a SNIP for each subnet/VLAN.
  2. Create a VLAN object for each subnet/VLAN.
    1. Bind the VLAN object to the SNIP for the subnet.
    2. Bind the VLAN object to the Port Channel or single interface that is configured for the VLAN/subnet.

SNIPs for each VLAN

You will need one SNIP for each connected subnet/VLAN. VLAN objects (tagged or untagged) bind the SNIPs to particular interfaces. Citrix ADC uses the SNIP’s subnet mask to assign IP addresses to particular interfaces.

NSIP Subnet

The NSIP subnet is special, so you won’t be able to bind it to a VLAN. Use the following SNIP/VLAN method for any network that does not have the NSIP. The remaining interfaces will be in VLAN 1, which is the VLAN that the NSIP is in. VLAN 1 is only locally significant so it doesn’t matter if the switch is configured with it or not. Just make sure the switch has a native VLAN configured, or configure the interface as an access port. If you require trunking of every VLAN, including the NSIP VLAN, then additional configuration is required (NSVLAN or Tagall).

Configure Subnets/VLANs

To configure Citrix ADC with multiple connected subnets:

  1. Add a subnet IP for every network the Citrix ADC is connected to, except the dedicated management network. Expand System, expand Network, and click IPs.
  2. On the right, click Add.

    1. Enter the Subnet IP Address for this network/subnet. The SNIP will be the source IP address the Citrix ADC will use when communicating with any other service/server on this network. The Subnet IP is also known as the Interface IP for the network. You will need a separate SNIP for each connected network (VLAN).
    2. Enter the netmask for this network.
    3. Ensure the IP Type is set to Subnet IP. Scroll down.

      add ns ip 172.16.1.11 255.255.255.0 -type SNIP
    4. Under Application Access Controls, decide if you want to enable GUI management on this SNIP. This feature can be particularly useful for High Availability pairs, because when you point your browser to the SNIP, only the primary appliance will respond. However, enabling management access on the SNIP can be a security risk, especially if this is a SNIP for a DMZ network.
    5. Click Create when done. Continue adding SNIPs for each connected network (VLAN).

      set ns ip 172.16.1.11 -mgmtAccess ENABLED -telnet DISABLED -ftp DISABLED
  3. On the left, expand System, expand Network, and click VLANs.
  4. On the right, click Add.

    1. Enter a descriptive VLAN ID. The actual VLAN ID only matters if you intend to tag the traffic. If not tagged, then any ID (except 1) will work.
    2. In the Interface Bindings section, check the box next to one physical interface or channel (e.g. LA/1) that is connected to the network.
    3. If this is a trunk port, select Tagged if the switch port/channel is expecting the VLAN to be tagged.
    4. If your switches do not allow untagged packets, then you will need to use the tagall interface option to tag Citrix ADC High Availability heartbeat packets. See CTX122921 Citrix NetScaler Interface Tagging and Flow of High Availability Packets
    5. If you don’t tag the VLAN, then the Citrix ADC interface/channel is removed from VLAN 1, and instead put in this VLAN ID.
    6. Switch to the tab named IP Bindings.
    7. Check the box next to the Subnet IP for this network. This lets Citrix ADC know which interface is used for which IP subnet. Click Create when done.

      add vlan 50
      bind vlan 50 -ifnum LA/1 -IPAddress 172.16.1.11 255.255.255.0
  5. Add static routes to the internal networks through an internal router.
    1. On the left, expand System, expand Network, and click Routes.
    2. On the right, click Add.
    3. Make sure NULL Route is set to No.
    4. Set the Gateway (next hop) to an internal router.
    5. Then click Create.

      add route 10.2.0.0 255.255.0.0 10.2.2.1
  6. The default route should be changed to use a router on the DMZ network (towards the Internet). Before deleting the existing default route, either enable Mac Based Forwarding, or create a Policy Based Route, so that the replies from NSIP can reach your machine. You usually only need to do this for dedicated management networks.
    1. Note: PBR is recommended over MBF, because PBR can handle traffic sourced by NSIP (e.g Syslog traffic), while MBF cannot.
    2. Mac Based Forwarding sends replies out the same interface they came in on. However, MBF ignores the routing table, and doesn’t handle traffic sourced by the NSIP (e.g. LDAP traffic). To enable MBF:
      1. On the left, expand System, and click Settings.
      2. On the right, in the left column, click Configure modes.
      3. Check the box next to MAC Based Forwarding (MBF), and click OK. More info on MAC Based Forwarding can be found at Citrix CTX1329532 FAQ: Citrix NetScaler MAC Based Forwarding (MBF).

        enable mode mbf
  7. Go back to System > Network > Routes.
    1. On the right, delete the 0.0.0.0 route. Don’t do this unless the Citrix ADC has a route, PBR, or MBF to the IP address of the machine you are running the browser on.

      rm route 0.0.0.0 0.0.0.0 10.2.2.1
    2. Then click Add.
    3. Set the Network to 0.0.0.0, and the Netmask to 0.0.0.0.
    4. Make sure NULL Route is set to No.
    5. Enter the IP address of the DMZ (or data) router, and click Create.

      add route 0.0.0.0 0.0.0.0 172.16.1.1

DNS Servers

  1. To configure DNS servers, expand Traffic Management, expand DNS, and click Name Servers.
  2. On the right, click Add.

    1. Enter the IP address of a DNS server, and click Create.
    2. Note: The Citrix ADC must be able ping each of the DNS servers, or they will not be marked as UP. The ping originates from the SNIP.

      add dns nameServer 10.2.2.11
  3. Citrix ADC includes DNS Security Options, which are useful if you use this Citrix ADC to provide DNS services to clients (e.g. DNS Proxy/Load Balancing, GSLB, etc.). You can configure them at Security > DNS Security.

  4. Additional DNS Security Options are detailed at DNS security options at Citrix Docs.

NTP Servers

  1. On the left, expand System, and click NTP Servers.
  2. On the right, click Add.
  3. Enter the IP Address of your NTP Server (or pool.ntp.org), and click Create.

    add ntp server pool.ntp.org
  4. On the right, open the Action menu, and click NTP Synchronization.
  5. Select ENABLED, and click OK. This starts the NTP daemon in BSD to perform the NTP sync.

    enable ntp sync
  6. You can click the System node to view the System Time.
  7. If you need to manually set the time:
    1. SSH (Putty) to the Citrix ADC appliances.
    2. Run shell to access BSD.
    3. Run date to manually set the time. Run date –help to see the syntax.
    4. Ntpdate –u pool.ntp.org will cause an immediate NTP time update. You’ll need to disable NTP Sync before you can run this command.

SYSLOG Server

Citrix CTX120609 NetScaler Log Rotation and Configuration Using Newsyslog

The Citrix ADC will, by default, store a few syslogs on the local appliance. You can create a syslog policy to also send the syslog entries to an external server, like Citrix Application Delivery Management (ADM).

  1. On the left, expand System, expand Auditing, and click Syslog.
  2. On the right, switch to the Servers tab, and click Add.

    1. Enter a name for the Syslog server.
    2. You can change Server Type to Server Domain Name, and enter a FQDN.
    3. Enter the IP Address or FQDN of the SYSLOG server, and 514 as the port.
    4. Configure the Log Levels you’d like to send to it by clicking CUSTOM – typically select everything except DEBUG.
    5. Select your desired Time Zone and Date Format.
    6. You can optionally enable other logging features. User Configurable Log Messages lets you use Responder policies to generate log entries.
    7. Then click Create.

      add audit syslogAction MySyslogServer 10.2.2.12 -logLevel EMERGENCY ALERT CRITICAL ERROR WARNING -timeZone LOCAL_TIME -userDefinedAuditlog YES
      add audit syslogAction MySyslogServer syslog.corp.local -logLevel EMERGENCY ALERT CRITICAL ERROR WARNING -timeZone LOCAL_TIME -userDefinedAuditlog YES
  3. On the right, switch to the Policies tab, and then click Add.

    1. Give the policy a descriptive name,
    2. Change the Expression Type selection to Advanced Policy.
    3. Select the previously created Syslog server.
    4. And then click Create.

      add audit syslogPolicy MySyslogServer true MySyslogServer
  4. While still on the Policies tab, open the Actions menu, and click Classic Policy Global Bindings or Advanced Policy Global Bindings, depending on which one you chose when creating the Syslog policy.

    1. Click Add Binding.
    2. Click where it says Click to select.
    3. Click the radio button next to the Syslog policy you want to bind, and then click the blue Select button at the top of the page.
    4. Change the Priority to 100 or similar.
    5. If you don’t select anything in Global Bind Type, then it defaults to SYSTEM_GLOBAL.
    6. Click Bind.
    7. Click Done.

      bind audit syslogGlobal -policyName MySyslogServer -priority 100
      bind system global MySyslogServer -priority 100

SNMP – MIB, Traps, and Alarms

  1. On the left, expand System, and click SNMP.
  2. On the right, click Change SNMP MIB.

    1. Change the fields as desired. Your SNMP tool (e.g. Citrix Application Delivery Management (ADM)) will read this information. Click OK.
    2. This configuration needs to be repeated on the other node.

      set snmp mib -contact NSAdmins@corp.com -name ns02 -location Corp
  3. Expand System, expand SNMP, and click Community.

    1. On the right, click Add.
    2. Specify a community string, and the Permission, and click Create.

      add snmp community public GET
  4. On the left, under SNMP, click Traps.

    1. On the right, click Add.
    2. Specify a trap destination. The fields will vary for V2 vs V3. Click Create. You’ll have to add the Trap Destinations twice so you can select both Generic and Specific.

      add snmp trap generic 10.2.2.12 -communityName public
      add snmp trap specific 10.2.2.12 -communityName public
  5. On the left, under SNMP, click Managers.

    1. On the right, click Add.
    2. Change the selection to Management Network.
    3. Specify the IP of the Management Host, and click Create.

      add snmp manager 10.2.2.12
  6. The Alarms node allows you to enable SNMP Alarms and configure thresholds.

    1. You can Edit an alarm to set thresholds. For example, CPU-USAGE can be set to 90% alarm, and 50% normal, with a Critical severity.

      set snmp alarm CPU-USAGE -thresholdValue 90 -normalValue 50 -severity Critical
    2. You can also configure the MEMORY alarm.

      set snmp alarm MEMORY -thresholdValue 90 -normalValue 50 -severity Critical

From http://www.slideshare.net/masonke/net-scaler-tcpperformancetuningintheaolnetwork: In addition to the usual OIDs, we have found these very useful to warn of potential problems.

  • ifTotXoffSent – .1.3.6.1.4.1.5951.4.1.1.54.1.43
  • ifnicTxStalls – .1.3.6.1.4.1.5951.4.1.1.54.1.45
  • ifErrRxNoBuffs – .1.3.6.1.4.1.5951.4.1.1.54.1.30
  • ifErrTxNoNSB – .1.3.6.1.4.1.5951.4.1.1.54.1.31

Call Home

Citrix Blog Post – Protect Your NetScaler From Disaster With Call Home!: If you have a physical Citrix ADC (MPX or SDX) with an active support contract, you may optionally enable Call Home to automatically notify Citrix Technical Support of hardware and software failures.

Call Home at Citrix Docs has information on how it work.

From the Citrix ADC release notes: Call Home is now enhanced to send Citrix ADC usage metrics to Citrix Insight Services (CIS) periodically. Citrix collects the data to understand how the appliance works and how to improve the product. By default, Call Home sends the metrics once in every 7 days. For more information, see Call Home at Citrix Docs.

To enable Call Home:

  1. On the left, expand System, and click Diagnostics.
  2. On the right, in the left column, in the Technical Support Tools section, click Call Home.
  3. Check the box next to Enable Call Home.
  4. Optionally enter an email address to receive notifications from Citrix Technical Support. Click OK.
  5. If you go back into Call Home, it should indicate if registration succeeded or failed. Successful registration requires an active support contract.

Change nsroot Password

  1. In ADC 13.0 build 67 and newer, you’ll be forced to change the default nsroot password.
  2. If you want to force strong passwords for local accounts, go to System > Settings, and on the right, click Change Global System Settings

    1. Scroll down to the Password section.
    2. You can change Strong Password to Enable Local, and also specify a Min Password Length. Click OK.
  3. Expand System, expand User Administration, and click Users.
  4. On the right, right-click nsroot, and click Change Password.
  5. Specify a new password and click OK.

    set system user nsroot Passw0rd

TCP, HTTP, SSL, and Security Settings

Citrix Docs Introduction to best practices for Citrix ADC MPX, VPX, and SDX security

Best practice settings:

  1. On the left, expand System, and click Settings.
  2. On the right, in the right column, click Change TCP parameters.

    1. Check the box for Window scaling (near the top) and set the Factor to 8.
    2. Scroll down and check the box for Selective Acknowledgement.
    3. Nagle’s algorithm should not be checked.
    4. Click OK.

      set ns tcpParam -WS ENABLED -SACK ENABLED
  3. On the right, click Change HTTP parameters.

    1. Under Cookie, change the selection to Version1. This causes Citrix ADC to set Cookie expiration to a relative time instead of an absolute time.

      set ns param -cookieversion 1
    2. Check the box next to Drop invalid HTTP requests. Note: this might break some web sites.
    3. Scroll down, and click OK.

      set ns httpParam -dropInvalReqs ON
  4. From Citrix CTX232321 Recommended TCP Profile Settings for Full Tunnel VPN/ICAProxy from NetScaler Gateway 11.1 Onwards:
    1. Expand System, and click Profiles.
    2. On the right, on the tab named TCP Profiles, edit the nstcp_default_profile.
    3. Enable Window Scaling with a factor of 8.
    4. Set Minimum RTO (in millisec)600.
    5. Set TCP Buffer Size (bytes)600000
    6. Set TCP Send Buffer Size (bytes)600000
    7. Change TCP Flavor = BIC.
    8. Enable Selective Acknowledgement. Don’t enable Nagle’s algorithm.
    9. Click OK when done.
  5. You can run the following command to see statistics on the dropped packets:
    nsconmsg -g http_err_noreuse_ -d stats
  6. See CTX209398 Addressing false positives from CBC and MAC vulnerability scans of SSHD to harden SSHD by editing /nsconfig/sshd_config with the following. Then run kill -HUP `cat /var/run/sshd.pid` to restart SSHD.
    Ciphers aes128-ctr,aes192-ctr,aes256-ctr
    MACs hmac-sha1,hmac-ripemd160

Citrix Knowledgebase articles:

The following security configurations are detailed by Jason Samuel at Mitigating DDoS and brute force attacks against a Citrix Netscaler Access Gateway:

  • Maximum logon attempts on Citrix Gateway Virtual Server
  • Rate Limiting for IP.SRC and HTTP.REQ.URL.
  • nstcp_default_XA_XD_profile TCP profile on the Citrix Gateway Virtual Server.
  • Syslog logging
  • External website monitoring
  • Obfuscate the Server header in the HTTP response
  • Disable management access on SNIPs
  • Change nsroot strong password, use LDAP authentication, audit local accounts
  • Don’t enable Enhanced Authentication Feedback
  • SSL – disable SSLv3, deny SSL renegotiation, enable ECDHE ciphers, disable RC4 ciphers.
  • 2-factor authentication
  • Citrix Application Delivery Management (ADM)
  • Review IPS/IDS & Firewall logs

Management Authentication – LDAP

Load balancing of LDAP servers is strongly recommended. If you bind multiple LDAP servers instead of load balancing them, Citrix ADC will try each of the LDAP servers, and for incorrect passwords, will lock out the user sooner than expected. But if you instead load balance your LDAP servers, the authentication attempt will only be sent to one of them.

  1. Expand System, expand Authentication, expand Basic Policies, and then click LDAP.
  2. On the right, switch to the Servers tab. Then click Add.

    1. Enter LDAPS-Corp-Mgmt or similar as the name. If you have multiple domains, you’ll need a separate LDAP Server per domain so make sure you include the domain name. Also, the LDAP policy used for management authentication will be different than the LDAP policy used for Citrix Gateway.
    2. Change the selection to Server IP. Enter the VIP of the Citrix ADC load balancing vServer for LDAP.
    3. Change the Security Type to SSL.
    4. Enter 636 as the Port. Scroll down.
    5. In the Connection Settings section, in the Base DN field, enter your Active Directory DNS domain name in LDAP format.
    6. In the Administrator Bind DN field, enter the credentials of the LDAP bind account in userPrincipalName format.
    7. Enter the Administrator Password (bind account password). Click Test LDAP Reachability. Scroll down.
    8. In the Other Settings section, use the drop-down next to Server Logon Name Attribute, Group Attribute, and Sub Attribute Name to select the default fields for Active Directory.
    9. On the right, check the box next to Allow Password Change.
    10. It is best to restrict access to only members of a specific group. In the Search Filter field, enter memberOf=<GroupDN>. See the example below:
      memberOf=CN=Citrix ADC Administrators,OU=Citrix,DC=corp,DC=local
      You can add :1.2.840.113556.1.4.1941: to the query so it searches through nested groups. Without this, users will need to be direct members of the filtered group.
      memberOf:1.2.840.113556.1.4.1941:=CN=Citrix ADC Administrators,OU=Citrix,DC=corp,DC=local
      An easy way to get the full distinguished name of the group is through Active Directory Users & Computers. Make sure Advanced Features is enabled in the View menu. Double-click the group object. Switch to the Attribute Editor tab. Find Distinguished Name and copy it.
      Scroll down to distinguishedName, double-click it, and then copy it to the clipboard.
      Back on the Citrix ADC, in the Search Filter field, type in memberOf=, and then paste the Distinguished Name right after the equals sign. Don’t worry about spaces.
    11. Scroll down and click More to expand it.
    12. For Nested Group Extraction, if desired, change the selection to Enabled.
    13. Set the Group Name Identifier to samAccountName.
    14. Set Group Search Attribute to –<< New >>–, and enter memberOf.
    15. Set Group Search Sub-Attribute to –<< New >>–, and enter CN.
    16. Example of LDAP Nested Group Search Filter Syntax
    17. Scroll down, and click Create.

      add authentication ldapAction Corp-Mgmt -serverIP 10.2.2.210 -serverPort 636 -ldapBase "dc=corp,dc=local" -ldapBindDn "corp\\ctxsvc" -ldapBindDnPassword Passw0rd -ldapLoginName samaccountname -searchFilter "memberOf=CN=Citrix ADC Admins,CN=Users,DC=corp,DC=local" -groupAttrName memberOf -subAttributeName CN -secType SSL -passwdChange ENABLED
  3. On the left, go to System > Authentication > Advanced Policies > Policy.
  4. On the right, click Add.

    1. Enter the name LDAPS-Corp-Mgmt or similar.
    2. Change the Action Type drop-down to LDAP.
    3. Select the previously created LDAPS-Corp-Mgmt server.
    4. On the bottom, in the Expression area, type in true.
    5. Click Create.

      add authentication Policy LDAPS-Corp-Mgmt -rule true -action LDAPS-Corp-Mgmt
  5. Click Global Bindings in the right pane.

    1. Click where it says Click to select.
    2. Click the radio button next to the newly created LDAP policy, and then click the blue Select button at the top of the page.
    3. Click Bind.
    4. Click Done.

      bind system global LDAPS-Corp-Mgmt -priority 100 -gotoPriorityExpression NEXT
  6. Under System, expand User Administration, and click Groups.

    1. On the right, click Add.
    2. In the Group Name field, enter the case sensitive name of the Active Directory group containing the Citrix ADC administrators.

      • ADC 13.0 build 41 and newer lets you restrict a group to the CLI only. Note that GUI access requires API permissions.
    3. In the Command Policies section, click Bind.
    4. Select the superuser policy, and click Insert.
    5. Scroll down, and click Create.

      add system group "Citrix ADC Admins" -timeout 900
      bind system group "Citrix ADC Admins" -policyName superuser 100
  7. To prevent somebody from creating an nsroot account in LDAP (Active Directory) and then using that external nsroot account to login to ADC, disable external authentication on the local nsroot account.
    1. On the left, go to System > User Administration > Users.
    2. On the right, edit the nsroot user.
    3. At the top of the page, in the System User section, click the pencil icon.
    4. Uncheck the box next to Enable External Authentication and then click Continue.
    5. Click Save and then click Done.
  8. If you logout:
  9. You should be able to login to Citrix ADC using an Active Directory account.

Management Authentication – Two Factor

Citrix ADC supports two factor authentication for management access. The technology is based on nFactor but works in all editions of ADC (no licensing restrictions). Here’s a summary of the configuration steps with more detail coming later:

  1. The first authentication factor must be an Advanced Authentication Policy that is bound globally. Classic Authentication Policies will not work.
  2. Create a Login Schema to ask for the second factor password (i.e. passcode).
    • This Login Schema is for second factor only and has no effect on the first factor. The second factor Login Schema should only ask for a single password prompt. It doesn’t appear to be possible to ask for both factors using the same Login Schema.
    • Login Schema for the second factor does not use the normal nFactor language files and you instead must hard code the password prompt label for the second factor logon field directly in the Login Schema .xml file.

  3. Create an Advanced Authentication Server and Policy for the second factor (e.g. RADIUS).
  4. Create an Authentication Policy Label with Feature Type set to RBA_REQ. This is not the default so make sure you change the Feature Type drop-down field.

    1. When creating the Policy Label, select the Login Schema for the second factor.
    2. Bind the second factor Advanced Authentication Policy to the Policy Label.
  5. Go to Global Bindings for Authentication, edit the existing authentication binding, click Next Factor, and select your new Policy Label. That’s it.

Here are detailed configuration instructions for adding a second authentication factor to the management logon page.

  1. Login Schema XML File:
    1. Point WinSCP to your ADC appliance.
    2. Navigate to /nsconfig/loginschema/LoginSchema and download the SingleAuth.xml file.
    3. Rename the file to MgmtNextFactor.xml or something like that.
    4. Edit the file.
    5. Look for the <Requirement> element with ID of passwd. Then look for the Label and set the Text field to whatever you want displayed on the second password page. Save the file when done.
    6. The Label Text you enter will be shown on the second factor logon page.
    7. In WinSCP, change the directory to /nsconfig/loginschema, which is one directory up from where you downloaded the file.
    8. Upload your modified file.
  2. RADIUS Authentication Server:
    1. Follow the link for instructions to create a RADIUS Server. Only create the Server object. The Policy object will be created later when creating the Authentication Policy Label.
      add authentication radiusAction RADIUSMgmt -serverName 10.2.2.42 -serverPort 1812 -radKey b746744 -encrypted -encryptmethod ENCMTHD_3
  3. On the left, go to System > Authentication > Advanced Policies > Policy Label.
  4. On the right, click Add.
  5. Name the Policy Label MgmtNextFactor or similar.
  6. In the Login Schema field, click Add.

    1. Name the Login Schema MgmtNextFactor or similar.
    2. In the Authentication Schema field, click the pencil icon.
    3. On the left, select the Login Schema .xml file you uploaded earlier.
    4. On the top right, click the blue Select button. Do NOT click Create on the bottom left until you’ve clicked this blue Select button.
    5. The window collapses showing you the Login Schema file that you selected. Now you can click Create.

      add authentication loginSchema MgmtNextFactor -authenticationSchema "/nsconfig/loginschema/MgmtNextFactor.xml"
  7. Back in the Authentication Policy Label screen, notice that you can edit the Login Schema object from here.
  8. Change the Feature Type drop-down to RBA_REQ. If you don’t do this, then you won’t be able to bind this later.
  9. Click Continue.

    add authentication policylabel MgmtNextFactor -type RBA_REQ -loginSchema MgmtNextFactor
  10. In the Policy Label’s Policy Binding field, click Add.

    1. Name the Authentication Policy RADIUSMgmt or similar.
    2. Change the Action Type drop-down to RADIUS.
    3. Select the RADIUS server that you created earlier. Or you can Add one from here.
    4. In the Expression box, enter the word true and then click Create.

      add authentication Policy RADIUSMgmt -rule true -action RADIUSMgmt
  11. Back in the Policy Label Policy Binding screen, click Bind.
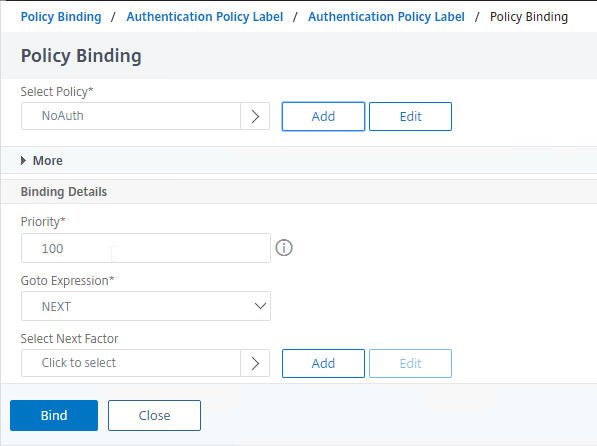
    bind authentication policylabel MgmtNextFactor -policyName RADIUSMgmt -priority 100 -gotoPriorityExpression NEXT
  12. The Authentication Policy Label configuration is complete so click Done.
  13. On the left, go to System > Authentication > Advanced Policies > Policy.
  14. On the right, click the Global Bindings button.
  15. You should already have an Advanced Authentication Policy bound globally.
    add authentication ldapAction LDAPS-Corp-Mgmt -serverIP 10.2.2.11 -serverPort 636 -ldapBase "dc=corp,dc=local" -ldapBindDn ctxsvc@corp.local -ldapBindDnPassword 5054fc33f673bf4c5c6 -encrypted -encryptmethod ENCMTHD_3 -ldapLoginName sAMAccountName -groupAttrName memberOf -subAttributeName cn -secType SSL -passwdChange ENABLED
    
    add authentication Policy LDAPS-Corp-Mgmt -rule true -action LDAPS-Corp-Mgmt
    
    bind system global LDAPS-Corp-Mgmt -priority 100 -gotoPriorityExpression END
  16. Right-click your existing global binding and click Edit Binding.
  17. In the Next Factor field, click where it says Click to select.
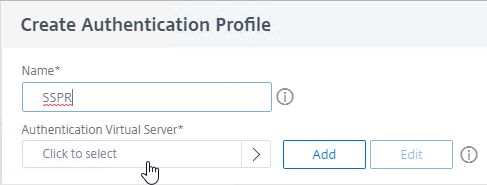
  18. Click the small circle next to your Management Next Factor Policy Label and then click the blue Select button at the top of the page.
  19. Back in the Policy Binding screen, click Bind.

    bind system global LDAPS-Corp-Mgmt -priority 100 -nextFactor RADIUSMgmt -gotoPriorityExpression END
  20. Click Done to close the Global Authentication Policy Binding screen.

CLI Prompt

  1. When you connect to the Citrix ADC CLI prompt, by default, the prompt is just a >.
  2. You can run set cli prompt %u@%h to make it the same as a UNIX prompt. See Citrix Docs for the cli prompt syntax.

Backup and Restore

Citrix Application Delivery Management (ADM) can automatically backup your instances. Or you can do it manually:

  1. Save the configuration.
  2. On the left, expand System, and click Backup and Restore.
  3. On the right, click Backup/Import.
  4. Give the backup file a name.
  5. For Level, select Full, and click Backup.
  6. Once the backup is complete, you can download the file.

For a PowerShell script, see John Billekens Create offline backups of the NetScaler config

To restore:

  1. If you want to restore the system, and if the backup file is not currently on the appliance, click the Backup/Import button.
  2. Change the selection to Import.
  3. Browse Local to the previously downloaded backup file.
  4. Then click Backup. This uploads the file to the appliance and adds it to the list of backup files.
  5. Now you can select the backup, and click Restore.

Next Steps