Navigation
This post applies to all Horizon versions 2006 (aka 8.0) and newer.
Change Log
- 2023 Oct 28 – Published Apps – Single Application Launch Limit in Horizon 2309
- 2021 Jan 10 – Disable Published Application in Horizon 2012 (8.1) and newer.
- 2021 Jan 9 – updated screenshots for Horizon 2012 (8.1)
- 2020 Aug 14 – updated entire article for Horizon 2006 (8.0)
Overview
This post details Horizon configuration for Remote Desktop Session Host (RDS) Horizon Agents. Virtual Desktops are detailed at Master Virtual Desktop and Virtual Desktop Pools.
Before following this procedure, build a master RDS Session Host.
Before you can publish applications or RDS desktops, you must create an RDS Farm. An RDS Farm is a collection of identical (cloned) Remote Desktop Session Hosts. Applications must be installed identically on every machine in the farm. If you have different applications on different Remote Desktop Session Hosts, then these are different RDS Farms.
Once the RDS Farms are created, you publish icons from them by either creating a Desktop Pool or an Application Pool or both. When creating a Desktop Pool or Application Pool, all members of the RDS Farm are selected. It is not possible to select a subset of Farm members.
Omnissa Tech Paper Best Practices For Published Applications And Desktops in Horizon:
- vSphere Best Practices – Hardware, Network Adapters, ESXi BIOS Settings, ESXi Power Management
- Core Services Best Practices – Active Directory, DNS, DHCP, NTP, KMS, RDS Licensing
- ESXi Host Sizing Best Practices
- RDSH Configuration Best Practices – Optimization
- Horizon 7 Best Practices – Instant Clones, Load Balancing
- User Environment Management Best Practices – Horizon Smart Policies, Folder Redirection, User Profiles, Printers, Hardware Graphics Acceleration
- App Volumes Best Practices – dedicated AppStacks
- Antivirus Best Practices
- Maintenance Operations Best Practices – scheduled reboots
RDS Farms – Instant Clones
For a description of Instant Clones, see Instant Clones for RDSH in VMware Horizon 7.1 YouTube video.
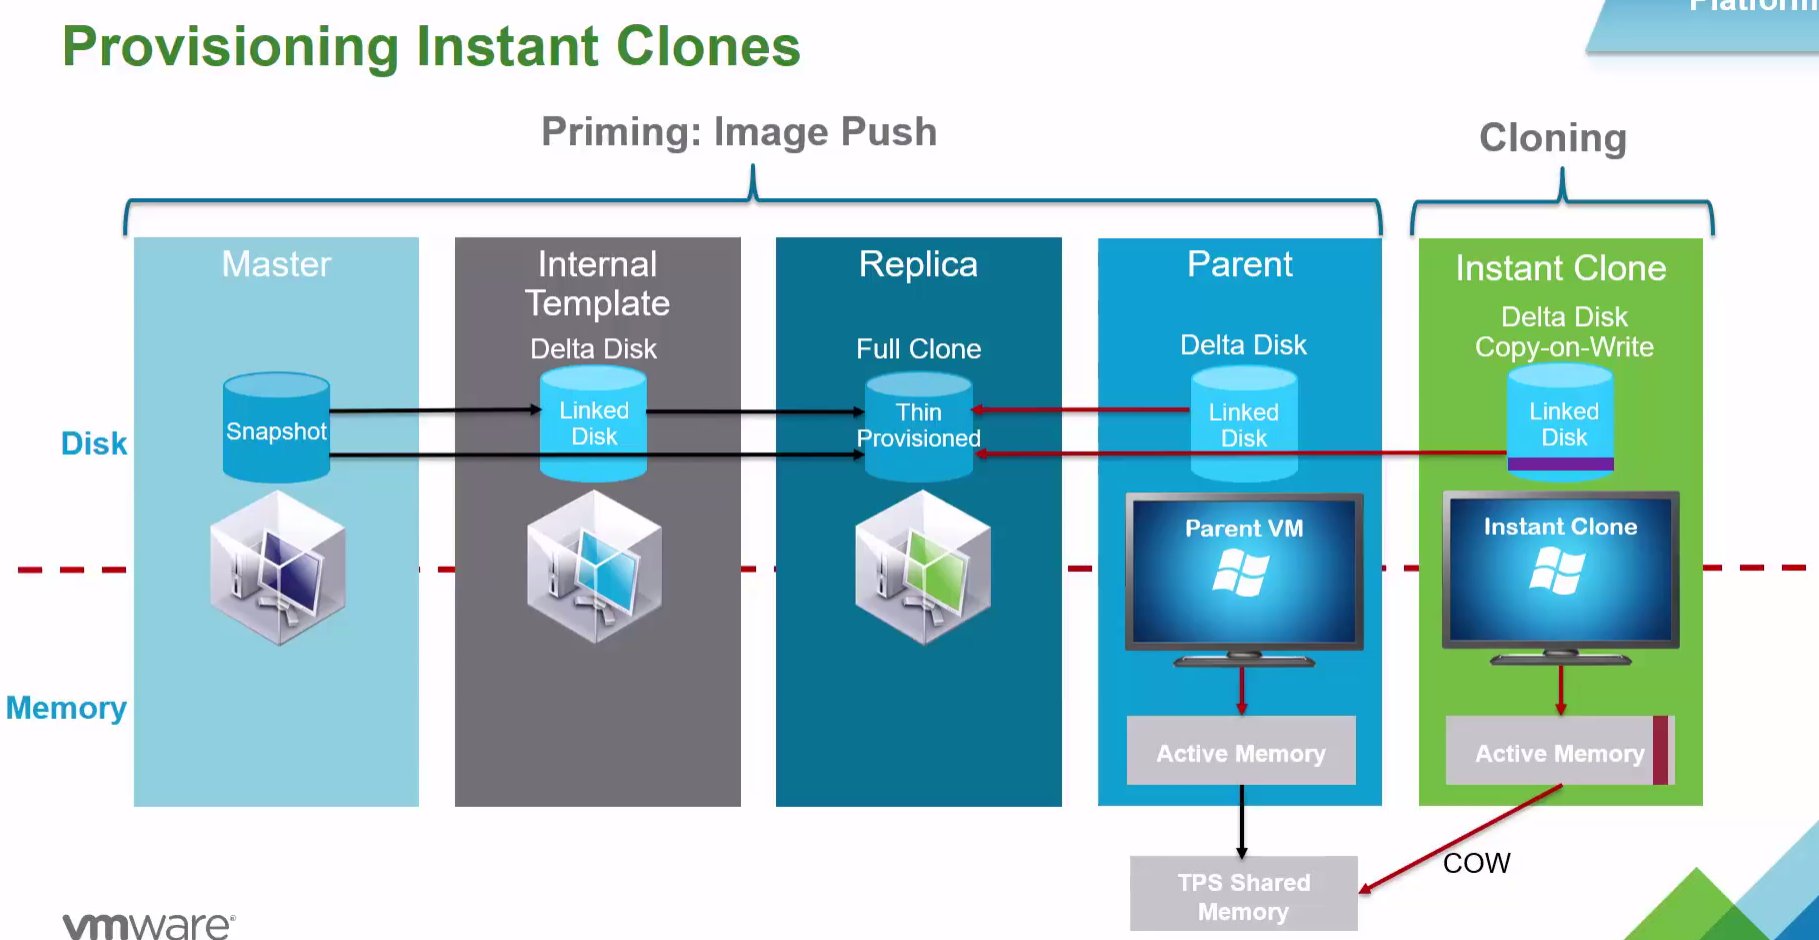
- You select a snapshot from a master image.
- Horizon creates a template VM that boots from the master snapshot. After some prep, the template VM shuts down and creates a new snapshot.
- The template snapshot is copied to a Replica VM on every LUN (datastore) that will host RDS Farm VMs.
- For each datastore, Horizon creates a Parent VM on every host in the cluster. This parent VM is powered on and running at all times.
- Horizon 2306 (8.10) and newer now default to no longer creating parent virtual machines.
- The linked clones can finally be created by forking the parent VM to new linked clone VMs. Notes:
- Once the Parent VMs are created, creating/recreating linked clones is fast. But it takes time to create all of the Parent VMs.
- And the Parent VMs consume RAM on every host. If you have multiple datastores and/or multiple pools, then there are multiple Parent VMs per host, all of them consuming RAM.
- You can schedule a periodic reboot of the Instant Clones, which causes the Instant Clone machines to refresh (revert) from the parent VM.
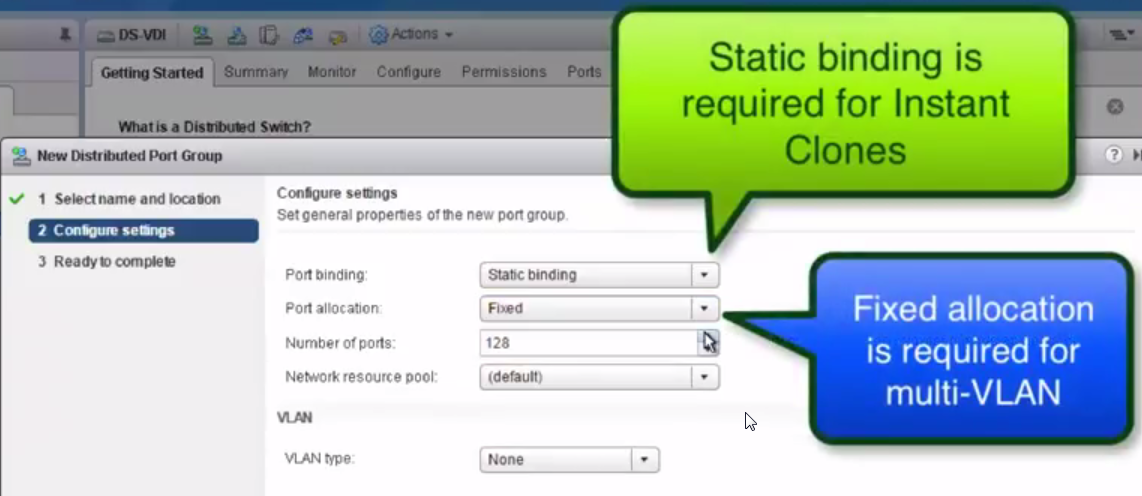
- Instant Clones require Distributed vSwitch and Distributed Port Group with Static Binding and Fixed Allocation. Standard vSwitch is not supported. Multi VLAN and vGPU for Instant Clones in VMware Horizon 7.1 YouTube video.
Create an Automatic RDS Farm
Instant Clones in Horizon 2303 and newer require vSphere 7 or newer. vSphere 6.7 and older will not work.
Master Image Preparation
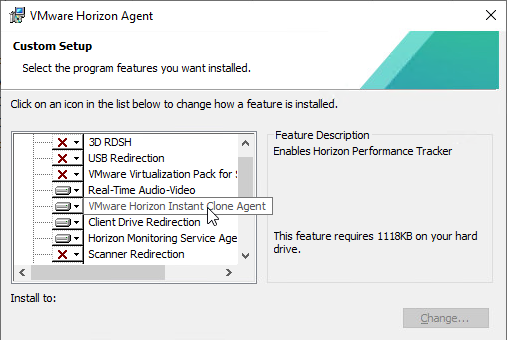
- Make sure your RDS gold Agent has the VMware Horizon Instant Clone Agent feature installed.
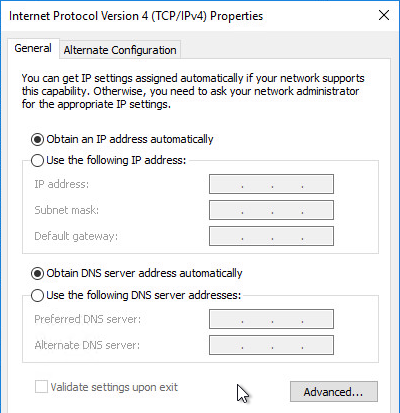
- Make sure your RDS master Agent is configured for DHCP.
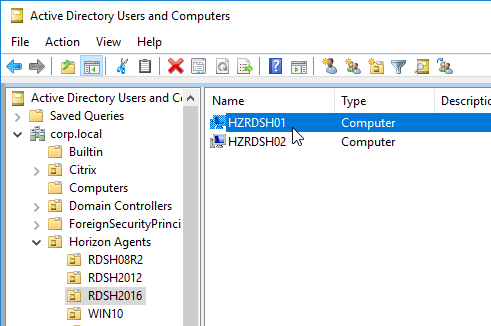
- Computer Group Policy – Make sure the Master VM is in the same OU as the Instant Clones so the Master VM will get the computer-level GPO settings. Run gpupdate on the master after moving the VM to the correct OU. New Instant Clones do not immediately refresh group policy so the group policy settings must already be applied to the master VM. See Omnissa 2150495 Computer-based Global Policy Objects (GPOs) that require a reboot to take effect are not applied on instant clones.
- Shut down the master image.
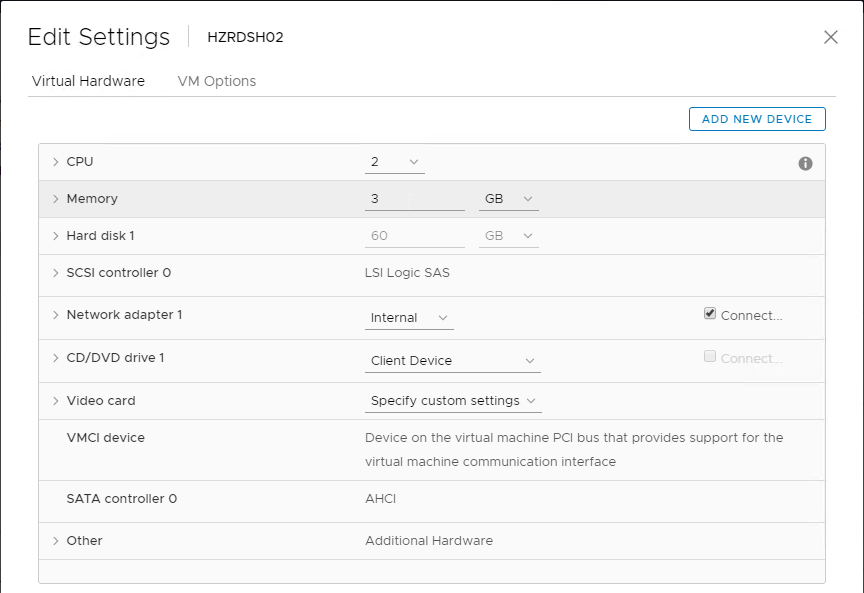
- Edit the specs of the master VM to match the specs you want the linked clones to have.
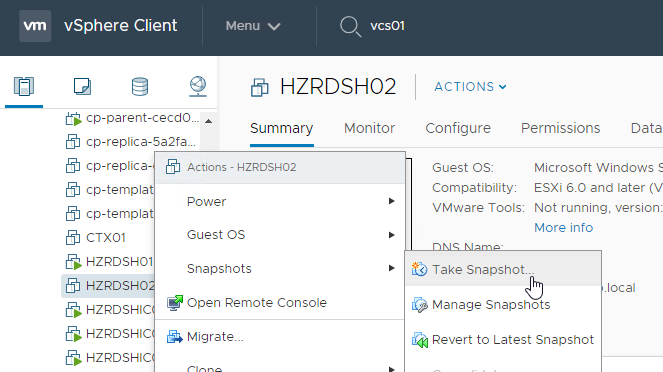
- Take a snapshot of the master image.
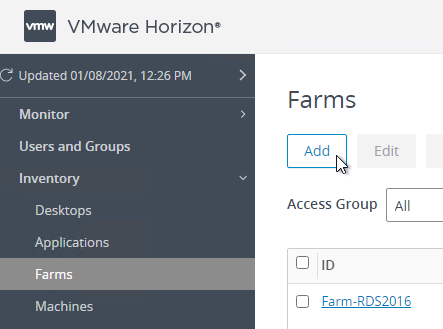
- In Horizon Console, on the left, expand Inventory, and click Farms.
- On the right, click Add.
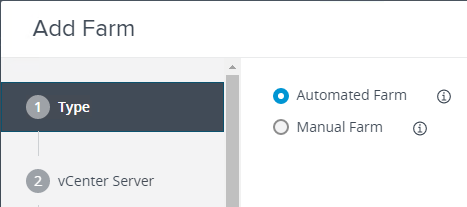
- In the Type page, select Automated Farm, and click Next.
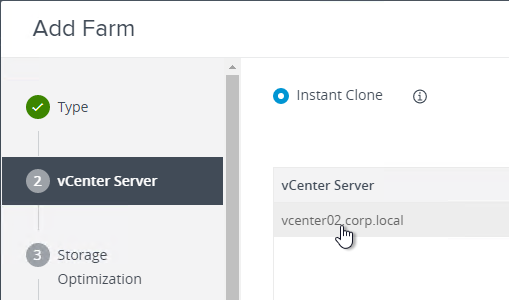
- In the vCenter Server page, select Instant Clone, select the vCenter Server, and then click Next. Notice that Composer is no longer an option.
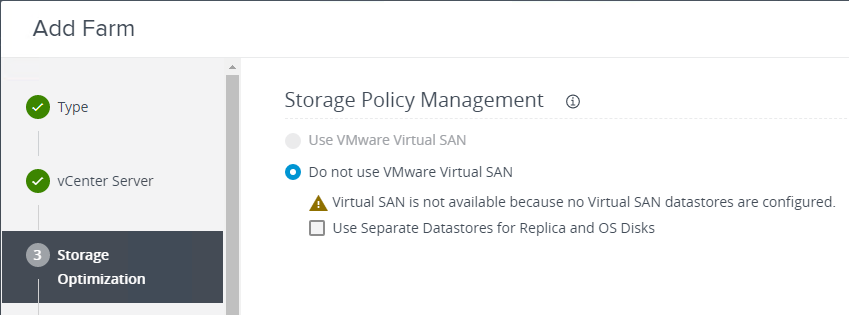
- In the Storage Optimization page, click Next.
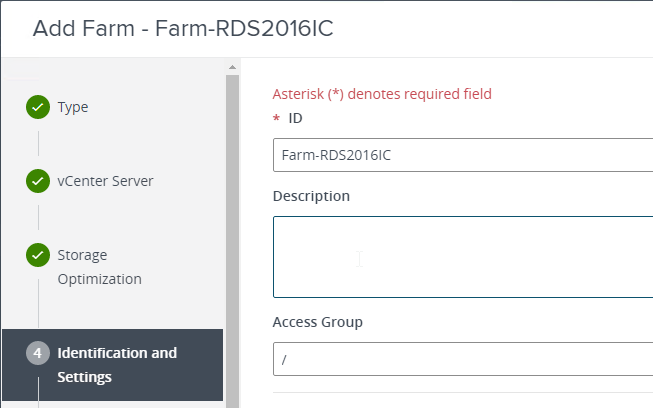
- In the Identification and Settings page:
- Enter a name for the Farm. A VM folder with the same name will be created in vCenter.
- Note: There’s no place to set the Display Name here. You do that later when creating a Desktop Pool.
- Scroll down to the Farm Settings section.
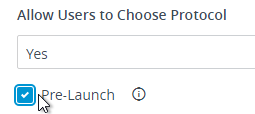
- Horizon supports Pre-launch. If pre-launch is enabled on a published app, when the user logs into Horizon Client, an empty RDS Session is immediately established. When the user double clicks an icon, the program launches quickly since there’s already a pre-launched session. When the user closes Horizon Client, the pre-launch session is disconnected for the duration specified here. The minimum duration is 10 minutes.
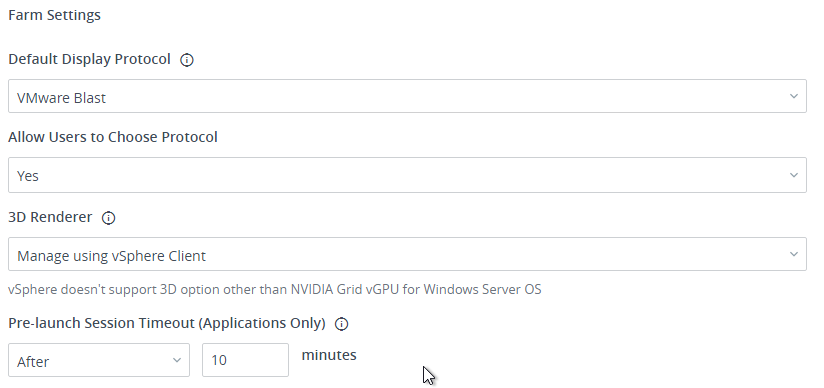
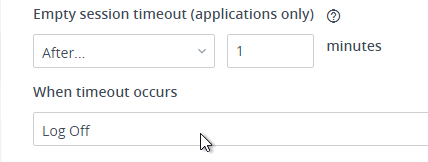
- For Empty session timeout, set it to 1 minute. For When timeout occurs, set it to Log off. You usually want the session to end when users close all of their applications.
- For Log off disconnected sessions, specify a disconnect timer. This is in addition to the idle timer configured in Global Settings.

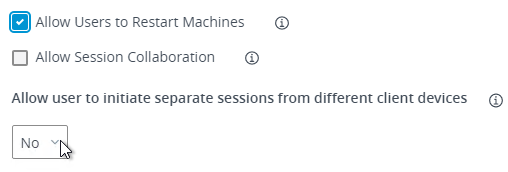
- There’s a Allow Session Collaboration checkbox, which adds a VMware Horizon Collaboration icon in the system tray of the remote desktop, which lets you invite users to collaborate. See Session Collaboration for details.

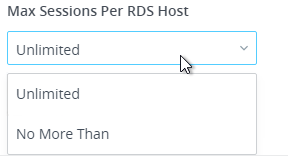
- Max sessions per RDS Host will block connections if this number is exceeded. You can leave it set to Unlimited.
- Click Next.
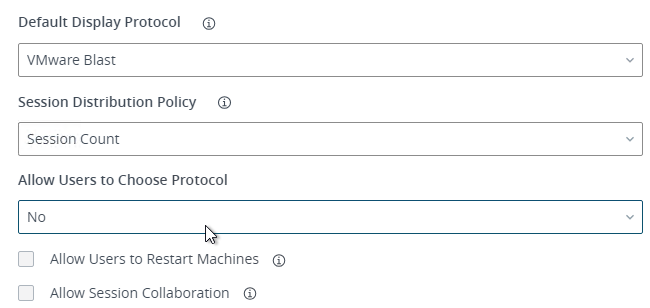
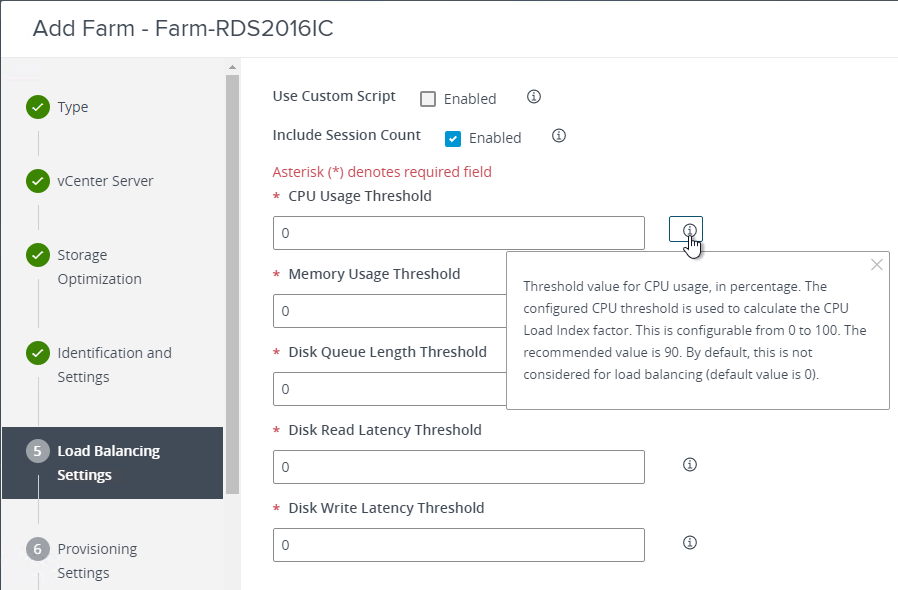
- The Load Balancing Settings page lets you configure what metrics are used for even distribution of users across the farm. By default, only Session Count is considered. You can add other metrics like CPU or Memory. Click Next.
- In the Provisioning Settings page:
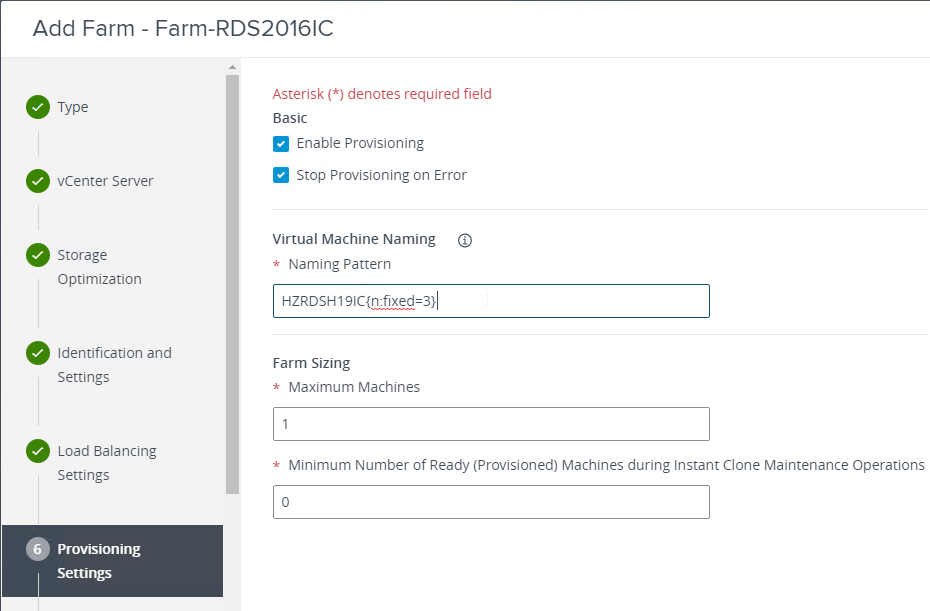
- Enter a Naming Pattern. Make sure the name includes {n:fixed=3} or something like that. Computer names must be 15 characters or less.
- In Farm Sizing, enter the number of machines to create.
- Click Next.
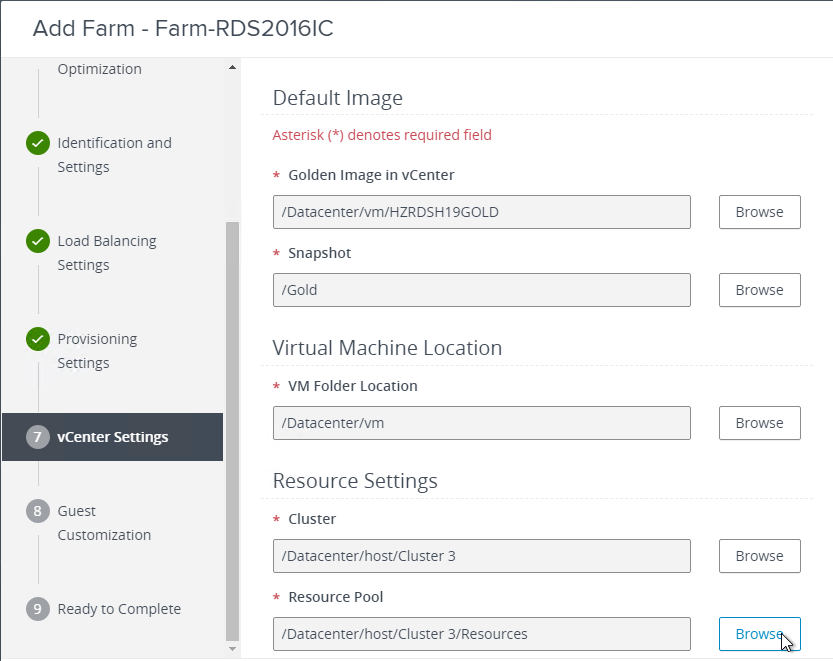
- In the vCenter Settings page, click Browse next to each option and make a selection. These are self-explanatory. Make sure VM Folder Location doesn’t have any spaces in it. Scroll down to see all options. Then click Next.
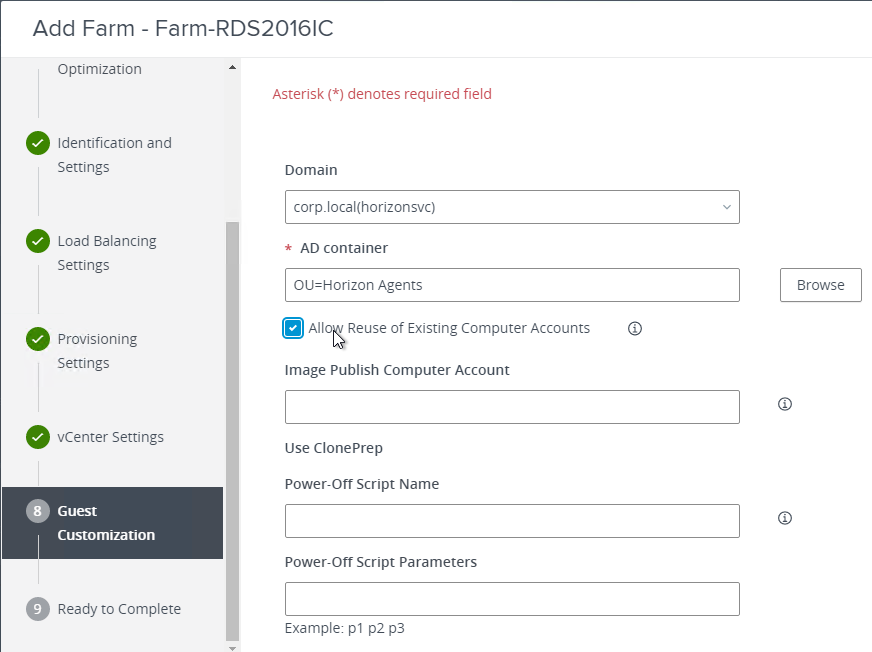
- In the Guest Customization page:
- Select an OU to place the new virtual machines. This should be an OU that is configured with group polices for the RDSH machines.
- Consider the Allow reuse of pre-existing computer accounts check box.
- Click Next.
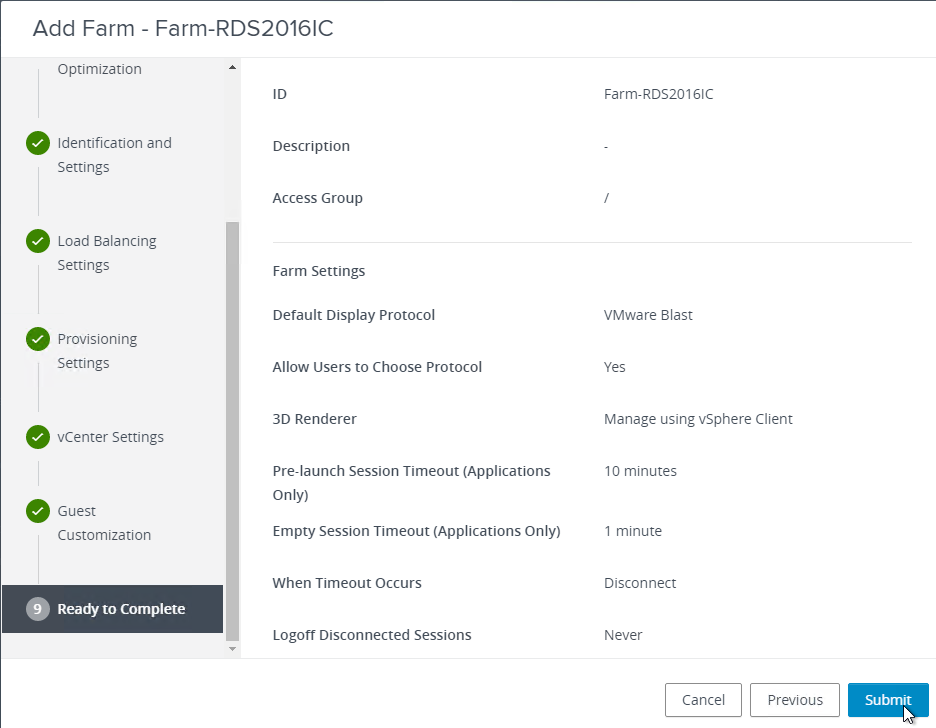
- In the Ready to Complete page, click Submit.
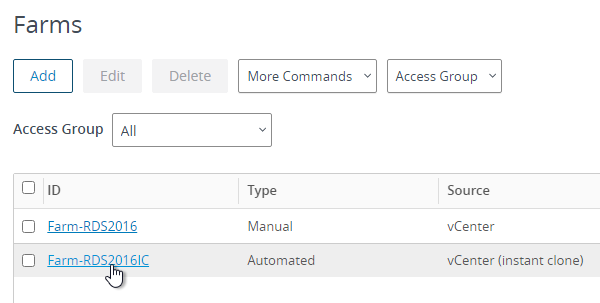
To view the status of RDS Farm creation:
- Click the farm name.
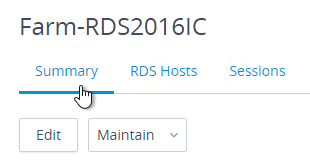
- The bottom of the Summary tab shows you the State of the Publishing progress.

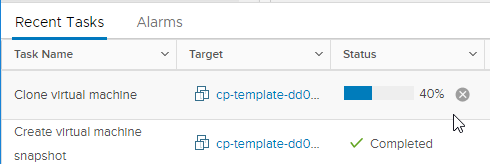
- You can watch the progress in vSphere Client. It goes through a couple longer tasks, including cloning the snapshot, and creating a digest file.
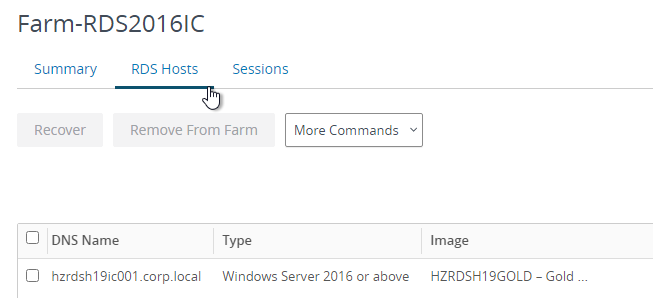
- Eventually the tab named RDS Hosts will show the new virtual machines.
- Once the RDS Hosts are created, you publish resources from them by either creating a Desktop Pool, or an Application Pool, or both.
Add more RDS Hosts to an Automatic Farm
To add RDS hosts to an existing RDS Automatic Farm.
- On the left, expand Inventory, and click Farms.
- Click the link for an automated farm.
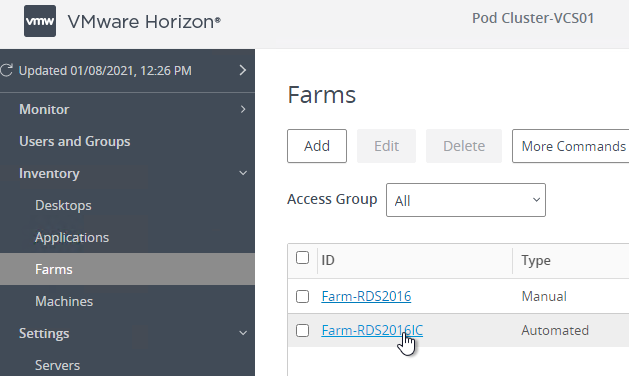
- On the right, click Edit.
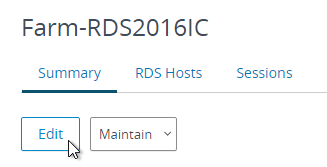
- Switch to the Provisioning Settings tab and change the Max number of machines. Then click OK.
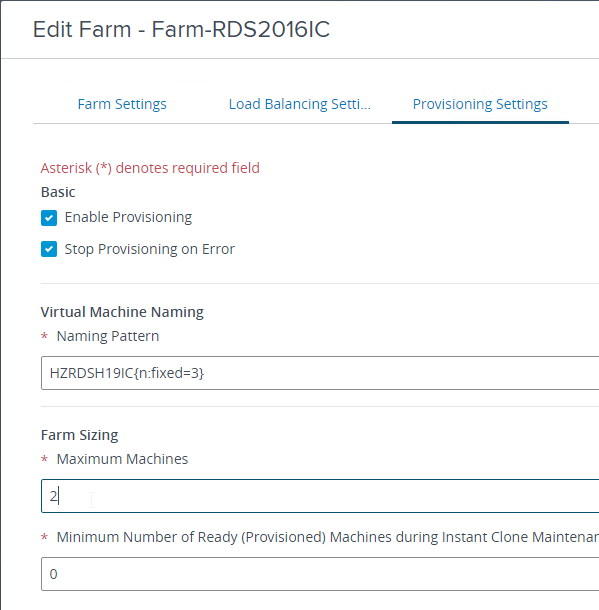
- It should not take long to add the new VM.
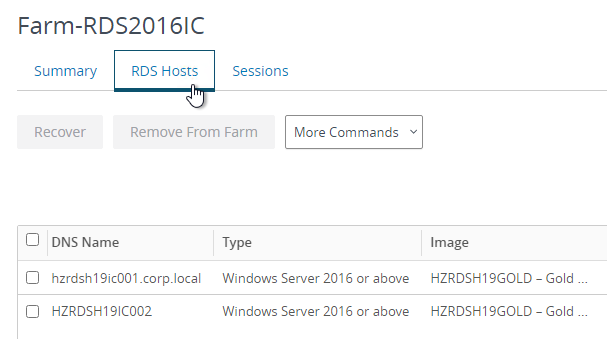
- The RDS Hosts tab of the RDS farm shows the new RDS host(s).
Update an Automatic Farm
Master Image Preparation
- Power on the master session host.
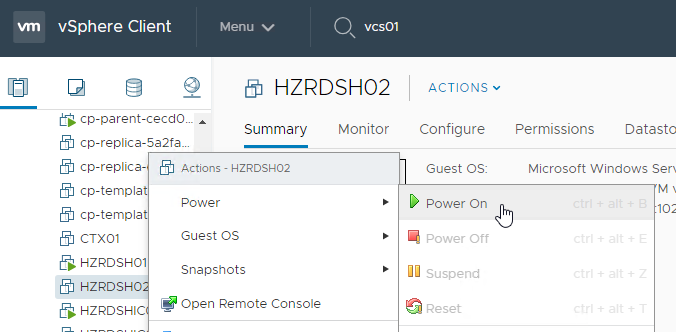
- Login and make changes.
- After making your changes, shut down the master session host.

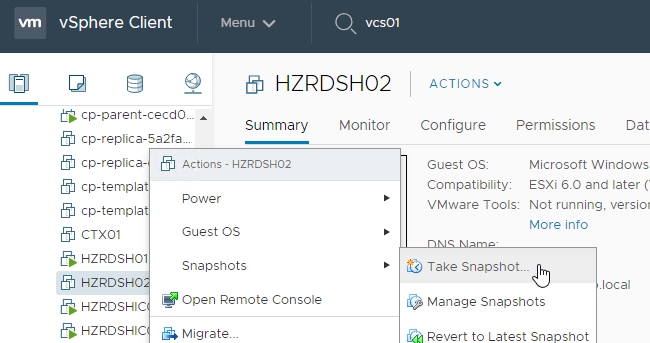
- Right-click the virtual machine, and take snapshot. You must create a new snapshot.
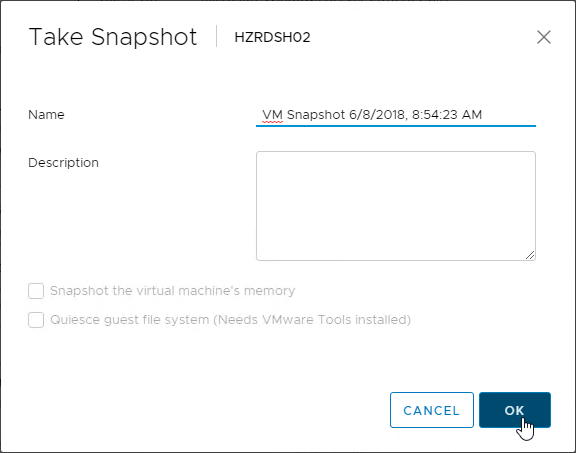
- Name the snapshot, and click OK.
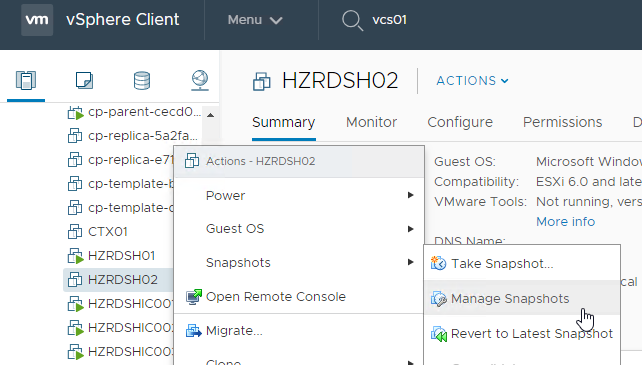
- You’ll need to periodically delete the older snapshots. Right-click the master VM, and click Manage Snapshots.
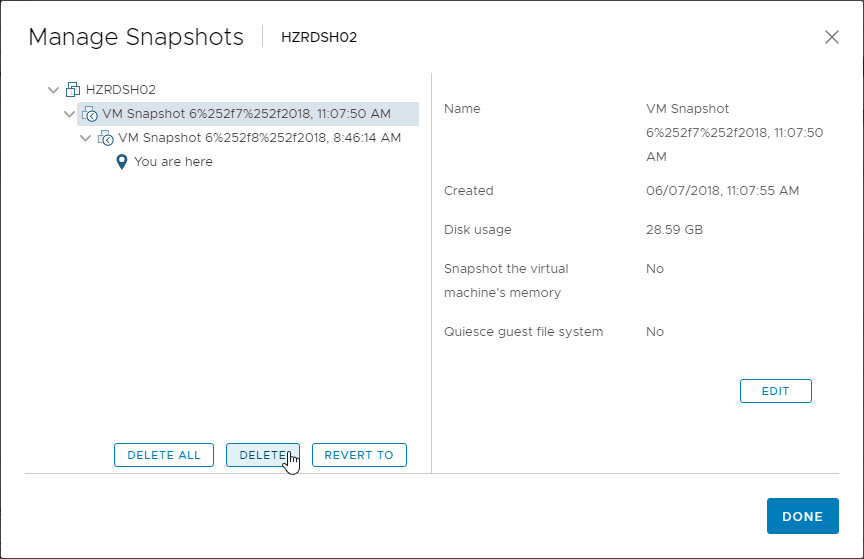
- Delete one or more of the snapshots.
- In Horizon Console, go to Inventory > Farms.
- Click the farm name’s link.
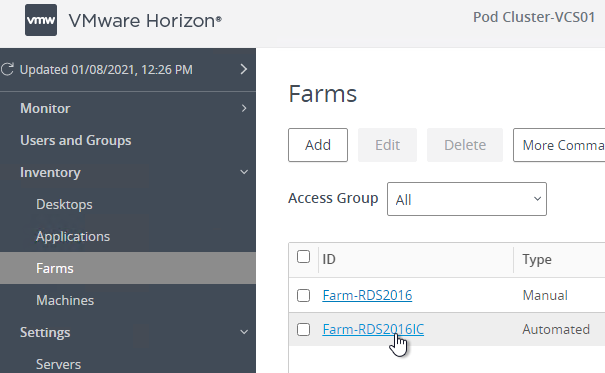
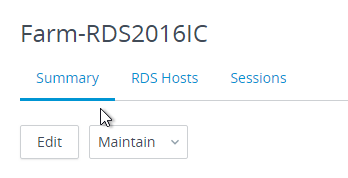
- On the Summary tab, click Maintain, and then click Schedule.
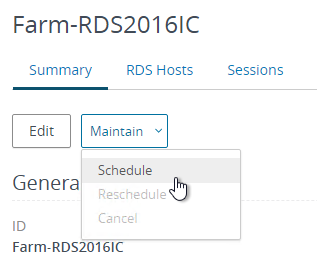
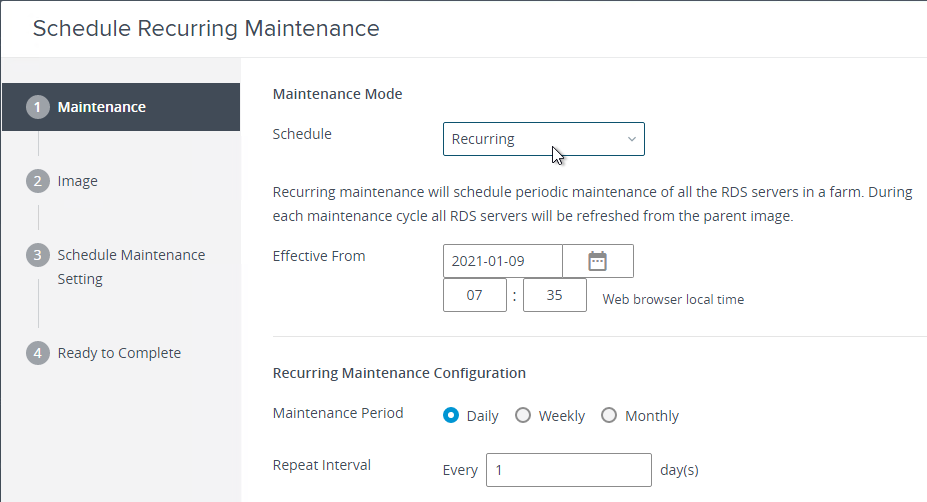
- One option is to schedule Recurring reboots, which revert the RDS Hosts to a clean state.
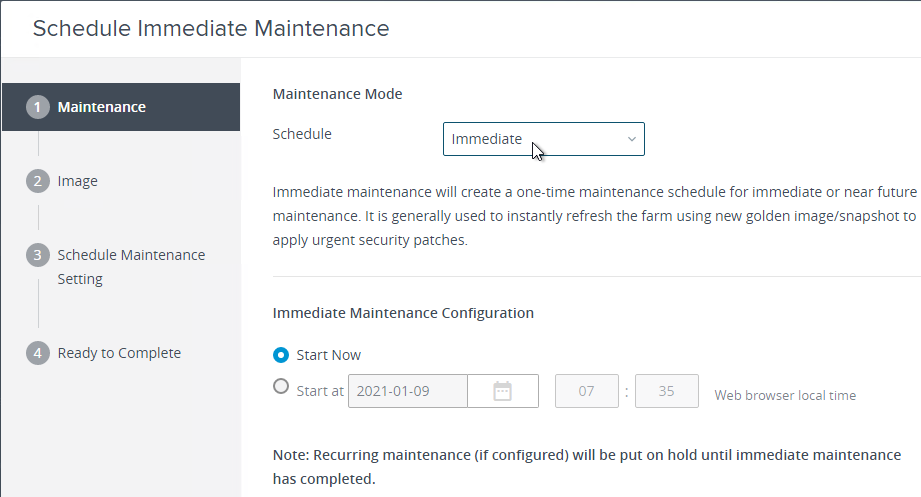
- To push out an updated Master Image, change the Schedule to Immediate.
- Select Start Now, or select Start at a future date/time. Click Next.
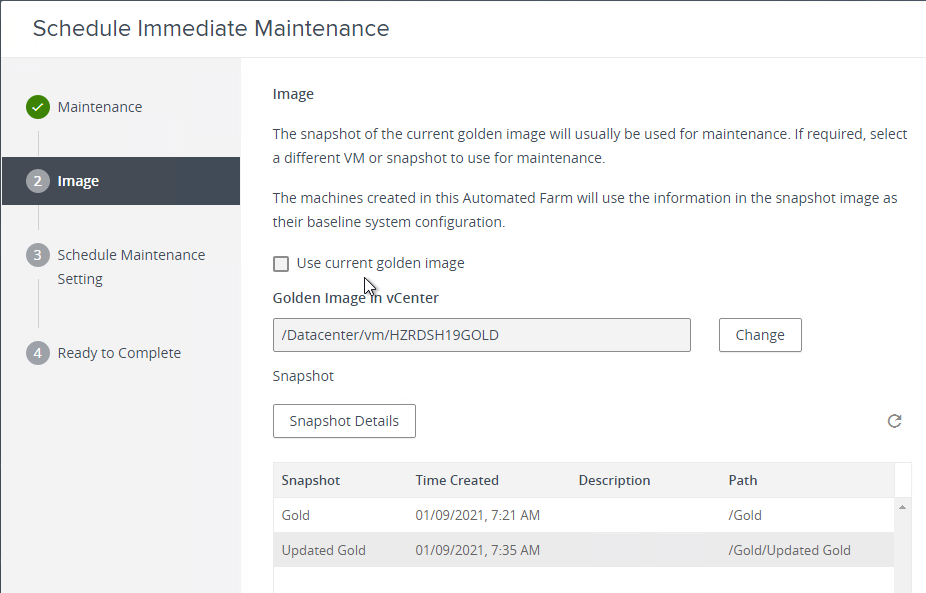
- In the Image page, uncheck the box next to Use current golden image, select the new snapshot, and click Next.
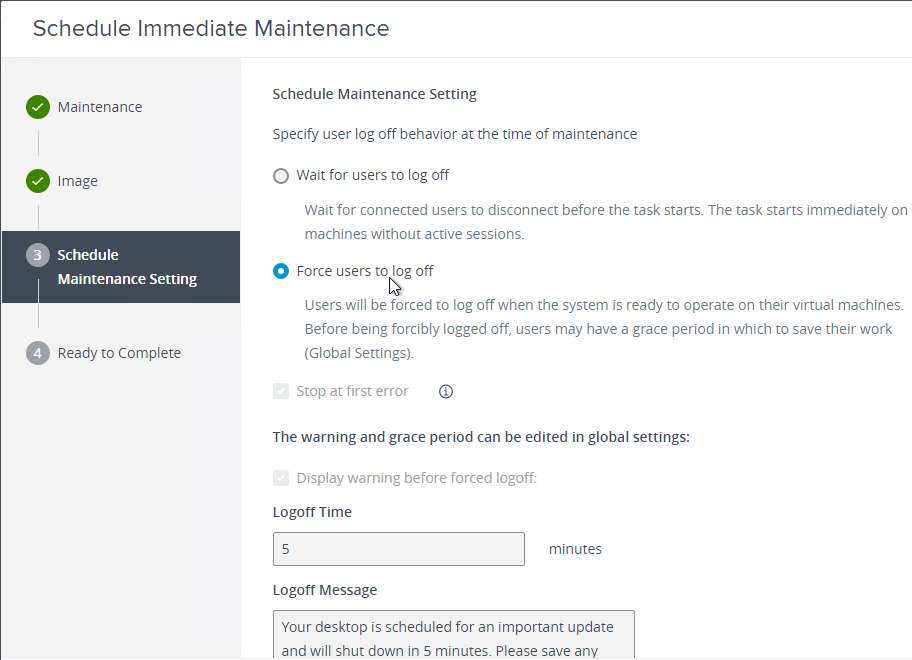
- In the Scheduling page, decide if the reboot should wait for users to logoff or force them off and then click Next.
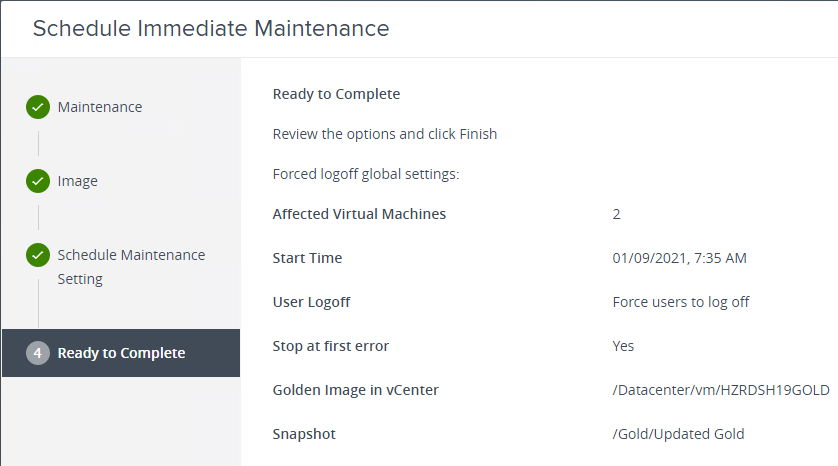
- In the Ready to Complete page, click Finish.
- The RDS Farm’s Summary tab (scroll down) shows you that it’s publishing the new image.

- After the image is published, on the RDS Hosts tab, you can check on the status of the maintenance task.
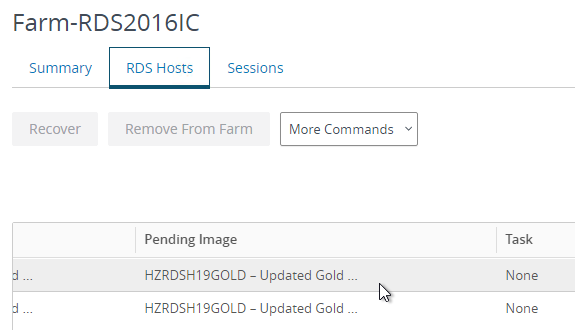
Instant Clones Maintenance
To perform Instant Clone Maintenance:
- If you click an Instant Clones RDS Farm name…
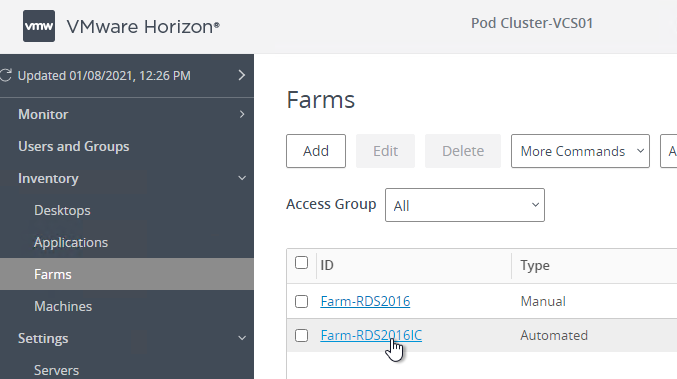
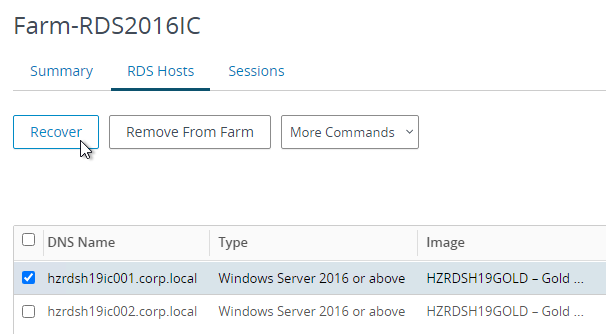
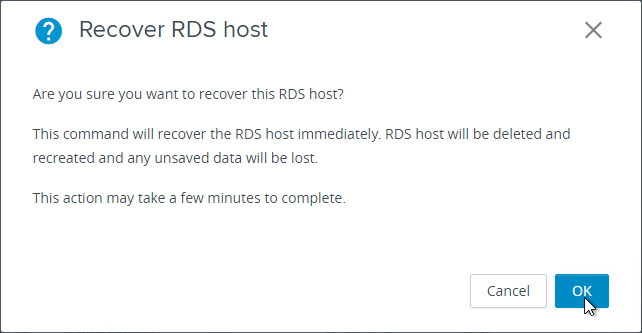
- And switch to the RDS Hosts tab, you can select a machine, and then click Recover, this causes the VM to be deleted and recreated, thus reverting to the master image snapshot.
- On the Summary tab of the RDS Farm, you can click Maintain > Schedule to schedule a reboot of every VM in the RDS Farm. Rebooting causes the VMs to revert to the master image snapshot.
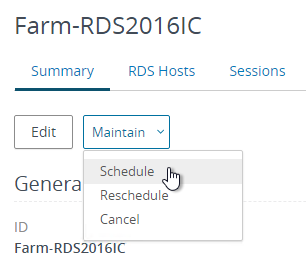
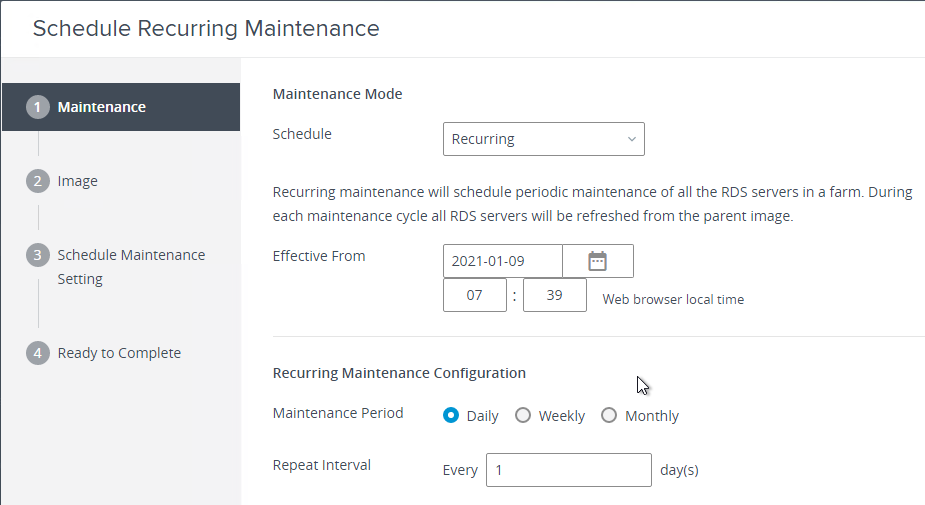
- Specify how often you want the reboot to occur, and then click Next.
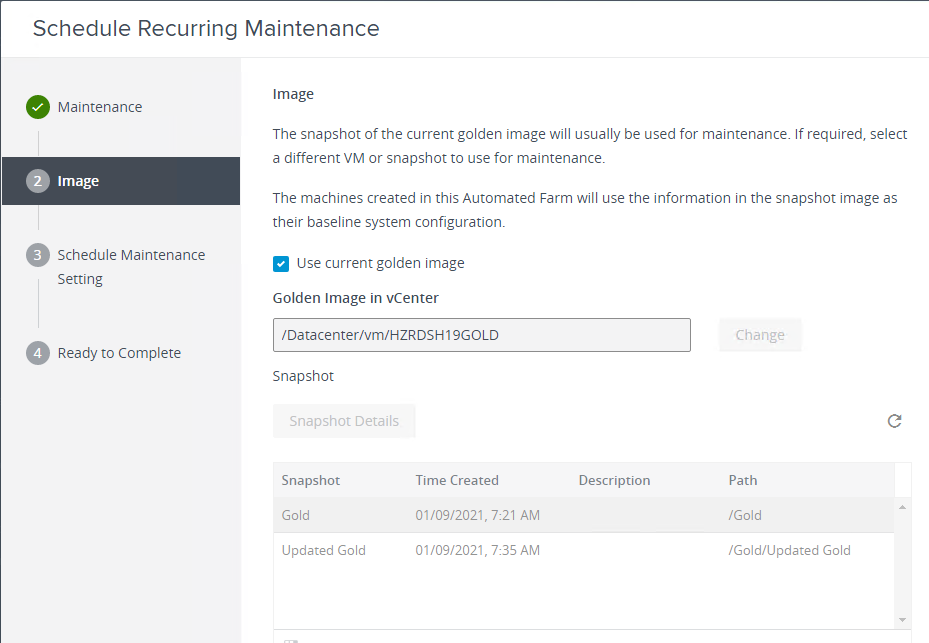
- In the Image page, you don’t have to change the snapshot. Click Next.
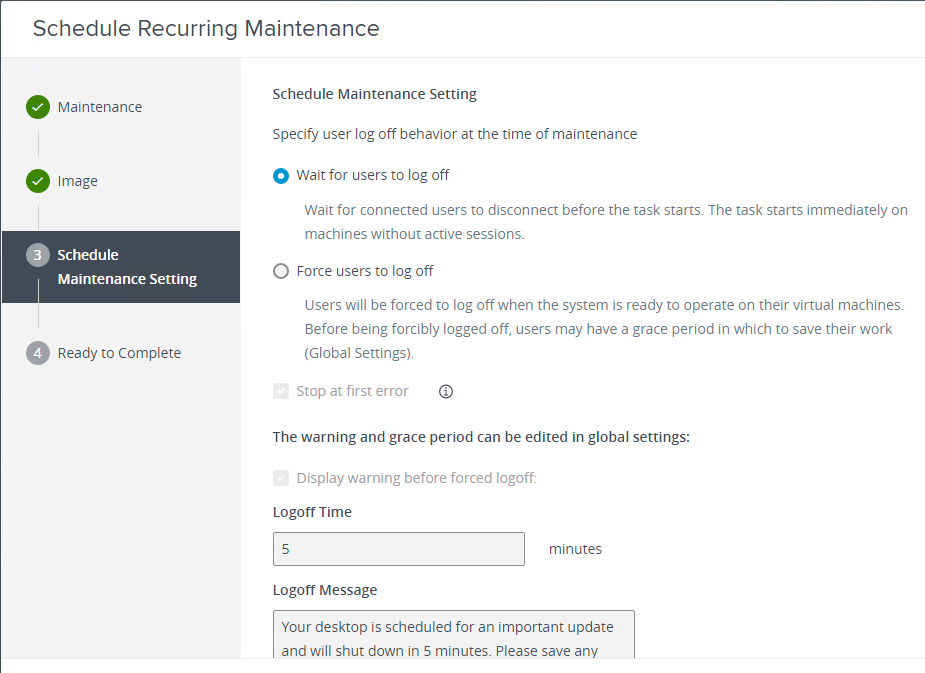
- Decide what to do about logged on users, and click Next.
- In the Ready to Complete page, click Finish.
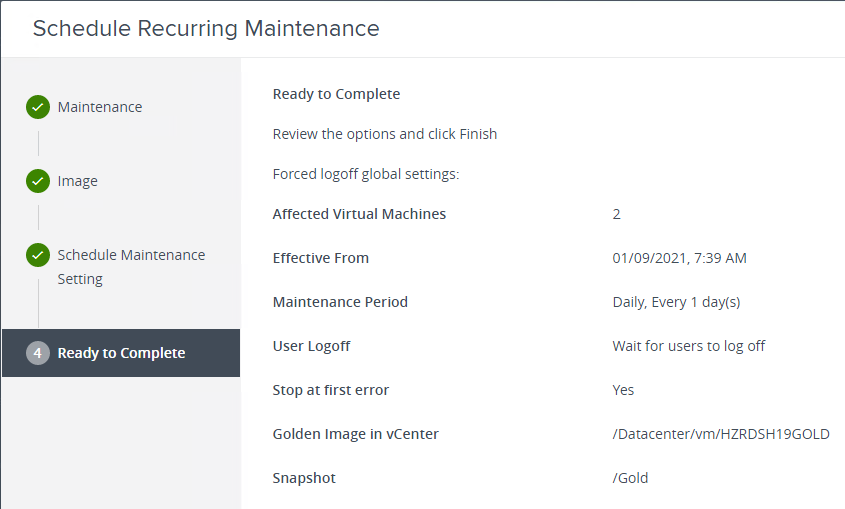
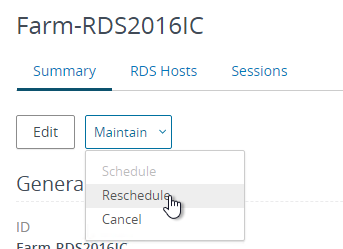
- If you click the Maintain menu again, you can click Reschedule to change when the reboots are scheduled. Or click Cancel.
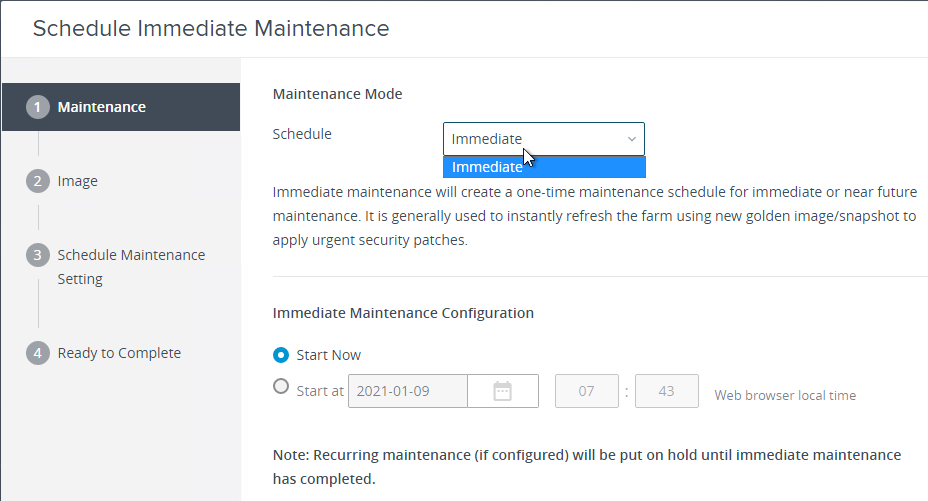
- If you click Schedule again, you can only schedule a one-time update, typically to replace the master image snapshot used by the RDS Farm.
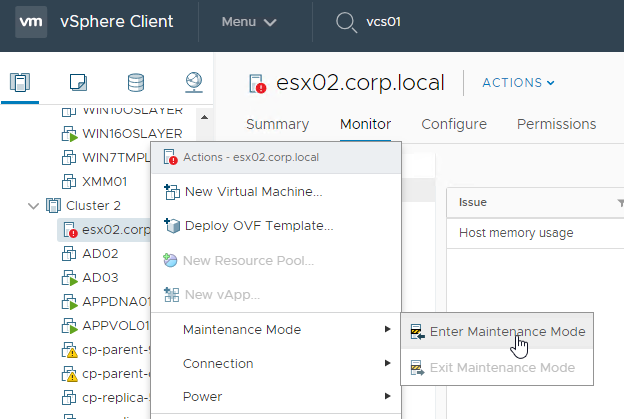
- ESXi hosts running Instant Clones can be placed into maintenance mode without any special instructions.
RDS Farms – Manual
If you are building your RDSH Machines manually (e.g. cloned manually in vCenter; no Instant Clones), then add the manually created machines to a Manual Farm.
- All RDS machines added to a single Manual Farm should be identical because Horizon will load balance across the servers in the farm.
To create a manual RDS Farm:
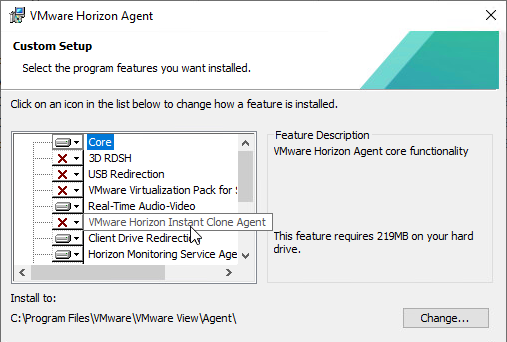
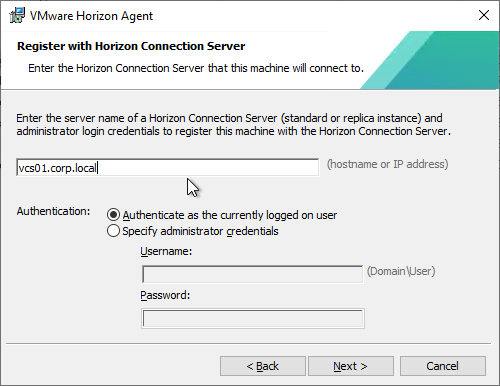
- Make sure the Instant Clone Agent is not installed on your manual RDS servers, and make sure you saw the screen to register the Agent with a Horizon Connection Server.
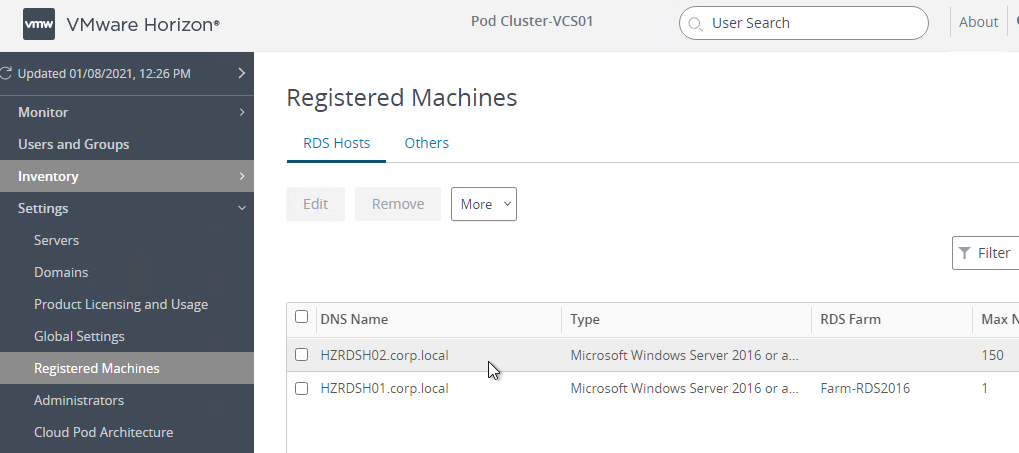
- Verify registration at Settings > Registered Machines.
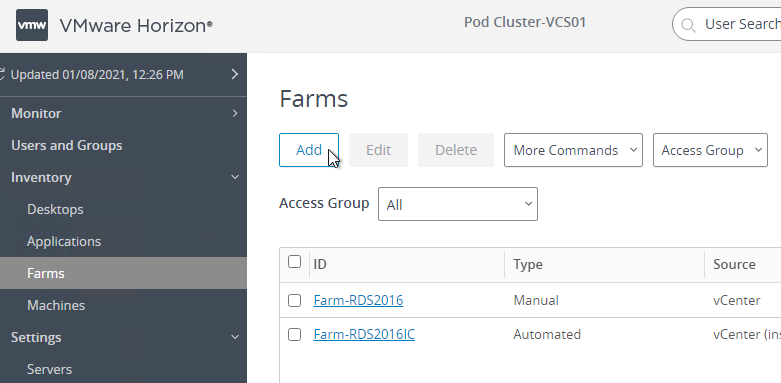
- On the left, expand Inventory, and click Farms.
- On the right, click Add.
- In the Type page, select Manual Farm, and click Next.
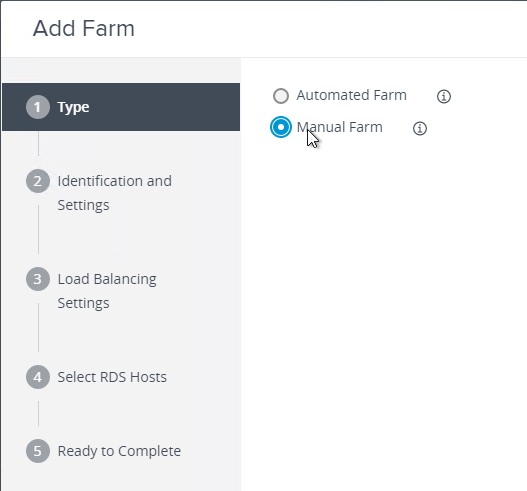
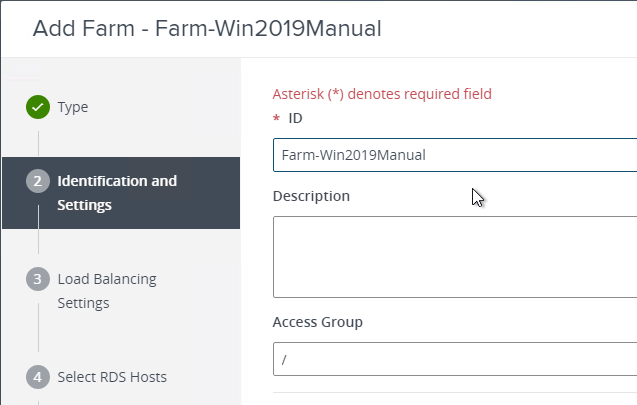
- In the Identification and Settings page, enter a name for the Farm. Scroll down.
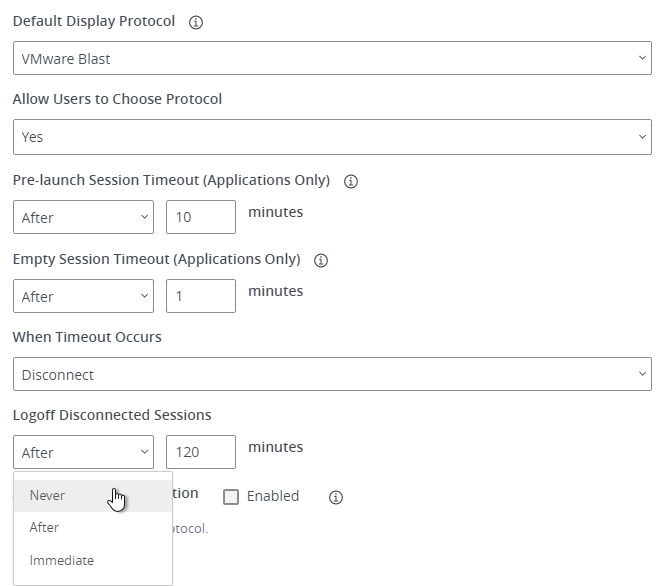
- Scroll down to the Farm Settings section.
- There is a pre-launch option. If pre-launch is enabled on a published app, when the user logs into Horizon Client, an empty RDS Session is immediately established. When the user double clicks an icon, the program launches quickly since there’s already a pre-launched session. When the user closes Horizon Client, the pre-launch session is disconnected for the duration specified here. The minimum duration is 10 minutes.
- For Empty session timeout, set it to 1 minute. For When timeout occurs, set it to Log off. You usually want the session to end when users close all of their applications.
- For Log off disconnect sessions, specify a disconnect timer. This is in addition to the idle timer configured in Configuration > Global Settings.
- There is an Allow Session Collaboration checkbox, which adds a VMware Horizon Collaboration icon in the system tray of the remote desktop, which lets you invite users to collaborate. See Session Collaboration for details.
- Click Next.
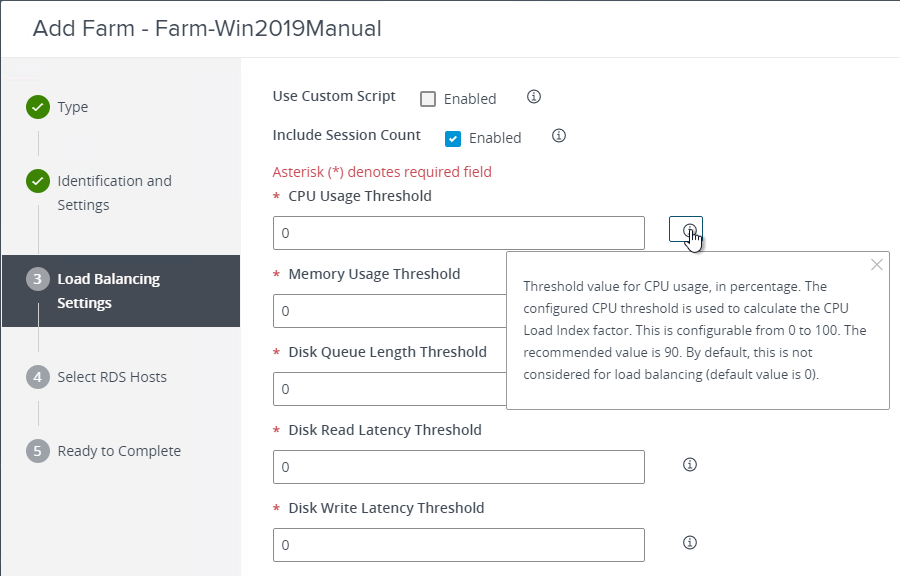
- The Load Balancing Settings page lets you configure what metrics are used for even distribution of users across the farm. By default, only Session Count is considered. You can add other metrics like CPU or Memory. Click Next.
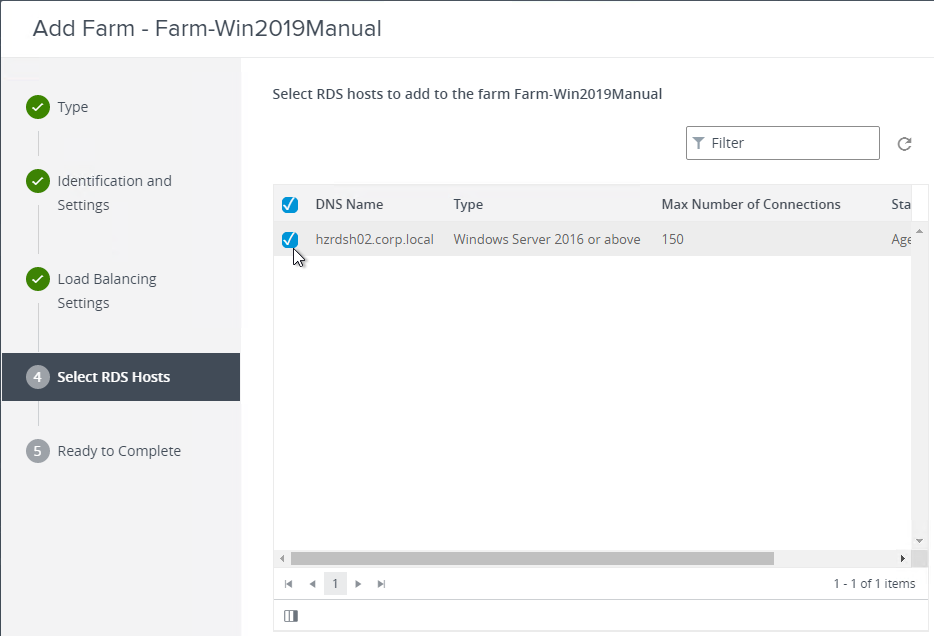
- In the Select RDS Hosts, select one or more identical Remote Desktop Session Hosts that are registered with Horizon Console. Click Next.
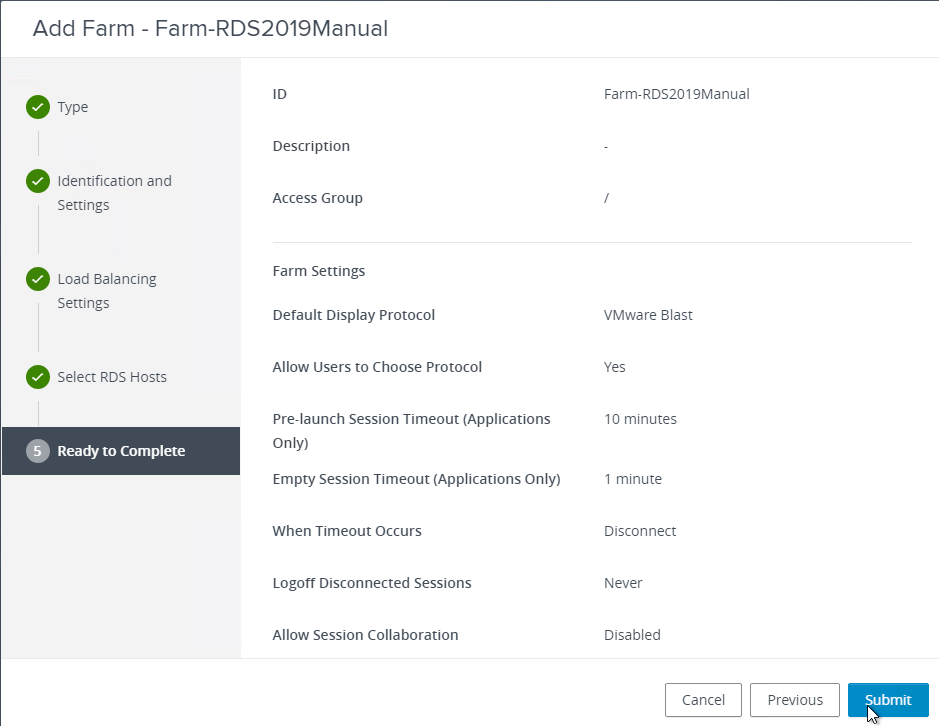
- In the Ready to Complete page, click Submit.
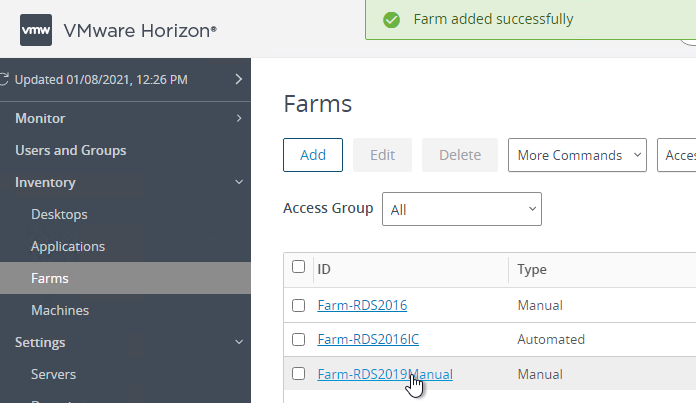
- If you click the farm name…
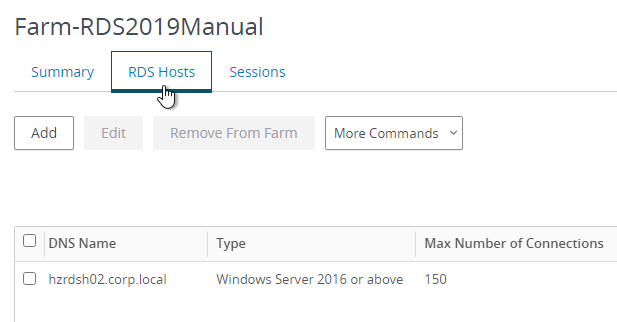
- On the RDS Hosts tab, you can click Add to add more registered RDS Hosts. Make sure every Host in the RDS Farm is identical.
Publish Desktop
To publish a desktop from a load balanced RDS Farm (Automatic Farm or Manual Farm):
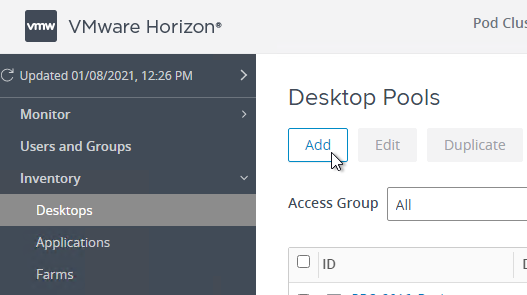
- In Horizon Console, on the left, expand Inventory, and click Desktops.
- On the right, click Add.
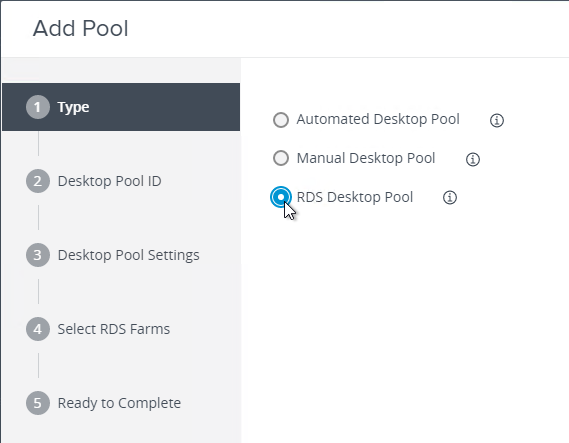
- In the Type page, select RDS Desktop Pool, and click Next.
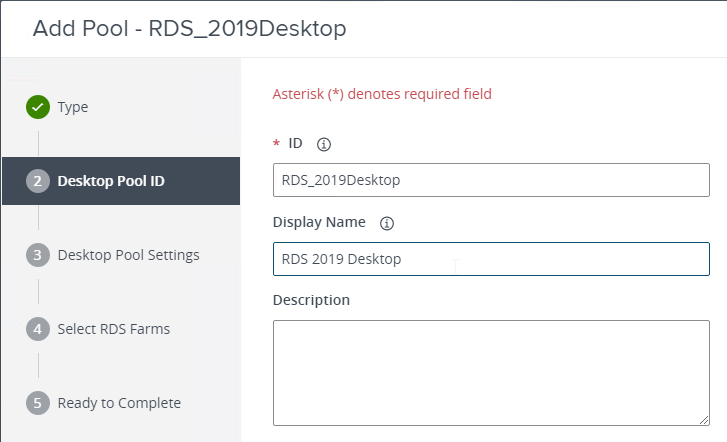
- In the Desktop Pool ID page, enter an ID and name. They can be different. The ID cannot contain spaces. Click Next.
- In the Desktop Pool Settings page:
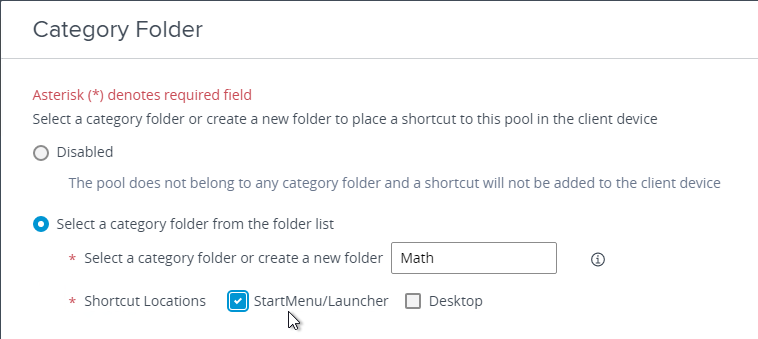
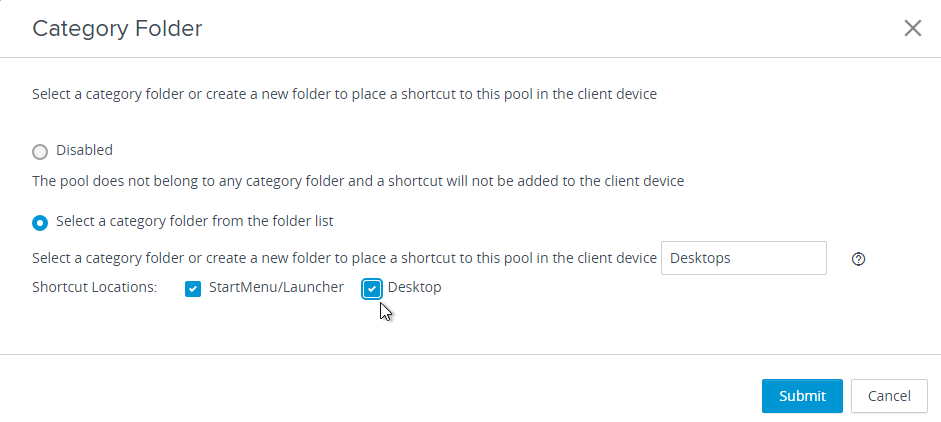
- You can select a Category Folder where the published icon will be placed on the client’s Start Menu.
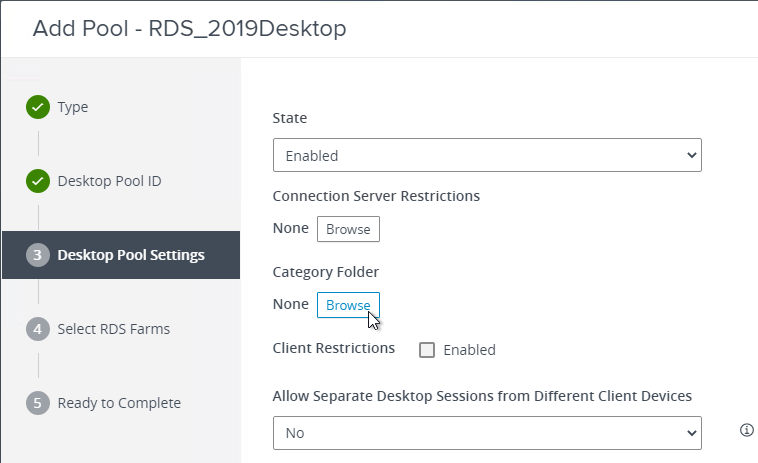
- You can type in a new category folder name or select an existing one. Also select Shortcut Locations.
- There is a checkbox named Client Restrictions. When this is enabled, you can add Client Computer Accounts to an AD Group and entitle the published desktop to that computer AD group. The published desktop can then only be accessed from the client computers in the AD group.
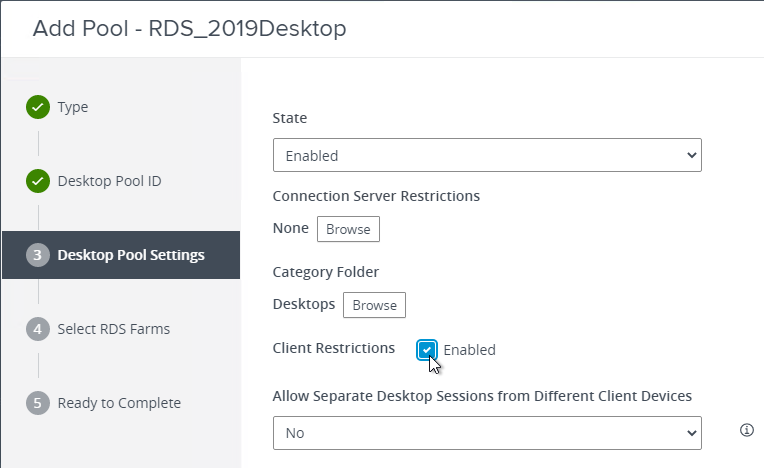
- Notes on Client Restrictions:
- Click Next.
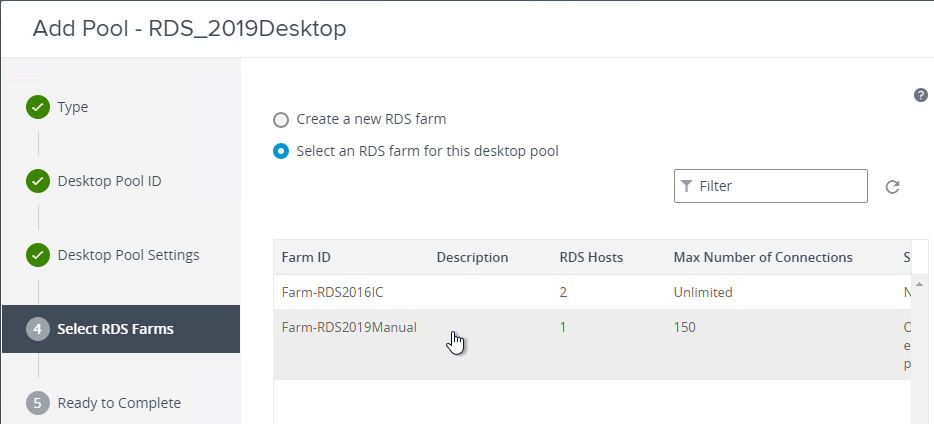
- In the Select an RDS farm page, select a farm, and click Next. The farm can be either Instant Clone or Manual.
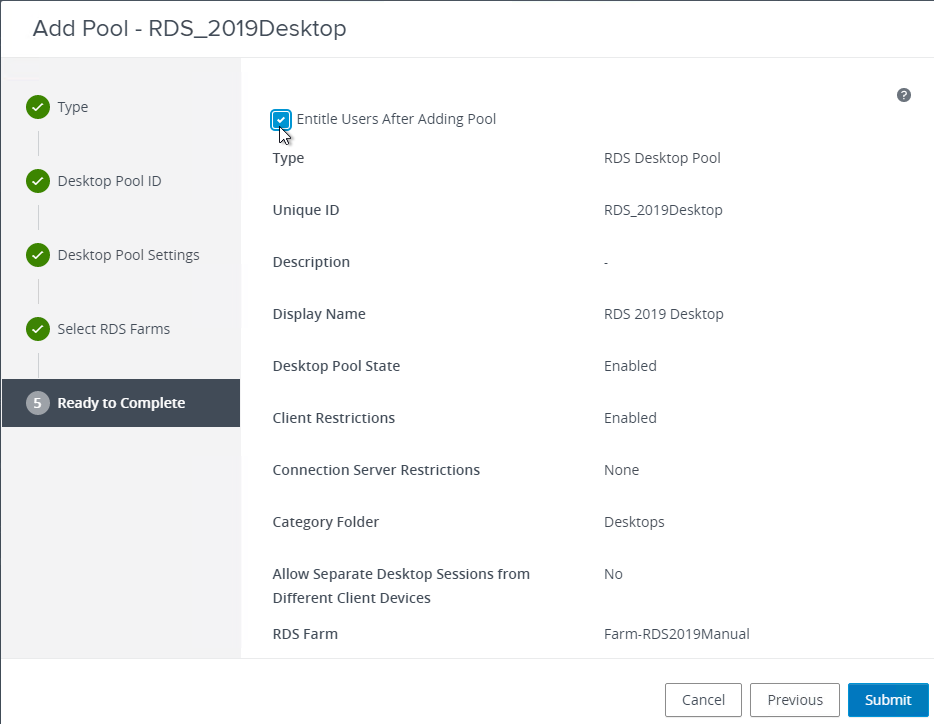
- In the Ready to Complete page, check the box next to Entitle users after this wizard finishes, and click Submit.
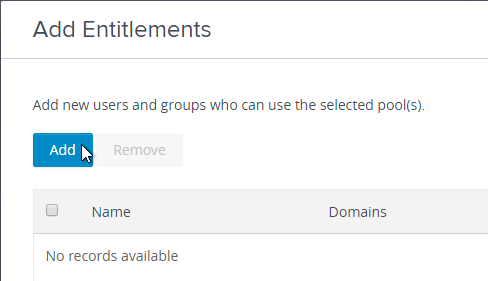
- In the Entitlements window, click Add.
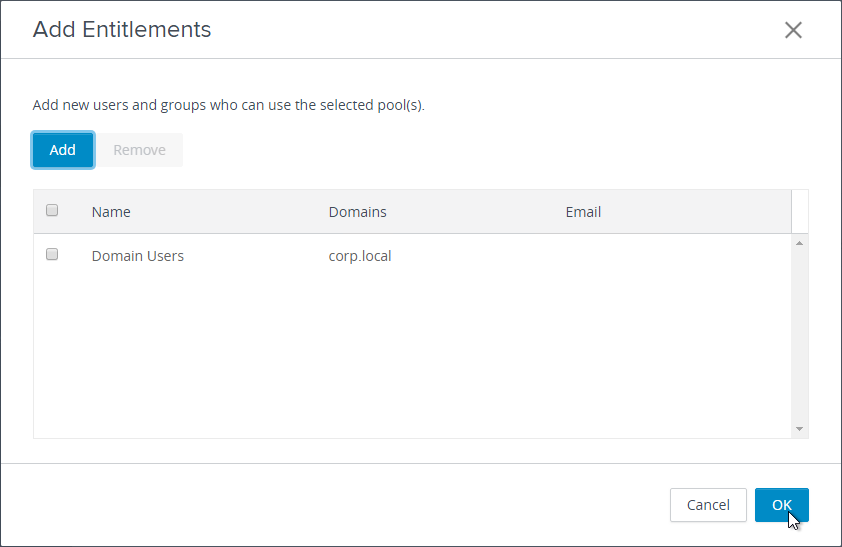
- Browse to an Active Directory group, and click OK.
- Then click Close.
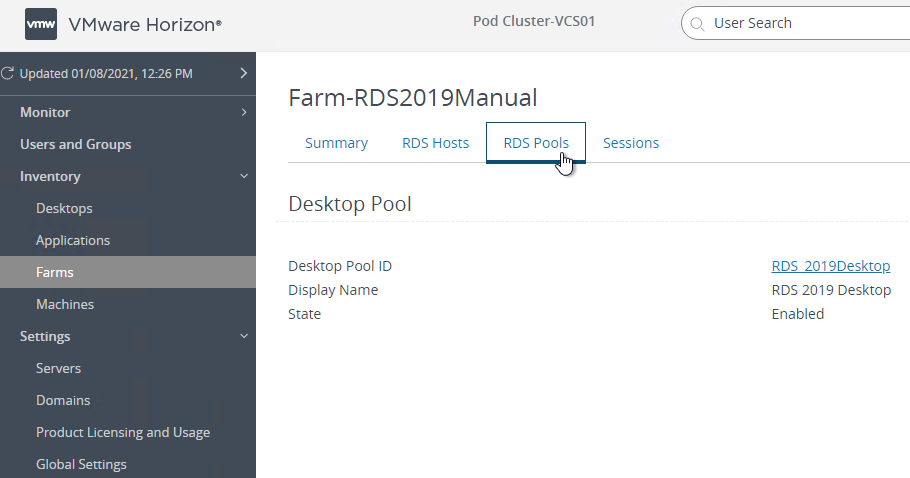
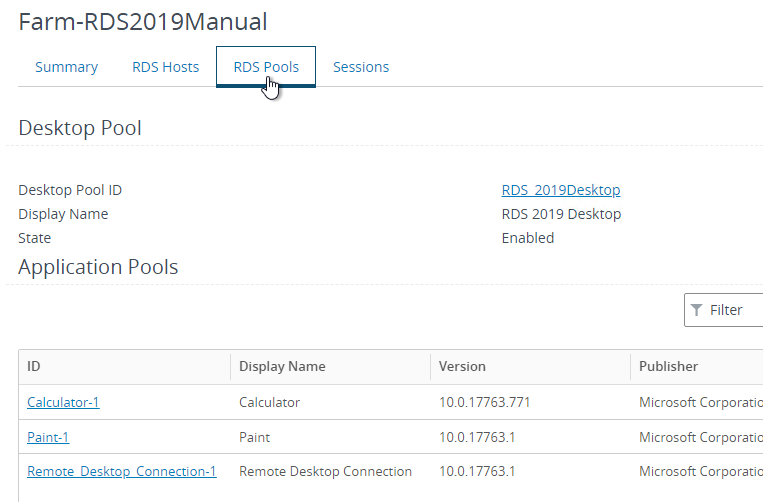
- If you go to Inventory > Farms, click your farm name, there will be a RDS Pools tab, where you can see which Desktop Pool is associated with this farm. An RDS Farm can only belong to one Desktop Pool.
Publish Applications
To publish apps from an RDS Farm (automatic farm or manual farm):
- In Horizon Console, on the left, expand Inventory, and click Applications.
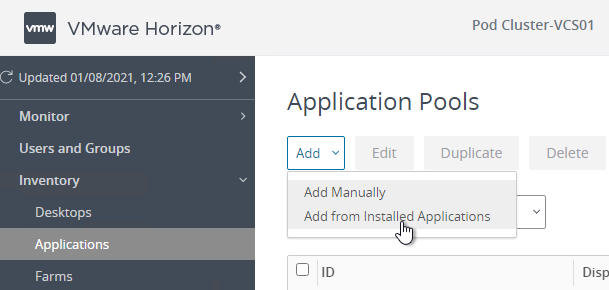
- On the right, click Add, and then click Add from Installed Applications.
- In the Select Applications page, select a RDS Farm.
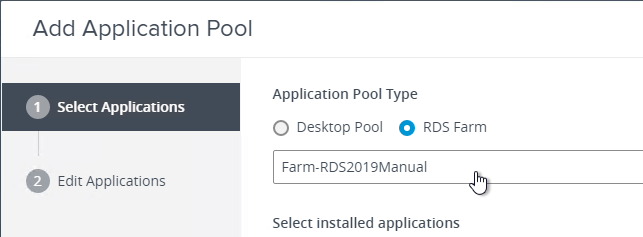
- The purpose of this wizard is to publish applications from an RDS Farm and then assign them to users (aka entitlement). The entitlements (aka user assignments) will apply to all of the applications you select on this page. If you want different entitlements for different applications, run this wizard multiple times and select different applications. Once the applications are published, you can change their entitlements individually.
- Select one or more applications. Notice that File Explorer is not one of the options. You can manually add that application later. Scroll down.
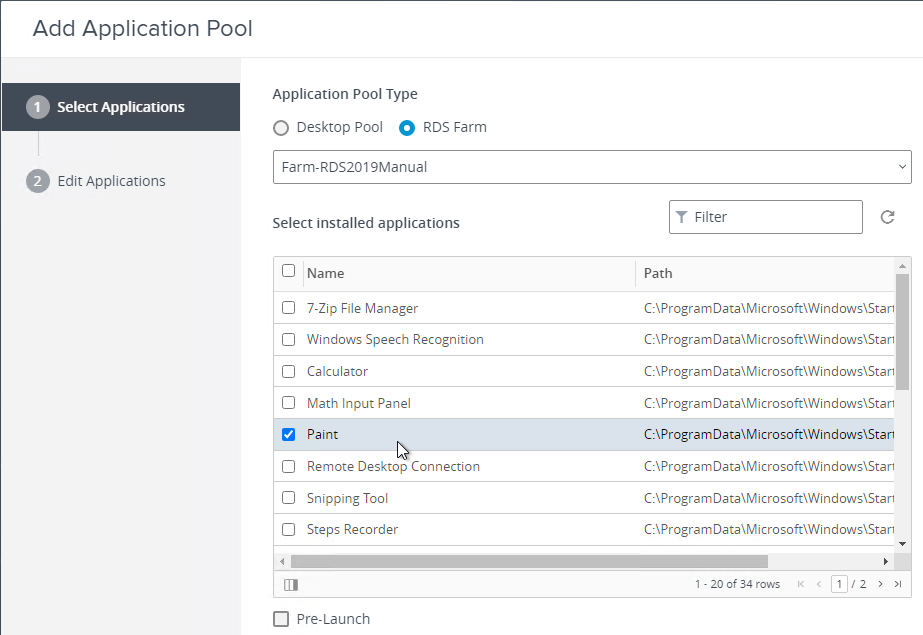
- There are additional options at the bottom of the Select Applications page. Notice the Entitle users box is checked by default.
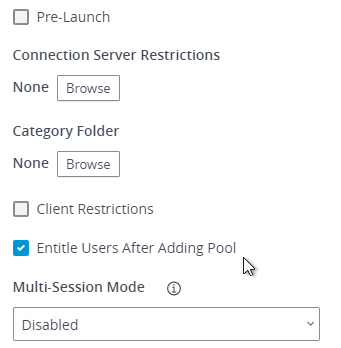
- There’s a Pre-launch option for published applications. You can optionally enable it on at least one application, and then entitle the pre-launch application to the users that need the Pre-launch feature.
- Horizon 2309 and newer let you restrict applications to a Single Application Launch Limit.

- You can assign tags for Connection Server restrictions, which lets you control visibility of icons for internal users vs external users.
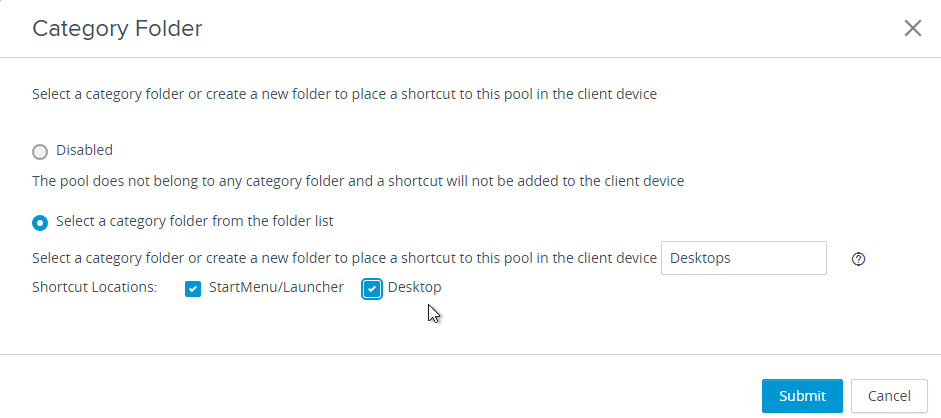
- You can select a Category Folder where the published icon will be placed on the client’s Start Menu and/or Desktop.
- There’s a checkbox named Client Restrictions. When this is enabled, you can add Client Computer Accounts to an AD Group and entitle the published application to that computer AD group. The published application can then only be accessed from the client computers in the AD group. Notes on Client Restriction:
- Click Next when done.
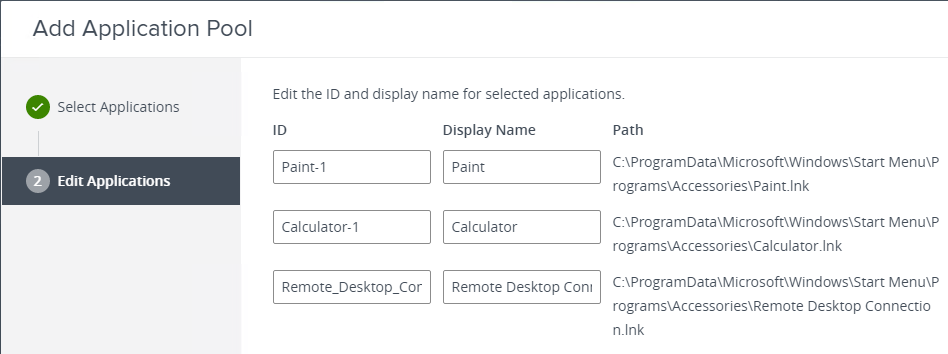
- The Edit Applications page lets you rename (Display name) the published icons. Click Submit when done.
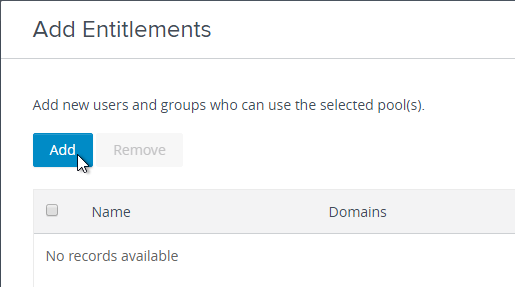
- Click Add to select a group that can see all of the applications that you selected. This is the normal entitlement process.
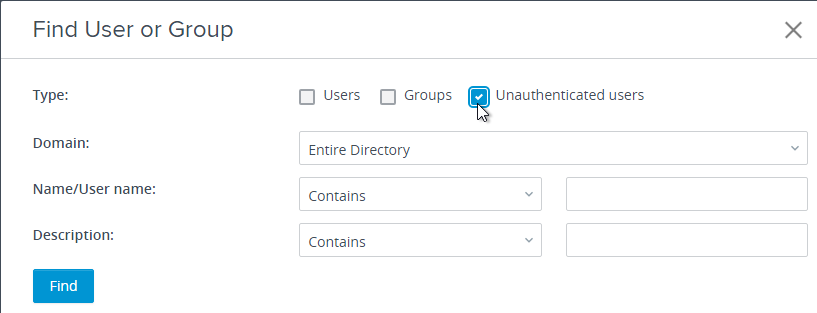
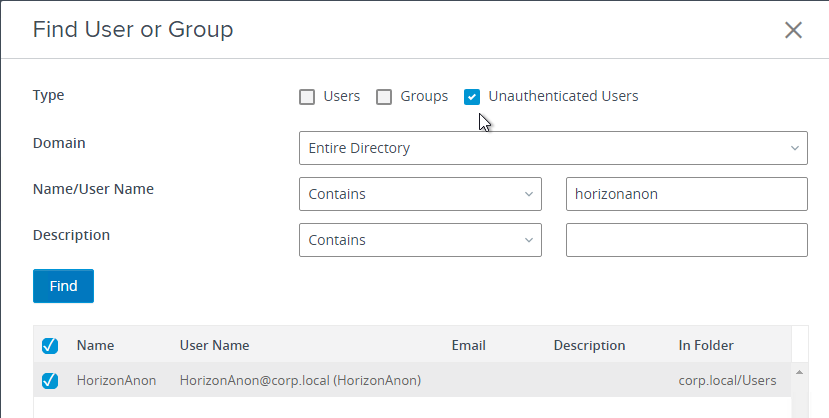
- There is an option for Unauthenticated users, which is detailed at Entitle Unauthenticated Access Users to Published Applications at Omnissa Docs.
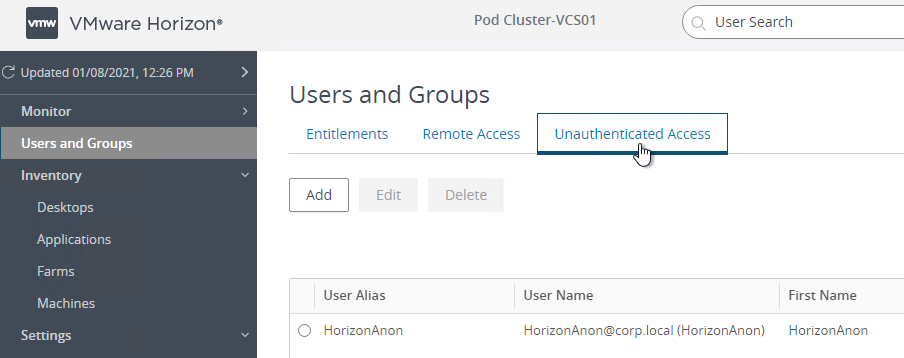
- Before you can configure Uauthenticated Access on published applications, you must add a Domain Account that will be used for anonymous access at Users and Groups > Unauthenticated Access.
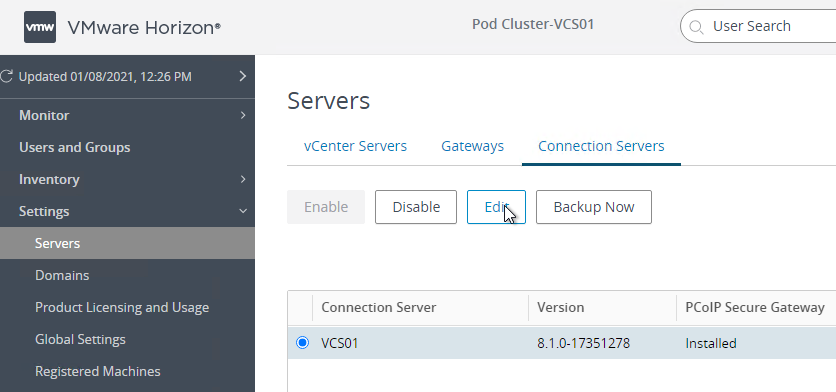
- Then go to Settings > Servers and Edit a Connection Server.
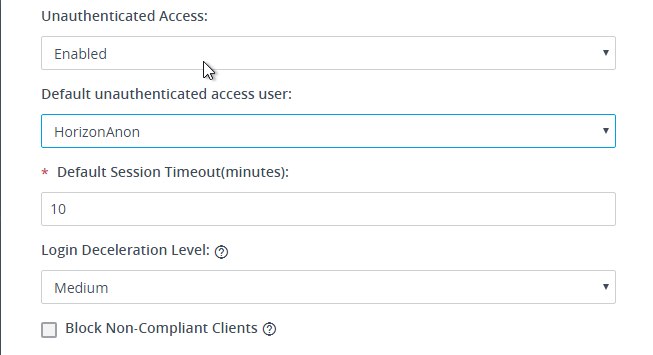
- On the Authentication tab…

- …enable Unauthenticated Access, and select the Default unauthenticated access user account.
- Back in your entitlement, you select Unauthenticated Users, and entitle it to the Domain User that is your anonymous account.
- You can run the Add Application Pool wizard again to publish more applications with different entitlements (aka user assignments).
- If you click the name one of the application pools…
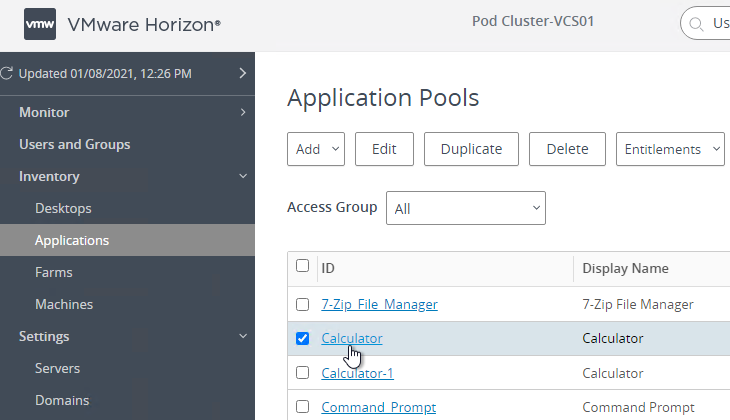
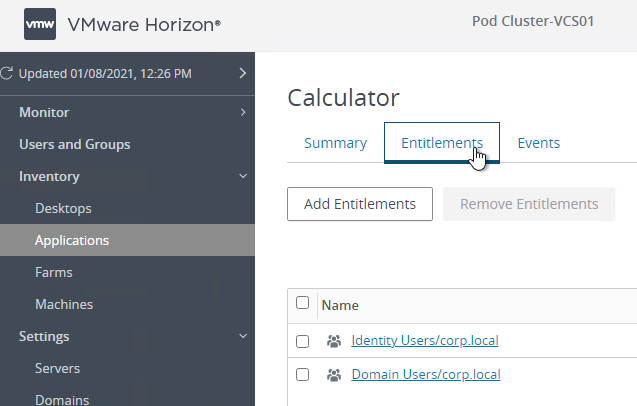
- …on the Entitlements tab, you can change the entitlements
Manual Application Publishing
Instead of publishing an existing application from the Start Menu, you can add an application manually:
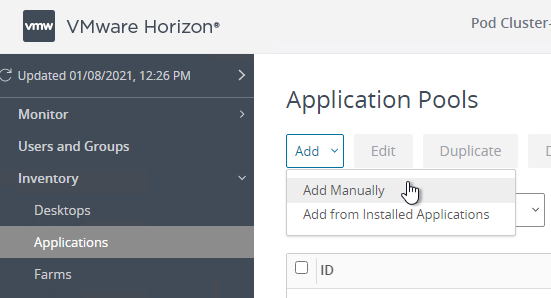
- Go to Inventory > Applications, click Add, and select Add Manually.
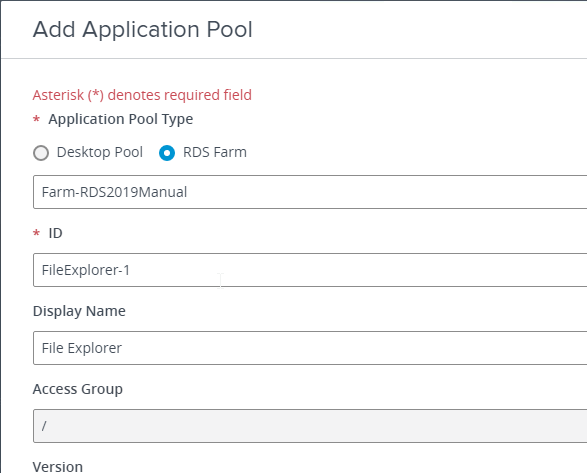
- File Explorer is an application that has to be added manually. Select an RDS Farm and then enter the path to the application.
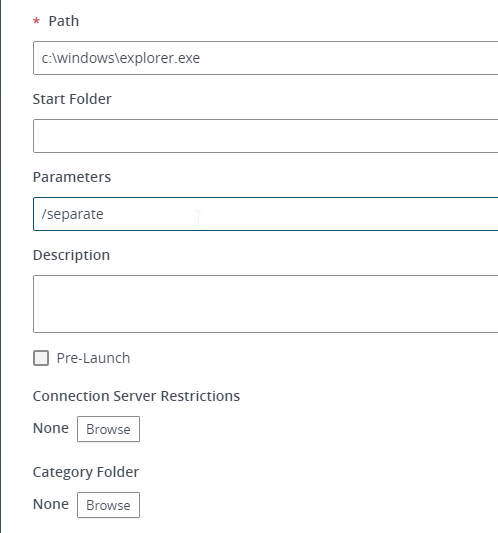
- When publishing Explorer, add the /separate switch. This prevents the full desktop from appearing when launching published Explorer through HTML Blast.
- There are more settings at the bottom of the page.
Icon for Published Application
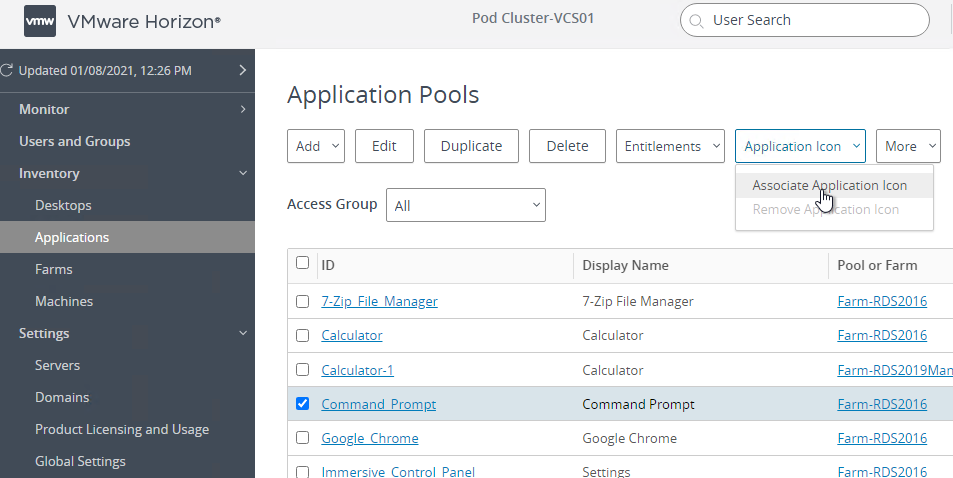
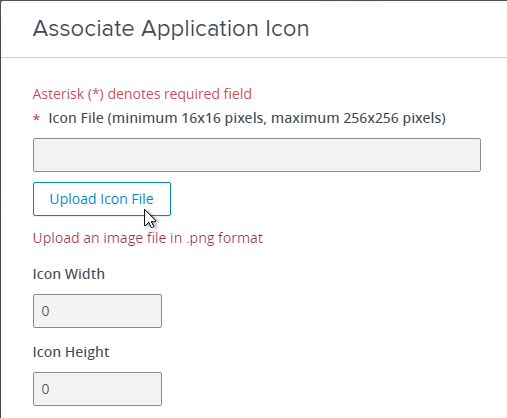
- You can select an Application Pool, then open the Application Icon menu and click Associate Application Icon.
Published App Monitoring
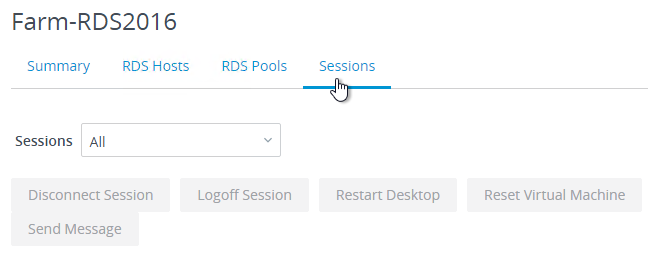
If you click a Farm name, you can view Sessions connected to that Farm and the published application each user is running. Monitor > Sessions does not show published application information, but RDS Farm > Sessions does.
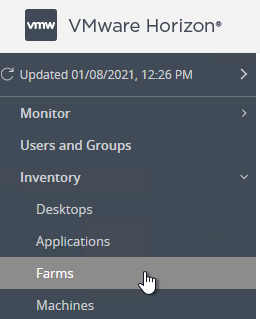
- In Horizon Console, on the left, expand Inventory and click Farms.
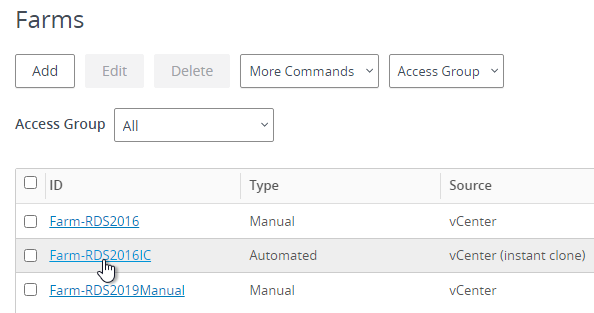
- On the the right, click the link for one of the farms.
- Switch to the tab named Sessions.
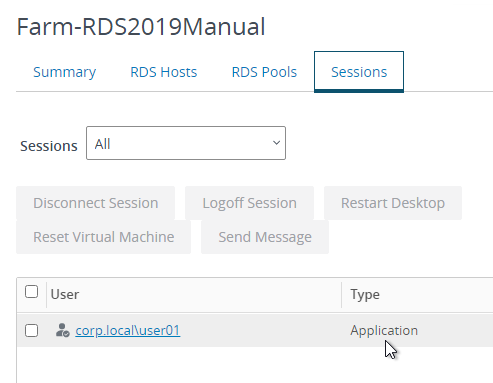
- As you scroll down the table you’ll see sessions with Type = Application.
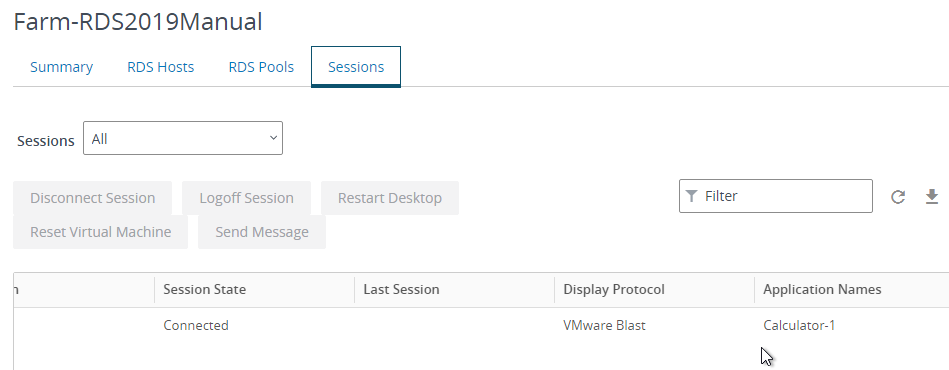
- If you scroll to the right, you’ll see the Application Name in the far-right column.
Show application pools associated with RDS Farm
- If you go to Inventory > Farms, click your farm name…
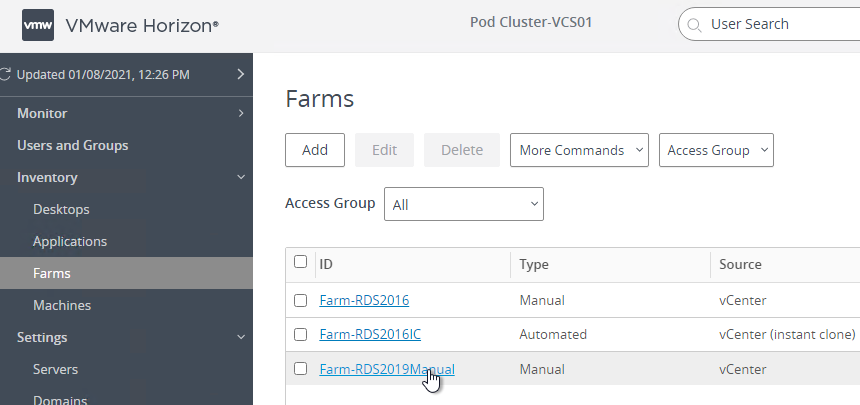
- …and switch to the RDS Pools tab, you can see which Application Pools (published applications) are associated with this farm. You can click the link for a pool to be taken to the pool’s property pages.
Disable Application
Horizon 2012 (8.1) and newer let you disable an application pool. Go to Inventory > Applications, select one or more applications, click the More menu, and click Disable Application Pool.
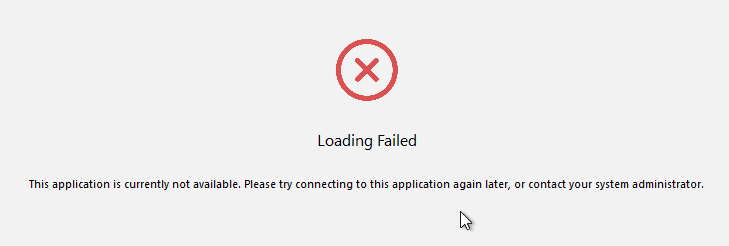
When the application is disabled, the application icon is removed from Horizon Client at next refresh. If the user tries to launch the icon before it has been removed, then the message is “This application is currently not available”.
Anti-affinity
You can configure Horizon to restrict the number of instances of an application running on a particular RDS host. Here are some limitations:
- If the user already has a session, then anti-affinity is ignored.
- If the application is launched from within an RDS Desktop, then anti-affinity is ignored.
- Not recommended for Horizon Mobile clients.
See Configure an Anti-Affinity Rule for an Application Pool in Horizon Console at Omnissa Docs.
Do the following to configure Anti-Affinity in Horizon Console:
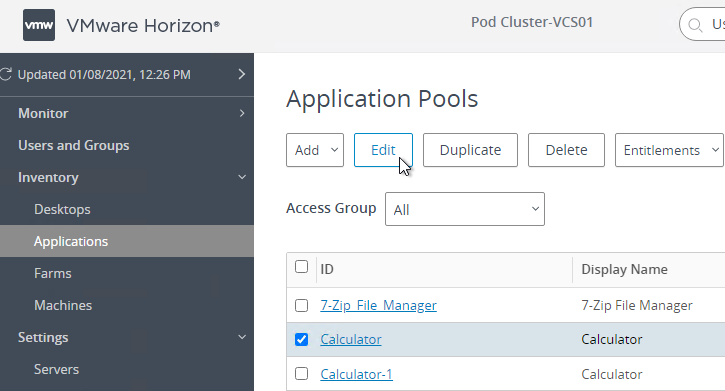
- On the left, go to Inventory > Applications.
- On the right, edit an existing application pool.
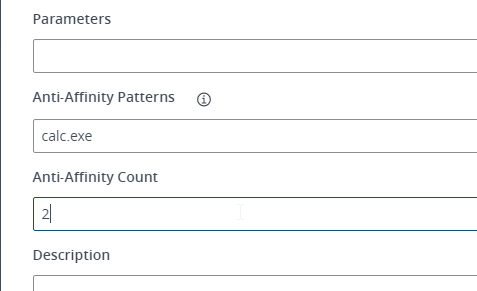
- Scroll down. In the Anti-Affinity Patterns field, enter process names to match. Wildcards are supported. Each match is counted.
- In the Anti-Affinity Count field, enter the maximum number of process name matches that can run on a single RDS Host.
Related Pages
