Navigation
This page assumes the Enterprise Layer Manager (ELM) has already been imported and configured. This page is based on VMware vSphere. For Hyper-V and PvS focused instructions, see Create and update the OS Layer by CTP George Spiers. For Azure, see How to configure Citrix Cloud – App Layering 4.x to deliver virtualized apps and Office 365 caching – User Layers for XenApp and XenDesktop Service Cloud Workspaces in Microsoft Azure by CTP Christiaan Brinkhoff.
- Change Log
- Layers Overview
- Operating System Preparation
- vSphere Connector
- Platform Layer
- Update OS and Platform Layers (Add Versions)
- App Layers, Image Templates, and Publishing (separate page)
Change Log
- 2024 March 27 – Updated OS Prep section for Layering 2403.
- 2022 July 18 – added link to Citrix Blog Post Citrix App Layering and reporting.
- 2021 Dec 25 – Platform Layer – added screenshots of new HTML5 interface.
- 2021 Feb 22 – Layers Overview – added link to Citrix Blog Post How to approach designing your app layering strategy
- 2020 July 14 – OS Layer – added link to CTX255870 Windows 10 v2004 – Citrix Known Issues
Layers Overview
25-page Citrix App Layering Reference Architecture at Citrix Tech Zone details the following:
- Why App Layering
- Technical Overview of Citrix App Layering
- Types of Layers
- App Layering Integration with Citrix Provisioning and Citrix Machine Creation Services
- Cross-Platform Support
- App Layering Communication Flow
- Availability, Backup, and Recovery – including User Layers
Enterprise Layer Manager (ELM) uses several types of layers:
- Operating System Layer
- Platform Layer
- Application Layer
- Image Template
- User Layer
The master versions of all Layers are stored inside the Enterprise Layer Manager virtual appliance.
Citrix Blog Post How to approach designing your app layering strategy describes in which layer to install an application.
Citrix CTX225952 4.x Layering Best Practices
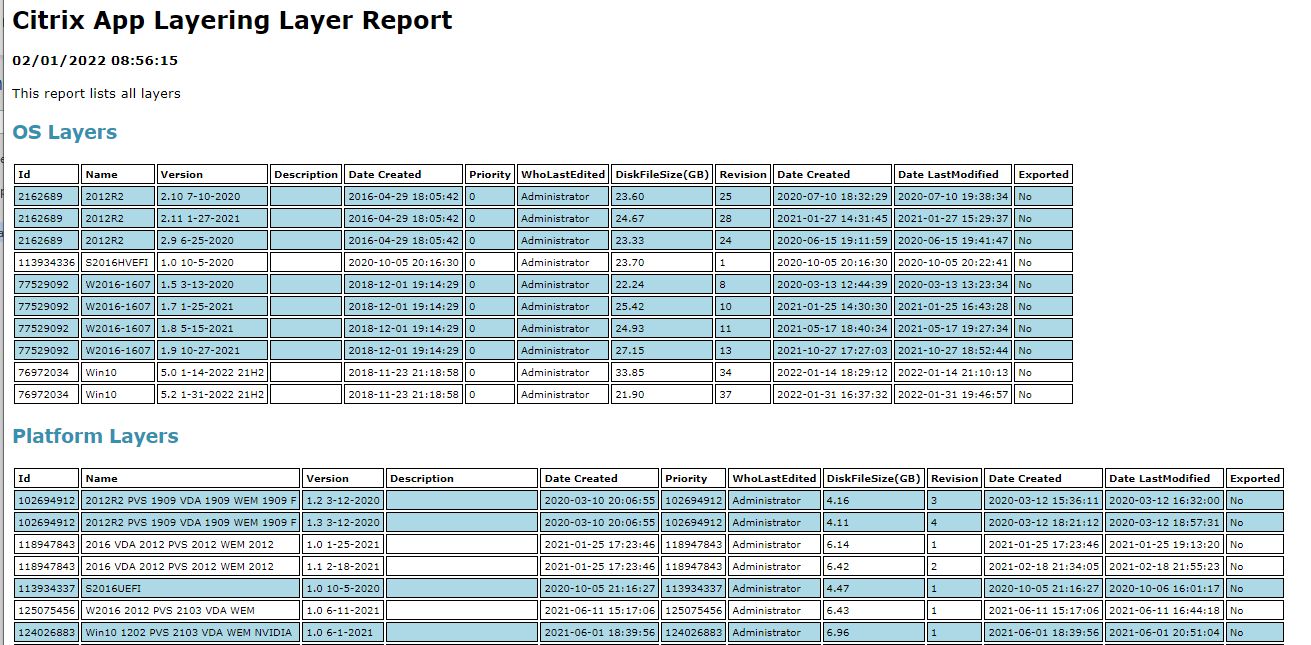
Layer Report – lists all of the Layers and the information associated with the layers. See Rob Zylowski at Citrix Blog Post Citrix App Layering and reporting.
Operating System Layer
Operating System Layer is just the base OS (with patches) and VMware Tools. Other components are usually installed in Platform and Application Layers.
- If you install .NET Frameworks in the OS Layer, then you only need to run Windows Updates on the OS Layer. However, Office should always be installed in an Application Layer.
- Windows Store apps should be removed from the OS Layer, not other layers.
Platform and Application Layers are tied to the OS Layer – The remaining layers (Platform and Application) are created from an OS Layer. These layers are linked to one OS Layer, and can’t be used on any other OS Layer.
- If you upgrade the hypervisor tools in the OS Layer, then you might have to recreate the Platform Layer.
Only OS Layer captures changes to local groups and local apps – Any application that creates local users (e.g. XenApp 6.5) should be installed in the OS Layer. Platform Layer and Application Layers do not capture changes to local groups or local users.
Platform Layer
Platform Layer is the highest priority layer and should contain the following: (from CTX225997 Considerations When Creating a Platform Layer in Citrix App Layering 4.x)
- Citrix Virtual Delivery Agent, or VMware Horizon Agent.
- Citrix Provisioning Services Target Devices Software
- NVIDIA Drivers
- Join the Domain
- Citrix Receiver – for the Single Sign-on Component
- Citrix Workspace Environment Management Agent
- Imprivata
- Hypervisor Tools – if packaging or publishing to a different hypervisor than originally used to create the OS Layer.
SAM database changes (local users, local groups) are not captured in the Platform Layer. You might have to use group policy to create and populate local groups. For example, Citrix Virtual Delivery Agent creates local users adds domain users to local groups. See Direct Access Users Group Missing All Layers at Citrix Discussions.
- Domain Join in Platform Layer does not capture adding Domain Admins to local Administrators group and Domain Users in the local Users group. Use Group Policy Restricted Groups or Group Policy Preferences Local Users and Groups to add these Domain Groups to the Local Groups.
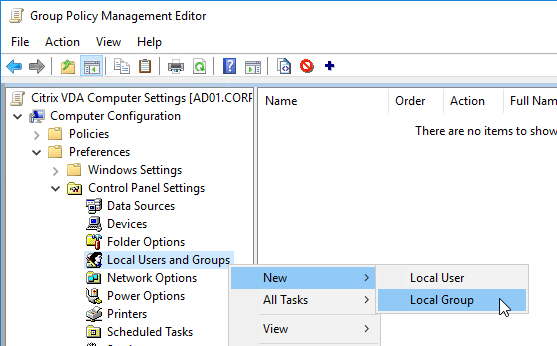
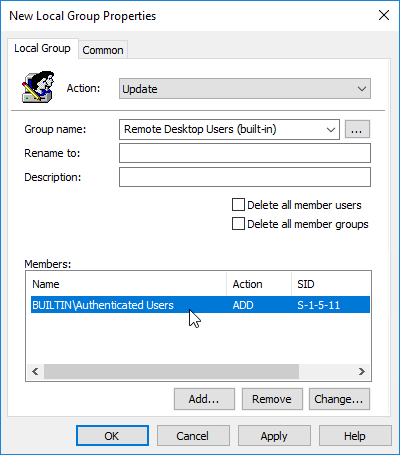
- Here are some additional settings in a Group Policy at Computer Configuration > Preferences folder > Control Panel Settings Right-click the Local Users and Groups node, point to New, and select Local Group. More info at CTX259057 VDAs are not registering using a published image – Use GPO/GPP to add the proper accounts and services.
- Action – Update – Group – Remote Desktop Users – Add Members “DOMAIN\Domain Users”
- Action – Update – Group – Remote Desktop Users – Add Members “NT AUTHORITY\Authenticated Users”
- Action – Update – Group – Performance Log Users – Add Members “NT Service\CitrixTelemetryService”
- Action – Update – Group – Performance Monitor Users – Add Members “NT Service\BrokerAgent”
- Action – Update – Group – Administrators – Add Members DOMAIN\Your_Citrix_Admins_Group
- Action – Create – Group – Anonymous
- Action – Create – Group – Direct Access Users – Add Members DOMAIN\Your_User_Group
Windows 10/11 apps should be removed from the OS Layer, not from the Platform Layer.
An Image Template (the composed machine that is published to the hypervisor) can contain only one Platform Layer. If you are creating a Platform Layer for Citrix Provisioning Services, then that one Platform Layer should include both the Citrix VDA and the Citrix PvS Target Device Software.
Application Layers
Application Layers contain anything not in the OS Layer or Platform Layer, including the following:
- Applications
- Antivirus
- Print Drivers
- SCCM Client
Per-user settings (profile changes) are not captured in an Application Layer.
When creating a Layered Machine, there are two methods of merging the Application Layers:
- Pre-boot – ELM merges the App Layers with the OS Layer and Platform Layer to create a single monolithic disk file. This method provides the greatest application compatibility. Use this method for Apps with boot time services or drivers.
- Elastic – When the user logs into a Layered Machine, a service looks in a file share for any Elastic Layers assigned to the user, and merges (mounts) them as the user logs in. Different users can have different Elastic Layers, even on multi-user Remote Desktop Session Host (XenApp) machines. However, Elastic Layering doesn’t work for apps that need boot-time services/drivers.
A single App Layer can be merged using either of these methods. If the App Layer doesn’t work Elastically, then you can mount it Pre-boot (Image Template) instead. There is no need to create separate App Layers for each mounting method.
Elastic App Layers are stored in a SMB file share. You can use any desired method to provide High Availability for this file share, including: Scale Out File Server, DFS Namespace/Replication, etc.
FSLogix creates local groups every time the service restarts, thus it works when installed inside an Application Layer.
Image Template
Image Template contains one OS Layer, one Platform Layer, and zero or more App Layers. The App Layers assigned in the Image Template are merged pre-boot.
You then Publish the Image Template to your hosting platform.
- For MCS, the Template is pushed to a hypervisor (e.g. vSphere) virtual machine, which becomes the master image for an MCS Catalog.
- For PvS, ELM creates a VHD file, and pushes it to a PvS vDisk Store, so you can assign it to Target Devices.
For Elastic Layers, you must enable Elastic Layers in the Image Template.
User Layers
User Layers allow users to install their own applications. In ELM 4.14 and newer, User Layers are fully supported.
User Layers require additional consideration for backup, replication, and recovery.
User Layers are tied to OS Layer – From Gunther Anderson: “Like App and Platform Layers, User Layer disks are tied to the OS layer they were originally built from. If you have a user login to images from two different OS layers, you will see the User Layer disks in two different directories on the share, one for each OS layer. The image itself knows what OS layer it was built from, and the ULayer service uses that information.”
- If you want profile portability, store the profile outside of the User Layer by implementing Citrix Profile Management.
The default size for User Layers is 10 GB. You can change this size by setting HKLM\Software\Unidesk\Ulayer\DefaultUserLayerSizeInGb on the managed machines. Source = Understanding Elastic Layering > Scaling (tab) > User Layer Size.
Layering Tips
From Citrix Blog Post 5 Tips for Packaging Your Apps with Citrix App Layering:
- .NET Frameworks go in the OS Layer
- Store apps are removed from the OS Layer.
- Keep the layer as clean and as small as possible
- A packaging machine will not be part of your domain
- Delete any installers from the desktop, delete any temp directories, and empty the recycling bin
- If Windows Updates, delete the contents of C:\Windows\SoftwareDistribution\Download
- Underlying applications should be layered first, and then selected as prerequisite layers when you go to create a layer for the subsequent application
- Use Application Layer Recipes
- Turn off the application’s auto-updater
- For antivirus, follow the manufacturer’s steps to “generalize” or remove any unique client identifiers
- Handle application licensing – rearm, activation, etc.
- Run
ngen.exe update
Also see Citrix CTX225952 4.x Layering Best Practices:
- Operating System Layer:
- Application Layers are tied to the Operating System Layer.
- ELM automatically upgrades OS Layer drivers. However, OS Layer Scripts should be updated reinstalling the Machine Tools.
- .NET should be in the OS Layer.
- OS Layer is lowest priority.
- Patch OS by creating an OS Layer Version.
- When patching, ensure Windows is activated.
- VMware Tools goes in the OS Layer. Update it too.
- Windows Store apps should be removed from the OS Layer.
- Application Layers:
- Per-user profile settings are not captured.
- Local users and local groups are not captured. Use Group Policy Restricted Groups instead.
- A single utility layer can include Java, Flash, Adobe Reader.
- Turn off application automatic updates.
- If domain membership required for an app installation, join domain, install app, remove from domain.
- Antivirus can go in OS Layer or App Layer.
- Printer drivers can be layered – but not elastically
- Use Layer Recipes.
- All Office apps needed by a machine/user should be combined into a single Office Layer
- Office cannot be elastically layered
- When patching Office, update the OS Layer first.
- Max 50 layers per desktop.
Operating System Preparation
- See Citrix CTX225952 4.x Layering Best Practices
- Windows Server 2019 – Windows Server 2019 is supported in App Layering 1905 and newer
- Office 2019 – Office 2019 is supported in App Layering 1905 and newer
- Windows 11 is supported in App Layering version 2112 and later
- Windows 10
- Windows 11 22H2 and Windows 10 22H2 are supported in App Layering 2211 and newer.
- Windows 11 is supported in App Layering 2112 and newer.
- Windows 10 version 21H2 is supported in App Layering 2110 and newer.
- Windows 10 version 21H1 is supported in App Layering 2107 and newer.
- Windows 10 version 20H2 is supported in App Layering 2011 and newer.
- Windows 10 version 2004 is supported in App Layering 2008 and newer.
- Windows 10 version 1909 is supported in App Layering 2001 and newer.
- Create a virtual machine.
- If vSphere:
- Make sure your OS Layer creation machine has a NIC of type VMXNET 3.
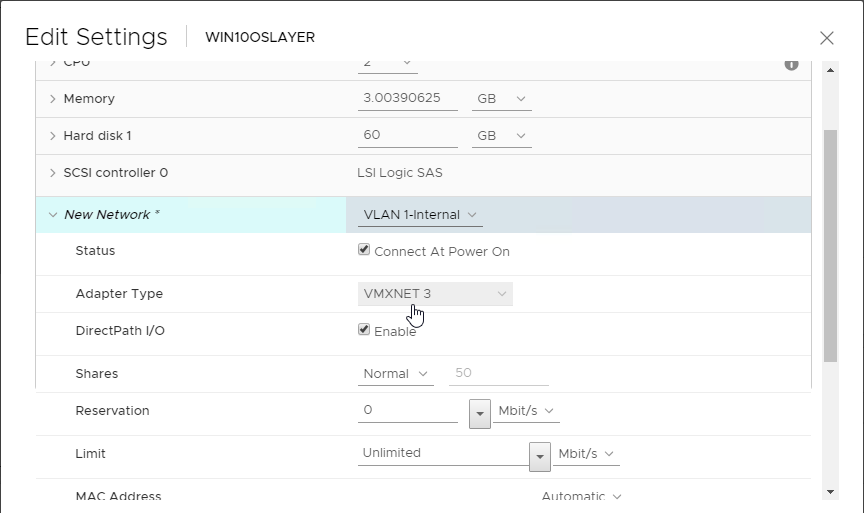
- Paravirtual SCSI controllers are supported in App Layering 2001 and newer.
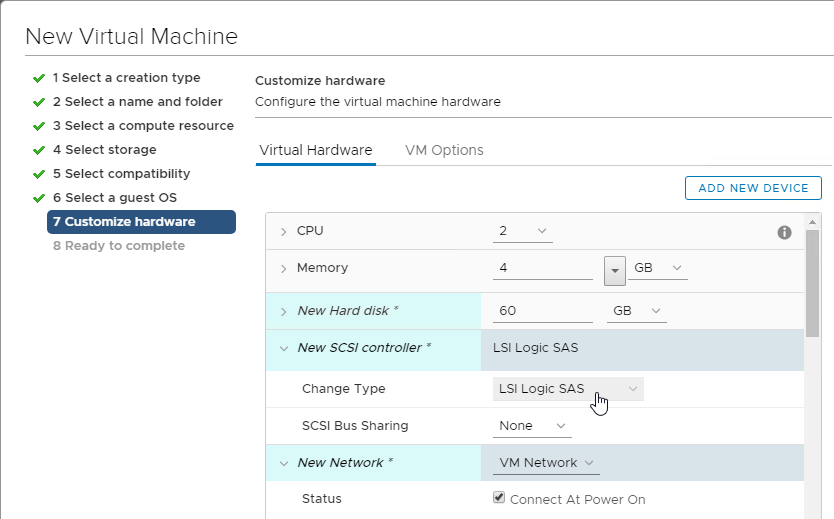
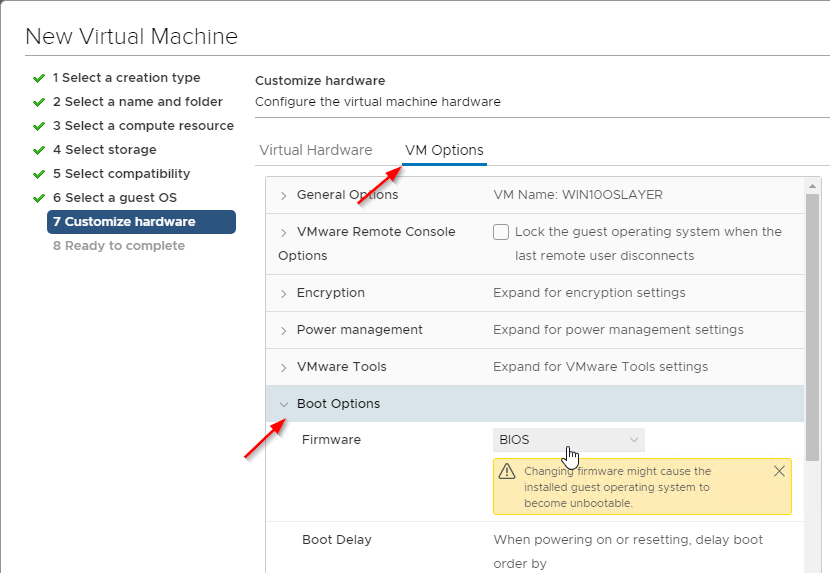
- On the VM Options tab, expand Boot Options, and make sure the Firmware is BIOS, not EFI.
- Make sure your OS Layer creation machine has a NIC of type VMXNET 3.
- EFI:
- App Layering 2003 and newer has a ImportOsLayer.ps1 script that can import an EFI machine.
- Connectors with Compositing Engine enabled support EFI.
- Older versions of App Layering cannot import an EFI OS Layer.
- vSphere 6.7 defaults to EFI for new VMs.
- Install an operating system (Windows 11, Windows 10, or Windows 2022/2019/2016), and patch it.
- If you in-place upgrade Windows 10 to a newer version, you might have to use diskpart to delete the Recovery Partition. See CTX226407 App Layering: Windows 10 upgrade may result in new Recovery Volume partition.
- CTX255870 Windows 10 v2004 – Citrix Known Issues has a couple issues related to Citrix App Layering.
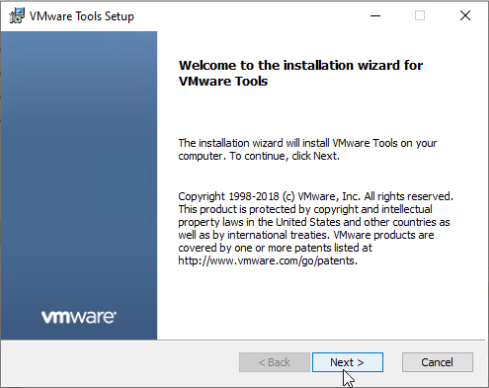
- Install VMware Tools.
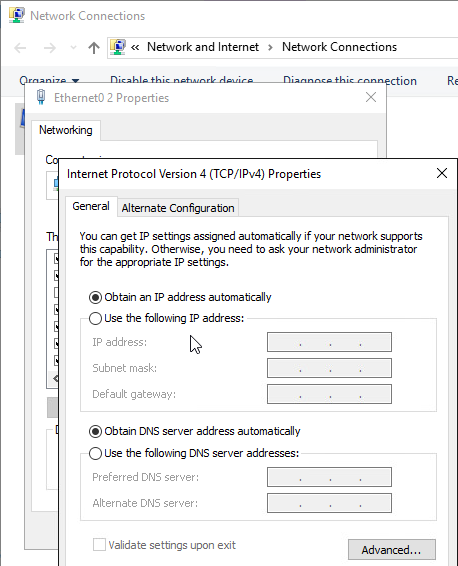
- DHCP – Make sure the NIC is set to DHCP.
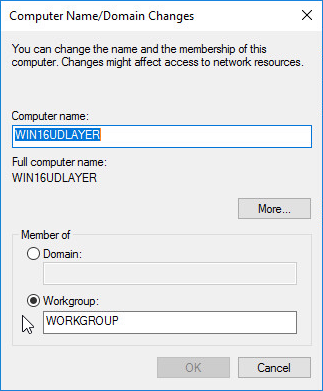
- Workgroup – Don’t join the template machine to the domain. Leave it in a workgroup.
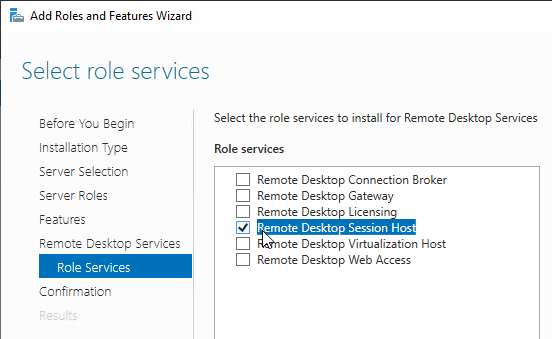
- RDSH – For RDSH machines, Citrix recommends installing RDSH in the OS Layer instead of the Platform Layer.
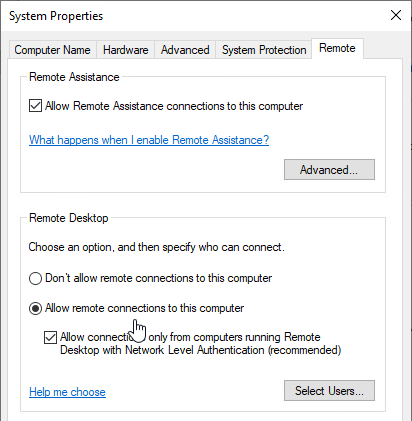
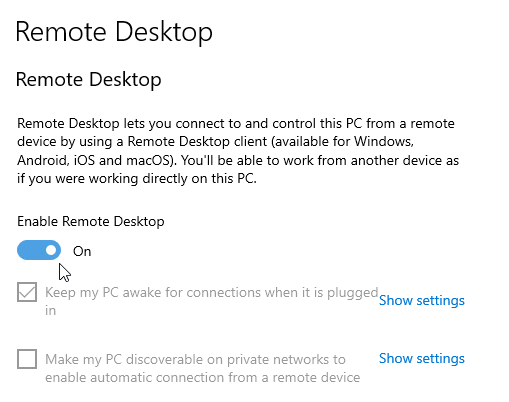
- Remote Desktop – Enable remote connections (Remote Desktop).
- Install Windows Updates.
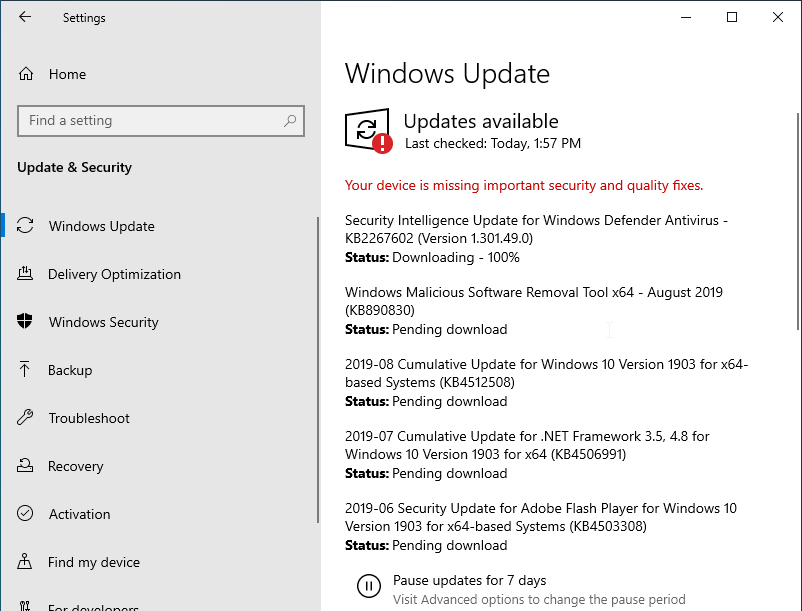
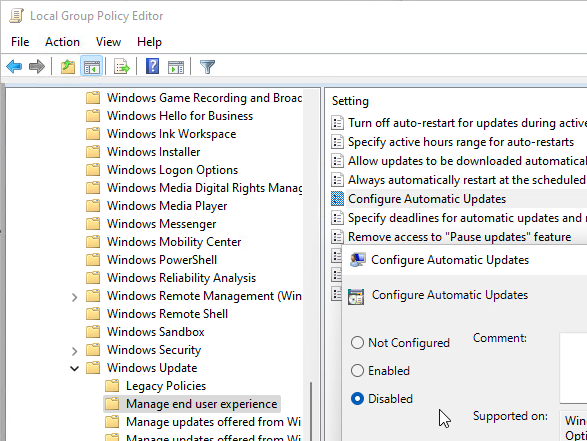
- Disable Automatic Updates on the template machine. You can use layers to install updates. An easy method to disable it is in Group Policy (gpedit.msc) at Computer Configuration | Policies | Administrative Templates | Windows Components | Windows Update | Manage End User Experience | Configure Automatic Updates. Disable the setting.
- To stop Windows from performing maintenance and consuming 100% CPU, set the following registry value: (source = Win 10 Image – CPU Utilization 100% non-stop at Citrix Discussions):
HKEY_LOCAL_MACHINE\Software\Microsoft\Windows NT\CurrentVersion\Schedule\MaintenanceMaintenanceDisabled(REG_DWORD) = 1
- If Citrix Provisioning, George Spiers says IPv6 should be disabled.
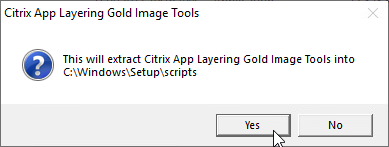
- Go to the downloaded App Layering 2403 files, right-click the citrix_app_layering_os_machine_tools_24.3.0.exe file, and click Run as administrator.

- Click Yes to extract the files.
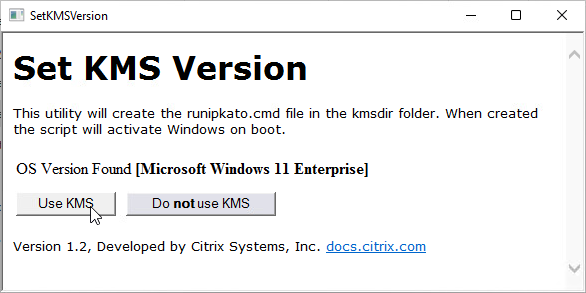
- If you look on the taskbar, you might see an open program called Set KMS Version.

- Click Use KMS.
- Click Close when prompted a reboot is needed.
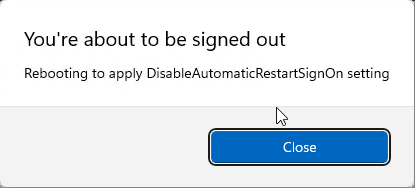
- Then close the window.
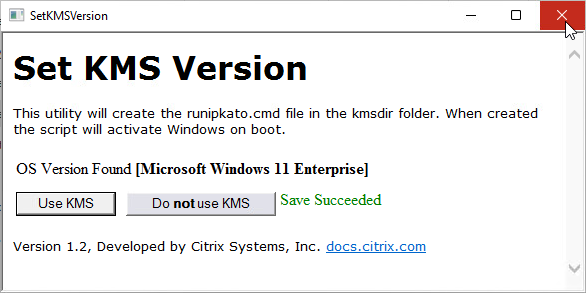
- If Set KMS Version did not run automatically, then manually run C:\Windows\Setup\scripts\SetKMSVersion.hta as administrator (elevated).
- Shift right-click the file to copy its full path.
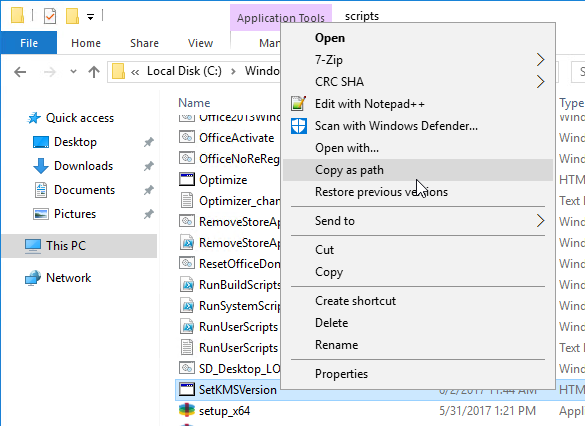
- Open command prompt as administrator, paste the path, and run it from there.

- Click Use KMS.
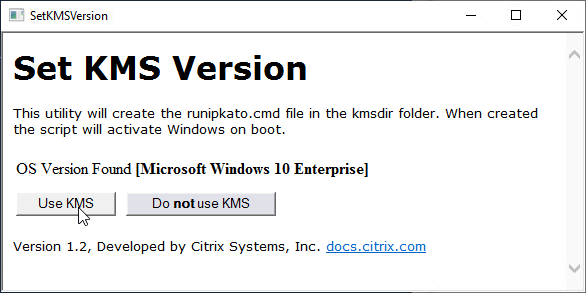
- This adds the file runipkato.cmd to C:\Windows\Setup\scripts\kmsdir, which ELM will run when it publishes the image. The script installs the KMS Client key and activates it.
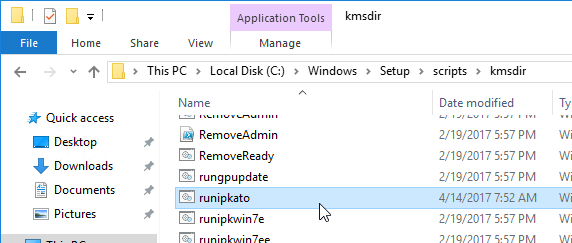
- Shift right-click the file to copy its full path.
- If you have run KMS Setup multiple times (usually due to Machine Tools upgrades), check the registry for duplicates and remove the duplicates.
- In regedit, go to HKEY_LOCAL_MACHINE\SOFTWARE\Microsoft\Windows\CurrentVersion\Group Policy\Scripts\Startup\0\0. You should see kmssetup.cmd.
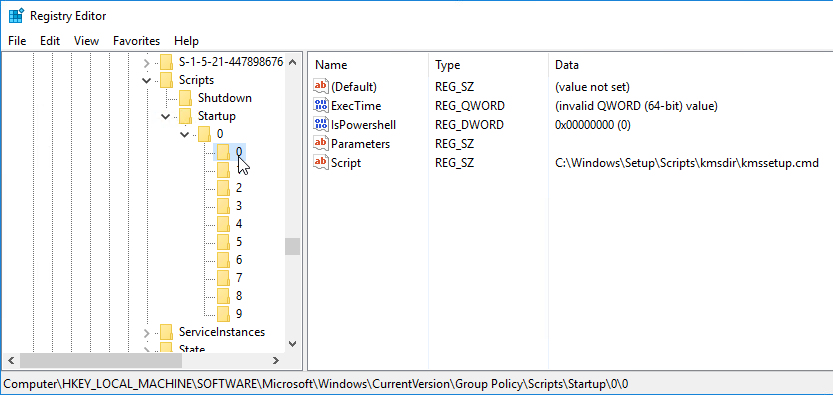
- If there are other registry keys named 1 or higher, check them for kmssetup.cmd. If true, then delete the duplicate keys so that only 0 remains.

- See CTX238316 After upgrading the OS Machine Tools, kmssetup.cmd runs twice at startup for more details.
- In regedit, go to HKEY_LOCAL_MACHINE\SOFTWARE\Microsoft\Windows\CurrentVersion\Group Policy\Scripts\Startup\0\0. You should see kmssetup.cmd.
- If this is a Windows 10 or Windows 11 virtual machine, and if you want to remove Store apps, remove them from the OS Layer instead of the Platform Layer.
- In App Layering 4.11 and newer, Store apps are supported, and it is no longer necessary to remove them.
- App Layering 4.7 and newer has a script at C:\Windows\Setup\Scripts\RemoveStoreApps.cmd that can remove the store apps. Note: this script removes Calculator, so you’ll probably want to find a replacement Calculator.
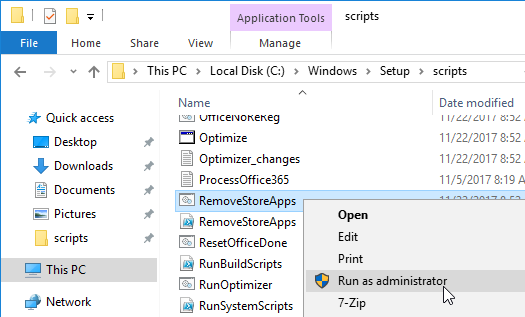
- Citrix Optimizer can remove Store apps.
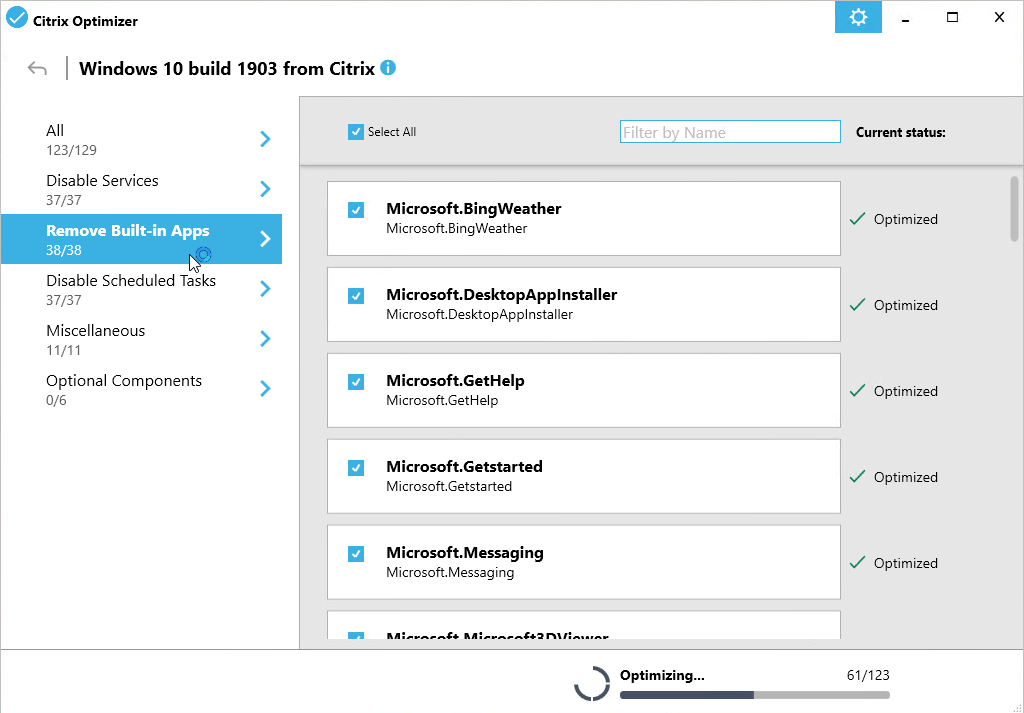
- The Citrix Optimizer community marketplace at https://raw.githubusercontent.com/ryancbutler/Citrix_Optimizer_Community_Template_Marketplace/master/communitymarketplace.xml also has an App Layering Supplement.
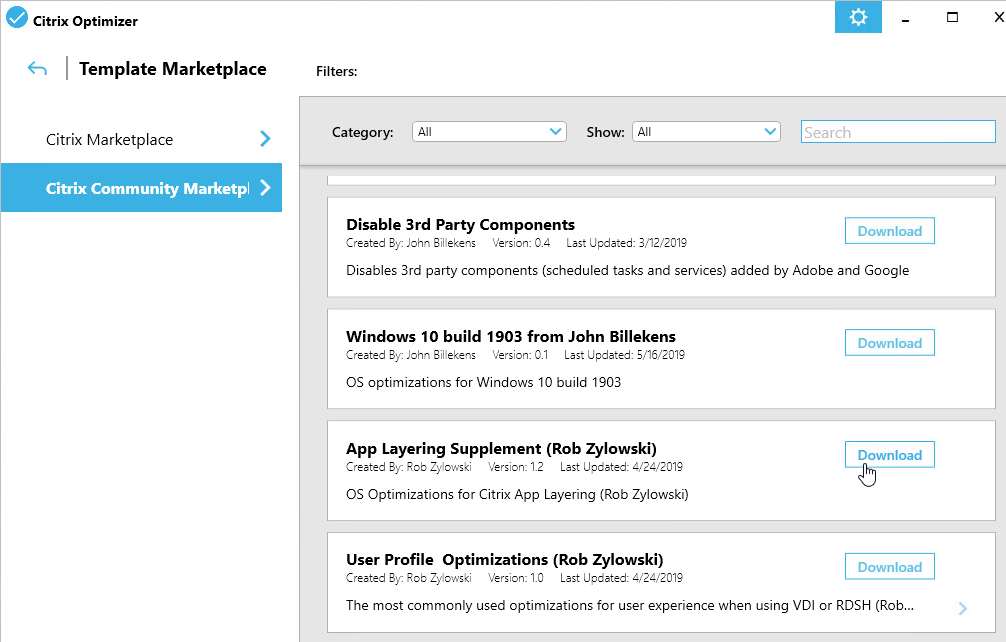
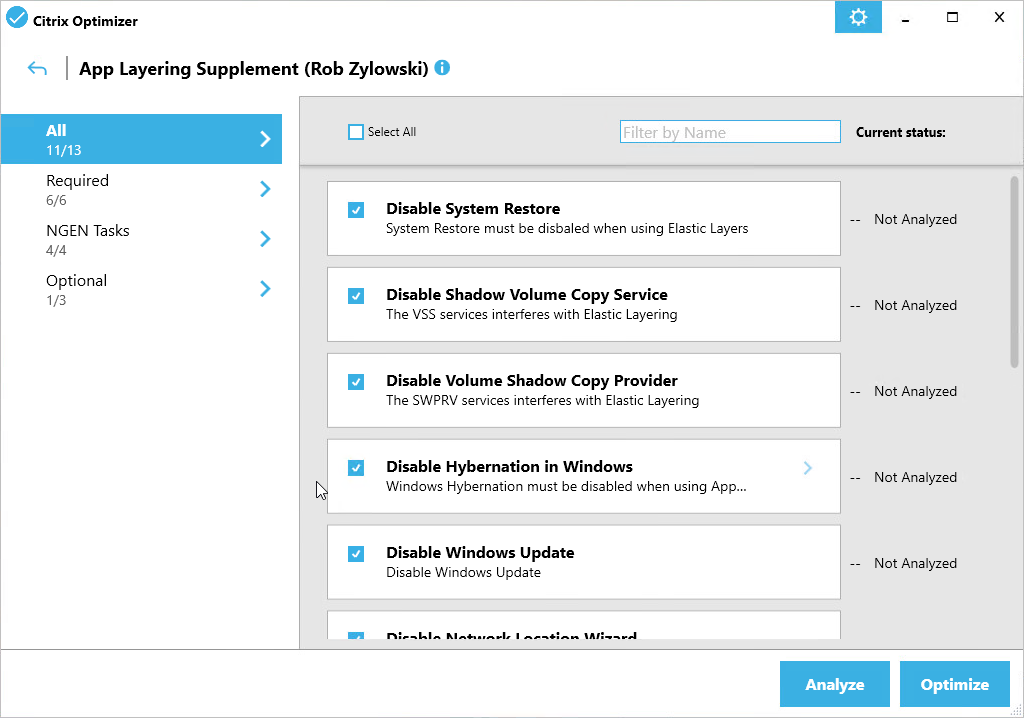
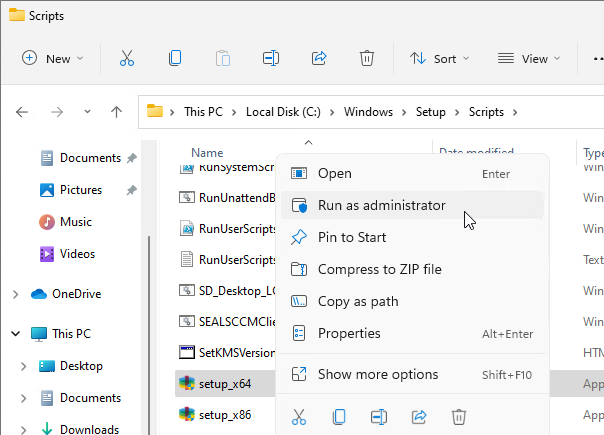
- Run setup_x64.exe from C:\Windows\Setup\scripts. Make sure you run it elevated.
- In the Welcome to the InstallShield Wizard for the Citrix App Layering Image Preparation Utility 23.12.0.4 page, click Next.

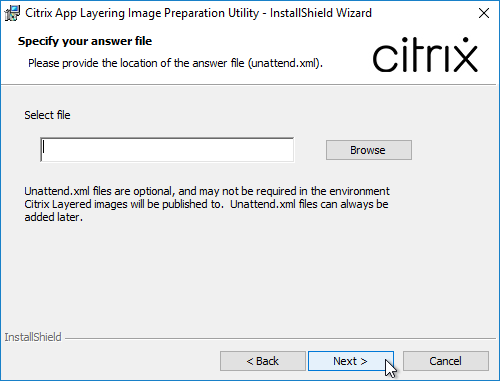
- In the Specify your answer file page, click Next.
- In the InstallShield Wizard Completed page, click Finish.
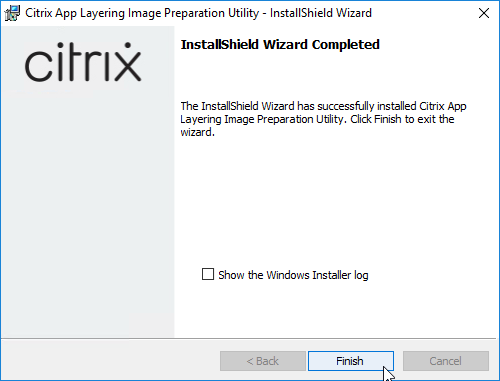
- CTP George Spiers Citrix App Layering Preparation Script: runs a number of tasks to clean out temporary folders, clear out Event Log entries, remove ghost devices from Device Manager, etc.
- Run the ImportOsLayer.ps1 script to import your new OS Layer to ELM. Newer versions of ELM only support the ImportOsLayer.ps1 method of creating an OS Layer.


vSphere Connector
ELM uses Connectors to communicate to push images and layers to various hypervisors.
- In App Layering 2202 and newer, you can use the new HTML5 interface to create Connectors.
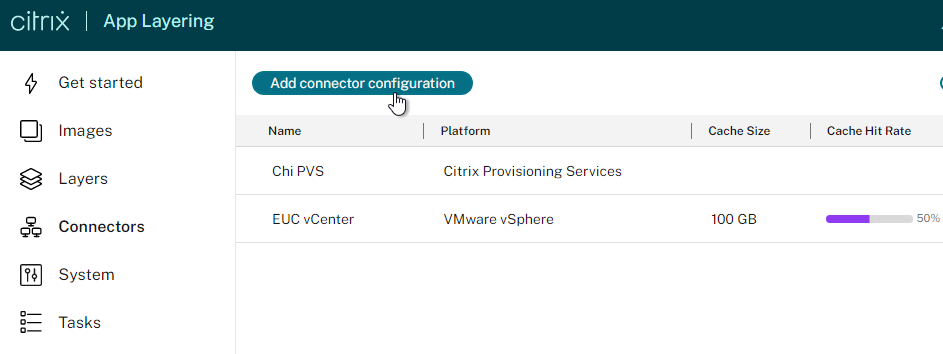
- In ELM 4.11 and newer, in the Internet Explorer Silverlight console, you can create or edit connectors at System > Connectors. This page also shows Connector Cache information. Caching improves performance of the connectors.

- In ELM 4.11 and newer, in the Internet Explorer Silverlight console, you can create or edit connectors at System > Connectors. This page also shows Connector Cache information. Caching improves performance of the connectors.
- See System requirements at Citrix Docs for the list of supported hypervisors and brokers.
- To create the vSphere connector, in the Choose a Connector Type window, select VMware vSphere.
- For configuration instructions for the other connectors, see Connector configurations at Citrix Docs.
- Click New.
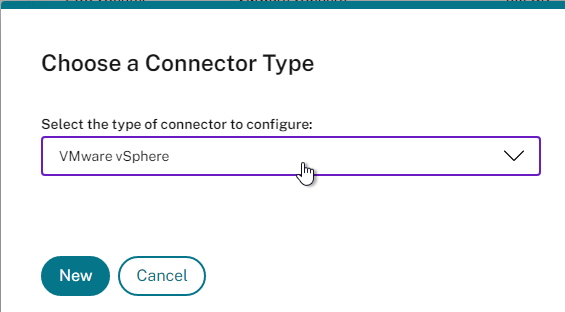
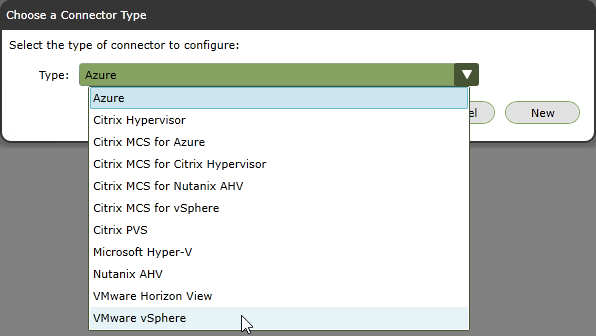
- In App Layering older than version 2304, a new tab opens. Version 2304 and newer have a new interface for configuring the Connector.

- Give the Connector a name (e.g., vCenter name). The Connector specification includes specific storage, so the Connector name should indicate the storage name.


- Enter the vCenter FQDN and service account credentials.
- The vCenter permissions needed by the service account are detailed at vSphere Permissions at Citrix Docs.
- Click Check Credentials.

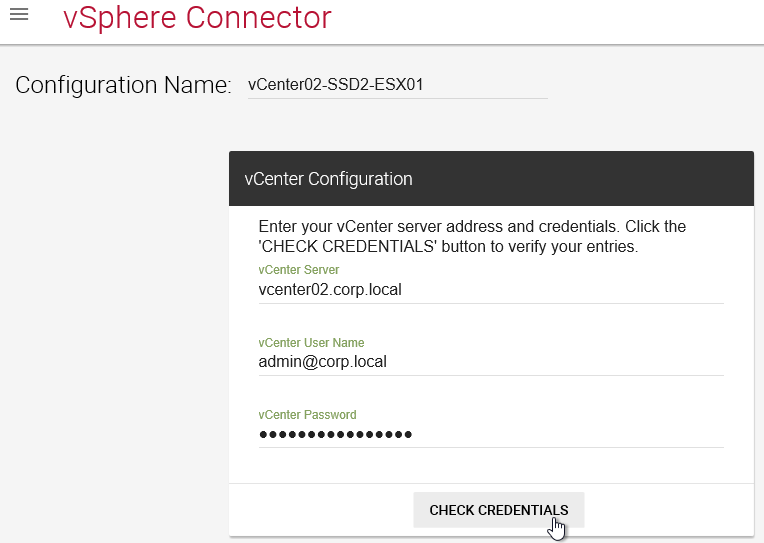
- Scroll down and use the drop downs to select where you want Packaging VMs and Published Templates to be created.
- The Packaging VMs and Published Templates will be created under the Virtual Machine Folder that you specify here.
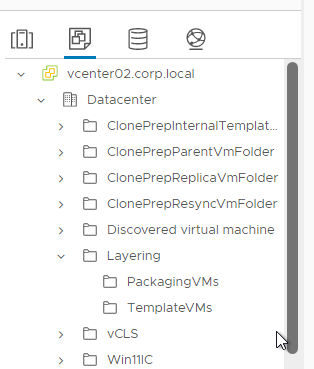
- The Packaging VMs and Published Templates will be created under the Virtual Machine Folder that you specify here.
- If MCS, in the Virtual Machine Template (optional) field, search for a Template VM that will be copied to create the MCS master image. The Template VM needs CPU, Memory, and GPU settings, but no disks. See Required information for this Connector Configuration at Citrix Machine Creation Services for vSphere Connector Configuration at Citrix Docs.
- To ensure that the published images have the correct time zone, it may help to generate a new template for your Connector by having (or building) a Windows VM that has booted in the correct time zone. Shut it down, clone it, delete the attached disk from the clone, and convert that to a template for your Connector configuration in the Layering Management Console. More info at CTX230562 App Layering: Machine time on a published image is wrong at first boot.
- Packaging Cache Size in GB speeds up App Layer creation operations if you are creating multiple App Layers for the same OS/Platform combination. The size should be greater the size of the OS/Platform combinations.

- Offload Compositing – at the bottom of the connector, make sure Offload Compositing is enabled to speed up provisioning operations. In 2304 and newer, click Confirm and Complete.

- In older versions click Test.
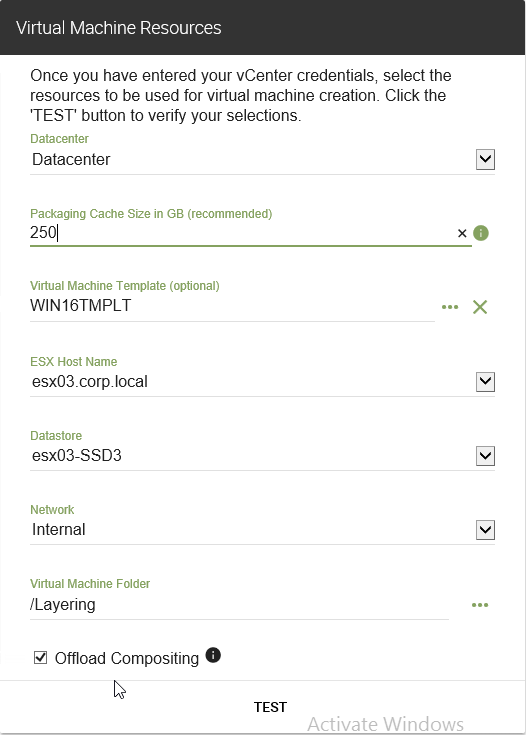
- When the Test is successful, click Save.

- Then click Close.

- When the Test is successful, click Save.
Platform Layer
Create Packaging VM
- See Citrix CTX225952 4.x Layering Best Practices.
- See Citrix CTX225997 Considerations When Creating a Platform Layer in Citrix App Layering 4.x.
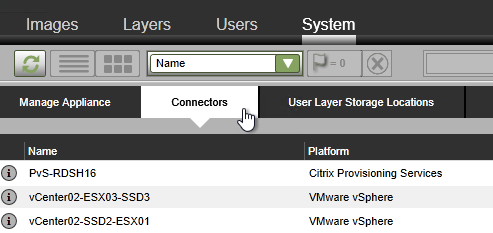
- Create your Hypervisor Connector before you create the Platform Layer. In the new HTML5 console in App Layering 2202 or newer, click Connectors on the left. Or in the Internet Explorer Silverlight console, go to System > Connectors to create a Connector.
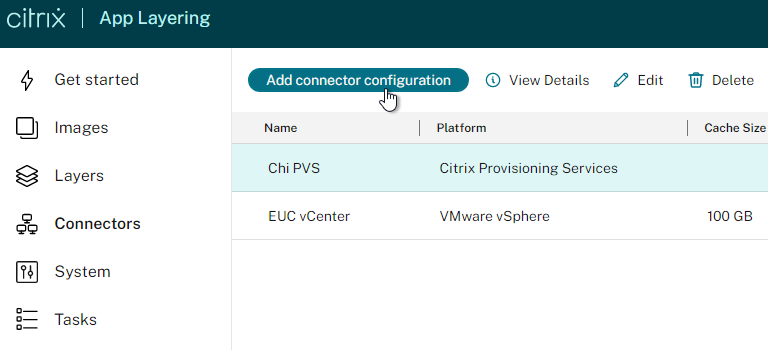
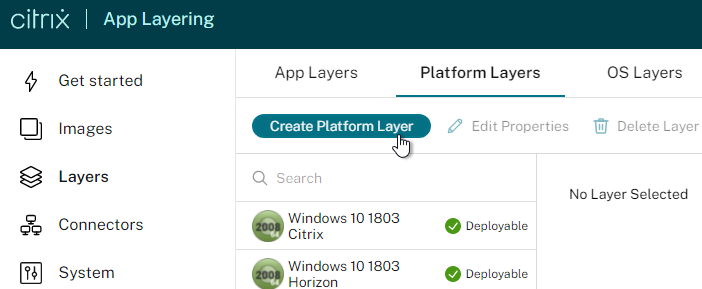
- In the HTML5 console, click Layers on the left, switch to the Platform Layers tab on the right, and then click Create Platform Layer.
- In the older Internet Explorer Silverlight console, in the Layers tab, Platform Layers sub-tab, right-click in the grey area, and click Create Platform Layer.
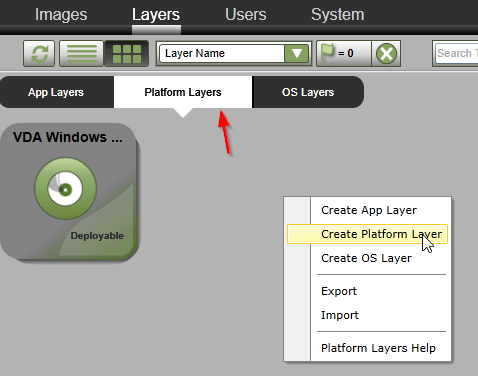
- In the older Internet Explorer Silverlight console, in the Layers tab, Platform Layers sub-tab, right-click in the grey area, and click Create Platform Layer.
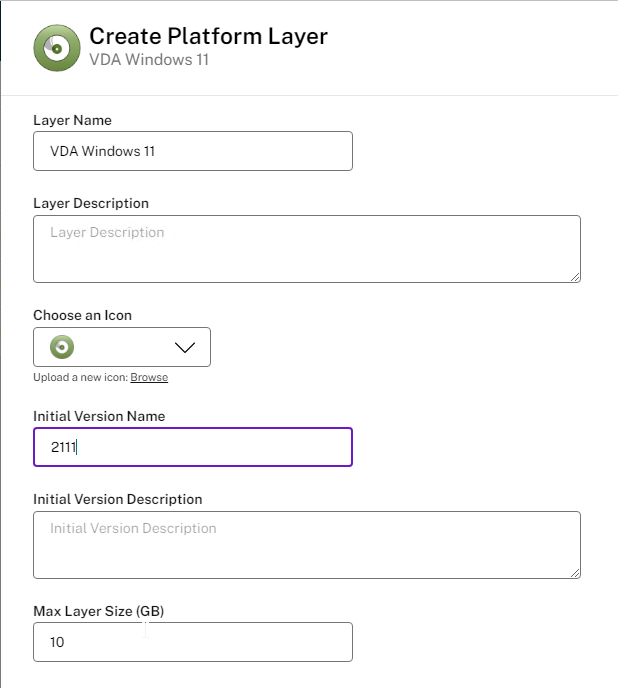
- In the Layer Details page, give the Platform Layer a name and version. Note: Platform Layers are linked to OS Layers, so it’s best to indicate which OS Layer this Platform Layer is based on. You can’t use a Platform Layer created on one OS Layer on a different OS Layer.
- Enter a version number.
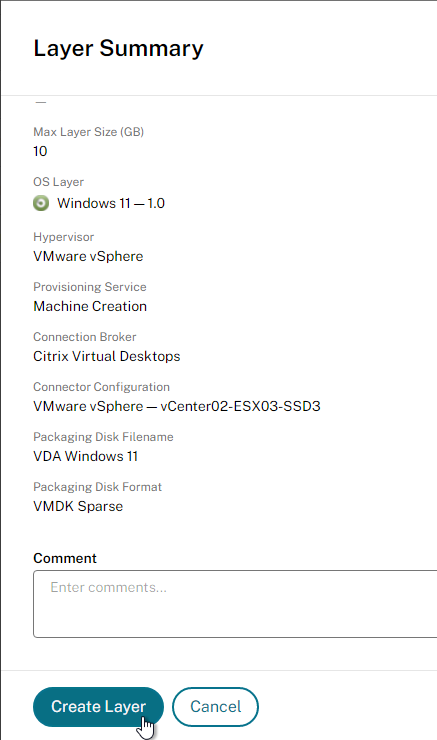
- Specify a Max Layer Size. Note: the packaging machine is thick provisioned using the size specified here, plus the size of the OS Layer.
- In the HTML5 interface, scroll down.
- In the Silverlight interface, click Next (down button).
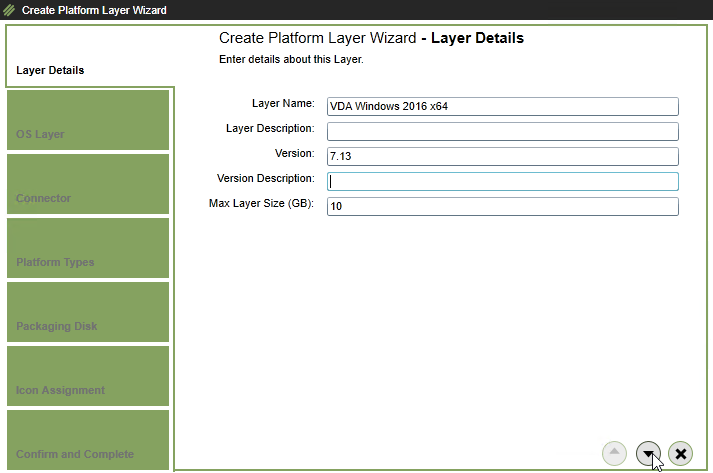
- In the Silverlight interface, click Next (down button).
- In the OS Layer page, select the OS Layer (and layer version) this Platform Layer will be based on.
- In the HTML5 interface, scroll down.
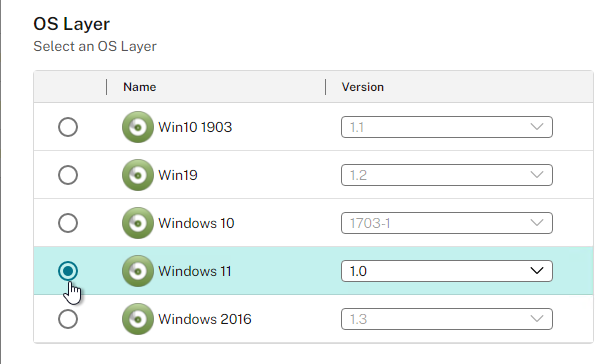
- In the Silverlight interface, click the next button (down arrow).
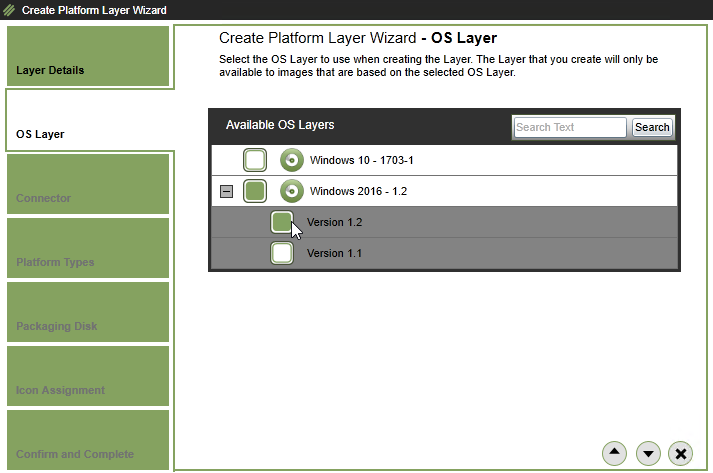
- In the Silverlight interface, click the next button (down arrow).
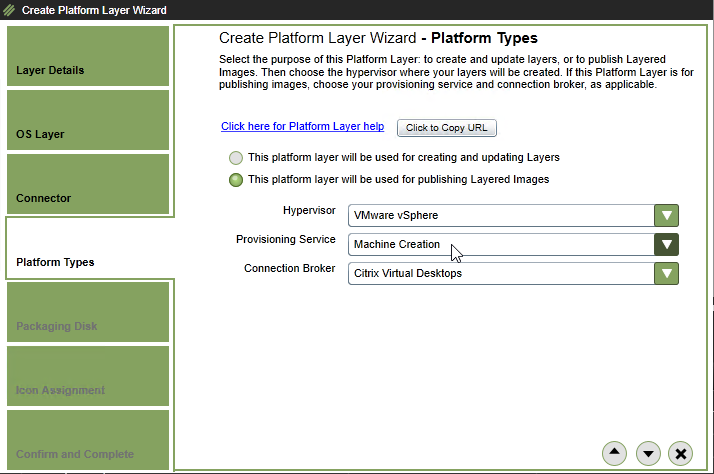
- In the HTML5 interface, change the selection to This platform layer will be used for publishing Layered Images.
- Use the drop downs to select the Hypervisor, Provisioning Service, and Connection Broker. These can be changed later.
- Select an existing vSphere connector.
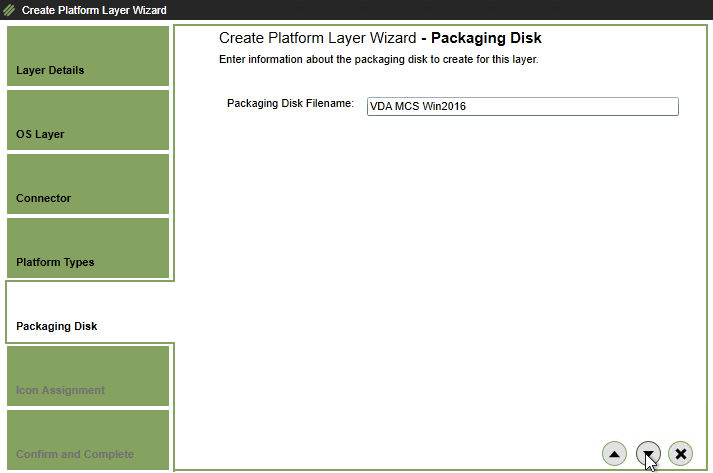
- For Packaging Disk Filename, enter a name for the .vmdk disk that will be created in vSphere. Click Confirm and Complete.
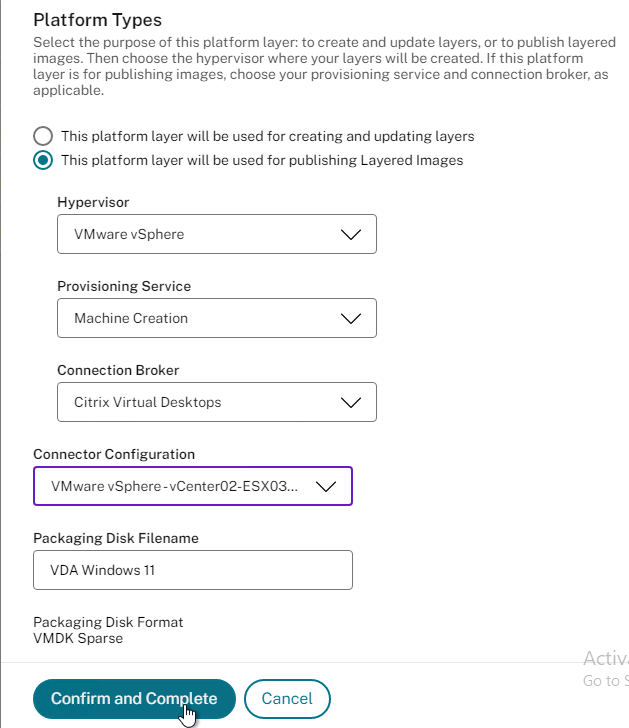
- Then click Create Layer.
- In the Internet Explorer Silverlight interface, in the Connector page, if you already have a vSphere connector, select it, and click Next. If you don’t already have a vSphere connector, then click New to create one. Click the down arrow.

- In the Platform Types page, change the selection to This platform layer will be used for publishing Layered Images. The other selection is if you want to deploy the vSphere OS Layer on a different hypervisor (e.g. Azure).
- Use the drop downs to select the Hypervisor, Provisioning Method, and Connection Broker. These can be changed later. Click the down arrow.
- In the Packaging Disk page, enter a name for the .vmdk disk that will be created in vSphere. Click the down arrow.
- In the Icon Assignment page, select an icon, or upload a new one. Click the down arrow.
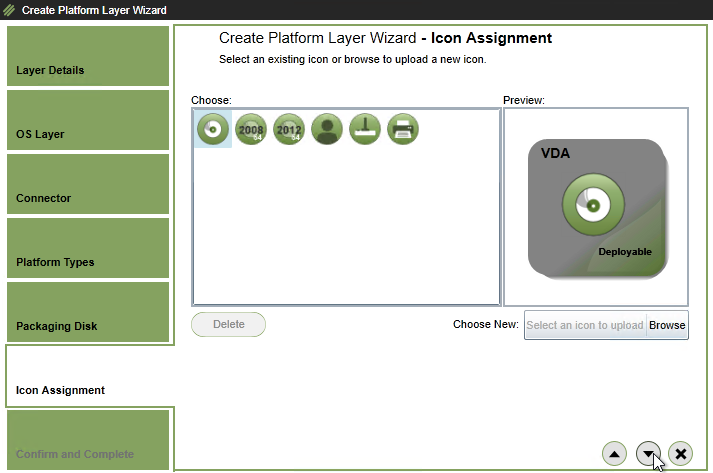
- In the Confirm and Complete page, click Create Layer.
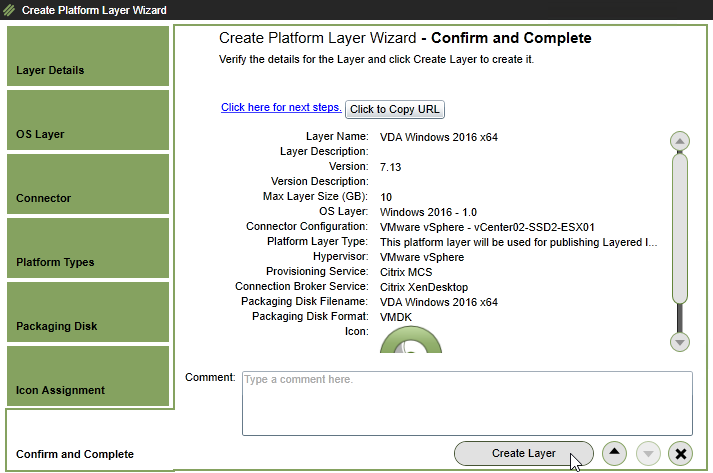
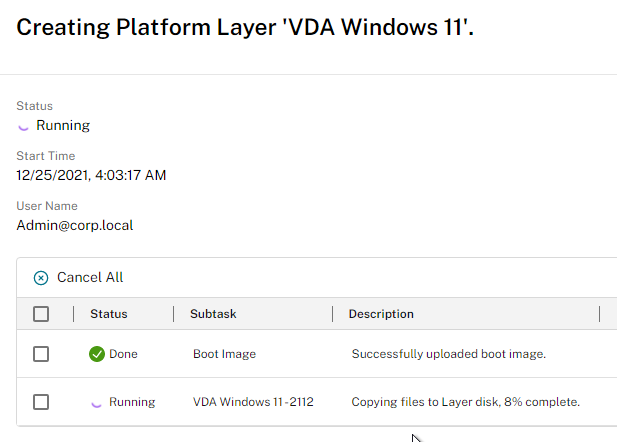
- In the HTML5 interface, on the left is the Tasks node showing you the current progress. Click View Details.
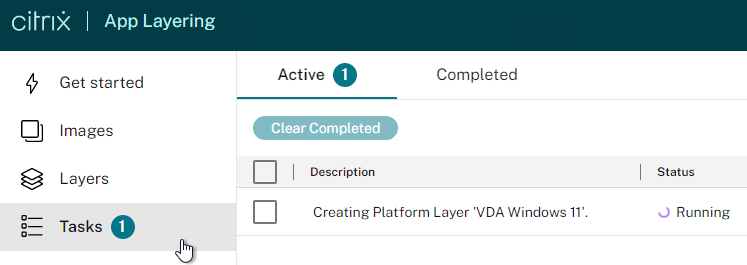
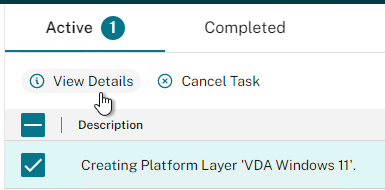
- In the Silverlight interface, on the bottom of the screen, open the Tasks pane.
- Click the information icon to view what the task is doing.

- Eventually it will say Pending (Action Required), meaning it’s waiting for you to perform the packaging in vSphere.
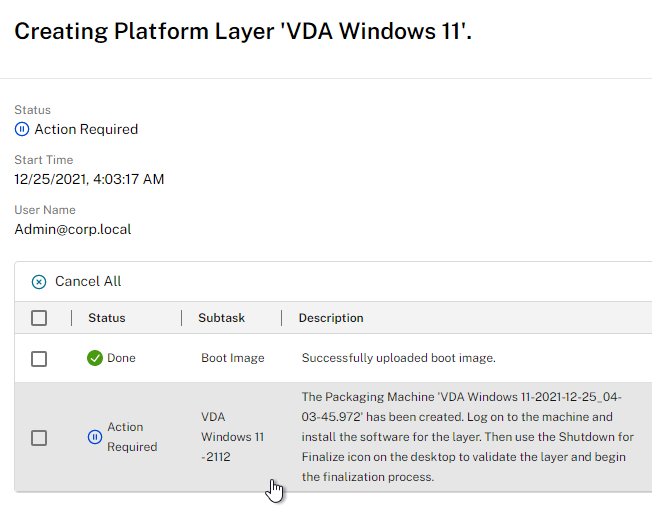

Edit Packaging VM
- In vSphere Web Client, in the VMs and Templates view, expand the Layering folder, expand Packaging VMs, and click the new Packaging Machine.
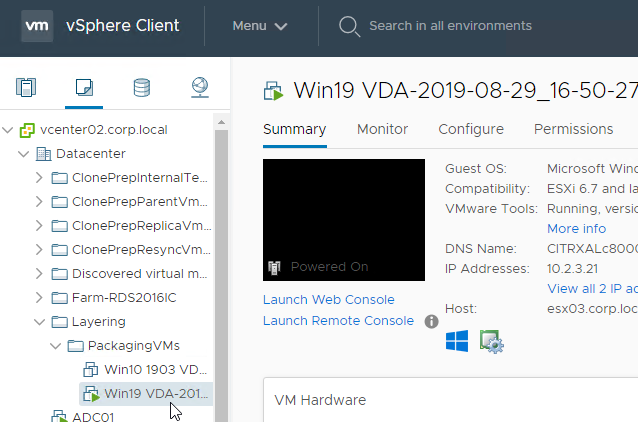
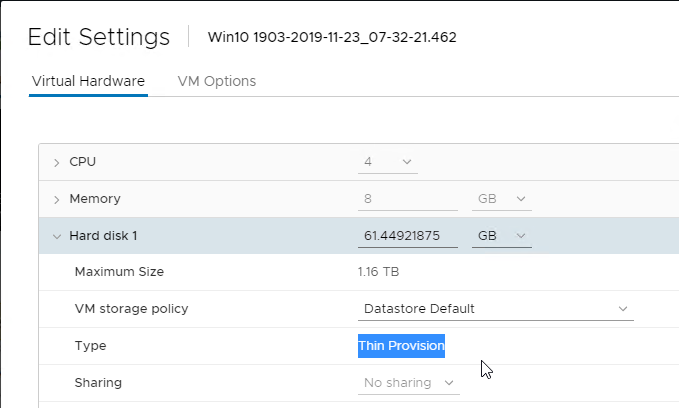
- If you edit the VM’s hardware, and if Offload Compositing is enabled, then the Hard Disk is Thin Provisioned.
- If Offload Compositing is not enabled, then notice that the disk is Thick Provisioned.
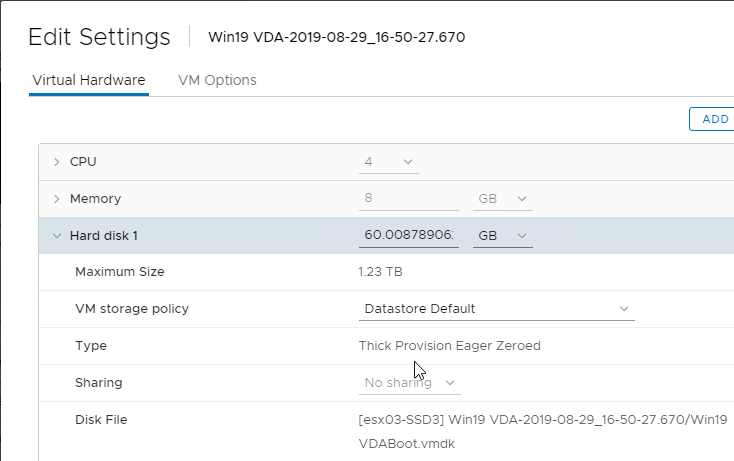
- If Offload Compositing is not enabled, then notice that the disk is Thick Provisioned.
- Open the VM’s console and login to the machine.
- Join it to the domain. Only join the Platform Layer to the domain. OS Layer and App Layers must not be joined to the domain. You’re welcome to change the computer name.
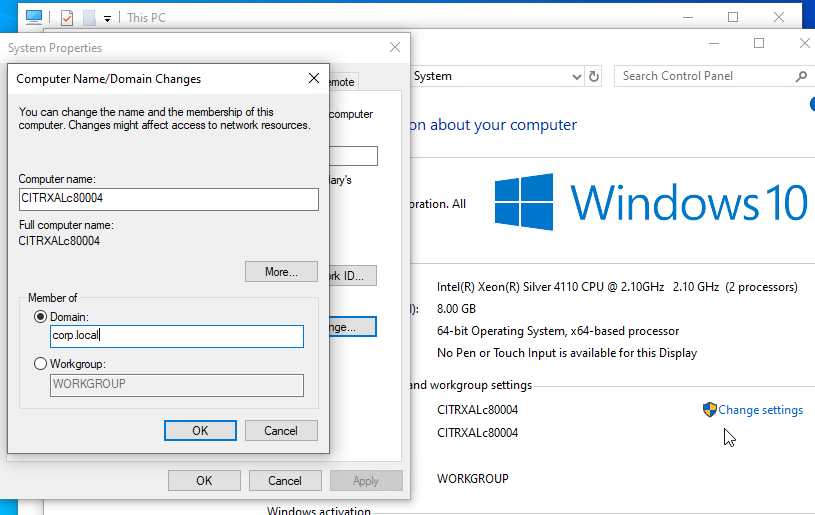
- After joining the domain, move the computer object to your VDA OU so the GPO computer settings are applied to the Platform Layer.
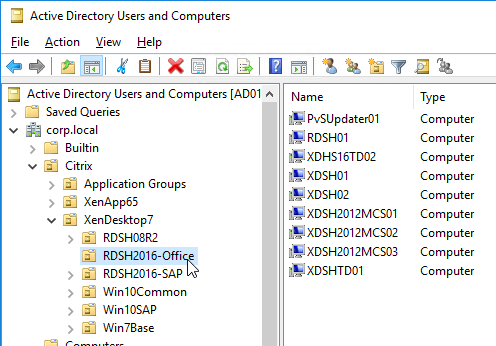
- After joining the domain, move the computer object to your VDA OU so the GPO computer settings are applied to the Platform Layer.
- You can now install VDA software.
- VDA 2112 is supported with App Layering 2112 and newer.
- VDA 1912 LTSR is supported with App Layering 2001 and newer.
- VDA 1909 is supported with App Layering 1910 and newer.
- VDA 1906 is supported with App Layering 1907 and newer.
- VDA 1903 is supported with App Layering 1905 and newer.
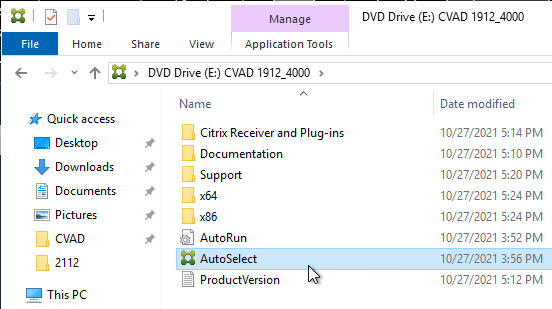
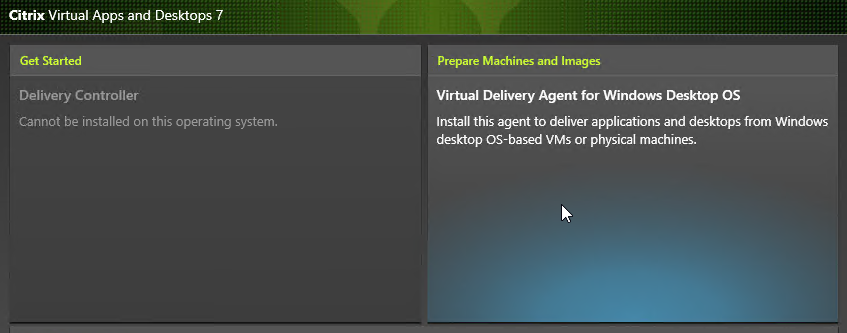
- Feel free to reboot the Packaging VM.

- Rob Zylowski at Imprivata App Layers at Citrix Discussions recommends installing Imprivata in the same Platform Layer that contains the VDA.
- According to Direct Access Users Group Missing All Layers at Citrix Discussions, the Platform Layer does not capture or merge changes to local groups.
- Use Group Policy Restricted Groups or Group Policy Preferences Local Users and Groups to configure local groups.

- At Computer Configuration >Preferences folder >Control Panel Settings, right-click the Local Users and Groups node, point to New, and select Local Group. More info at CTX259057 VDAs are not registering using a published image – Use GPO/GPP to add the proper accounts and services.
- Action – Update – Group – Users – Add Members: “DOMAIN\Domain Users”
- Action – Update – Group – Administrators – Add Members: “DOMAIN\Your_Citrix_Admins_Group”, “DOMAIN\Domain Admins”
- Action – Update – Group – Remote Desktop Users – Add Members: “NT AUTHORITY\Authenticated Users”
- Action – Update – Group – Performance Log Users – Add Members: “NT Service\CitrixTelemetryService”
- Action – Update – Group – Performance Monitor Users – Add Members: “NT Service\BrokerAgent”
- Action – Create – Group – Anonymous
- Action – Create – Group – Direct Access Users – Add Members: “DOMAIN\Your_RDP_Allowed_User_Group”
- Use Group Policy Restricted Groups or Group Policy Preferences Local Users and Groups to configure local groups.
- If Citrix Provisioning:
- Install the Citrix Provisioning Target Device Software in the Platform Layer. The ELM Templates only allow one Platform Layer per template, so you’d need to install both VDA and Provisioning Services Target Device components in a single Platform Layer.
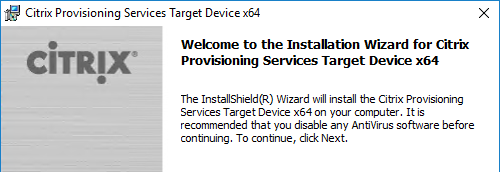
- Rearm KMS licensing (slmgr /rearm). MCS does this automatically during Image Prep.

- Install the Citrix Provisioning Target Device Software in the Platform Layer. The ELM Templates only allow one Platform Layer per template, so you’d need to install both VDA and Provisioning Services Target Device components in a single Platform Layer.
- From Citrix CTX225997 Considerations When Creating a Platform Layer in Citrix App Layering 4.x): Additional software to install in the Platform Layer:
- NVIDIA Drivers
- Join the Domain – after joining, login as network account, then login as local account, and delete the profile of the network account.
- Citrix Workspace App – for the Single Sign-on Component
- Citrix Workspace Environment Management Agent
- Hypervisor Tools – if packaging or publishing to a different hypervisor than the one originally used to create the OS Layer.
- Windows 10/11 apps should be removed from the OS Layer, not from the Platform Layer.
- CTX226984 App Layering/Unidesk: The list of Windows Updates is usually wrong in app/platform layers and published images/desktops.
- When done installing components, finalize the layer:
- CTP George Spiers Citrix App Layering Preparation Script: runs a number of tasks to clean out temporary folders, clear out Event Log entries, remove ghost devices from Device Manager, etc.
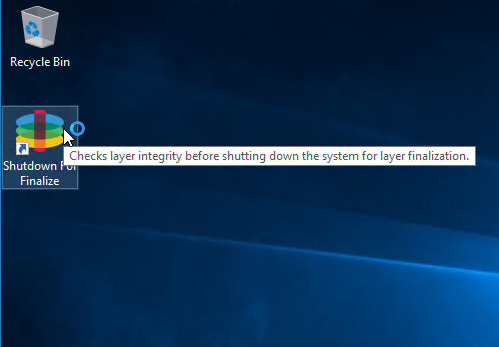
- Double-click the Shutdown for Finalize icon on the desktop. If it finds issues, it will tell you what to do (e.g. reboot needed).
- If it tells you that you need to run ngen, then run the following commands:
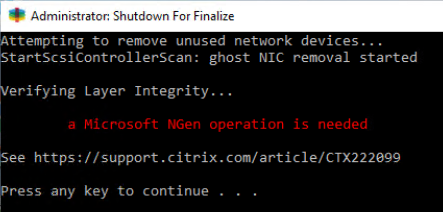
"c:\windows\Microsoft.NET\Framework64\v4.0.30319\ngen.exe" update
"c:\windows\Microsoft.NET\Framework\v4.0.30319\ngen.exe" update
- Otherwise, it will shut down the VM.
- If Offload Compositing is enabled in your Connector, then the Packaging VM will reboot into Windows PE and automatically run the CompositingEngine.
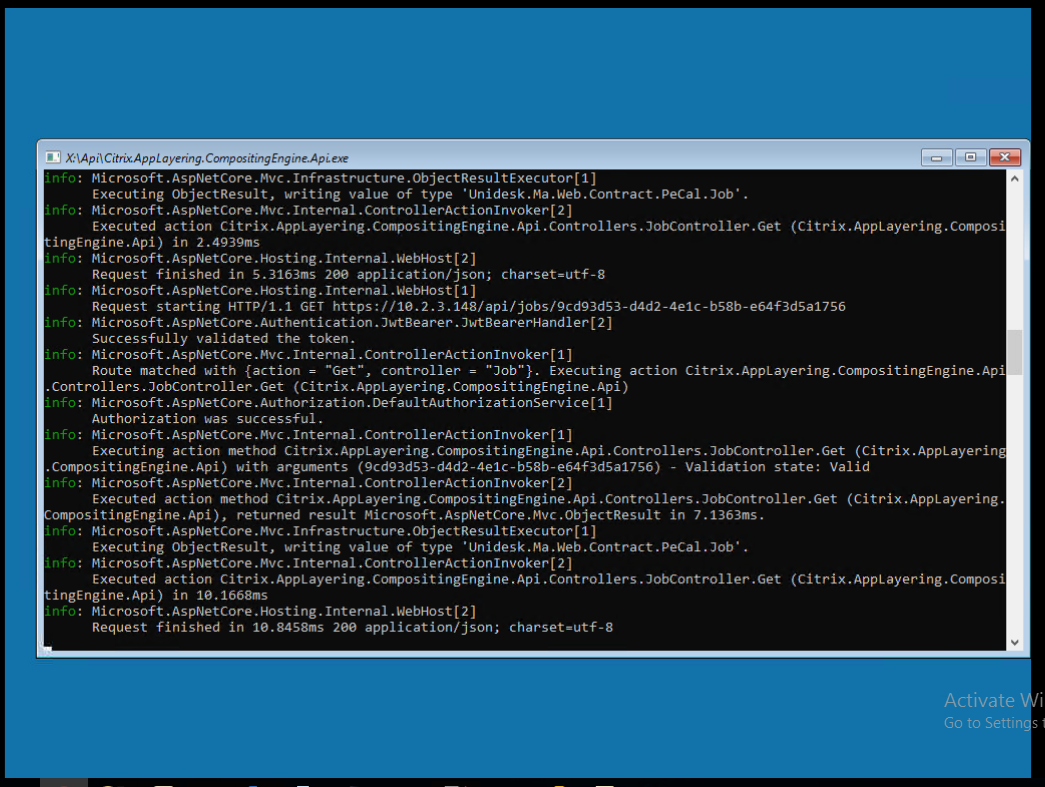
- ELM will automatically transfer the files from the Compositing Engine. You don’t have to click Finalize.

- If Compositing Engine is not enabled in your Connector:
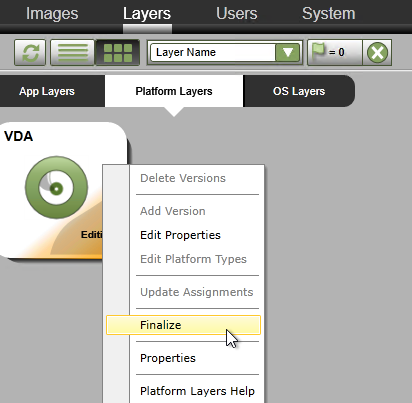
- Back in the ELM Internet Explorer Silverlight Console, in Layers > Platform Layers, right-click the Editing layer, and click Finalize.
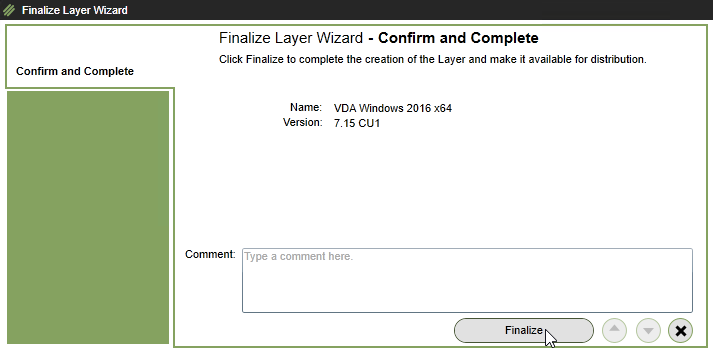
- In the Confirm and Complete page, click Finalize.
- You can click the information icon next to the running task to see what it’s doing.


- Back in the ELM Internet Explorer Silverlight Console, in Layers > Platform Layers, right-click the Editing layer, and click Finalize.
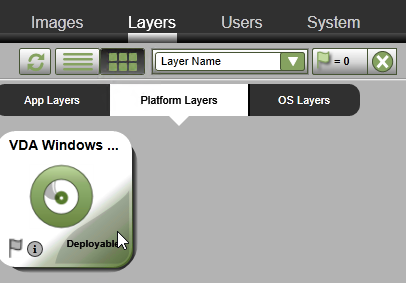
- Eventually the icon will say Deployable.
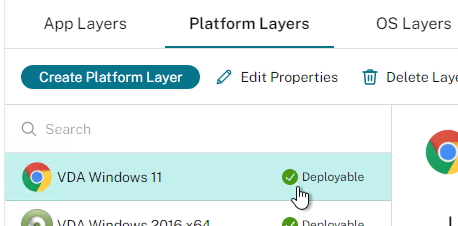
- In the HTML5 interface, the tabs show you details on the layer.
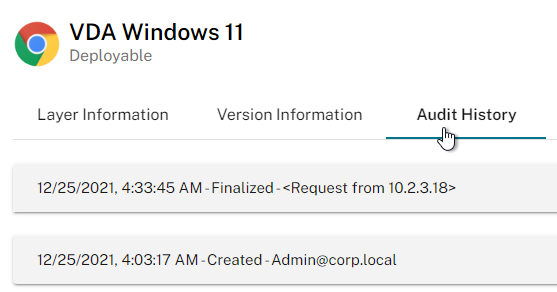
- In the Internet Explorer Silverlight interface, you can click the information icon on the Platform Layer to view its details.
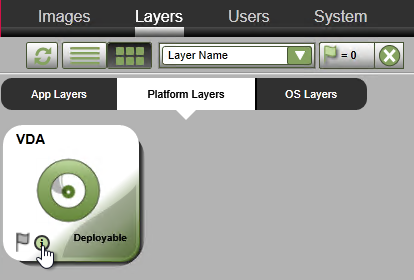
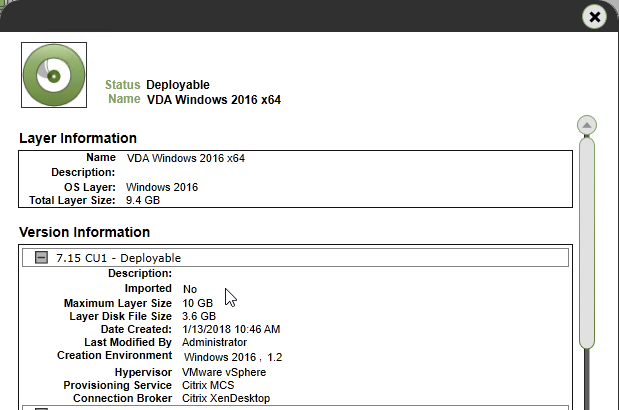
- In the Internet Explorer Silverlight interface, you can click the information icon on the Platform Layer to view its details.
Next Steps
Update OS or Platform Layers
- In the HTML5 Interface, select a layer, switch to the Version Information tab, and click Add Version.
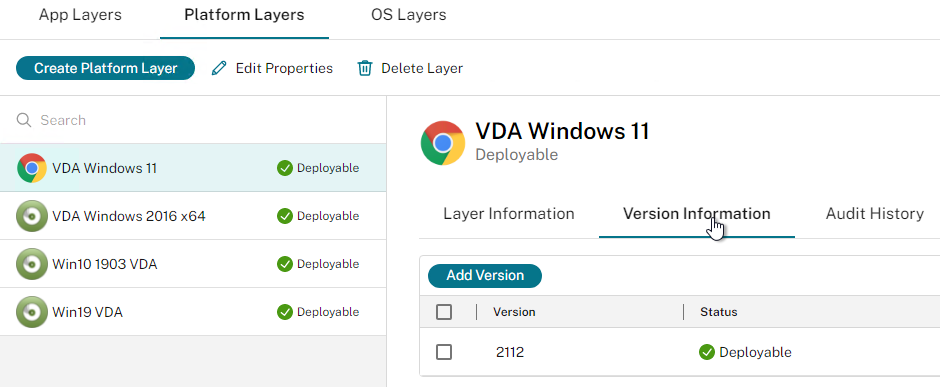
- In the Silverlight interface, right-click an OS Layer or a Platform Layer, and click Add Version.
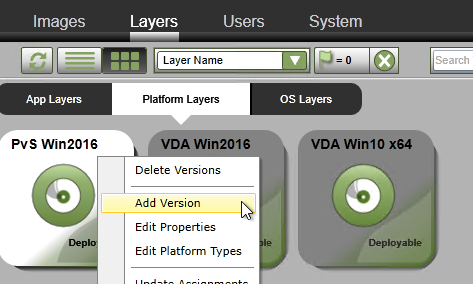
- In the Silverlight interface, right-click an OS Layer or a Platform Layer, and click Add Version.
- In the Version Details page, select a Base Version that you want to update. In the New Version field, enter a new version. In HTML5 Interface, scroll down. In Silverlight interface, click Next.
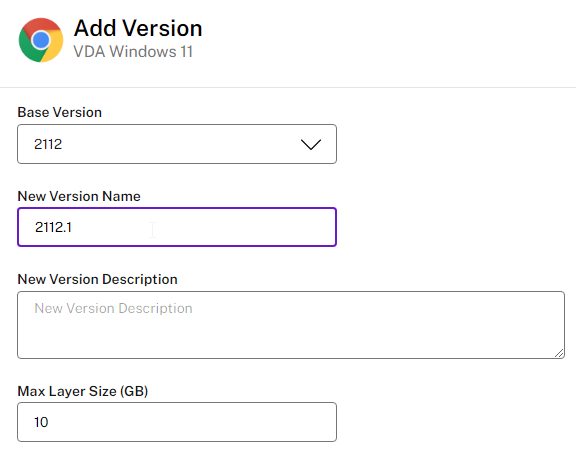
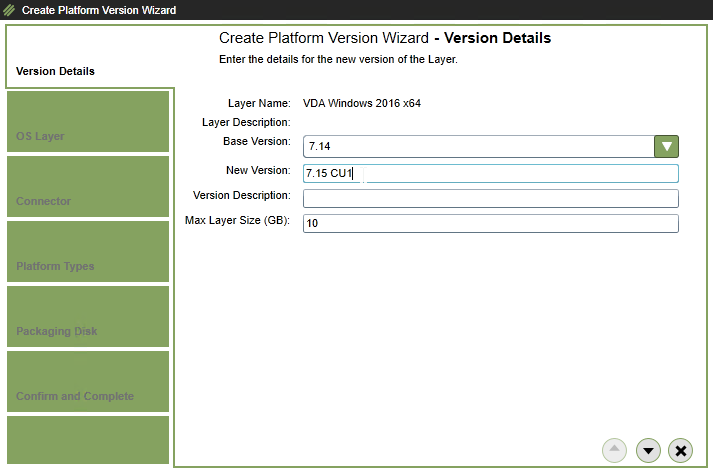
- In the OS Layer page, select an OS Layer version, and scroll down or click Next.

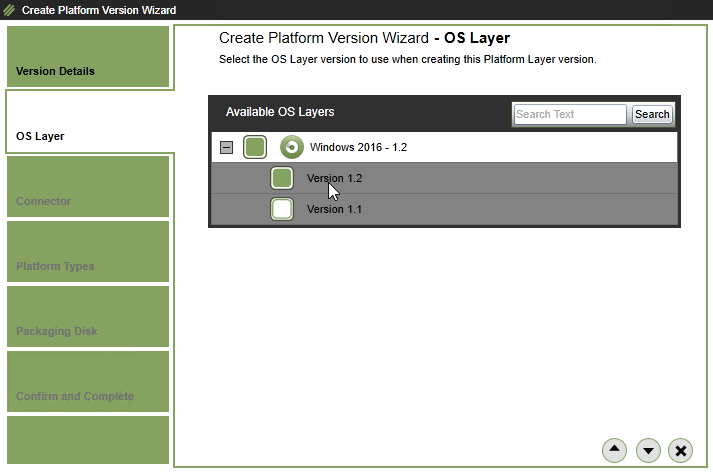
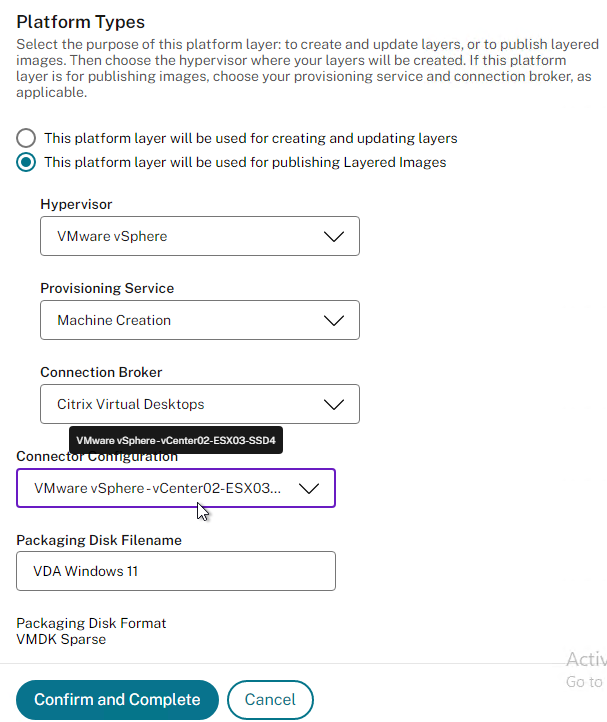
- In the HTML5 Interface, in the Platform Types section, most of this should already be filled in. Choose your Connector Configuration and then click Confirm and Complete.
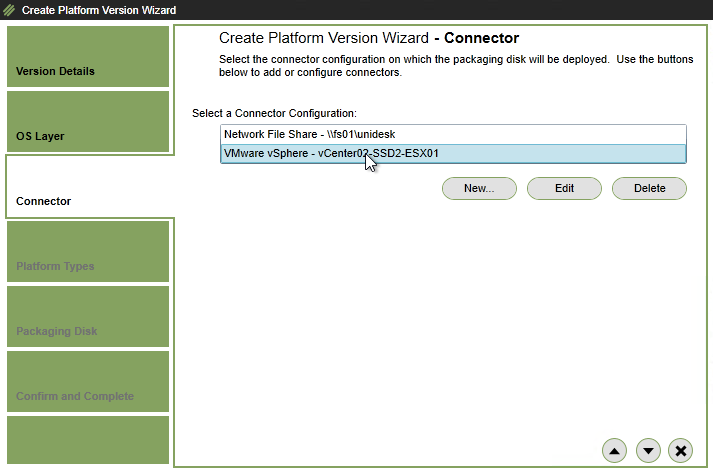
- In the Internet Explorer Silverlight interface, in the Connector page, select a Connector, and click Next.
- In the Platform Types page, click Next.
- In the Packaging Disk page, click Next.
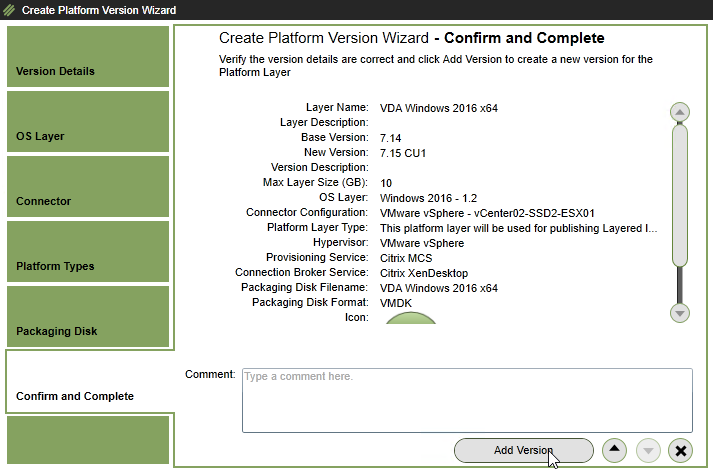
- In the Confirm and Complete page, click Add Version.
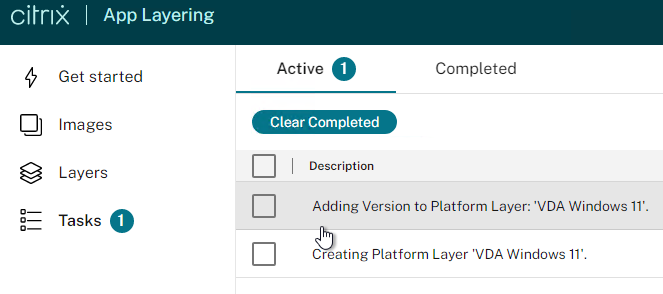
- The Tasks page and Task Details shows the current progress and will eventually say Action Required.
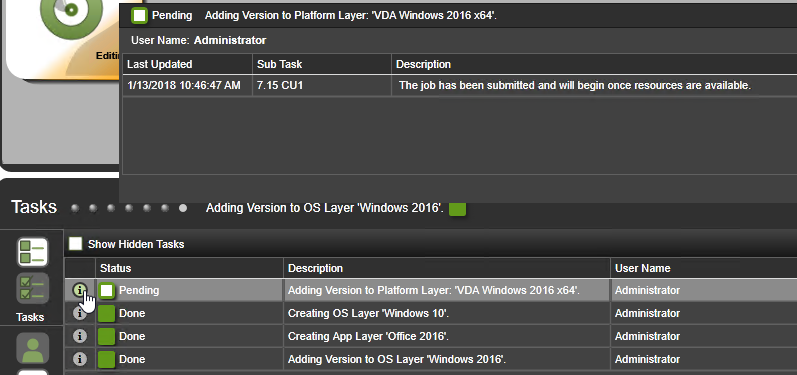
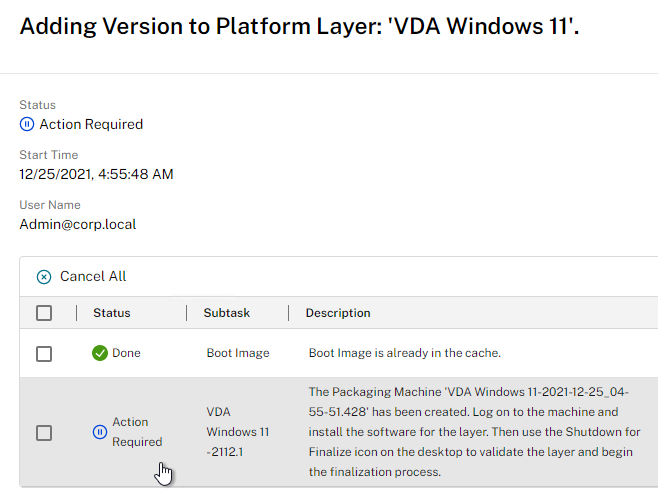
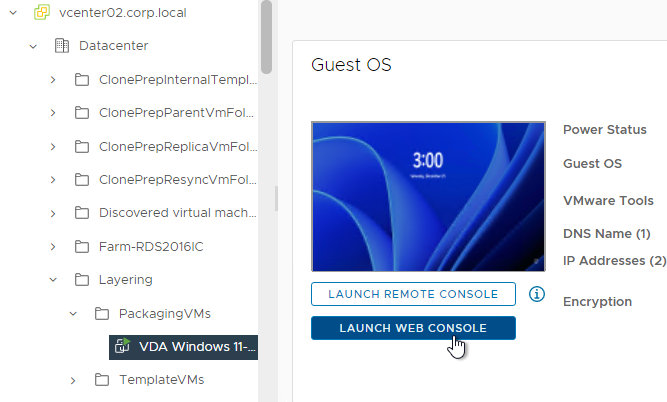
- When the Packaging Machine is deployed, you can connect to its console and perform any desired updates.
- If you in-place upgrade Windows 10 to a newer version, you might have to use diskpart to delete the Recovery Partition. See CTX226407 App Layering: Windows 10 upgrade may result in new Recovery Volume partition.
- When done installing updates, finalize the layer:
- George Spiers Citrix App Layering Preparation Script: runs a number of tasks to clean out temporary folders, clear out Event Log entries, remove ghost devices from Device Manager, etc.
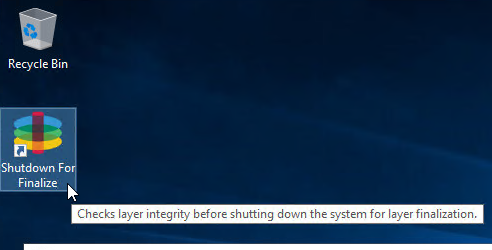
- Double-click the Shutdown for Finalize icon on the desktop. If it finds issues, it will tell you what to do (e.g. reboot needed). Otherwise, it will shut down the VM.
- If Offload Compositing engine is not enabled in your Connector:
- When done updating the Packaging Machine, right-click the Layer that is marked as Editing, and click Finalize.
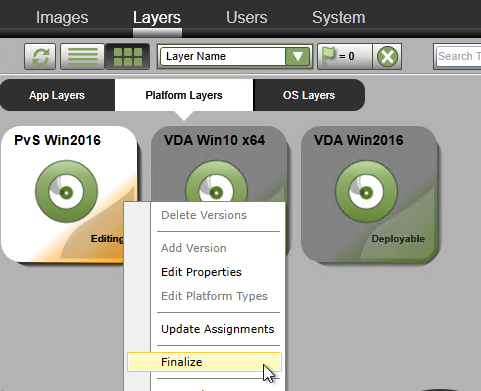
- In the Confirm and Complete page, click Finalize.

- When done updating the Packaging Machine, right-click the Layer that is marked as Editing, and click Finalize.
- View the task details to see the current progress.
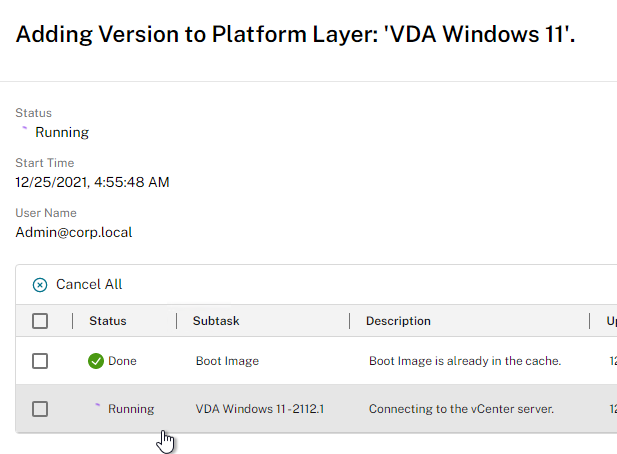

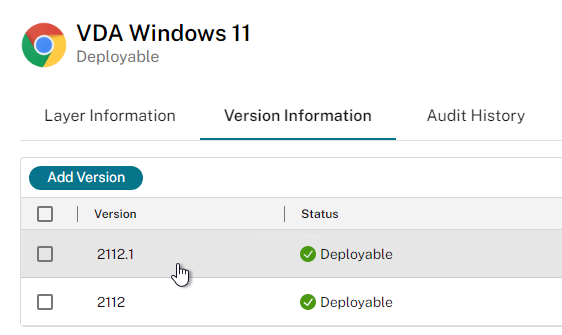
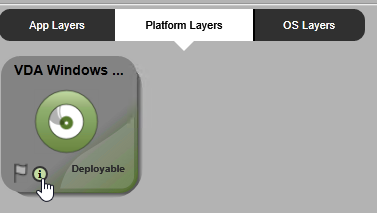
- To confirm that you have a new version, the layer’s Version Information tab shows the new version. Or in the Silverlight interface move your mouse over the layer icon, and click the information icon. The available versions are shown.
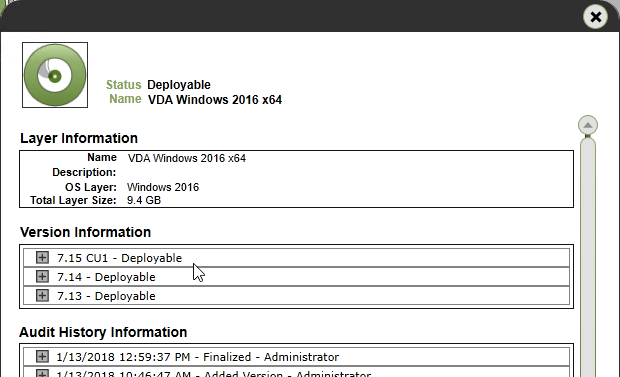
- There are two methods of assigning a new version: one image at a time, or multiple images.
- To edit one image:
- Go to the Images tab.
- Select an Image, and click Edit Template.
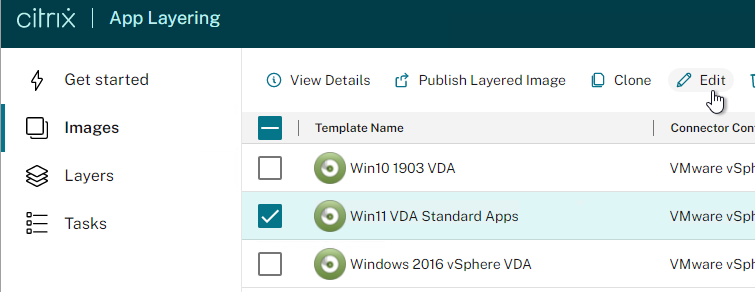
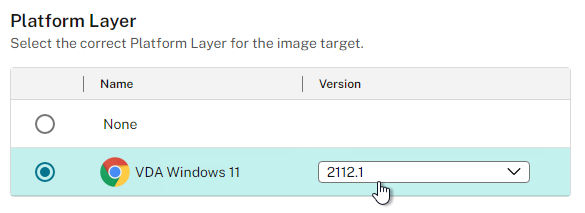
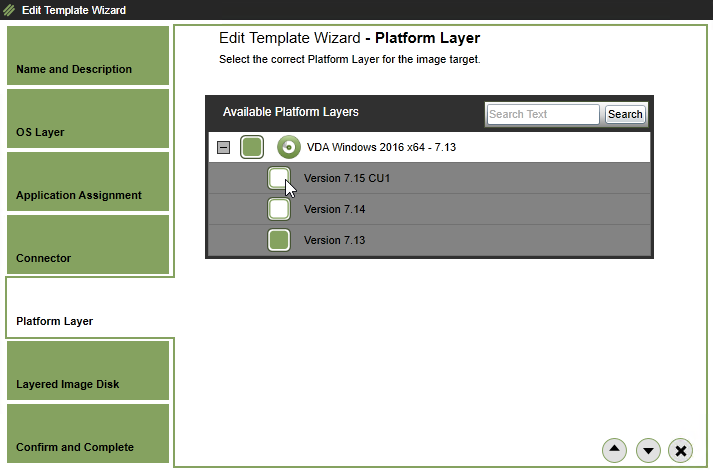
- Scroll down or click the OS Layer or Platform Layer page.
- Click the plus arrow next to a Layer and select the new version. Then complete the wizard.
- To update multiple images:
- In HTML5, select the Layer, switch to the Version Information tab, select a version, and click Update Assignments.
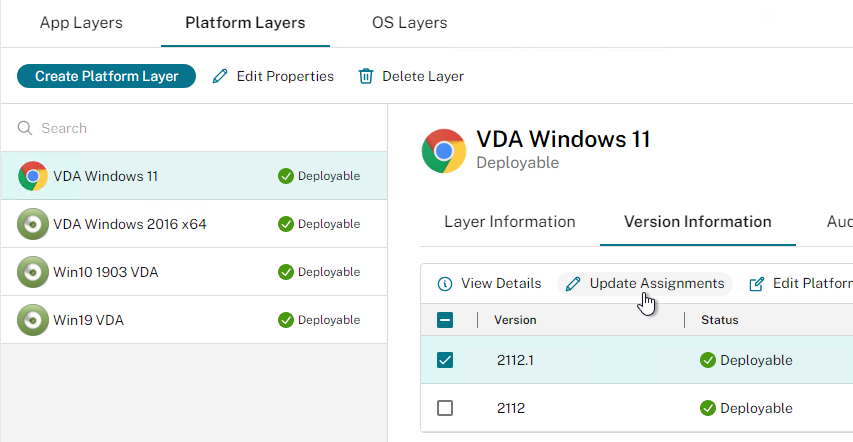
- In Silverlight, on the Layers tab, right-click the updated layer, and click Update Assignments.
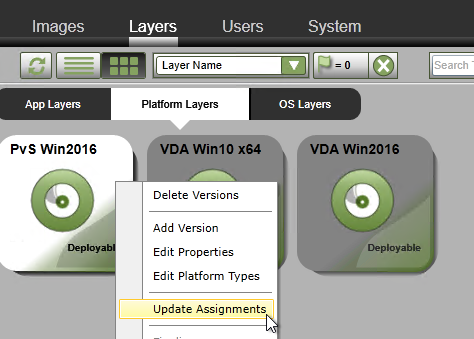
- In the Select Version page, select the version you want to assign, and click Next.
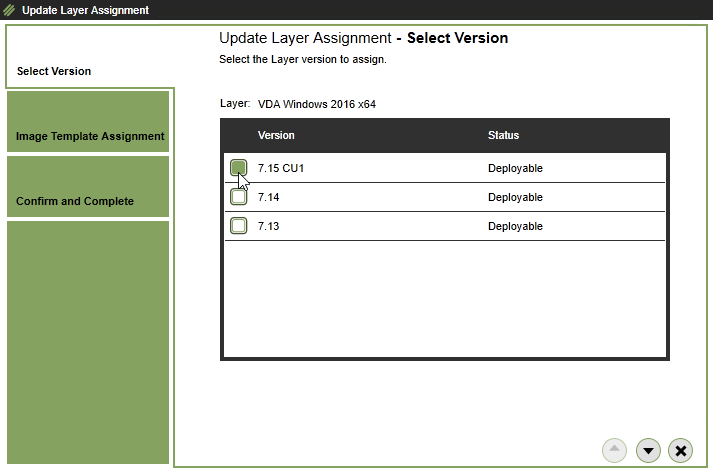
- In Silverlight, on the Layers tab, right-click the updated layer, and click Update Assignments.
- In the Image Template Assignment page, select the templates you want to update, and scroll down or click Next.
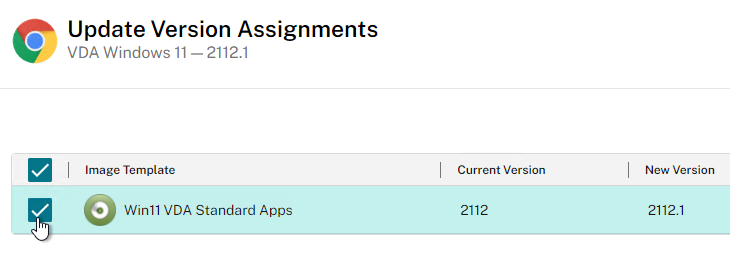
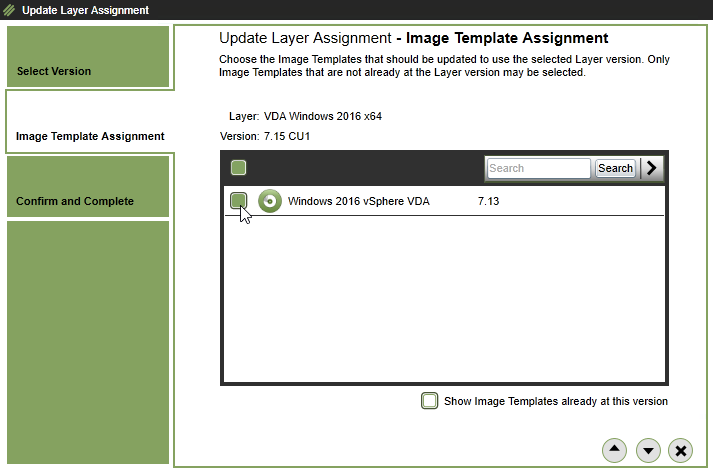
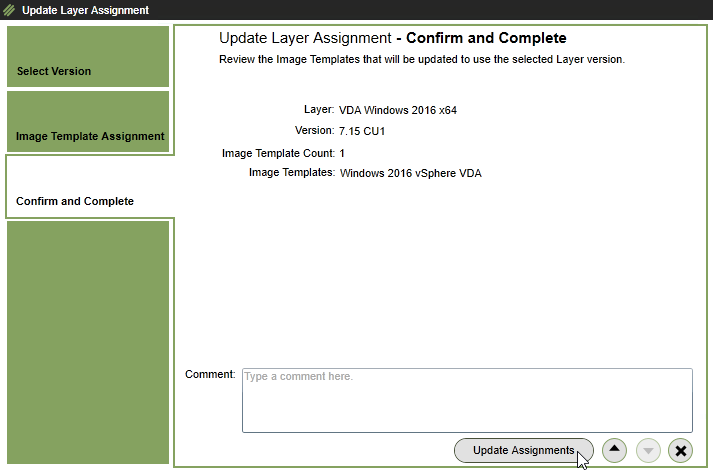
- Click Confirm and Complete, or in the Confirm and Complete page, click Update Assignments.

- In HTML5, select the Layer, switch to the Version Information tab, select a version, and click Update Assignments.
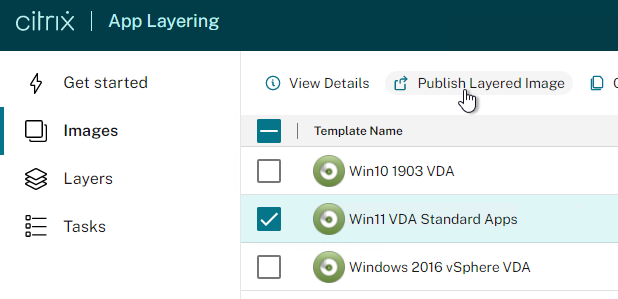
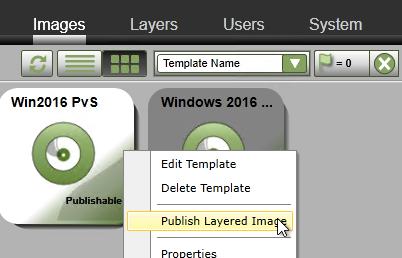
- Once an image has a new version assigned, go to the Images tab, and republish the image.
Hey Carl, have you had any feedback as to when 1709 is or will be supported for Windows 10?
Hi Carl , I am confused about installing the hypervisor tools in the OS layer. If you install the tools in the hypervisor layer then you cannot swop out if you want to change hypervisors. I read on other platforms that you need to install the tools in the platform layer.
Regards
Craig
When you create a Platform Layer, you specify the hypervisor. This is to let App Layering know that the hypervisor tools in the OS Layer need to be replaced with the hypervisor tools in the Platform Layer if they are different.
Hi Carl ,
I dont know what we would do without guys like yourself, that take the time and effort to assist us. I truly appreciate your time and all the other times that you have answered my questions.
Kind Regards
Craig
Hi Carl,
I’m currently in the process of setting up Citrix App Layering 4.8 for the first time, using XenServer and PVS 7.13. I’m a little confused as to the hypervisor connector. I’ve so far created a Windows 10 VM on my XS host, configured it as per your and JG Spiers recommendations and copied the VM to my SMB share. I’ve then created an O/S layer which is currently showing as “Deployable”.
When creating the platform layer, the XenServer connector asks which template will be used for machine creation? Do I then need to convert the Windows 10 VM that I made my O/S layer with to a template in XenCenter?
Any guidance much appreciated
The template VM has a # of vCPUs and Memory. When ELM pushes the image (or Packaging VM), it copies template so it will have your desired # of vCPUs and memory. If you don’t specify a template VM, then ELM will use default settings for # of vCPUs and Memory.
Is it possible to use Elastic Layers on PVS/MCS targets NOT built from App Layering? (i.e. to use App Layering to deliver only elastic applications to XenApp servers traditionally built and managed?
Unfortunately no. I think you asked this at Citrix Discussions – https://discussions.citrix.com/topic/392308-elastic-layers/
Hi Carl. After building a new PL for PVS (already had one for MCS) I have run “Finalize and shutdown” and the VM has shut down. But the job in the console is still saying Action Required and the PL VM hasn’t been deleted. Why might this be and how can I finalize it now? Thanks
In ELM, did you click Finalize?
Carl have you by installed WEM while using Citrix App Layering? I see you state to install it. But you don’t say anthing about pointing it to another drive like you stated in your PVS guide? So I am curious if you can add another drive in the OS layer. I have not tried it yet. Do you know if its possible?
Hi Carl,
We are thinking of using a single ELM device to manage our customers VDI images. This device will manage multiple domains. in the guide you mention joining the platform layer to the domain? in our environment is it best to create a platform layer per customer or not join the layer to the domain but join the vdisk created in the PVS server to the domain?
Also any news on when user layers will move to production?
Kind Regards
Jamie
Platform Layer per domain. You need the domain registry keys so PvS can adjust them for machine identity.
You might also be able to manually join the vDisk to the domain after you publish to PvS but before you assign them to target devices.
Hi Carl,
when capturing an application as a layer, how exact does the OS used to capture need to match the target OS?
For instance… can an app layer captured using Windows 2016 be delivered to a Windows 10 device?
And, can you even deliver an app layered that was created on Windows 10 Build 1609 onto a device running Windows 10 1709?
Thanks
App Layers are tied to specific OS Layers.
For Win 10, you can upgrade the OS Layer to a newer version of Win10. However, 1703 and 1709 are currently not supported by App Layering.
So for AppX I’d need a Windows 2016 layer for my XenApp devices, and a separate layer for AppX for my Windows 10 devices?
Back on the Win10 builds question… let’s forget 1703 and 1709 then. If I needed to deliver AppX to devices running both 1607 and 1511wouold that require one or two layers? Not sure what you mean by “you can upgrade the OS Layer to a newer version of Win10″…. would that be that I’d have to get a layer that was built with 1511, “reopen it” and run through a 1607 upgrade? And I’d have to do this for each and every layer built with 1511???
Each Layer has one or more versions. You can configure different templates to use different Layer versions.
Yes, you create a new version for your Win 10 layer, install the Win 10 upgrade, and Finalize it. You have the old version, plus the new version.
If you have two different OS Layers, then you need separate App Layers for each OS Layer. Another option is to use the same OS Layer for both RDSH (XenApp), and Server VDI (instead of desktop VDI) in different Platform Layers. This avoids the multiple App Layers.
The only drawback there is that the additional Windows files which are usually installed while installing the additional Windows roles and features for RDSH then aren’t updated when you are patching the OS layer later on because they reside in the Platform layer and not in the OS layer.
If you really want to patch all Windows files in such a case this becomes quite a challenge. You always have to patch the OS layers first and to assure you don’t miss anything there. Then afterwards you can patch the remaining files in the Platform layer by running Windows Update there again.
But this is normally not suggested as you are recommended to run Windows Updates only in the OS Layer. However, it usually should work that way – but one wrong or missed step and the new Platform layer version is messed up…
The only other way I see there is to install all required roles and features into the OS Layer but then you have to use different OS Layers for the same OS for different cases. And exactly that is what you usually want to avoid.
And we haven’t even talked about App Layers containing Microsoft Office or other Microsoft products…
How should you patch MS Office if you are recommended to run Windows Updates in the OS layer only?
Citrix really should give this some deeper thoughts and at least come up there with some best practices and/or how-to’s. Patching all the layers at the moment is really a pain in the ass and the actual recommendations do not work out very well…
But maybe I have missed out some recommendations there. In that case any suggestions are appreciated.
I know it isn’t always ideal, but when I POC’d this product earlier in the year I decided to put all roles and Microsoft software (Office) in the OS layer to keep MS patching simple. For me Office is going to be on every deployed machine so it wasn’t a big deal and you could then use multiple OS images to split up Office versions (and roles) if you need to. I would avoid doing multiple patch runs between layers. I haven’t tried it myself, but I wouldn’t’ be surprised if it would cause some unexpected behavior. I also agree that they should have more specific best practices.
Hi Mark!
Thank you for your input there!
Maybe I’ll really do it the same way – at least for our XenApp server images…
For our other productive servers the OS images serve only as a base.
Everything else gets installed after the VM with the base OS was rolled out already – at least at the moment.
Has anyone some hints how to automate the OS Layer patching process?
Adding new version – running Windows Updates within the VM – Finalize.
The best would be if this all happens without any user interaction.
I would really appreciate some recommendations there!
I think at a minimum you would need API access to App Layering which as far as I know doesn’t exist. I’m hoping that it the coming months they more tightly integrate App Layering into Studio. It would make things a lot easier and then would probably expose some API access to the process. I’ve been actually wanting to develop this for MCS and still plan to do so in the next few months. When I get around to that it could hopefully be adapted in the future if/when App Layering has some API access.
This is a support nightmare potentially isn’t it? If Microsoft are going to release SAC versions like 1703 and 1709 and only support them for 18 months, what are customers going to do in such scenarios whereby 1703 will only be supported until around Sept 2018 (this year), and AppLayerig doesn’t allow you onto those versions? By the time Citrix App Layering does support 1703 it will be time for the next one, which App Layering may also have issues with. What’s your thoughts here Carl?
This is a problem for all vendors trying to support Windows 10 SAC. Citrix has had difficulty with Store apps, and removing them should allow them to support the newer OSs in a more timely manner. Otherwise, I encourage you go to Citrix Synergy and talk to the App Layering team. They are also very responsive on Citrix Discussions.
Hello Carl,
I have prepared the OS layer and ran the executable – SetKMSVersion.exe. Do I still need to run the SLMGR / commands for directing the image to KMS server ?
It should find the KMS server through DNS. Is that what you’re asking?
Yes, Thank You Carl.
Hello,
has anybody Windows activation with MAK and Provisioning up running? My OS layer is activated using a MAK key, but my target devices are not. There is almost no difference between my packaging VM and my target VMs virtual hardware. My customer don’t has KMS keys, so this is unfortunately not an option.
Thanks
Joern
Does it work without layering?
Did you setup VAMT? https://docs.citrix.com/en-us/provisioning/7-7/pvs-vdisks-manage/pvs-vdisks-os-volumelicensing.html
KMS is very easy. Just install the KMS Server key on a machine, and set the Targets to use KMS Client keys.
Hey Carl,
I have a running setup with KMS at another customer and your reply ecouraged me to go on KMS with this customer too. Already triggered the license team to get me the KMS Host key to get started.
Thanks
Joern
Hey Carl,
I’m trying to get APP layering to work with my XenApp (Server 2016) deployment. I keep getting Image Preparation failed to rearm the copy of Windows installed on the master image. Confirm that the machines created in the machine catalog are licensed correctly.
After publishing the template I checked the VM and saw that it was properly licensed. Not sure why I’m getting this issue. If you have any advice that would be great. Thanks
There are a couple issues. VDA 7.15 has a bug. As does ELM 4.5 with Elastic Layering enabled. See https://www.carlstalhood.com/catalogs-delivery-groups/#imageprep
If elastic layering is on and you’re using app layering 4.5 there will be activation issues. turn off EL or use 4.4.
Hi Carl ,
I’m trying these days to install an old application on my xenapp session hosts. The problem with this app is that is not “windows profile friendly: The base installation directory of application is on c:\application1. Every user should have access (read/write) on that folder.
Can appLayering help me on something like that ?
Thanks in advance
Christos
Layering does not help with app isolation. For that, you would need App-V.
Hey Carl,
would it be possible to get more information about nvidia grid cards on this page as well? Considering app layering is so nuanced, it would be nice to see some good info on when to install the drivers in the platform later, any commands or configurations needed to ensure proper functionality as well would be nice!
Thanks,
-Matt
Citrix says you’d probably have to add a GPU to the Packaging Machine so you can install the drivers in the Platform Layer. Nothing else special.
Hi Carl,
would you consider to move or also add George Spiers Citrix App Layering Preparation Script to the OS Layer, please?
He notes that it should be executed each time an OS Layer, Platform Layer and Application Layer is created.
I had some serious troubles after running it at the Platform Layer only and had to throw away that version of the Platform Layer finally. I’m assuming it did some tasks which should have been done earlier on while creating the OS Layer.
Sorry for the delay. It should be in the OS Layer section now. Thanks for mentioning it.
Hi, Carl:
This may just be a warning for people. I am just setting up App Layering as a POC, and I ran into an issue with VMware. When i try to import my VM into an OS Layer, I get this:
error The OS disk on the virtual machine is an invalid type. It must be an LSI SCSI disk.
In VMware, I do not see an option to change this. I can choose to make a SCSI disk or an IDE disk. There’s no mention of different types of SCSI or even a SCSI controller However, if I look in Device Manager on the server, it shows a VMware PVSCSI Controller. I found this on the Unidesk site: the Paravirtual SCSI adapter is not supported. It has to be the LSI Logic SAS controller
Whole article here: https://www.unidesk.com/support/kb/error-when-importing-os-layer-virtual-infrastructure-failed-stop-virtual-machine-error-in
Morning Carl,
Attention: The lines below on your webpage. When I tried to do this, Technet says to do this locally, can I do this in Active Directory? Secondly if not, where in my layers should I apply this setting, the Platform or OS Layer?
Add NT SERVICE\BrokerAgent account to the local Performance Monitor Users group
Add NT SERVICE\CitrixTelemetryService account to the local Performance Log Users group
Hi Carl, it’s not entirely clear when it is recommended that we attach a write cache to the PVS layers. Do we do it in the OS or in the platform?
Hi Carl, I’m getting a DISM error failed to install RDSH even though it’s already been installed, tried a standalone component got the same result, something to do with DISM, had a chat with CItrix last night and got no where? I’m trying to configure the platform layer using your examples.
Beautiful article Carl, I have a question, if I create my Layers in Xenserver how do I go about importing it into vSphere, giving the fact that vmware tools needs to be installed on the Platform Layer? Are there any concerns to consider there?
Cross-platform layers is a Platinum Edition feature.
Install VMware Tools in the Platform Layer. When you publish the image to vSphere, ELM should automatically remove the XenServer tools that are in the OS Layer.
Thanks for the response Carl. I have XenApp Platinum edition so i guess that applies. I followed your article to the letter but when I try to install Vmware Tools on in the Platform Layer (this is still on my Xenserver) it throws an error saying “it needs to be installed in a virtual machine”. I know this would work well in VMware but I am with a hosted DC provider and I have requested full access permission to my hardware but came back with a NO, hence why I am going down the road of a cross platform. Do you have any suggestions on what to do? I’d really like to deploy unidesk for our users.
Where do you add / configure the Write Cache Drive for PVS?
Hi Carl,
I have the situation that I want to add a second disk to store the user profiles there.
I want to hide the system disk from the users but some applications do not like it if the system disk is hidden while the user profiles are stored on it.
This worked quite well in our old XenApp 6.5 farm and I want to do the same on our new 7.14 farm.
Where and how should I add the second disk while working with App Layering and Provisioning Services?
The OS layer seems not to work and I haven’t tried it on the other layers so far.
Hi Carl
May I know do we need to join the domain on platform layer then install the vda, after that remove the domain and do the finalize?
With kind regards
Eric
For PvS, you definitely join the Platform Layer to the domain and leave it like that. I think MCS will join the machine to the domain for you.
Hello, Carl
I got below error when trying to create a platform layer:
“Operation cannot be completed due to lack of permissions. Permission required is ‘System.Read’.
as well as I cannot use domain account to log on to ELC management page. It always failed after long time trying to authenticate.
I wonder if there is any relates between those error. Appreciate to your response.
Sincerely yours,
Thinh Tran
Hi could you find a solution? I am trying to create a connector and on the logs I see Operation cannot be completed due to lack of permissions…
I am on step 17 and when I try to install Citrix VDA 7.13 on the Windows 10 Image I keep getting a failed install of the VDA with error 1603. Have you ever ran into this error? If so, how can I fix it?
You should see log files in %localappata%\Temp\Citrix. There’s a master log file that points to other log files. Check the component-specific log file.
Thanks for the quick reply, I finally got the Citrix VDA 7.13 installed using the 1607 version of Windows 10, before I was using the 1703 version. Apparently there must be an issue with 7.13 and 1703.
Hi Carl,
I’m having a strange issue with Office 2016. After I have installed it as a App Layer and put with the platform layer in an Image Layer, when I open for example word, it says that it needs to be repaired and it crash saying it can’t find the license. I have a KMS system in my organisation.
Can you help me?
Carl,
Maybe this was added in 4.2 but why use local GPO to disable Windows Updates when the Optimizer says it will “Disable Automatic Updates” as a Madatory Change?
Webster (AKA The Other Carl)
I got this part from the Unidesk documentation. 🙂
I am having difficulties understanding the “Import OS Layer 6 j” part: “If MCS, in the Virtual Machine Template (optional) field, search for a Template VM that will be copied to create the MCS master image.”
I am trying to import the OS Layer, and I am creating a new vSphere Connector. What Template VM are we talking about here, the one we just prepared for the OS Layer?
The template is just an empty VM with specs defined. The idea is that it copies the number of vCPU, amount of RAM, etc., so you don’t have to make those changes to the published image later.
Thanks again Carl, your website is great!
I’m successfully using Citrix App Layering in a test environment, but have run into an interesting issue. I’m using Active Directory-Based Authentication for Windows 10 and Office 2016 Pro Plus (c2r). I’ve found that if I join the platform layer to the domain and install Office 2016 in the platform layer everything will work fine.
If I attempt to create a separate layer for Office 2016, then I run into an issue where an Office app will need to repair itself. Once repaired, the application will close and work fine for the rest of my Citrix session.
Do you know of any tricks for those of us using ADBA instead of KMS or MAK? It seems like Unidesk and Citrix are lacking documentation for this scenario.
I’ve followed all of this creating an OS layer for Windows 2012R2 and then creating a Platform layer for VDA. The machine gets created under layering as VDAXXXXXXXXXX in VCenter and I can connect to the VM and see the 10GB UDiskBoot but there is no unidesk icon on the desktop to seal.
If I install something then shutdown the machine and try to finalise the layer it complains saying it has a pending reboot task, presume this is due to the fact I haven’t run the sealing script/tool shutdown for finalise.
So not sure what i’m doing wrong or why the icon on the desktop is not appearing, I’ve tried with 4.1 and 4.2 but the same issue.
Any ideas?
Thanks,
Steve
Do you have a GPO that hides common program groups? Do you see the icon in the Public Desktop folder?
Hi Carl,
Isn’t there a step missing in this. Before importing the OS layer, aren’t you supposed to export the master vm to OVF?
Thank you!
Not in 4.1 and newer. 🙂
Do I make the preparations like for example the pagefile preparations and such (https://www.carlstalhood.com/pvs-master-device-preparation/) in the platform layer?
Yes. They are PvS-specific so they go in the PvS Platform layer.
Have you tried removing modern apps for the OS layer?
Hi Carl,
When creating OS Layer and going to create new connector for vsphere “page can not display”
“•Make sure the web address http://192.168.0.14:3004 is correct.”
error is coming. accessing from IE 11 with silver light.
I think I’ve seen similar threads in the forums saying that rebooting the ELM might fix it.
I had the same problem and a reboot resolved the problem. I spoke with Citrix support and they are aware of this issue.
Carl, should the TCP Offload be disabled at the OS or Platform layer? I didn’t see that anywhere in here but I’m pretty sure it still needs to be done?
If you’re putting the Target Device software in the Platform Layer then I would do it there. You usually don’t need TCP Offload disabled for other platforms.
Thank you. I went back and updated my Platform Layer and updated one of my app layers. I created a new image template using the new platform/app layer and exported to PVS. For some reason now the machine is back in a work group? Do I need to rejoin the domain every time I update the platform layer and rearm?
Is it a requirement for the OS layer to be non-domain joined, for example we have official company builds of OS’s which are deployed using SCCM to VSphere with VMtools and include anti-virus etc and already domain joined. For MCS masters I simply take a new built machine and install the VDA and deploy a catalog. AppDisk was simple enough to layer on top of this master base disk. So with UniDesk do we have to build a completely new clean OS from ISO without any of the company build or secuirty requirements? or can I take a build already domain joined with all security requirements and just import that as an OS layer to unidesk and then build out the application layers?
I suspect either way is acceptable. It just depends on how you want to break it up.
When you publish a template, there’s an option to run SysPrep and join the domain.
Hi Carl,
Thanks for the great article, it has been of huge help.
Following up on this question, my primary requirement is to see if I can replace AppDisk with Citrix app layering. I understand that when using company builds (includes Antivirus, VM tools, SCCM etc), all of which comes with the build are present in OS layer. Additional to this we create platform layer for VDA and PVS tools. Does it make a difference if VM tools/antivirus/SCCM are in OS layer?
VM Tools needs to be in the OS Layer. The others can be App Layers, assuming they are added to the image, instead of Elastic.
Hi Carl,
thanks for this great resource !
When I have build my images in the past i always used the BISF script to “seal” the image. Is there still the need to do that within application layering, if yes when would you do it or does the applayer optimization script take fully care of it ?
Thanks
R.
Since there are many methods of optimizing an image, Citrix doesn’t recommend the Unidesk optimization tool. It’s only KMS activation that they need. Sealing and optimizing are two different things. You might need to seal your Platform Layer.
Hi Carl,
I have a problem with the creation of the vSphere connection. My datacenter is in a folder and for this reason Citrix App Layering is not able to browse it. Is it a known limitation (I can’t find this information on Unidesk Website) ?
I try with differents accounts (with full vSphere permissions) and I have the same results.
Thanks for your answer.
Regards,
Julien
Hi Carl, I have this same issue. Any ideas?
Hello Carl, Thanks for the gread documentation!
I have published a desktop image using Unidesk. I have noticed that the Direct Access User (created by the VDA installer) group is not part od the image. I know that this is a limitation of Unidesk. Have you created it with a script? a GPO?
Thanks!
The group is missing? Or the group is not populated?
It is created when the VDA is deployed, but it is missing when the server is publish via the template.
Thanks!
Hi Carl, i have recently started to test with unidesk. I have implemented the ELM on our vSphere 6 Environment. Everything fine. I have created an gold image from scratch and followed your instructions. Also the creation of the platform layer was successful and i published the image at last to our PVS 7.1 environment. Unfortunately while booting the image i get a “blue screen – an error occured on your ….” I tried several times with different gold image setups, but always the same error. Do you have any guess what i may have missed?
OS layer: Server2012 R2
Platform Layer: VDA 7.12 with target device software and domain join
no application layers
Hi Sascha – I’m experiencing the same issue. I receive a blue screen when I publish the layered image to PVS with my OS layer and Platform layer. I tried both Server 2012 R2 and Windows 10 multiple times. The SATA controller was removed prior to importing the golden image into the Unidesk console along with all other preparations but still a no go.
My version of Unidesk is 4.2 and PVS 7.13. Did you have any luck getting this going?
Another question. When finishing up OS layer preparation, what is the correct way to handle the unattend.xml/optimizations for an MCS machine? MCS will already handle all domain operation, KMS activation, etc., but there doesn’t seem to be a way to make use of the optimizations WITHOUT using unattend.xml. The unattend.exe sets up the unattend.xml AND creates SetupComplete.cmd. SetupComplete.cmd is the script that launches optimizations.cmd, so it doesn’t look like you can use optimizations.cmd without unattend. There are a number of things that an MCS user would want from optimizations while not wanting anything from unattend (service disabling, GPUpdate forcing, etc). I was previously handling a number these things in MCS using the BISF framework.
So, a few things I was unsure about or have comments on…
1.) We are supposed to use VMXNET3, but put VMWare tools in the Platform Layer. At the same time we are supposed to patch in the OS layer which requires network access. The VMXNET3 driver is part of VMWare tools. I am just putting VMWare Tools in the OS layer because I will not using layers in anything other than VMWare, but I was wondering how to handle this to make use of this new platform layer properly.
2.) The OS layer instructions talk about exporting to an OVF, but at the same time specify that you can import directly from vCenter. It took me a few reads to see what was going on here. Might be a little confusing to others. Maybe it should show that you can either use the OVF/SMB method OR vCenter method.
2. Oops, I forgot to remove that section. 🙂 Direct import from vCenter was added in 4.1.
1. Install VMware Tools is the OS Layer. The Platform Layer lets you install tools for a different hypervisor, thus giving you hypervisor portability.
For 2, how would you actually go about installing VMware Tools in the platform layer? I don’t have this requirement, but just curious how it would work with the VMXNET3 requirement.
If you started on VMware, it’s already installed on the OS Layer.
If you started on XenServer, you install VMware Tools on the Platform Layer. When you publish the image to VMware, ELM will remove XenTools and install VMware Tools instead.
Ah, so ELM would remove VMware Tools if I published to say XenServer?
Yes.
Platform Layer has been a challenge. The update machine never gets created. Failed- Description- A failure occurred while deploying the virutal machine. The error is “Cannot read property ‘$value’ of undefined’ Not much documentation on this particular error.
Are you able to create App Layers?
Or create a new OS Layer version?
No app layers either. I can create new OS layer. Ended up putting in a ticket. They are going to do some log collection. Seems to be related to creating a machine in VSphere. IMO.
I’m running into this exact issue. We are on vSphere 5.5.0, AppLayering 4.2, Windows Server 2016 build 1607.
Is it possible there is any relation to the ESXi’s needing to be upgraded to 6.0+?
I don’t know if i am able to create app layers, because I am currently trying to create the platform layer that will be responsible for publishing the images, and i don’t think it will let me go past that point without that platform layer in place.
I am EXHAUSTED at trying to figure this problem out. Our virtualization guy has no clue, I have no clue, there is little to no documentation on this problem anywhere.
vSphere shows a n error of “A specified parameter was not correct” which led me down an entirely different rabbit hole where nothing has panned out either. The only thing that comes to mind is our ESXi’s only being 5.5 and technically not supporting Server 2016 yet until update 2 (i think).
Hi Rich, did you get any result regarding this? We are facing the same issue.
Thank you.
Csaba
Hello,
we’ve suspected that it might be a permission issue on the VSphere side. One of my colleagues tried to create the connector with an account which has full administrative rights on the entire VCenter environment and he managed to create the Platform Layer without any problems.
I thought I’ll update this just in case it helps.
I also wanted to say thanks to Carl for the great instructions.
Cheers,
Csaba
Trying to get the concept and the strength of Unidesk. Probably I miss something.
Lets say:
10 golden images for XenApp server. Then I can use one OS layer for all 10.
But when I patch the OS layer and assign them to my 10 images, I have to build and publish 10 new images, that need to have a new AD insertion with new SID and I also need to update my Citrix machine catalogs with the new machines
Thats a lot of job, more than to start 10 golden images, patch them and republish them?
Or what am I missing in the concept?
Hi Carl,
First of all thank you for this great post.
I have got a question for the OS Layer. Do you include RDS Feature in the OS Layer ? I ask this because, when you make an application you could need RDS feature to install the application to be compatible with a multi user environment.
Thanks by advance for your answer.
Regards,
Julien
Typically RDS is included in the Platform Layer. You can also install it in an App Layer and include it as a dependent layer when creating app layers.
Question – if you dont run MCS, where do you add your machine to your active directory?
When a Unidesk machine boots, there’s a script that can join it to the domain.
Hello Carl! Dont get it anyway. I have ruu the “Unattend” and entered the AD information in my OS layer and when I´m done I run the “SetupComplete.cmd”(as administrator) on my golden image – it runs a lot of stuff but it dont add the machine to the ad? What am I missing?
When you create the Image Template, there’s an option to run SysPrep. SetupComplete.cmd runs after SysPrep.
Ahh – you mean the choice “Sysprep: Generalized offline”??
Yes! That was the solution! I missed that part! Thanks
If you are using PVS it can join the device to the domain when it streams the image.
Hi Carl….thanks for this great documentation. I have a question about step #17 – when I look at the properties of the Packaging VM that has been deployed, the disk is not Thick Provisioned, it’s showing Thin Provisioned. Not sure what caused that. Does it matter?
If it’s thin provisioned, then that would be preferable to thick so you’re not consuming too much disk space.
So in a PVS Deployment at what point do I complete the PVS master image tweaks? Like all these settings: https://www.carlstalhood.com/pvs-master-device-preparation/ Also when using PVD, when do run update PVD inventory?
Unidesk replaces PvD, especially when they release the User Layer feature.
Ok and thanks. As I understand UniDesk doesn’t support that for Windows 10 yet. Until they do, you don’t suggest using PVD?
I had some issues with creating an OS Layer and had to contact Unidesk support. They told me that only MBR is supported at this time. This was for Unidesk 4.0.8. Hope this helps
XenServer 7
4.0.8
GPT/MBR – don’t understand?
Dynamic. 300Gb free space
/Kent
My suspicion is that only Basic disks are supported.
GPT/MBR are two methods of partitioning a disk. MBR is certainly supported. Not sure about GPT.
Hello! Really love your site and your work! THANKS! Saves a lot of time for us out in the field!
I have tried to make a OS Layer Server 2016 from your instruction above but when the layer is created to 97% the next I get is “Failed to attach the disk /mnt/repository/Unidesk/OsImport Disks/Server_2016.vhd.
Failed to probe partitions from virtual disk.”
Any idea what could be wrong?
/Kent
What hypervisor?
4.0.8?
GPT? Or MBR?
Basic disk? Or Dynamic Disk?
I’m seeing the same thing with 2016. I was able to import a 2012 R2 earlier.
Kent,
Normally I hit shift+F10 when installing the OS (2016 in this case), and I go through diskpart to create/format an NTFS partition. This stopps the hidden system partition from being created. That is what I did the first time when I had the same error as you.
The second time I did it I followed the same steps, but I didn’t format the partition in diskpart… I let the installer handle that part. Viola it worked!
Hi Carl,
Nice and helpful post, it’s very useful for setting up a new Citrix App Layering environment.
I have just one question, have you ever used Citrix App Layering in combination with the user environment tooling RES Workspace Manager?
I’m wondering in which layer I must install it, now I’ve installed it in the platform layer but I get a few errors about not registered ocx files like mscomctl.ocx.
If I look at your explanation I should put it in an Application Layer? Just like you’ve done with Citrix WEM?
I’m looking forward to your view about this case.
Thanks, in advance.
With kind regards,
Jeroen.